Several cameras now let you capture images that are larger than the pixel dimensions of their sensor. Angela Nicholson explains how.
The primary purpose of an in-body image stabilisation (IBIS) system is to compensate for the accidental movements that occur when hand-holding a camera and therefore enable sharp images to be captured when using slower shutter speeds than normal. It works by detecting the camera shake and shifting the sensor by tiny amounts to correct it so the image isn’t blurred.
The fact that the sensor can be moved very precisely enables another feature, usually called something like Pixel Shift Multi-Shot mode or High Res Shot mode, that is now found in some cameras from Fujifilm, Olympus / OM System, Panasonic, Pentax and Sony. When the mode is activated, the camera takes a series of images, shifting the sensor by a tiny amount, sometimes half the width of a pixel, between each one. These images can then be combined into one image to either create a larger, high-resolution image with more detail or in the early incarnations of Sony and Pentax cameras, images that have the same pixel count as normal but have slightly better detail, colour and tonal gradations.
In some cases, the images are combined using software running on a computer, but Olympus / OM System, Panasonic and Pentax cameras can composite the images in-camera when their High Res Shot mode or High-Resolution modes are used. The most recent Olympus and OM System cameras, including the OM-D E-M1X, OM-1 and OM-5 feature two modes, one that is suitable for use when the camera is mounted on a tripod and the subject is motionless and the other which can cope with a little subject movement and when the camera is hand-held. In tripod mode, the cameras produce 80MP images while in the hand-held mode they produce 50MP images.
Let’s take a look at how to use High Res Shot mode in the OM System OM-5.
- Press the ‘Menu’ button and navigate to ‘High Res Shot’ in ‘Shooting Menu 2’ before pressing the right navigation button twice.

1. Press the ‘Menu’ button. Navigate to ‘High Res Shot’ in ‘Shooting Menu 2’. Press the right navigation button twice.
2. Now use the dropdown options to set the delay time for firing the shutter after the release is pressed. This is more important when you plan to use tripod mode as it gives time for any wobble to die down. It can be set to from 1/2 to 60 sec, I use 1/2 second when I’m shooting in Handheld mode and 2 sec in Tripod mode. Press the ‘OK’ button to confirm the setting.

2. Use the dropdown options to set the delay time for firing the shutter after the release is pressed. Press the ‘OK’ button to confirm the setting.
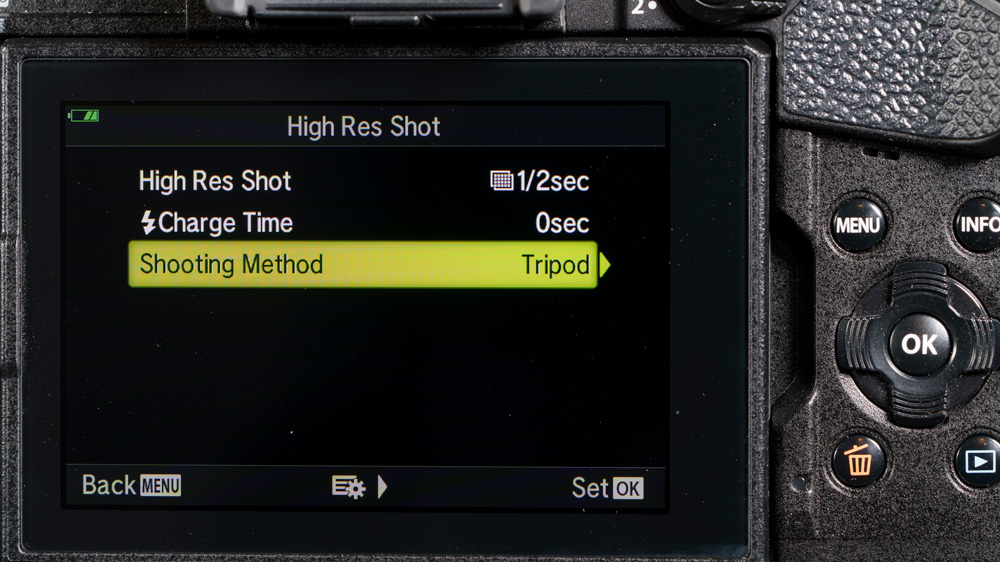
3. Scroll down to ‘Shooting Method’ and press the right navigation key to get the option to switch between Handheld or Tripod.

Switch between Handheld or Tripod in Shooting Method
4. If you’re using a non-Olympus flash, you may want to set a time to allow it the recharge between shots. If you’re not using a flash or it’s an Olympus model, there’s no need to worry about this setting.
Set the charge time between shoots
5. Exit the menu and check that the High Res Shot mode icon is displaying on the camera screen before pressing the shutter release to shoot the images. If you are using Handheld mode, try to keep the camera still, if it moves too much the camera can’t composite the images.
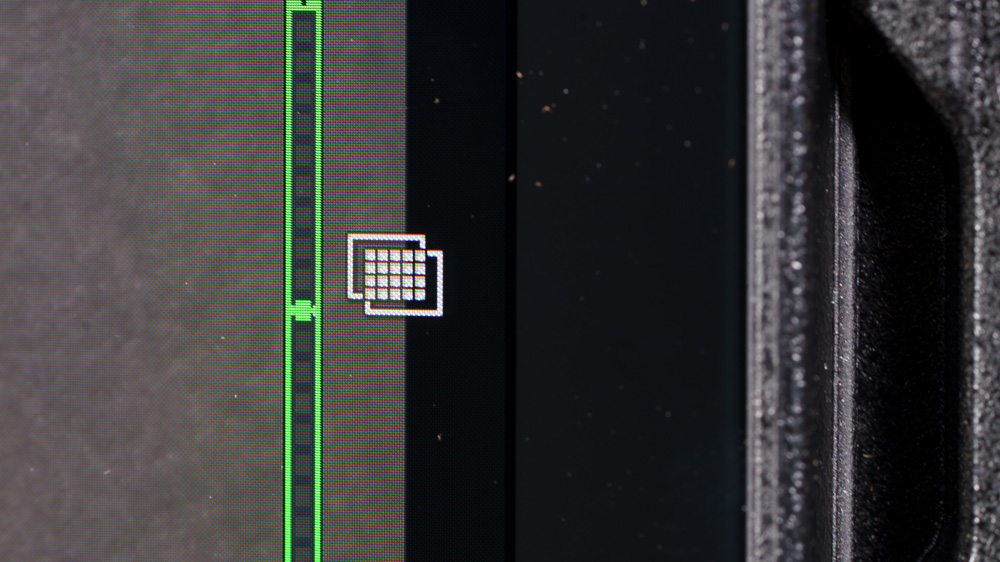
Check for the Hi-Res Shot mode icon
6. The constituent images aren’t saved to the card, you just get the one the composited shot, but there are raw and Jpeg versions if you are shooting in raw and Jpeg mode.

The camera will save the composite image.
Using software
Compositing large files into one huge image demands quite a lot of processing power and unsurprisingly, some manufacturers have gone down the route of using computer software to do the job. The camera still captures a series of images but each one is tagged to enable the software to identify it as suitable for compositing into a larger picture.
Here’s how it’s done with the Fujifilm X-T5:
1. The camera needs to be set to single-shot drive mode before Pixel Shift Mode can be used.

Set the camera to single-shot drive mode
2. In the menu, head to ‘Shooting Setting’ (camera) on page 3 and select ‘Pixel Shift Multi Shot’ before pressing the ‘OK’ button.
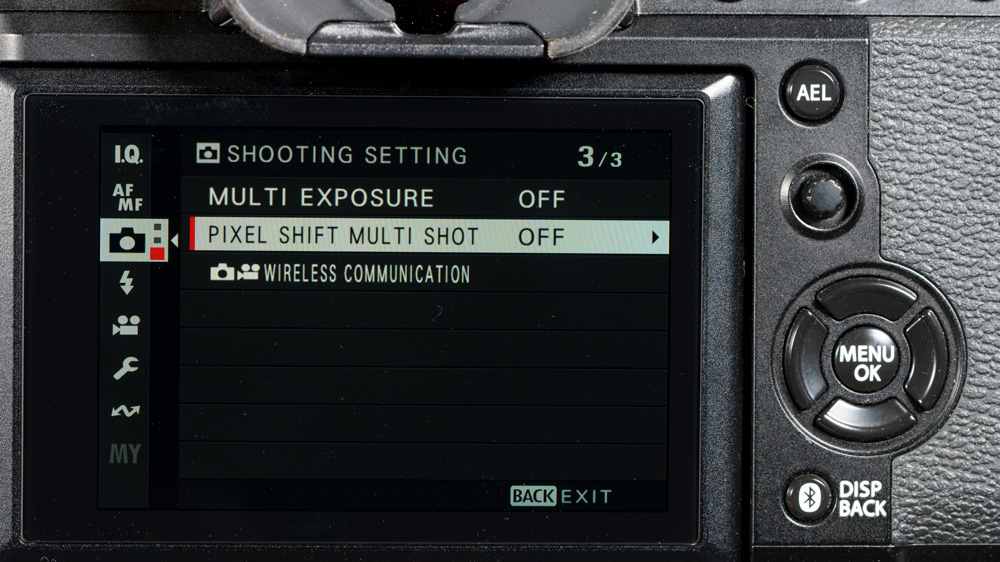
Fujifilm X T5 Single-shot drive mode
3. Set the shortest interval that you want between each of the constituent shots, it can be set to 1, 2, 5 or 15 seconds.

Shooting interval settings
4. With the camera on a tripod, compose the image, focus, set the exposure and press the shutter release to start the camera capturing 20 images in a sequence.

Compose, focus, set the exposure and start shooting.
5. Download your images from the memory card to your computer and open Fujifilm’s Pixel Shift Combiner software.

Download the images and process them using Fujifilm’s Pixel Shift Combiner software.
6. Click on ‘Register jobs’ and select the first sequence of images shot in Pixel Shift Multi-Shot Mode, the software automatically detects the others.

Click on Register Jobs to start stacking the images.
7. Click on ‘Run’ to start the software automatically combining the images. It will save the composite as a DNG file in the same folder as the original images.
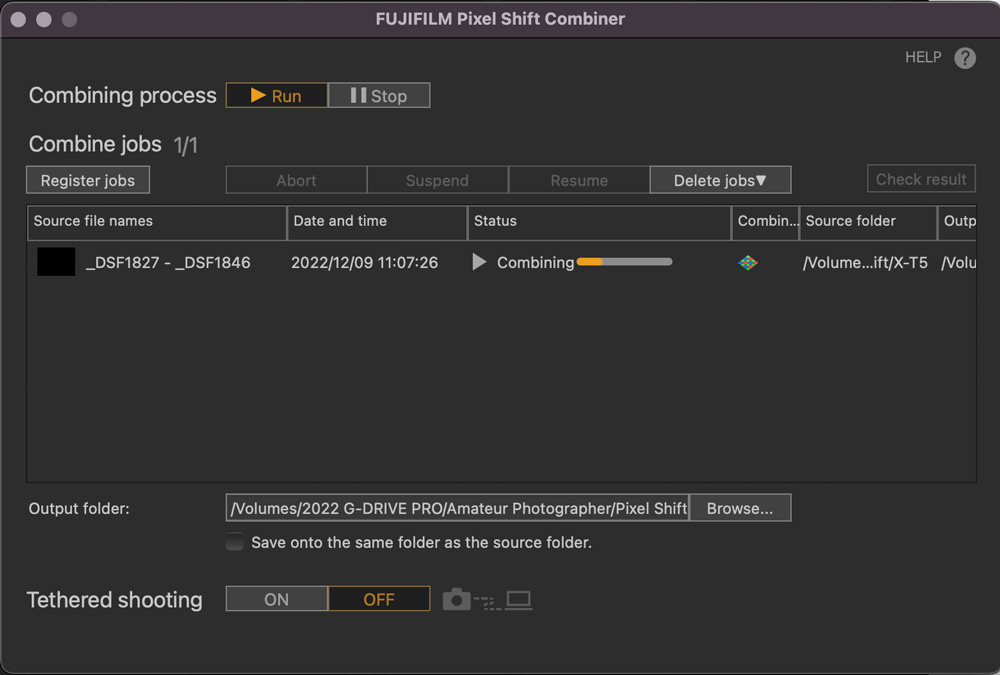
Click on ‘Run’ for the software to automatically combine images.
How big are the images?
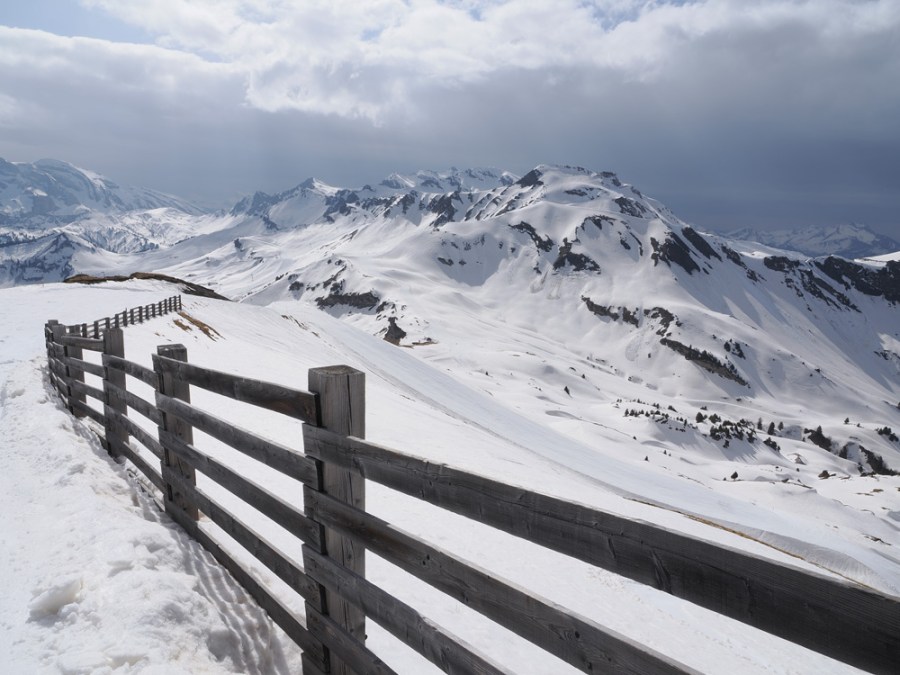
The OM System OM-1 has a relatively modest pixel count of 20.4MP. However, in Tripod High Res Shot mode, it can produce 80MP (10400 x 7792 pixel) images while in handheld mode it creates a 50Mp (8200 x 6132 pixel) image. At 300ppi, the 80MP images measure 88 x 66cm while the 50MP images measure 69.1 x 51.8cm. That’s larger than most people will print.
Jumping to a 102MP camera like the Fujifilm GFX100S brings the ability to create 400Mp images in Pixel Shift Multi-Shot mode. These images are made up of 23,264 x 17,448 pixels which means they measure almost 197 x 148cm when printed at 300ppi. That’s far bigger than the average photographer needs, but it could be perfect for commercial work or gallery prints.
Which cameras have high resolution modes?
Fujifilm
Fujifilm first put its Pixel Shift Multi-Shot mode in its medium format GFX cameras but it has now spread to some APS-C format X-series models. The images are merged using Pixel Shift Combiner software on a computer.
- GFX100: In Pixel Shift Multi-Shot mode, the 102MP sensor shifts between 16 shots that are merged into a 400MP image using Pixel Shift Combiner.
- GFX100S: A sequence of 16 102MP images is merged into one 400 MP image.
- GFX50S II: A series of 16 51.4MP shots that are merged into a 200 MP image.
- X-H2: The camera shoots a series of 20 images, shifting the 40.2MP sensor, to enable a 160MP image to be created in Pixel Shift Combiner.
- X-T5: The camera shoots a series of 20 images, shifting the 40.2MP sensor, to enable a 160MP image to be created in Pixel Shift Combiner.
Olympus
Olympus first introduced its High Res Shot mode in the OM-D E-M5 Mark II in 2015 and it’s now a feature of all its more recent mid-to-high-end cameras. The images are combined in camera.
- OM-D E-M5 Mark II: In High Res shot mode, the camera shifts the 16MP sensor between each of 8 shots which are combined to create a 40 MP image.
- Olympus OM-D E-M5 Mark III: The 20.4MP sensor is moved through a series of 8 images to enable a 50MP image to be created.
- OM-D E-M1 Mark II: A series of 8 20.4MP images are combined to create a 50MP image
- OM-D E-M1 Mark III: This 20.4MP camera has Tripod and a Handheld High Res Shot modes which enable the creation of 80MP and 50MP images respectively. These are created from 8 images in Tripod mode and 16 in Handheld mode.
- OM-D E-M1X: The 20.4MP sensor is shifted to enable the creation of 50MP images in Handheld mode and 80MP images in Tripod mode.
- PEN-F: In High Res Shot mode, the 22MP sensor is shifted to enable the creation of a 50MP JPEG or an 80MP raw file.
- OM System – OM System has inherited the Olympus High Res Shot mode technology and the images are combined in-camera.
- OM-1: In High Res Shot Tripod mode, the 20.4MP sensor is shifted to enable an 80MP image to be created while in Handheld mode it creates a 50MP image.
- OM-5: The 20.4MP sensor is shifted to enable an 80MP image to be created while in Handheld mode it creates a 50MP image.

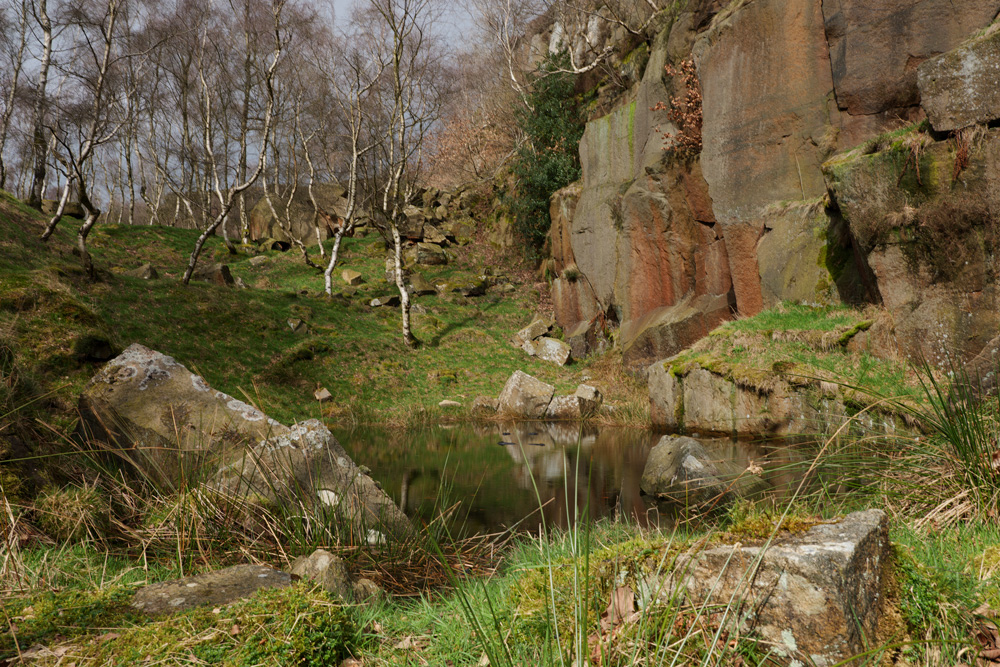
Using the Handheld High Res Mode on the OM System OM-1 resulted in a 50MP image with enough detail to make a large print. © ANicholson
Panasonic
Panasonic introduced its High Resolution mode with the Lumix G9 in 2017 and it has subsequently been included in the company’s full-frame S-series cameras. The images are combined in-camera.
- Lumix G9: In High Resolution Mode the 24.2MP sensor is moved between each of 8 shots which are then composited into an 80MP or 40MP image depending on the selected option.
- Lumix S1: The 24.2MP sensor is moved between each of sequence of shots to enable an image of up to 96MP to be created in-camera. The pixel count varies depending on the selected aspect ratio.
- Lumix S1R: In High Resolution Mode, the 47.3MP sensor is moved between shots as 8 images are captured, These are then merged to create an image of up to 187MP
- Lumix S1H: The 24.2MP is moved to enable the creation of a 96MP image in High Resolution mode.
- Lumix S5: The 24.2MP is moved to enable the creation of a 96MP image in High Resolution mode.
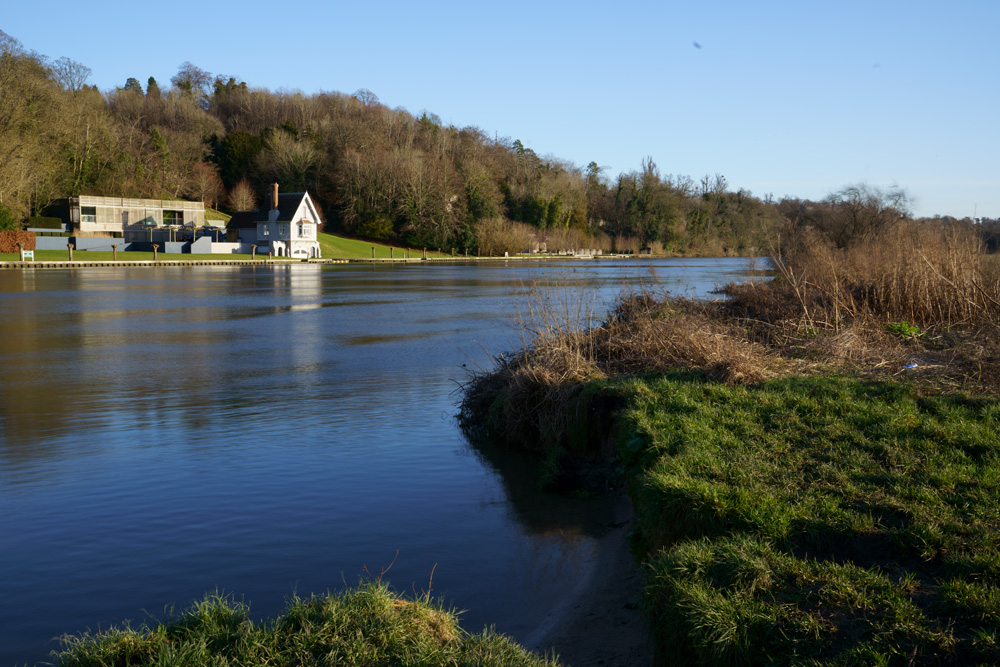
Shooting in the Panasonic S1’s High-Resolution mode results in 12000 x 8000-pixel images © ANicholson
Pentax
When Pentax first introduced its Pixel Shift Resolution mode it didn’t increase the pixel dimensions of the image but the most recent incarnation enables larger images to be created in-camera as follows:
- Pentax K-1 II: The 36.4MP sensor.
The K-1 II has tripod-only and handheld Pixel Shift Resolution modes. In both modes, the 36.4MP sensor is shifted to enable the creation of a 47.3MP image.
Sony
In the first incarnation of Sony’s Pixel Shift Multi Shooting mode the Sony A7R III captured a sequence of 4 shots that were merged to produce a 42.4MP image. That’s the same size as the standard output but the detail and tonal gradations are improved. Subsequent implementations enable larger images to be created. The images are merged using Sony Imaging Edge software.
- A7R IV: The 61MP A7R IV has a 4-shot mode that results in 61MP images and a 16-shot mode that results in 240MP images.
- A7R V: The 61MP A7R V has two-pixel shift modes, one that takes a series of 4 shots that results in a 61MP and another that takes a sequence of 16 shots and creates a 240MP image
- A1: The 50MP A1 can shoot a sequence of 4 shots that are combined into a 50MP image, or 16 shots that are combined into 200MP image.
Sony composite shot in Pixel Shift Multi Shooting mode.
Further reading:
Seven awesome camera features you didn’t know you had
APC vs Full Frame – which sensor size is best
Complete guide to ISO – tips to boost your camera skills
Follow AP on Facebook, Twitter, Instagram, and YouTube.