

Since the latest version of the iPhone regularly appears in our list of best smartphones for photographers, we know that Apple devices are extremely popular with many different photographers. And with good reason.
One of the best things about them is their relative simplicity – point and shoot and you get great pictures. To take your shots to the next level, though, there are lots of different things you can try to get more out of the cameras – some of which are somewhat hidden.
Most of these tips and tricks can be used with all of the recent iPhone models, so you don’t need to have the latest (iPhone 16 series, reviewed here) to take advantage of them. However, we’ve marked a couple that are currently unique to the newer models.
Read on to find out how you can unleash the power of your iPhone camera and get your best smartphone photos yet with our iPhone photography tips and tricks.
iPhone photography tip 1 – Shoot in raw format
Many of the top-end smartphones now offer you the opportunity to shoot in raw resolution. This gives you great scope for editing your shots later down the line to bring out extra detail, particularly in areas of highlight and shadow.
Apple calls its raw format “Apple ProRAW”, but it’s universal DNG format, meaning you’ll be able to open it on your computer using software such as Adobe Photoshop CC, or on your phone with editing apps such as Adobe Lightroom Mobile.
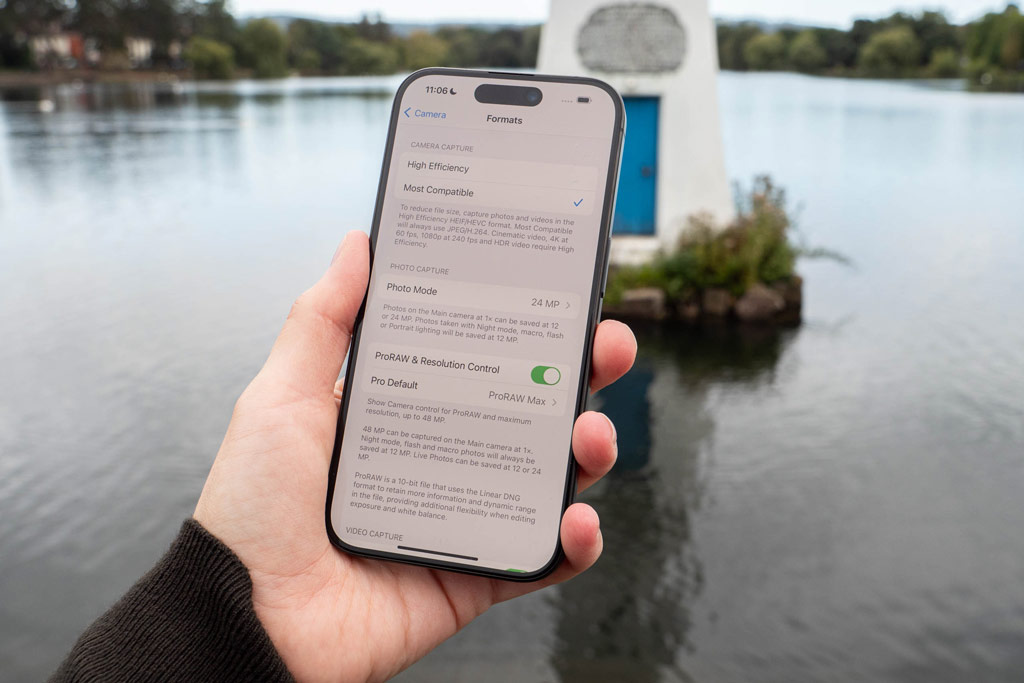
In order to see the raw option when shooting, head into the phone’s main Settings, then select Camera, then Formats. Select ProRAW & Resolution Control and you’ll now see it in the main shooting window. You can also choose a default resolution for your raw images too.
To save space, you can toggle raw format shooting on and off – you probably don’t need to use it for a quick snap of your dinner for example, but this can be a good choice for more considered shots .
Note that in this menu you can either shoot in “most compatible” or “high efficiency.” Most compatible will leave you with JPEG images that can be read by just about everything, while high efficiency means you’ll shoot in HEIF – this format is becoming increasingly readable, but is not yet as universal as JPEG.
iPhone photography tip 2 – Choose your resolution
With iPhone 15 series phones, the default output of images taken with the main sensor is 24 megapixels.
However, you can choose to shoot at a different resolution, depending on your needs. Firstly, you can shoot at the maximum 48 megapixels (in either JPEG or raw format) where lots of detail is desired. Alternatively, you can reduce the resolution to 12 megapixels in order to save more space on your device, too.
First, head into Settings > Camera> Formats. From here, tap “Photo Capture” and you can reduce the standard output from 24MP to 12MP if you prefer. In the same menu, you can also toggle on ProRAW & Resolution control, and also set a default for the ProRAW setting (JPEG Max (up to 48MP), ProRAW 12MP or ProRAW Max (up to 48MP).
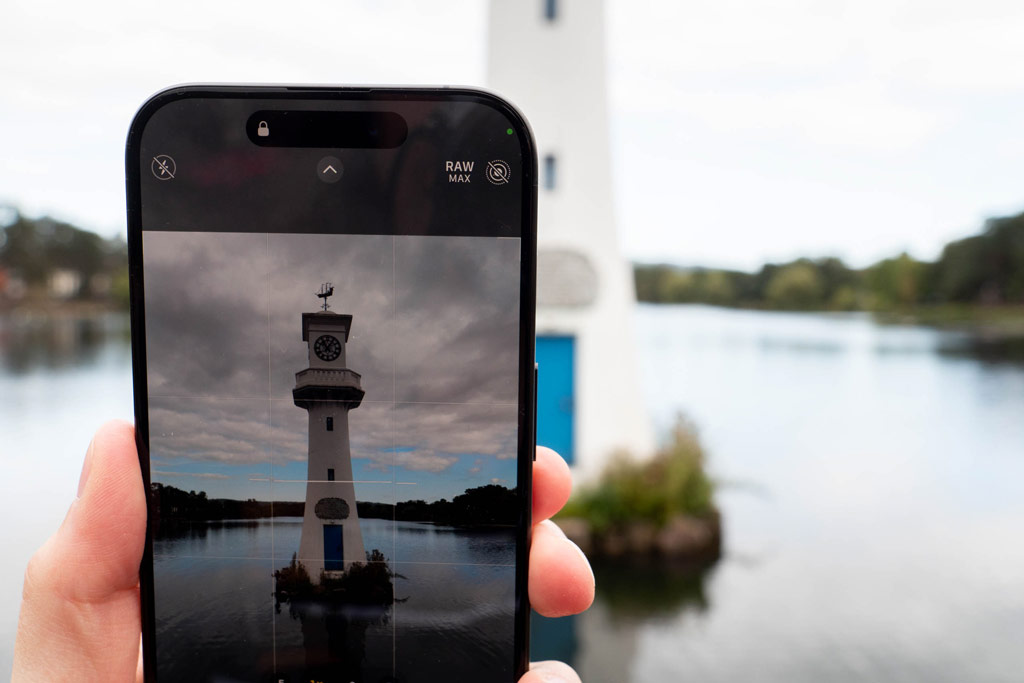
Now, when you go back into the camera app, you should see “RAW” at the top of the screen. A single tap of this will switch raw shooting on or off, while if you hold it down you’ll be able to toggle between the different resolutions available.
Just to note – it says “up to 48MP” in the Settings menu, because if you shoot with other lenses aside from the main one, the resolution will drop to match that sensor.
For other recent iPhone series models, such as the iPhone 13 Pro and the iPhone 14 Pro, the default resolution from the main sensor is 12MP, and it can’t be increased to 24MP. With the iPhone 14 Pro, you can still shoot at the higher resolution, though – up to 48MP.
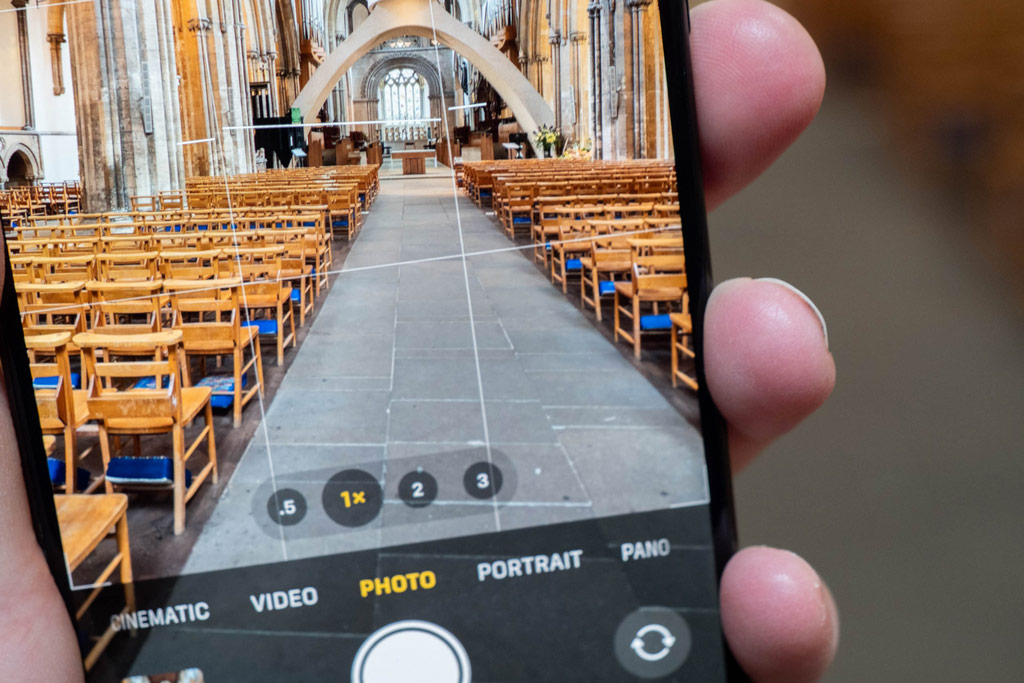
iPhone photography tip 3 – Choose a 1x lens (iPhone 15 Pro series only)
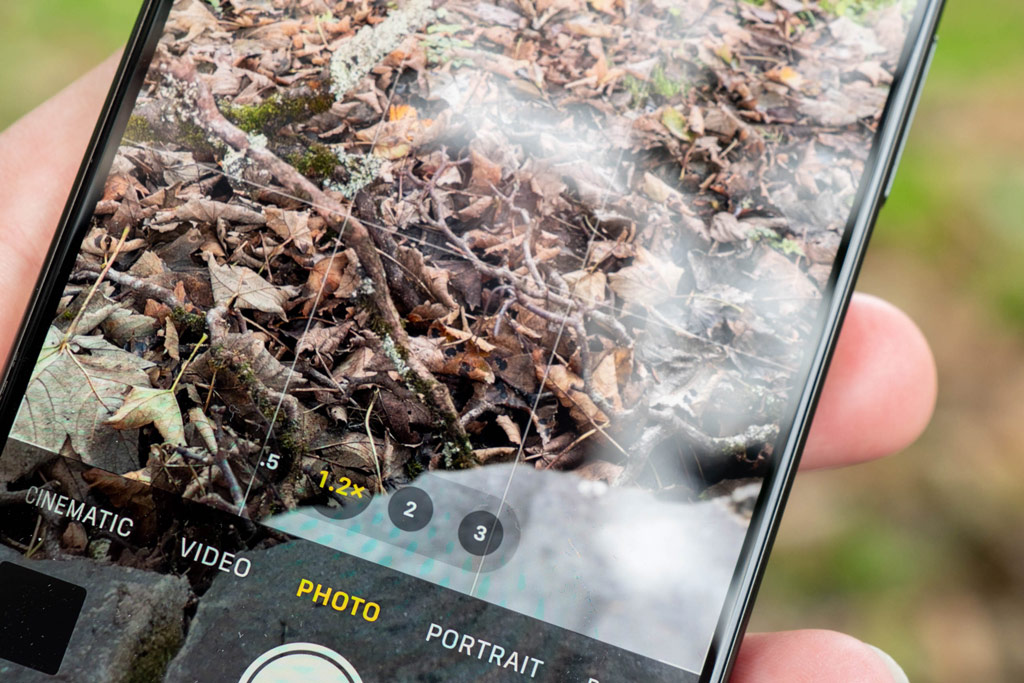
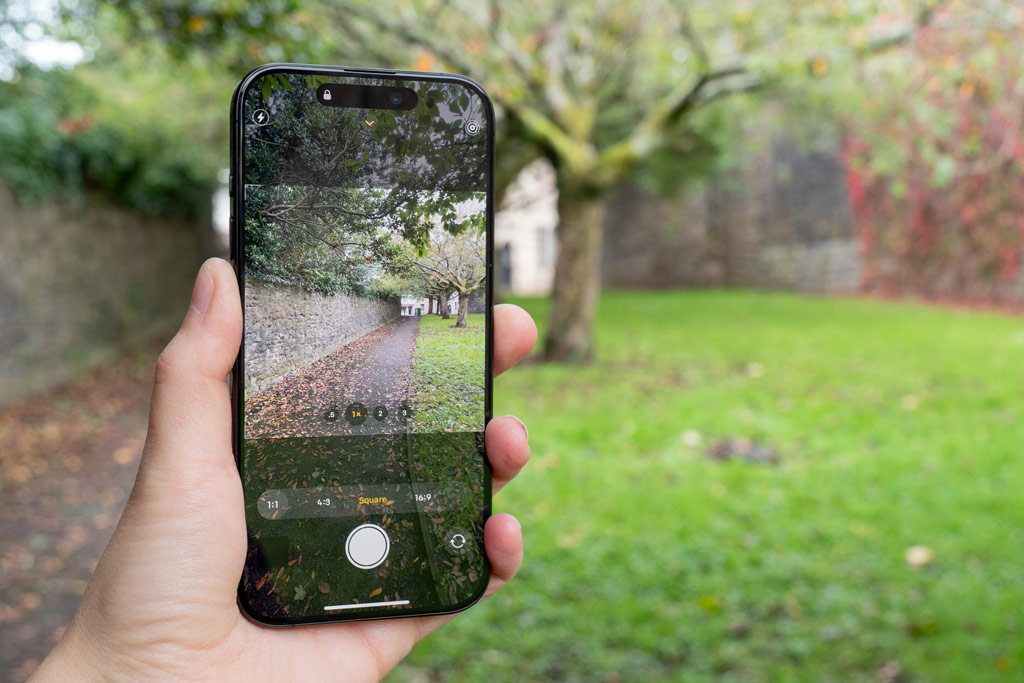
A fun feature of the iPhone 15 Pro series is the ability to choose a different “1x” lens from the standard 24mm option.
In the main camera app, tapping the “1x” lens will take you to 1.2x (28mm equivalent) and 1.5x (35mm equivalent) very quickly. Tap again to return to the standard 1x option.
If you find you’re regularly shooting at 1.2x or 1.5x, you can opt to have this as your default option, too. Alternatively, switch off any of the two extra “lenses” that you don’t want, to enable you to jump from 1x to 1.5x for example.
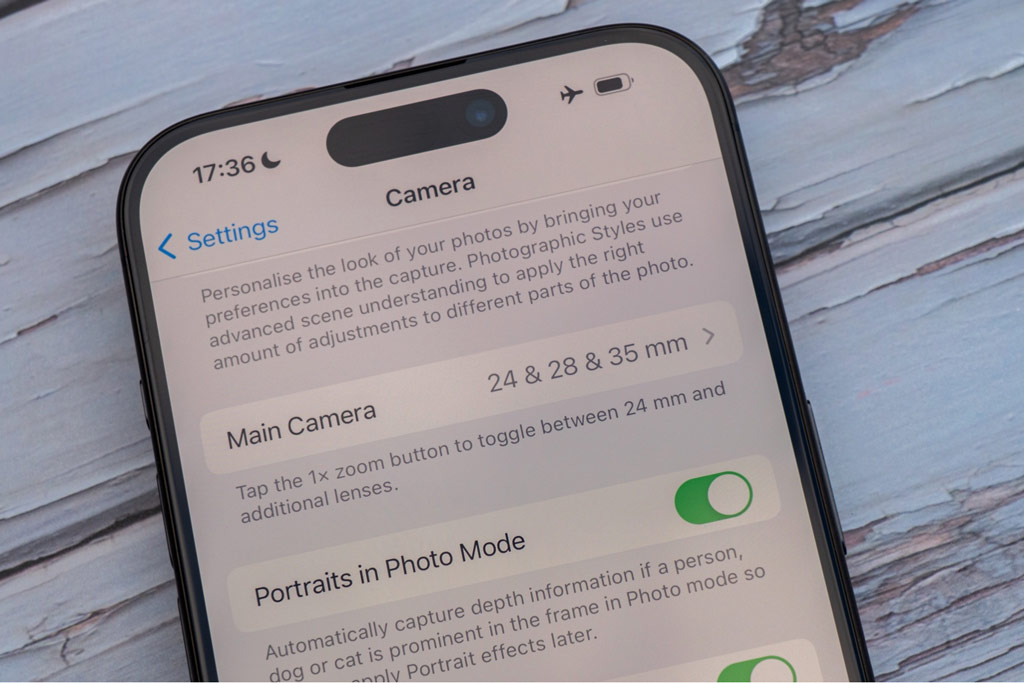
Go to Settings > Camera > Main Camera, where you can toggle lenses on and off, and choose a different default if you prefer.
Note that this is only available for iPhone 15 series phones, for now at least.

iPhone photography tip 4 – Extend Night mode exposure time
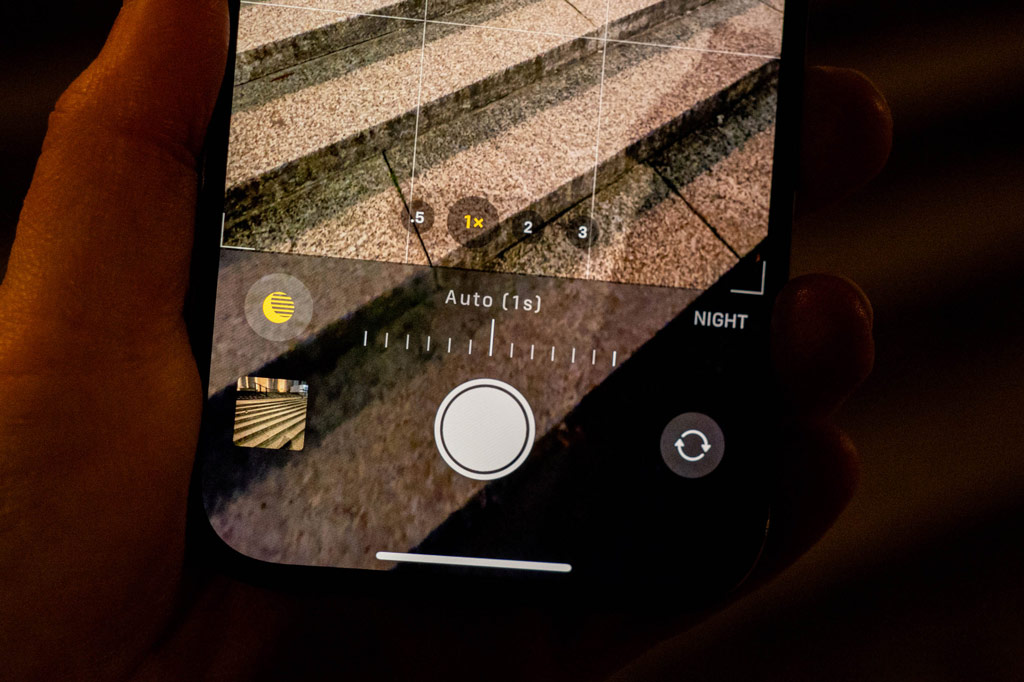
All of the recent iPhone models have had an automatic Night mode, which should kick in when the phone detects that there isn’t much light in the scene.
It’s a shame that the Night mode can’t be selected manually but, once it works, you can take additional control for potentially even better pictures. Swipe up from the bottom of the screen and tap on the moon icon (as shown in our picture here), and you’ll be able to adjust the shutter speed from what the phone thinks is appropriate.
When using a tripod or balancing the phone on a steady surface, you’ll be able to increase the shutter speed to several seconds (the phone automatically knows when it’s stable).
iPhone photography tip 5 – Switch on macro mode
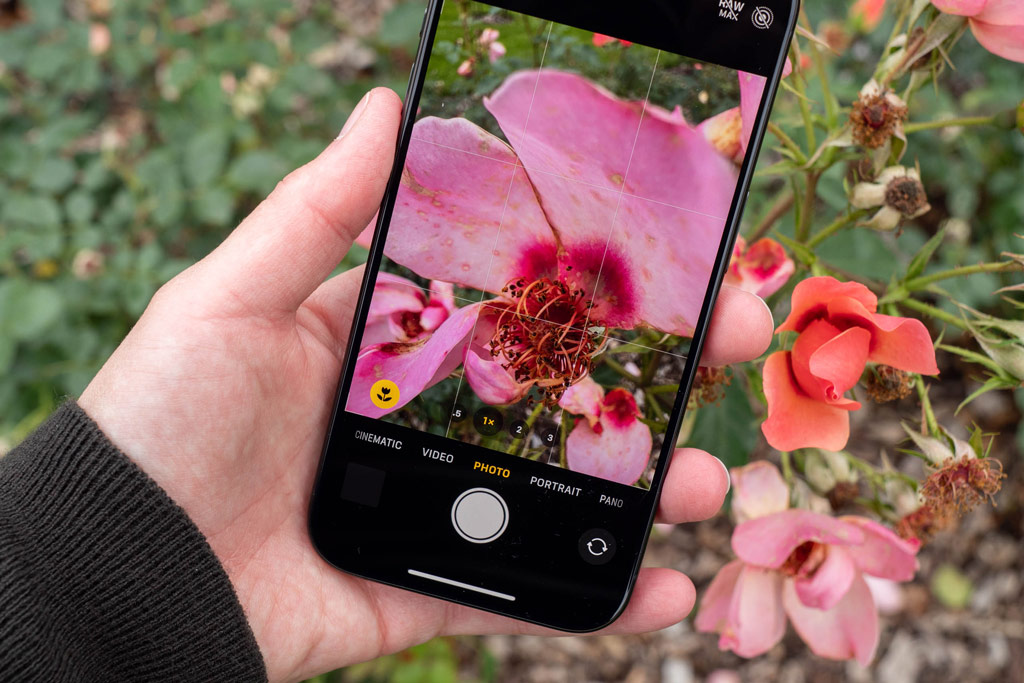
Macro mode has been a feature of iPhones for several generations now. It works by automatically detecting when you are very close to a subject and switching to the ultrawide lens.
You should notice that a small flower icon appears when you get close to a subject. If you don’t see this, make sure macro detection is switched on in the main menu (Settings > Camera > Macro Control).
At any time, you can switch off macro, too – this can be useful in some circumstances. As the phone is switching to the ultrawide lens, you lose the ability to shoot in high resolution, while the aperture of this lens is narrower than the 1x lens. If you’re doing some close-up work, but you’re not *too* close, it can be worth tapping the icon to switch back to the main camera. Try experimenting with how close you can get with that to see what works best.
iPhone photography tip 6 – Switch on Portrait detection (iPhone 15 Pro series only)
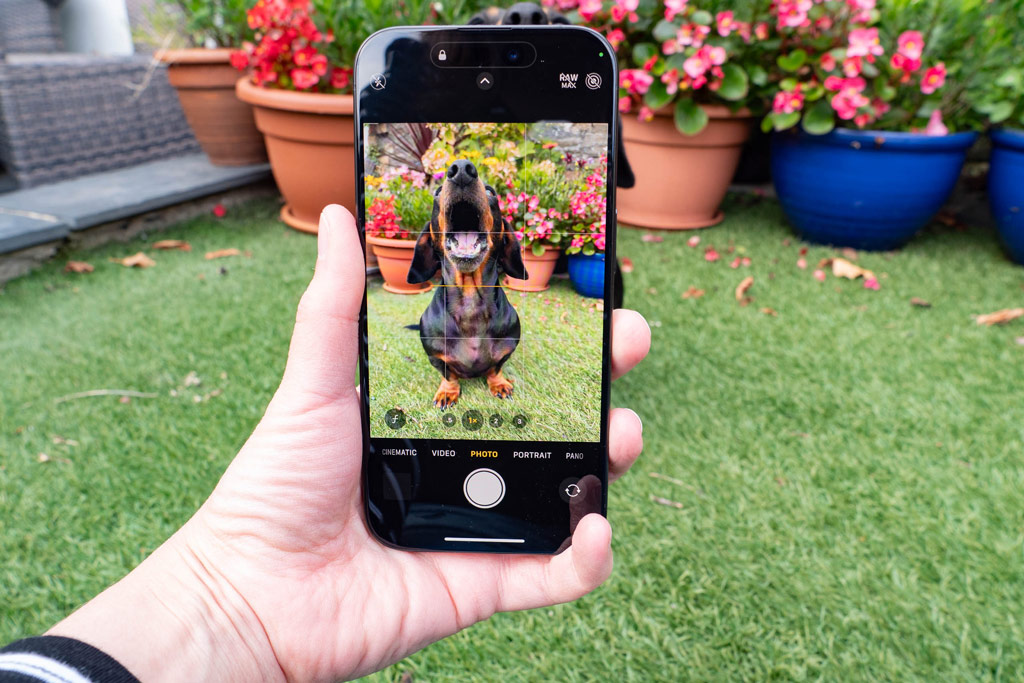
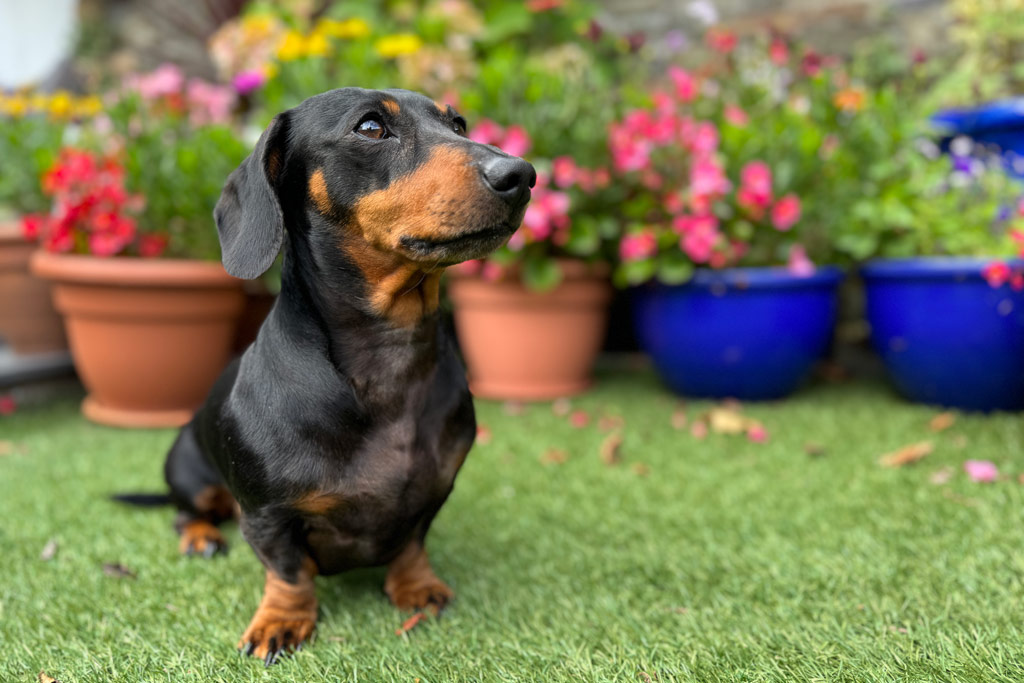
One of the new introductions of the iPhone 15 series was automatic portrait detection. This works by recognising when a portrait subject is in front of the lens (human, dog or pet) and capturing all the necessary detail required to create a “Portrait” (shallow depth of field image).
This is great when you’re using the main Photo mode and want to quickly capture a moment without having to switch to the specific shooting mode.
You will notice when a Portrait subject has been recognised by the appearance of a small “f” (to denote aperture) in the corner of the screen. Once you’ve taken the picture, you’ll be able to add or remove the Portrait stylings as you see fit.
If you don’t see the f, make sure it’s switched on in the main menu (Settings > Camera > Portraits in Photo Mode).
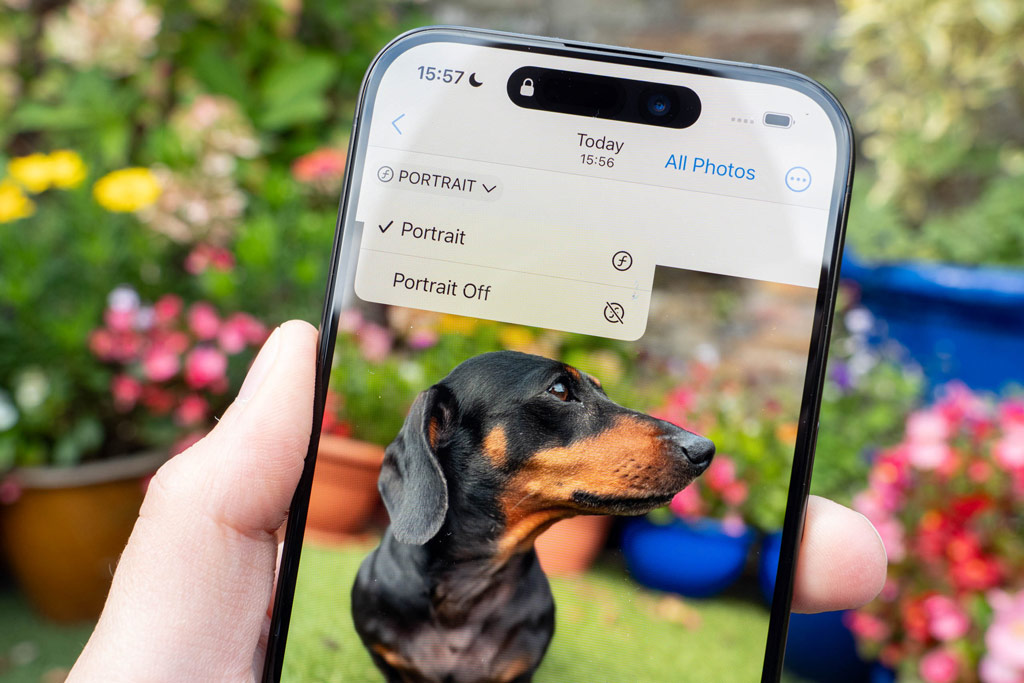
With iOS 17 you can also adjust the focus point for your portraits after the fact – perhaps the phone has focused on your dog’s nose, rather than its eyes for example. This is a feature that should work with any iPhone from the 13 series onwards, so you don’t need to have the latest 15 models for this part of the tip.
To try it, open a Portrait and tap Edit in the top right hand corner. Tap anywhere around the screen to change the focus point as you see fit. You can also adjust the level of blur to create a more – or less – pronounced effect too. When you’re happy, click Done to save your changes – you can revert back to the original, or remove Portrait styling altogether at any time too.
iPhone photography tip 7 – Experiment with Picture Styles
A fun way to change up the look of your photos is to shoot using different Picture Styles.
To access them, swipe up from the bottom of the main camera window and tap on an icon which looks like three squares.
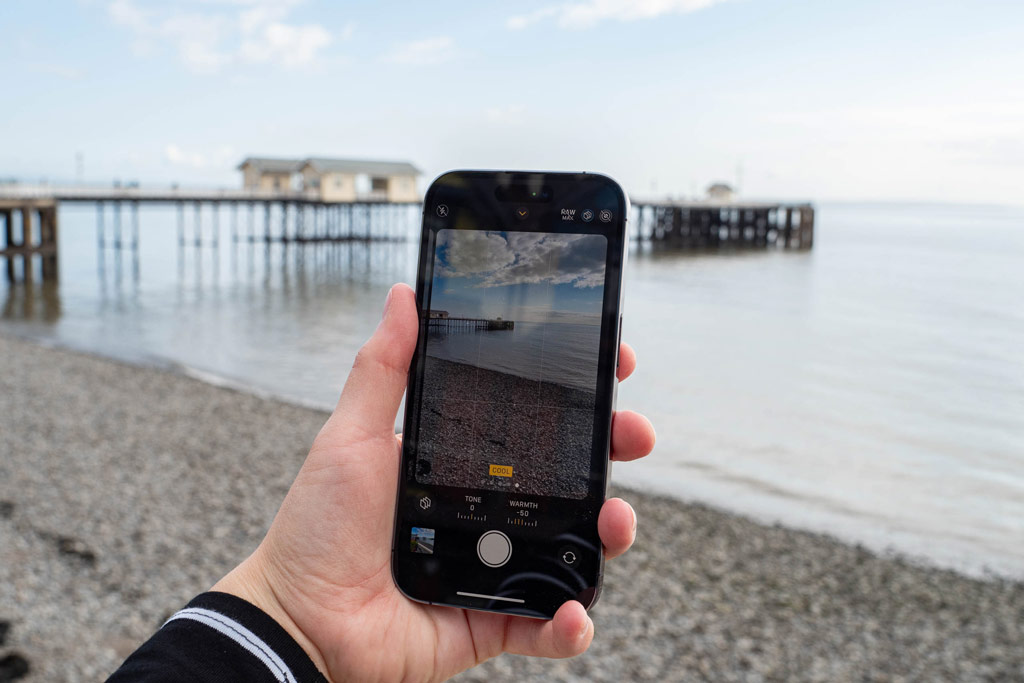
From here, you can swipe to move from the default option (Standard), to Rich Contrast, Vibrant Warm, Warm, and Cool. These are all fairly subtle, but are worth experimenting with – some will suit some situations better than others.
You can also customise each Style by adjusting Tone and Warmth to get a slightly different look again. If you do that, the names of the styles will change – for example to “Vibrant Cool”. You can reset the Styles any time you like.
A couple of things to note about Picture Styles. You can’t remove them after you’ve shot a picture – so make sure they are turned off when you don’t want them – if one is activated you should see an icon at the top of the screen to allow for a quick removal (or change) of the Style. Secondly, you can’t shoot in raw format with Styles activated, but can shoot Live photos (where a short amount of video is captured with the style).
iPhone photography tip 8 – Switch on the Level and Grid
This is a feature which has been around in cameras (and other types of smartphones) for a long time and always comes in handy when trying to compose things like landscapes and architecture.
iOS 17 introduced the ability to switch on a level which you can see in your main camera window – it’ll turn yellow if you hold the camera straight.
To switch it on, go to Settings > Camera and toggle “Level” on. Although not a new feature, it can also be worth switching on the Grid too, to help your composition too (Settings > Camera > Grid).
iPhone photography tip 9 – Try different filters
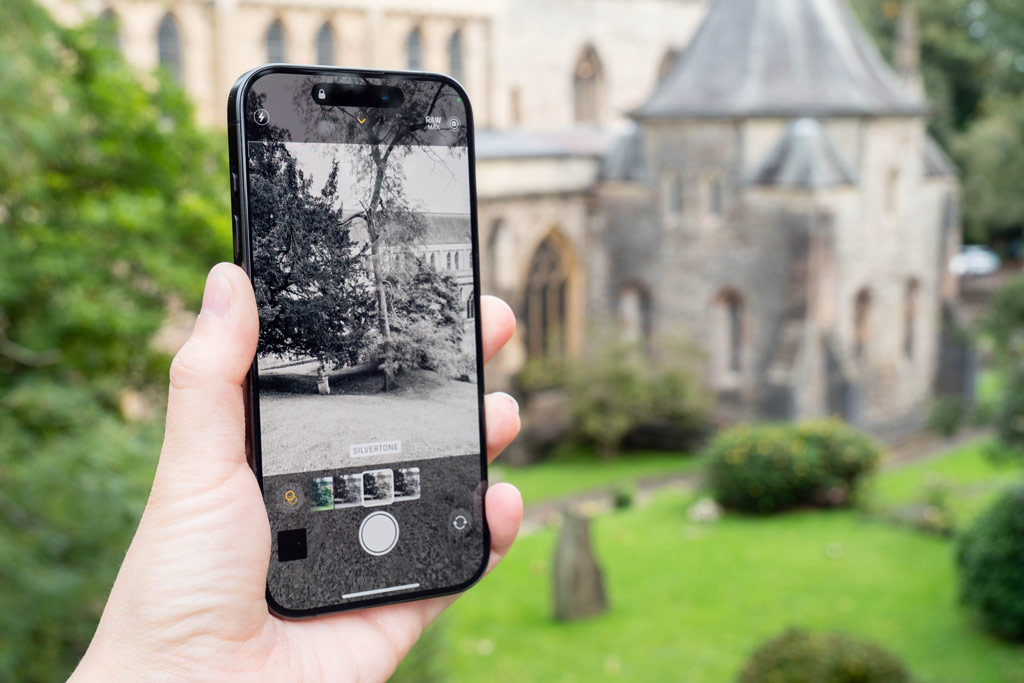
If you like the idea of your photos having a different look but are put off by the permanence of Picture Styles, then take a look at Filters.
These can be accessed by swiping up from the bottom of the screen, swiping along the various options presented here, and tapping the icon that looks like three overlapping circles.
The filters are a lot more dramatic than the Styles, and include monochrome options too. You will see how your picture looks during composition too. The good thing about these is that you can remove or change the filter after you’ve taken the shot by tapping “Edit”, and, you can also shoot in raw format with filters switched on too.
iPhone photography tip 10 – Adjust aspect ratio
By default, the iPhone will shoot in 4:3 ratio, which works well for many different scenarios.
But you might not be aware that there are other aspect ratios which you can select too. To access them, swipe up from the bottom of the screen and tap the circle marked 4:3. You’ll now see options to shoot in Square (1:1) or 16:9 ratio.
Remember to change back to your preferred ratio – though if you forget, you’ll be able to access the default (4:3) ratio by tapping Edit, selecting “Crop” and then “Original” too – which is handy to know.
iPhone photography tip 11 – Preserve your settings
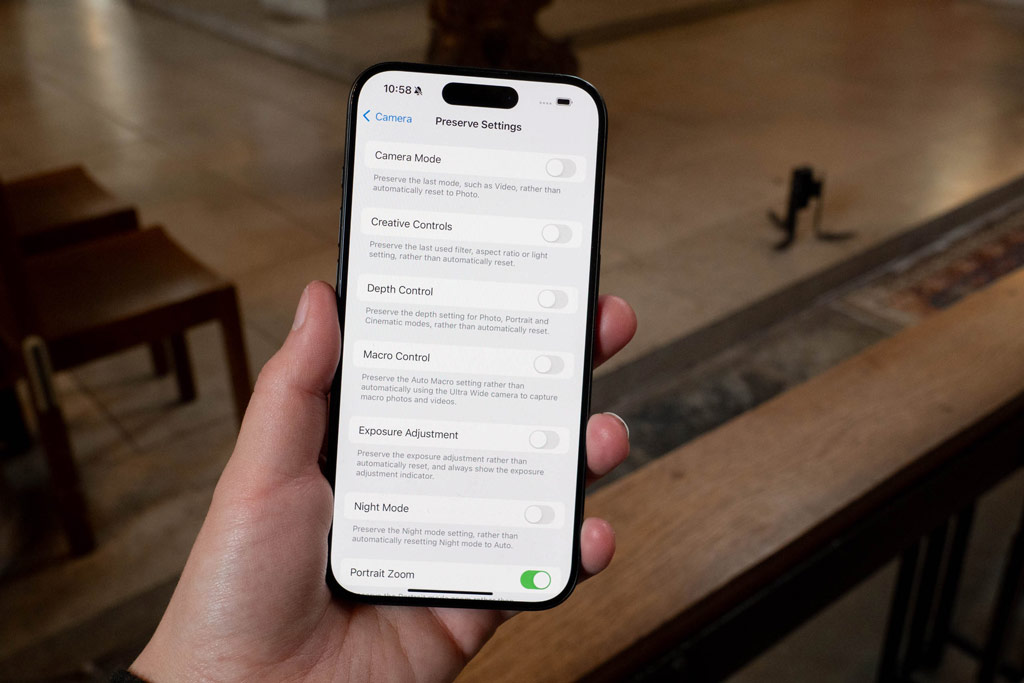
If you regularly shoot one particular subject, it can be quite frustrating when the settings reset every time you open up the camera app.
Happily, there’s a way around this – head to “Preserve Settings” (Settings > Camera > Preserve Settings) and you can toggle on (or off) a number of settings, including Exposure Adjustment, settings you’ve changed with Night Photo, Creative Controls and more.
Setting it to “Camera Mode” is a good one to select if you’re shooting lots of video in a day – as you won’t have to keep going back to the video mode every time you open the app.
There’s an explainer about what each setting does if you’re not sure, which comes in handy.
iPhone photography tip 12 – View outside the frame

This feature is particularly handy for street photography and similar situations.
By enabling “View Outside the Frame” (Settings > Camera > Composition) you can see on either side of the frame what’s about to come into view. This can be helpful for waiting for the opportune moment. It’ll also give you a good idea of how an image will look when shot at a wider focal length, without actually having to adjust the length, too.
The data for this setting comes from the wider camera, so it’ll work when shooting in 1x, 2x, or 3x/5x (depending on your model of iPhone), but you won’t be able to use it with the ultrawide lens, since that’s already the widest you can go.
And finally… tip 13 – Editing
Don’t forget to edit your photos if you want to make your photos POP. All you need to do is select the image you want to edit in the photos app then press edit in the top of your screen. There is a whole range of options, but if you just want a quick fix to your photo you can just press the auto button and it will edit it for you. If you want more advanced editing options have a look at our guide to the best photo editing apps for your phone.
Related reading:
- Best photo editing apps for your phone
- 10 ways smartphones can help your photography
- iPhone vs Android: Which is better for photography?
- iPhone 15 Pro Max vs iPhone 15 Pro: Do you need a 5x zoom?
- iPhone 15 Pro Max vs iPhone 14 Pro/Max: Should you upgrade to get 5x zoom?
Follow AP on Facebook, X, Instagram, YouTube and TikTok.


