When it comes to converting images to black & white there are lots of options available to you. We’ll explore some of the best tools for black & white in Adobe’s photography range. Whether you use Lightroom, Photoshop or Elements, here you’ll find advice not just on how to convert, but also how to fine-tune the look of your monochrome images.
Welcome to the AP Improve Your Photography Series – in partnership with MPB – This series is designed to take you from the beginnings of photography, introduce different shooting skills and styles, and teach you how to grow as a photographer, so you can enjoy producing amazing photography (and video), to take you to the next level, whether that’s making money or simply mastering your art form.
Each week you’ll find a new article so make sure to come back to continue your journey. The start may seem basic to some photographers, but it’s an important step in making sure you’re comfortable with your equipment and the basics of photography, as it’s part of the foundations that help build into great photographs, and once you know these, you’ll be able to play with them, and understand further articles in this series.
Before conversion…
Fine tune your photos when converting to black and white
Often this is more than just about removing the colour, it’s also about tweaking the conversion, controlling the contrast, adjusting the shadows and highlights, and selectively dodging and burning. These tools are not difficult to master, and even an image-editing novice can make stunning monochrome photos in minutes.
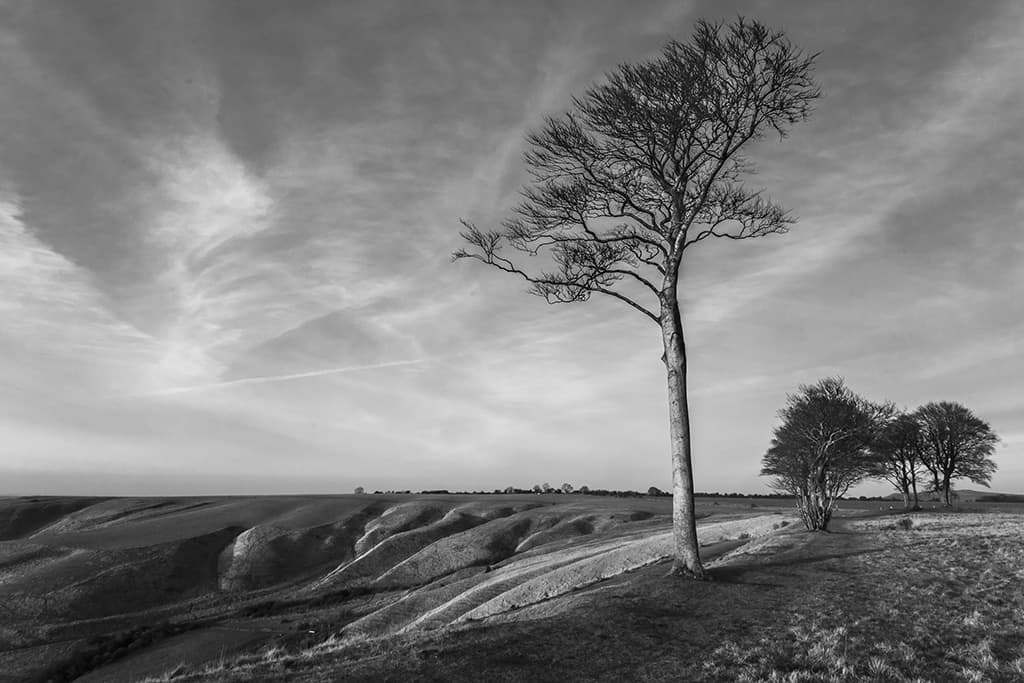
Converting your colour images to monochrome is just the start of the process. Fine-tuning will transform a scene into a stunning vista
Use Black and White Profiles
Available both in Lightroom and in Camera Raw, the Profile Browser is a great way to kick-start your image editing. It offers a range of one-click treatments and effects for your photos, including a useful set of monochrome profiles. These profiles give you different black & white looks that alter the luminance of colour ranges in a variety of ways, just as if you were experimenting with the B&W mixer options.
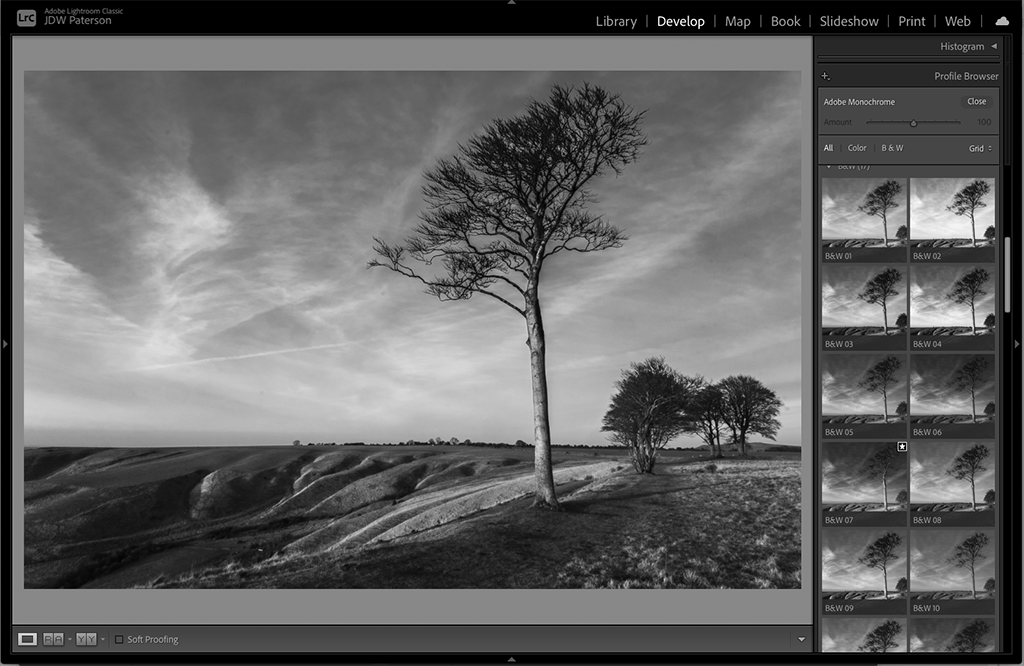
A good starting point is to try the Black and White Profiles that are available
Each profile (excluding the raw profiles) also has a handy Amount slider that lets you fine-tune the strength of the treatment. One of the best things about using Profiles is that, unlike Presets, they work independently of all the other settings in Camera Raw/Lightroom. So you can begin your black & white workflow by choosing a profile, then go on to fine-tune things using the B&W Mixer settings or any other tools you like.
What’s more, if you hit upon a new black & white recipe that you like then you can save it as a new profile in Camera Raw – simply go to the Preset panel and Alt-click the New Preset icon to open the New Profile dialog, then work through the settings to create your own custom profiles. Any custom profiles will automatically sync with Lightroom the next time you open.
Get to grips with Lightroom’s B&W panel
If you shoot in raw then, as a general rule, it’s best to convert to mono during the raw processing rather than once an image has been saved as a JPEG, as this way you make use of the greater colour information that raws hold. We can utilise this colour information during the conversion by fine-tuning the brightness of different colour ranges as we remove the colour.
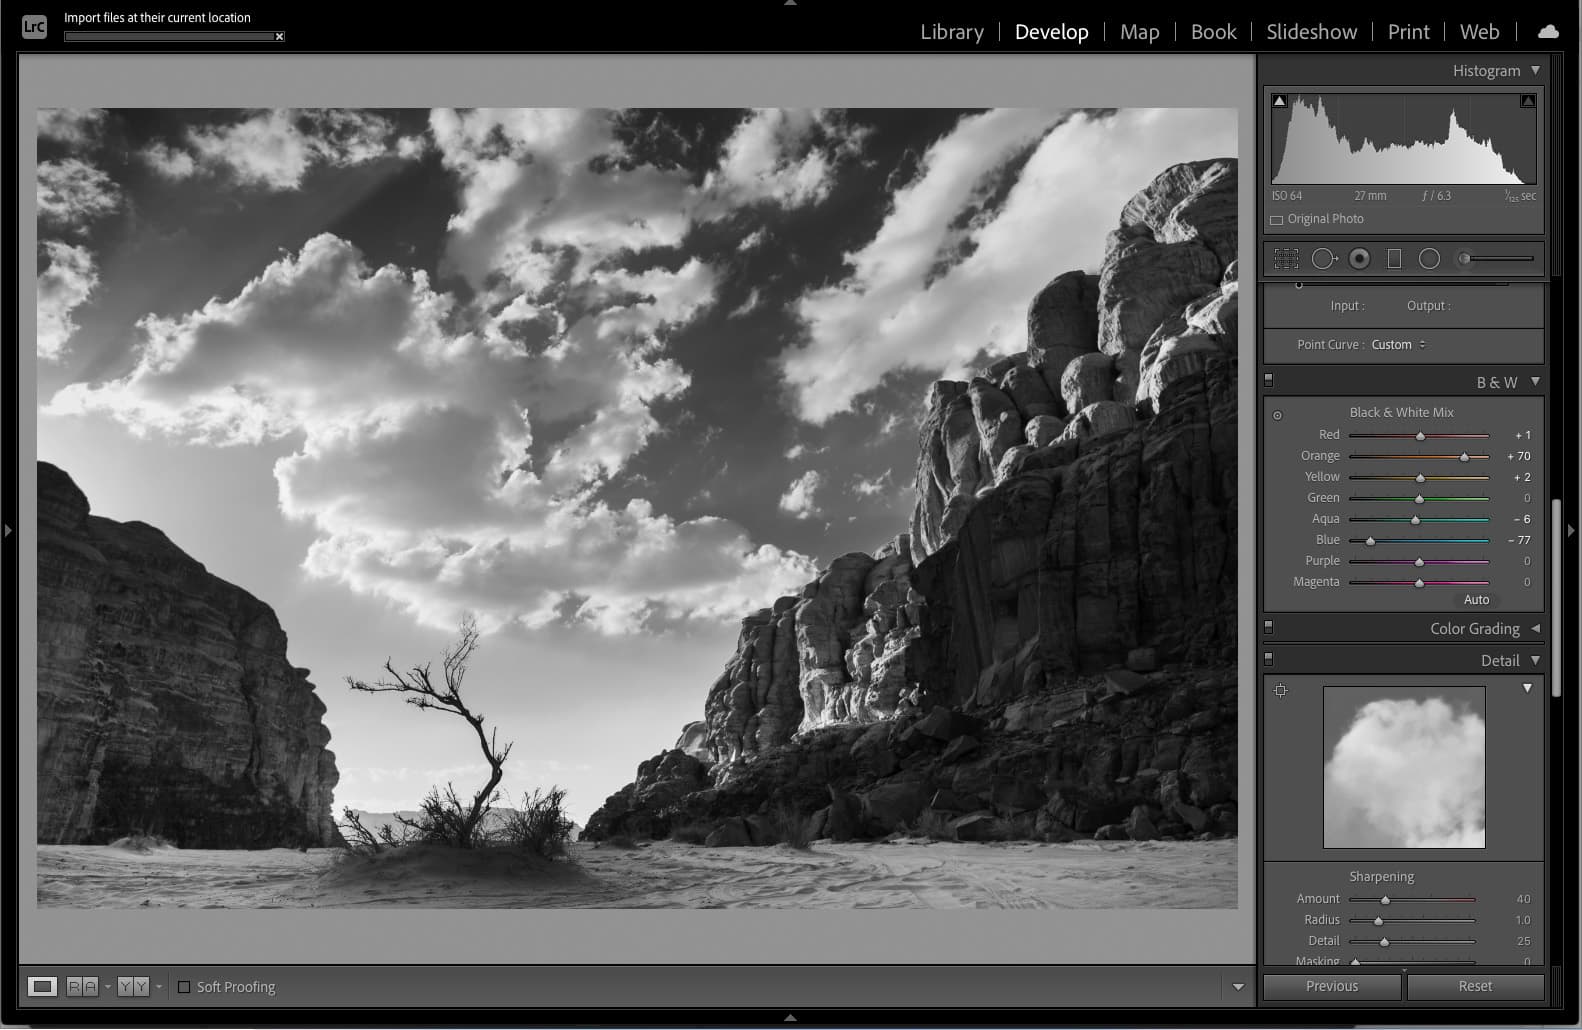
Converting to mono during raw processing gives you greater control
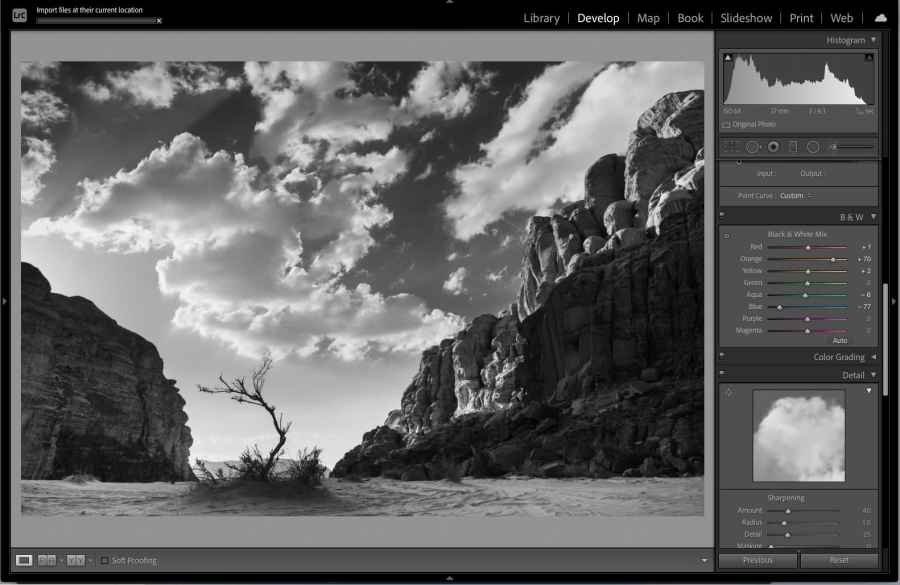
This is where the Lightroom/Camera Raw B&W Mixer panel comes in. You can either begin your conversion here, or start by choosing a black and white Profile and then use these sliders to fine-tune the conversion. The B&W Mixer panel controls let you alter the luminance of different colours. You can simply drag the eight sliders to alter the colours, or click the target icon in the panel then drag up or down over parts of the image to alter the brightness of the colour ranges within.
The on-image target tool is usually a better choice as it can alter more than several colour ranges at once, which tends to lead to more natural tonal shifts. Here dragging down over the sky darkens the blues, which makes the sky look more dramatic and increases the contrast with the white fluffy clouds.
Top five Photoshop black and white tools
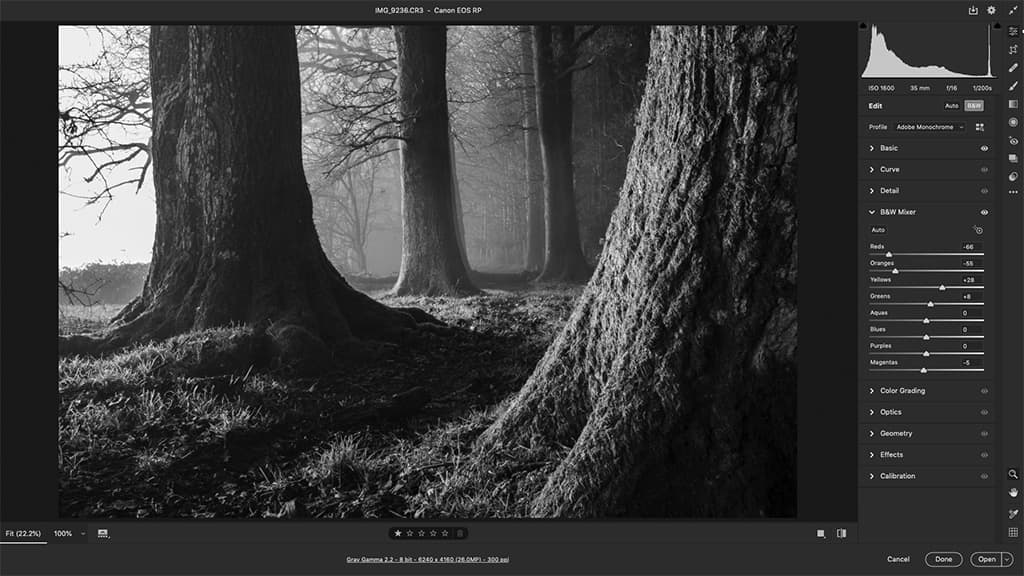
1 – B&W Mixer
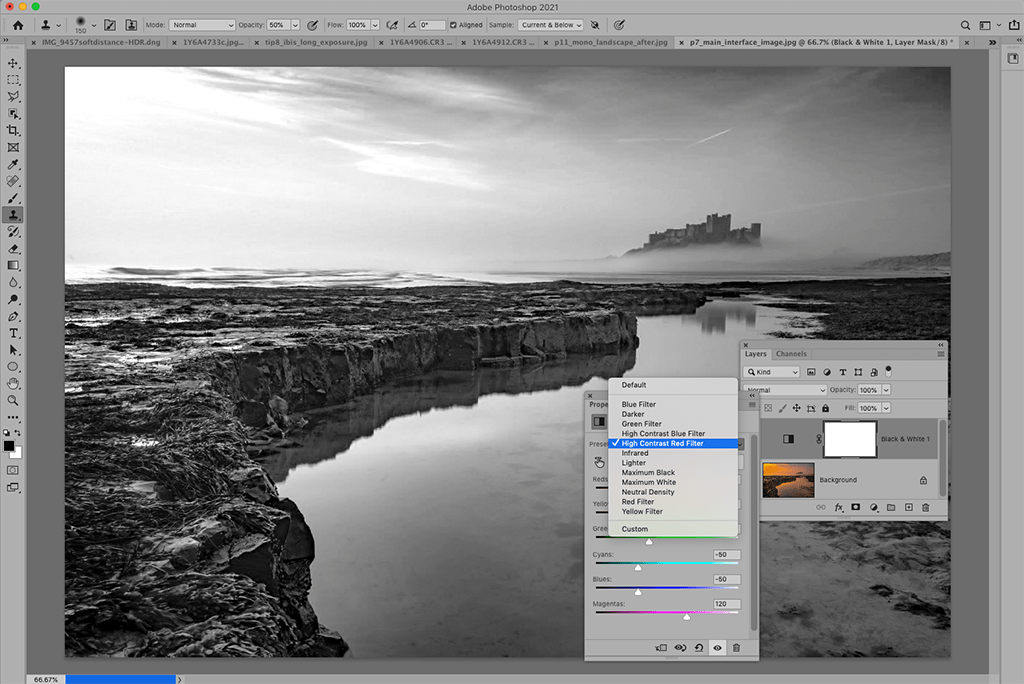
This panel in Camera Raw offers more control over your black & white conversion than any other in Photoshop. It works in much the same way as the near-identical Black and White panel in Lightroom by giving you on-image control over the luminance of eight colour ranges.
2 – B&W Adjustment Layer
Available in Photoshop as a direct adjustment (under Adjustment menu) or for more control as an Adjustment Layer (go to Layer > Adjustment Layer). Like the B&W Mixer in Camera Raw this also lets you control the brightness of colour ranges, but there are six here compared to eight in Camera Raw.
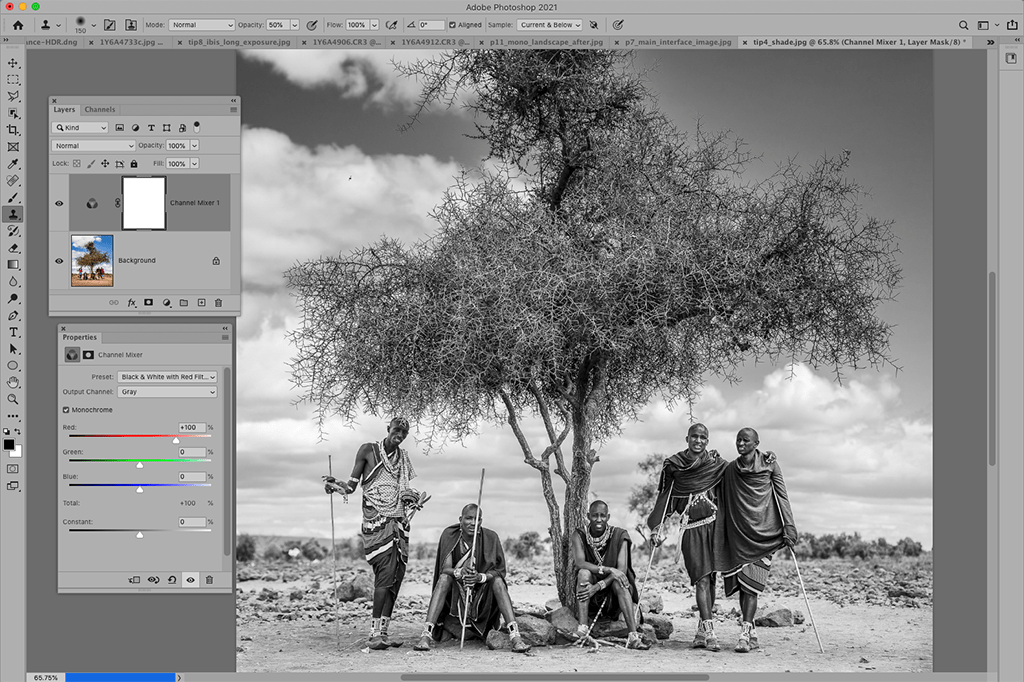
3 – Channel Mixer
Apply the Channel Mixer as an Adjustment Layer in Photoshop for a range of black & white effects. You can either check Monochrome and adjust the sliders to fine-tune your conversion, or simply choose one of the excellent black & white presets from the dropdown at the top of the settings.
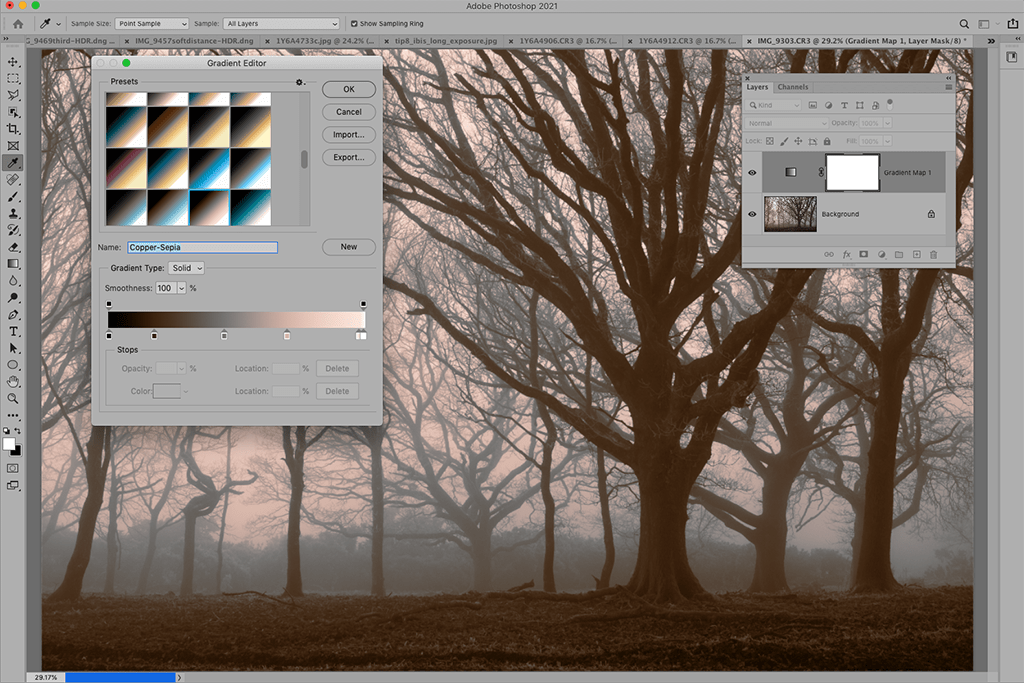
4 – Gradient Map
A Gradient Map lets you add one tint to the shadows and another to the highlights, so it’s great for tinting. You’ll find a great set of analogue treatments hidden in the settings. Add a gradient map, click the gradient preview, then click the cog icon in the settings and load the ‘Photographic Toning’ set.
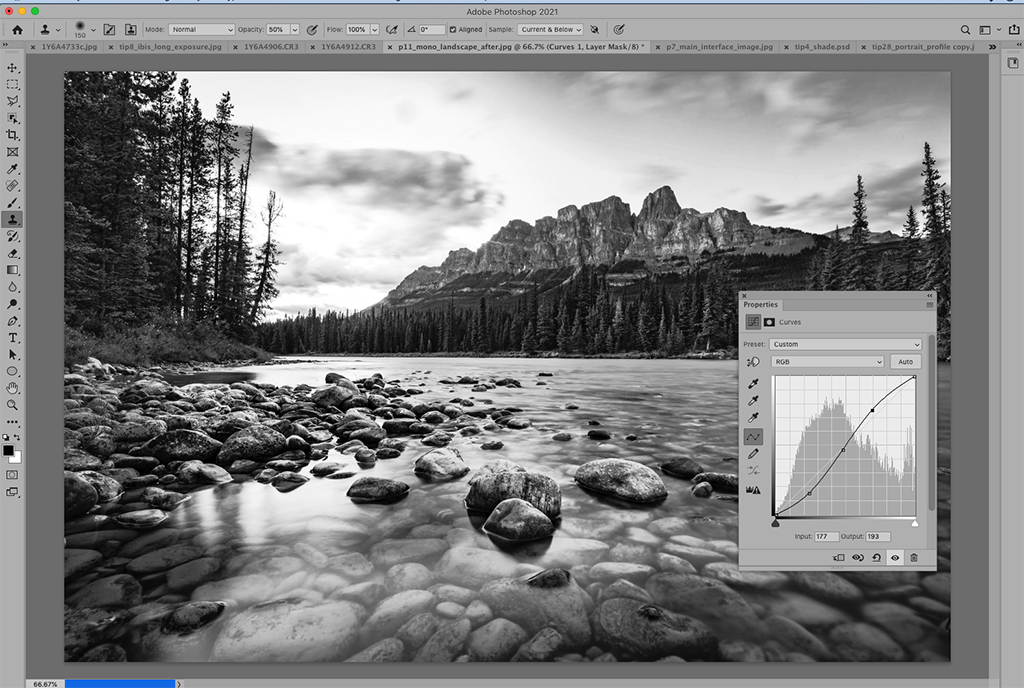
5 – Curves
It’s not just for black & white photos, but Curves works brilliantly on them. After converting to mono, images can look flat. An S-shaped curve like this boosts contrast and adds much-needed punch to monochrome conversions. The more pronounced the S-shape, the greater the contrast.
Convert in Photoshop Elements
Photoshop Elements offers a useful array of black & white tools that are perfect for beginners. While the learning curve may be gentle, they can still be used to create stunning monochrome images. If you’re just getting started with monochrome conversions then you’ll find several useful Guided Edits in the Elements Guide workspace.
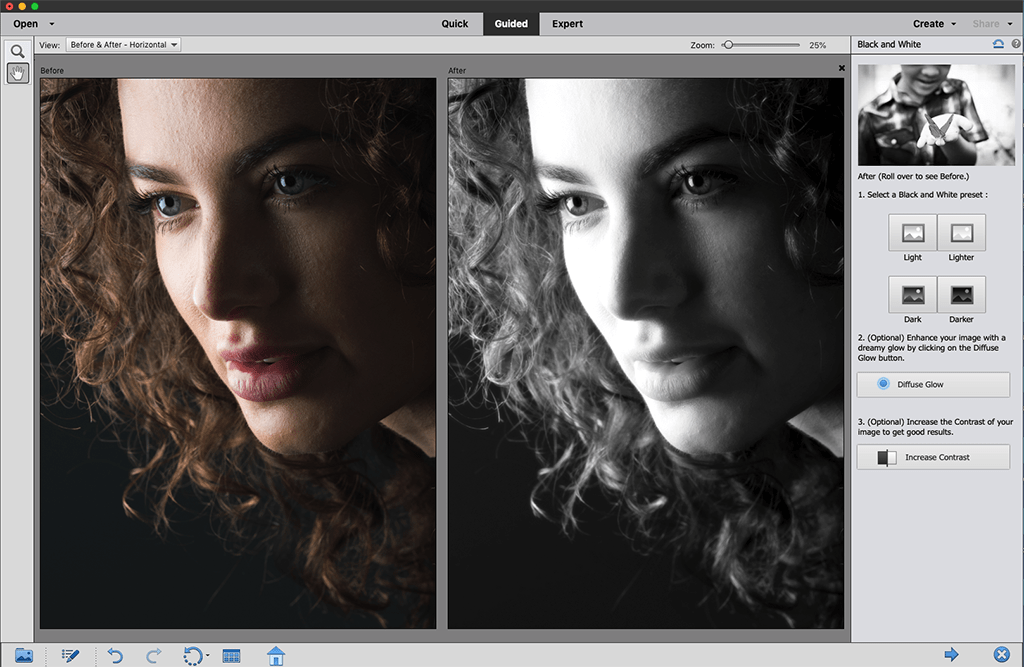
Photoshop Elements offers a number of mono conversion methods
The best of these is the simple Black and White conversion edit, which lets you remove colour then go on to add a glow and increase contrast. If you’re after effects like colour pop and high-key treatments, you can try guided edits for these as well.
If you’re comfortable using the Elements Expert workspace then you’ll find a more advanced black & white tool. Go to Enhance > Convert to Black and White for a range of black & white treatments such as Portrait, Infrared and Vivid Landscapes.
10 top tips for black & white photo editing
- Make presets or profiles of your favourite black & white recipes so that you can easily apply them to other images.
- Download black & white Lightroom presets from sites such as presetsheaven.com, presetlove.com, presetpond.com and on1.com.
- Once you’ve converted to mono, use the Dodge and Burn tools in Photoshop CC or Elements to selectively lighten or darken areas.
- When you’re shooting for mono, switch your camera picture style to monochrome – and then replicate it afterwards with the Profile Browser’s Camera Matching set.
- You can often get away with stronger Clarity and Contrast settings with black & white images, so don’t be afraid to push these further than normal.
- After converting to black & white in Camera Raw / Lightroom, you can tweak the look of the image with the Temperature and Tint controls.
- If you want a quick, rough-and-ready black & white effect in Photoshop then you can hit Cmd/Ctrl+Shift+U to desaturate the image.
- Black & white photos can often benefit from heavy vignettes to darken the edges of the frame. Try using the Radial Filter in Camera Raw/Lightroom to add one.
- Shooting in raw results in images with more colour information than JPEGs, and this can give you extra headroom and smoother gradations when editing your black & whites.
- After converting to mono, try painting selective Clarity with the Adjustment Brush in Camera Raw/Lightroom to enhance textures and details.
Make sure you have a look at our “Top tips for shooting black and white photos” for more on how to get great black and white photos, and check out our guide to the best cameras for black and white photography.
Tune in next week, for the next article in the series of the AP Improve Your Photography Series – in partnership with MPB.
- Part 1: Beginners guide to different camera types.
- Part 2: Beginners guide to different lens types.
- Part 3: Beginners guide to using a camera taking photos.
- Part 4: Beginners guide to Exposure, aperture, shutter, ISO, and metering.
- Part 5: Understanding white balance settings and colour
- Part 6: 10 essential cameras accessories for beginners
- Part 7: Beginners guide to the Art of photography and composition
- Part 8: Beginners guide to Photoshop Elements and editing photos
- Part 9: Beginners guide to Portrait Photography
- Part 10: Beginners guide to Macro Photography
- Part 11: Beginners guide to Street Photography
- Part 12: Beginners guide to Landscape Photography
- Part 13: How to shoot Action and Sports Photography
- Part 14: How to shoot wildlife photography
- Part 15: Raw vs JPEG – Pros and cons
Find the latest Improve Your Photography articles here.
Original article: James Paterson
Related articles:
Top tips for black and white portrait photography
Best cameras for black and white photography