In photography, taking pictures is often just the start. Photo editing is the next step, allowing you to correct any problems and make your photos look as good as possible. This how to guide will get you started with the basics of photo editing using Adobe Photoshop Elements, one of the most popular and affordable photo editing programs.
Photo editing software lets you adjust colours, exposure and composition, and remove any blemishes. Adobe Photoshop Elements has recently been updated to version 2024, with a redesigned interface and a clutch of new features. These include one-click sky or background selection, stylized text tools and one-click colour and tone adjustments. Other photo editing programs are available, but the same basic principles apply to all of them.
There are a few photo editing packages that come with Windows and Mac computers, but these are quite basic, and it’s likely that you’ll soon reach the limitations of these.
From there, though, it’s quite a jump to Adobe Photoshop, which is the industry standard for photo editing. Photoshop can be quite daunting for beginners and also costs around $10 / £10 a month as part of Adobe’s Creative Cloud subscription based Photography Plan. You have to commit to this a year at a time, and if you cancel the subscription you’re no longer able to use Photoshop – so you could be looking at paying $10 / £10 per month for the rest of your photo editing life!
But there is an alternative if you want a similar set of tools without paying an ongoing subscription. Adobe Photoshop Elements is available for a single one-off payment and offers many of the same tools and editing processes as Adobe Photoshop, but is much more beginner-friendly.
Photoshop Elements has enough features for editing images to serve most people, and is one of the best photo editing software packages for beginners. Our screenshots are from the latest Photoshop Elements 2024. Elements is updated every year, but the fundamentals don’t change very much, and everything in this tutorial can be achieved in Photoshop Elements 2022 and 2023.
How much does Adobe Photoshop Elements cost?
You can try Photoshop Elements for free for 30 days, without paying. If you do want to buy it, then you’ll find its price is $99.99 / £86.56 as a one-off payment. We’d recommend you use trial versions of any software before shelling out for it, just to make sure it suits you! Photoshop Elements is also sold with Adobe Premiere Elements, a program designed for entry-level video editing, and you can save money if you buy them both together as a bundle.
Things you’ll want a photo editing package to do:
- Crop and resize images
- Adjust colour
- Adjust brightness and contrast
- Remove unwanted objects from an image
- Convert images to black and white
- Adjust orientation
- Create artistic effects and changes
There are also a range of free photo editing tools out there, but we are using Adobe Photoshop Elements as our starting guide, as the tools and controls on offer are fairly universal, and you should be able to find very similar features in other photo editing packages.
An an example, the hand selection tool is used in almost every photo editing package available. The zoom, crop, and text tools are all universal tools that you’ll find in alternatives, too.
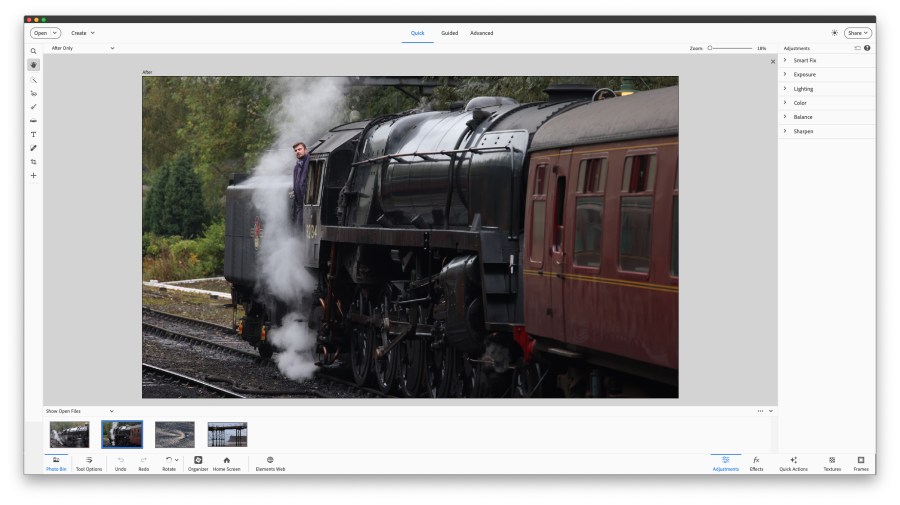
There are three different ways of using Photoshop Elements, using the Quick, Guided, and Advanced tabs at the top, and this makes it really user-friendly for the beginner. Once you’ve got Photoshop Elements installed and gone into the “Photo Editor”, you’ll want to start by using the program in the Quick mode.
Photoshop Elements Quick mode
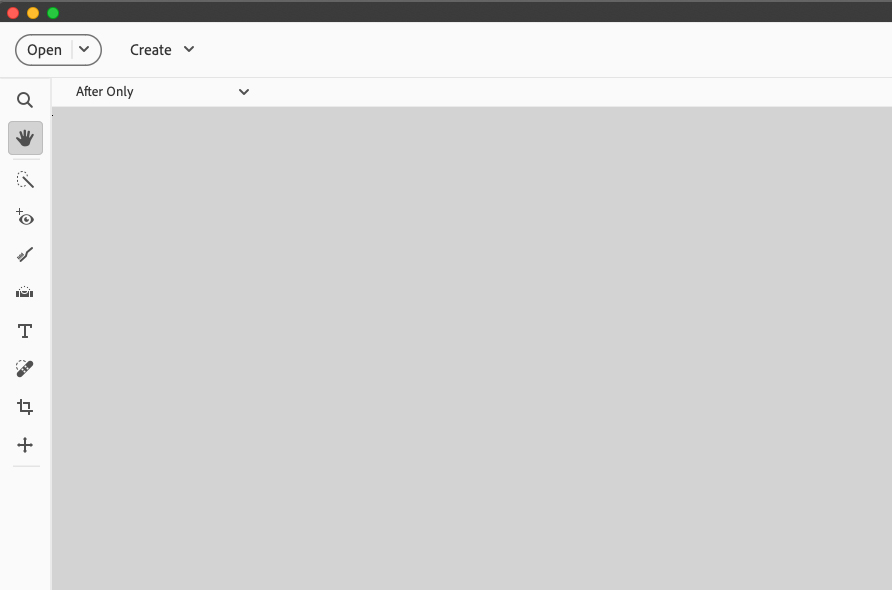
The vertical tools panel, left side
These are the main tools you’ll be using to adjust or crop images. Hover the mouse pointer over the controls and a text label pops up that describes what each tool does.
There are also keyboard shortcuts you can use if you want to quickly switch between them when editing an image. Here are the tools, and the keyboard shortcuts in brackets – simply press the key on your keyboard for the tool you want to switch to. You can press it again and it will toggle between the different options if the tool has more than one function.
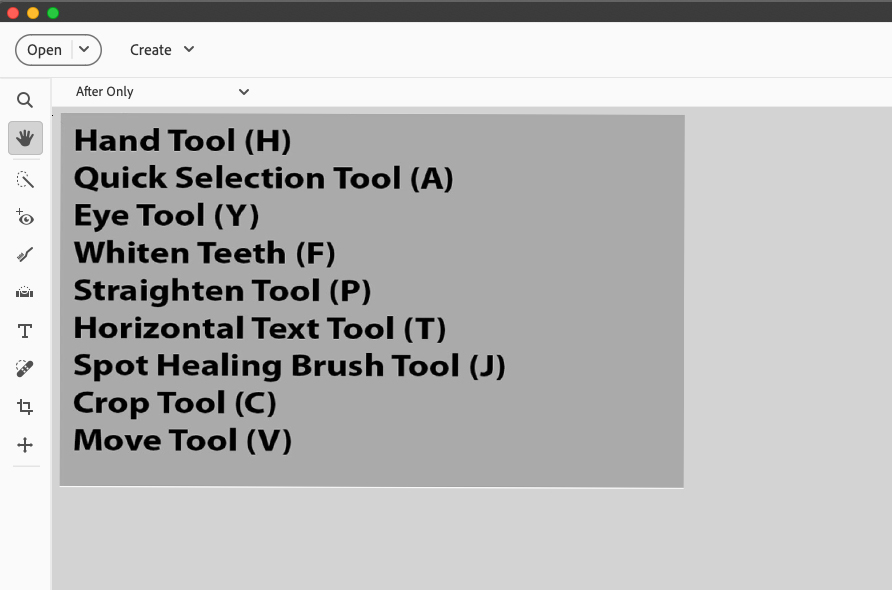
10 tools you need to know in Photoshop Elements
Here’s a quick overview of what each of these tools do. Once you’ve got these worked out, you’ll be ready to change and adjust your image.
- Zoom tool – this lets you zoom into the image for a better view, as well as zoom out (you’ll also find a zoom slide control in the top right)
- Hand tool (H) – to move around the image if you’ve zoomed in
- Quick selection tool (A) – For selecting something in the image. Once selected it, you can use the move tool to move this (if needed), or select something in the image to adjust only the selected area.
- Eye tool (Y) – This is designed to correct “red-eye” in photos, but also offers a pet-eye option, as well as opening closed eyes! Depending on the photo you use, you may get mixed results.
- Whiten teeth (F) – This one needs no explanation. Simply draw over the area in the image where you want to whiten teeth.
- Straighten tool (P) – To use this you draw a line along an edge in the image, and the program will automatically straighten the photo for you
- Horizontal text tool (T) – This lets you create text, and once you’ve selected it, will find a variety of options at the bottom.
- Spot healing brush tool (J) – This is great for removing anything unwant in your image – try the “Content aware” option and Photoshop Elements will automatically work out what needs to fill the content you are removing
- Crop tool (C) – This lets you crop the image, as well as set the aspect ratio, for example you could set it to 5:5 if you want a square image
- Move tool (V) – This lets you move selected in the image, or any other objects you’ve created, such as text.
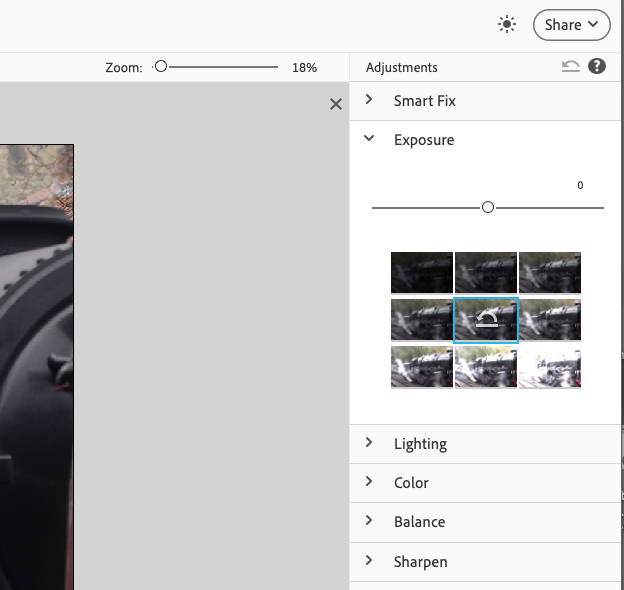
Adjustments sidebar, right
On the right you’ll find quick adjustments you can make. With Photoshop Elements you can see the changes apply to your image in real time as you select the different options available. If you don’t like the changes, simply click the “Undo” button at the top.
Don’t forget to check out the “Create” menu right at the top, where there are a range of different tools available, including the ability to create a Slideshow, Collage, Prints, Cards, Photo books, Calendars and more.
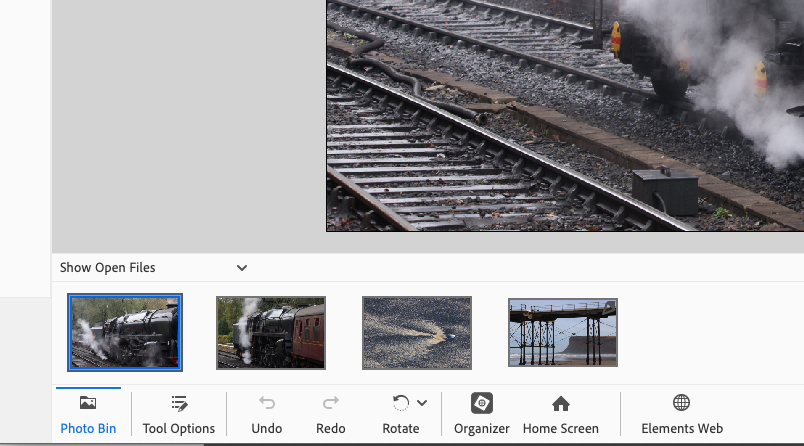
Bottom toolbar, left
You’ll find an undo and redo button at the bottom left. This is also where the different options are found when using the tools from the top left corner.
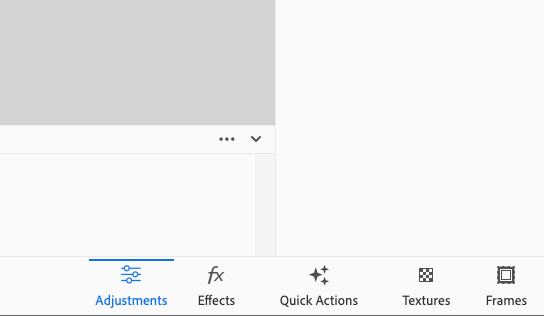
Bottom toolbar, right
Bottom right you’ll find more options, including fx/effects, textures, and frames.
Don’t forget to save your changes… and keep the original image untouched
We’d recommend saving the edited image as a new file, so that you always have your original image to go back to if need be. For example, you might not like the changes you’ve made, or might want to try something completely different. Keep the original image untouched, and you can always start again. You’ll find all the options for opening and saving images in the File menu at the top.
Photoshop Elements Guided mode
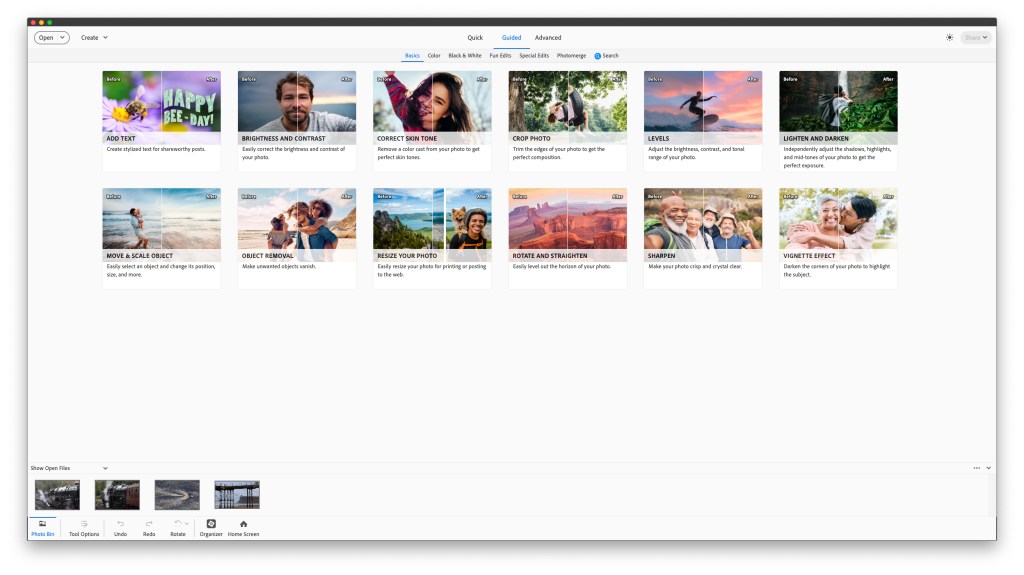
After you’ve got to grips with the basics, why not have a look at the Guided mode? You might find it quicker to try some of these guided features, as the software teaches you how to get the results you want, for example with object removal, or creating a vintage effect.
The idea of the Guided mode is that it offers a range of different photo editing effects that you can achieve, but walks you through each step so that you can see what the software is doing, change settings or options to suit your taste and learn key tools so that you can achieve the same effects yourself later on.
The Guided mode shows how a series of steps can produce a much more sophisticated result than a single tool or adjustment. This is how professionals and experts approach photo editing.
Photoshop Elements Advanced mode
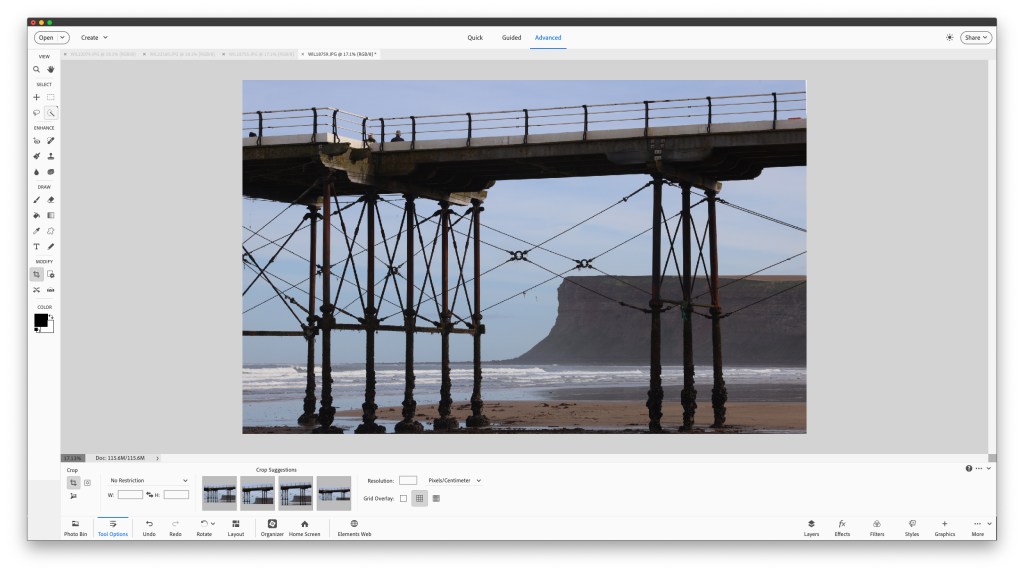
Once you’ve got to grips with the Basic mode, or if you want to jump right in, then have a look at the Advanced mode, which has a similar layout of controls as the full Adobe Photoshop program. To find out what each of the tools do, simply hover over them and you’ll see pop-up text letting you know.
The Advanced mode is where you will spend much of your time once you’ve mastered the basics. It’s perfect for photographers who know exactly what they want to do with a photo and are familiar with the tools they will need. It makes Photoshop Elements useful even for more advanced photographers.
You’ll also find a range of Photoshop Elements tutorials on Adobe’s website.
Some helpful Photoshop Elements links:
- Master the essential tools in Photoshop Elements
- Get terrific colour and tones in Photoshop Elements and working with raw
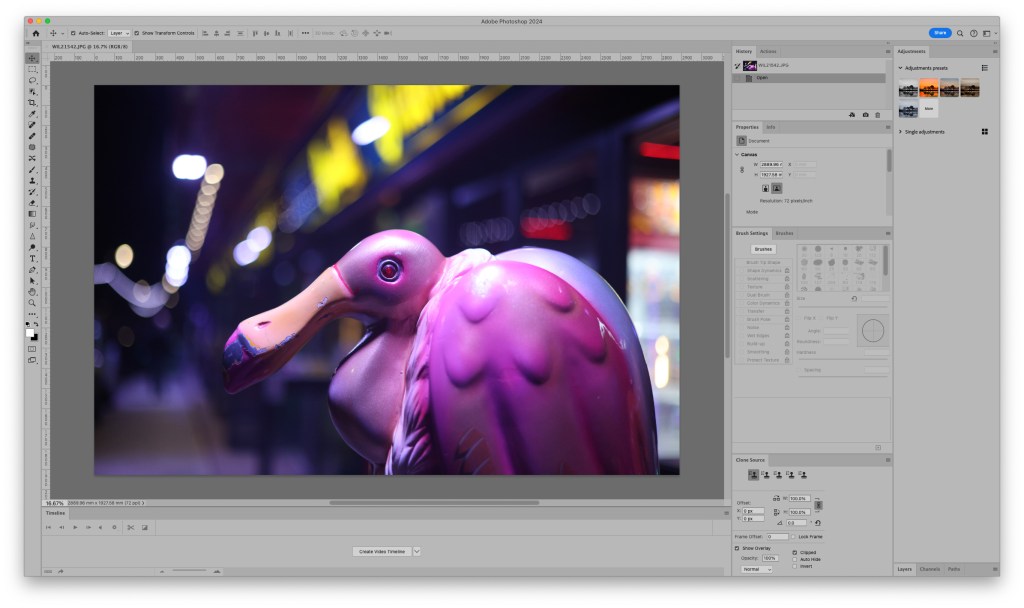
An introduction to Adobe Photoshop
Adobe Photoshop is available only as part of the Adobe Creative Cloud Photography Plan, and it does have advantages for more serious photographers. It tends to get the latest features first, and if you’re serious about photo editing, then Photoshop is well worth learning. It’s one of the most popular photo editing packages, so there are lots of online tutorials on how to use and get the most out of it. See our Adobe Photoshop review.
Adobe Photoshop vs Photoshop Elements – what’s the difference?
Adobe Photoshop is the flagship image editing package from Adobe, and not only gives photo editors and retouchers a complete toolkit, but also offers specific workspaces for 3D, Graphic and Web, Motion, Painting and Photography. It has a vast array of tools, which in itself can be a daunting prospect to learn; to get used to the software and controls, as well as how to make your desired changes.
In comparison, Photoshop Elements is designed to be quick and easy, for both beginners and the more advanced photographer, and includes a range of tools that help you produce content for print, such as photobooks, calendars and cards. Of course you can do the same with Photoshop, but would need to work out how it’s all going to be laid out yourself. Some people will prefer the precise control over every step, whereas others will prefer the simplicity of Elements.
For the more advanced photographer and editor, Adobe Photoshop provides a complete range of tools that mean you can expand beyond photography and into graphic design, illustration, motion, or more.
There’s also the difference in how you buy and pay for Photoshop vs Elements. Photoshop is part of the Adobe Creative Cloud Photography Plan which costs around $10 / £10 per month (renewed annually) and you’ll always get the latest version when it comes out. Whereas Photoshop Elements is subscription-free, meaning you pay for it once, and it’s yours forever, but if you want the latest version, you’ll need to buy it again. I’d usually update it every year.
More on Adobe Photoshop:
- How to use Photoshop’s new background blur tool
- How to replace skies in Photoshop
- Major Adobe Photoshop updates announced
You’ll also find versions of Adobe Photoshop available on your smartphone or iPad so you can start editing on the move.
An introduction to Adobe Photoshop Lightroom
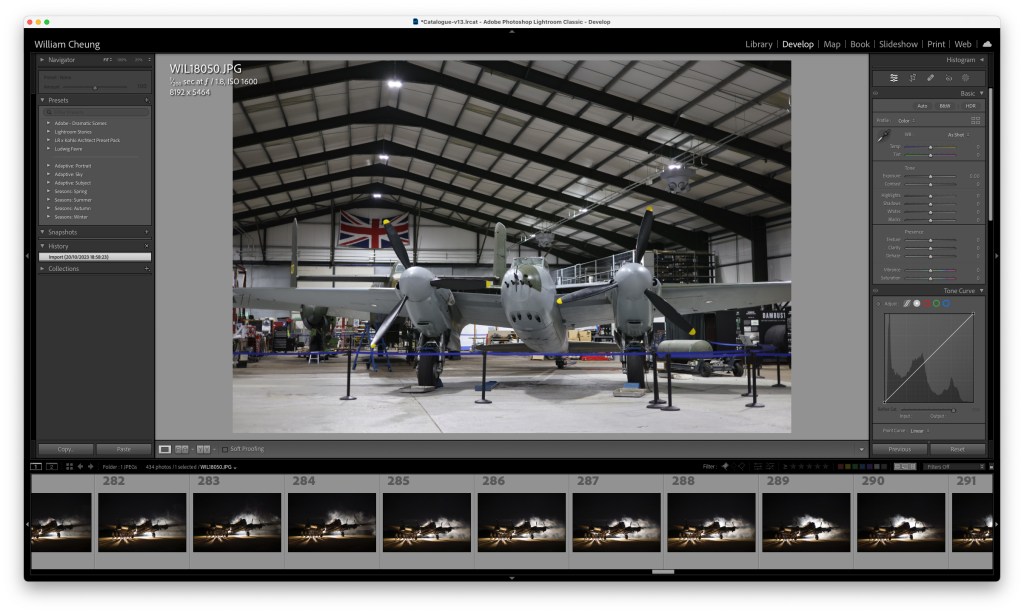
The Adobe Photography Plan includes more than just Photoshop. It also includes Adobe Photoshop Lightroom; an advanced image management and editing program that can be used on its own or alongside Photoshop. Lightroom uses a library (catalogue) in order to keep a record of all your changes. This can be particularly useful if you’re editing a large number of images and want to apply the same changes to all of your images or reverse your changes later via its ‘non-destructive’ editing tools – your original photos always remain unaltered. Lightroom comes in a ‘Lightroom Classic’ desktop based version, or as a cloud-based ‘Lightroom’ version that uses cloud storage to make your photo library available anywhere.
- What is Lightroom and how to use it
- Adobe Photoshop vs Lightroom
- Adobe Lightroom Classic vs Lightroom CC
To discover free alternatives, and find out what else is available, have a look at our guide to subscription-free photo editing software.
For an extensive guide to Photoshop and Lightroom, see the AP Improve Your Photography “Photoshop and Lightroom” book. or read the photo editing section.
This article is part of the AP Improve Your Photography Series in partnership with MPB. This series is designed to take you from the beginnings of photography to the next level, to introduce different shooting skills and styles, and teach you how to grow as a photographer, so you can enjoy producing amazing photography and video, whether that’s making money or simply mastering your art form. Read more articles in this series.
Find the latest Improve Your Photography articles here.
Follow AP on Facebook, Twitter, Instagram, and YouTube.