A lot of photographers shy away from shooting action or sports photography because they say they don’t have the equipment needed to make great action photographs. In this guide, we’ll show you how to get started with sports and action photography, and how to make the most of your kit!
Welcome to the AP Improve Your Photography Series – in partnership with MPB – This series is designed to take you from the beginnings of photography, introduce different shooting skills and styles, and teach you how to grow as a photographer, so you can enjoy producing amazing photography (and video), to take you to the next level, whether that’s making money or simply mastering your art form.

Each week you’ll find a new article so make sure to come back to continue your journey. The start may seem basic to some photographers, but it’s an important step in making sure you’re comfortable with your equipment and the basics of photography, as it’s part of the foundations that help build into great photographs, and once you know these, you’ll be able to play with them, and understand further articles in this series.
Great action photography can take a lot of skill and good equipment to produce, but this shouldn’t be a barrier keeping new photographers, or the occasional action shooter, from trying their hand.
Photography should be an enjoyable and memorable activity and nothing could be more so than spending the afternoon shooting a local village football match, or the sports on Brighton beach.
And to capture great images from these activities you will need some of the skills of the sports photographer.
In fact, I believe that shooting action or sports events will help develop a range of skills that might be missed if the photographer avoided the area. Timing, thinking ahead, seeing and working seamlessly with your equipment are all skills that can be learnt while ‘having a go’ at shooting action or sports photography.
How to shoot action and sports photography: It’s all in the timing!
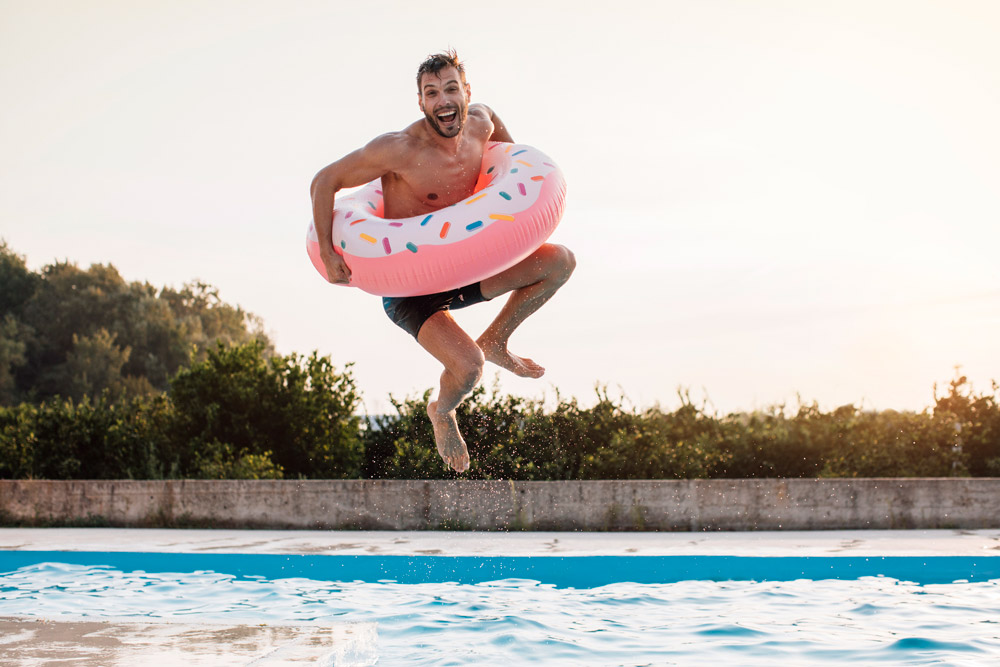
Man jumping in a pool, timing is essential. Credit: mihailomilovanovic, Getty Images
Timing is crucial. It’s the photographer’s job to look and anticipate where and how the action is going to unfold, and then be ready to capture it.
In a sports photography context the area where the action will be is fairly predictable, bounded by sidelines, and governed by the norms and rules of the game.
In football, for instance, you know, or rather hope, that there will be some action around the goalmouth. The pitch and the game’s structure itself, dictate this.
If timing is the key, then how does a new sports photographer develop great photographic timing? Simple – practice, practice, practice!
How to shoot action and sports photography: Pre-planning
If possible, it is worth checking out the location beforehand. Look to see where the best vantage points are, and assess how far you will be from the action.
A rough rule of thumb is that for each 10 metres you are from your subject you will need 100mm of lens length if your subject is to fill a standard vertical frame (with a full-frame camera). In practice this means that if you are shooting a football match and you are 30-40 metres from the penalty area, a 300-400mm lens should give you full-frame shots.
In sports like cricket, photographers will often use lenses of 600mm with 2x teleconverter attached, giving an effective lens length of 1200mm. Being close enough is only part of the equation when choosing your shooting spot.
Watch out for distracting backgrounds. It’s true that some of the distraction of the crowd in the background can be minimised by using a shallow depth of field, but it is best to have as clear a background as possible. This will help to make your subject stand out.
How to shoot action and sports photography: Expect the worst
From the weather, that is. This doesn’t mean you need to be laden down with all manner of wet weather gear. A ‘pac-a-mac’ and a couple of plastic bags will see you and your valuable equipment through most wet-weather conditions.
How to shoot action and sports photography: Finding shots
Know your sport
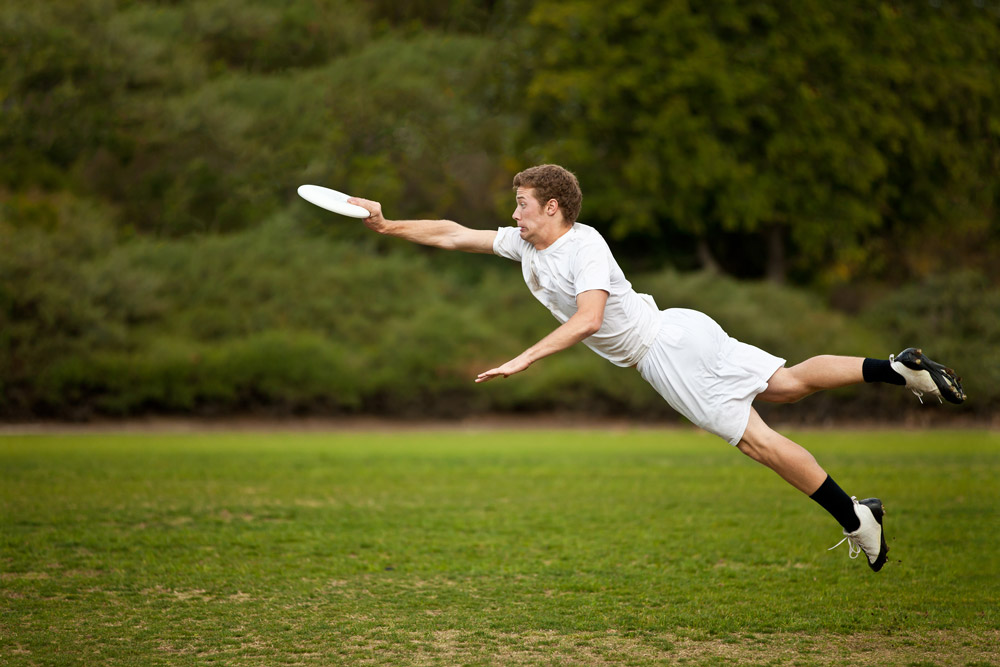
Young Man Catching Frisbee, Credit: drbimages, Getty Images
Ensure you have a good working understanding of the activity you are shooting. Then you can pre-empt where some of the action will be, and make sure you are in the right place at the right time.
You will also be able to pick the peak shooting points of the action, a moment which typifies the activity. For instance, in golf, it’s the end of the swing at the moment of contact with the ball.
Think about the nature of the action and try to capture the parts of the activity that are most visually descriptive
Split-second opportunities
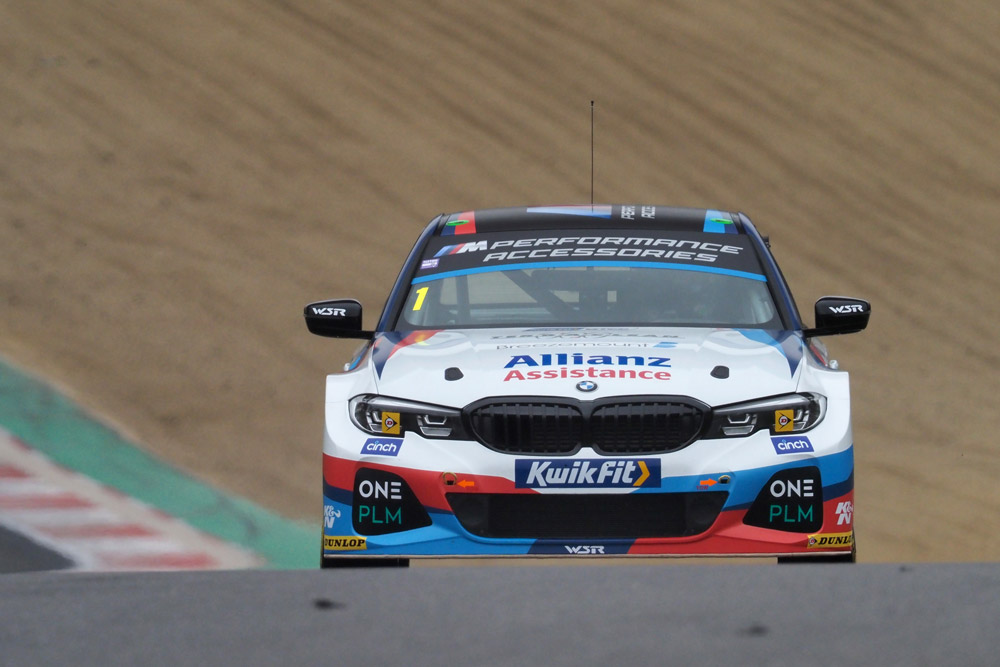
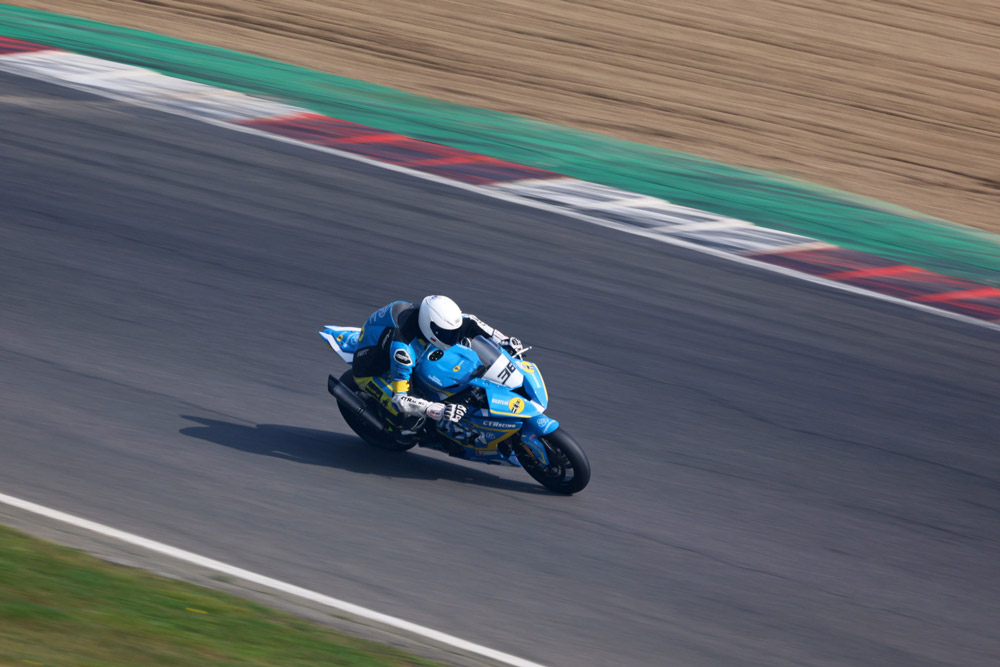
Brands Hatch, a fast shutter speed freezes the motion. Photo: Andy Westlake (1/2000s, f/5.6, ISO1250, 420/840mm equivalent)
When analysing the action, you are not just looking for the most aesthetically representative moment, but also the one that can most easily be captured by your camera.
Take a competitive diver as an example. There is a point in the execution of the dive when just after leaving the platform the upward motion ceases and for a fraction of a second the diver is suspended in mid air. In photographic terms this part of the action can be frozen more easily than at the fastest point of the activity where the diver enters the water.
The final pre-planning activity for sports photography is to check with organisers about any restrictions beforehand. This will determine the equipment you need and the range of shots you will be able to get.
Often photographers are confined to a particular part of the arena, or you’ll need clearance to photograph pitch side, or flash will not be allowed.
Don’t watch – shoot!
There is an old sports photographer’s adage that says: ‘If you see the action through the viewfinder then you’ve lost it’, and this is largely true.
At the moment of exposure for most digital users, the viewfinder goes blank to allow the mirror to retract and the shutter open. So if you see the action then you have missed the chance to record it.
It takes practice, but anticipating the action point is one of the most important skills needed to take good sports photography images.
Shoot plenty of images – after all, exposing digital frames essentially costs nothing. Wherever possible, use the continuous shooting feature on your camera to capture action sequences. Or better still, if your camera is up to it, with a fast enough continuous shooting speed, shoot ‘through’ the action and select the best images later at the desktop.
Look beyond the obvious
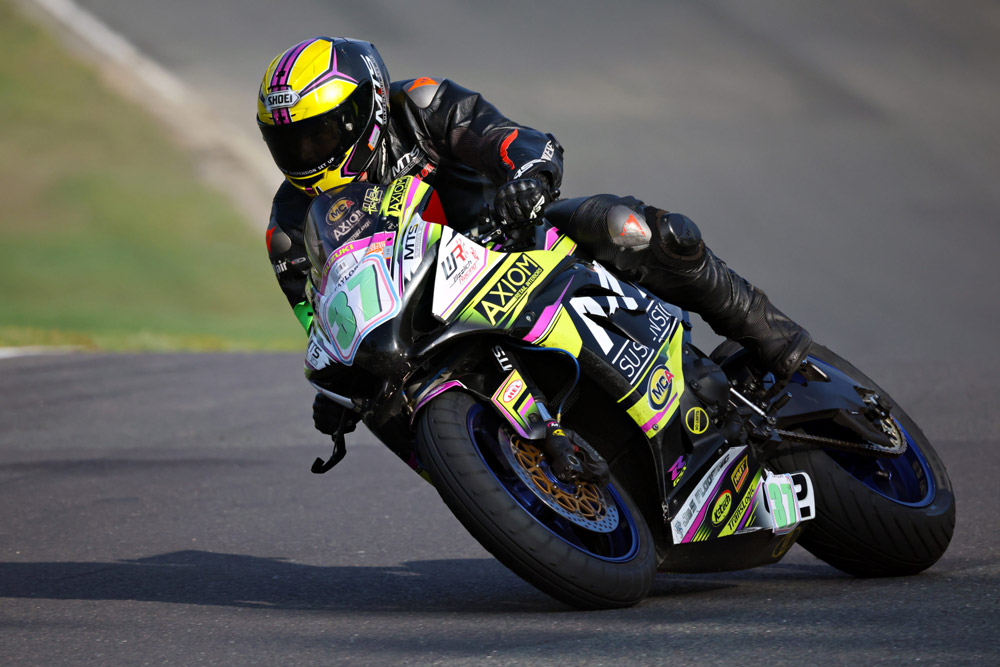
Motorsports action – using a fast shutter speed to freeze the bike. Photo: Andy Westlake (1/2000s, f/11, ISO2000, 800mm)
Don’t forget that there are stories to be had behind the scenes as well. It could be worthwhile following the progress of one individual through the warm ups, heats, the big event and the aftermath, be it jubilation or despondency.
Shoot high, shoot low, but make sure you change your angle of view. Make the most of the location by moving around to find new vantage points.
Also ensure you vary your shots. Use different focal lengths so that at the end of the event you have a combination of close-up, mid-range and long shots.
A couple of good-quality zoom lenses can help cover an astonishing range of focal lengths.
How to shoot action and sports photography: Shooting techniques
Frozen and Blurred Techniques
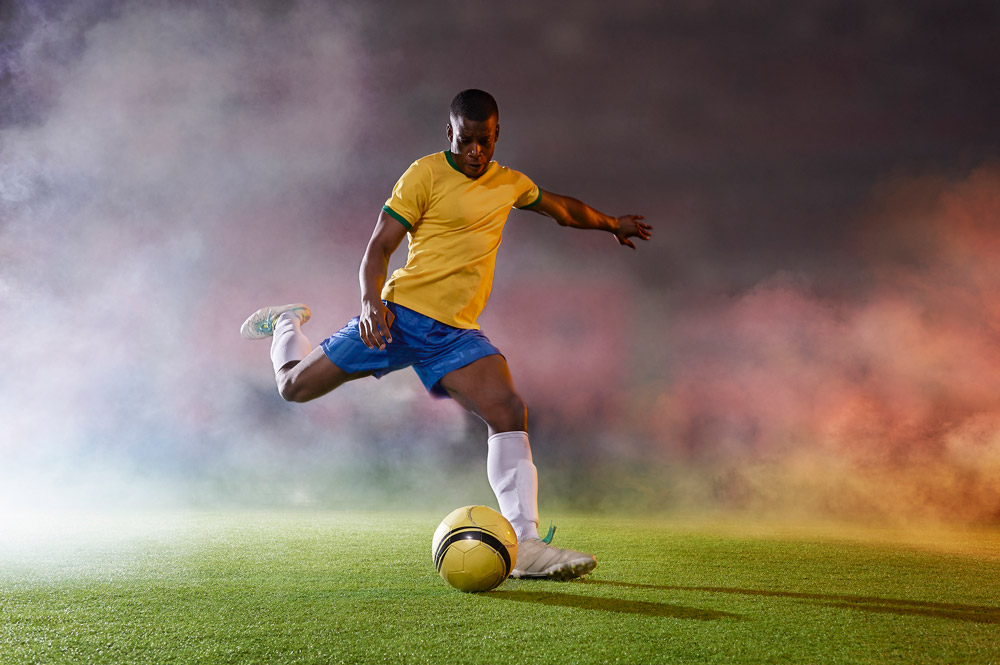
Shooting power, Photo: John Lamb, Getty Images (1/200s, f/9, 38mm, Nikon D3)
There are a variety of techniques that you can use for sports photography. These range from those designed to freeze a precise moment to those that give the feeling or sense of movement and those that are a combination of the two.
Freezing the action for sports photography
Freezing the action is the ultimate aim for a lot of sports photographers, and there are essentially two techniques you can use to achieve this:
1. Fast shutter speed
There is a direct link between aperture, shutter speed, ISO value and the light in the scene. Put simply, to be able to use speeds that will freeze motion, you need a fast lens, high ISO setting and good light.
2. Fast light source.
The alternative of shooting with a fast shutter speed is exposing with a light source that has a very short duration, like a portable flash.
Most on-camera flash systems output light for durations of between 1/800sec and 1/30,000sec. It is this brief flash that freezes the motion.
Don’t be confused with the shutter speed your camera uses to sync with the flash – usually between 1/125sec and 1/250sec – the length of time that is used to expose your frame is based on the flash’s duration.
Using slower shutter speeds for sports photography
Photographers also like to use slower shutter speeds to capture moving subjects. The blurry results communicate a feeling of motion.
The shutter speed, direction of the motion through the frame, the lens length and the speed of the subject all govern the amount of blur in the final image.
Try a range of speeds with the same subject. Your tests will give you a starting point that you can use next time you are shooting a similar subject.
Using panning and flash blur for sports photography
An extended blurred motion technique is panning. This involves the photographer moving with the motion of the subject, keeping the subject in the frame during the exposure.
A relatively slow shutter speed was used while panning the camera with the subject. Canon EOS R3, RF 800mm, 1/200sec at f/11, ISO 125, Photo: Andy Westlake
When this technique is coupled with a slow shutter speed, it’s possible to produce photographs that have sharp subjects and blurred backgrounds. Try starting with speeds of 1/30sec up to 1/200sec depending on the subject.
You can also combine stillness and movement, using a flash blur technique. To achieve this effect you need to set your camera on a slower than normal sync shutter speed. The short flash duration will freeze part of the action and the long shutter will provide a sense of motion.
Focusing issues common with sports photography
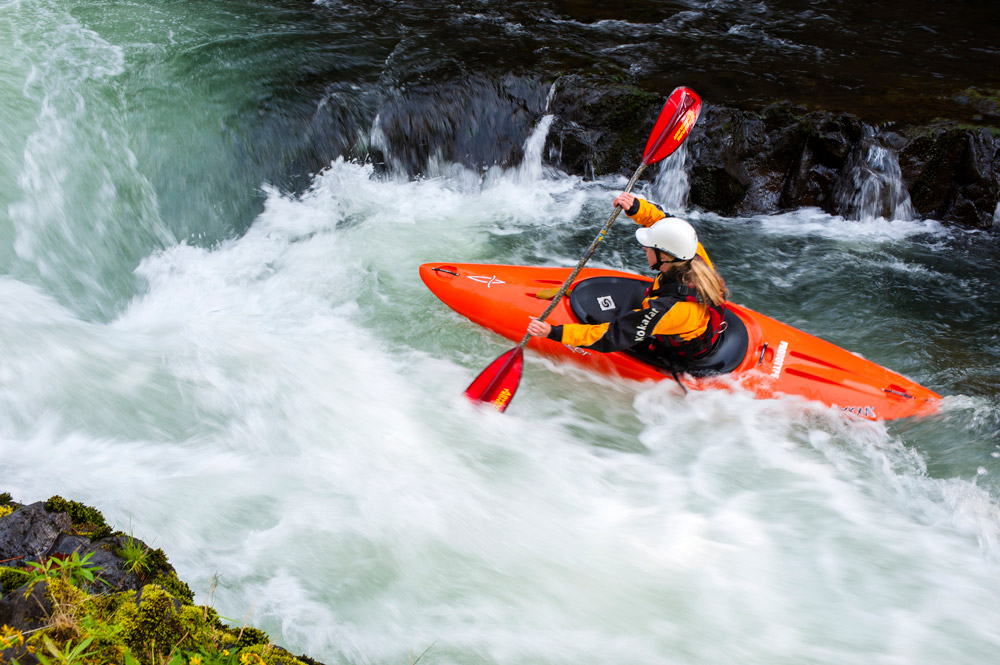
A female kayaker paddling on the White Salmon River in Washington State. Credit: Charlie Munsey, Getty Images
In the viewfinder or screen of a modern camera you will see multiple focusing points distributed across the frame. For the camera to focus accurately, the subject must be in one of these areas. You can simplify the focusing experience by selecting the centre point, or a central area. If you know your subject will be off-centre, then you can set this, letting you focus on subjects that are off-centre.
Autofocus modes – Single AF vs Continuous AF
What about AF (Auto-focus) modes, though? The two main AF modes are found on most cameras: single (S-AF) and continuous auto focus (C-AF). These determine the way the AF system works on your camera.
In single mode when the button is held halfway down, the lens focuses on the main subject. If the user wishes to change the point of focus then they will need to remove their finger and repress the button. If the subject moves, while using this mode, then you must refocus.
The constant or continuous focusing mode (C-AF) also focuses on the subject when the shutter button is half pressed, but when the subject moves the camera will adjust the focusing in order to keep the subject sharp. This is called focus tracking.
Some AF systems have taken this idea so far that they have ‘pre-emptive focusing’ features that not only track the subject but analyse its movement across the frame and try to predict where it will move to. This helps to keep the main subject fully sharp.
Each mode has its uses. Single focusing is handy if you wish to focus on a zone into which the subject will appear. Constant is more useful for subjects that move more randomly.
Make sure you familiarise yourself with your camera’s manual, and find out what tracking or advanced focusing modes can be used. When focus tracking is used in combination with continuous shooting, you can ensure that each shot is in focus, as well as have a number of shots to choose from. More advanced cameras offer face and eye detection, with models higher up in the range offering advanced subject detection, with some featuring vehicle detection, as well as advanced human/subject tracking.
Using continuous shooting mode for sports photography
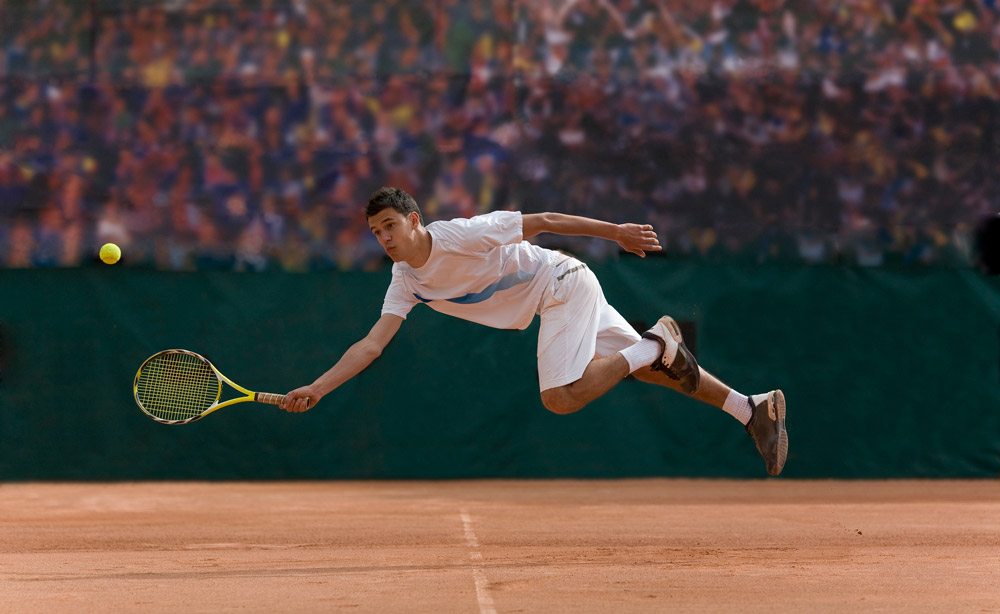
Tennis player diving to hit ball on clay court, Credit: Photo and Co, Getty Images (1/2000s)
Many digital cameras have the option to shoot a rapid sequence of pictures. The rate at which sequential images are captured and the total number possible for a single burst varies.
If you plan to take part in sports photography regularly, use the list below to compare the continuous modes before buying a new camera:
- Check the frame rate (in frames per second, or fps)
- Check the sustain rate. Look for how many frames can be shot at the fastest rate before slowing. Find out which file formats work with the fastest rates
- Look at the picture dimensions, or megapixels for each mode. For example, a very fast mode that produces pictures with only enough pixels to print a postage stamp isn’t that useful.
- Check the type of memory card used for the statistics as the speed with which the card saves the files can affect the overall frame rate.
How to shoot action and sports photography: Equipment
If you’re serious about action and sports photography then equip yourself with the right kit for the job. It used to be that to get high-speed continuous shooting you had to buy the most expensive cameras available, but with mirrorless cameras this has changed, with even entry-level models offering 8-9fps a lot of the time. Step up slightly and you can find models with 20/30/60fps for around £1000, or even 120fps continuous shooting for around £2000.
Cameras for sports photography
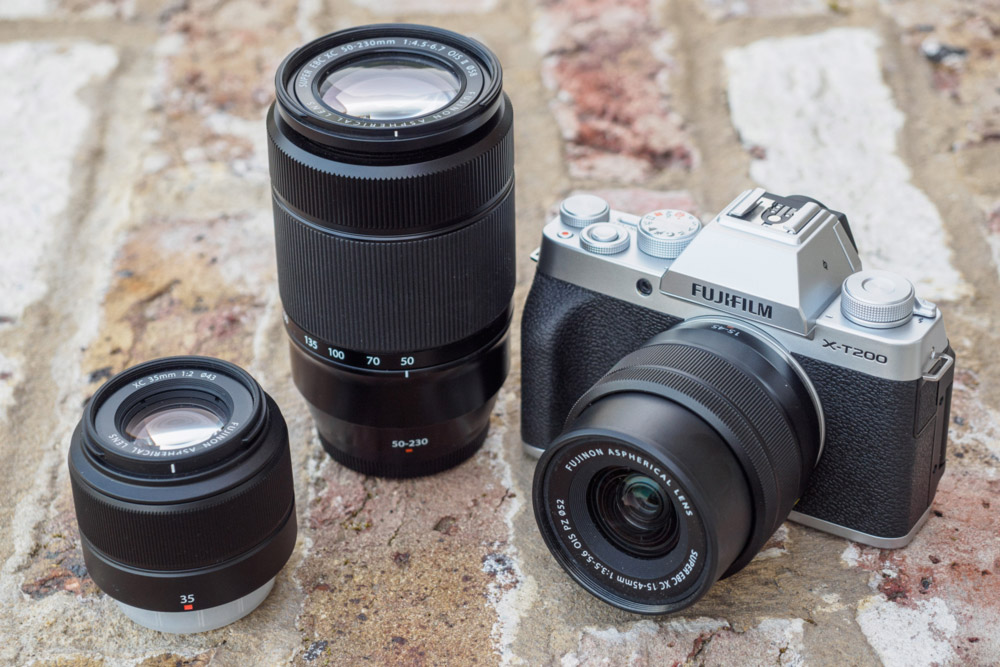
Fujifilm X-T200 with XC lens options – the X-T200 offers 8fps continuous shooting, whilst the X-T20, X-T30, and X-T30 II offer up to 30fps continuous shooting and improved auto-focus performance.
Check what ISO speed options your camera has, and experiment to see what the highest ISO speed you’d be happy shooting at. For example, most modern cameras have high ISO speeds up to ISO12800, ISO25600 and more, but image quality can drop significantly, so it’s worth seeing what the images look like, and making a note of the highest ISO speed you’re happy to use. By using higher ISO speeds, you’ll be able to use faster shutter speeds to freeze sports and action shots.
Professional action photographers use very fast auto-focus cameras, but this does not mean that good shots can not be taken with the slower entry level systems or even with focus control switched to manual. In fact, in some cases, some pros prefer to turn off their AF systems and use manual focusing.
Cameras with high-speed continuous shooting:
- Upto 15fps continuous shooting: Olympus OM-D E-M10 IV (£649 body only)
- Upto 20/30fps continuous shooting: Fujifilm X-T30 II (£769 body only), X-S10 (£949)
- Upto 60fps continuous shooting: Panasonic Lumix G9 (£899 body only)
- Upto 60fps continuous shooting: Olympus OM-D E-M1 III (£1249 body only)
- Upto 120fps continuous shooting: OM System Olympus OM-1 (£1999 body only)
- Upto 120fps (11MP), 20/30fps full resolution: Nikon Z9 (£5299 body only)
Again, it’s worthwhile spending some time getting to know your camera, and the options available, as some (mostly mirrorless) models offer quicker continuous shooting speeds when you switch to an electronic shutter, rather than a mechanical shutter.
Make sure you have a look at whether there are any limitations with different continuous shooting modes, as some of the higher speed modes are fixed (single) AF, which won’t help if you want to be using continuous AF, and some are are a reduced resolution.
For more great action cameras, have a look at our guide to the best cameras for action and sports photography!
Lenses for sports photography
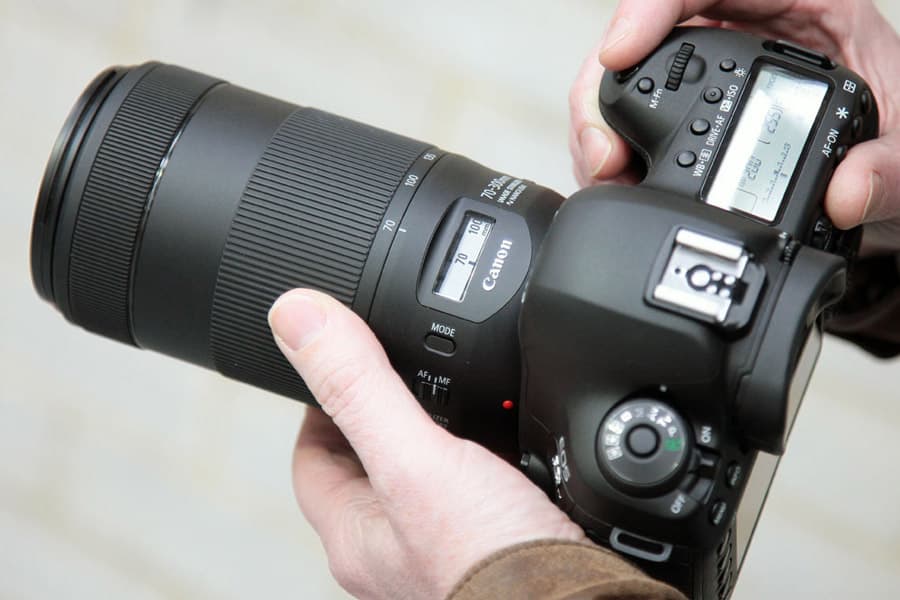
Canon EF 70-300mm F/4-5.6 IS II USM, suitable for both full-frame and APS-C Canon DSLRs
Generally, the fastest (widest maximum aperture) and longest lenses are best suited to action and sports photography, with many full-frame camera users opting for a 70-200mm f/2.8 lens, or telephoto prime lenses. These factors allow you to get in close and maintain a high, action-freezing, shutter speed.
This said, there are a number of budget telephoto zoom options available, that are cheaper, lighter and offer additional telephoto reach. These have a slower aperture, but are suitable for outdoors events if a faster ISO speed is used.
Budget telephoto zoom lens options for sports photography:
- Canon DSLRs (APS-C and full-frame): Canon EF 70-300mm f/4.5-5.6 IS II USM – £639
- Canon RF-mount (full-frame): Canon RF 100-400mm f/5.6-8 IS USM – £699
- Nikon DSLRs (APS-C): Nikon AF-P DX 70-300mm f/4.5-6.3G ED VR – £299
- Nikon Z-mount (APS-C): Nikon Nikkor Z DX 50-250mm f/4.5-6.3 VR – £379
- Sony E-Mount (APS-C): Sony E 70-350mm f/4.5-6.3 G OSS – £629
- Micro Four Thirds: Olympus M.Zuiko 75-300mm f/4.8-6.7 II – £395
- Micro Four Thirds: Panasonic Lumix G Vario 45-200mm f/4-5.6 II Power OIS – £349
- Fujifilm X-Mount: Fujifilm XC 50-230mm f/4.5-6.7 OIS – £315
- Pentax K-Mount (APS-C): Pentax DA 55-300mm f/4-5.8 ED WR – £315
These are just some of the options available, but give you an idea of some of the cheaper lenses available with most of these featuring image stabilisation. Lenses with Optical Image Stabilisation (OIS, OSS, or IS) or Vibration-Reduction (VR) are also handy, great for shooting in low light, they enable you to continue shooting with slower shutter speeds.
Nb. It’s worth noting that APS-C and Micro Four Thirds cameras give you a 1.5-1.6x and 2.0x crop (respectively), so the lens will give even more reach, for example a 45-200mm lens on a Micro Four Thirds camera (with 2x crop) gives you a 90-400mm equivalent zoom range.
Tripod
In the interest of getting the sharpest sports photography images possible it’s also advisable to use a tripod or monopod.
Heavy lenses are very difficult to hold steady. You will also find that camera shake becomes a lot more of an issue when you start to use long focal length lenses.
A good tripod with an easy to use head or a monopod fixed to the tripod collar of your lens will go a long way to help solve these problems.
Batteries
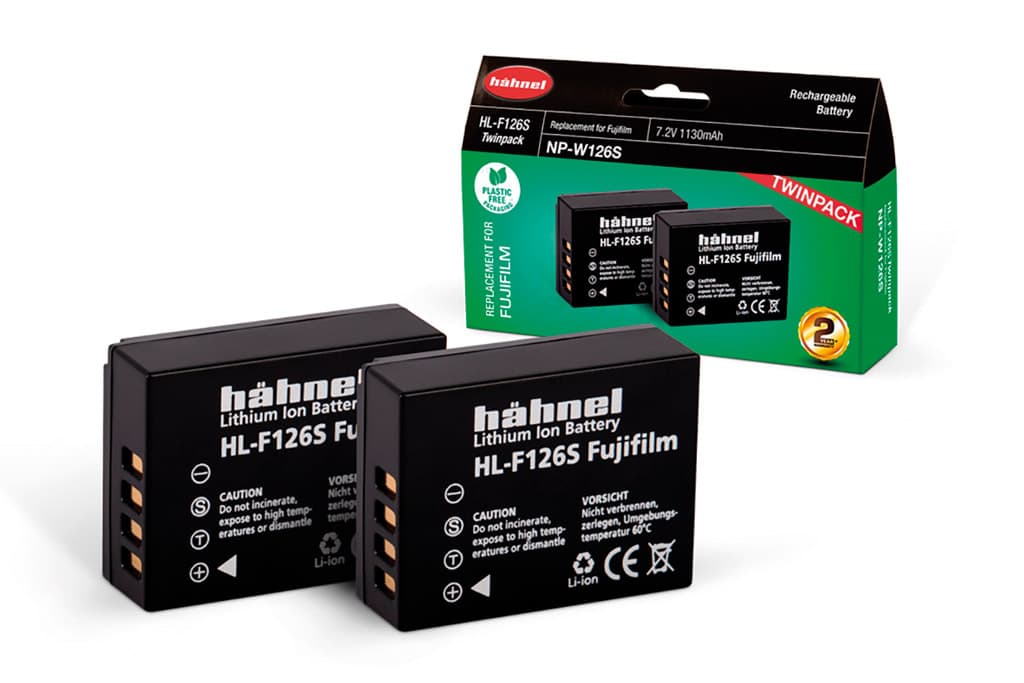
Ensure that your camera’s batteries are fully charged and that you have a spare set stashed in a side pocket of your bag, especially if you’ve got a camera with short battery life. As a general guide, DSLRs tend to have much better battery life than mirrorless cameras.
Memory Cards
Sports photography has a higher ratio of shots taken to shots used, than other types of photography, so ensure you have plenty of space on your memory card. Luckily large memory cards are much cheaper than they used to be.
How to shoot action and sports photography: Editing in Photoshop
There’s no reason why you shouldn’t improve your action images with a little post-production ‘tweaking’ in Photoshop. Adjusting brightness, saturation, colour and exposure where needed can always help give your images more punch, and it’s likely you may need to crop images if the subjects not quite where you want it to be. If you’re looking for a quick easy tool, then have a look at our beginners guide to Photoshop Express.
Tune in next week, for the next article in the series of the AP Improve Your Photography Series – in partnership with MPB.
- Part 1: Beginners guide to different camera types.
- Part 2: Beginners guide to different lens types.
- Part 3: Beginners guide to using a camera taking photos.
- Part 4: Beginners guide to Exposure, aperture, shutter, ISO, and metering.
- Part 5: Understanding white balance settings and colour
- Part 6: 10 essential cameras accessories for beginners
- Part 7: Beginners guide to the Art of photography and composition
- Part 8: Beginners guide to Photoshop Elements and editing photos
- Part 9: Beginners guide to Portrait Photography
- Part 10: Beginners guide to Macro Photography
- Part 11: Beginners guide to Street Photography
- Part 12: Beginners guide to Landscape Photography
Find the latest Improve Your Photography articles here.
Original article: Philip Andrews.