

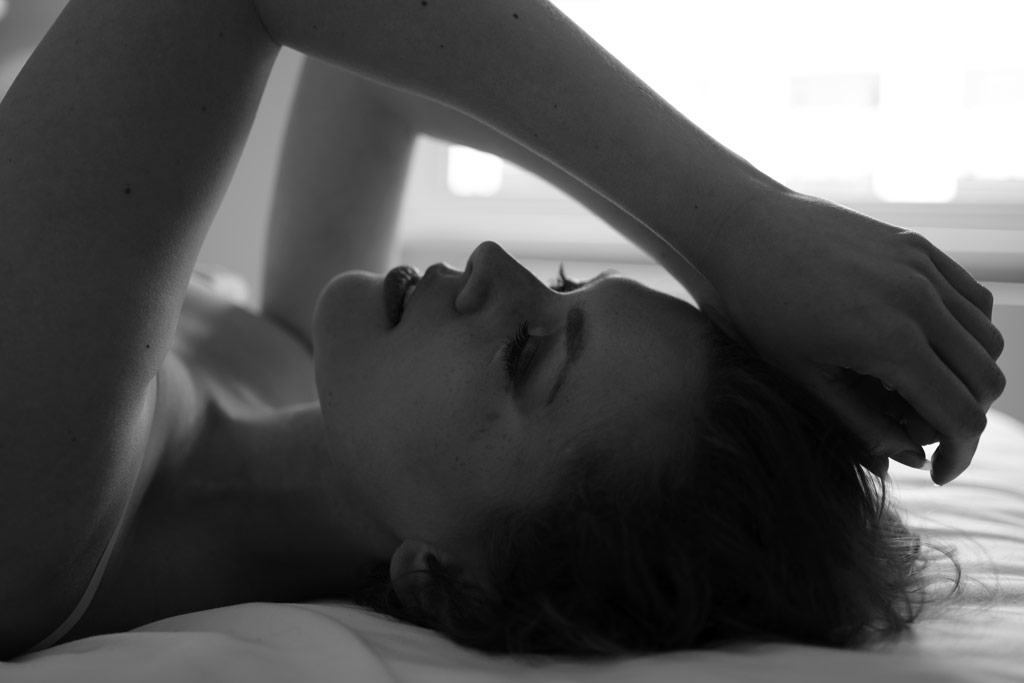
Boudoir photography is booming, with many photographers making a business of it. Experienced boudoir photographer Damien Lovegrove shares his expertise in the Fujifilm X system with a DSLR user looking to get started in the boudoir genre.
London-based photographer and visual artist LA Creativity broadened her repertoire into boudoir photography, being already established in shooting portraits and weddings. As the owner of a Canon EOS 5D Mark III she has also been looking at switching to a smaller, lighter mirrorless kit and has been eyeing up the Fujifilm X camera and lens range.
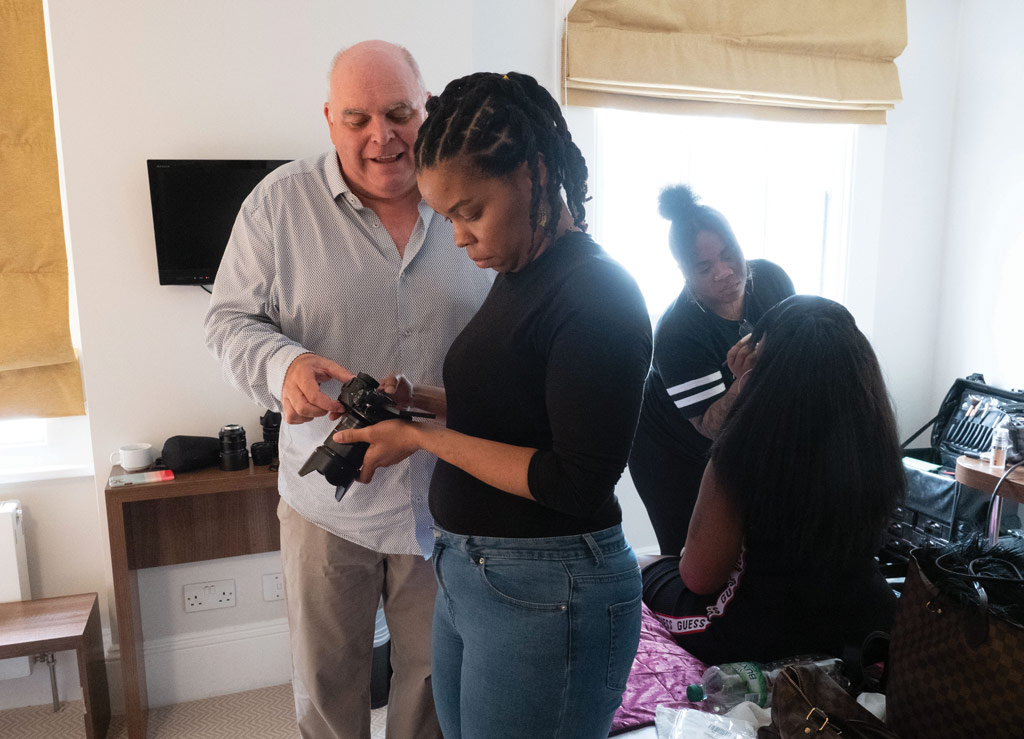
We thought it would be a good idea to introduce LA Creativity to Damien Lovegrove: one of the UK’s most respected boudoir photography practitioners and teachers, he made the transition from Canon DSLRs to Fujifilm some years ago and is something of an X-system expert. We set up a photo shoot in London for Damien and LA with a selection of models and lovely prime lenses.
“I’ve used the full-frame Canon EOS R6 mirrorless camera to shoot weddings, and it’s a great camera,” explains LA. “It’s really fast, and the image quality is great, but I’m drawn to the look, feel and size of the Fujifilm system. The fact that it’s APS-C is not an issue for me – for seven out of the ten years that I’ve been a photographer I’ve used a cropped-sensor Canon DSLR. For me it’s not so much about the sensor, it’s about the glass. If you’ve got good glass on the front then even on a cropped sensor you’re going to get quality images. You may not be able to enlarge them quite so big, but I’m not making billboards.”
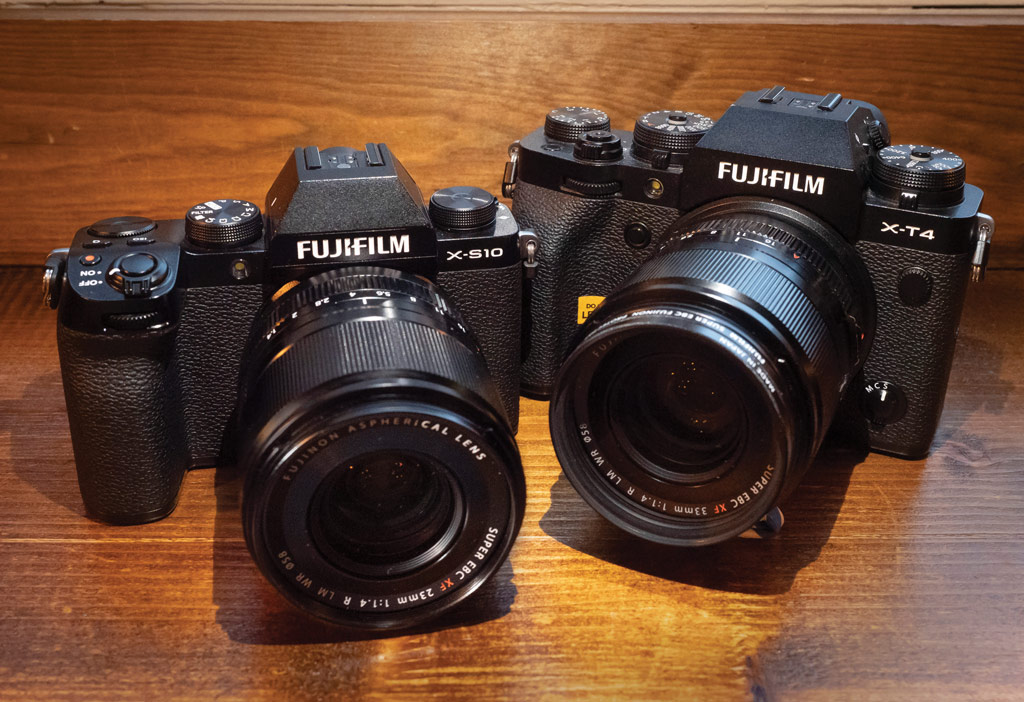
The Fujifilm kit they used
We brought two very different cameras to the shoot for LA to try: a Fujifilm X-T4 and a Fujifilm X-S10. At 465g the X-S10 is considerably smaller and lighter than the 607g X-T4 and leaves a much smaller hole in the wallet. But both cameras feature the same 26MP APS-C sized BSI-CMOS sensor with image stabilisation, and both come with a three-inch articulated screen; though the X-T4 boasts additional features such as a higher-resolution EVF and weather-proofing to justify its higher price.
More importantly, both cameras offer a very different user experience. Whereas the X-T4 follows Fujifilm’s traditional user interface, with 35mm SLR style shutter speed dials and aperture rings, the X-S10 uses the PASM interface more familiar to DSLR users – making it, in theory, an easier camera for users like LA to transition to.
“The X-S10 is just like an X-T4 on the inside, just shrunk,” explains Damien. “It’s a marvel. Okay, you miss out on a few things such as fast burst rate shooting, and you haven’t got two SD card slots – a few small compromises. But if you put the images from both cameras side by side they would be identical.”
Get started with boudoir: How to set up your camera
Our first step, while our models were getting ready, was for Damien to go through how he sets up his cameras for shooting. “The first thing I do is take everything off auto,” he explains. “With DSLRs, there’s this feedback process where you take a picture, look at it, adjust the exposure compensation and repeat. With mirrorless, it shows you the picture before you press the button, and you can see what’s happening in real-time as you adjust the settings, so auto and exposure compensation are completely unnecessary.
“When shooting on manual you have to decide which, out of the three exposure factors, you’re going to use to adjust the brightness of your image. Let’s assume you want shallow depth of field, so the aperture is wide open. You’re shooting handheld so the minimum shutter speed you’ll want to be working on is 1/125sec, maybe even 1/250sec, to avoid any subject movement.
“So that leaves you with the ISO to adjust the exposure. I’m happy to use any ISO setting up to 6400, or even 12,800. That little bit of texture in the images is great. It isn’t the same as the digital noise you get when you underexpose the picture and then lift the shadows in post-production – that looks horrible. If you get the exposure right you won’t have a problem shooting at high ISOs.”
Damien does not use histograms to judge exposure. “For a lot of what we’ll shoot, the histogram will be misleading,” he says. “With a nice rim-lit silhouette, for example, the levels will all be bunched over in the black and you’ll be thinking it’s way underexposed, but it will actually be perfect; and when we do a high-key shot with the white sheets and the sunlight streaming in we’ll have a really bright, zingy picture but the histogram will be screaming at you. Just use your eyes – if the picture looks gorgeous, it is gorgeous.”
In order to make this process easier, Damien reduces the screen contrast using the Shadow and Highlight levels. ‘This is so that every bit of shadow and highlight detail in the file is there on the screen to see. It makes the picture look a bit flat but it helps you to set the most accurate exposure at the time of taking the picture.’
Get started with boudoir: Black & White tips
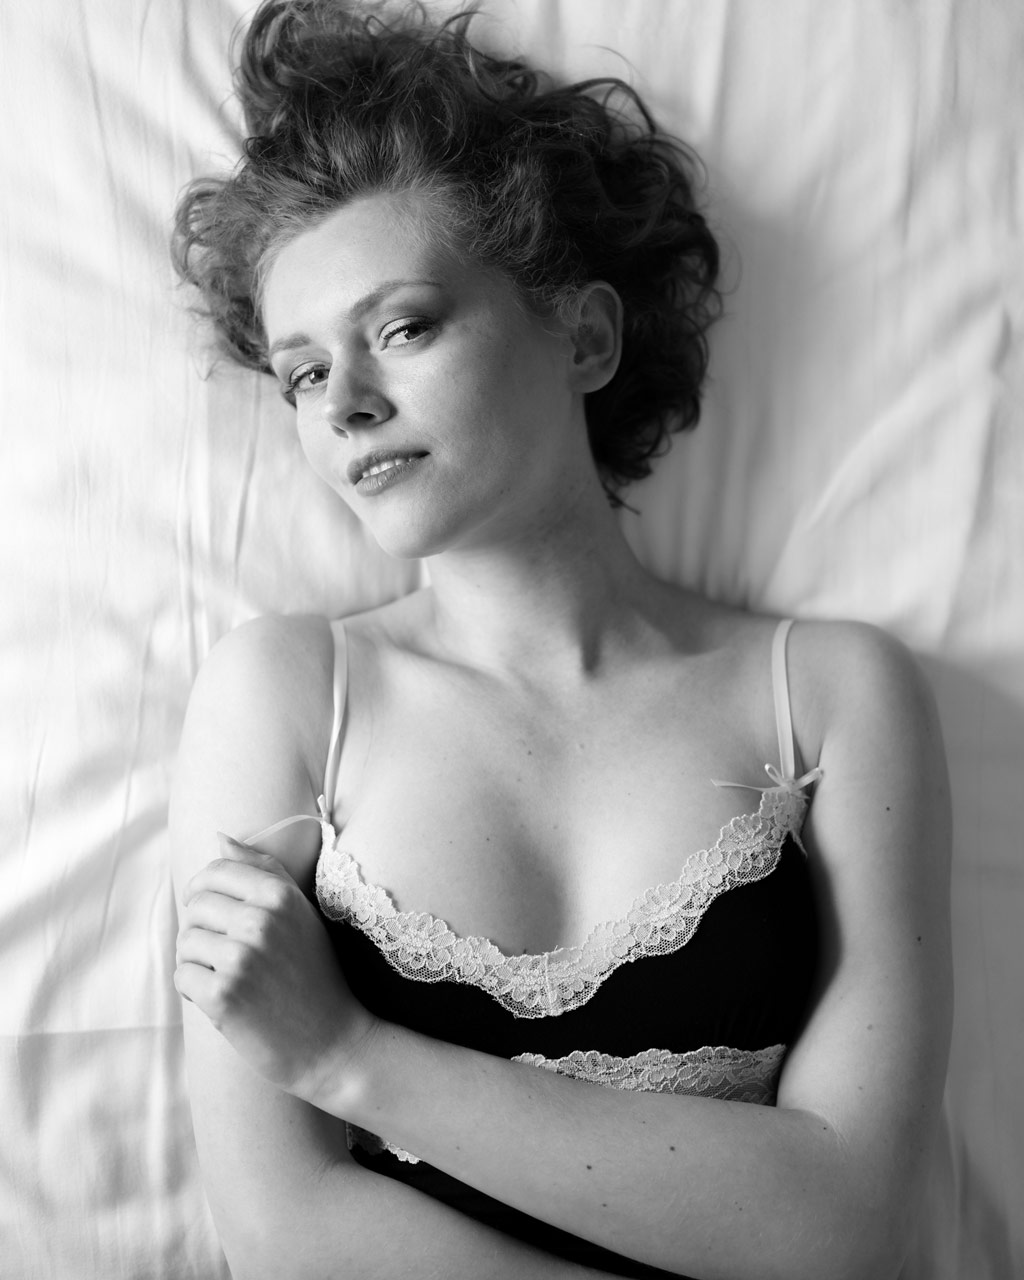
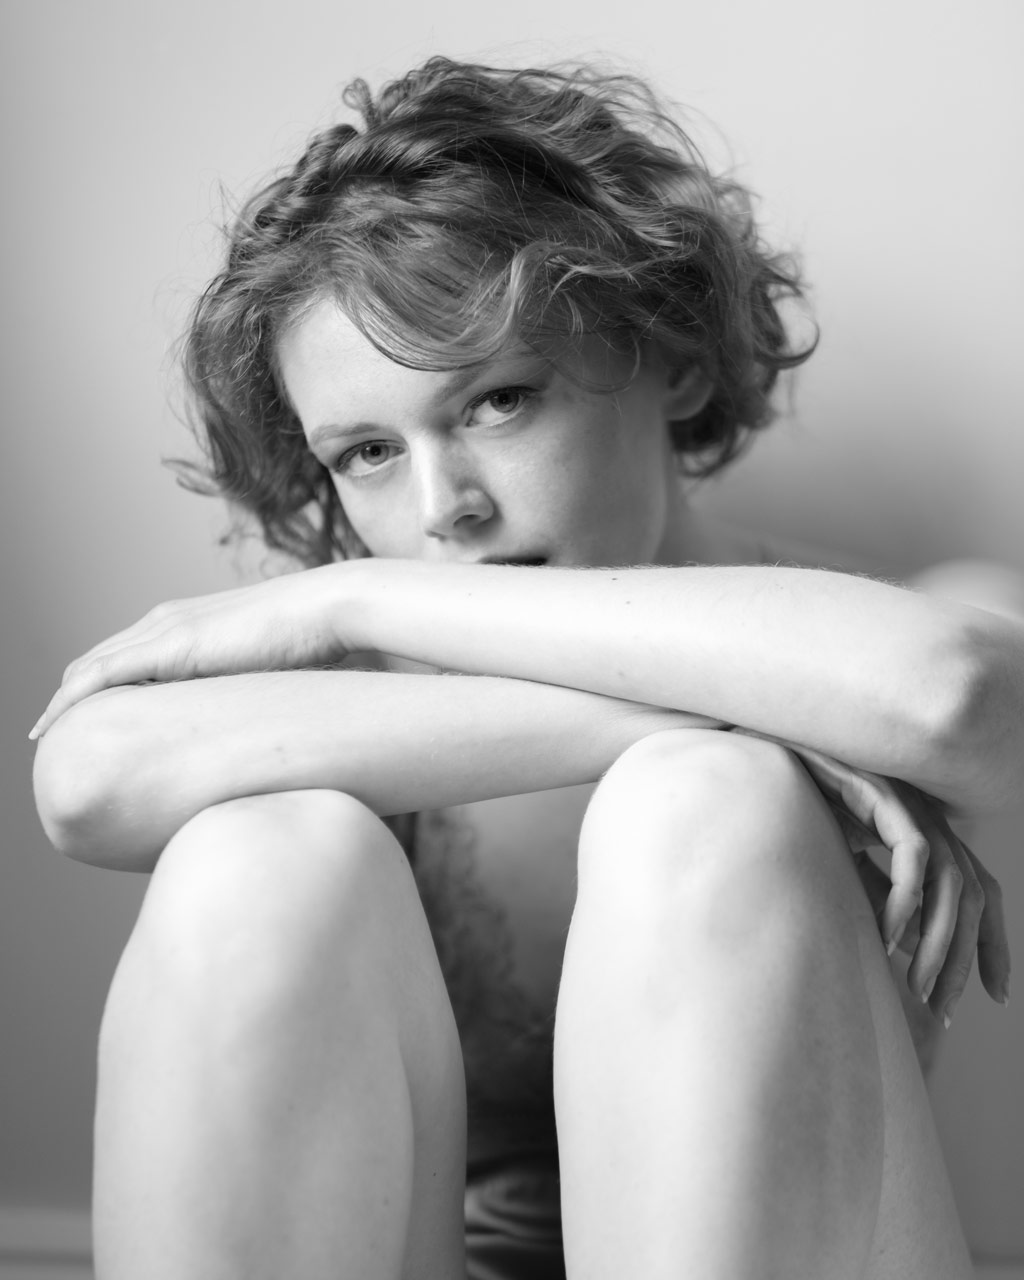
Even though we’ll mostly be shooting in black & white, Damien insists on setting the white balance, and chooses 5500K to match the daylight and the settings on the Lupo LED light panel that he has brought with him. “Don’t assume that because you’re shooting b&w it doesn’t matter what the white balance is set to,” he warns.
“It makes a difference to how the tones reproduce in black & white. Also, in the b&w modes, there are optional yellow, red and green filters, which alter how the tones in the scene are reproduced in b&w. The green filter is good for portraits: lips will be darker and more defined, and the skin will look healthier. It does mean pimples and blemishes will be more defined too, but they would be retouched in post anyway. A red filter has the opposite effect. It makes blemishes disappear but the skin can look a bit plasticky. Red lips disappear too but you can fix that by your subject wearing a lipstick with more blue, like plum or purple.”
For the colour shots, Fujifilm offers a wide selection of profiles among its much-lauded film simulation modes, but Damien recommends the Pro Negative Std setting. “It gives the most calm, natural, beautiful skin rendition,” he says. When it comes to focusing he advocates using Single point AF and positioning the AF point manually using the joystick.
Get started with boudoir: Focusing and composition
“With boudoir, we’re often using shallow depth of field- so you have to be really careful with focusing. Take care to align your subject so you’ve got both eyes in focus, or at least a dominant eye. Or sometimes with boudoir, I’ll ask the subject to give me a look that isn’t to camera and then I’ll focus on the mouth. The mouth is where we naturally look when we’re talking to someone, because we’re all lip-reading subconsciously.”
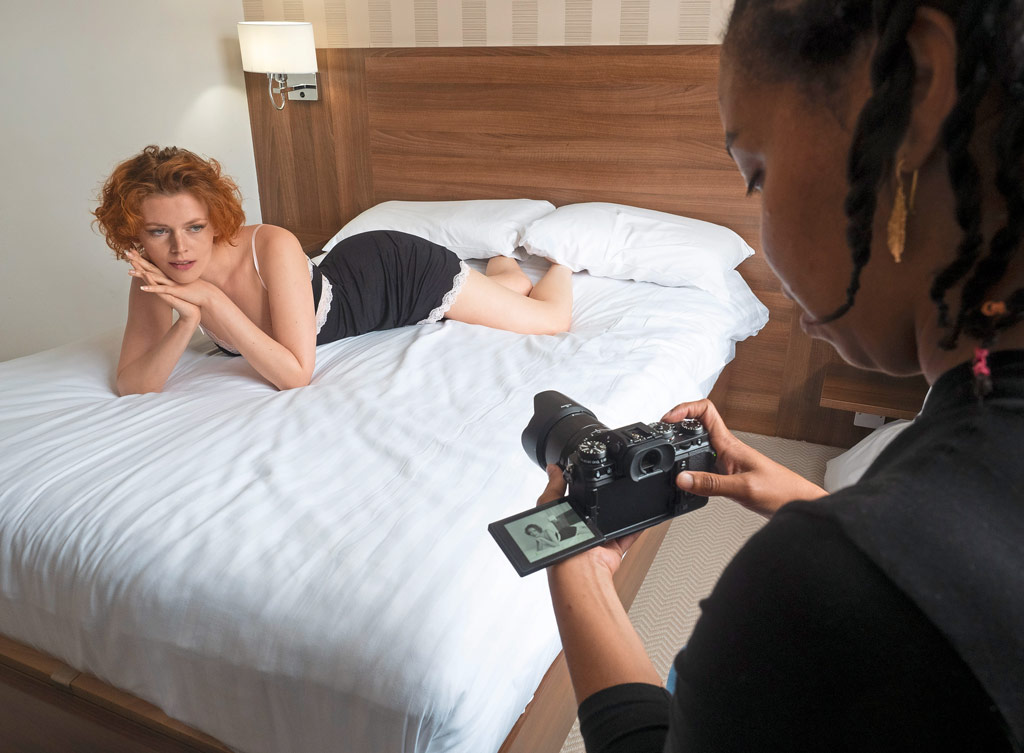
One recommendation that will surprise many is to compose using the vari-angle LCD screen rather than the EVF. “A lot of people think you need to look through the hole because that’s what professionals do. But actually, when photographing people it’s better to use the LCD because you haven’t got something in front of your face.
“It means that when you’re communicating with your subject there’s a much better connection than when you have to keep peeking over the top of the camera. You can be so much more fluid with the movement and position of the camera, which is such a joy. You can vary your shooting angle without having to crawl around on the floor, or stand up on a chair.”
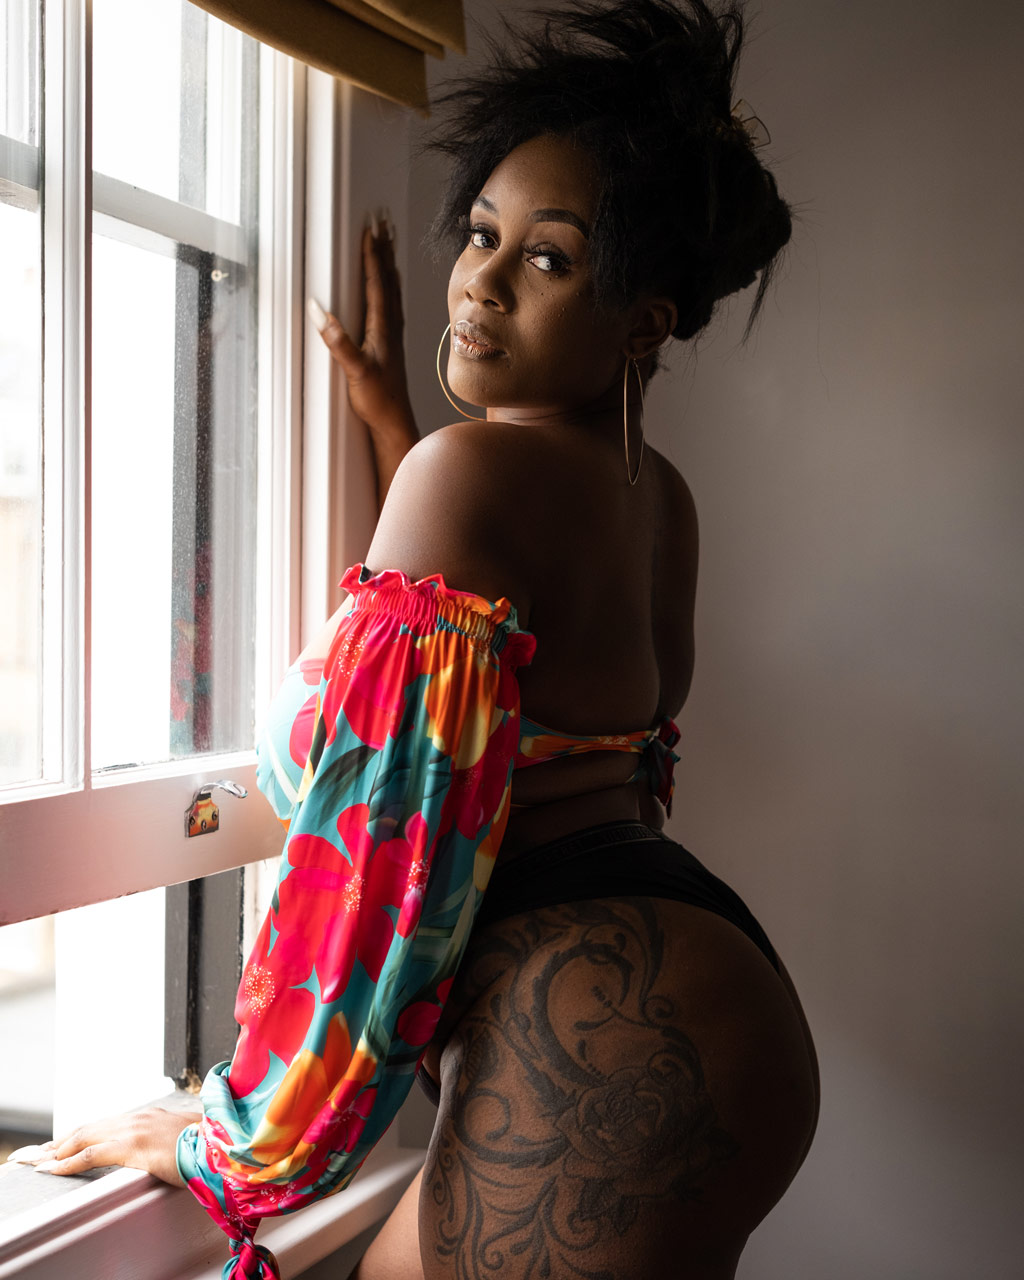
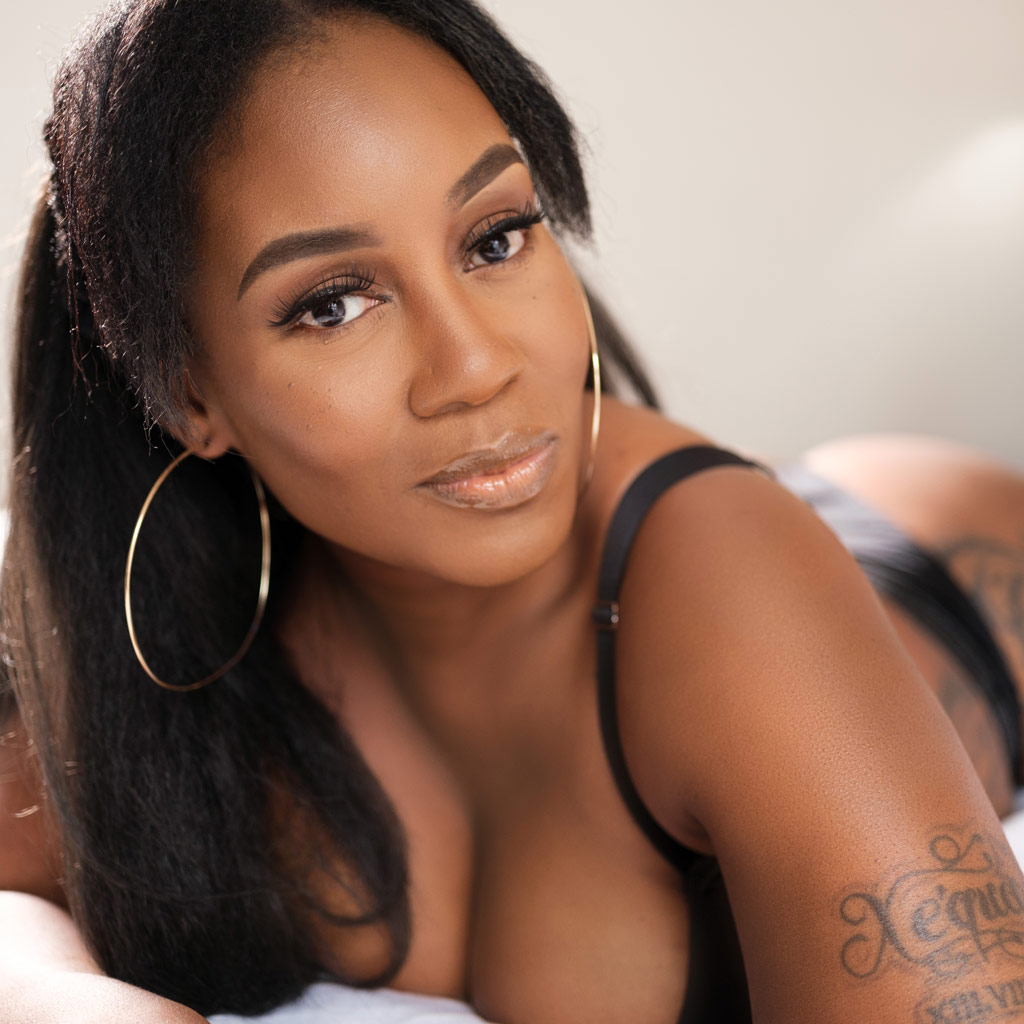
With the cameras set up, Damien hands them to LA and the shoot begins, starting with model Kate Ri. LA has a trio of Fuji prime lenses: the 23mm f/1.4, 33mm f/1.4 and 56mm f/1.2 – equivalent to 35mm, 50mm and 85mm on full frame. Damien takes charge of positioning the Lupo light – which is set to 4800K to simulate the warmth of evening light with the camera set to 5300K. Kate is a professional model and has worked with Damien before on his workshops; but real-world shoots with paying clients who – like our other model, Naiomi – have less experience in front of the camera, will naturally be more challenging. However, Damien offers a steady stream of tips, gained from his years of experience.
“Always look at the person you’re photographing and work out what their best features are,” he advises. Which is their best side? Don’t be afraid to ask them. Or look at their Instagram. If I see that all the photos of them are from their left side then I know I need to light them from the other side and shoot from that side.
“Some people will focus on what they don’t want to show: ‘I don’t like my legs’ or ‘I don’t want to show my tattoos’– so then you need to think about how to hide body parts by scrunching up the duvet, or playing with a pillow, or using lighting to throw areas into shadow.”
Get started with boudoir: Lighting Tips
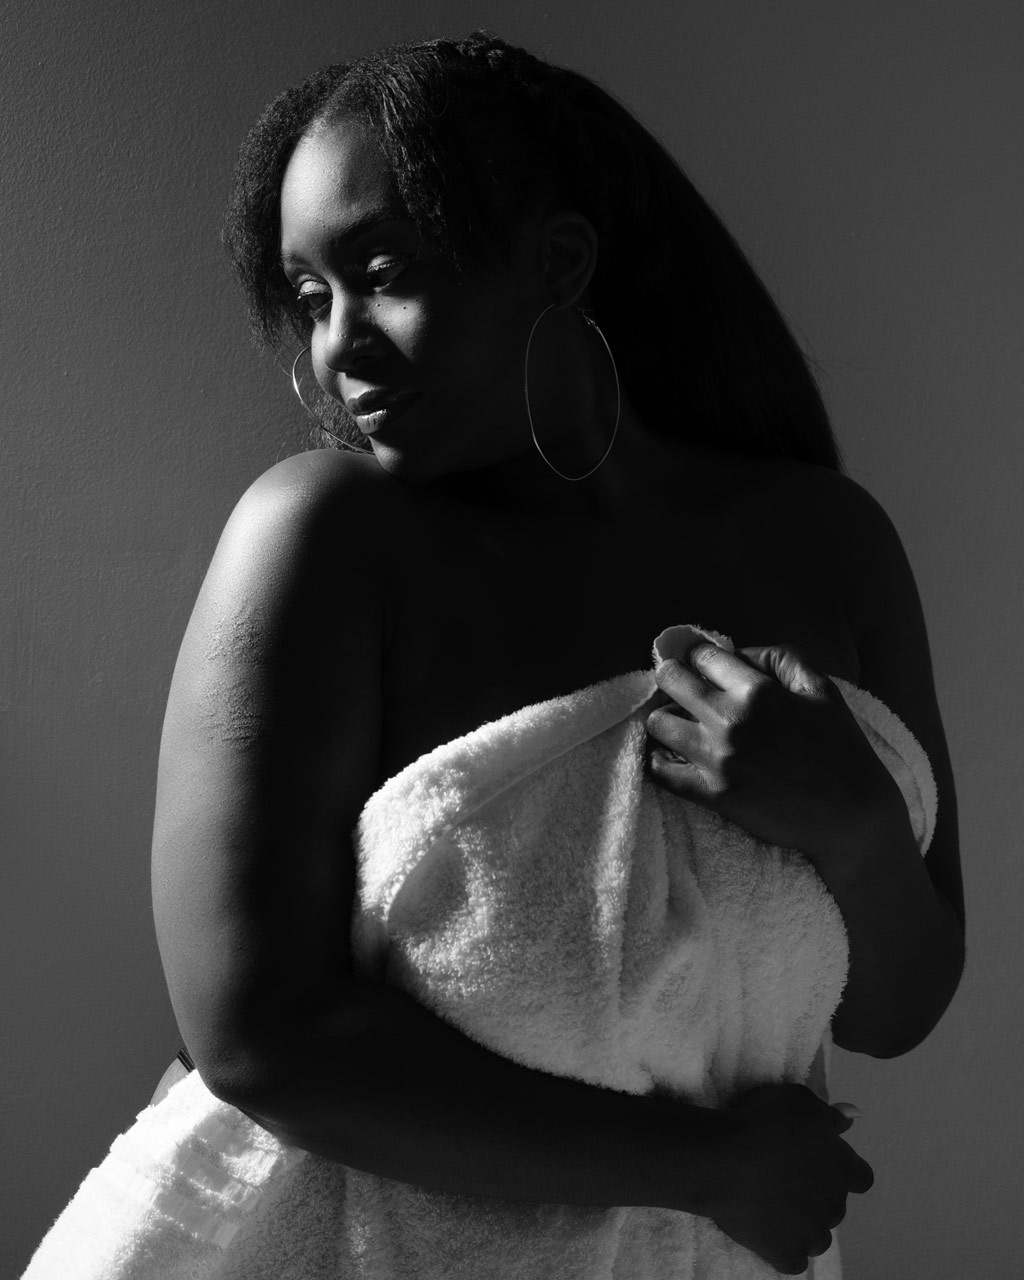
One of the biggest revelations for LA was seeing how Damien used lighting. “Previously I’d mainly shoot with natural light,” she admits. “I would go into a room and find the light. But Damien showed how you can introduce lighting to change the mood of the picture, which was really interesting.
“He also made me pay attention to the small things I may not have noticed. For example, turning on the bedside lights to add a bit of atmosphere. I wouldn’t have thought to do that. It was interesting to see how boudoir can very easily lean into ‘glamour’ if you shoot it in a particular way. In order to maintain the style of boudoir, you have to keep the mood sensual rather than sexual, by careful use of lighting, pose and expression.”
Using the LCD screen to shoot was also a new experience. “It was a bit tricky to start with,” she admits, ‘but I got used to it. The vari-angle screen is a game-changer for me. I tend to shoot from a lot of different angles, and you can’t always get your eye down to where you want the camera to be. This would be a must-have feature for me on my next camera.”
Fujifilm X system for boudoir
“What I liked most about this whole kit is that I was able to fit four lenses and two bodies in my bag, and still had space,” she says. “And my bag wasn’t heavy with all the kit in it. That’s definitely a bonus. My Canon is heavy, so you really know it’s there, but on the other hand, it does make you feel more like a pro, whereas using the Fujifilm system does take that feeling away slightly. But it works just as well as the Canon and the pictures are just as good.”
“I liked the size and weight of the X-S10, and the functionality is similar to my Canon, but overall I preferred the X-T4 to use. I felt like I had more control, even though the results of the images looked the same. The X-T4 is more like my Canon in that there’s a dial for everything, so I don’t have to think too much. With the X-S10 you have to press a button and then do something else.
“Also, I found myself accidentally changing settings when I inadvertently brushed the dials. Sometimes I would look and wonder how I’d ended up on this shutter speed – which didn’t happen with the X-T4. And unlike the X-T4 the X-S10 isn’t weatherproof, and I like to shoot outside.
“The only thing I don’t like about the X-T4 is the grip – it’s too small. I need to feel like I’m holding something, and the X-T4 doesn’t really feel safe in my hand – it feels like it could slip.” We should point out that the handgrip issue can easily be solved by adding one of the many third-party grips from companies such as SmallRig that come in a range of styles at a decent price online, and there is also Fujifilm’s own battery grip.
One aspect of the system that LA was especially taken with were the lenses. “Fujifilm has a lot more lenses for its X system than Canon has at present in the R system, and they’re so nice to use. I just loved the 56mm f/1.2,” she enthuses. “That is a beautiful lens. The quality of the images is stunning, especially wide open. It’s essentially the same as my 85mm f/1.4 Canon lens, just smaller. Obviously, you can also use Canon’s EF lenses with the adapter but that just makes it bigger and heavier still.”
Overall the shoot proved beyond doubt that mirrorless is the way forward for LA. “Seeing the exposure and lighting in real-time lets you work quicker and work smarter. You worry less. It takes away the guesswork – what you see on the screen is exactly what you’re going to get.”
Catching up a few days later, having had time to go through the images and think about the experience, LA has decided to make the switch to Fujifilm. “I love the simplicity of it, and the portability, but that you can still get great quality,” she comments. Her biggest problem now is deciding which camera body and lenses to go for – a decision made even trickier by the recent introduction of the X-H2S. Perhaps we need to do another shoot to find out.
Further reading:
- Essential Guide to Lighting and Studio Setup for Boudoir Photography
- Fine-art portrait photography guide
- Best Fujifilm cameras to buy
- Best Fujifilm lenses to buy
Follow AP on Facebook, Twitter, Instagram, YouTube and TikTok.


