

Black and white photography is timeless. A challenging, fun and creative form of artistic expression, any photographer can try it with what they have in their camera bag. Monochrome specialist Will Cheung guides us into the world of black and white photography.
All that’s needed is a little adjustment in mental approach to picture-taking, and perhaps a new editing trick or two to make the most of your vision. For those who still own a film camera, sticking with analogue techniques is an option. You could always pick up a pre-owned film camera or take the low-fi Lomography route. I have several toy cameras including pinhole models that see regular use and I scan the negatives to work on.
See our pick of the best cameras for black and white photography, which gives a selection for all budgets from more expensive Leica models to the very reasonably priced.
When I embarked on my photography journey, there was only film with the choice of colour print, colour slide or black & white. Going monochrome was the obvious route because, as a schoolkid, it was the only affordable one. Not only that, but the pictures I saw in magazines and books that fired my imagination were in black & white.
I grew up loving and being inspired by the work of many legends of photography: including Ansel Adams, Bill Brandt, Henri Cartier-Bresson, Duane Michals, Arnold Newman, Irving Penn and Sebastião Salgado, to name my magnificent seven.
Their work continues to inspire me and no doubt many others. If you don’t know them, their works are well worth a look. Established shooters in mono will have their favourites, but the uninitiated in the medium will do well to get online or to a bookshop for ideas. Whether you’re enthused by the work of old masters or more contemporary visionaries, there’s a lot of wonderful imagery out there.
Which subjects work best in black and white?
My view is that black & white can be applied very successfully in almost any genre. This is not to say you should turn every image in your archive into shades of grey, or that these will be more successful than full-colour shots. Our message is rather that black & white is a much more versatile medium than you may think, and can be indulged to great effect in almost any genre.
It may seem paradoxical to say that the absence of colour can an extra dimension to your creative output. Monochrome images can evoke moods or impressions that colour photography simply cannot. Naturally, some subjects and scenes are better suited to colour, but here we consider some with great scope and potential for shooters to explore in black and white.
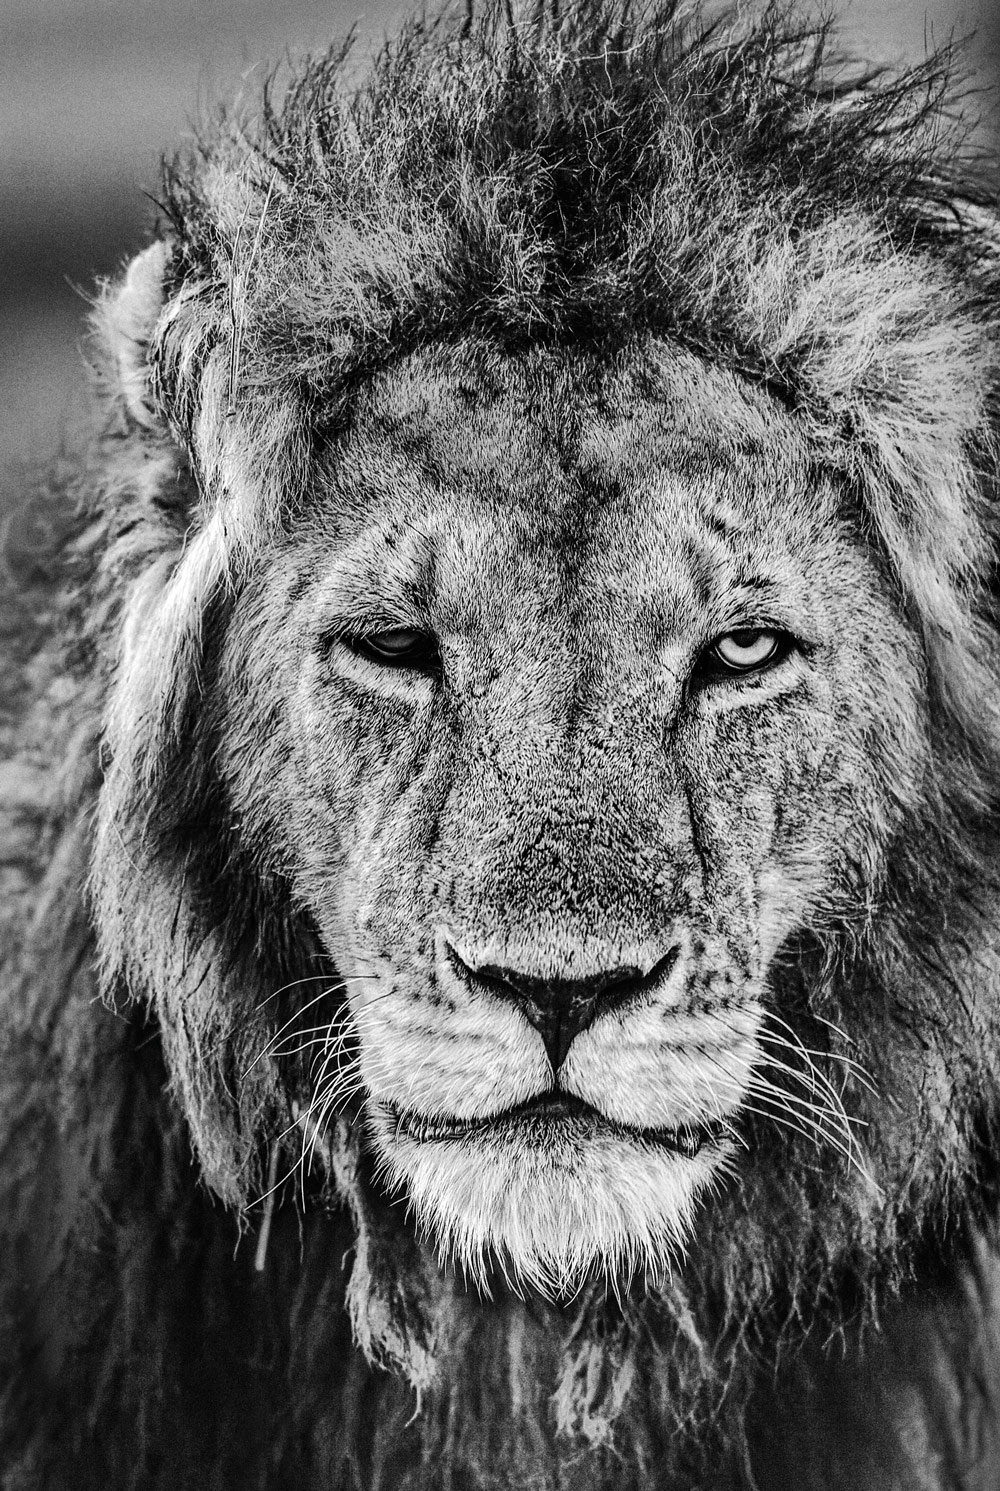
Some subjects are also inexorably linked to colour photography. Take nature as an example, where the goal is to portray reality in all its elements; colour an obvious one. But shooting in black & white offers a whole other world of views in the wild. For evidence that it can work exceptionally well, check out the remarkable output of Nick Brandt.
There are plenty of creative avenues to explore with mono. As most of us now capture digitally, shooting raw makes the world your oyster; take any route in it you want. That said, I suggest six subjects that work exceptionally well in monochrome, and name six that are less successful. Continue reading to discover more.
Essentially, there is no right or wrong, so don’t be dictated to by convention. Choosing to use monochrome is a creative decision. If the medium works for you, suits the pictures you’re taking and your taste, then work on developing a style that suits your evolving pictorial approach.
Six subjects that work well in black and white photography
Black and white is a powerful creative medium, and incredibly versatile. Next time you’re out shooting, select the mono picture mode and give it a go. Shoot raw + JPEG so you get a mono preview but still have the colour option. You can explore black & white right now on existing files in software. In Adobe Lightroom, a single click takes you from colour to mono so you get an idea of the potential, and if you like what you see, work on the conversion for the best result.
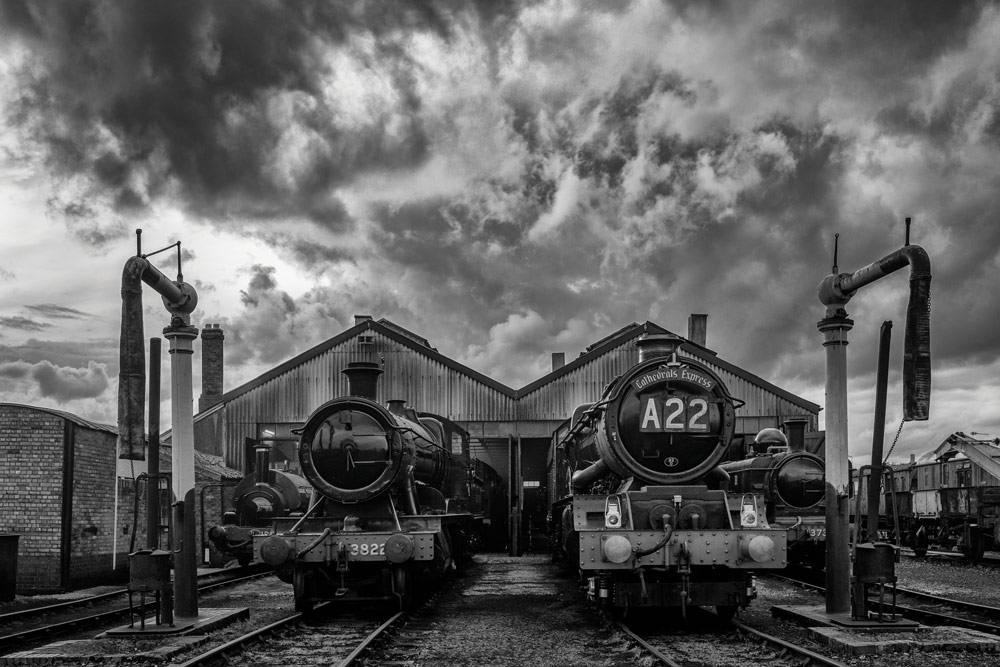
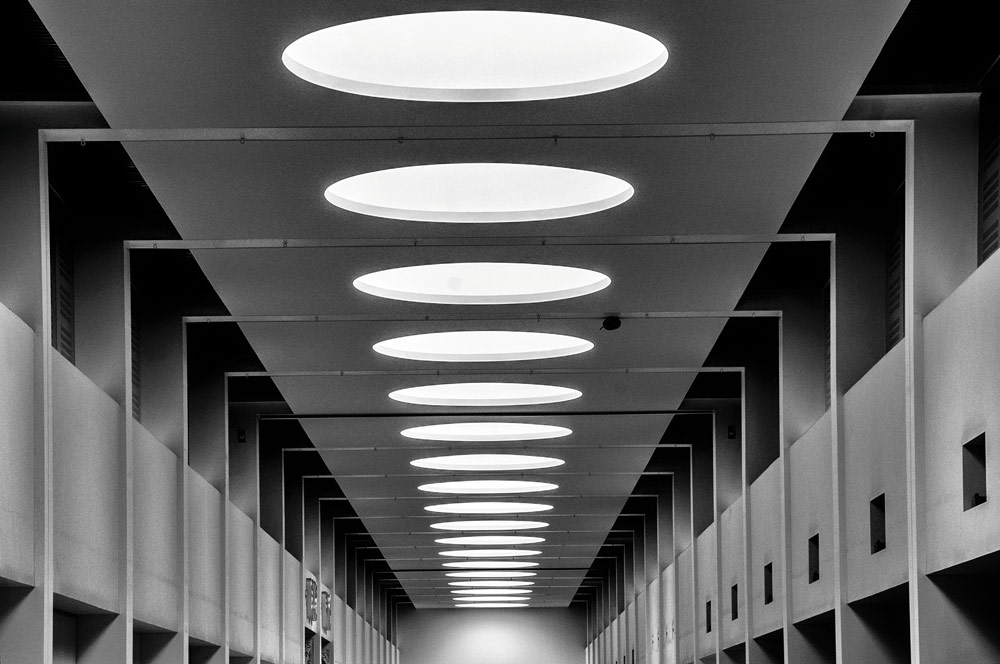
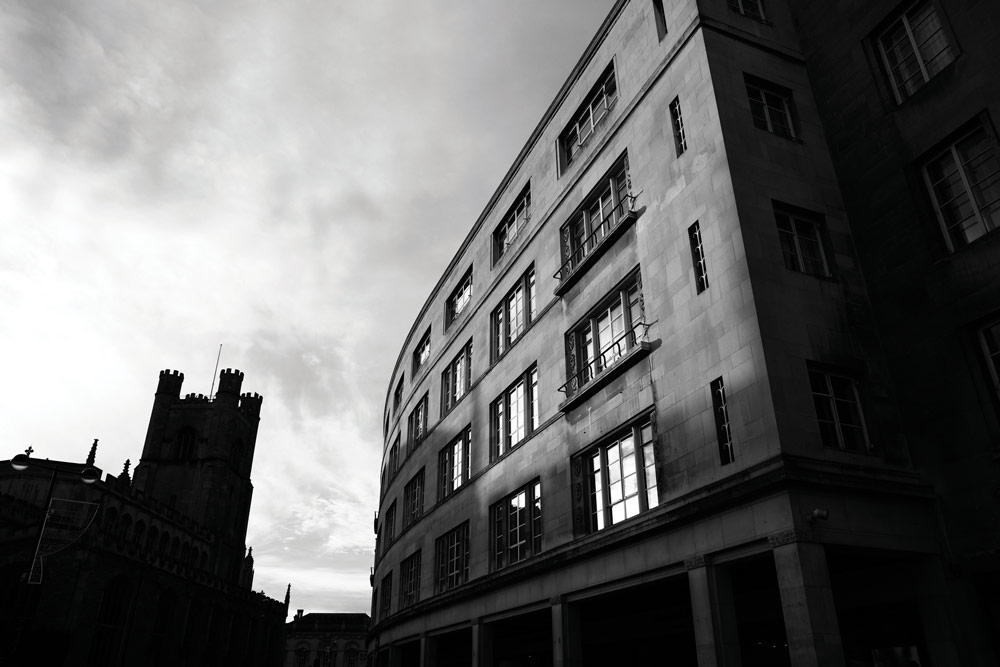
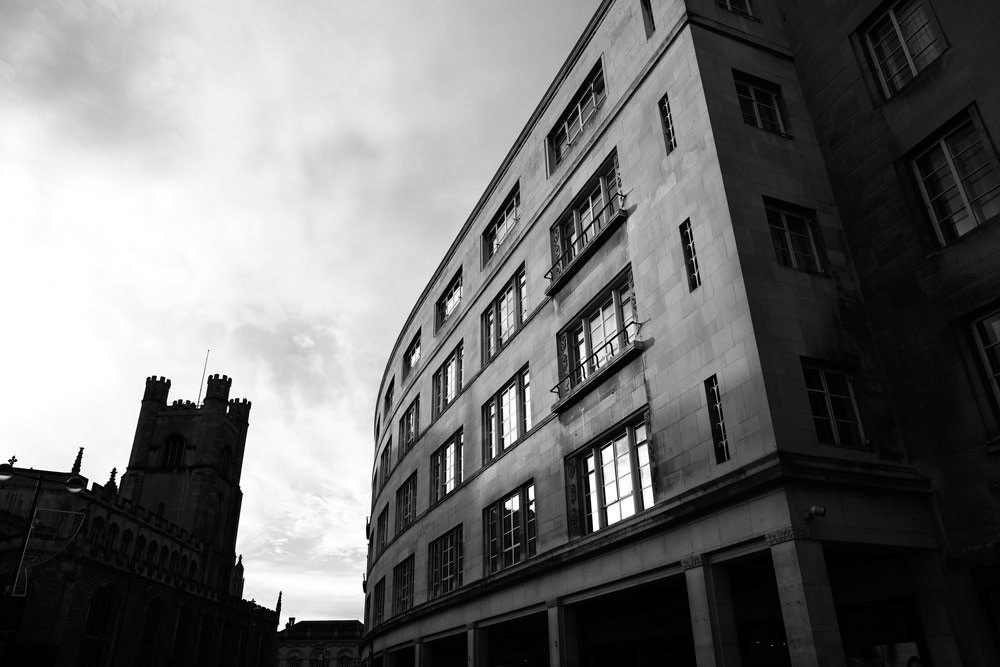
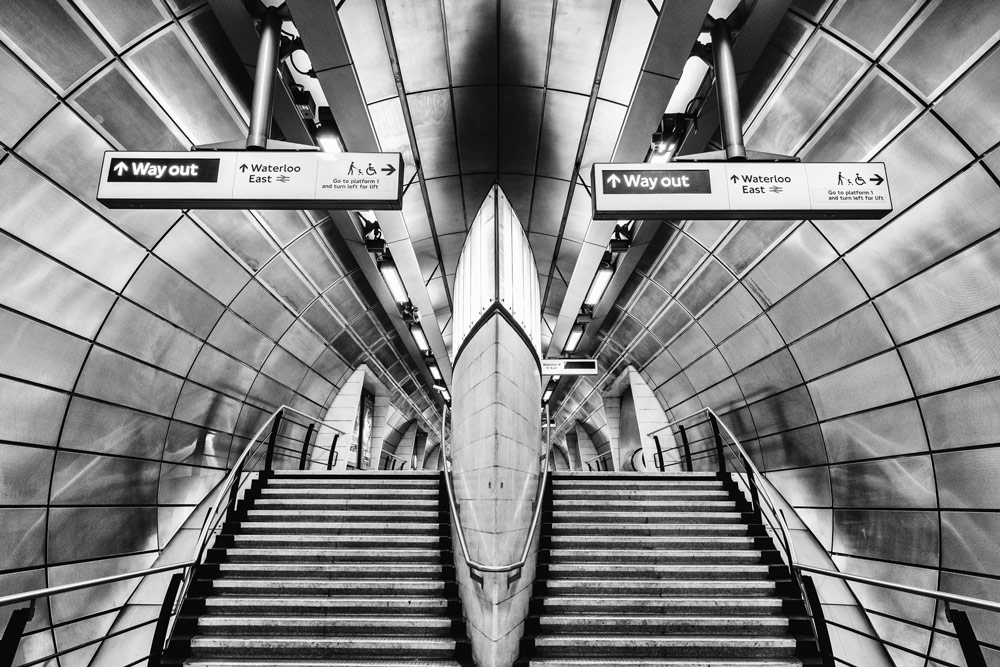
Black and White: Architecture
Interiors or exteriors, modern or classical, overall view or detail – whatever your taste, black & white is a good option. One advantage when tackling interiors in black & white is that you don’t have to worry about weird and not-so-wonderful colour casts created by artificial lighting. Church and cathedral interiors, for example, can have very warm lighting and the vivid orange cast is almost impossible to neutralise satisfactorily. No problem in black & white, though.
Black and White: Close-ups
Close-up details, patterns and texture can look wonderful in black & white and even better when side-lit to add an extra splash of contrast – but not too much! Such images in full colour can look a tad too busy with different hues competing for attention or look unsettling with clashing colours. Of course, this can work in your favour, so be prepared to explore both options. In mono, try the halfway option and tone your shots in editing.

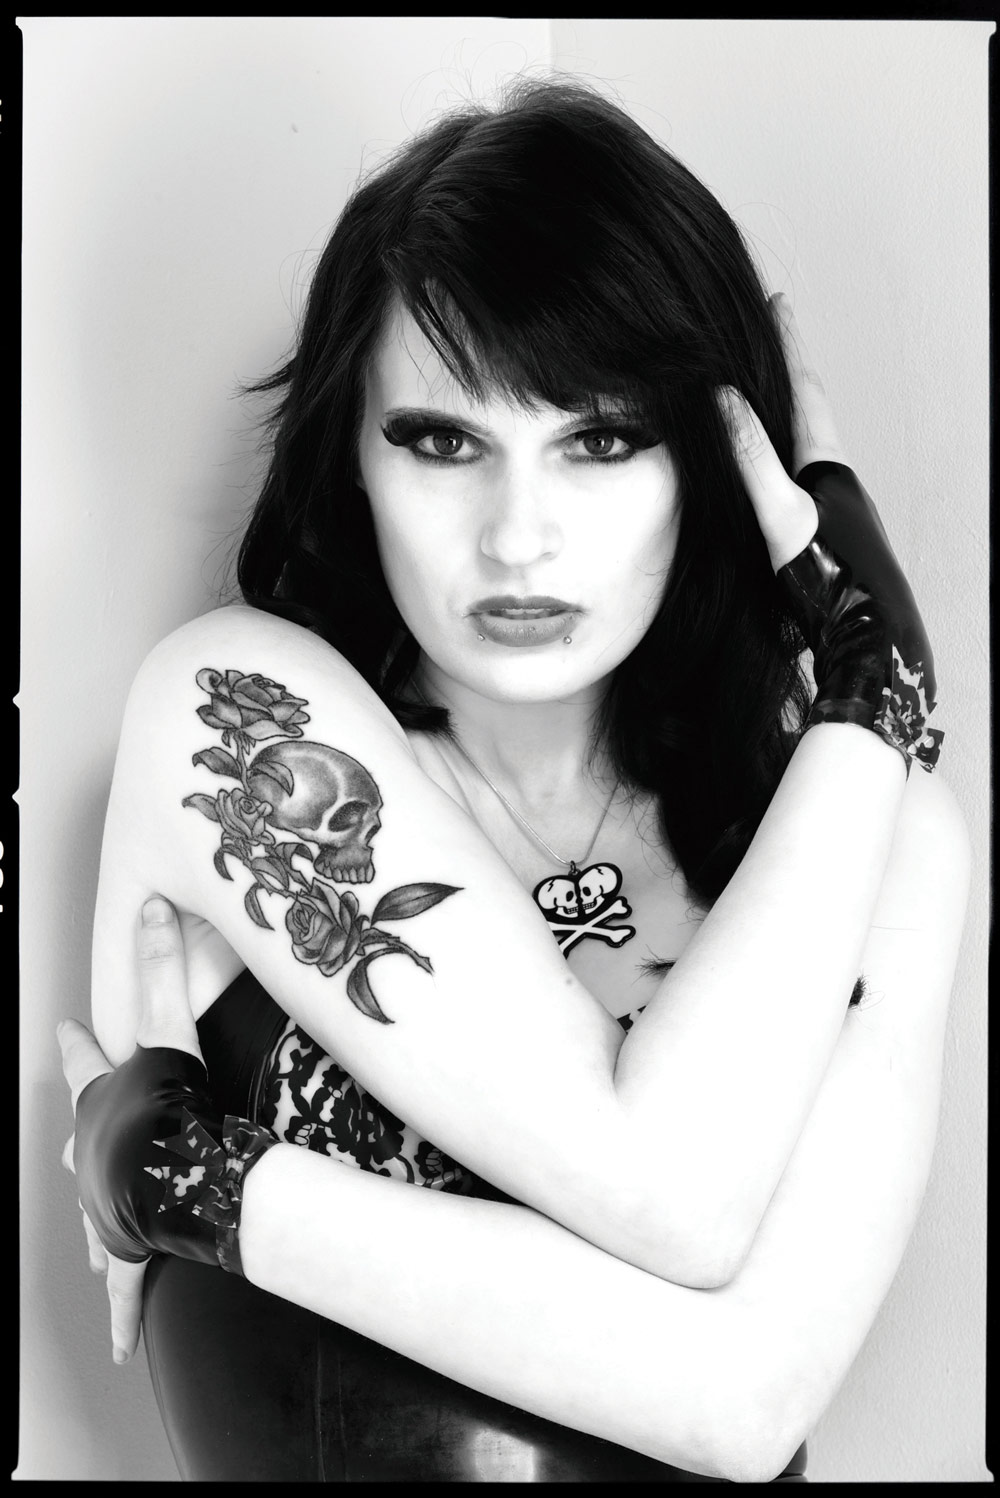
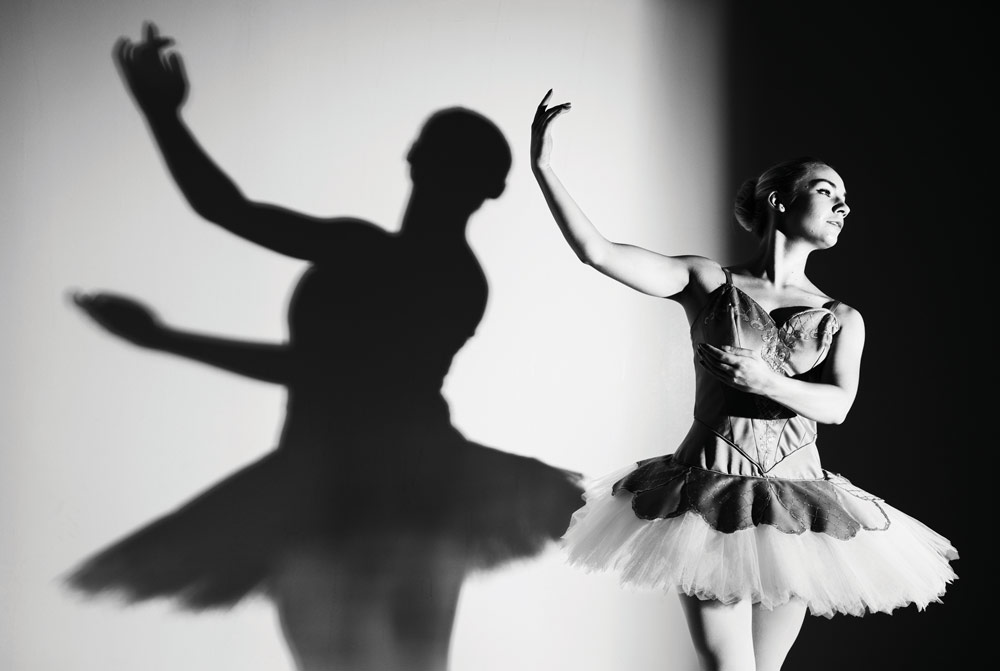
Black and White: Portraits
Nothing beats black & white for character portraits, whether using natural light, LED lights or flash. Unless you are going for a beauty shot with diffused lighting, try Rembrandt or split lighting for contrast. Be brave and put away the reflector, to keep the shadows deep. In editing, use the highlight and shadow recovery sliders sparingly to keep the contrast high. Adding digital noise for a film-like grain effect can be very effective too. See more black & white portrait guidance here.
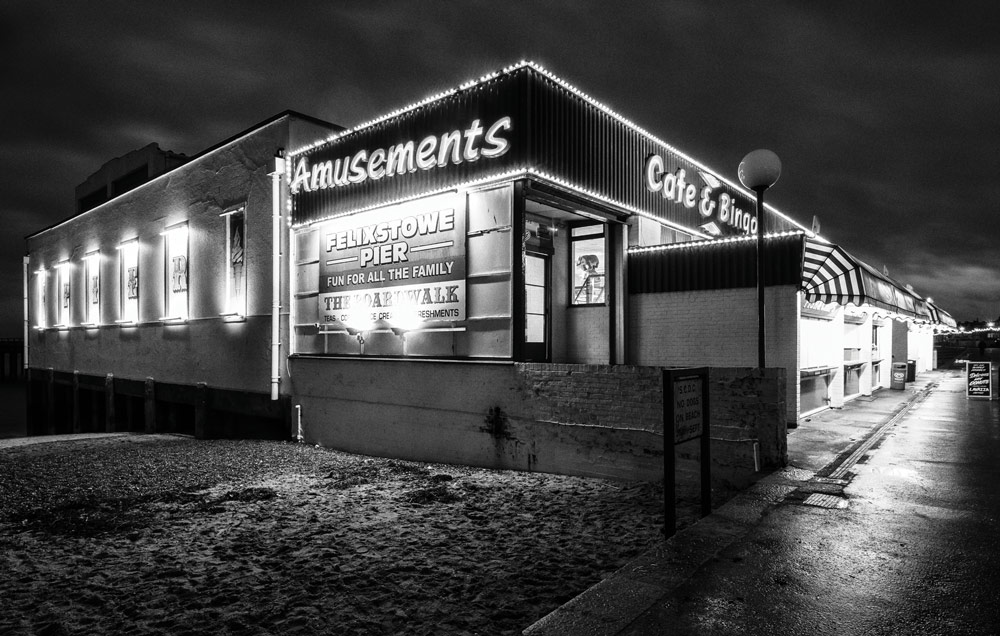
Black and White: Night photography
Vibrant colour abounds at night with office lighting, street lamps and car trails. Again, shooting in colour is the obvious thing to do, yet monochrome can produce rewarding images too. Blackness and deep shadows inevitably dominate, and any highlights present in the scene are often intense and can burn out. But the high contrast, relative lack of delicate mid-tones and darkness can work very nicely in black & white. Shoot raw to give more flexibility when it comes to dealing with the highlights and pools of darkness.
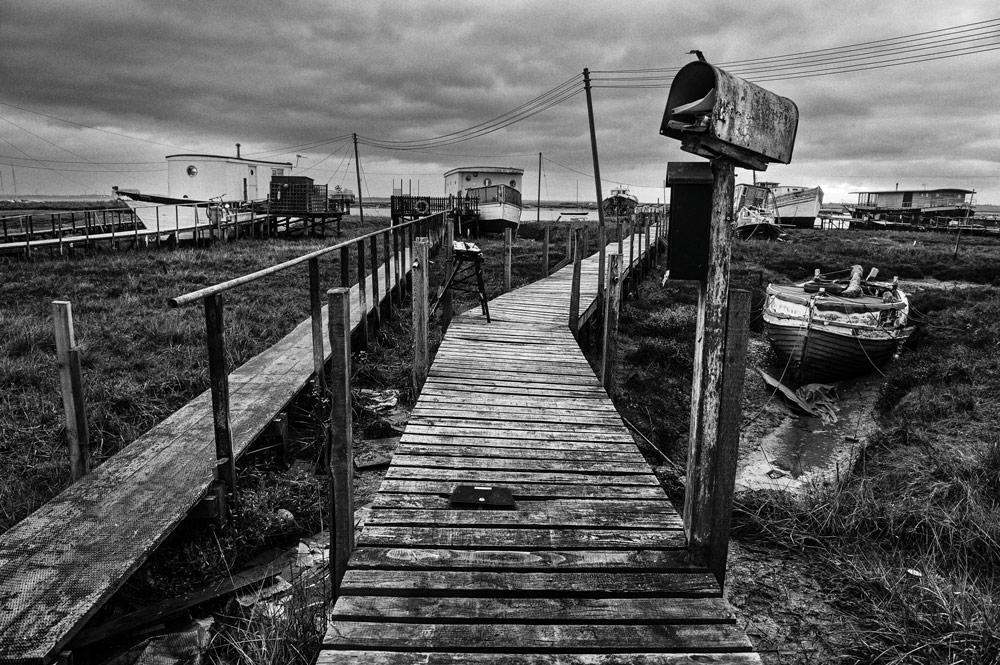
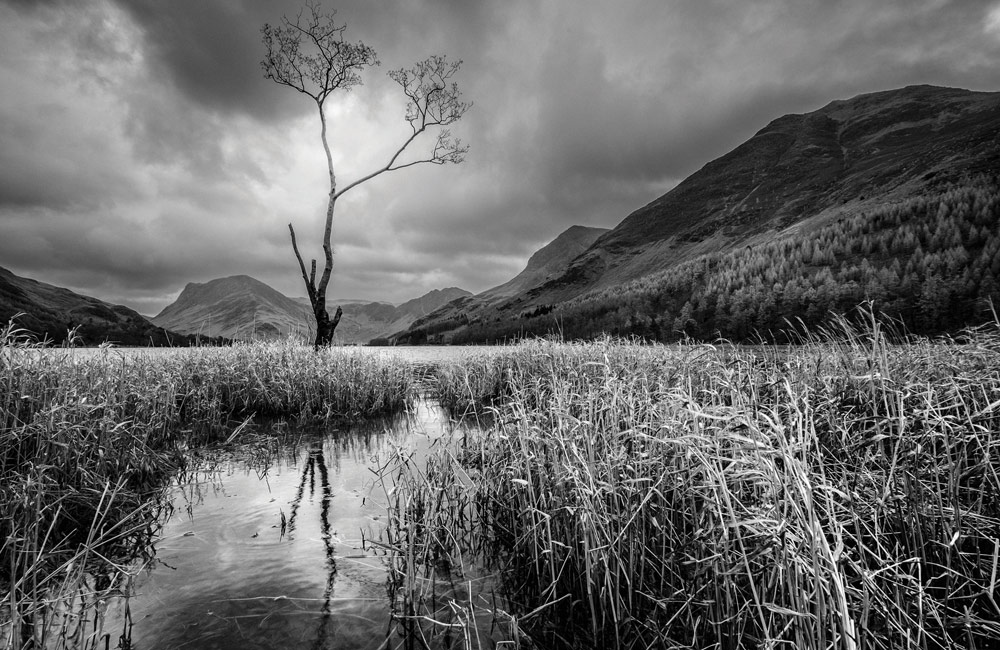
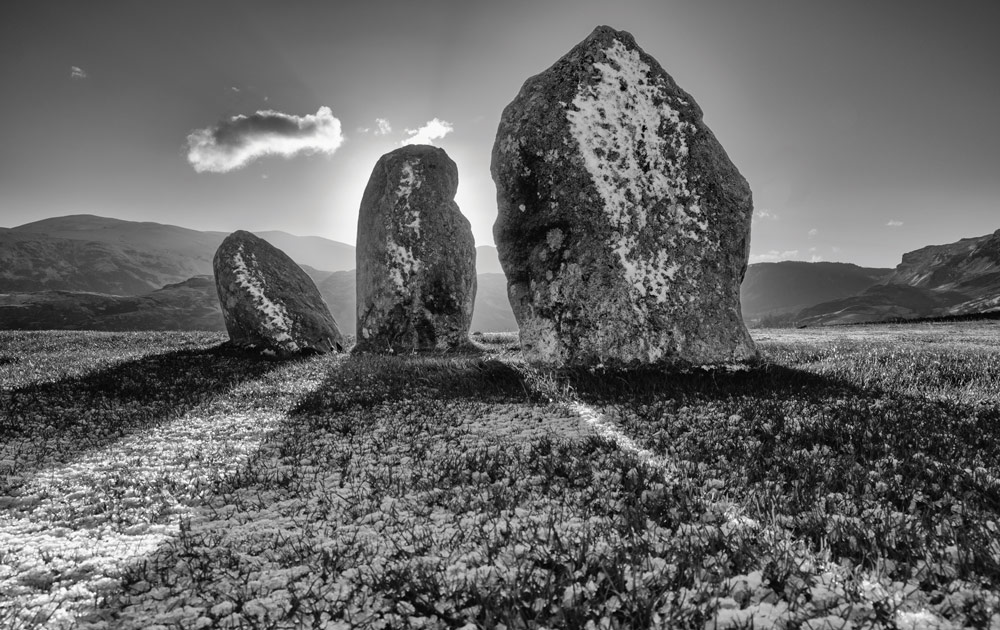
Black and White: Scapes
Seascapes, landscapes and urbanscapes all suit the monochrome approach. Whether you envisage your final shot to be in colour or in mono, good light to bring out texture or add warmth is always a benefit. But when the lighting is flat and there’s lots of cloud cover, shooting in mono route can work really well. Make more of a cloudy sky by taking one correct exposure and then one under-exposed by one or two f-stops, so the sky shows greater detail. The two shots can be merged in editing.
See more advice for creating moody monochrome landscapes.
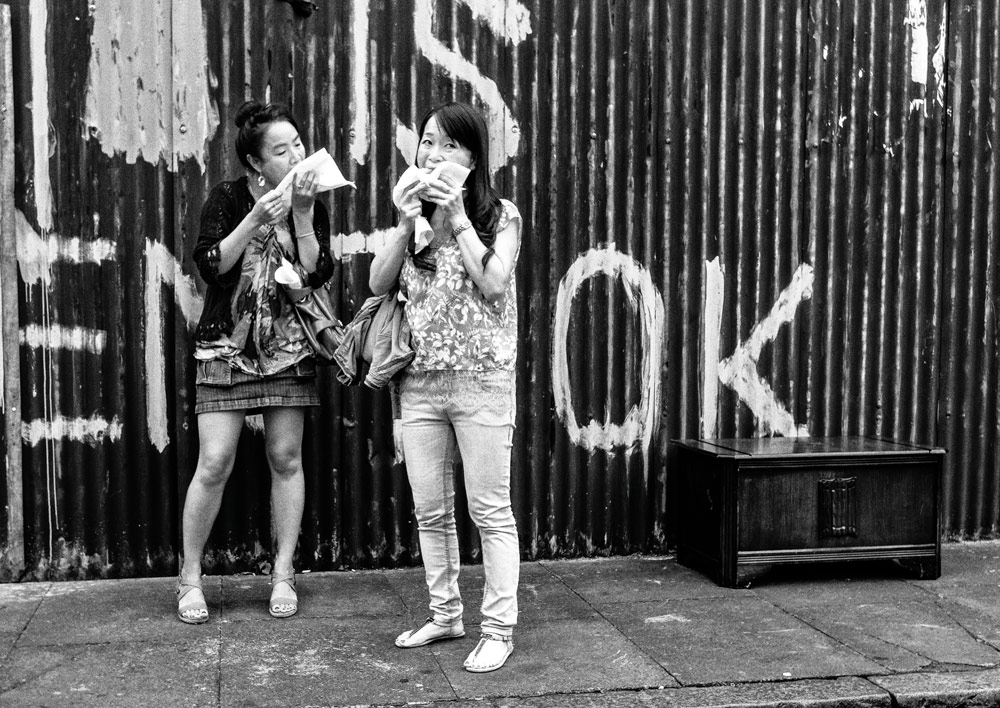
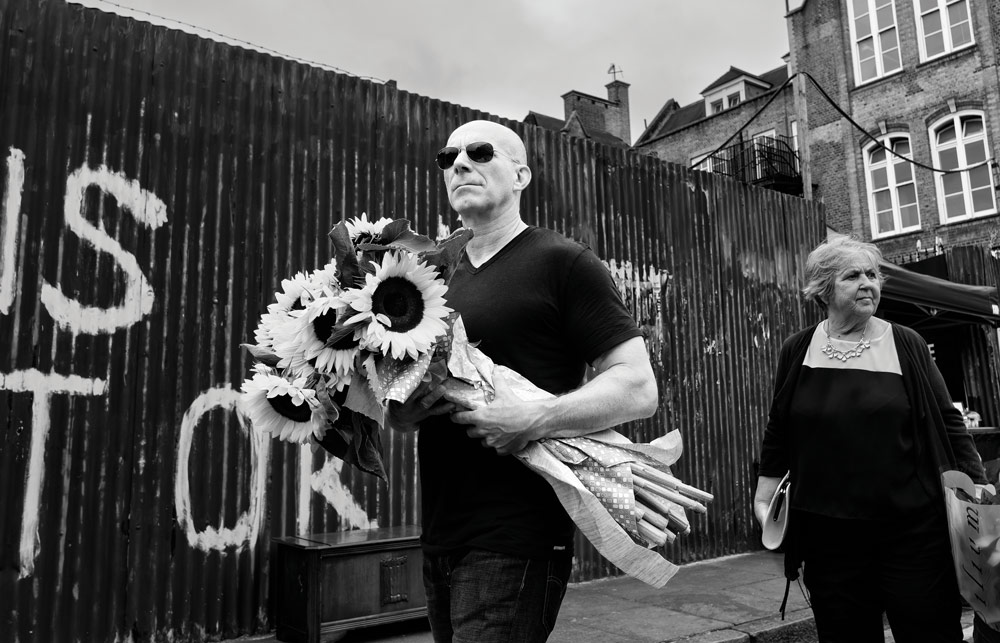
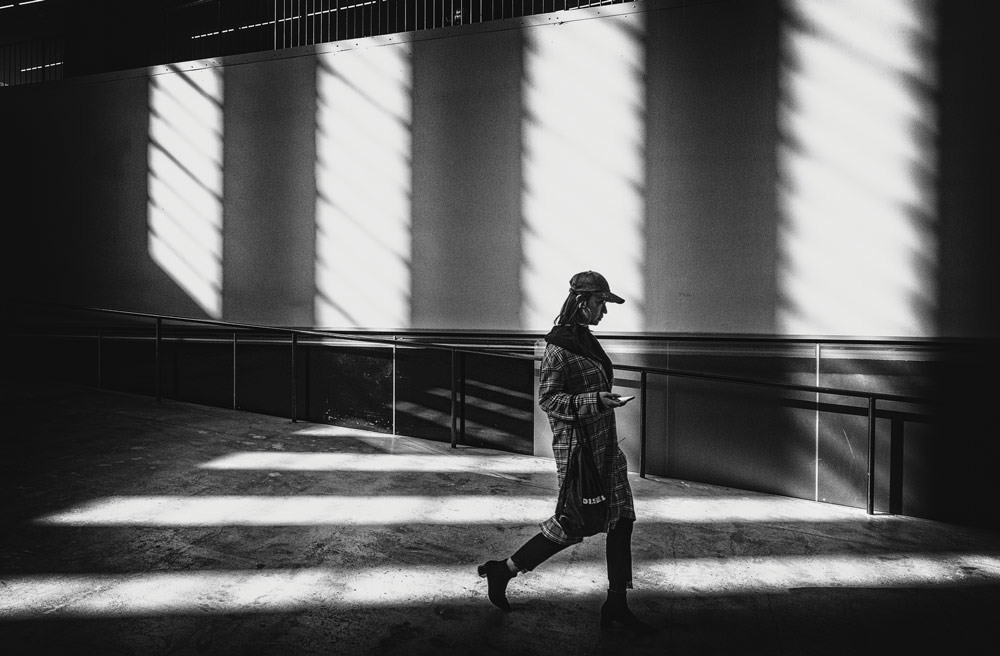
Black and White: Street photography
Shoot mono and explore your inner Cartier-Bresson. Few can get anywhere close to the work produced by the master of street photography but taking the mono option is at least a start and can add a unique mood to your shots. A popular form of street photography is using full sunlight, bold shapes and contrast.
This approach can be very powerful in monochrome, especially if you keep the contrast high and perhaps recover the highlights a little in editing. See our full guide to black and white street photography.
How do you take good black and white photos?
The first steps in black and white photography
Just set the digital camera to shoot monochrome. Digital cameras have picture modes; among the colour and subject settings, you’ll find monochrome as a menu option. With this mode selected, take a picture and the preview will be in mono regardless of the image format you have set.
If you usually shoot raw you’ll still get files with everything recorded by the sensor. Therefore, the image will be colour as normal once opened in your usual editing software, so you’ll need to do some work to render them mono. However, for mono shots straight out of camera, select JPEG image format and what you see previewed is what you get. This way, though, you can’t revert to colour later, so decide on your approach in advance.

The third way, and the best of both worlds, is to set the camera to monochrome picture mode and shoot both JPEGs and raws in-camera. The JPEGs mean you have mono shots for immediate use and also proof images that can help when you process the raws. Essentially, this option is win-win with the only downside being the memory needed for shooting and storing two files of every image. This is the method I use although I only archive a few JPEGs.
Whichever method you adopt, using monochrome picture mode means you see the shot in shades of grey, which is of great benefit to new and regular mono shooters. The thing about using the default monochrome picture mode is to treat it as a start.
There’s no problem with raw files because the hard work begins on the computer, but if you’re expecting to use the in-camera JPEGs then fine-tuning the mono settings is essential because the default settings often give anaemic results lacking in any depth and punch. For more information on how to setup your camera before you shoot, check out these 14 tips to setting up your camera.
Going mono in camera
Digital cameras have mono picture modes so you can enjoy out-of-camera black & white JPEGs by doing nothing more than digging into the camera menu. Remember, though: if you are shooting monochrome JPEGs only, you won’t then be able to convert them into colour later.
So, set the camera to shoot raws as well as mono JPEGs, to keep the colour option open. Raws give superior results with much more control over contrast, exposure and tonality in post-processing. In-camera monochrome shots can look flat and rather dull at default settings, so you need to exploit the options your camera offers. The usual adjustable parameters are contrast, clarity and sharpness (and these apply only to JPEGs) although the nomenclature varies from brand to brand. Filters, and even toning can be applied too.
The two shots (above and below) were taken with and without the camera’s red filter setting. Fine-tune the parameters and make a note or save them as a preset for future use. This takes time and some fiddling with the settings, but the effort is worthwhile.
What is the best way to use filters for black and white photography?
Another way to modify images during capture is to use filters. Black & white film photography and filters are joined at the hip. Most mono films are over-sensitive to blue light: a nicely lit scene on a sunny day will come out blank and lack detail in the sky space. A coloured filter to reduce the amount of blue light reaching the film will rectify this. A yellow filter has the weakest effect, orange is stronger and red is even more potent.
Generally, film photographers keep with yellow or orange for results that don’t look unnatural. It’s different with digital capture but filters still have their uses. Of course, use a coloured filter on a digital camera and the result will match the filter’s colour; and there’s no point having a single-coloured yellow, orange or red image. In digital cameras there are virtual filters that try to emulate the effect achieved with the filters on monochrome film. These are often in the same menu as the mono picture mode settings.
“Try” is the operative word; while they have an effect it is usually limited so don’t expect too much. The best thing is to utilise the various filters. If you prefer skies darker, dial in the orange or red filter and tweak the contrast and clarity settings, too. Fun with filters In-camera filters have no effect on raw. Regardless of the kind of image you’re shooting, get physical with actual filters to really produce files with more sky detail. Then work on them in editing.
See our guide to the best camera filters.
ND (neutral density) graduated filter
This filter type helps control sky brightness giving a better tonal balance with the foreground, which is why it is a common accessory among scenic shooters. If you had to pick one to buy or use, the 0.6 (2 stop) soft grad is a good all-rounder. The ND grad is a good choice and not dependent on light direction which is not the case with the second option, the polariser. When it comes to skies, popular belief has it that the polariser has magical powers and can transform an insipid sky into something spectacular.
Fact is, it can do a brilliant job – but not all the time. Shooting towards or away from the sun on a sunny day, a polariser will have little effect on the clouds or sky. That’s because there is less polarised light in those regions to filter out. However, turn 90° to the sun and a polariser will help you achieve fabulous skies. Next time you’re out there with the polariser, use the ‘rule of thumb’. Make a pretend gun with your hand, i.e. thumb up, forefinger out, the other fingers tucked out of the way.
Point at the sun with the forefinger and then rotate your hand at the wrist. The areas where the thumb points (90° to the sun) is where the polariser has the strongest effect. There is lens choice to consider too. If you enjoy ultra-wide lenses such as a 20mm lens on 35mm format, use a polariser – applying the rule of thumb – and you’ll find the central area of blue sky looking lovely and rich while the edges of the frame look unaffected.
Uneven polarisation does not look great and while you might be able to correct it in post, it’s best to avoid it in the first instance and use a less extreme focal length, or remove the filter.
Just beware, though, because on very bright days, at higher altitudes or in sun-drenched countries, a polarised sky can be overpowering and look unnaturally dark. It is always best to rotate the polariser and shoot when the effect is optimum for the shot.
On cloudy days, when there is not much-polarised light around, a polariser can still cut down glare and make greyness look slightly more intense. Generally, unless you’re using the polariser as an ND filter, it’s not worth fitting on a grey day.
What if I don’t have filters?
If you’re filter-less, another technique for more sky in the final result is to shoot a correctly exposed shot followed by an underexposed one (by -1 or -2 f-stops) so that the sky records with some detail. In editing software, the sky from the underexposed shot can then be used on the correctly exposed shot. Using a tripod is ideal if you want perfect registration but this technique works with shooting handheld too.
Engage the camera’s autoexposure bracketing mode to make this easier; many cameras have two-frame bracketing but use three frames if there’s no choice. You can take the first serious steps into monochrome image-making right now by turning on the computer – assuming you have editing software – and exploring your back catalogue. This has an obvious appeal when it is cold out – seeing how colour pictures you’re familiar with look in mono is time well spent.
Of course, there is no substitute for actual experience. With your camera set up to shoot monochrome, start exploring the world in shades of grey and experimenting with exposure, picture settings and filters. Learning to shoot without the realism of colour to obscure your creative vision might be alien initially – but it will come. As legendary landscape photographer Ansel Adams once put it, ‘Visualisation is the single most important factor in photography.’
However, you have one tool at your disposal that Adams didn’t have. To see how a scene looks in monochrome, just take a shot and check over the preview. It might not be an accurate depiction of how the final edited picture will look – it rarely is, in my experience! – but it’ll certainly be a big clue and will reveal the tonal relationships between the main elements of the scene.
What’s more, there is no cost and you’re learning in real-time, so just shoot away even on scenes that may have no potential. With practice and experience, you’ll soon learn how scenes will look in monochrome without having to ‘proof’ them first.
What is the best light for black and white photography, and how to get the exposure right?
Colour and black & white images can succeed in all manner of lighting conditions, and it’s always a good thing when the sun’s shining and there are some photogenic clouds. In some ways there is more tolerance in black & white and the flattest lighting can give eye-catching pictures, especially with an injection of contrast. Also, if you are confronted by a blank sky, compose to crop it out, just as you would shooting colour.
With black & white there’s no issue with the light’s colour. You get lovely, warmer or more red light at both ends of the days and it’s neutral and cool in between, which is why colour landscape photographers are busiest early and late on and relaxing in between. In black & white, you can shoot all day long and the higher contrast and harshness are powerful tools. Whether you’re taking the raw or JPEG road to monochrome, the exposure process is the same as for colour.
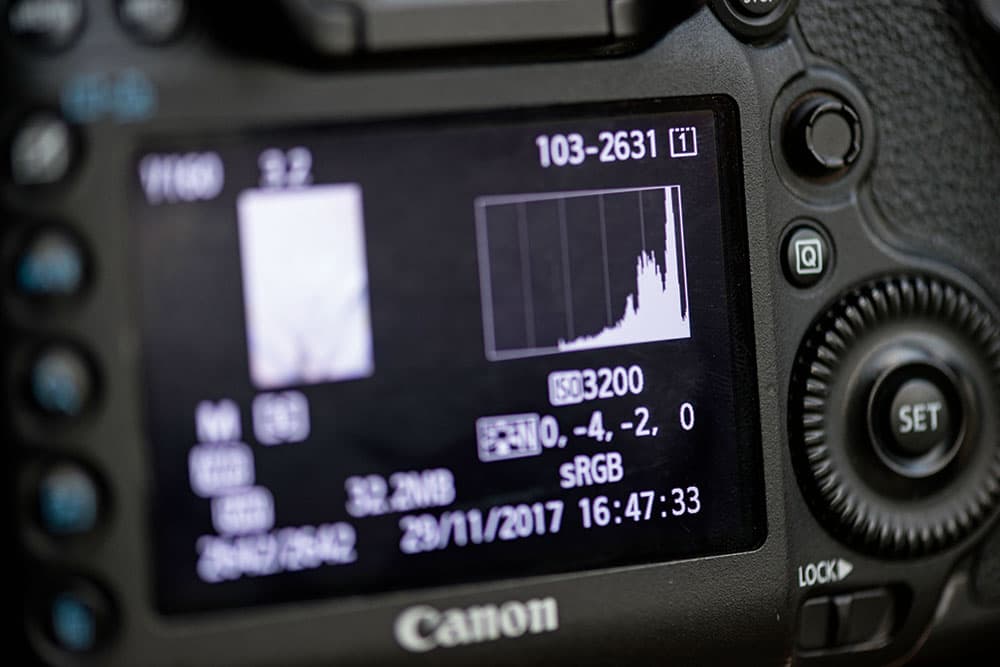
As always with JPEGs, you need to be more accurate because there is less data to work with and advanced editing is not an option. There’s no real need for special exposure techniques and certainly nothing like the Zone System which expert film users employed. Just get it right in-camera and learn how to read a histogram, the graphic that appears when you review an image in-camera.
There is no such thing as an average scene but if there were, the histogram will show some information in the shadows (left side of the histogram) and some in the highlights (right side) and there’ll be a big middle hump between the two extremes.
Unless the scene is very dark or very light, you don’t want a histogram too left or right-sided. With careful metering and using exposure compensation or exposure lock to deal with awkward lighting, try to keep the histogram mostly in the centre, and especially try to avoid overexposure. Read more on ISO, exposure and metering here.
A digital raw file has much more tolerance to underexposure compared with overexposure. Recover a grossly overexposed shot in editing and the highlights will come out veiled and slightly off-grey; it is not a good look.
There are issues with heavily underexposed shots, too. While editing might give a decent tonal range the image might suffer from artefacts or digital noise, which looks like mottling. It might seem ok but is not a good look. Some photographers like to expose so that the histogram has a right-sided bias but without the graph bleeding off to the far right. The preview image might look bright but the aim here is to get more information into the shadows so when they are lifted in editing there is less digital noise in evidence.
Editing black and white images
By now, you should have a good idea of how to shoot mono images successfully including camera set-up, file format choice, applying in-camera and lens filters and how to use the histogram. The next step – a big one – is turning on the computer and processing and fine-tuning your shots. The computer and editing software play the same role as film processing kit and the enlarger in the wet darkroom. It’s where the magic takes place. See our guide to the best programs for editing black and white images.
Out-of-camera mono JPEGs can look great and be perfectly usable but having the capability to edit the raws is the ultimate in flexibility and it’s where you make your black & whites truly sing. My workflow is based on Adobe Lightroom Classic supported by a few plug-ins. You can see how images look in black & white with a single click and check out any potential. If not, another click restores the colour preview.
How you progress the mono conversion depends on what software you have, and there are plenty of great options when it comes to working with raw files. Profiles, plug-ins, using masks and different conversion techniques in software are all fair game. Those already into black and white mono probably already have a process that works for them. Mono newbies will be on a voyage of discovery. With most software and plug-ins available as limited-time, fully functional demo versions, it’s time to trawl the world of apps.
There are packages from the likes of Adobe, Affinity, Capture One, DxO, Luminar and Topaz. Some are available on subscription, others are outright purchases and there are free/shareware options too. Most of my mono conversions are done through Silver Efex from DxO’s Nik Collection which I use as a plug-in in Adobe Lightroom. I will apply some Lightroom adjustments before taking the file into the plug-in. Usually, it’s some highlight and shadow control, plus tweaks in contrast and clarity.
You have to be careful because significant adjustments can result in halos where shadows and highlights meet. As with most plug-ins, Silver Efex has a wide range of presets and you can create your own. I often start with a preset – I like More Silver – and will try several and when I settle on one will spend time adjusting the sliders to taste. A great DxO feature is the ability to fine-tune images locally with control points that you can place in any area of the image and use as many as required.
There is much more too with the ability to add vignettes and grain, emulate films, burn in edges, tone images and add frames. It’s not perfect but it is a capable mono plug-in that I have used for years.
The latest version of the Nik Collection costs £135 for new members or £69 for Nik Collection 4 & 5 users looking to upgrade. A more detailed breakdown of all the features and creative possibilities with Silver Efex can be found here.
Learn more about how to enhance your black and white images with Silver Efex.
Don’t forget to print!
Shooting and making black & white images is all very well, and of course, you can appreciate your handiwork on screen, just as you would with your colour images. However, if you really want to marvel at your talent, get your favourite images printed. Canson, Fotospeed, Hahnemuhle and PermaJet are among the many brands offering baryta papers that have the feel and look of a traditional wet darkroom print. It would be a shame to expend all your creative energy into making mono images you’re proud of, and not to show them at their very best. See our guide to the best printers and papers.
If you decided to go all traditional and use an analogue camera read our guide on how to develop your black and white film at home here.
Six subjects less suited to black and white
Black & white doesn’t work for everything, but it’s always worth trying and has more creative potential than many assume. Here are a few subjects that are perhaps less successful in shades of grey.
Sunrises and sunsets
Every day, nature provides two spectacularly colourful events (unless it’s cloudy!) just aching to be photographed. All those intense shades of yellow, orange and red look wonderful in colour, and rather less interesting in shades of grey. That said, with nice clouds or a bold foreground, black & white sunsets can look good.
Twilight
That brief period before sunrise and after sunset when the sky can be a palette of beautiful colours is a must for the camera, but perhaps not in mono. While those gorgeous, vibrant hues or a mackerel sky can look absolutely stunning in colour, they are much less effective in black & white. A bold foreground in silhouette might work, though.
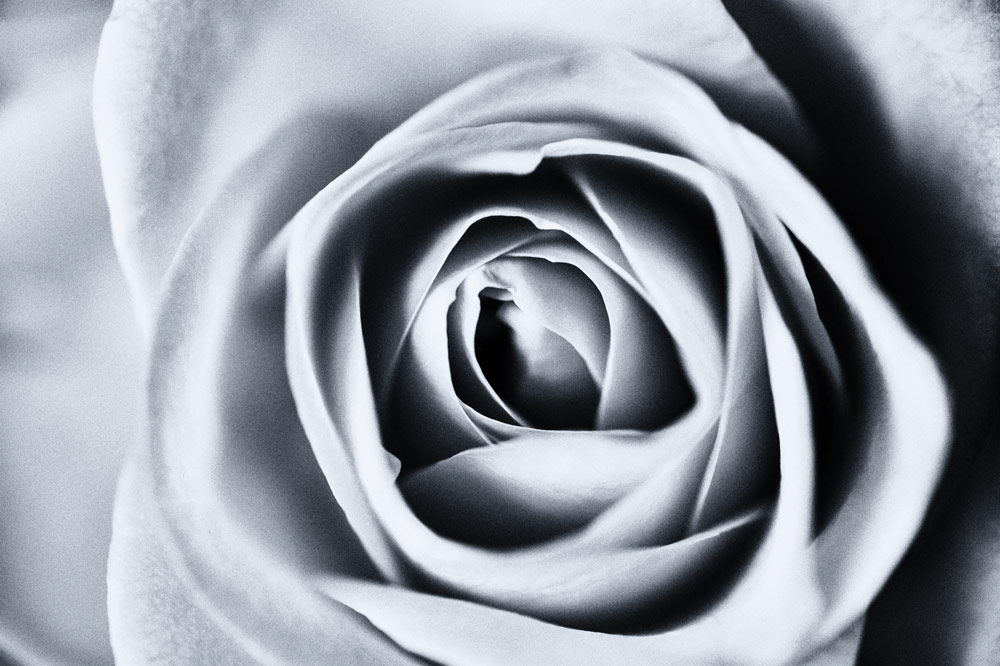
Flowers
Colourful blooms photographed in monochrome might seem a wasted opportunity, and often it is, but check out Robert Mapplethorpe’s images of irises and see how it can be done. His fine art images were created in the studio and that’s probably why they work. Pictures taken in the back garden might not have the same resonance.
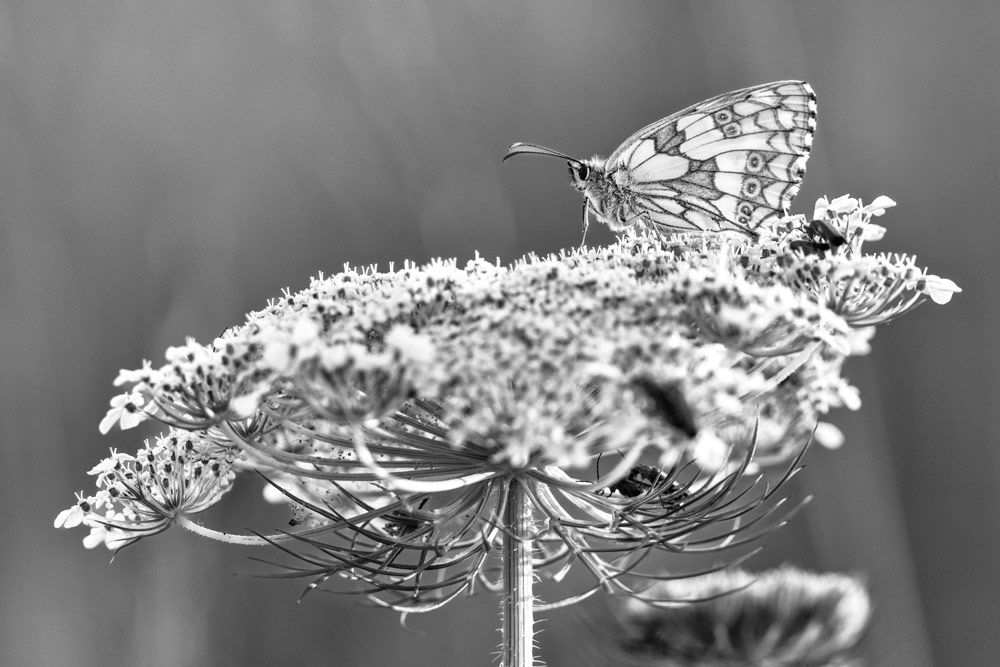
Butterflies
Many nature subjects work in black & white, but butterflies don’t. A painted lady, a swallowtail or a marbled white as in this shot do not look great in shades of grey. They are such beautiful insects that they deserve the full-colour treatment. However, the combination of a clean background, good lighting and a nice pose can succeed.
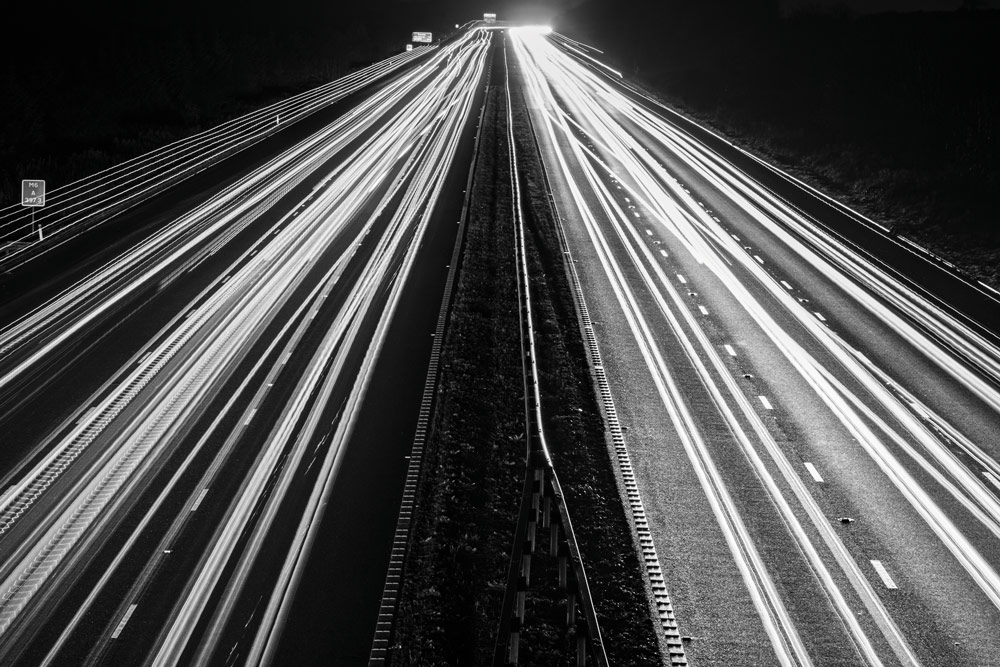
Light trails
A popular and fun technique especially at this time of year. A long exposure using a tripod-mounted camera of a busy road or traffic junction can give awesome results – in colour! Red tail lights, blinking orange turn indicators and the warmth of artificial light, often combine to give magical and very vibrant results.
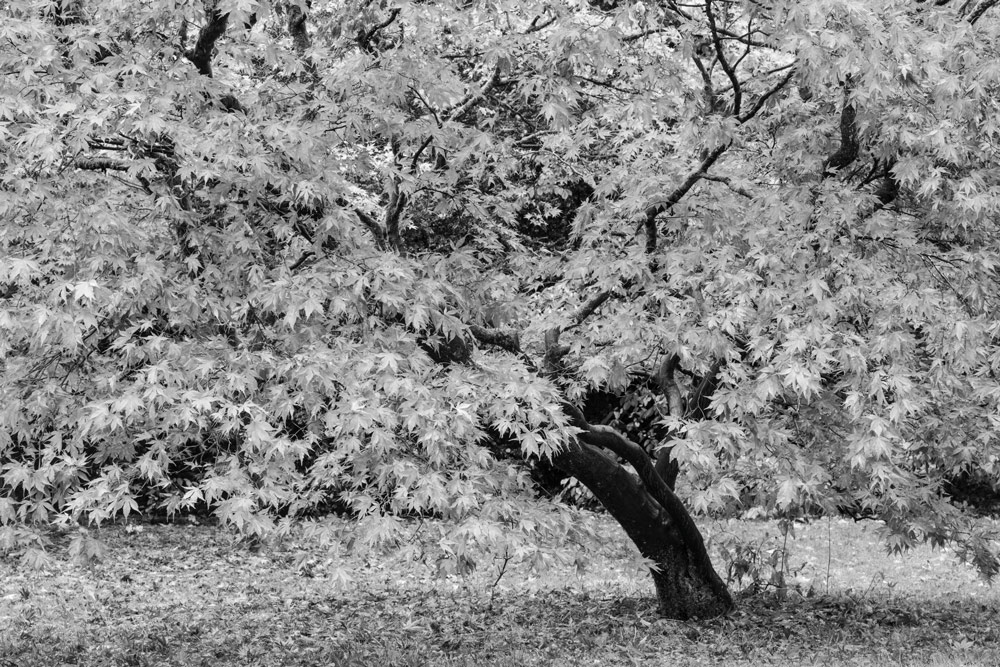
Autumn colour
There are some subjects that simply cry out for colour and the monochrome route is almost inevitably less captivating. Garden scenes, fireworks and autumn, to name but three. If you want to make the most of vibrant acers this autumn, colour is the way to go, but if you have the raws there’s time to explore the creative options retrospectively.
Quick black & white photography tips:
- Choose your subject wisely and try “seeing” in black and white. Setting your camera to monochrome mode will help.
- Keep an eye on the direction and intensity of light
- Look out for interesting shapes, contrasts and textures
Ready to take the next step with your black and white photography?
Learn how to put together a successful portfolio or try entering your images to photography competitions.
Further reading
- Complete guide to fine-art black and white photography
- Black and white editing with Snapseed on your smartphone
Follow AP on Facebook, Twitter, Instagram, YouTube and TikTok.


