Make your best-ever mono conversions. We show you the best photo editing software for black & white editing, using Adobe Photoshop, DxO Film Pack and Nik Silver Efex
There are some excellent image-editing software packages for converting images to black & white. Below, we’ll explore the key features of three of the best black & white editors: Adobe Photoshop, then DxO FilmPack 6 and Nik Silver Efex (formerly Silver Efex Pro).
Don’t miss our complete guide to black and white photography too, and how to take better black and white building shots
The best software for black & white all-rounder: Adobe Photoshop
As the best all-round image-editor, Photoshop has a depth of features that no other program can match. The software is part of Adobe’s Creative Cloud, a subscription-based service. The Photography package costs from $9.98 / £9.98 a month or $119.88 / £119.08 annually and for that you get Photoshop, Lightroom and 20GB of cloud storage. For 1TB cloud storage the price is $19.99 / £19.97 monthly and $239.88 / £238.47 annually.
For black & white conversions alone there are at least six methods (Camera Raw B&W Panel, Black and White Layer, Desaturate command, Gradient Map Adjustment, Channel Mixer, and LAB Color technique). But this raft of options doesn’t necessarily translate to superior black & white conversions.
Where Photoshop really brings benefit to the black & white photographer is in the unique degree of control it gives over the final image. This is down to two main things. Firstly, Photoshop’s brush-based tools and selection features are the best there is, so local adjustments that let you enhance different areas of the image can be made with precision.
Whether you want to lighten your subject, darken their surroundings or add contrast to parts of the frame, these are easily done.
Secondly, every edit you make can be carried out on a separate Photoshop layer or Adjustment Layer. This non-destructive workflow not only lets you tone things down or increase the strength of an effect but also gives you the freedom to experiment and take your image in any number of directions.
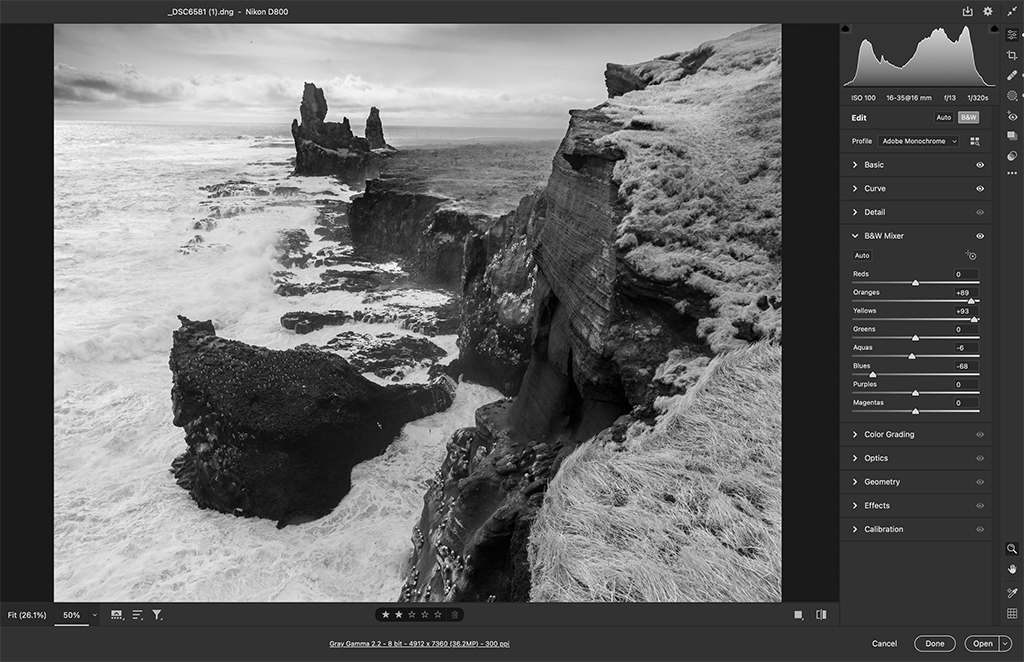
Fine-tune with B&W Mixer panel
Even though we’re removing the colour, it can still play a vital role in the look of our monochrome image. The Black and White Mixer panel has eight sliders that let you control the brightness of different colour ranges. We can use these to, for example, darken down the blues to make a sky more dramatic, or lift reds and oranges to make skin tones brighter.
You can use the sliders, but it’s easier to grab the target tool and then drag left/right over parts of the image. Not only is this more intuitive, it also allows you to affect several sliders at once, which leads to more-natural-looking shifts in brightness.
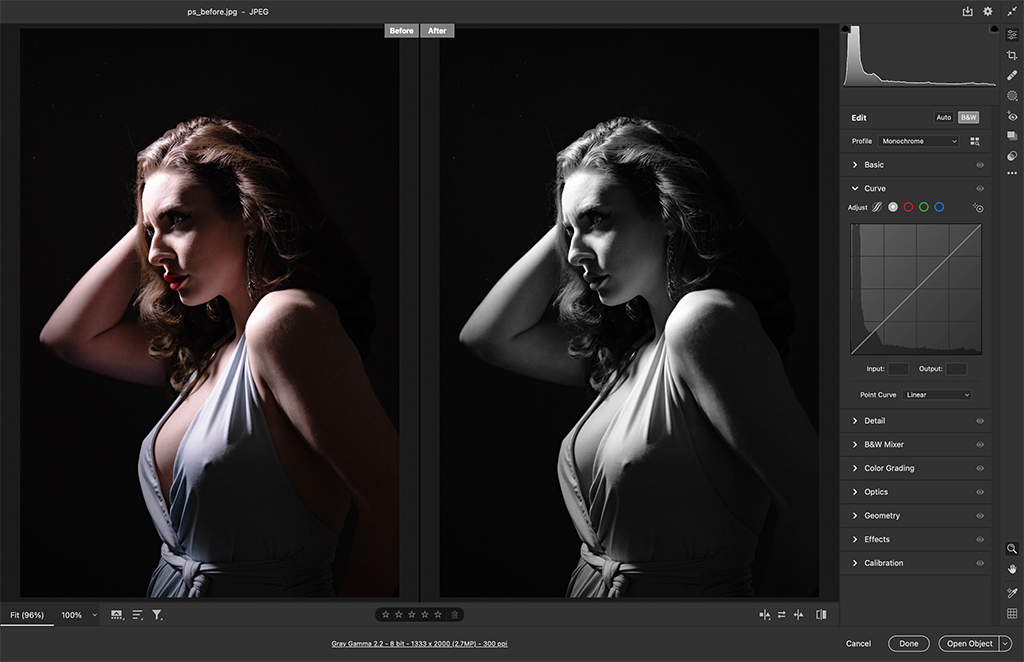
How to convert images to black and white using Photoshop
1. Open in Camera Raw
Photoshop’s Camera Raw and Lightroom both offer identical black & white tools. These are the best tools for converting to mono in Photoshop. Open the image into Camera Raw then click the B&W button in the Basic Panel to begin the conversion process.
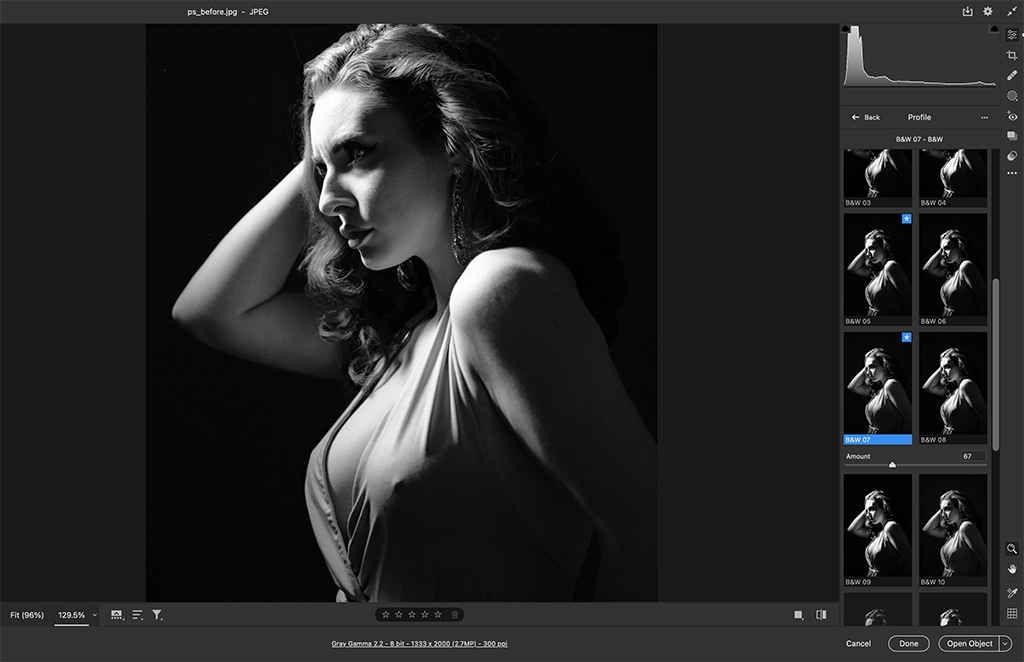
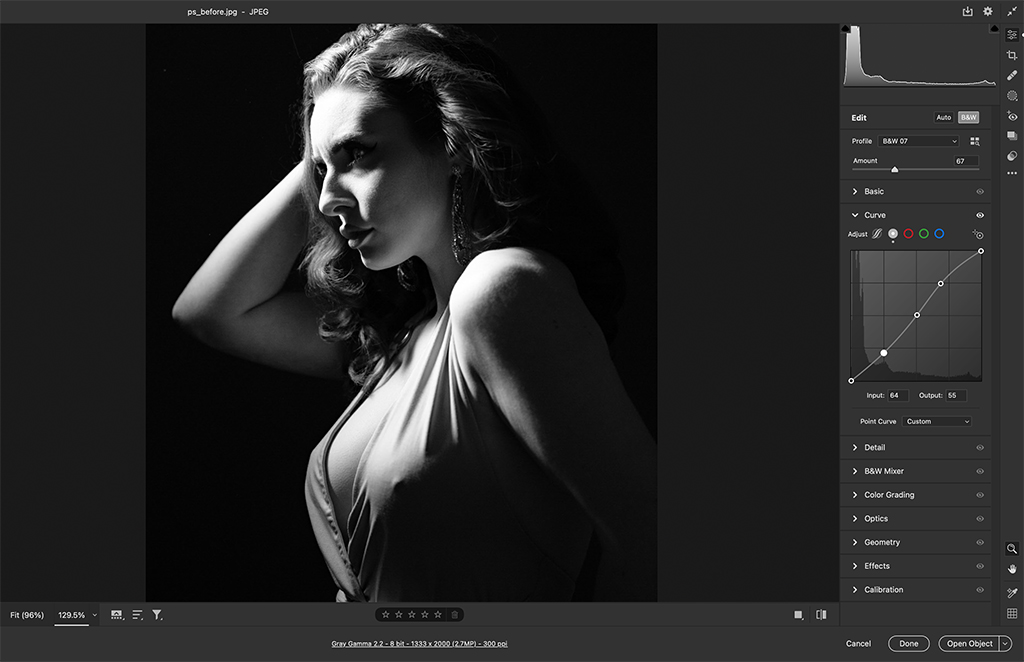
2. Experiment with profiles
If you want quick and easy black & white treatments then try using Profiles. These one-click effects can transform your image in seconds, and also make for useful starting points for further edits. Go to the Profile Browser in Camera Raw/Lightroom and try out the range of black & white profiles.
3. Boost contrast with Curves
Go to the Tone Curve panel and plot three points along the diagonal curve line then drag them to make a shallow S-shape. The top point controls the highlights, the bottom point sets the depth of the shadows, and the midpoint controls the midtone brightness. The more pronounced the S-shape, the greater the contrast.
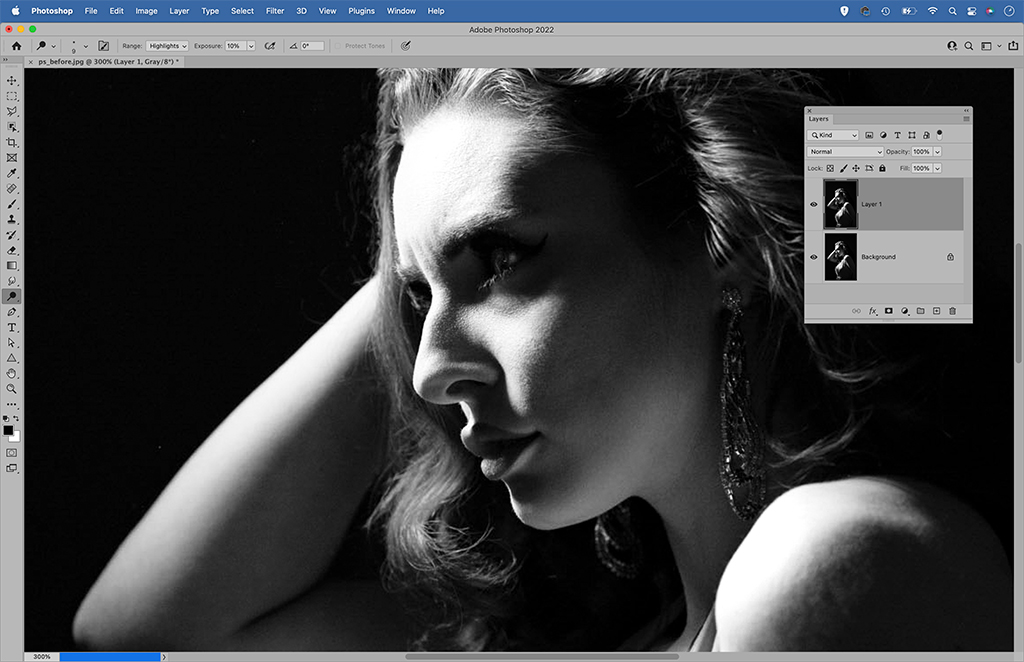
4. Burn the shadows
Open the image into Photoshop for dodging and burning, then duplicate your layer with Cmd/Ctrl+J. The Dodge and Burn tools let you lighten or darken tones. We begin here with the burn tool. First we set the Range to Shadows or Midtones and strength to 20%, then paint to darken areas of the image.
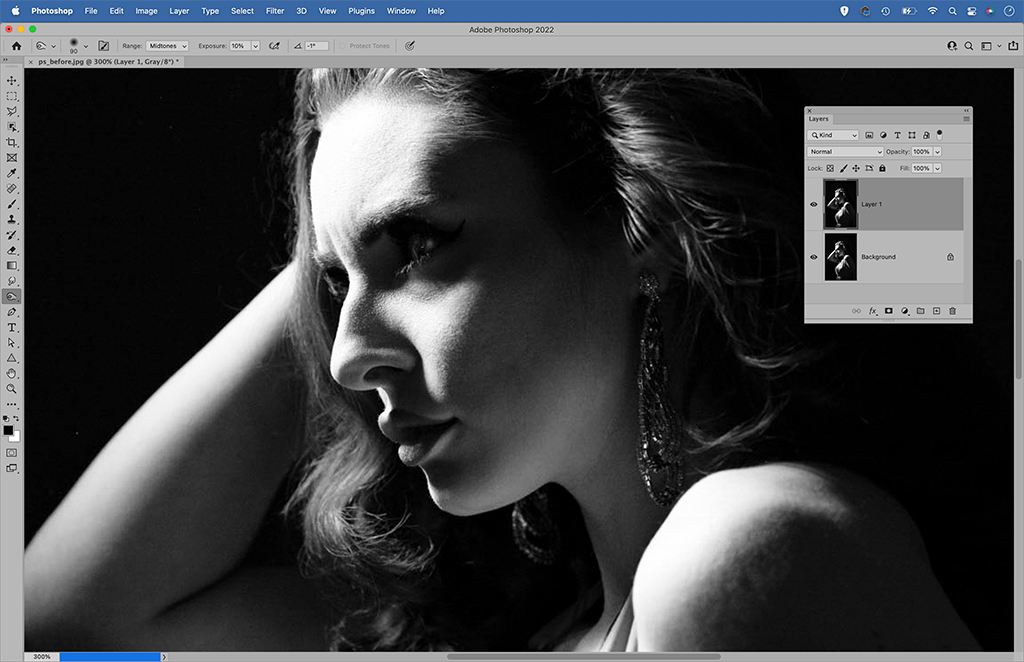
5. Dodge the highlights
Next we can switch to the Dodge tool (or hold Alt to temporarily switch) and paint to lighten areas. The Dodge tool works best when the range is set to Midtones or Highlights. Once done, we can check our dodging and burning by toggling the layer on and off, or lower layer opacity to tone it down if we need to.
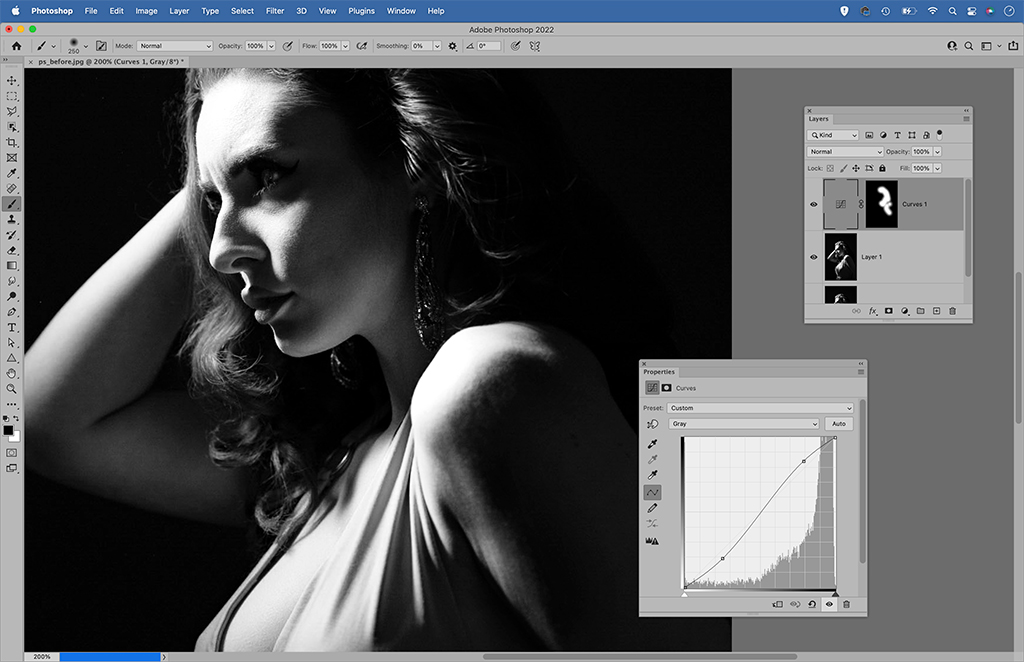
6. Add local contrast
Adjustment Layers are ideal for making local adjustments. Here we add a Curves layer and plot an S-shaped curve to boost contrast just as in step 3, but then we hit Cmd/Ctrl+I to invert the mask on the curves layer and hide the effect. Now we can paint with white over the image to reveal local contrast changes in the areas that need it.
Recreate a classic black & white film look: DxO FilmPack 6
It’s sometimes said that digital photography struggles to capture the ‘feel’ of black & white film. While it might be impossible to recreate the feeling of being in a darkroom, the actual look of black & white film isn’t unattainable, and there isn’t some sort of inherent flaw in the digital image that prevents you from making great black & white photos.
The ‘feel’ of black & white film can be broken down into distinct characteristics, including contrast, tone, grain, and dynamic range. These characteristics can be analysed, quantified and recreated in digital images. This is exactly what happens in DxO FilmPack 6.
FilmPack 6 is a film emulator that gives you 221 looks to play with. Among the 65 black & white settings there are toned effects and the films on offer are classics such as Agfa APX 100, Kodak Tri-X 400, Fujifilm Neopan 400 and 1600, and Ilford FP4 Plus.
DxO has a deserved reputation for image quality – its PhotoLab application offers unrivalled automatic noise-correcting and lens-correcting tools – and this same attention to detail is carried through to FilmPack. Each of the film effects has been carefully calibrated through in-depth analysis and lab tests of the film stocks on which they are based, with particular attention paid to the grain, dynamic range and contrast of each classic film.
FilmPack costs $129 / £129, and it works as either a standalone app or as a plug-in for Lightroom, Photoshop, Capture One or DxO’s own PhotoLab.
Time Machine titbits
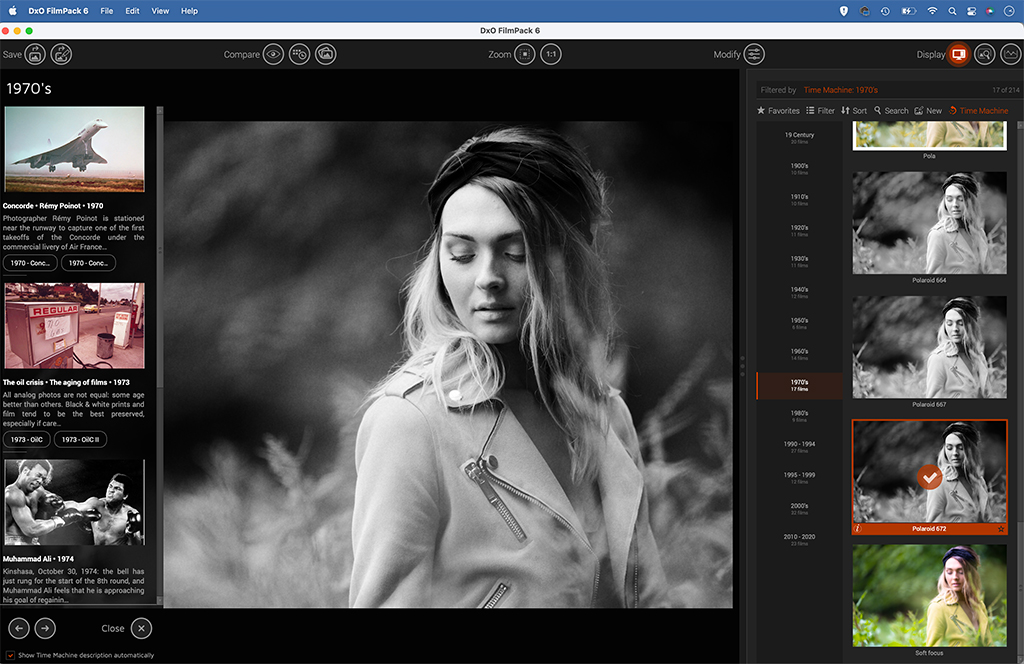
In days gone by black & white was the only option, but these days we make a conscious choice to remove the colour. Why do we make that choice? Perhaps because it connects the image to a rich photographic heritage. FilmPack 6 gives us an intriguing look into this heritage with its unusual Time Machine feature.
Time Machine lets you filter the different film stocks by the decade in which they were first released, so you can, for example, look at films from the 1950s such as Ilford HPS 800, or the 1970s like Polaroid 672.
Each decade also brings up a set of classic photos – of public figures, street scenes, famous portraits and landscapes – and offers insights into how the image was created, its place in history and the film used to capture it.
How to convert images to black and white Using DxO FilmPack 6
1. Choose a preset
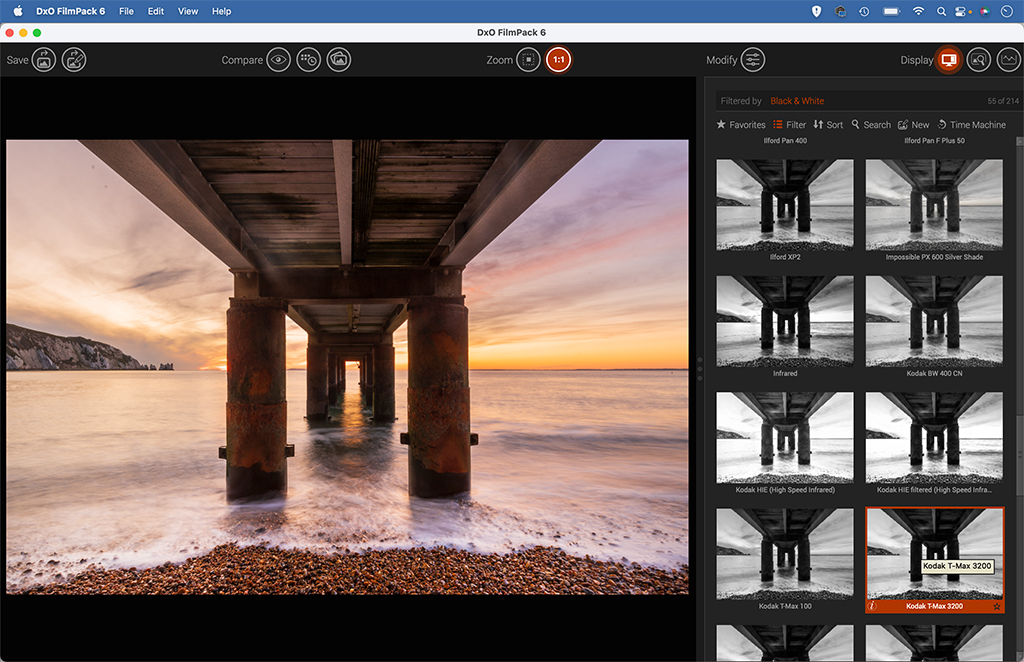
Open FilmPack 6 (or if using Photoshop go to Filter > DxO > FilmPack 6) then begin by choosing a film stock from the list on the right. You can filter the 84 films on offer to view the various black & white choices. As well as film stocks, you’ll also find several image effects such as ‘old postcard’ and ‘new selenium’.
2. Find out about the film
When you choose a particular film stock an info box will pop up that explains when the film was first produced, when (or if) it was discontinued and what the characteristics of the film are. We’ve chosen the classic Kodak Tri-X 400 here, used ‘by the great reporters of the 1960s and 1970s’.

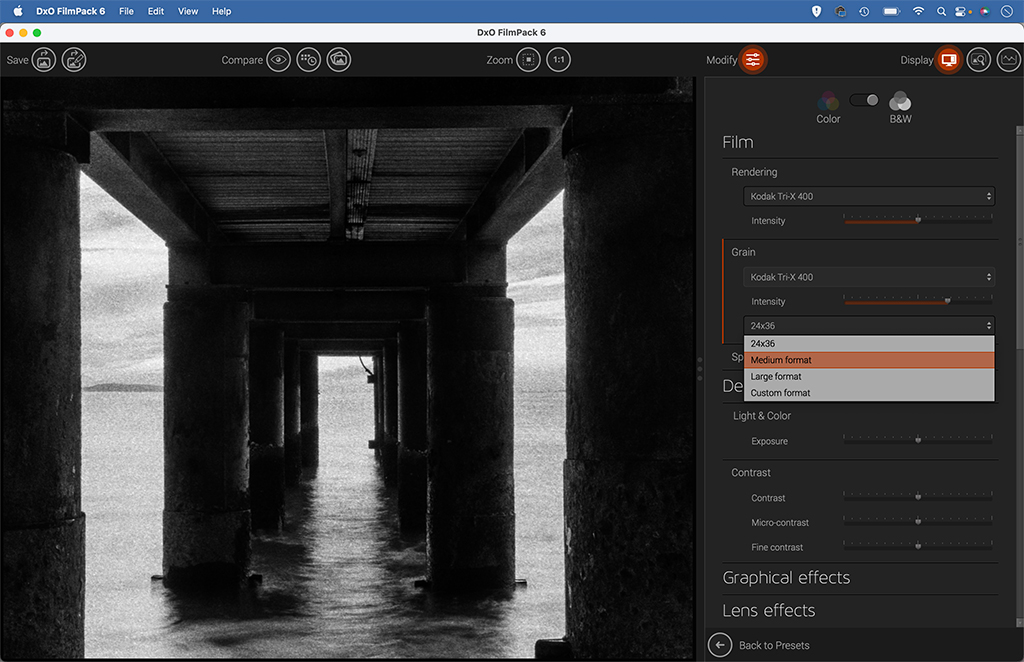
3. Fine-tune the grain
You can fine-tune the characteristics of your chosen film stock in the Modify workspace. A film intensity slider lets you tweak the overall strength of the effect, and grain settings below allow you to add more or less, or choose between different formats like 35mm, medium or large format – each of which has its own specific grain.
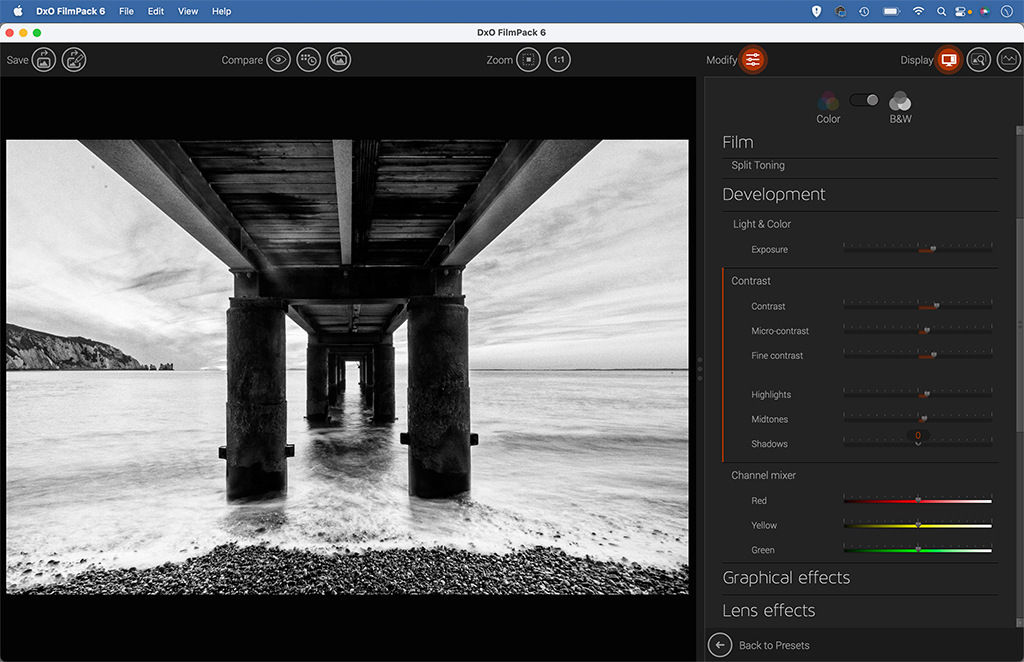
4. Control micro contrast
A set of tonal sliders let you adjust the exposure and add more or less contrast. The Micro Contrast and Fine Contrast sliders can be useful for defining details like the clouds here. Heavy use of these can detract from the overall feel of the film stock and result in an image that looks over-processed, so use a light touch.
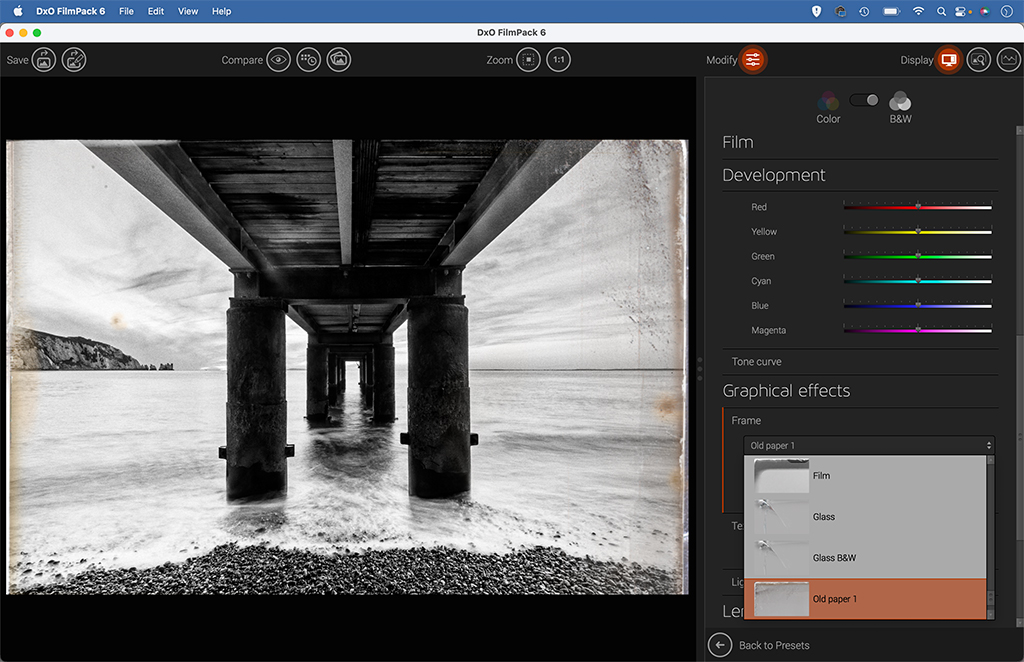
5. Try a border
If you like you can finish off your image with a border effect. There are 35 to choose from, ranging from simple black borders or white keylines to atmospheric old glass or paper edges. These can be great if you want to complement a classic film stock with a vintage effect.
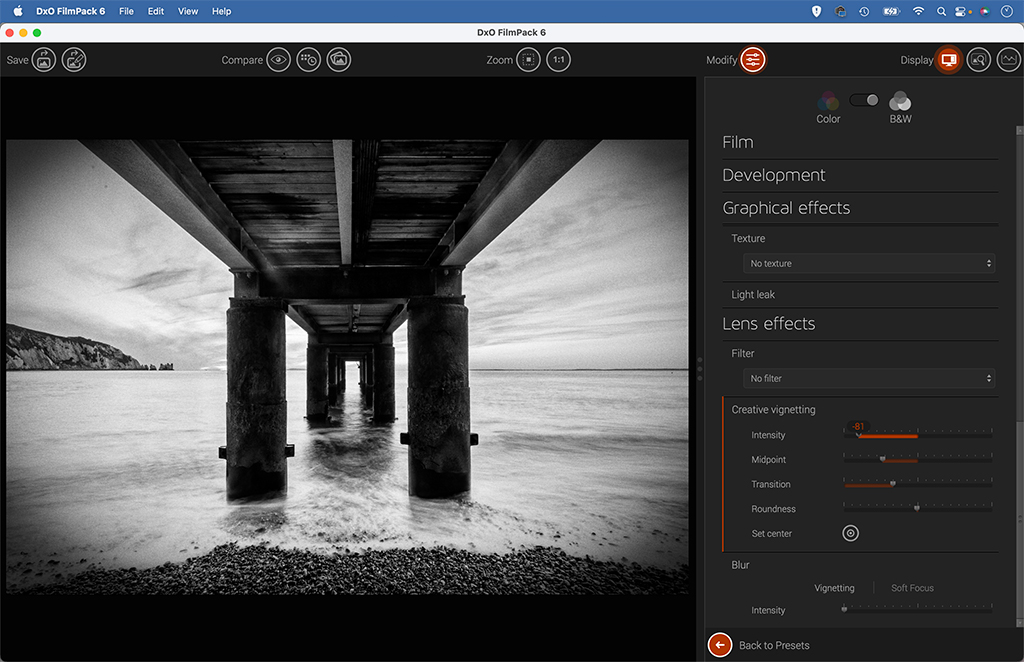
6. Add a vignette
The vignette controls in FilmPack 6 are excellent. We can add a vignette to darken down the corners of the frame (which works especially well for symmetrical compositions like this one here) then adjust the centre point and sizing. There’s also an option to blur the corners to mimic the edge softness of old lenses.
How to convert to black & white like a pro: Silver Efex
Silver Efex Pro (now known as Silver Efex) has long been the tool of choice for monochrome lovers, and with good reason. If you’re after a program that’s dedicated entirely to black & white photography, it’s the best you can get. You get a wide array of presets, brilliant contrast control, a variety of film stock presets and the ability to make precise local adjustments with Silver Efex’s intuitive control point system.
As such there’s plenty of depth to this black & white plug-in. But more than this, the best thing about Silver Efex is how it just seems to come up with the goods time and again.
Whenever we edit our images there are inevitably umpteen decisions and judgements we need to make – should this slider be set to 10 or 20? Should I boost the contrast a touch? Should I add more grain? And so on.
With Silver Efex these judgement calls just seem to be a little easier than with other editors. Perhaps it’s the strength of the presets, which often take your image a long way straight off the bat.
Having a solid starting point ensures that, while you might go on to try out different effects, tonal settings, colour tinting and so on, the end results are almost always pleasing.

Silver Efex comes as part of the Nik Collection by DxO, a suite of eight plug-ins with 250 presets so you can also make use of Analog Efex for vintage treatments, HDR Efex for high dynamic range images and Perspective Efex for perspective corrections. The set costs $149 / £135 and there’s a free 30-day trial.
The power of vignettes
When editing monochrome images we can push our edits further than we perhaps would with colour photos. They can withstand heavier lightening and darkening without looking too over-processed. Of course, this is only helpful if we have a clear idea of the best places to lighten and darken.
The viewer’s eye is naturally drawn to the lightest parts of an image first, and away from darker areas. This is why one of the simplest monochrome local adjustments – a vignette – is so effective, as by darkening the corners of the frame we can draw the eye into the image.
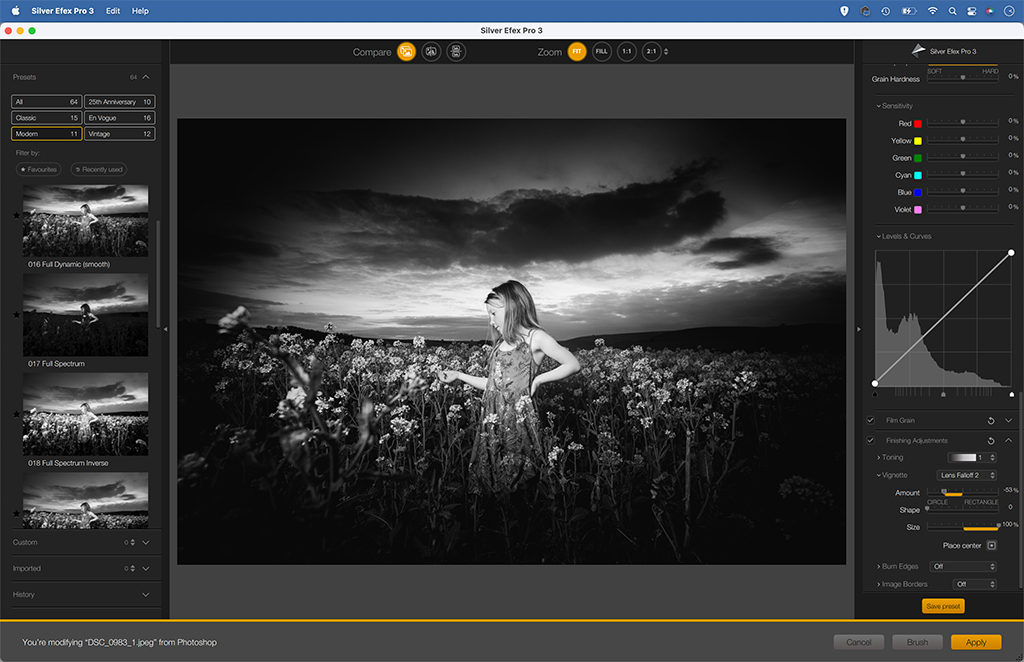
Silver Efex offers a handy set of vignette presets, such as the Lens Falloff 2 effect used here. We can open up the settings to further fine-tune the brightness and spread of our vignettes.
Using Silver Efex
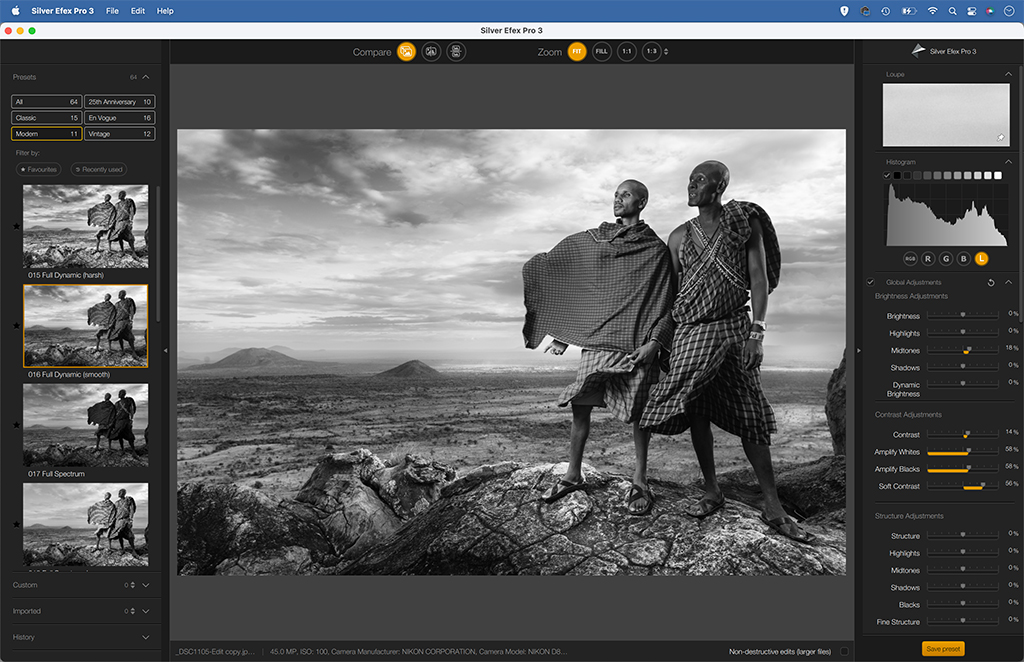
1. Try a preset
Drag an image into Silver Efex to begin editing, or if in Photoshop you can open via Filter>Nik Collection>Silver Efex. The simplest place to begin is the presets panel at top left. This gives you a range of effects to try out, from classic black & white treatments to old analogue processes and vintage colour tints.
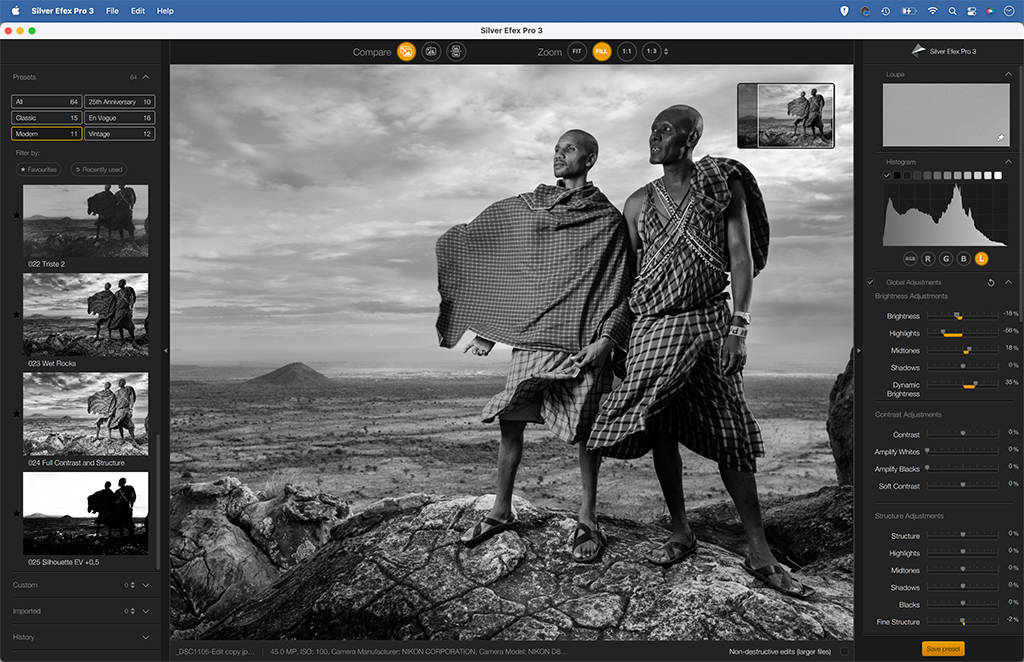
2. Adjust dynamic brightness
We chose the Full Dynamic (smooth) preset here in the ‘Modern’ set. Next we can use the sliders to the right to fine-tune the look of our mono conversion. The Global Adjustments panel lets us make typical changes to brightness, highlight detail and so on. The Dynamic Brightness slider here gives us a welcome boost.
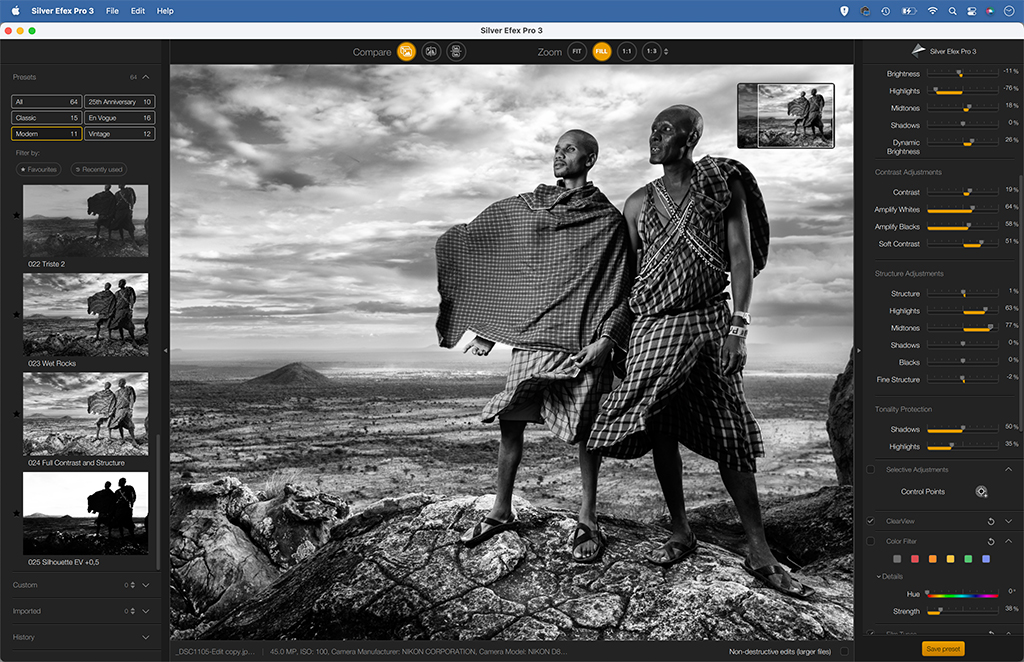
3. Boost the structure
The contrast and structure controls in Silver Efex are second to none. Increasing Highlights Structure here lets us pull detail out of the clouds without making them look over-processed, while the Midtone structure slider lets us add contrast to the midtones, which gives the image a bit of extra crunch.
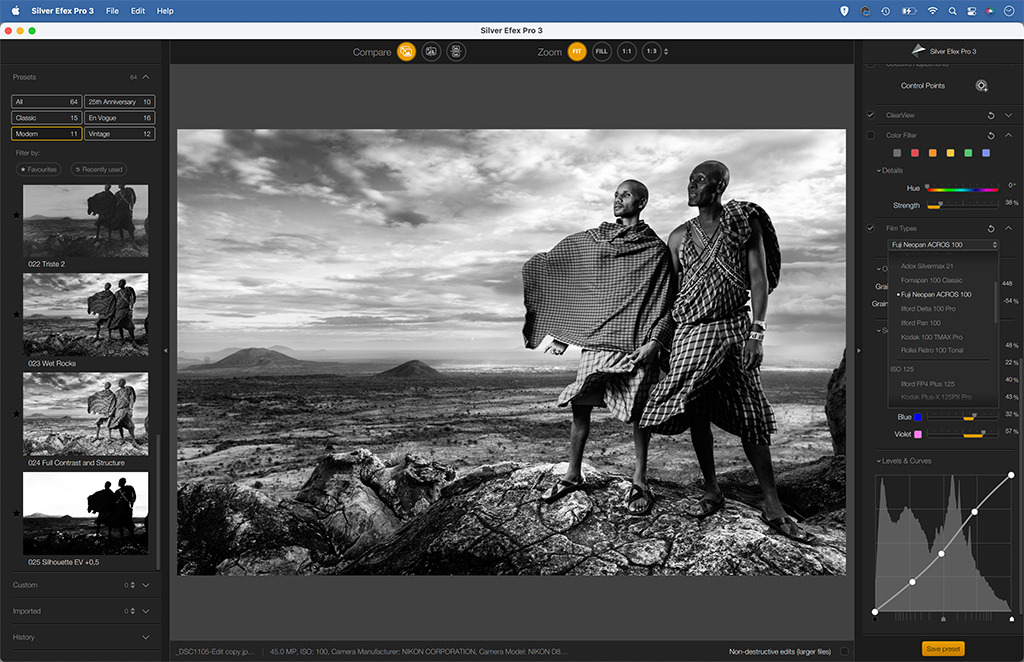
4. Try the film stocks
Scroll down the list of settings on the right and you’ll find a set of film stock presets. Based on classic film stocks similar to those in FilmPack 6 (DxO produces both FilmPack and Silver Efex), these film effects apply differing amounts of grain, contrast and dynamic range to your black & white image.
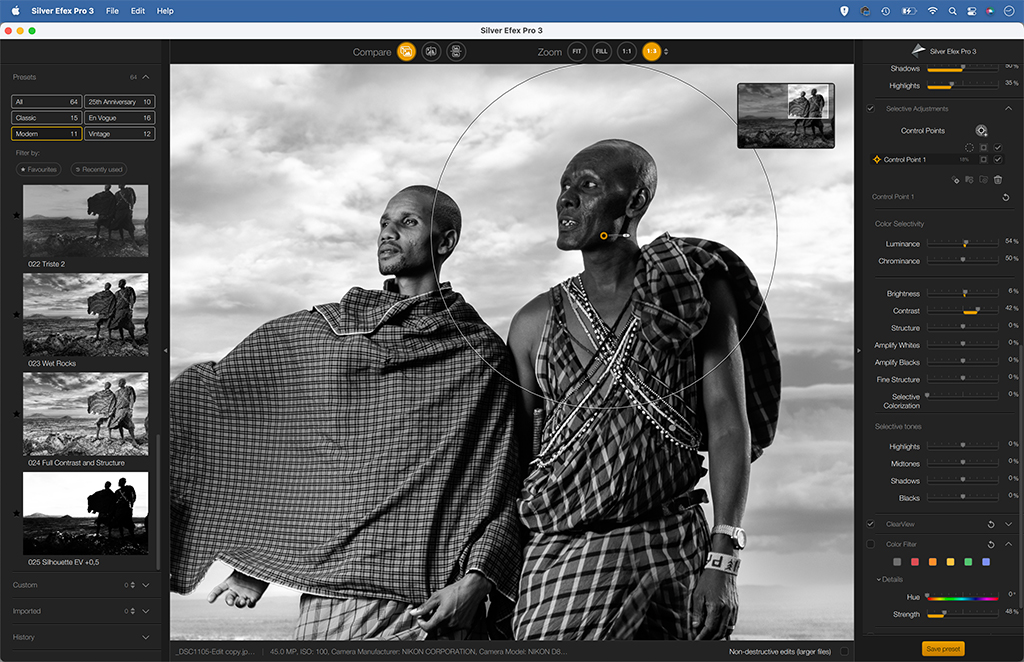
5. Use Control Points
The Control Points feature lets you make local adjustments to areas of the image. Unlike brush-based adjustments, these work by automatically locking on to details within an area defined by a simple circle. We can then go on to alter the tones using the sliders on the right. Here it lets us brighten the figure.
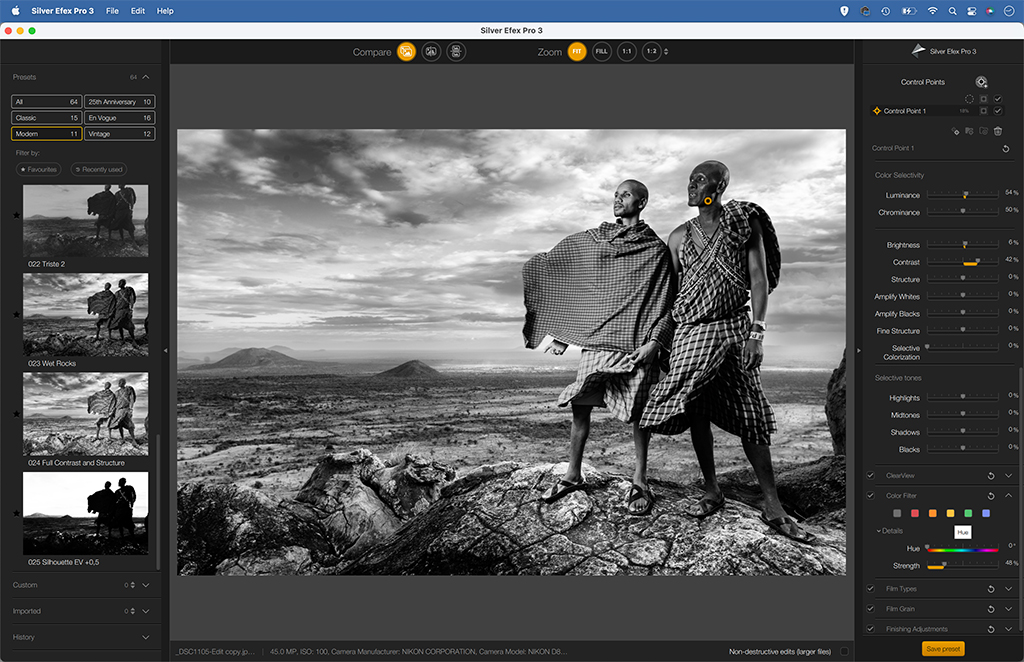
6. Try colour filters
As anyone who has used lens-mounted colour filters with black & white film will know, different colours will filter out different wavelengths of light, resulting in brighter or darker colours. The Color Filter options in Silver Efex let you mimic this effect. Here the red filter lifts the subject’s clothes.
Further reading:
How to convert images to black and white in Lightroom
Get the black and white film look – with digital cameras
Photo editing masterclass: Converting an image to black and white