
Claire Gillo turns to monochrome, sharing her top tips for creating fabulous black and white fine art photography.
What is fine art black and white photography?
Fine art black and white photography is your artistic impression of a subject or a scene. The subject matter can be of anything when shooting in this genre. However, the end result is often more abstract and/or artistic: not commercial in any sense. The only rule for shooting a fine art black and white image is that it is shot or processed with your artistic impression.
Learn more about what fine art photography is here.
Subjects and concepts that work for fine art black and white photography
Fine art black and white landscapes
There are many different subjects you can explore, and a good place for us to start is with the landscape genre. When shooting landscapes in black and white think less about the golden hour; beautiful sunrises and sunsets, and more about the shape and form of the land. Look for scenes that create interesting patterns or are atmospheric and alternative. Think about how the light is going to shape an image and whether you want flat light or strong sunlight.
Misty scenes, grey skies and drizzly rain work great if you want to take a minimalistic approach. If you’re after bold and interesting shadows then you’ll want to shoot in strong sunlight instead. Think about how the shadows will appear in the scene and how they contrast against the light.
Fine art black and white portraits
Portraiture is another medium that can be explored through a monochromatic fine art approach and there are many ways you can capture amazing images. Again think less about the usual rules – for example making sure the eyes are sharp. Instead, think more about the concept or emotion behind your portrait. Using a slow shutter speed and showing movement or capturing a feeling in a creative way will get you on the right track.
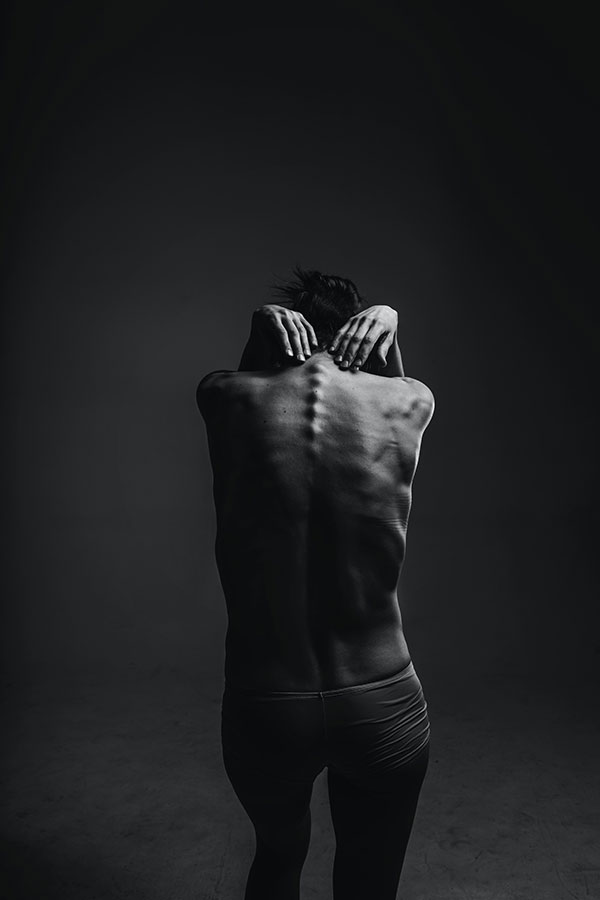
Fine art black and white nude and boudoir photography
Following on from portraiture, fine art nude or the study of the human body is another way to use the monochrome medium. Again it’s less about getting technically perfect images and more about conveying a concept or an emotion so the image raises a question. This style of photography can be shot on location (carefully planned and in an appropriate place) or in the studio. If you are going to hire a model make sure you discuss pre-shoot your ideas and ensure they are completely happy with the set-up and plan.
If you’re interested in doing this type of photography, check out this guide to lighting for Boudoir Photography and setting up a studio.
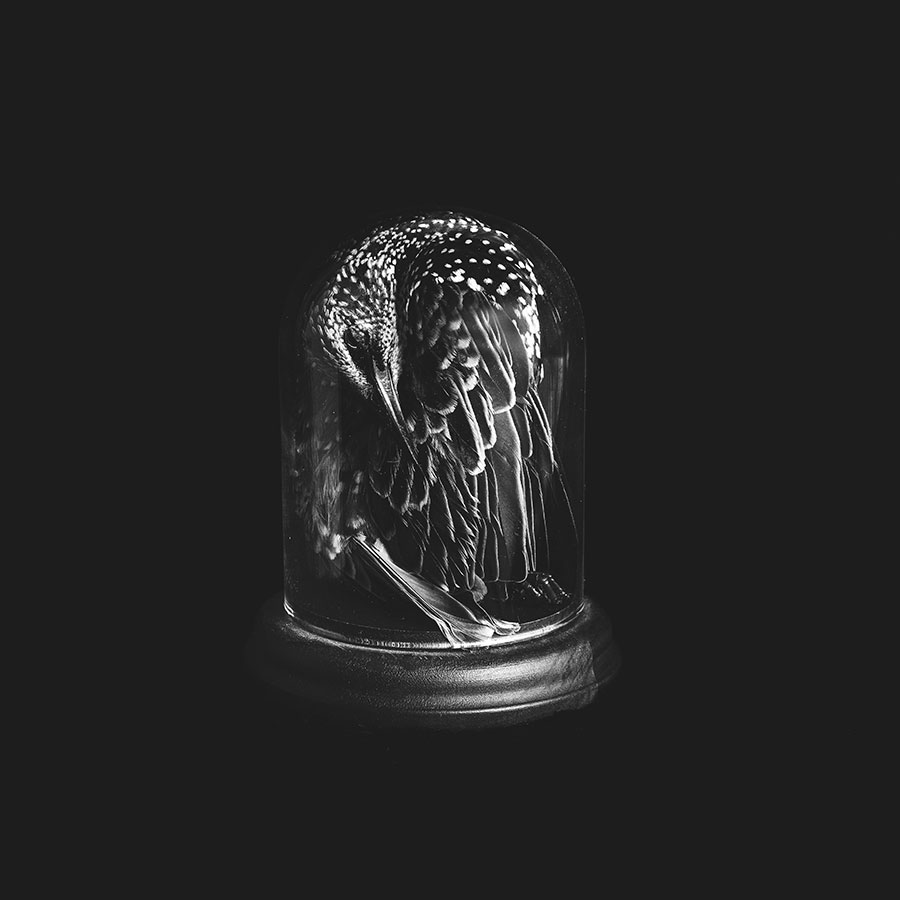
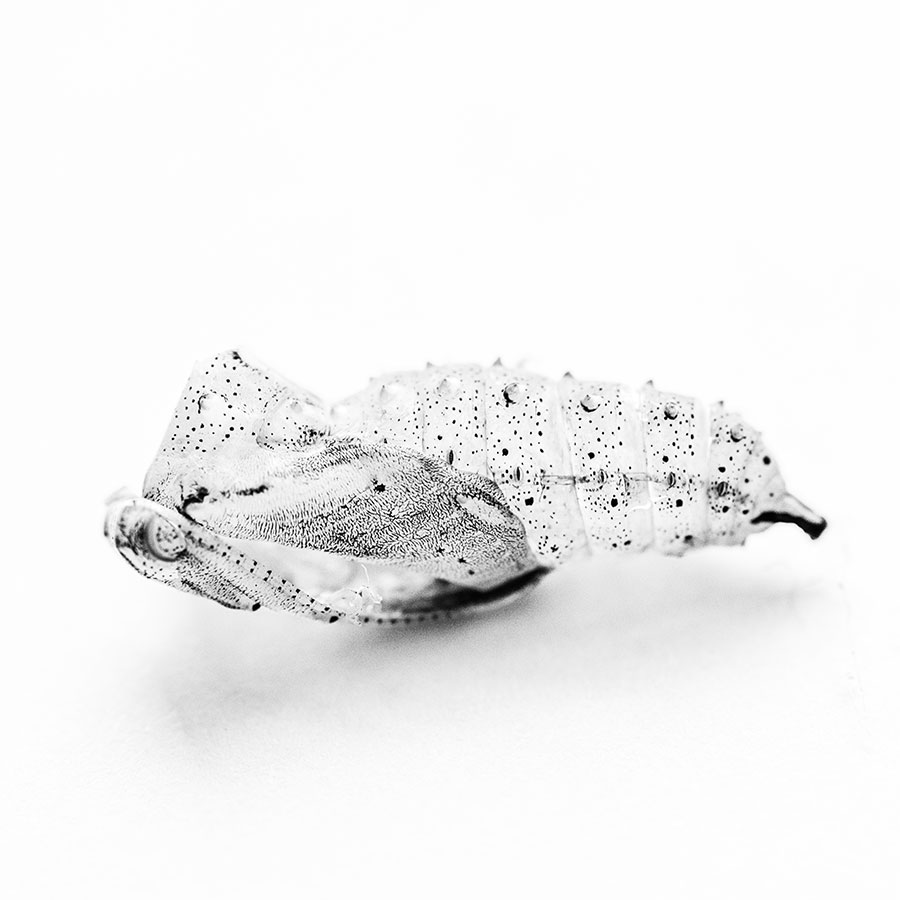
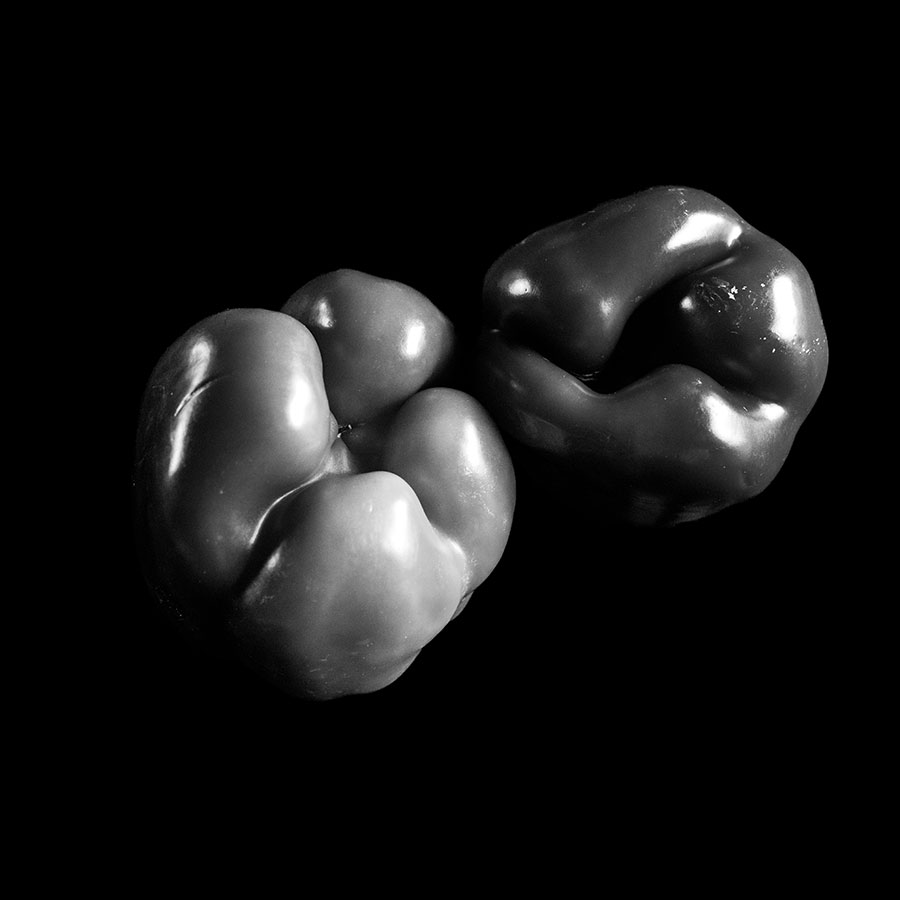
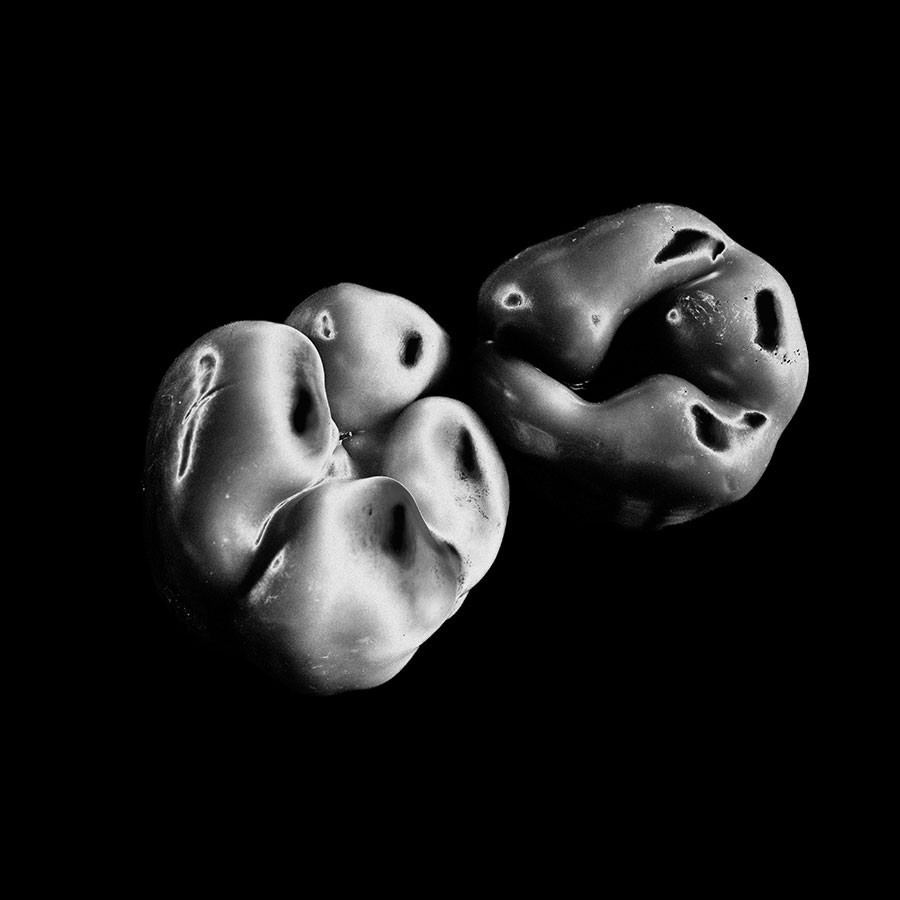
Fine art black and white still life photography
If you enjoy shooting inanimate objects then still life photography is another way to explore black and white fine art photography. With still life photography you have full control and can decide where to place your subject and how to light it best. There are some safe subjects that will work well in a still life scenario such as food and flowers. But these have been photographed many times, so think about how you could be original.
We’ve covered a few of the more popular genres above, yet there are no limits in this field: your black and white fine art image can be of whatever you want. Fine art photography is more about being an artistic expression from yourself so don’t worry about fitting it into a genre or category.
What’s the best type of light for fine art black and white photography?
You can use natural or artificial light to shoot your fine art images and each have their advantages and disadvantages. Natural light is great to work with but you are at the mercy of external conditions. Waiting for ideal conditions can be frustrating but worth it in the end.
With artificial light you are in complete control and do not have to worry about external factors. However, if you are out on location you will have to lug your lights around with you. Also, lighting can be a complex subject that requires much skill. Those just starting out may feel out of their depth using artificial light, and natural light will be an easier starting point.
When it comes to lighting your fine art images you want to take into account the importance of shadow and highlight detail. Do you want your subject to be silhouetted and the image have a high contrast or do you want to see the shadow detail and have a flatter result? Lots of this can be played around with at the editing stage too, which we will move onto soon!
What about B&W filters?
With film photography it was common for photographers to use filters as part of their black and white kit however this has greatly changed in the last few years. Some digital black and white shooters still like to use them, however as image editing software has become so good now they are less of a necessity and more optional.
Most cameras come with built in filters so if you want to experiment with this area then this is a great place to start. For example, to increase the contrast for a more dramatic effect then apply a red filter; or if you’re shooting lots of foliage then a green filter will work best. Set the picture style on your camera to monochrome as well.
We would recommend that you shoot in Raw so although the monochrome and filter effect won’t actually make a difference to your Raw file, it means you can preview the effect as you shoot on your LCD screen and see how it’s working. If you’re shooting in Jpeg as well then the effect will be directly processed onto these files.
What camera should I use?
As we’ve already covered black and white fine art photography has no boundaries. So you can use whatever camera you like! Although the majority of us will opt for our digital cameras (as this is what we have available and is easiest) black and white fine art photography also works well in other mediums. For example if you have a film camera (35mm, medium format or large format) dust it off buy a roll of black and white film and shoot your subject the old fashioned way. Or you could experiment further using antiquated photographic techniques.
Read our buyers advice and reviews for the best digital camera options and our essential guide for shooting film.
Photograms are a brilliant way of creating a fine art result. Simply lay objects over photographic paper and expose the paper to light. You’ll then need to process your image by using chemicals (developer, stop and fixer). You’ll need to do all this under a safe red light, and in a dark space where no natural light can seep through. Another antiquated alternative is to build yourself a pinhole camera.
How do I edit my black and white fine art images?
If you’ve shot your images digitally when converting your image to black and white at the editing stage the best advice we can give is to use the colour channel sliders when making adjustments. For example if you have a lot of red in your image see what happens when you push the red slider up and down. By going through each colour channel individually you’ll be able to tweak the end result to a more refined level. You’ll also want to play around with the Highlight, Shadow, Black and White sliders as well as the Contrast, Clarity and Exposure settings.
Read our guide on how to convert your images to black and white in lightroom.
Solarizing technique
A fun and quick technique to add to your still life fine art images is a solarization effect. This digital work around imitates the darkroom effect that was made famous by artists such as Man Ray and Lee Miller. They would quickly expose their developing prints to the light. In turn this wholly or partly reverses the developing process and what you’re left with is a slight silvery tone over your subject.
To solarize your images digitally in Photoshop add an Invert adjustment layer, then a Curves adjustment layer. On the Curves palette click on the pencil icon. Starting in the bottom left hand corner draw a diagonal line up to the top middle of the graph. Then carry on from that point and go down to the bottom right hand corner.
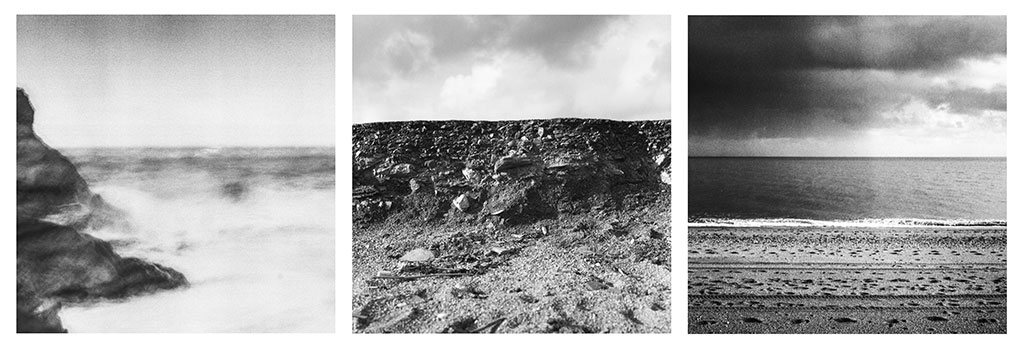
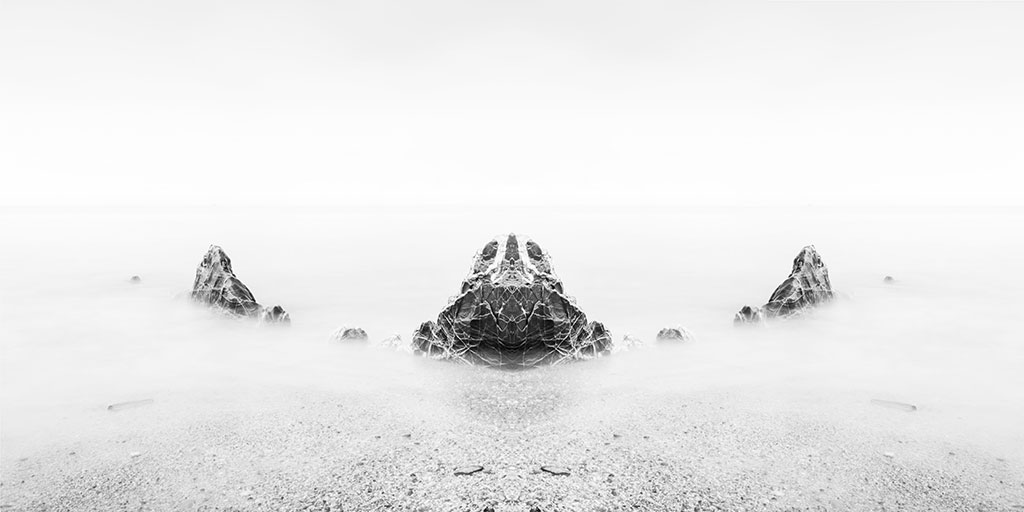
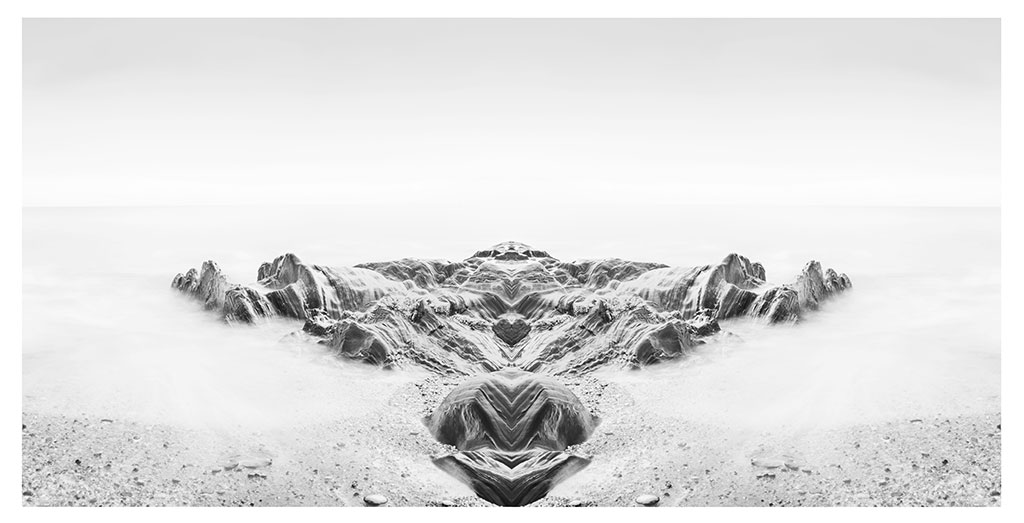
Presentation matters
When it comes to black and white fine art photography, whatever genre you shoot, presentation is key. Take for example this image here which is a square seascape that has been duplicated and flipped horizontally and then lined up to the original image. The end result is this surreal effect. You can really push the boundaries so think outside the box when it comes to presentation to make your fine art images stand out.
6 Top Tips for Fine Art Black and White Photography
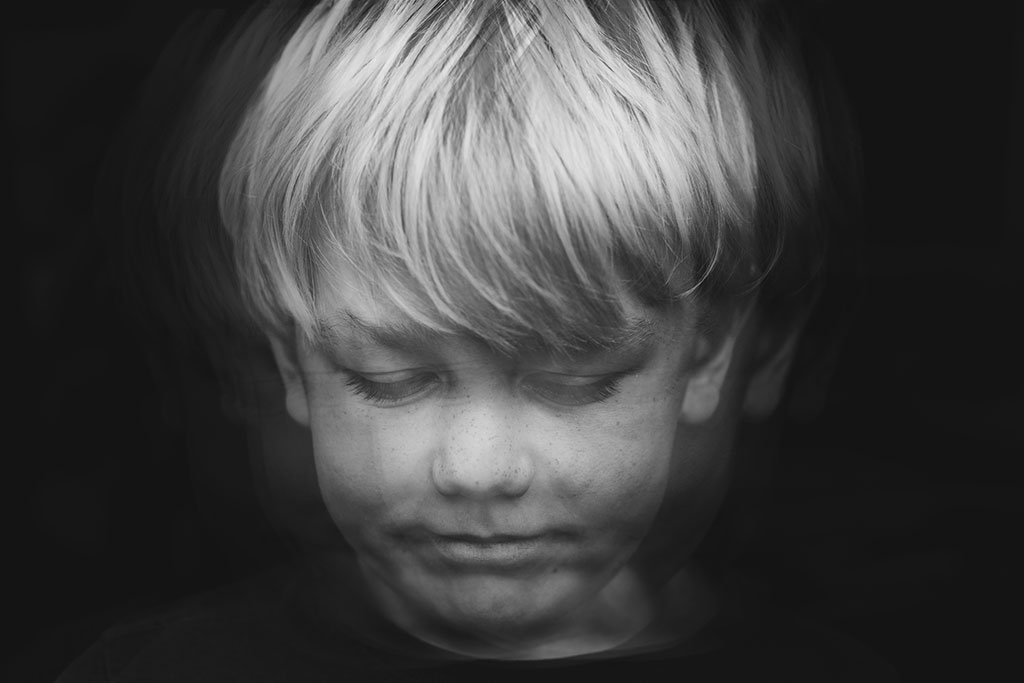
1. Colour channels
You’ll have far more control over the final edit if you shoot in Raw. At the editing stage start by converting your image to black and white and then go to the B&W colour channel setting. In this image here the boy’s freckles have been enhanced using the orange slider. Colour channels are a great way to make refined edits to get a stronger end result.
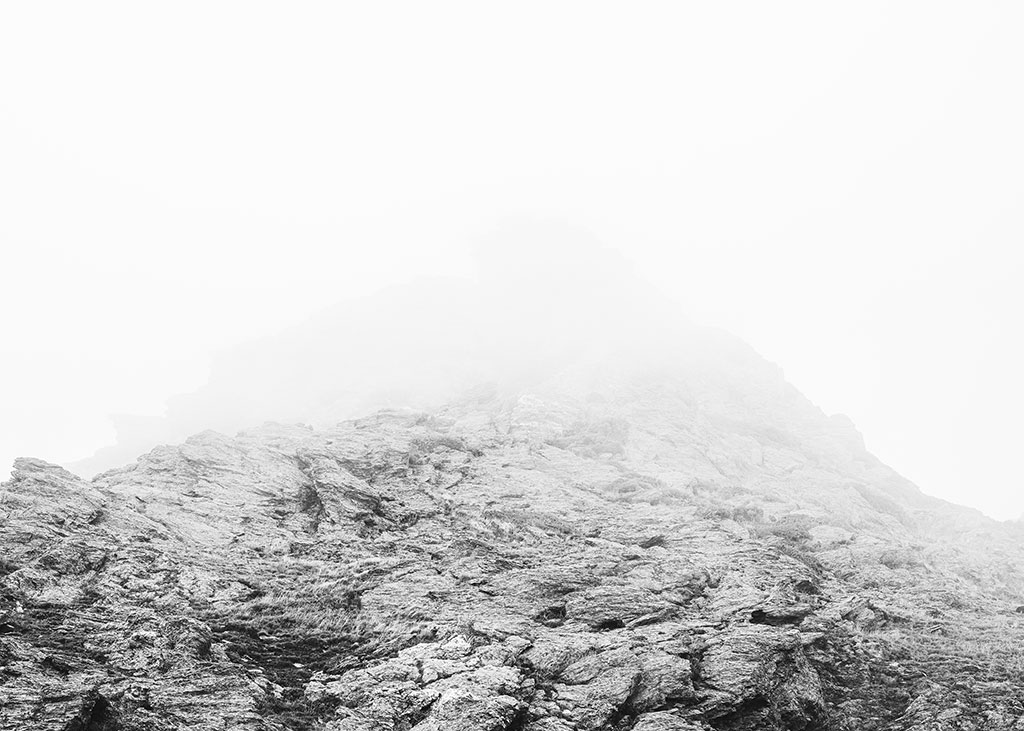
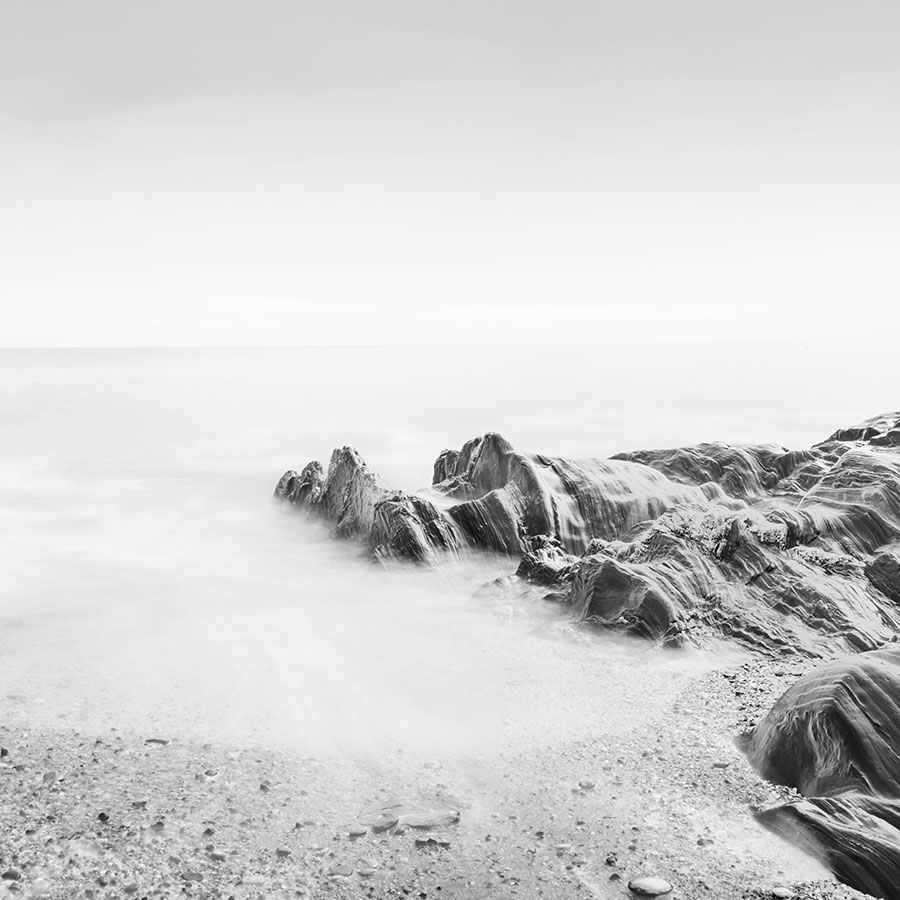
2. Misty conditions
Dull misty conditions are perfect for B&W fine art landscape photography. Take for example this image here that was shot in Devon on the south west coastal path. You want to look for something of interest in the foreground (which in this case are the rocks). Then capture that blend of the darker foreground blending into the white mist.
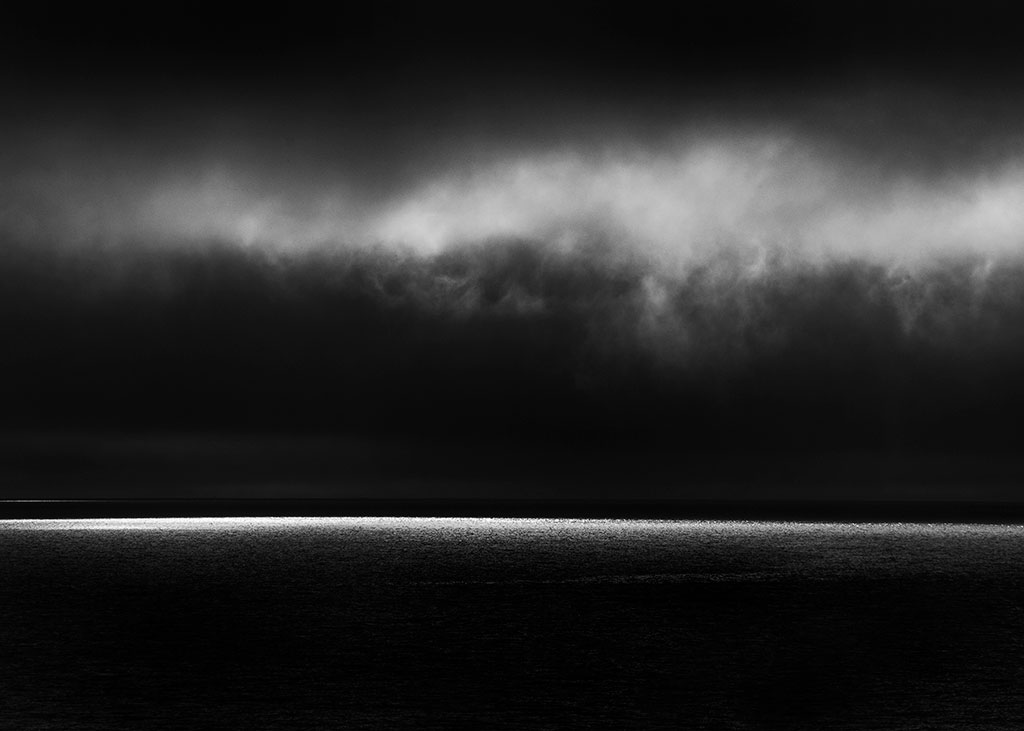
3. Dramatic light
There’s nothing better than a stormy sky with a strip of sunlight peeking through on the horizon. This image was taken at 9am in the morning. The cloudy sky has been edited to darken it down so to make the overall effect more dramatic.
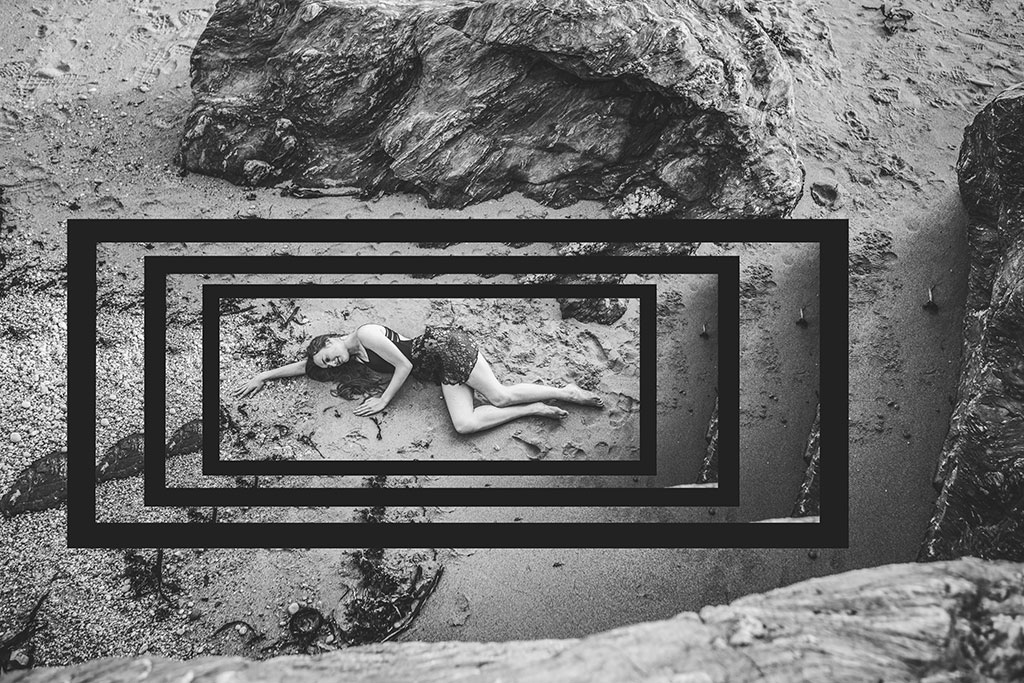
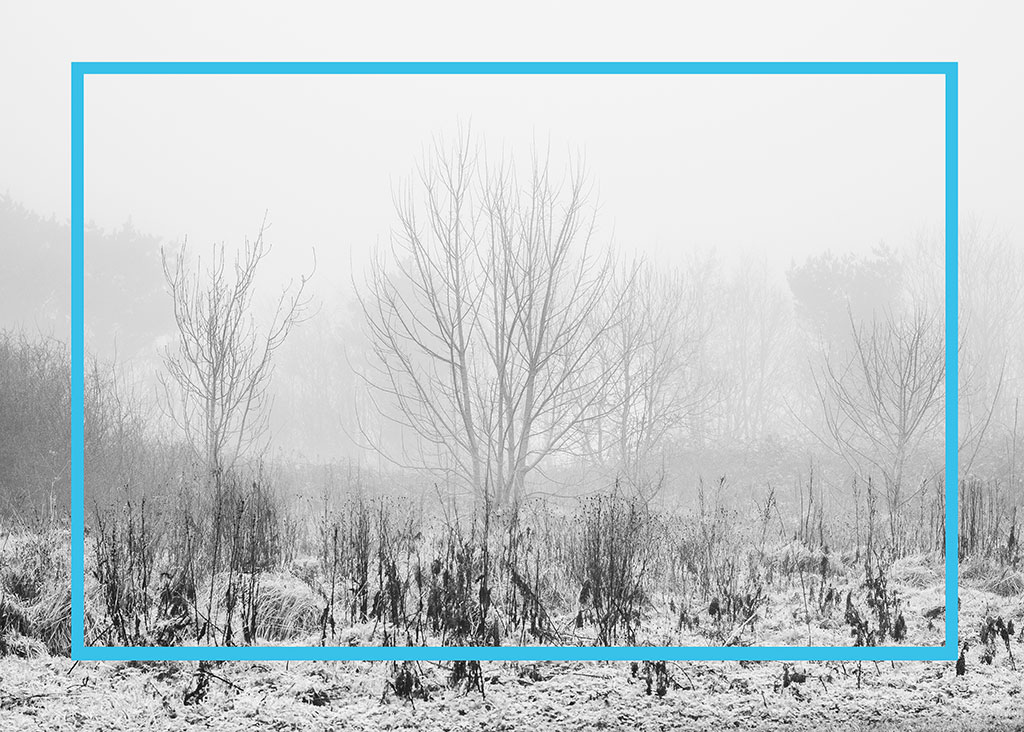
4. Be experimental
In fine art photography, any genre you shoot can be experimental. For example, in the image below we’ve added a colourful rectangle to the image. Not only does the blue rectangle contrast interestingly with the monochrome scene it also forces the viewer to examine the image in finer detail.
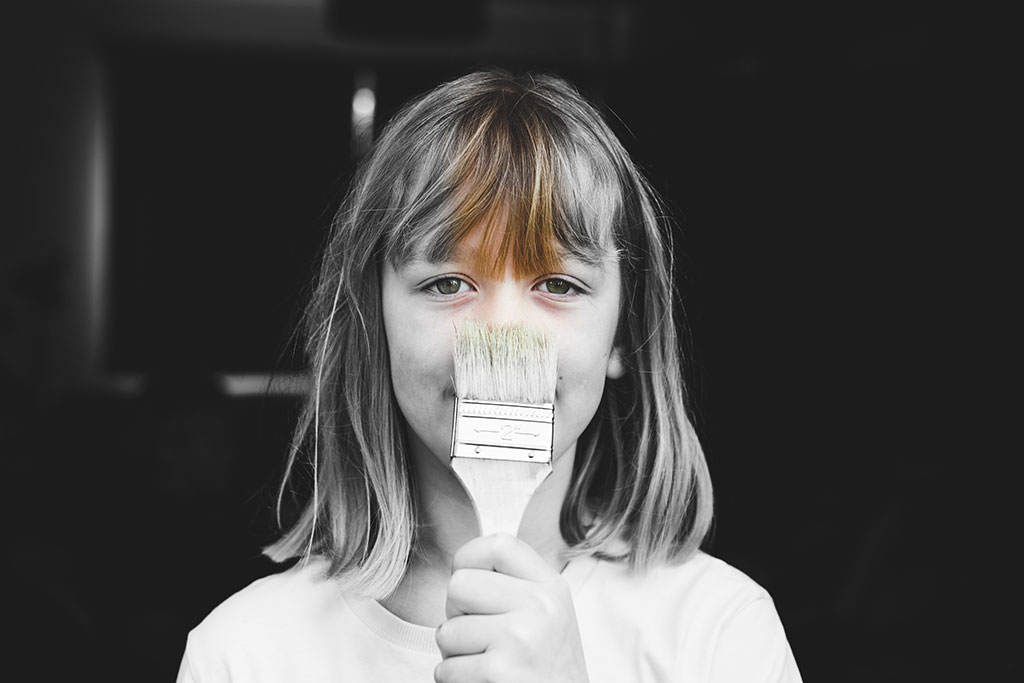
5. Splash of colour
Fine art photography doesn’t just have to be serious and you can have fun with your portraits and be playful in your approach. Here in Photoshop I’ve created a strip of colour to make it look as if the girl is removing the monochrome effect from her face.
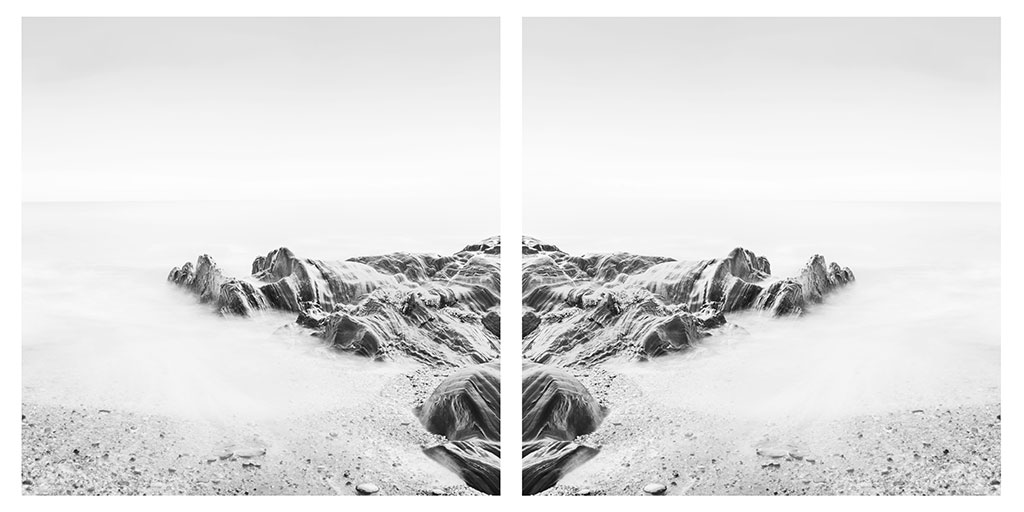
6. Image Aspect ratio
It’s easy to stick with the standard 2:3 ratio. But when it comes to fine art photography, think about shooting in a different aspect ratio. For example the square format can work really well, as can long panoramas too. Although the image ratio can be cropped at the editing stage on some camera models you can set it in camera so have an experiment.
Kit for fine art black and white photography
1. Lens choice
Depending on what genre I am shooting will determine what lens I select. In my kit bag my three favourite lenses are my Nikon AF-S Nikkor 16-35mm f/4G ED VR, Sigma 50mm f/1.4 DG HSM ART and my Nikon AF-S Nikkor 85mm f/1.8G. I mostly shoot with the Sigma 50mm ART when I can but it’s good to have a versatile focal range to pick from.
See our lens reviews and buying advice here for guidance.
2. Tripod
A tripod is an essential piece of kit for most of the genres I shoot. Portraiture is the exception to this as I tend to shoot by hand. Although on occasion depending on the setup it can come in handy with this genre too. In my kit bag I have the Manfrotto 190go! with the XPRO Geared three-way pan/tilt tripod head. The tripod comes with an interchangeable centre column, and the three way tripod head can be finely adjusted.
Read our guide for the best tripods in 2024.
3. Image editing software
When it comes to editing my black and white fine art images I predominantly use Lightroom for stylising and toning my images. But I’ll also use Photoshop for more advanced work (i.e. if I have to swap any parts of the image around).
Best software for black and white editing.
4. Hasselblad 500C/M
Occasionally I love to dust off my Hasselblad 500C/M and shoot on a roll of black and white 120 film. It’s a great exercise if you haven’t done it in a while!
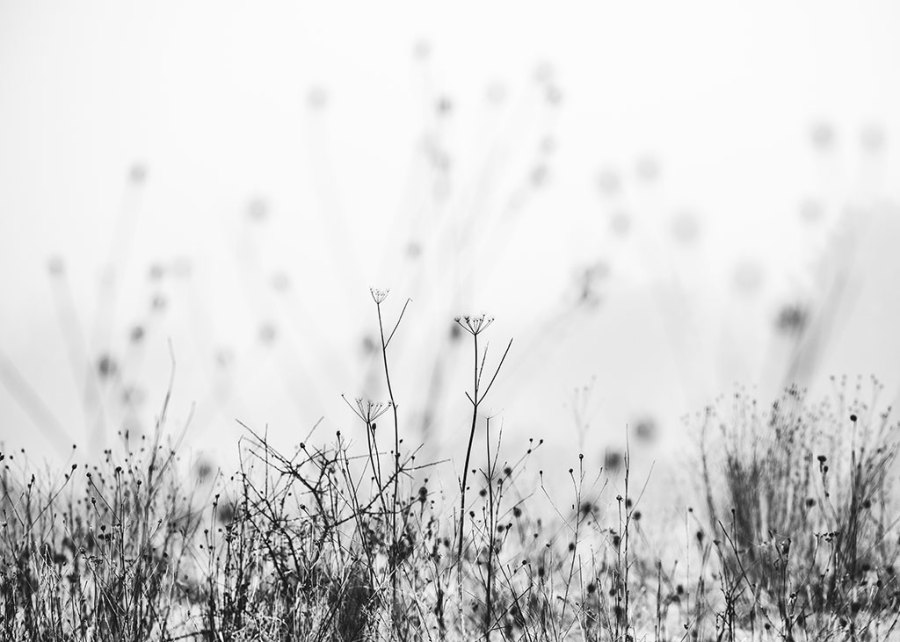
Featured image: A winter meadow. Taken on a misty winter morning last January. 1/500 sec at f/2.8, ISO 100. Image credit: Claire Gillo
Interested in further fine art photography guidance? Check out these articles:
- Guide to fine art landscape photography
- Top fine art portrait photography tips
- Fine art nude photography tips from the professionals
- Fine art architecture photography guide
Follow AP on Facebook, Twitter, Instagram, and YouTube.


