By following our essential guide on how to photograph weddings, you will be able to take top-class wedding pictures whenever the bride and groom make that request, and with practice, skill and time, this can be a great way to make money taking photos by mastering wedding photography.
Professional wedding photographers can charge a small fortune for what on the surface appears to be just a few hours work.
However, they spend many more hours working on a wedding than most amateurs can afford to. A lot of preparation goes into wedding photography, and many hours afterwards editing images so that each photograph is perfect.
Most photographers, at some point in their life, are asked to photograph a wedding, be it as the main photographer or merely to document the day’s events.
The task can seem a bit daunting at first, but even if you are not a professional photographer, there is no reason why your images can’t be as good as a pro’s.
However, there are certain pitfalls and tricky areas that professionals have spent much of their careers learning and avoiding.
By following our guide to avoiding the pitfalls of wedding photography, you will be able to take not just good, but top-class wedding pictures that will keep the bride and groom delighted. And if you’re still shopping for a good camera, check out our guide to the best cameras for wedding photography.
Welcome to the AP Improve Your Photography Series – in partnership with MPB – This series is designed to take you from the beginnings of photography, introduce different shooting skills and styles, and teach you how to grow as a photographer, so you can enjoy producing amazing photography (and video), to take you to the next level, whether that’s making money or simply mastering your art form.

Each week you’ll find a new article so make sure to come back to continue your journey, and have fun along the way, creating great images. If you’ve found these articles helpful, don’t forget to share them with people you know who may be interested in learning new photography skills. You’ll find a whole range of further articles in this series.
Essential Guide to Wedding Photography – Planning
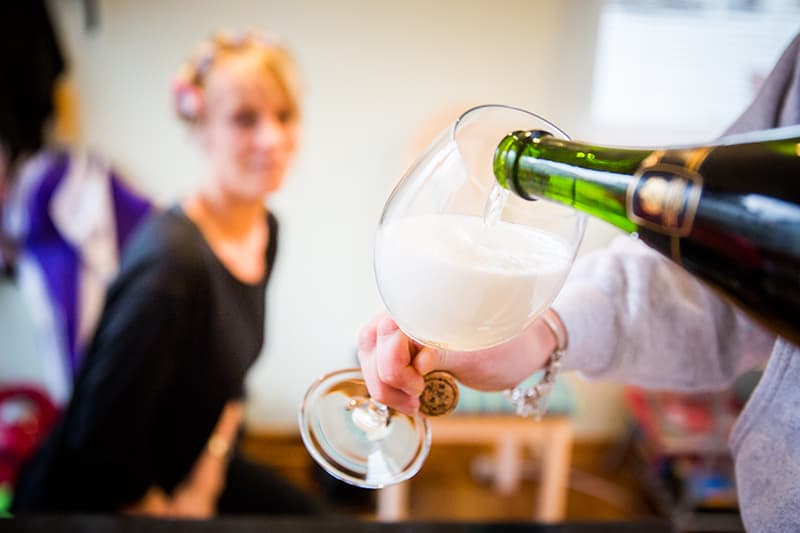 Photo by Michael Topham
The quickest way to turn a couple’s special day into an unmitigated disaster is to show up without a plan. Like it or not, if you want to photograph a wedding you need to invest a lot of time into planning the day. Here are the main things to think about.
Wedding Photography Planning – The Agreement
Just saying yes to bringing your camera along to a friend’s wedding is one thing, but if they are relying on you for the main photos it’s probably best to draw up something a bit more formal. This doesn’t have to be a long legal agreement; it can be a simple letter declaring that you agree to take the photos.
Of course, if you are looking to do this professionally, you will want to draw up terms and conditions, a formal contract, etc.
Wedding Photography Planning – Money
Unless you are taking photos for a family member or a close friend, there may be talk of payment involved for your time and photos.
If you’re not sure how much to ask for, consider the costs you’ll likely incur – your travel and any accommodation to consider, plus your working time, not just on the day but for the planning and, more important, the collating and editing time after. You might want to check out what ‘the competition’ are charging as a starting point.
Also remember that any money you earn will need to be declared to the taxman and you may need to pay tax on this earning.
Wedding Photography Planning – Insurance
There are two parts to this: first, camera insurance is a very good idea, as dropping, damaging or having equipment stolen can prove expensive – especially if it’s just before your shoot; and second, if you’re working as a photographer you should have some sort of public liability insurance.
Many people presume their camera will be covered on home insurance but if you use it to earn money, the chances are it isn’t. Have a look for the best camera insurance deals.
Wedding Photography Planning – Type of Shots and Style
Before you jump straight into the job in hand, you need to consider the look and style of the images both you and the couple are after. Take a look at as many wedding photography books and websites as possible to get a feel of the type of shots you like and ones you feel are achievable.
Wedding Photography Planning – Locations
 Photo by Callum McInerney-Riley/Stewart Clinton
Do some research into where you will be taking the photos and try to visit them to have a look around beforehand. This will give you a chance to work out the best places to take group or more intimate shots.
Trevor Yerbury on… Location Preparation
We asked Trevor Yerbury for a few tips on checking out the location for a wedding shoot. Here are his thoughts:
‘Personally we never scout any locations. Why? Well, first it will never be the same on the day of the wedding: the light will be different, backgrounds may have changed (scaffolding just erected, etc) and we believe it adds to the creative spirit if you have to think on your feet and seek out the locations that will work for that bride and groom on that particular day and all that it brings.’
‘One thing we do ask is: ‘Are there any surprises planned for the day?’ It may seem obvious but brides can neglect to tell you what they have up their sleeves in the way of surprises, anything from arriving on horseback to a flight of doves or firework displays.’
‘One way to make sure you have an image of everybody is to set up a small studio somewhere at the reception and do a portrait session of every guest. However, this is only suitable for smaller weddings as the numbers and logistics can become overwhelming.’
‘In the past we have had brides arrive for their interview with a folder stuffed full of the wedding details including a fully detailed itinerary of the day, in some cases down to five-minute time frames. We know, as will any wedding photographer who has covered a few weddings, that the likelihood of this schedule running to plan are so remote that it will never happen.’
Trevor and his wife Faye have been a professional photography duo for many years now. See their website for more.
Wedding Photography Planning – Shot List
Even if you are given a vague brief to just take pictures of everyone there, the couple will have at least some idea of specific images they want.
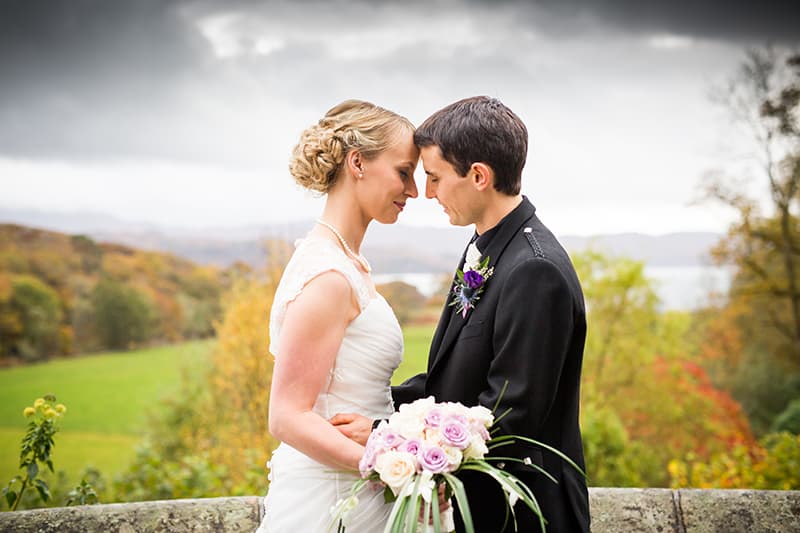 Photo by Michael Topham
Work with them to create a shot list of the main events they want images of, plus the formal shots. This will make life much easier on the day and will allow you to tick them off as you’ve done them.
Wedding Photography Planning – Weather
If your wedding is based in the UK it’s best to anticipate bad weather. That way, anything else is a blessing. Have a plan for alternative locations under cover, should it start to rain, or bring some nice umbrellas with you that will go with the shot.
If you plan to shoot inside, bring a studio light and stand to brighten things up.
Wedding Photography Planning – Back-up Plan
The chances are that if there is one day when your memory card corrupts or your shutter jams, it will be on the day of the wedding. So, rather than leave anything to chance, plan to take a second camera body, and back up your files as you go, with a storage device.
The same goes for batteries – some DSLR batteries may only be good for 300 shots and you may be looking to take at least double that, so carry a spare.
Wedding Photography Planning – Schedule
No matter how big or small the wedding, there will be some form of schedule kicking around for the day’s events. Try to get hold of this in advance so you can plan where you need to be and when. Things rarely stick to the schedule but at least you’ll be able to stay one step ahead, rather than dashing between events.
Wedding Photography Planning – Pre shoot
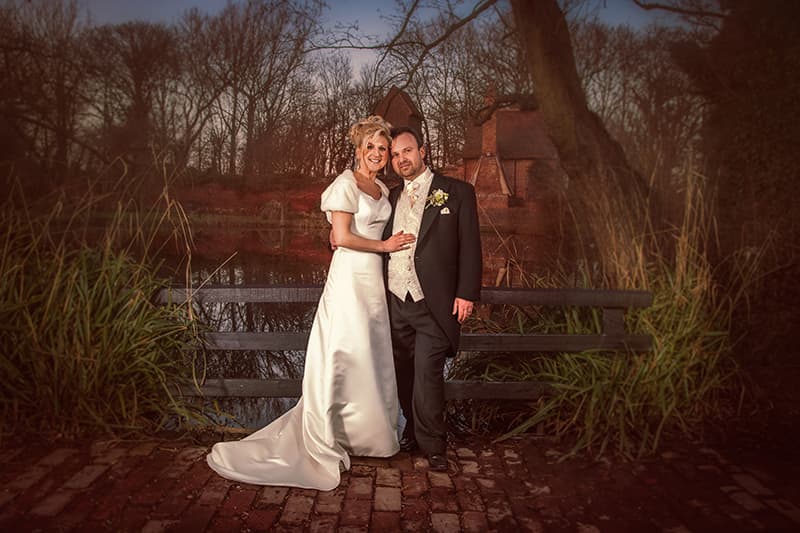 Photo by Callum McInerney-Riley/Stewart Clinton
Before the big day it is common to arrange for a pre-wedding shoot, to get the couple used to the photographer, and to some poses together.
This can take place in a studio, outdoors or even in the couple’s home and though it is primarily a getting to know each other session, can sometimes produce some great shots.
Wedding Photography Planning – Payment
Although you may not be the official wedding photographer, the happy couple may still offer you a small payment, or at least cover your expenses. Many unofficial wedding photographers offer to take the images as their gift to the bride and groom.
Whatever you have decided, it is best to make sure that all the necessary arrangements are sorted out with the couple beforehand. This ensures that everyone knows exactly what the deal is and avoids any unnecessary problems and confusion after the event.
Wedding Photography Planning – If the Worst Should Happen
To be clear – if you are the official photographer for a wedding then you need to turn up, come hell, high water or the M25.
If, however, a genuine emergency means that you categorically cannot make it, then it is still your responsibility to have arranged cover, i.e. another photographer who can photograph the day at short notice.
This is where a mutual arrangement with another wedding photographer to cover each other’s jobs in event of a true catastrophe can be beneficial, though of course you will have to notify your partner of dates in plenty of time so they can ensure they are free.
What equipment do you need for Wedding photography?
You’ll need to be properly geared up to take on something as big and complicated as a wedding. We spoke to a professional wedding shooter to get the lowdown on the kit used on the job.
The core essentials needed for wedding photography:
- The Camera (of course)
- Spare Mirrorless/DSLR/SLR body
- Standard Lens
- Long lens
- Memory cards
- Flashgun
If you’re starting out, or want to make sure you’ve got the best camera for the job, then have a look at our guide to the best cameras for wedding photography.
Other essential wedding kit:
- Backup Drive or laptop
- Studio Light
- Reflector
- Stepladder
- White Umbrellas
- Tripod
Though not essential for most shots (and a real hindrance for candids), a tripod can be useful for some of the posed shots.
This is especially the case for big groups, where you can leave the camera set up and talk to your group directly, rather than barking directions from behind the camera. It’s also handy for posed shots of the bride and groom, as it leaves you free to adjust the bride’s dress etc without moving the camera.
Beyond the camera choice, you’ll need to make an informed decision on the other kit needed, so make sure you have a look at our guide to the best kit for Wedding Photography – Cameras and accessories.
Essential Guide to Wedding Photography – On the Day
 Photo by Michael Topham
So, it’s the big day – don’t panic!
Wedding photography is definitely a challenge. But assuming your technical skills are up to scratch (and if they aren’t, you shouldn’t even consider letting yourself loose on someone’s big day) your problems are mainly about time and crowd management.
Follow our guide to keep a cool head and make sure you get all the shots you need.
Wedding Photography – Arrive Early
Allow for worst-case scenario with the traffic, or consider staying somewhere local the night before if it’s a long journey. That way you can arrive in plenty of time and unflustered.
Wedding Photography – Location Final Check
Try to visit the church and reception locations in the morning if possible, just to have a quick look around, brush up on potential shot locations, and check nothing has moved or changed – scaffolding or building work could make for an ugly background.
Wedding Photography – Getting ready
 Photo by Callum McInerney-Riley/Stewart Clinton
If you’ve been asked to shoot the bride getting ready, check what time is best to arrive – you don’t want to be too early or miss the process.
Around the time she is having her hair done is normally a good starting point, especially if the hairdresser is coming to her.
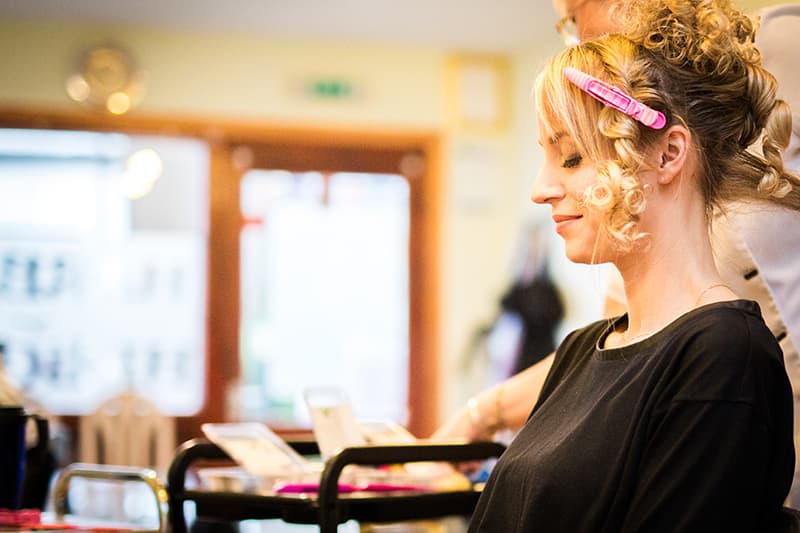 Photo by Michael Topham
Don’t crowd her, try to stay in the background, as this can be the most stressful time of the day. Pictures of the groom and best man getting ready can often be done alongside the bride pictures, as long as they’re not too far apart.
Wedding Photography – Arriving at the Church
Make sure you get to the church before the bride, and if possible, be there as people start to arrive – this is where working with an assistant or second photographer can help.
Make sure you take some general shots of the surroundings and the church/building, as these can help set the scene. Inside, take detail shots of any arrangements and decorations such as the flowers and books of service.
Wedding Photography – Bride Arriving
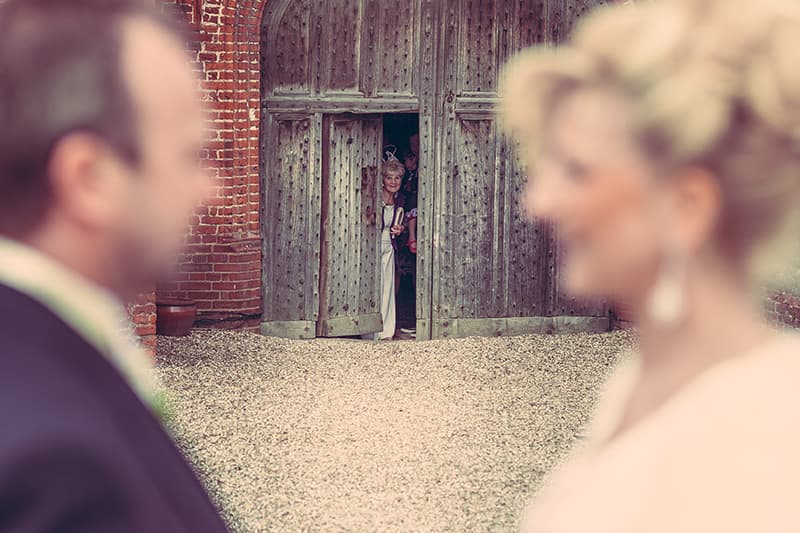
Photo by Callum McInerney-Riley/Stewart Clinton
The bride arriving is a key moment and takes some swift action on your part. Get to the arrival point as the car pulls up and grab some shots as she walks to the church doors. Again, this can be where having an assistant/second photographer can be handy too, as you’ll then want to be by the altar by the time the bride makes it down the aisle, in time for the main ceremony.
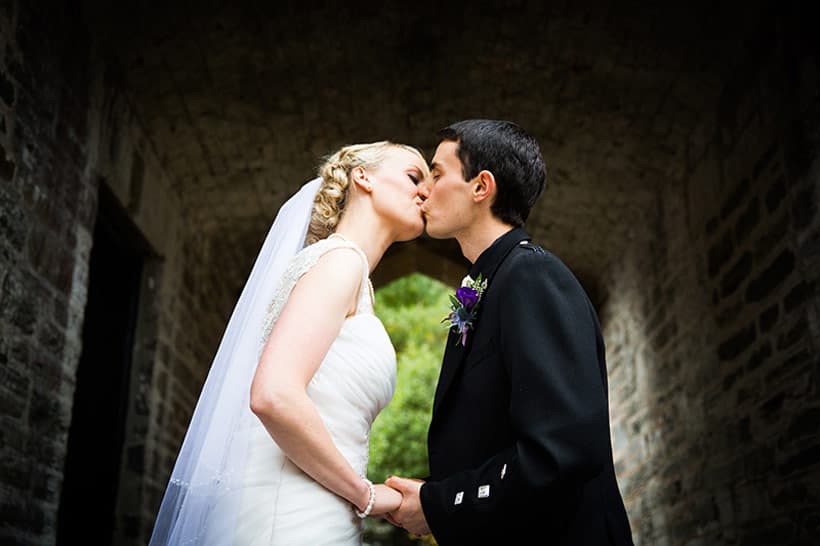
Wedding Photography – Ceremony
This is the main event, so it is important that you get some pictures – as long as the couple want you to – but you need to remain discreet so as not to distract from the ceremony, or spoil the view for those who have turned up to see it. If your camera has a quiet mode, use it, and switch off any confirmation beeps and your flash. Using a longer lens will allow you to stand well back. Some vicars may have reservations about shooting during the ceremony itself, so ensure that the couple are happy with arrangements.
The signing of the register is a great photo opportunity but can look a bit staged and be a bit of a bun fight as guests try to grab shots too. Grab discreet shots as they sign for real, then grab a posed shot before standing back to let other guests snap away.
As per on the way in, you need to be out the door before the couple, so keep a close eye on proceedings. Once outside take some initial shots with the couple before other guests leave the church, making best use of the doorway and the open space before the crowds begin to descend.
Wedding photography – What camera settings do I use?
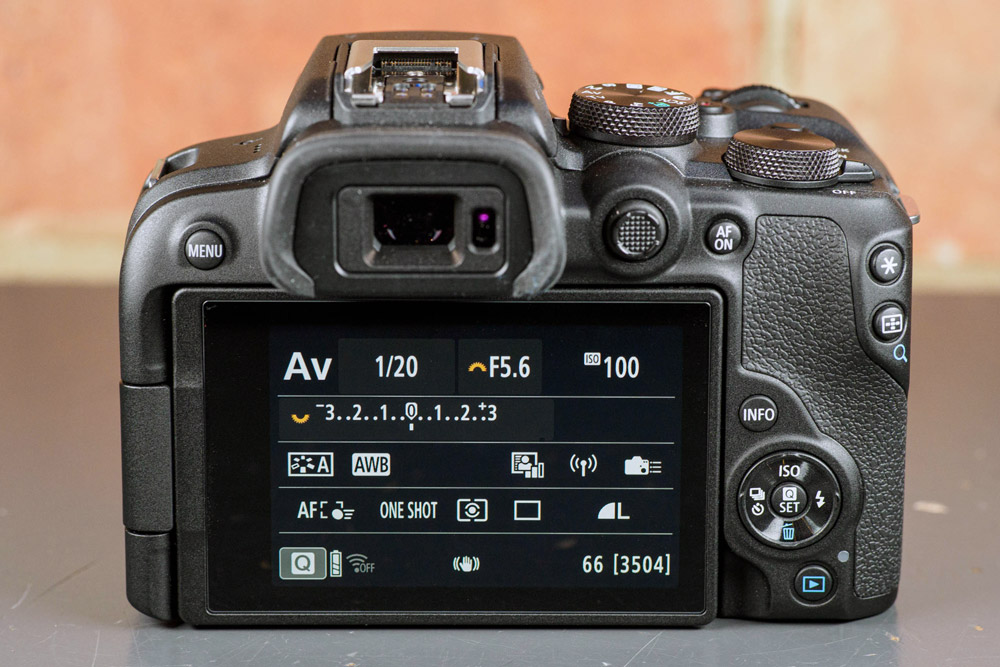
Know your camera settings to get the best results when shooting weddings
You’ll need to vary your settings to suit the conditions. By camera settings, we mean aperture, ISO, and shutter speeds, as well as JPEG and file settings.
During the ceremony you’ll most likely need to raise the ISO to 400/800 or higher to shoot without flash, especially in darker churches. With modern cameras this isn’t as much of an issue as it once was.
In high-contrast light you’ll need to be careful with white wedding dresses and dark suits, one of which can easily lose detail if your exposure isn’t spot on.
The best insurance is to shoot in raw format (or raw and JPEG), with its greater latitude, it will let you correct images later if needed.
Take a mid-tone light reading and check your LCD regularly. The flashing overexposure warning of many cameras may be helpful but it’s only a guide.
To learn more about camera settings, have a look at guide to exposure, aperture, ISO and shutter speeds.
Wedding Photography – Posed Shots
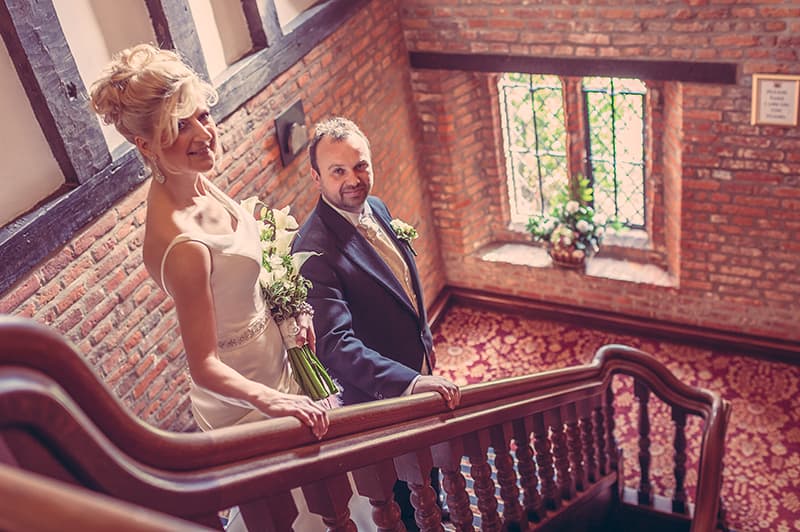
Photo by Callum McInerney-Riley/Stewart Clinton
Depending on the reception venue, you may want to take some pictures in the grounds of the church. However, you may find the couple will want some time to greet the friends and family after the service. For this reason try to be quick and be patient – get some shots done straight away, then step back and take incidental shots as the couple chat to guests. As the couple start to leave there’s normally the opportunity for confetti, and this can look great in photos if shot right. If there is a car waiting, use it as another location, both inside and out. Once the door is closed though, get moving, as you’ll want to be at the next venue in time to meet them.
Wedding Photography – Candidly Speaking
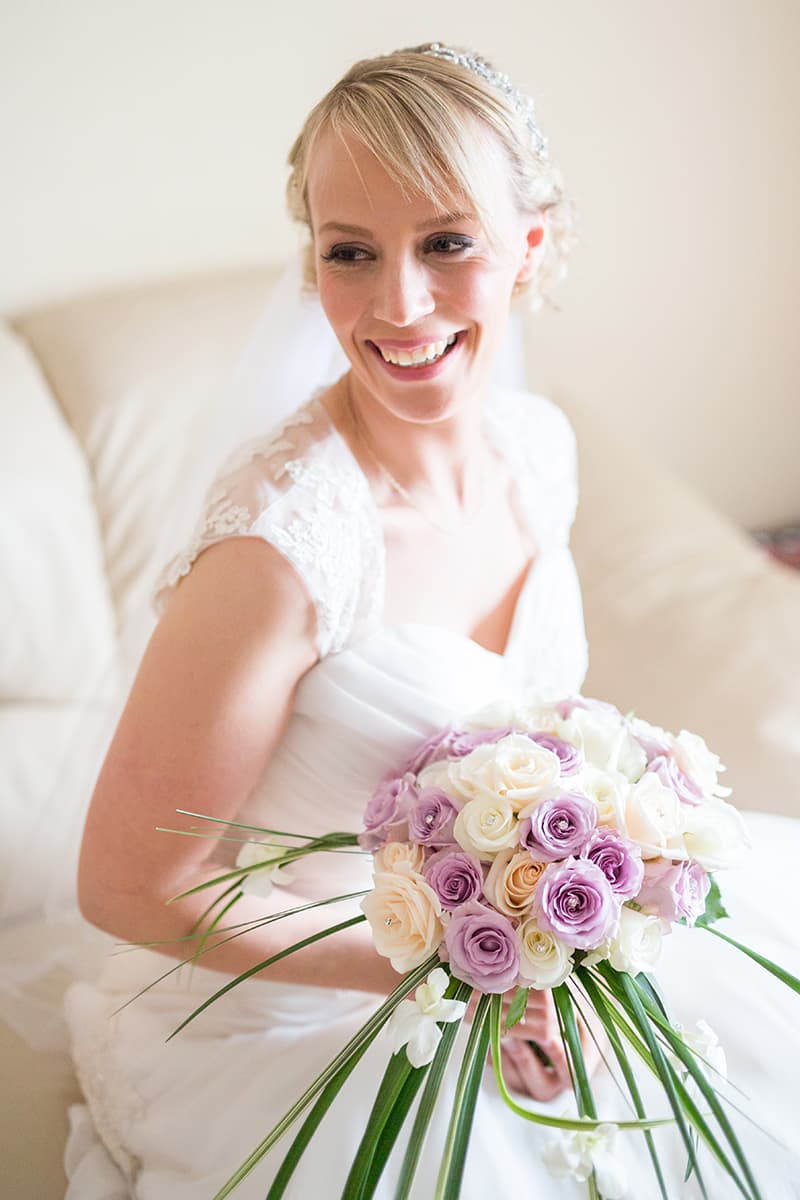
Photo by Michael Topham
While a few posed shots are important, it’s best to keep them to a minimum and spend more time on semi-posed and unposed candid shots, which are less disruptive to the day and better convey the atmosphere and emotion of the event.
Use the wider end of your zoom and get close to create a sense of intimacy. But also try zooming in to telephoto and using a wide aperture to isolate small groups and individuals from the background.
Wedding Photography – Confetti
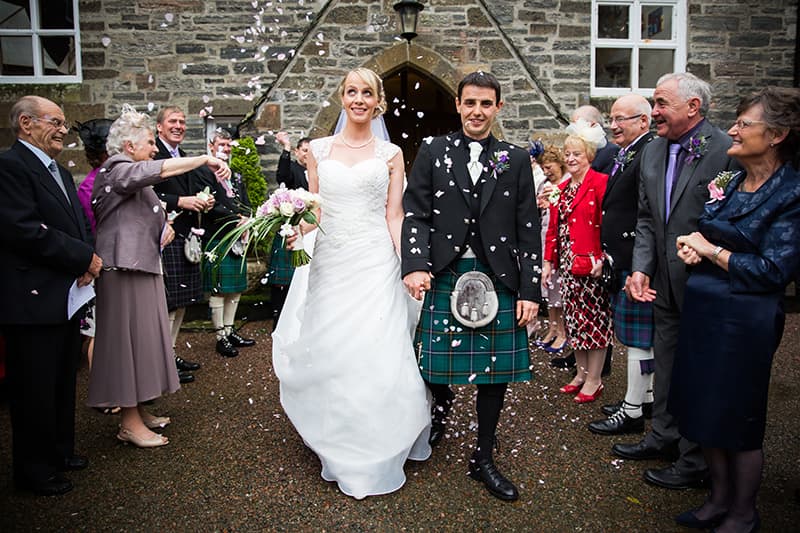
Photo by Michael Topham
One of the classic wedding shots is the throwing of the confetti. Yet it can be quite a tricky shot to get right. We have found that the best shots usually come when taking a slightly alternative angle of the scene.
Try crouching down and shooting up towards the bride and grooms’ faces to show the confetti falling. Alternatively, take a higher vantage point and try to capture the crowd of confetti-throwing guests.
Most of time the situation is completely out of the hands of the photographer. One little tip is to ask everybody to throw the confetti on the count of three. However, confetti can end up obscuring the bride and groom’s faces, or the sun can cast shadows from the confetti across them. You can try to reduce this by using a soft fill-in flash technique, but if you set the flash too high it will itself cause harsh shadows.
Often the bride and grooms’ best facial expressions come just after most of the confetti has been thrown; their faces will be less obscured and they won’t be squinting trying to avoid getting confetti in their eyes and mouth. However, the obvious problem with this is that there will now be little confetti in the image. Thankfully, you can add it in using image-editing software.
Post-Processing Tip – Add More Confetti

Add more confetti – before and after

Step 1. Select the Marquee tool and create a selection around a single piece of confetti. Select more random pieces by holding the shift when you make the next selection.

Step 2. Select Layer>New>Layer via Copy, which copies the selected pieces of the confetti to a new layer. Repeat this a few times. Now select the original background layer again and repeat step 1, this time selecting different random pieces of confetti.

Step 3. Once again copy the selected confetti to a number of new layers. Now, select each layer in turn, and use the Move tool to shift the confetti around the image to make it look as if more was thrown. Try to vary how far you shift each layer to avoid repetitive patterns.
Essential Guide to Wedding Photography – The Reception
 Photo by Callum McInerney-Riley/Stewart Clinton
Depending on the distances involved, you should have time to whisk the couple off for pictures before most guests arrive at the reception.
Though if guests are already there they may want more time with them first. Remember, you are there to document the day, not run it.
Place Settings

Photo by Michael Topham
A lot of time and effort goes into the place settings and table for the reception, so grab some shots of the room and details before people get to it. See our guide to food photography if you want more tips.
The Wedding Cake
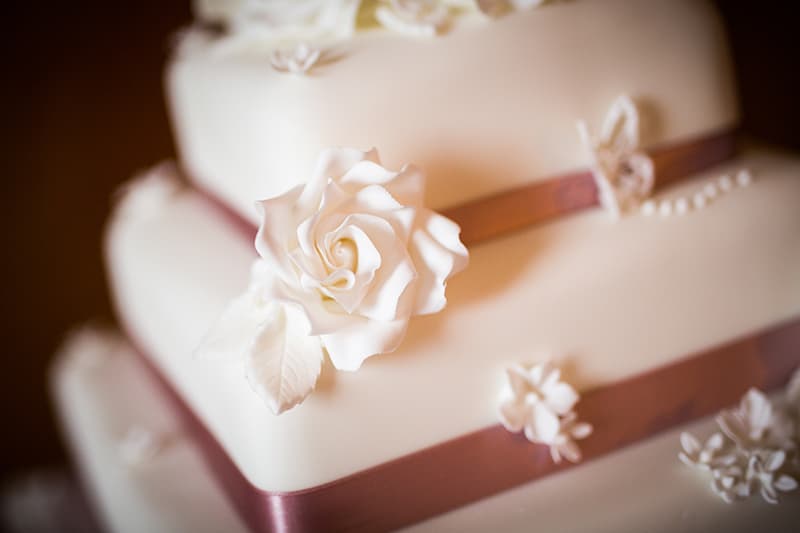
Make sure you get a shot of the cake, Photo by Michael Topham
Everyone wants a picture of the couple cutting the cake but by staging a shot in secret beforehand, you can ensure you get the perfect angle.
Before the meal, try to sneak the couple off and stage a fake cutting of the cake in secret. Then, when the event happens after the meal, you can stand back or take a different angle to include the crowd – essentially giving you two goes.
Formal Group Shots
The formal group shots can be a Herculean effort to organise, so try to involve the ushers or best man in rounding up the troops.
With your pre-planned shot list, try to do it in an order that minimises swapping over; for instance, grouping the bride’s family shots together and the groom’s family together.
A group shot of everyone is a nice one to have, and is best shot at the end of the group shots or at the beginning, to get everyone in one place. For this you will need a high viewpoint to get everyone seen, so pick your location carefully, or use a stepladder and a wide-angle lens.
The posed shots present the best opportunities to make sure everyone looks good in the shots and, for example, the bride’s dress is shown in its full glory.
Don’t keep guests waiting too long while you do them – they’ll soon become irritable.
Shoot a few key groups too, as a record of everyone who was there (it’s easy to miss people using the reportage approach).
Be clear and decisive in your instructions so guests know what’s required. Pose them quickly and don’t faff with the camera.
Informal shots
Photo by Callum McInerney-Riley/Stewart Clinton
A long lens is really handy for grabbing informal shots of the guests chatting at the reception. This time, as people are still arriving and before the meal, is also ideal for some impromptu group shots and portraits of various guests.
Location shots
Photo by Michael Topham
Your location shots should already be planned, at least in your head.
Feel free to go with what works on the day though, if locations aren’t working or you spot somewhere else worth trying.
Try to keep it fluid and relaxed, because if you look nervous it will make them nervous. Make sure you’ve got a good range of shots, both of the couple and individually but, equally, don’t take too long, as there will be guests waiting for them.
Using Flash
Most weddings take place in summer, and in strong sun, so images taken outside can suffer harsh shadows.
Shooting with your subjects facing the sun could cause them to squint their eyes, creating unflattering facial expressions. However, having the sun behind them can create equally problematic backlighting, as the bright light can fool a camera’s metering system, causing incorrect exposures.
Fill-in flash can help soften shadows caused by bright sun and can add light to the front of a backlit image.
Even the relatively weak power of a camera’s built-in flash can be suitable for fill-in flash at close range. For a slightly better effect, use an off-camera flash bracket, or wireless flash mounted on a stand or tripod. While an elaborate set-up is impractical for documentary-style images, it may be useful for group shots.
Another tip is to avoid the bright sunlight altogether by shooting in a slightly shaded area, using a hint of flash to brighten the subjects’ faces.
When shooting indoors, flash is almost essential, even where there is bright natural light. If the people you are photographing are giving speeches or cutting a wedding cake, in front of a window, then fill-in flash can help even out the backlit scene.

Fill-in flash is essential if a scene is backlit
To avoid the harsh shadows caused by an on-camera flash gun try angling the flash head and bouncing the light off of the ceiling. The light will reflect down on to the subject, which is more natural and less harsh than using direct flash.
If the ceiling is too high for this to work, try a diffuser, such as the Sto-Fen Omni Bounce, or try attaching a bounce card to your flashgun. These soften the harsh direct light from the flash, and can be used inside and out.
Should your flash fail, or if it doesn’t recycle its charge in time, you can use Adobe Camera Raw’s Fill Light feature to brighten shadows.
The First Dance
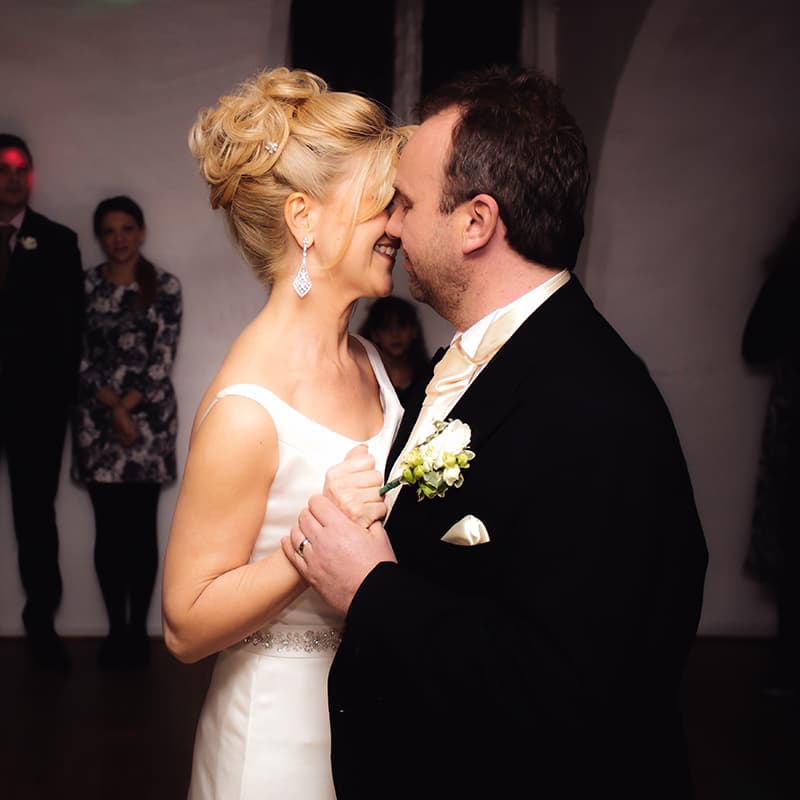
Photo by Callum McInerney-Riley/Stewart Clinton
The first dance is one of the trickiest moments to capture. There is usually little light, and it can be difficult to evoke any atmosphere.
Using direct flash can kill what atmosphere there is, as will bouncing it, as it can flatten the final image.
One way to get a nice image is to close in on the faces of the bride and groom, as they will be happy and laughing or in an embrace.
Better yet, use a slow-sync flash technique to capture some of the movement of the dance.
Handhold the camera and set the exposure so the shutter speed is around 1/30sec or less, and so that the image is underexposed by around 1EV.
With the flash set to rear curtain, use the flash to freeze the movement of the bride and groom.
The ambient light will cause a slight blur as the couple dance, creating a sense of movement, but with faces of the bride and groom remaing sharp.
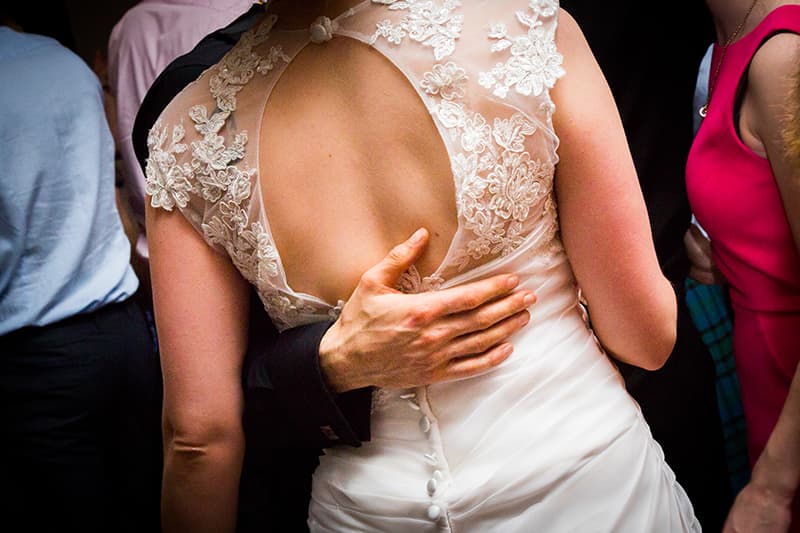
Look for intimate moments, and get some shots of the bride and grooms hands. Photo: Michael Topham
Get the details
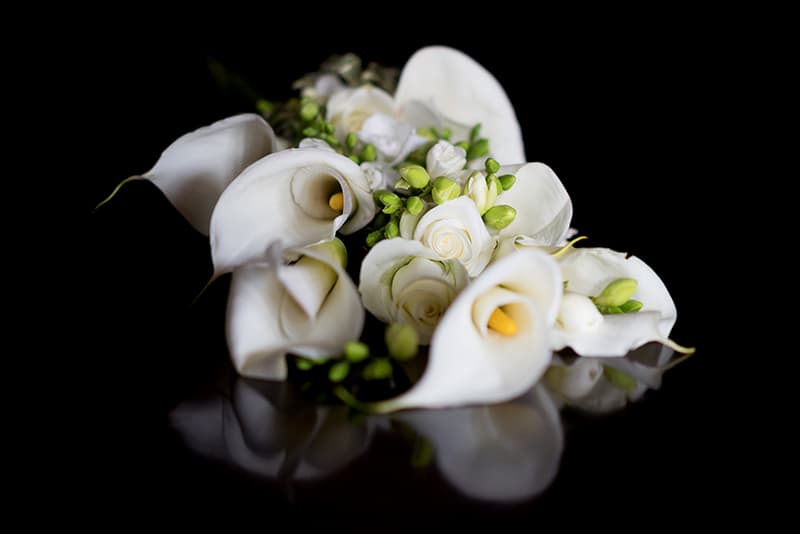
Photo by Callum McInerney-Riley/Stewart Clinton
Weddings can cost thousands and thousands of pounds with the bride and groom spending hours planning everything down to the finest detail.
With this in mind, make sure you take images of the little details that help make the day special.
Details on the bride’s dress, table decorations, gifts, cards and the wedding rings are amongst the obvious items to photograph.
Not only does it give you the chance to be artistic in the way you present images of these items, but it also serves as a reminder of the day for the bride and groom for years to come.
There are many small details that have gone into making the day perfect – try to capture as many as possible as they make great images for a wedding album.
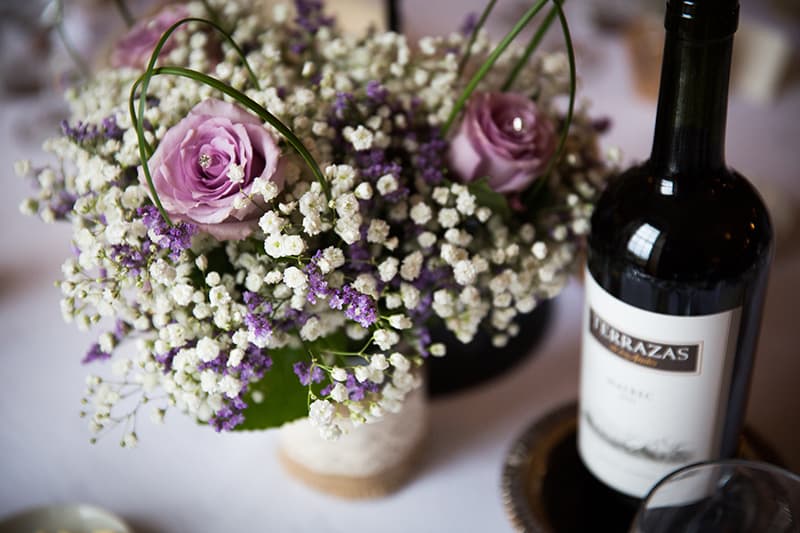
Photo by Michael Topham
Essential Guide to Wedding Photography – After the Day
So the wedding is over, you’ve taken all of the photographs that you needed to. We’re afraid your work isn’t done yet! Here’s what you need to do next:
1 – Choosing the Winning images
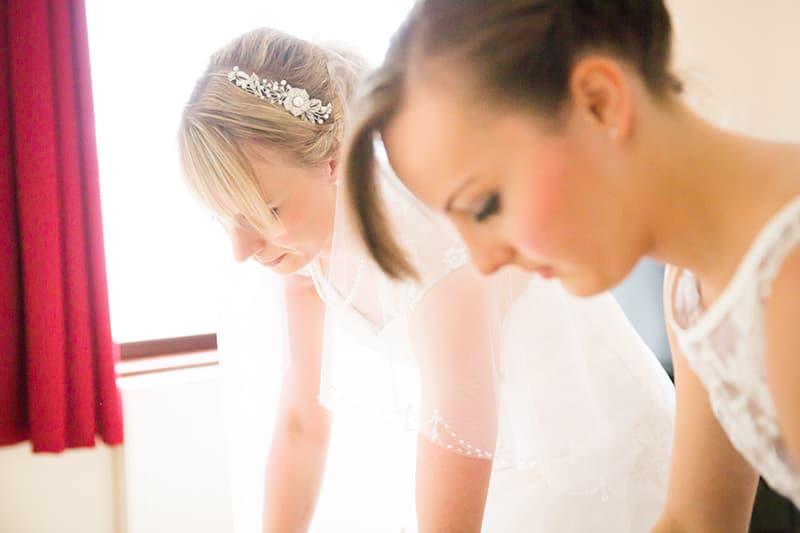
Photo by Michael Topham
As most digital photographers know, taking the shots is only half the process and having taken all the wedding shots, the work really begins.
From a good day’s shooting you can expect to have anywhere between 300 and 2,000 shots, hopefully all backed up to a drive.
Your first challenge, once you have all of your images visible on your computer, is to reduce the number down to something that is a bit more manageable.
For an initial set this should be down to no more than 400 and potentially closer to 300.
Once you’ve removed all the obvious duds, start to rate the images to allow you to build up collections of definite ‘keepers’, ‘maybes’ and ‘maybe nots’.
Software such as Adobe Lightroom are specifically designed for this kind of heavy image crunching and allow you to whittle down your selection fairly quickly. Their non-destructive image management also make it easy to apply simple image adjustments individually or globally.
You can then perform more specific and accurate adjustments once the final selection has been made.
2 – Photoshop Tweaks
If you’ve done a good job of shooting you shouldn’t need to spend much time on the PC.
Obviously if you shot them in RAW there will be the standard processing to do: adjusting contrast, colour and so forth.
A few shots may benefit from a tighter crop, or the removal of the odd distracting background element. In some high-contrast shots you may find that a small adjustment of the Highlight/Shadow control (under Image>Adjustments in Photoshop) will increase detail in highlights (eg the bride’s dress) and shadows (dark suits) .
This is the time to edit your shoot. You will have probably taken many dozens of pictures, and there’s no point handing over photos of people blinking and so forth.
3 – Presentation
In days of yore a newly married couple would receive their precious photos mounted in a thick leather album, but nowadays there are many alternatives.
The album is still a great way to present pictures but you can also have them made into a hardback book. If you can display the images on a website or online gallery the guests will probably order some prints too.
Depending on whether this is a commercially motivated venture, you could put them on a site such as Photobox, where guests can order and pay for their own shots, or a simple gallery, where they must order through you. Another option is a DVD slideshow, with music – but only in addition to printed output, not instead of it.
4 – Final Selection
At this stage it is standard practice to show the images to the couple, to allow them to pick their favourites for the album, or individual prints.
This can be done by creating a preview book, or a series of contact sheets. Some photographers may offer to display these on a website, either in addition or as an alternative to the printed version.
Give the couple a limit in the number of images, so as not to overcrowd the album – depending on the layout, this should be around 150 images. Once the images are chosen, individual image tweaking can be done to ensure each one is as good as possible.
5 – Books
 There are two main options when it comes to creating the album: the traditional, with prints mounted into the pages; or a modern photo book where the images are printed directly onto the pages.
The photobook comes in a range of prices from cheap paperbacks to high-quality coffee-table books for hundreds of pounds a time.
Photobook companies provide customisable layouts using their own software to produce the album. Many pros, however, will choose to design the layout themselves using a design or photo-editing program.
For album ideas see blurb.com and loxleycolour.com
Featured photo, and article by Michael Topham
More reading:
10 shots you must get at weddings!
Wedding photography is the most competitive
Best cameras for wedding photography
Best kit needed for wedding photography
Tune in next week, for the next article in the series of the AP Improve Your Photography Series – in partnership with MPB.
- Part 1: Beginners guide to different camera types.
- Part 2: Beginners guide to different lens types.
- Part 3: Beginners guide to using a camera taking photos.
- Part 4: Beginners guide to Exposure, aperture, shutter, ISO, and metering.
- Part 5: Understanding white balance settings and colour
- Part 6: 10 essential cameras accessories for beginners
- Part 7: Beginners guide to the Art of photography and composition
- Part 8: Beginners guide to Photoshop Elements and editing photos
- Part 9: Beginners guide to Portrait Photography
- Part 10: Beginners guide to Macro Photography
- Part 11: Beginners guide to Street Photography
- Part 12: Beginners guide to Landscape Photography
- Part 13: How to shoot Action and Sports Photography
- Part 14: How to shoot wildlife photography
- Part 15: Raw vs JPEG – Pros and cons
- Part 16: How to create stunning black and white images
- Part 17: How to photograph events and music
- Part 18: Pet photography – how to photograph pets
- Part 19: The ultimate guide to flash photography
- Part 20: The ultimate guide to tripods
- Part 21: Create awesome photos with light painting
- Part 22: Beginners guide to file and photo management
- Part 23: How to shoot food photography
- Part 24: Complete guide to outdoor light
- Part 25: Top tips for stunning car photography
- Part 26: How to master waterfall photography
- Part 27: How to use social media as a photographer
- Part 28: How to get started in film photography
- Part 29: How to connect your camera to your phone
- Part 30: How to make a great video recording with your camera
- Part 31: Why you should join an online community
- Part 32: Find the best online website to share and sell your photos
Find the latest Improve Your Photography articles here.