Beginners guide to using a camera effectively to take great photos
Anybody new to photography and a first proper camera is, we hope, excited for the journey of discovery that lays ahead. Parts of it will be painstaking, too, as you get to know how things work and learn some lessons the hard way; through mistakes. We have plenty of quick hints and tips to share that will help you get better, sharp blur-free photos, as well as guide you through the important things you need to know about cameras first.
If you aren’t already, it’s worth being familiar with the main camera types.
We are talking about digital cameras here – there are four essential components for a digital camera to work. These are:
- The camera
- The lens
- The battery
- The memory card
Without these, you’ll have great difficulty taking any photos. Ensure that the battery is charged, and that your memory card isn’t full. With these all in place, it’s time to get to know the main components and parts of a camera.
Let’s start with the main parts from the top of the camera:
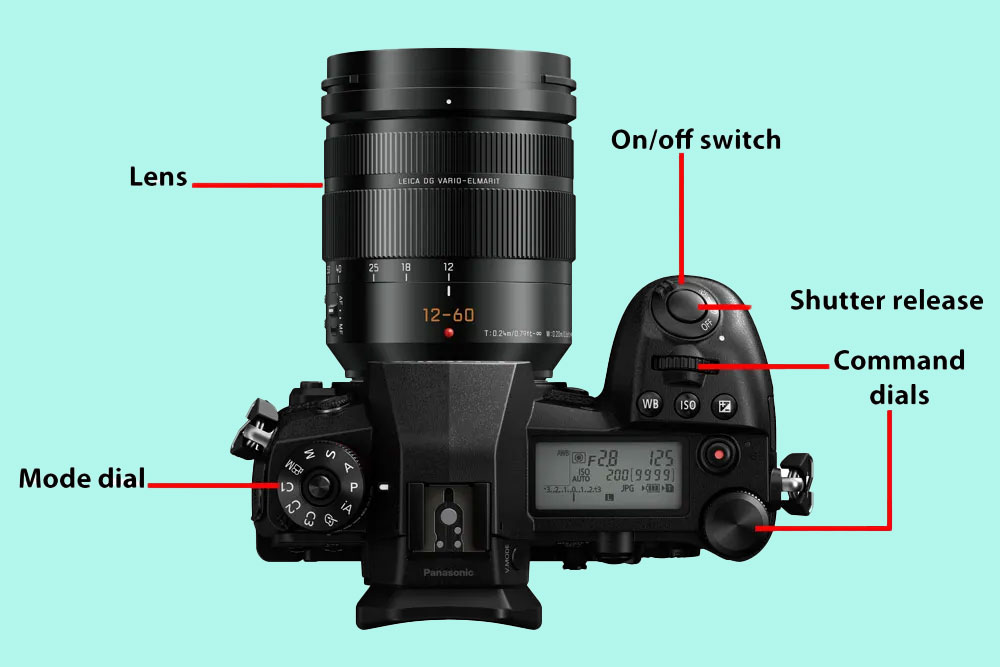
Lens – See our guide to lens types to learn more about lenses: without one, you won’t be able to take any photos! Lots of cameras have the lens built-in to the camera, if this is your camera, then you don’t need to worry about changing lenses.
On/Off switch – A useful tip: make sure you switch it off when not in use to save your battery life.
Shutter release button – This is what you use to take photos, and it has two stages or steps. If you learn the two-step process, it’ll ensure you get correctly focused photos. Half press it to activate Auto Focus (AF). By looking at the screen or viewfinder you’ll be able to confirm that focus is correct. Then, fully depress/press the button to instruct the camera to “release” the shutter and take the photo.
Command dials – These are used to adjust settings, such as exposure compensation, or the aperture and shutter speed, depending on which mode you are in.
Mode dial – Most cameras feature a mode dial. If yours doesn’t have one then it may have a mode button, or other way of switching to different shooting modes. For the purposes of this article we’ll run through the main modes on a dial.
The P or Program is a good place to start, or the iA/Auto dial. These are the modes where the camera chooses the shutter/aperture and ISO settings for you, letting you concentrate on taking the photo.
Here are some other main modes found on most cameras:
- Auto (or intelligent Auto)
- P = Program (Program Auto)
- A = Aperture priority (Av on Canon/Pentax cameras)
- S = Shutter priority (Tv on Canon/Pentax cameras)
- M = Manual shutter/aperture control
Aperture and shutter priority modes let you set the aperture or priority and the camera will work out the rest for a correctly exposed photo.
The camera from the back:
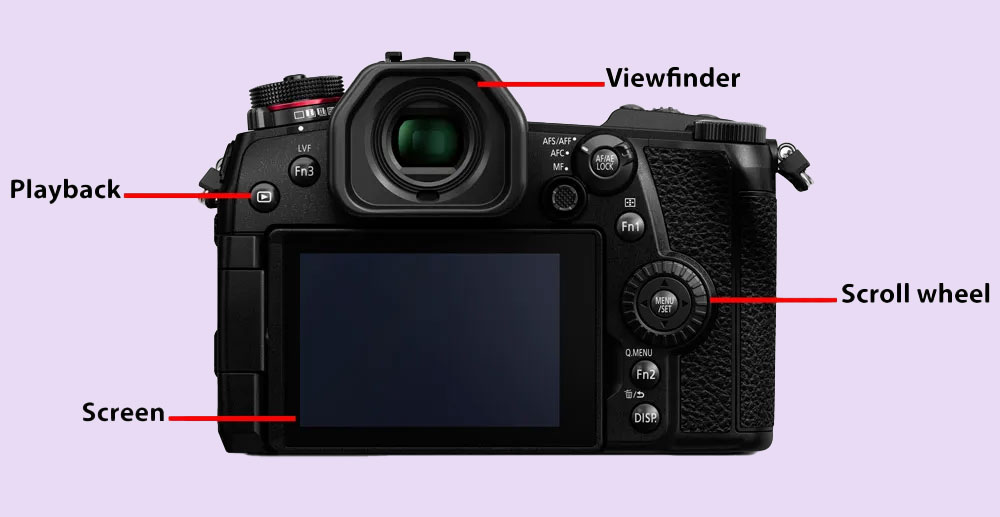
Viewfinder (if it has one) – With a Digital SLR, this is an optical viewfinder that lets you see through the lens. With a mirrorless camera, this will be an electronic viewfinder, showing you exactly what the camera’s sensor sees.
Rear screen – On many cameras this will include some form of tilt system, so you can tilt the screen up or down, or move it to face forwards. It’s used to compose shots and change settings. In cameras that lack a viewfinder (mainly mirrorless), the screen is the view through which you take photos. Whether you use the screen or viewfinder is down to personal preference, which you’ll arrive at with practice; but the viewfinder is helpful when outdoors in bright light. Many modern cameras feature a touchscreen, allowing use of the screen to set the focus point or change settings.
Controls / Dials (Rear) – You’ll often find a scroll wheel or a 4-way controller, that can be used to change settings, such as the focus point, or to choose different options and settings in the menus. It’s worth familiarising yourself with these controls so you can find and change settings as needed.
Playback – The playback button is what you press to access and view the photos you’ve already taken. It’s a good idea to learn where this is, so you could find it in the dark ie when shooting in low-light.
Main areas of interest from the front of the camera:
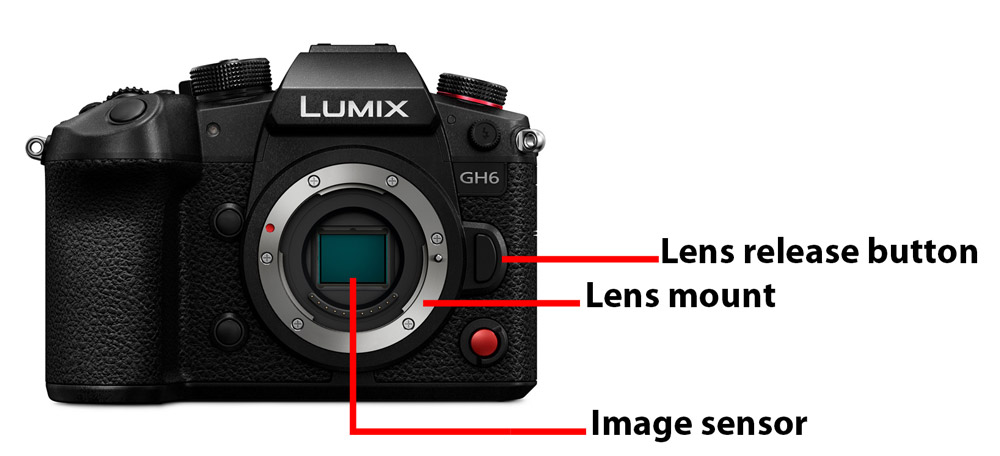
Image sensor – The image sensor is the part of the camera that absorbs the light from the scene, after it travels through the lens. These vary in size, but the most important thing to remember is that any dust or dirt that gets onto the image sensor can damage image quality eg specs of dust on images. Leaving the body or lens cap on the lens at all times between shooting reduces this – it is much easier to keep a sensor clean than it is to clean a dirty sensor.
Lens mount – The lens mount is what the lens attaches to. Line up the red/white dot on the camera body to the red/white dot on the lens, and then simply twist the lens till it clicks into position.
Lens release button – Press this to release a lens from the camera body in order to change lenses. You only need to press this when taking a lens off the camera; not when putting one on.
The main parts of a camera – from the bottom:
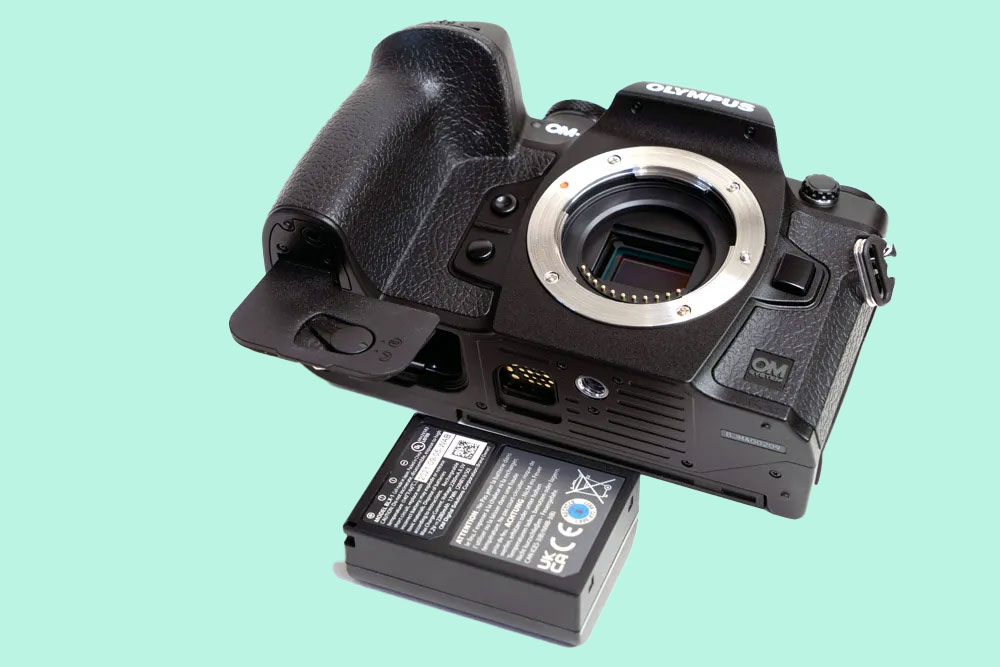
Battery compartment – On most cameras, the battery compartment is underneath the camera.
Tripod socket – You’ll also find the tripod socket underneath the camera, and this will be a metal, circular socket, with a metal thread (on most cameras).
Memory card slot – The memory card slot will normally be next to the battery, underneath the camera, but could also be on the side of the camera, so check your manual, or have a look around the camera to find where your memory card slot is.
Setting up your camera…
Once familiar with the main parts on your camera, with a memory card and battery installed in it, and a lens attached, you can switch it on and start taking photos.
If you have the camera’s manual, we recommend reading it for specific things you wish to, or should know about it. If you don’t have one, you should be able to find the manual on the manufacturer’s website.
With your switched your camera on, check through a few settings to ensure you achieve the best image quality possible: here are some quick and simple things to run through:
- Image size – check you’re shooting at the highest resolution available.
- Image quality – check you’re shooting at the highest possible quality, such as Fine or Extra/Super Fine. If you want to edit photos later, then you can shoot JPEG+RAW
- White balance settings – Check your white balance settings. Leaving this on Auto will generally give you great results. If you’ve accidentally changed it or left it at a wrong setting, then this can result in colours looking wrong or odd.
- Exposure compensation – this is normally shown with a +/- bar and/or number. Check this if your photos are looking over-exposed (too bright), or under-exposed (too dark).
- Focus settings and switches – make sure your lens and camera are set to auto-focus (AF) instead of manual-focus (MF), as these can sometimes be knocked when taking cameras out of bags.
- Memory card space – how many photos you can take will be displayed on screen. If not displayed, then you can toggle through the display with the DISP/display button – or check your memory card. To learn more about memory cards, have a look at our complete guide to memory cards.
- Battery life – again, this will be displayed on screen. There is variation between models in battery endurance, so it’s worth a regular glance at this while you get used to your camera. A most gifted photographer won’t look like one if out of power at a shoot.
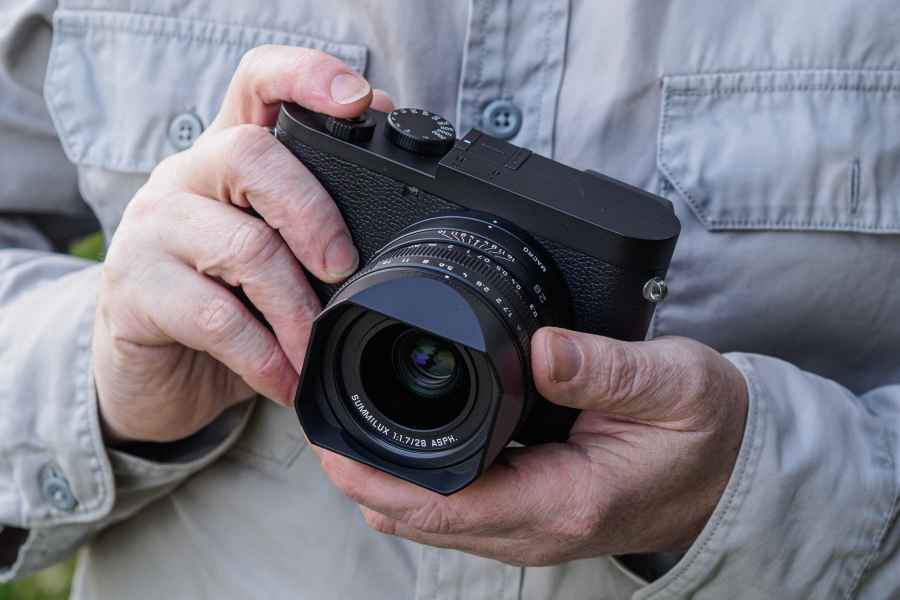
How to hold your camera…
Hold the camera with two hands where possible for a better grip, and to keep it more steady in your hands. This is useful for achieving sharp shots, as any camera movement can result in blurred (or shaky) shots. You’ll feel more secure in yourself, too, to the same effect.
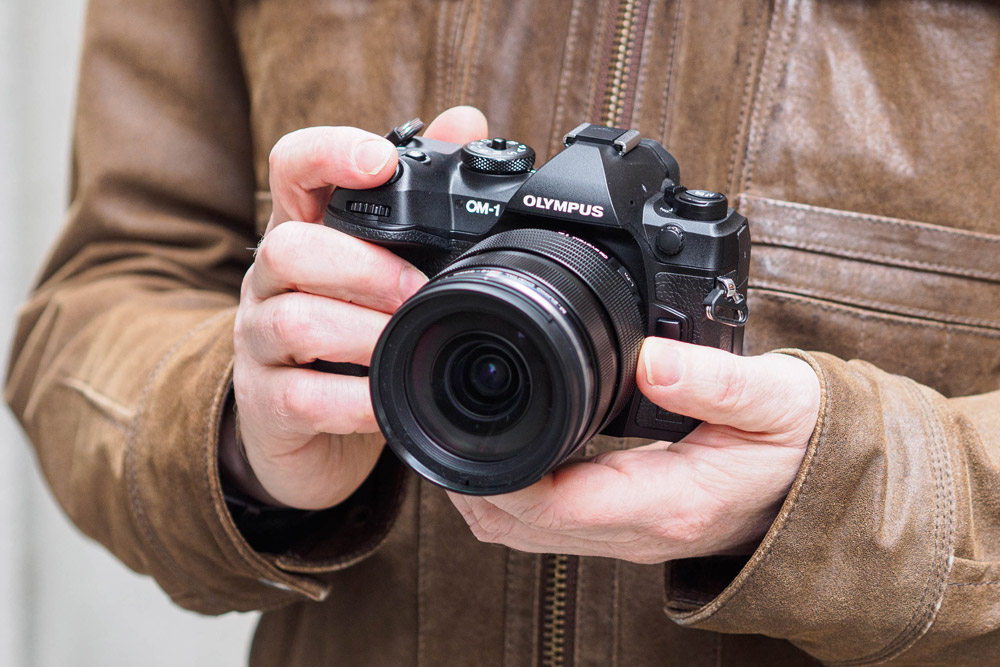
By holding the camera with two hands in this way, there is a firm hold on the cameras main grip, with the index finger positioned ready to take a photo. The left hand supports the lens, and can be used to adjust the lens zoom or focus if necessary.
This method gives you two points of contact with the camera, providing a steady grip, balance and control: desirable when using the screen on the back of the camera to compose your images.
The next step is to use the viewfinder… (if the camera has one)
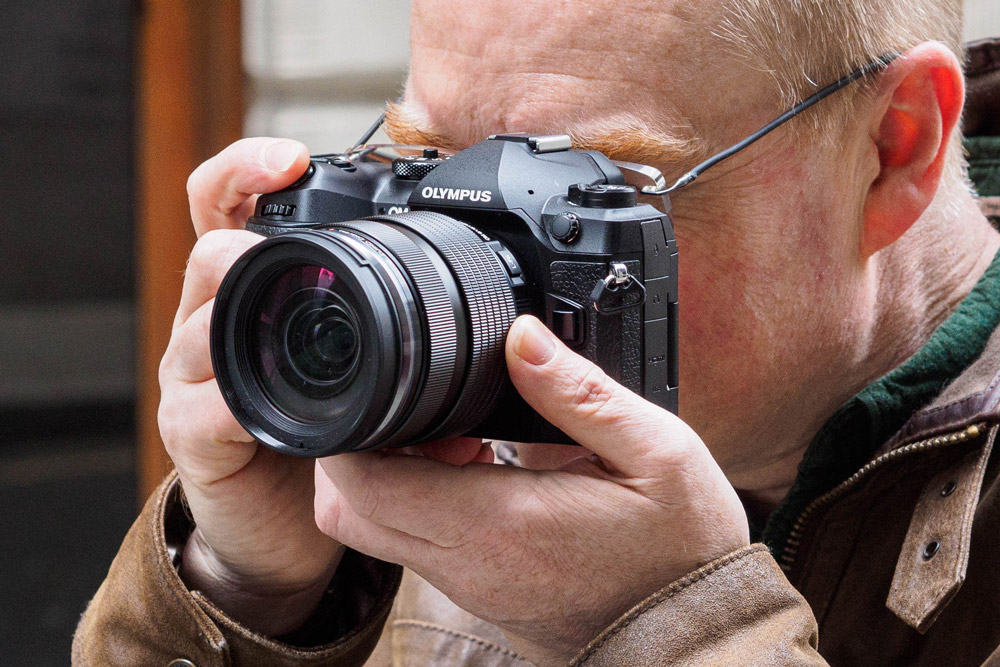
Holding the camera up to your eye gives a great view of the scene you are photographing, especially if your camera has a large viewfinder. However, it also provides the benefit of having a third contact point with the camera; naturally improving stability and control when taking photos.
Having nailed this, you can get out there and start taking photos, and really learn about your camera. The more familiar you are with it, the easier you’ll find it to change settings when needed, and have the right settings for taking your next brilliant photo!
See other beginners’ guides here: