File and photo management may not seem like the most exciting of topics, however it is one that is vital for any photographer whether you are professional or amateur. Keeping on top of your images and creating an efficient filing system will not only ensure you can easily and quickly find any images shot in the past, it’s also necessary if you want to run a successful photography business.
How to manage your photos
There are many photography based Digital Asset Manager (DAM) software programs out there that all perform similar tasks. Here are our top list of recommendations if you are unsure on where to begin –
- Adobe Lightroom Classic
- Adobe Bridge
- Apple Photos
- Adobe Elements Organizer
- ACDSee Photo Studio Professional 2022
For the purposes of this article we’ve focused our tips and advice around Adobe Lightroom Classic. This is an excellent DAM and is widely used amongst photographers. If you are thinking of going down a professional route and want to create a more efficient file management system then Adobe Lightroom Classic should be high up on your priority list. If you are using another DAM system the same advice will still apply however features may vary from software to software.
Where should I begin?
After any photoshoot the first thing you want to do is upload your images to your storage. Some photographers like to import their images directly into their image editing software, however we recommend that you first import images either onto an external device (see storage solutions below for more advice) onto your computer or ideally both so you have them backed up.
Once your images have been filed into your system you can implement all the necessary steps to easily locate them – we’ll get to this in a minute! As a quick side note make sure you copy your images from your memory card rather than just moving them, as that way your original images will be safe if anything goes wrong.
Every photographer has a different way of sorting and storing their images, and there is no right or wrong when it comes to this aspect. The key thing is you need to be able to understand your filing system and decide upon how you are going to sort your images. For example do you want to file your images into years, months, genres, or another way? Only you can decide here. Our preferred method is to create a yearly folder system.
Here are our top tips if you want to do the same:
- Create a folder called ‘Images’
- Inside that folder create a yearly folder – for example this year label as ‘2022’
- Inside the ‘2022’ (or whatever year it may be) create a new folder of your shoot. Label this folder with relevant information for example client’s name, location, model (if used) and date. A good tip is to use the date in reverse order, so 27th April 2022 would be 22.04.27. This means you can sort the folders by name and it will sort them by date! Here’s an example of one of ours: 22.04.27_TheSailLoft_food_pizza.
- As a final step, rename the uploaded images with the same information as the folder name whilst retaining the original filename if you have made any notes about any particular images on the photo shoot. This can be done by selecting multiple files and right clicking to rename. This is particularly useful when it comes to searching for images at a later date and only takes a minute.
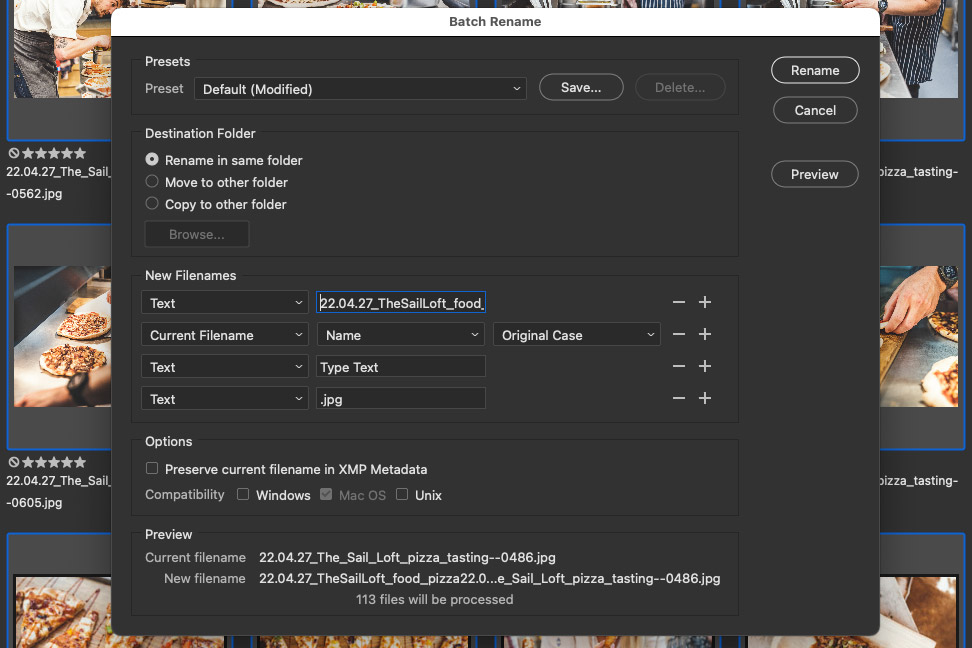
Labelling your folder and images with as much detail as possible will make them easier to find
Why do I need to Keyword my images?
Once your images have been copied you’ll then need to import them into your chosen DAM (in our case it is Lightroom) and Keyword. Keywording is a lot like Hashtagging – essentially you are tagging each image with words that are saved into the metadata. The reason to Keyword your images is if you need to find them quickly at a later time or search a particular genre from your library. Keywording is really easy to forget to do after a photo shoot or just to do it half-heartedly, however if you spend just a few minutes getting it right it will make a world of difference to your file management system.
With keywording the trick is to identify what is happening in the picture in just a few words. For example if you have used a model on your photo shoot one of the keywords could be their name, their hair colour, or what they are wearing. Although you can add the same keywords quickly to all of your images by simply having them all selected it can also help to run through the shoot and pull out any differences amongst the images. For example if there is a person in the landscape in one of your images but not another you could put person as a keyword. Again you’ll start to create your own system with this and know what keywords you want to apply.
Top tip! In Lightroom Classic the Keywording feature can be found on the right hand side of the scene under the Library Module.
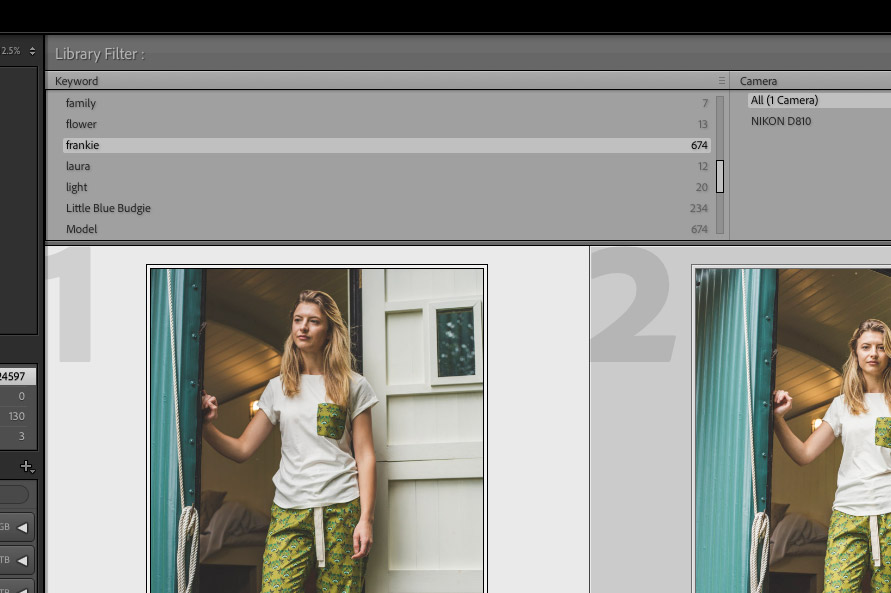
Keywording helps you quickly find images at a later date
Rate your images
After you’ve completed Keywording you may find it useful to rate your images. By giving your images a rating score it means you can quickly edit them down and just concentrate on fully editing the approved images. This really helps if you’ve just completed a large photo shoot like a wedding, or a shoot with 500 images plus.
In the future you may want to consider getting rid of any unrated files to free up some storage space. It can be very tempting to hold onto everything you have ever shot however there are times when deleting is necessary. Remember it costs money to store images so take this into account.
Top tip! To rate any image in Lightroom simply ensure it is selected and then key in a number on your keyboard from 1-5. We give any image we love a 5, and 4 to any we like but are unsure if it will make the final cut. Any images that are then unrated can either be removed or just left as they are.
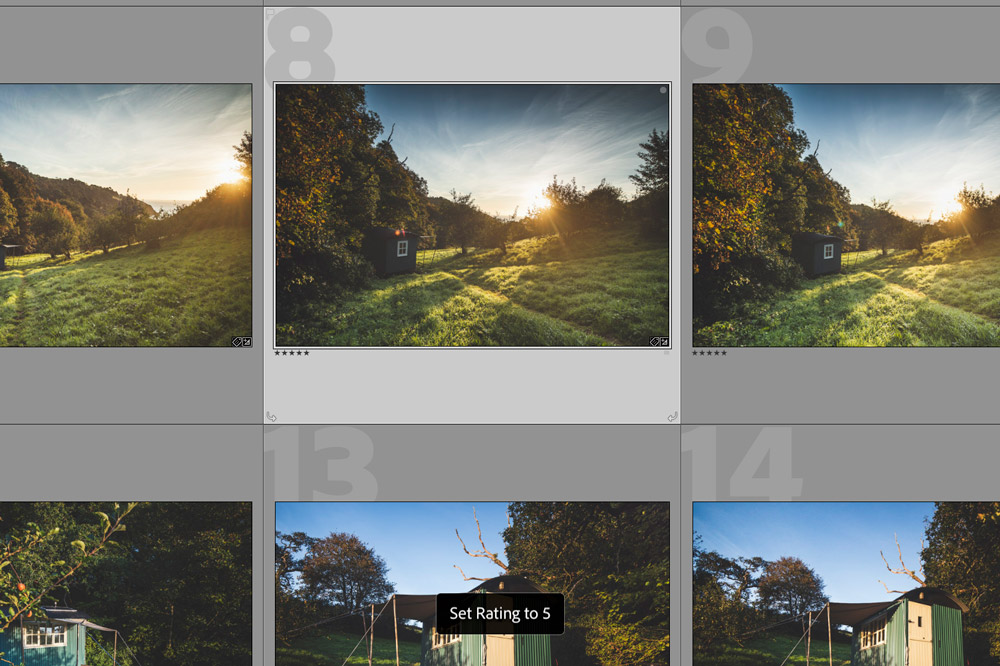
Rating your images helps you to eliminate unwanted ones that you can eventually delete
Our final checklist:
- Upload your files into your storage system
- Rename your files – keep the original file name too
- Keyword
- Rate
- Delete when necessary
How to store and backup your photos so you don’t lose them:
Above we briefly mentioned saving your images to an external device but let’s expand here so you can make a better informed decision when it comes to image storage. There are many different storage devices, systems and options to choose from.
Our top recommendations for photographers to look into, whether amateur or professional are the following:
- Online storage
- Portable external hard drive (powered by computer)
- Desktop external hard drive
- Solid State Drive (SSD)
- Network Attached Storage (NAS)
How much storage space you require will determine which storage system would be best to invest in. Storage devices have grown in size greatly over the last few years: they have needed to as image sensors and video resolution have also increased typical file sizes! 10 years ago 500 Gigabytes (GB) was a lot of storage whereas now it doesn’t seem like much. We now typically measure storage space in Terabytes (TB) – 1TB is equal to 1000GB.
If you are planning on shooting more than once a week or intend to shoot lots of video, or shoot in raw, you’ll want at least 6-8TB+ of storage. This may seem like a lot however if your camera has a high-resolution sensor it really doesn’t take long to fill up 8TB! Video takes up a lot of space so keep this in mind, especially when recording 4K or 8K video.
If you are only doing an occasional photo shoot (i.e. once a month) as a hobbyist we’d recommend looking at getting around 2TB to begin (or more depending on your budget). But this also depends on the type of photography (or video you do), shoot lots and you’ll need more storage. You’ll also want to think about future proofing.
There are pros and cons to any storage solution. What you decide upon will have to work for your budget and needs. Here are a few pointers to help you with your decision:
Online Storage
Pros
- Images are protected against theft, fire, and flood as they are stored online
- Access your files from anywhere giving you greater flexibility
- Syncing and updating. When you make changes to a file these changes will be updated across any
- device you access the cloud from.
Cons
- It can be expensive to store images (especially when you start going over 2TB)
- If you have a slow internet connection images can take a long time to upload
- If you no longer have the funds to pay for the monthly or yearly subscription your images will eventually become inaccessible. Many companies allow a grace period so you can move your images elsewhere.
There are many online image storage services out there. A few worth checking out include:
- iCloud
- Google Photos
- Dropbox
- iDrive
- pCloud
- SmugMug
- Microsoft OneDrive

Online storage is a great way to share images easily with clients and also offers full protection against theft or damage
External Hard Drive (desktop and portable)
Pros
- Great value for money – for instance you can buy a Seagate 4TB hard drive for just $90/£90.
- Many are small and light – easy to transport
- Portable hard drives powered by computer so no power source necessary
- Recommended for hobbyist and beginner photographers
Cons
- Not protected against theft or damage
- Moving parts makes them more likely to break (compared to a SSD)
- Often slower than a SSD
With these it’s well worth going with a well known brand. External hard drives worth considering on the market are:
- WD Elements Desktop
- SEAGATE Expansion Desktop External Hard Drive
- SanDisk G-DRIVE External Hard Drive
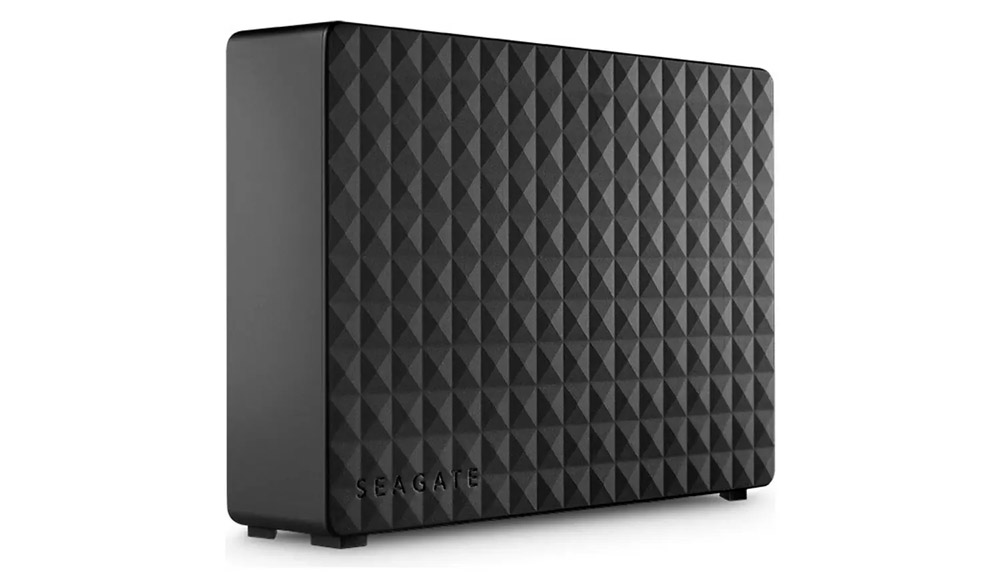
The SEAGATE Expansion Desktop External 10TB Hard Drive is just £180. That’s a lot of storage you get for your money
Solid State Drive (SSD)
Pros
- Faster compared with portable external hard drives
- More reliable – no moving parts which means they are less likely to break
- Small and light – easy to transport
- Powered from computer
Cons
- Not protected against theft or damage
- More expensive compared with portable and desktop external hard drives
Check out these SSDs:
- Samsung T7 SSD
- LaCie Portable SSD 1TB Solid State Drive
- Adata SD700 External SSD
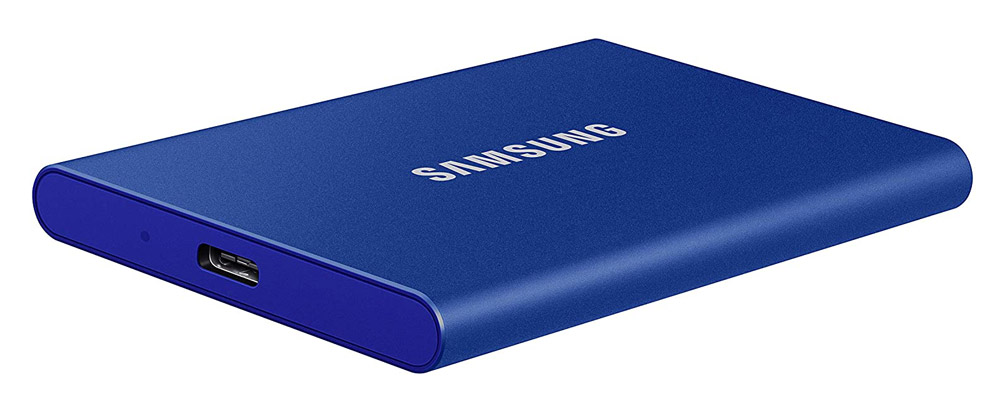
Solid State Drives, like the Samsung T7 SSD here, have no moving parts so generally they are quicker and more reliable compared to an external portable hard drive
NAS (Network Attached Storage)
Pros
- Use across multiple computers and devices
- Add more hard drives through configuration when needed
- Access your files from anywhere giving you greater flexibility
Cons
- Expensive to set up
- Not protected against theft or damage
- Need strong network connection to upload/download large files (if using over the internet)
Our recommended NAS on the current market include:
- WD My Cloud EX2 Ultra NAS drive
- TerraMaster F5-422 10Gb high-speed quad-core NAS
- IoSafe 218 2-Bay NAS Enclosure
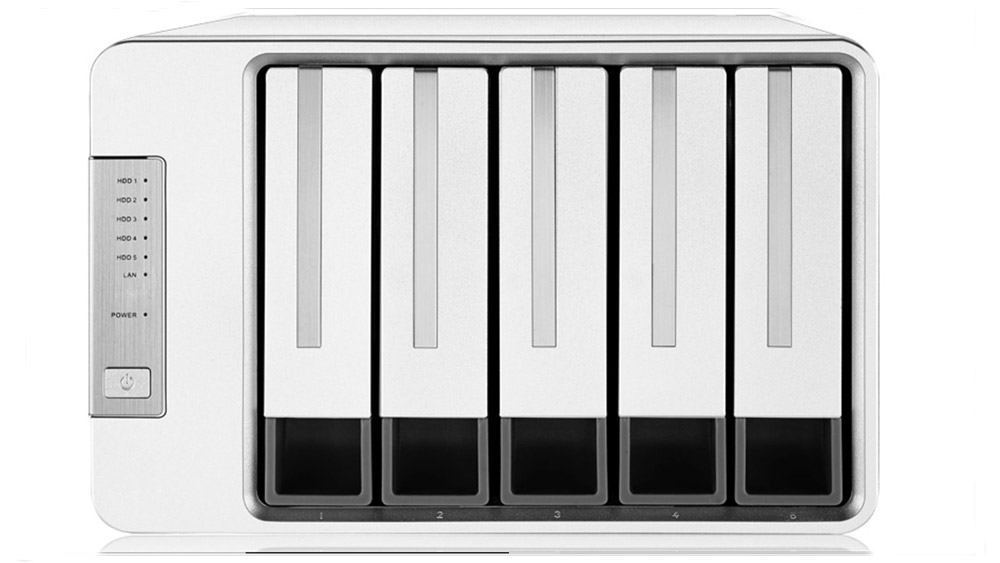
NAS image storage devices are aimed at the professional and work best for those needing a lot of storage space and for those working with multiple people
Top tip! Don’t put all your eggs in one basket! Ideally you want to select at least two storage methods. For example if your images are on a hard drive also upload them onto an online storage network so if your hard drive goes missing or is destroyed you still have them elsewhere.
And finally make sure you backup your photos!
The final thing to take into account when it comes to keeping your images safe is to back them up. This can be done in a number of ways. Either you can manually ensure all of your images are backed up – for example copying a folder from your main storage drive to another – or you can set your computer to automatically backup for you, for example to your external storage drive.
If you use external storage (such as a an external drive) as your main storage, then buying a second drive is an easy way to have a backup of the main drive.
On a Mac, backup is done under the ‘Time Machine’ feature, and in Windows look for the ‘Windows Back Up’ feature. There are also subscribed and paid backup software packages available online, however these will cost you more money so work out your budget before committing.
Article: Claire Gillo
Featured image: George Milton, Pexels
Tune in next week, for the next article in the series of the AP Improve Your Photography Series – in partnership with MPB. Find the latest Improve Your Photography articles here.