

Miniature photography can be the ideal winter and evening project for a few reasons. Your subjects can be anything from figurines to your every day Lego for one. Not to mention, you can do it all from the comfort of your own home. Amy Davies asks three photographers how they got started in miniature photography, what equipment they use, and what their top tips are.
Photographing Miniatures and “Film sets” with Steve Berry
I decided I would teach myself product photography and learn how to use my camera for studio type shots. That started out quite basic, such as bottles of Pepsi, but it rapidly became boring until I remembered I had a few bits of Lego knocking around. I thought I’d create some movie scenes with them and posted my first picture on Instagram. I wasn’t expecting anyone to be that bothered but I got a great response, so I started posting a few creations here and there”.
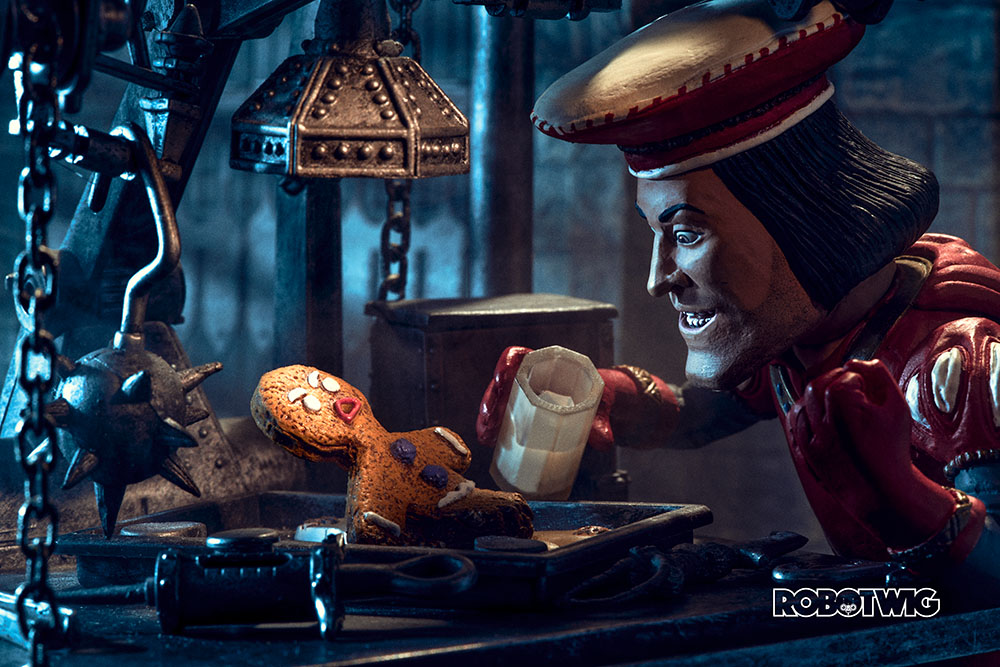
As lockdown became a lot lengthier than I anticipated, I started to think a bit more about my photos and started a theme called the COMPARE-O-SHOT where I would replicate a famous movie scene using Lego and whatever I had around the house. These went down a storm, and soon the creations started getting more intricate and extreme.
As I had no income, I had to improvise by illustrating mini sets on the computer, printing them out on card and using household items as backdrops and props, from there, it evolved into the work I create now.
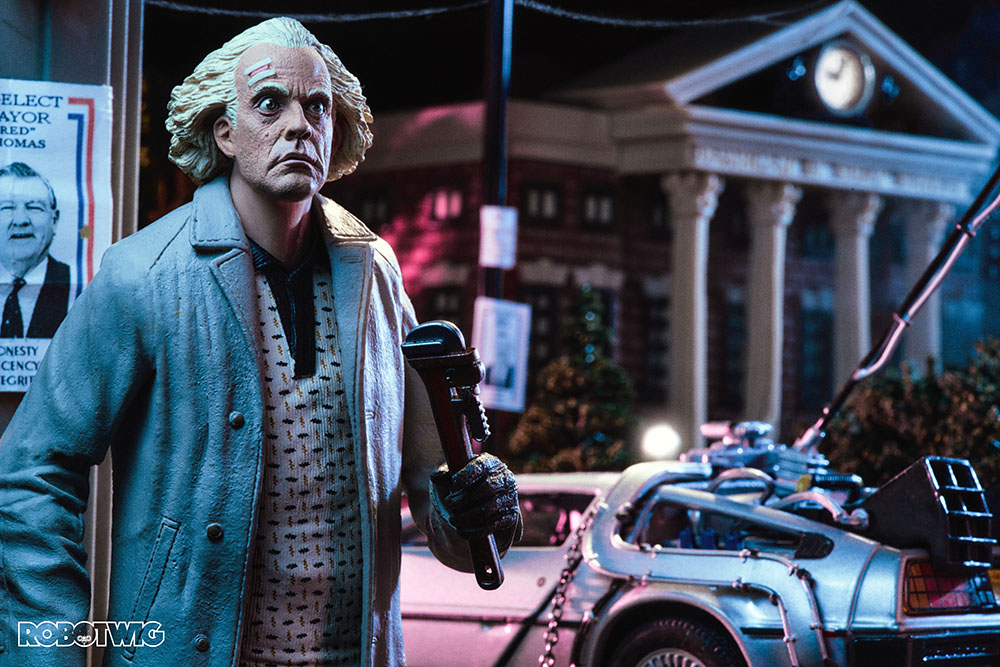
All my shots are based on whether or not I have the props and the figures. It’s all a low-budget exercise, which can be frustrating but also rewarding. Sometimes I have a clear vision of what I want to do, other times while I’m creating a particular scene something else may evolve from it, so I’ll create something new on the spot. I don’t sketch anything out, I just get on with it and see if it works.
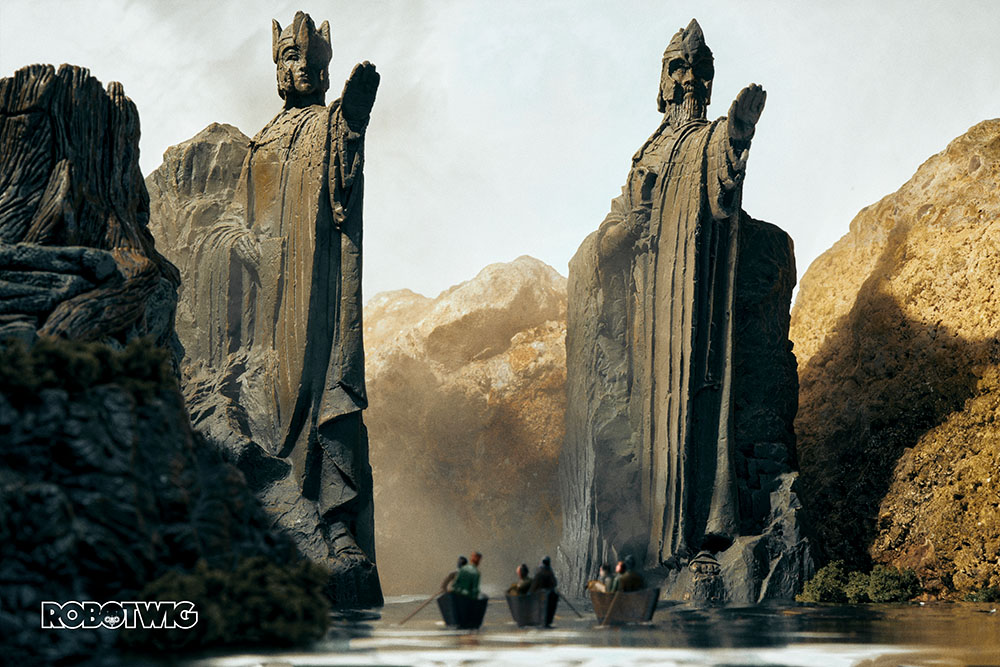
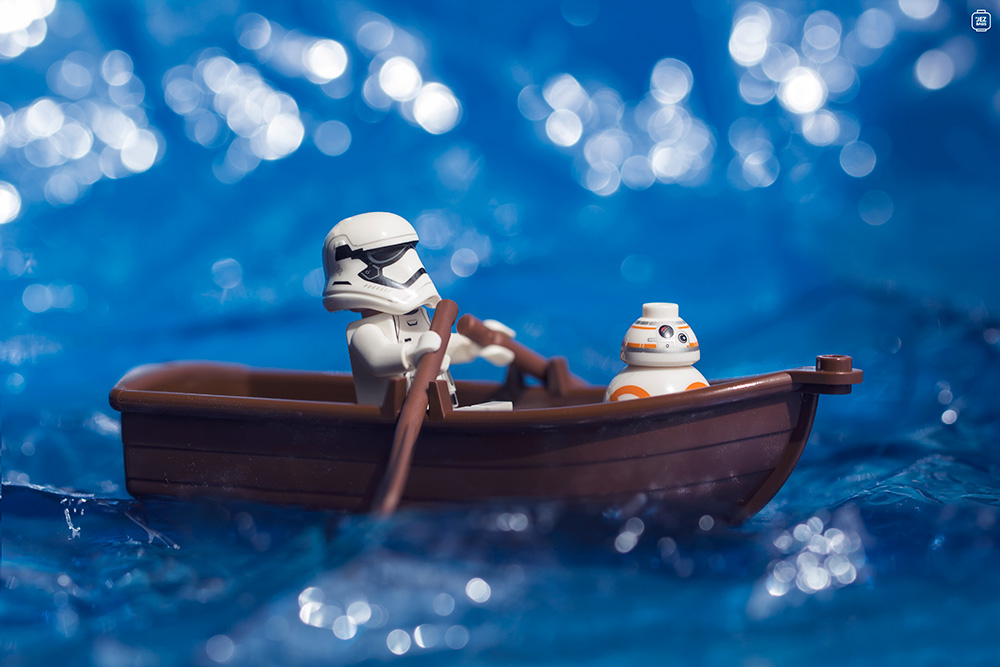
For example, recreating the Lord of the Rings ‘Gates of Argonath’ scene, I had a clear vision for that. I knew foil would work well for water, I had a couple of little miniature boats, and the rocks I found in the garden. Again, I already owned the bookends. The hardest part was piecing it together and not knowing if it was going to work out, but what was in my head is exactly what you see in the final photo, I’m really proud of it.
You don’t need fancy equipment to do this, you don’t need lighting – in fact you don’t even need a camera, many people just use their phones. I didn’t buy any new equipment for this project, everything I already owned. The key is just to have fun with it.
I have had an amazing response from the public, right from the beginning there’s been a really supportive network of followers on social media who have kept me toing when I’ve felt like giving up. My work has also helped other people – I received some lovely messages from people that said they were having an awful day and my photo cheered them up, it’s such a great feeling. I’ve even had celebrities along the way commenting on my work, which is also great.
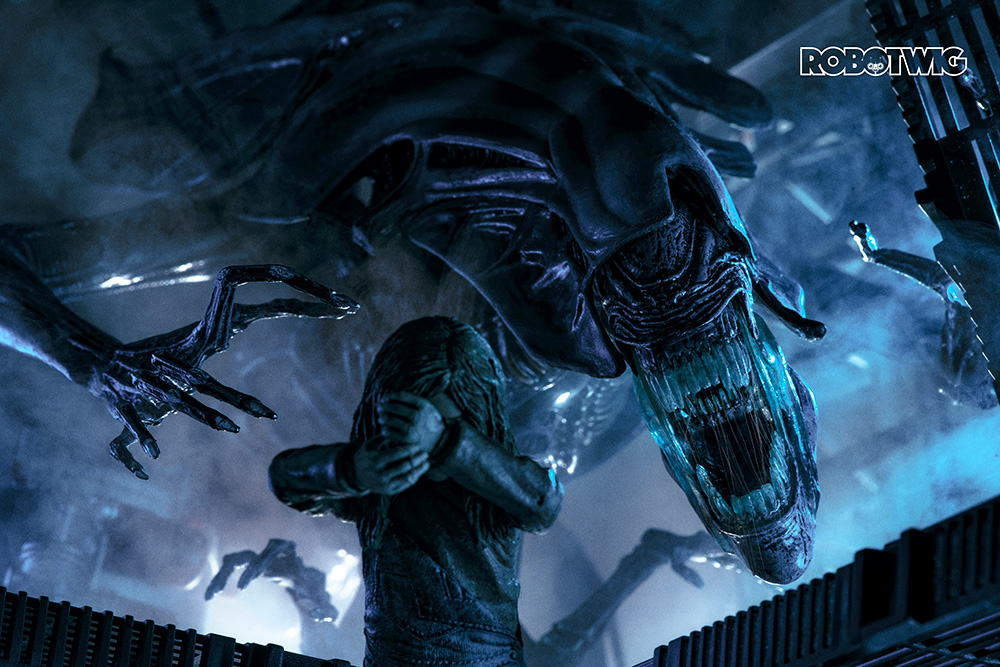
Read more about Steve Berry recreating scenes from Aliens in miniature here.
Steve’s Top Tips for Miniature Photography:
- I always try and find things around the house with interesting textures. I’ve used a fold-up stepladder as interiors to a spaceship, cotton wool for clouds and explosions, glass from picture frames to recreate practical ghost effects, there’s quite a wealth of stuff to be used if you have the creative vision.
- Use a narrower aperture than you might normally, due to the small scale. Anything from f/9 to f/22 depending on preference. I use flash, so my settings are generally ISO 100 and 1/250 shutter speed. From there you can experiment and see what works.
- Shooting with coloured gels helps to create mood in your shots. I prefer to create about 95% of the look of the image in camera, but I will finish it off in Lightroom by boosting contrast and enhancing it just a little bit. I always remove the joints of the figures from my photos to help the viewer believe it’s real.
- Other things that can be added in post-production which aren’t always practical in real life include car headlights, terminator eyes, flashlights, TV screens and stuff like that – all of it gives extra depth.
What kit do I need for miniature photography?
- Sony Alpha A7R II
- Various lenses including 50mm, 32mm
- “Dodgy £11 tripods”
- An old Canon flash, and a couple of Godox flashes
- Reflectors made from A3 paper, black card or tin foil
Steve is a self-employed creative, working in graphic design, photography and filmmaking. His photographs of famous movie sets started as a lockdown project back in March 2020, needing something to occupy his mind after losing out on a new contract thanks to the pandemic. Steve believes that model and miniature photography is an art-form which deserves more recognition, and would relish further opportunity to work with galleries, at events and with brands. Robotwig.com
How to photograph Lego with Jeremy Rider
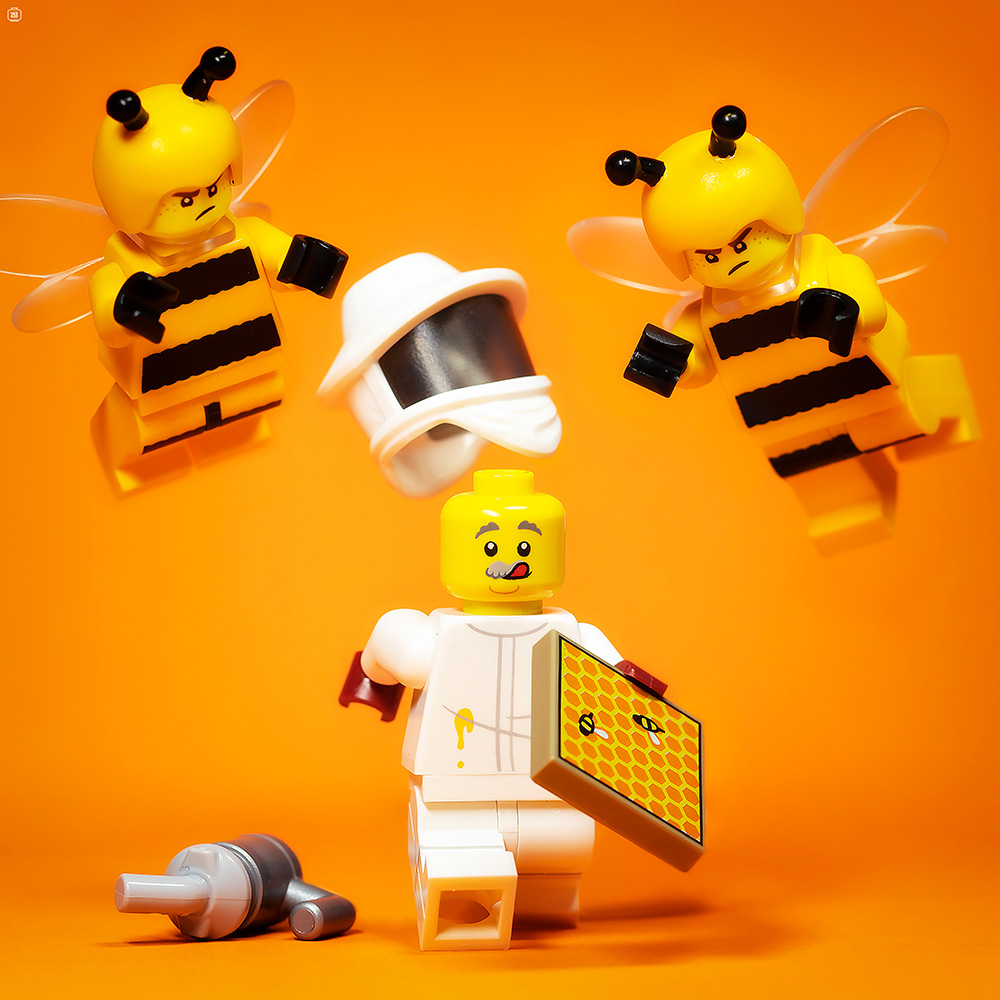
The reason why I do this type of photography is that I love the dynamic and imaginative stories you can create with LEGO and toys. Escaping into these fantasy adventures keeps my creative mind alive and feeds my inquisitive monster. There is so much you can do with the genre, the possibilities are endless.
My go-to for idea generation is my content calendar which focuses on key dates over the year. This is something I have created and added to over the years, so if I have a creative block, it’s a good way to speak ideas and create a design brief for myself.
Generally everything has a day associated with it over the year so in a week I might shoot Peter Parking swinging through some rooftops for ‘Spiderman Day’, then create a scene where an elephant is firing water out of its trunk for ‘World Elephant Day’. It really helps focus you on an idea and it’s always cool to try and improve on it the following year.
Linked to the calendar, I also follow what’s happening in world news, any interesting events, current affairs or maybe a new film or TV show has been released so you can create an idea that’s trending in the public eye. Also, when a new minifigure series or set of interest comes out, new ideas pop into my head. I jot it all down in my notebook of ideas.
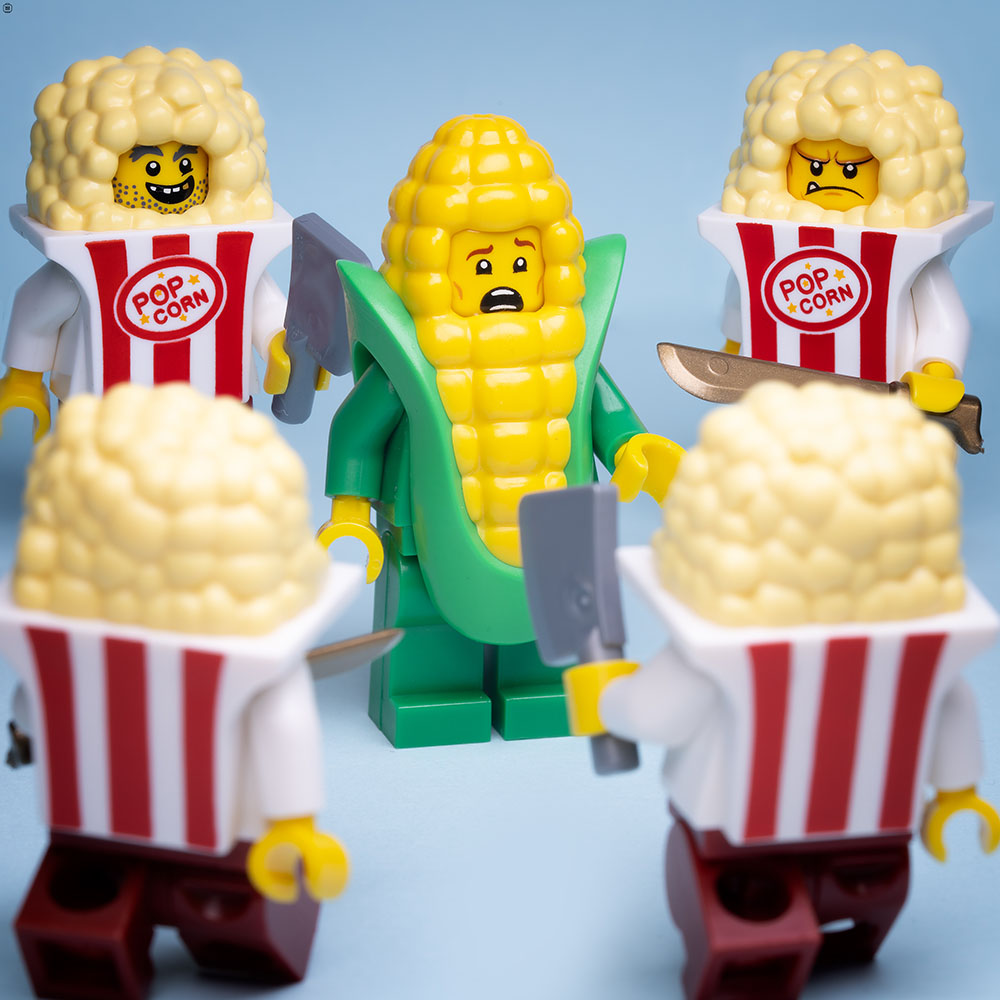
I generally do around 6/7 different set-ups in a sitting, mainly as I want to upload one photograph a day in the coming week. Once I Have my LEGO idea ready, I will select a complimentary coloured background from a plethora of different coloured cards. I have one piece for the floor, and one piece for the background. Coloured card backgrounds help the imagery pop when viewed on the Instagram grid next to other creations. It tends to create more focus on the subject matter due to the simplicity of the background.

The scene is set up on my desk, and I have two mounted Lume Cube Edge desk lights – one above the scene and one in front of the scene. The light above creates a softbox effect, backlighting the scene to generate shadows and elevate the background corners. The light at the front is the key light and illuminates the characters or subjects in the scene. I move the light around to try and remove the light reflection on the faces of the minifigures.
I use a Sony Alpha A7R IV with FE 90mm f/2.8 macro lens, attached to a 3-Legged Thing Leo Tripod with a Manfrotto three-way head. It’s useful to have flexibility in moving the camera’s angle without having to remove the camera from the tripod. I’m about 30-40cm away if it’s a fairly large scene (5 minifigures max), or as close as 15cm if I’m doing a very close macro shot (head and shoulders of a minifigure).
I shoot several pictures which I later combine in Photoshop. I focus on the different important parts of the scene knowing I can stack them later. It can take between 30 minutes to an hour for a shot to be complete.
Jeremy’s Top Tips for Lego Photography:
- If I want to have a minifigure in the air or off the ground, I use aluminium modelling wire. It’s very flexible and a must for this kind of photography. You will also need multi-purpose tack for keeping things in place.
- Always keep post-production in mind when setting up the scene. Use a brush to clean a minifigure before shooting. Don’t use too much white back as it’s a pain to remove in Photoshop and check to see if modelling wire is making a shadow. The amount of time I have wasted in Photoshop having to remove little hairs off a figure or having to redraw a minifigure’s arm back in can be very painful.
- I recommend the Photoshop plugin, Colour Efex Pro 4, which helps produce vignettes and for tweaking colours.
- I use f/16 to get lots of depth of field and lots of detail. I don’t allow ISO to go above 100 as I want to avoid graininess. I adjust the shutter speed accordingly, so the exposure value is as close to 0 as possible.
- If you want to create water but don’t want to get your figures wet, coloured blue acetate is great for creating out of focus water effects.
What kit do I need for Lego photography?
Here’s a run down of the camera, lenses, and other kit Jeremy uses for his creative Lego photography.
- Sony A7R IV
- Sony FE 90mm f/2.8 Macro G OSS Lens
- Venus Laowa 15mm f/5 Wide Angle 1:1 Macro Lens
- 3 Legged Thing Leo Tripod
- Manfrotto MHXPRO-3WG, XPro Geared 3 Way Pan/Tilt Head
- X2 Lume Cube Edge Desk Clamp Mounted Lights
- Lume Cube Mini Cube Light + Coloured filters
- AODELAN Camera Remote Control Shutter Release Remote
Jeremy is a Lead Digital Product Designer working for the LEGO Group. When not designing, his go-to hobby is photography, which is something he’s been doing for over 12 years. What started as landscape and nature photography, evolved into LEGO and toy photography around six years ago, sparked by receiving a LEGO Chicken Suit Guy minifigure as a gift from his wife. Visit his Instagram page for more of his work.
How do I photograph miniature toy figures? Jacki Gordon’s tips
I had a couple of Lego figures kicking about, and tried a few photos with those. I was rather pleased with them, but a friend told me they ‘didn’t work’ for him. Only slightly bruised from that feedback, I went online and brought a set a railway figures as they offered the potential for setting up more realistic looking dioramas.
Tentatively at first, I started to share these photos. I sent one off to the BBC and they posted it online as part of a roundup of pictures from around Scotland. From that point on, my Instagram followers increased from 4(!) to over 2000. Most importantly to me, followers commented that my images lifted their spirits. Such feedback fuelled what has now become a passion (and a bit of an obsession) for me.
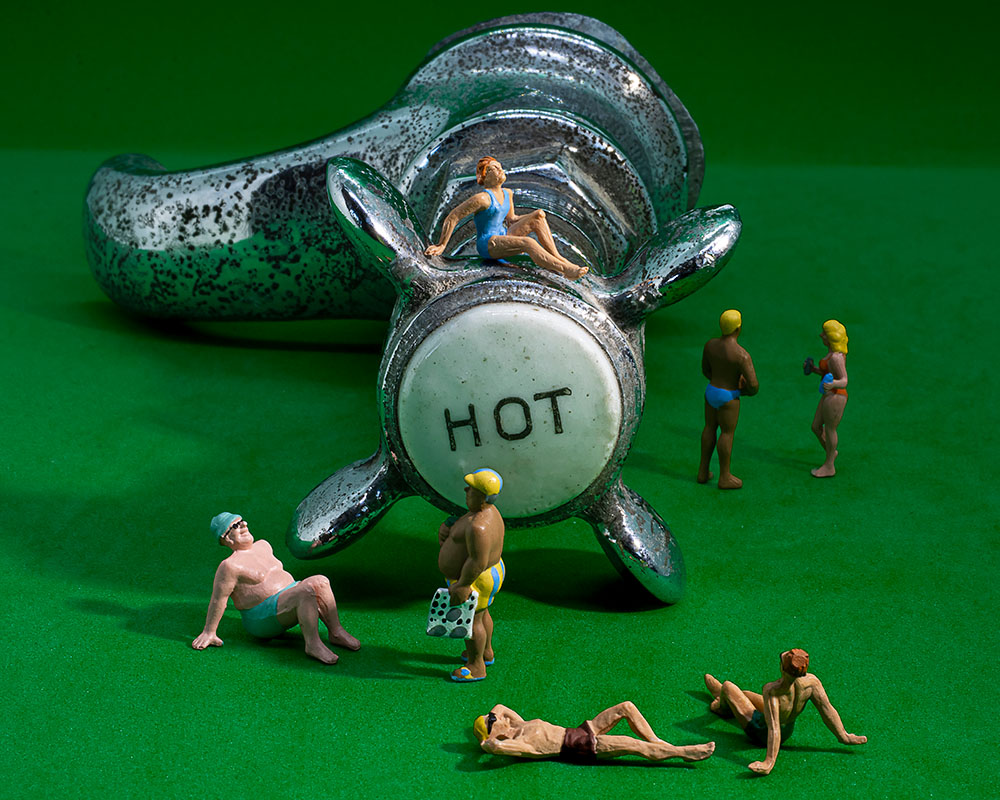
My head is always buzzing with ideas. If I get one in the middle of the night, I get up and add it to a long list written in a jotter by my PC. At the start my inspiration came from the fridge, the freezer, and basically anything that I happened upon our kitchen cupboards and drawers.

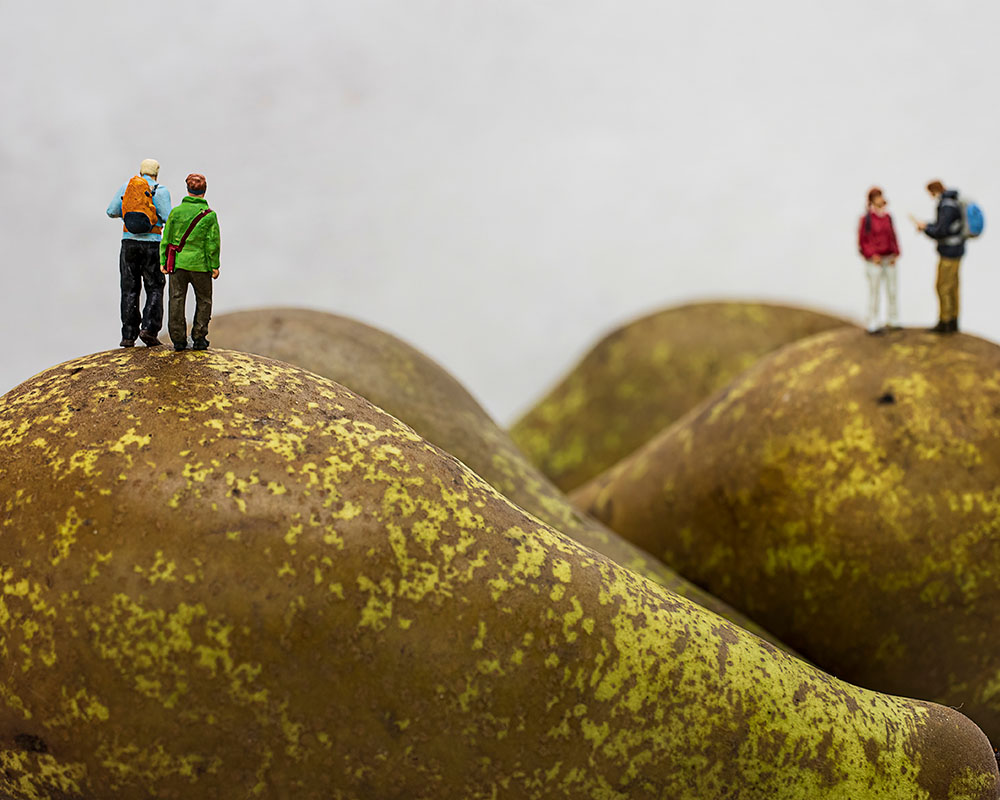
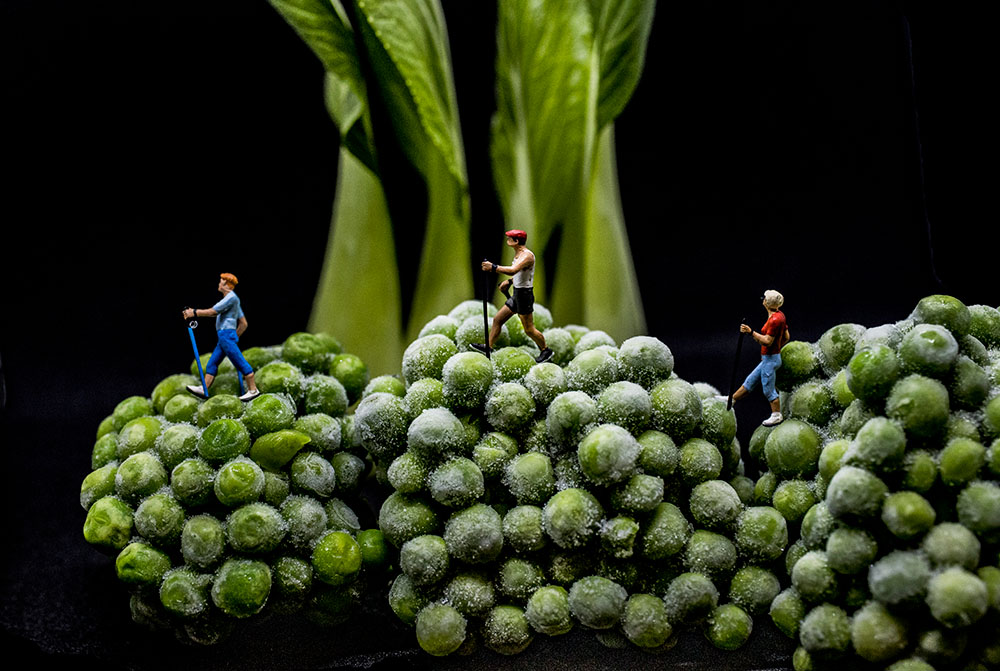
The first figures that I bought were Nordic walkers as a friend of mine had talked of missing doing this. I balanced them on peas from the freezer with some pak choi in the background. That first attempt was fraught with challenges: I had no idea what I was doing, and I was working against the clock as the peas defrosted.
I now have hundreds of mini figures so that gives me flexibility. I also buy sweets and biscuits that spark my imagination. Sometimes I have an idea in my head and try it out – for example at Easter, I thought “Hot Cross Nun” would be a funny idea. While other times, I look at something, an avocado, a Toblerone triangle, Dolly Mixture sweets, a shower drain, a paper clip – it can be anything, and I’ll wonder what I could do with that.
I was invited to talk about my miniature photography on Susan Calman’s Happy Space TV series. The film director asked to see me set up a shot in my studio – a bit of an embarrassing moment as my studio is the kitchen table!
The reaction to my shots has been amazing, and I have encouragement from others to thank for a lot. One of my followers suggested I submit an image to Food Photographer of the Year. I was turning cartwheels when I was shortlisted in the 2021 awards (in the Fujifilm Award for Innovation category). My mum is a huge fan of Grayson Perry (as am I) and suggested that I submit to his TV series. In 2022, he selected my image “Puppy Love” to be included in his Art Club exhibition (on display at the Midlands Art Centre until April).
With Moonpig, I simply thought why not fire off an email and see if they’re interested. You could have knocked me down with a feather when they got back to me, offering me a contract. I’ve also been commissioned to create an image for a drinks company (I can’t share details yet), and another image is being licensed to a music artist for the cover of her forthcoming album (on vinyl).
Jacki’s Top Tips for Miniature Photography:
- Let your imagination run riot and just have fun.
- I use OO/OH scale figures. They are tiny – a man for example is about ¾ inch tall, and children far smaller. It’s their size and the use of showing scale which makes the images impactful.
- Although I generally use quite a small aperture (between f/22 and f/32), abandon preconceived notions, and think about what works for a given set up. Sometimes a wider aperture might be just what you need.
- Be willing to try out different physical set ups and different exposures. Sometimes, a small change can make all the difference.
- Set things up on a lightbox to see how the scene looks with even lighting. Add drama and shadows with a second light.
- If your fingers are as fat as mine, don’t wait as long as I did to buy a pair of tweezers!
What kit do I need to photography miniature toy figures?
Here’s a rundown of the camera, lens, and kit Jacki uses to photograph miniature toy figures, as shown in this article.
- Canon EOS 90D (previously 200D)
- Canon 35mm Macro Lens
- JOBY Mini Tripod (3k Stand)
- A cheap lightbox from Amazon
- JOBY Beamo lights
- Adaptalux lighting (bought after a recent review in AP)
Jacki is another photographer who started her tabletop project during the lockdown of 2020. Originally a lover of wildlife photography, her 100-400mm lens didn’t have much use at home. So, she bought herself a macro lens and began taking her “Totie Photies” – Totie being a Scottish term for “tiny” and Photies being another word for “photos”. One of her photos was chosen by the artist Grayson Perry to appear in his national exhibition “Grayson Perry’s Art Club”, and there is now a selection of “Totie Photos” available to buy via moonpig.com as greetings cards. Totiephoties.com
Related articles:
- Photographer painstakingly recreates ‘Aliens’ in miniature
- Best Macro Lenses for Mirrorless and DSLRs
- Read our Top Macro Photography Tips!
Follow AP on Facebook, Instagram, and YouTube.


