James Abbott explores the shooting techniques and processing options for producing the best focus stacked macro images possible…
Macro photography naturally opens up an entirely new set of opportunities for photographers by revealing the intricate details of the minutiae we so often miss. Many different techniques are used for shooting macro photography, which typically focuses on the natural world, but here we’re going to look into the perennial challenge of depth-of-field and sharpness.
Macro lenses are constructed optically to deal with resolving fine detail close-up, and they’re often some of the sharpest lenses available. But when working so close to a small or often tiny subject, the depth-of-field produced at settings that would typically render an entire landscape in sharp focus is reduced to just a small fraction of the macro subject. For example, shooting at f/11 could still result in a depth-of-field that’s less than a millimetre depending on the size of the subject.


The simple or, indeed, not-so-simple way around this is to capture focus bracketed shots and blend them into a single shot. Focus stacking is a technique where you shoot multiple exposures of a single subject at different focal planes/points of the subject, then merge them in editing software – a bit like HDR for exposure but this is all about depth-of-field. Shooting is the easy part once you get a feel for how to set focus in each shot to ensure a depth-of-field overlap; the tricky part can be the work that’s involved at the editing stage to ensure a clean and blur-free blend.
We’re going to compare the results of shooting a single subject at different apertures and a focus stacked version, alongside looking at two software blending options with a short introductory tutorial for each. But to get started, we have two focusing tutorials below that show different approaches to capturing focus bracketed images so you can use the one that suits your way of shooting.
How to focus stack with AF
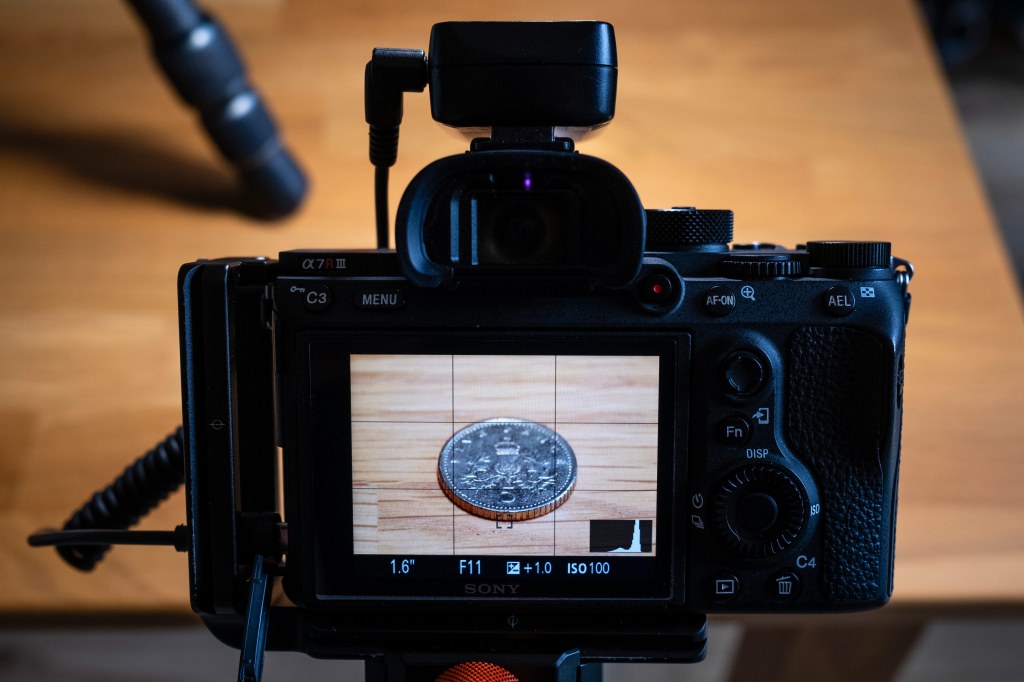
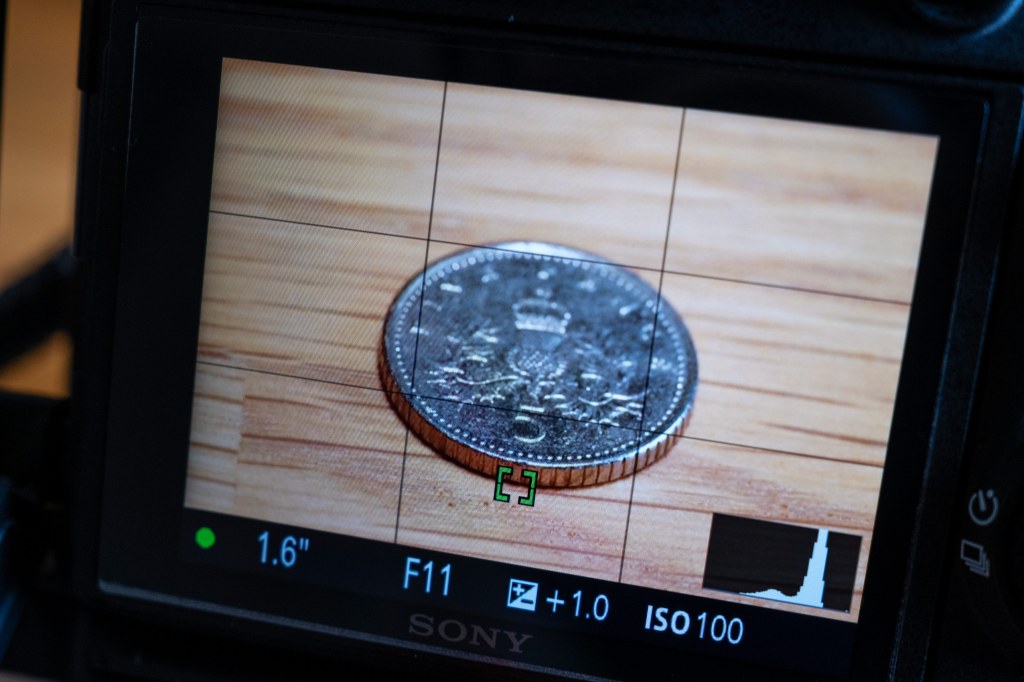
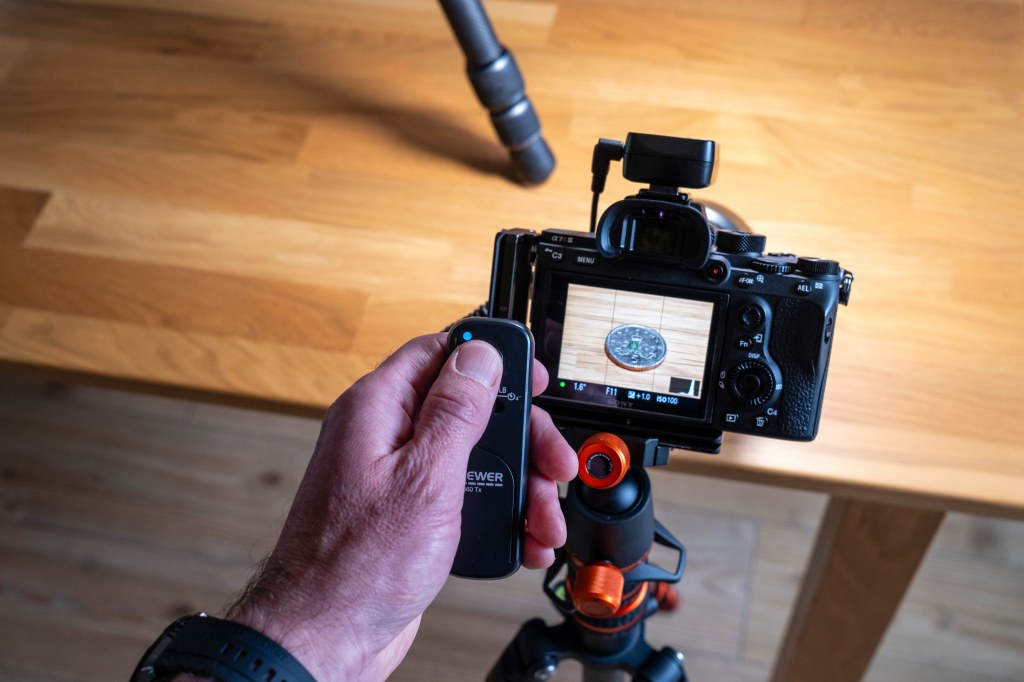
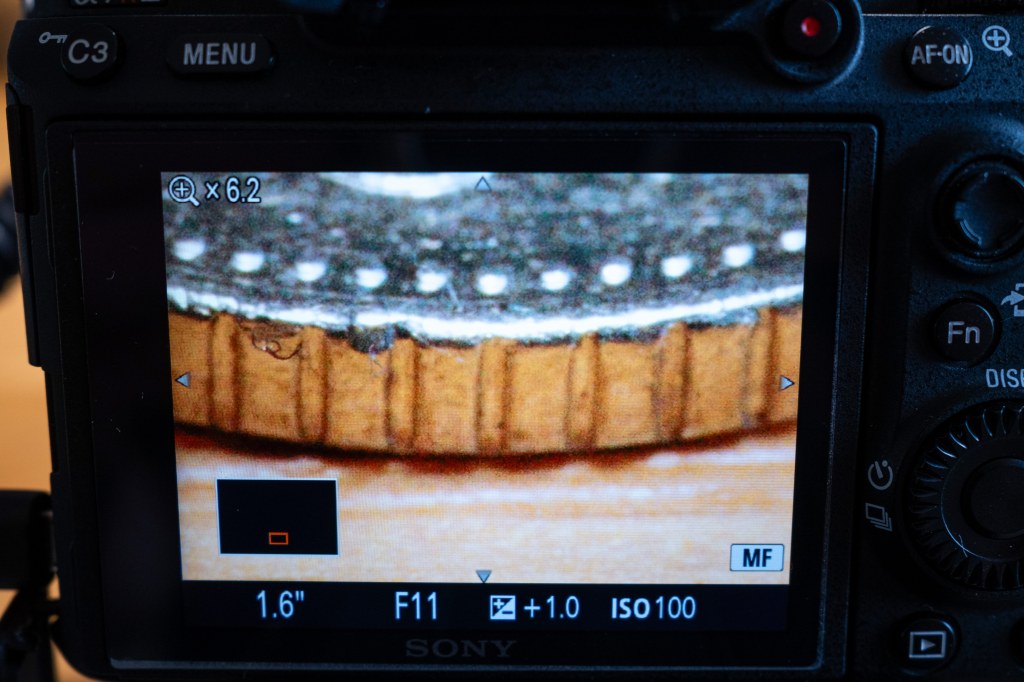
Starting with a simple subject like this is a great way to practise focus stacking. This shot of a five pence piece is made up of 12 focus bracketed images taken at f/11. If you consider the size of the coin alongside the depth-of-field you can achieve at this aperture when shooting landscapes, it quickly brings the depth-of-of-field challenges for macro photography into sharp focus.
1. Set up your shot
Set up and compose your shot, whether indoors or out. Using artificial lighting can make things easier because it maintains consistency, so use an LED light or off-camera flash unless you prefer natural light. Set the aperture to f/8 or f/11 with ISO 100. You can shoot in manual or aperture priority depending on lighting choice.
2. Focus stacking
With your camera attached to a tripod, position the active AF point right at the front of the subject and take a shot. Next, move the focus point up one position and take another – repeat until you’ve covered the subject from front to back. If the subject has an irregular shape, take additional shots around the edges and further inwards.
3. Use a shutter remote
With a medium aperture and a low ISO, unless shooting with off-camera flash, the shutter speed could be slow. With close-up work, even the slightest camera movements are amplified so using a shutter remote is a good way to avoid camera shake. These shots were over 1.5 seconds due to using a small LED, so a shutter remote was essential.
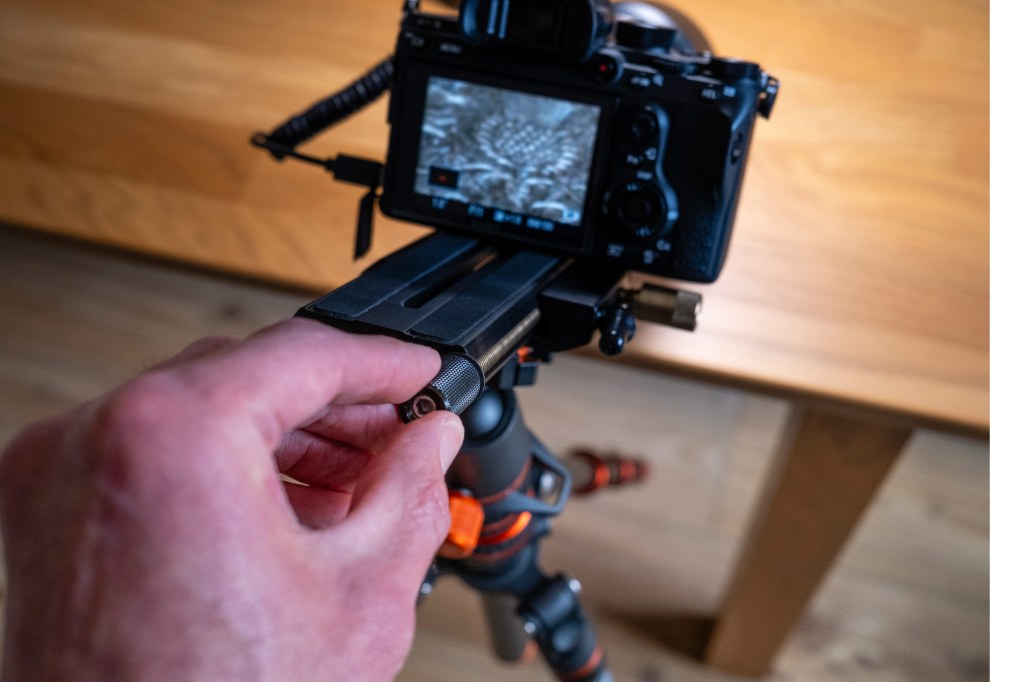
How to focus stack with MF
1. Set up and compose
Set up your camera on a focusing rail attached to a tripod, with the rail almost as far as it can go. Compose the shot and be prepared to move the tripod backwards or forwards to allow for close focusing. Set up your lighting, and shoot in aperture priority or manual at f/8 or f/11 with ISO 100 – shoot in manual if using flash.

2. Focus on the near edge
Manually focus as close as possible to the subject for the desired composition and adjust the tripod position if required. Next, turn the focus rail dial to move the camera backwards or forwards to focus, this is how you focus from now on, and zoom into the Live View image for precision to focus on the very front of the subject.
3. Focus stack
Take a shot and then turn the focus rail dial a tiny amount to move the camera closer to the subject to adjust focus. Use Live View zoomed-in to asses sharpness, ensuring an overlap of the previous shot and repeat. If you don’t have a macro focusing rail, simply turn the manual focus ring a tiny amount for each shot, using Live View to aid manual focus.
Comparing depth-of-field & image quality
The advantages and disadvantages of shooting at different aperture settings and focus stacking at a medium aperture
At this stage, you may be wondering why all of the images so far have been shot indoors under controlled lighting, and the simple reason is that it removes several variables, including subject movement, that can make capturing and editing direct comparisons incredibly difficult. Here we have shots of a houseplant taken at three aperture settings – wide, medium and narrow – alongside a focus stacked version shot at f/8 to take advantage of the ‘sweet spot’ of the lens. The sweet spot is the aperture that resolves the most detail to provide the sharpest image, but not the largest depth-of-field.
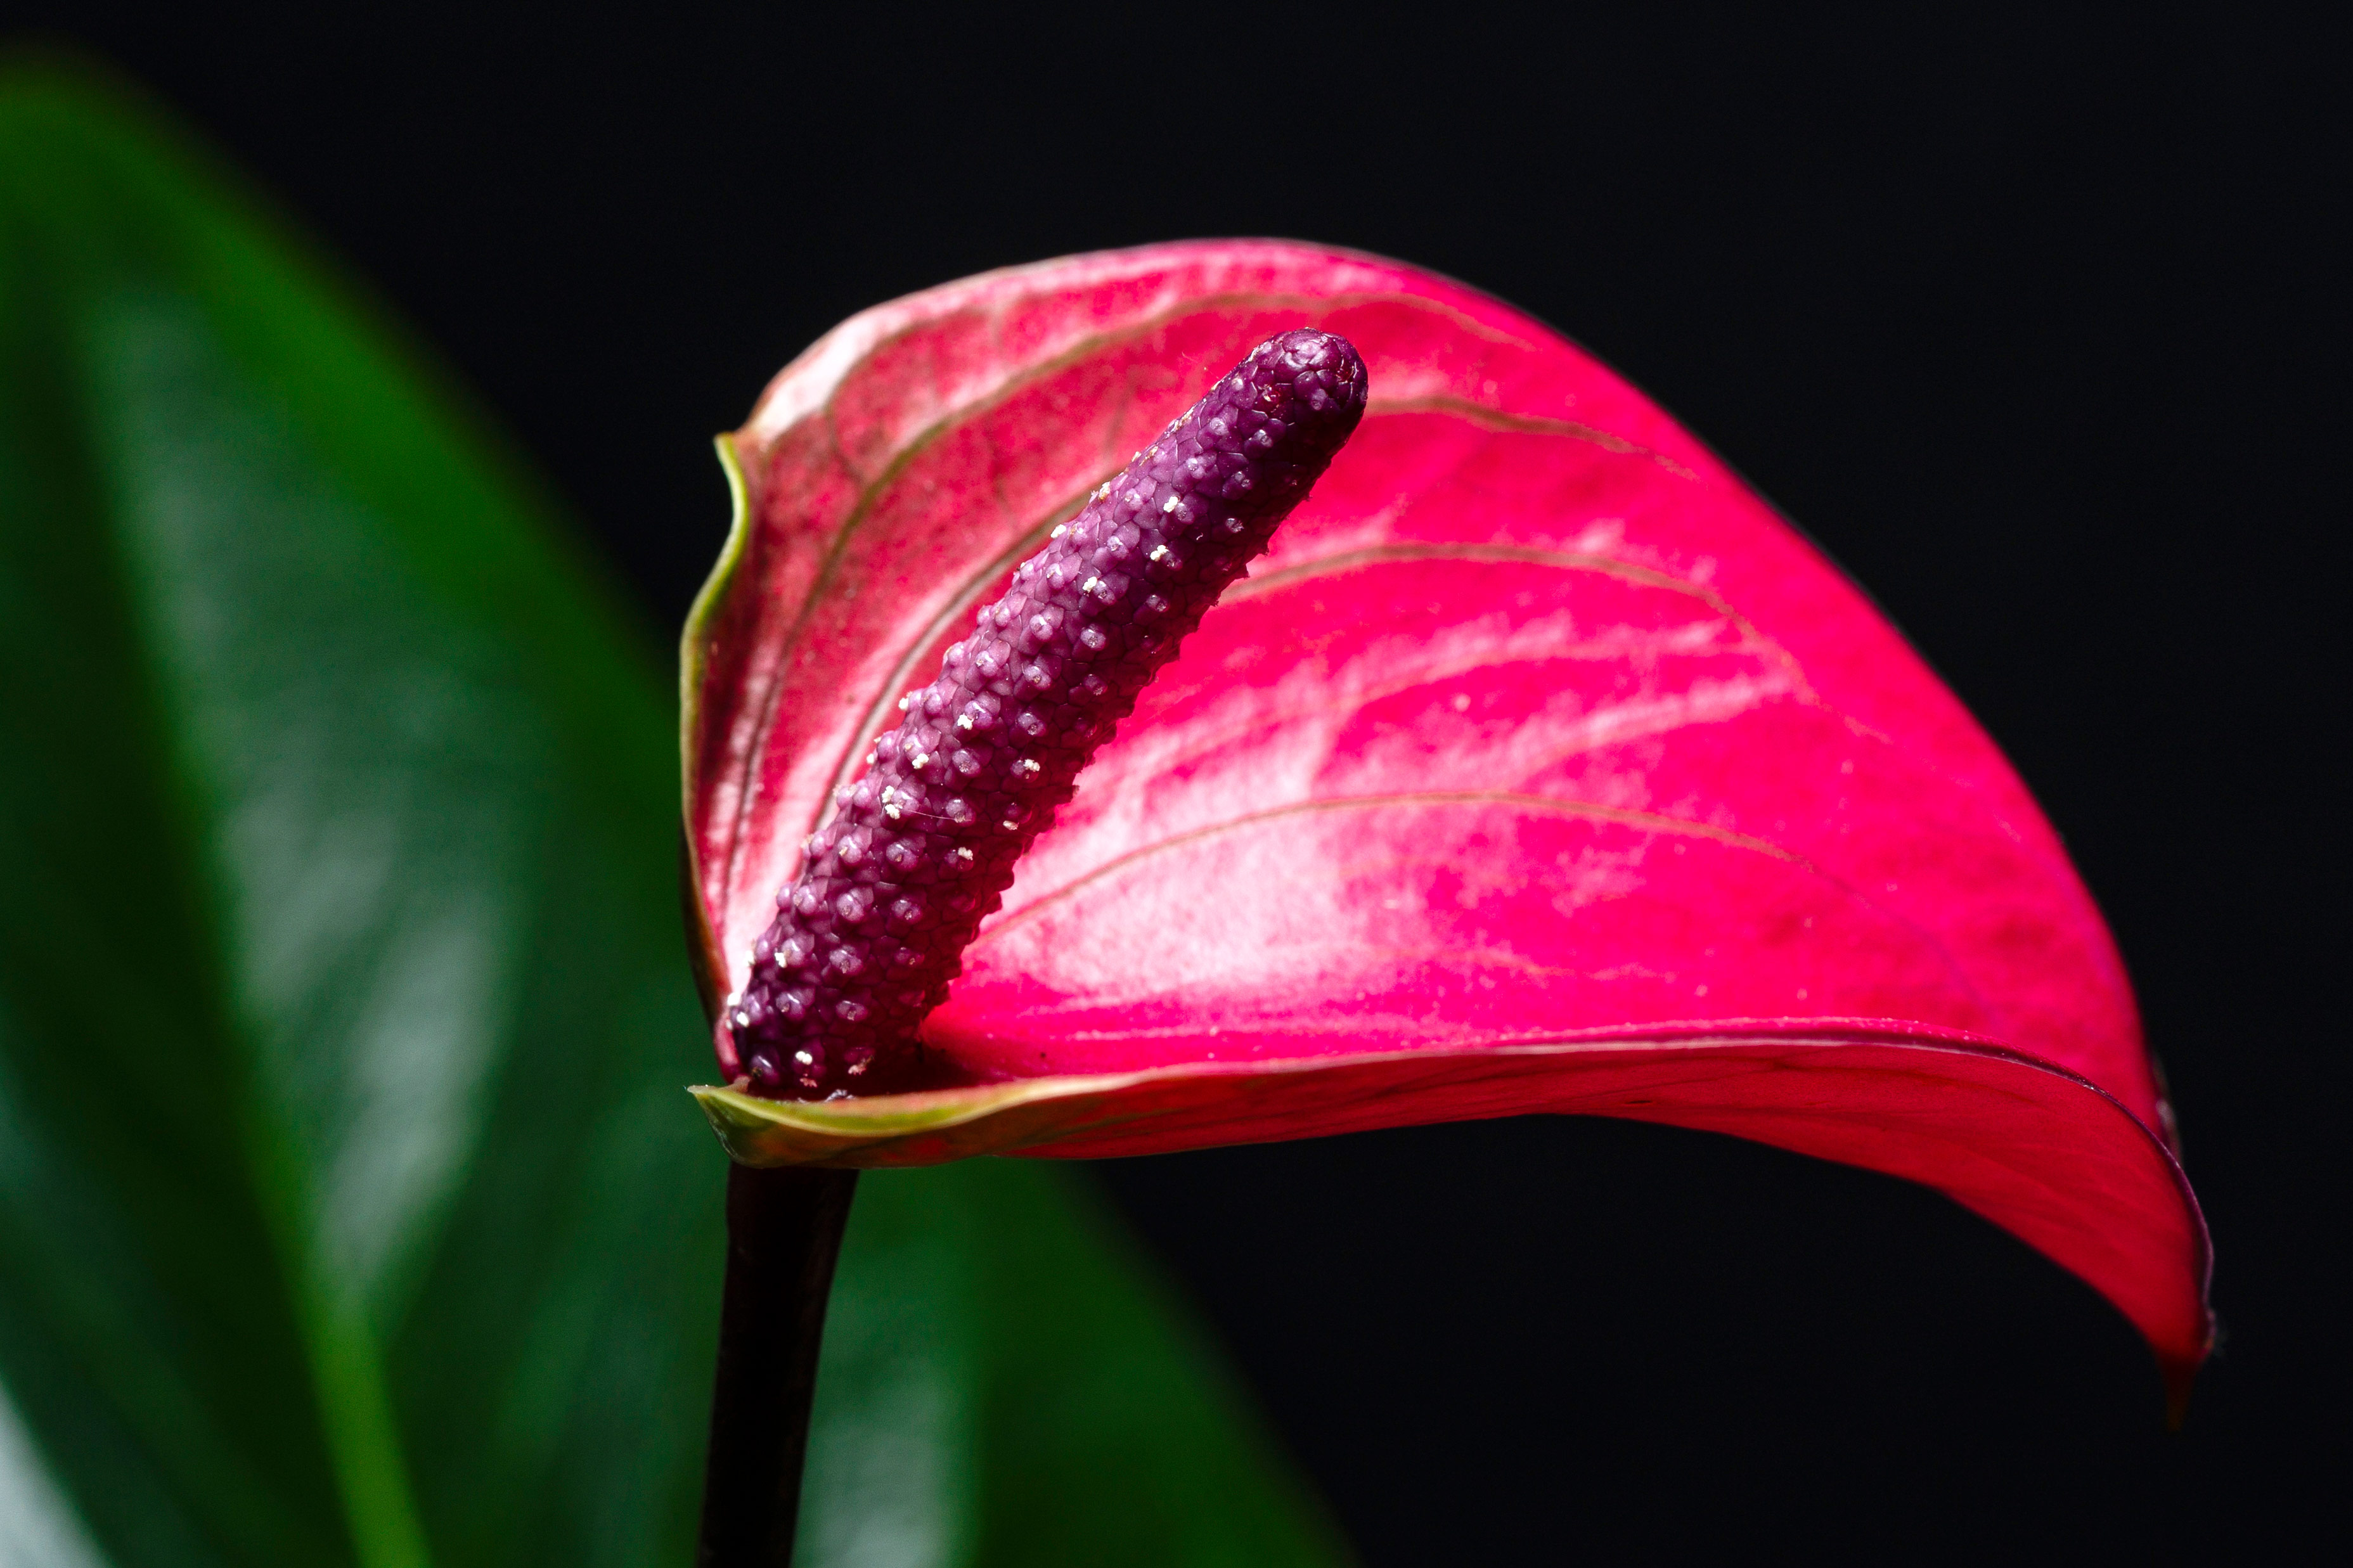
You can shoot macro at any of the apertures used here depending on what you’re aiming for, but none will produce sharpness exactly where you want it. Unless, of course, your aim is to capture a buttery shallow depth-of-field at f/2.8 to produce a dreamy result with focus on the stamen of the flower, for example, and everything else falling off. Shooting at f/8 increases sharpness throughout, but when you zoom in you’ll find that the desired section of the image, the flower head here, isn’t pin-sharp at the rear.
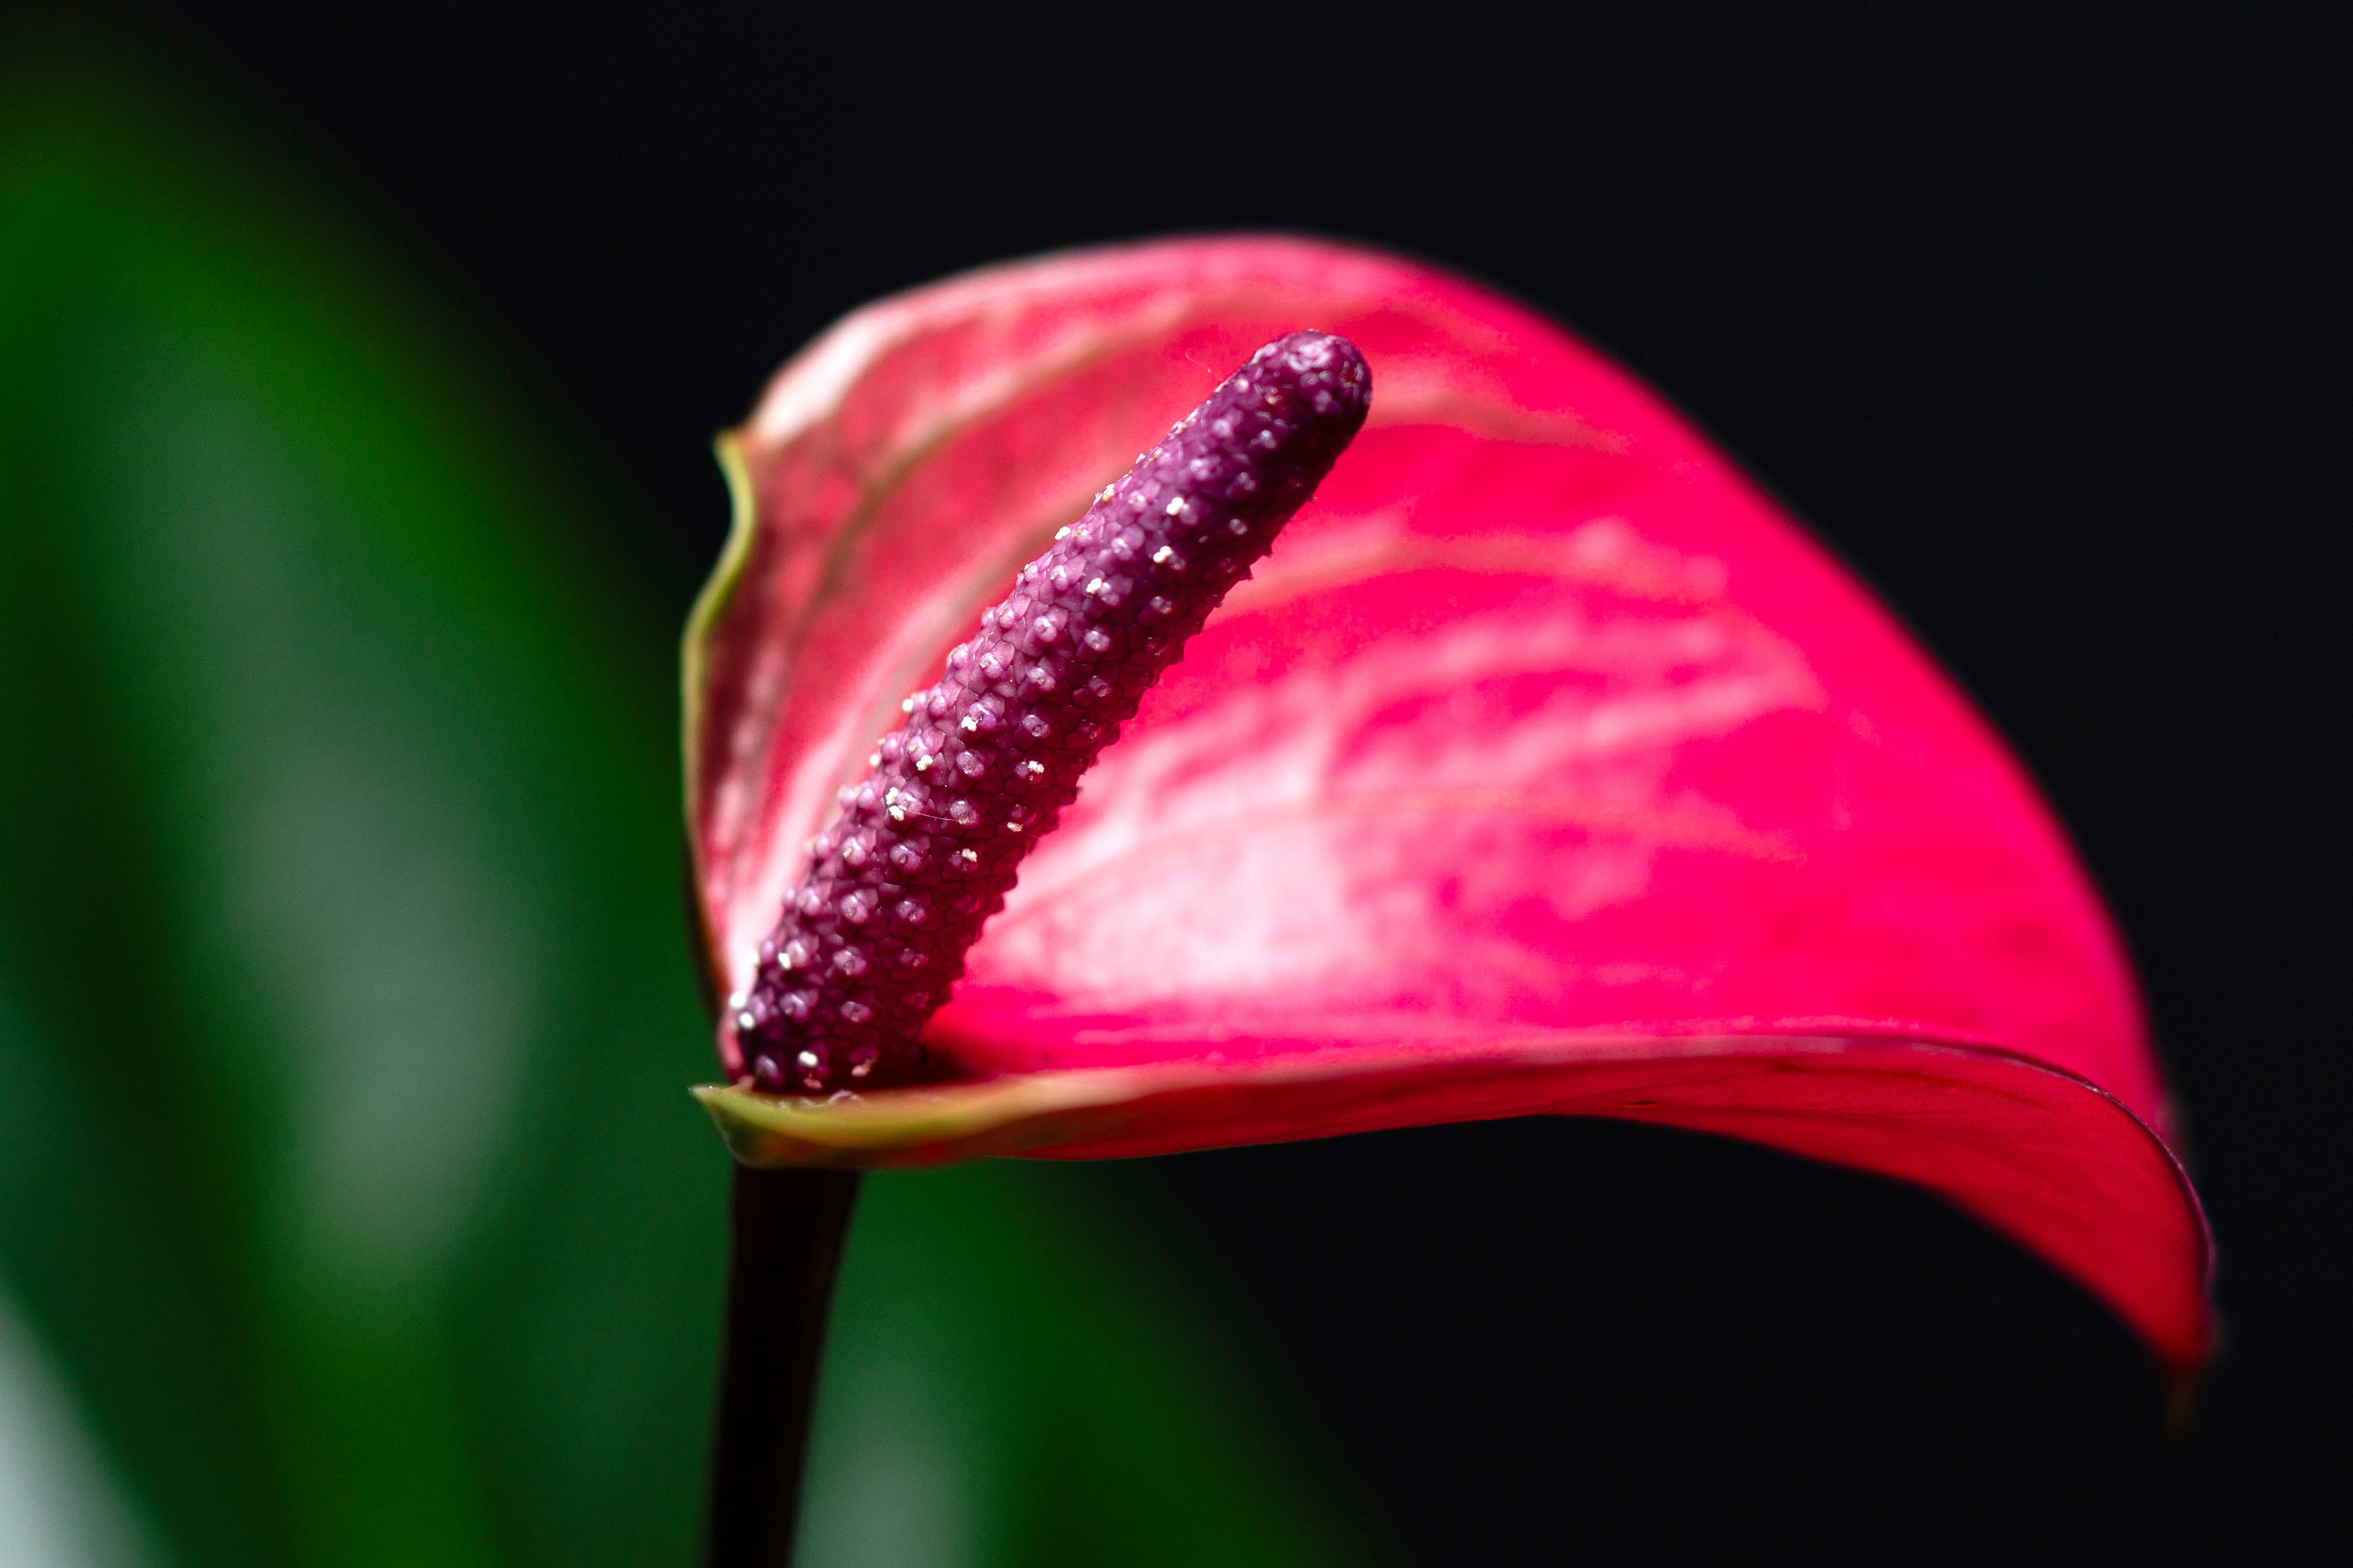
Even stopping down to f/22 doesn’t produce enough depth-of-field for the entire flower head to be pin-sharp, there’s still clearly visible fall-off. Plus, the negative side effects of stopping down this much are that the background, while slightly defocused, is still much sharper than wider apertures and may introduce an undesired messy background. Furthermore, diffraction comes into play which, in layman’s terms, is an overall loss of sharpness/image quality.

The middle aperture of most lenses, typically f/8 or f/11, is the sweet spot as previously mentioned. So, shooting focus stacked shots at one of these apertures produces the best image quality, while also providing enough depth-of-field overlap for a blend that works. Any mis-focusing can render a good result impossible. Then, once blended at the editing stage, the resulting image shows pin-sharpness throughout the desired part of the subject.
You can focus stack at wider apertures, such as f/2.8 or f/4, but for this, you have to take many more shots to ensure the overlap of depth-of-field. The difficulty here can be that the bokeh produced can make it difficult and sometimes impossible for a perfect blend, especially where parts of the subject overlap others.
Depth-of-field vs focus stacking – Which option is the best?
In terms of maximising depth-of-field with control over where this occurs, focus stacking wins every time. There’s simply no other way to guarantee what you might call a perfect depth-of-field in the desired part of the image. Shooting stopped down to f/16 or f/22 is never favourable, but if you’re aiming for a shallow depth-of-field for creative purposes or to maintain a clean background at the expense of depth-of-field, shooting at f/2.8 or f/4 can work well.
By the time you’re considering stopping down to f/8 or f/11 for a single exposure of a close-up subject, you’re still not necessarily going to be getting the entire subject in sharp focus. So, at this point, it’s often best to consider focus stacking where you’ll achieve a similar level of background sharpness as a single shot, but with the entire subject as sharp as it could be.
If you would like to take your macro photography to the next level read our top Macro Photography Tips and Techniques and macro photography lighting tips.
Don’t have a kit yet? No problem, our guide to the best cameras for photography and macro lenses alongside the best smartphones for macro will help you easily choose your new gear.
Related reading:
- How to get pin-sharp close-up and macro shots
- Focus stacking: achieve pin sharp macro shots of delicate subjects
Follow AP on Facebook, Twitter, Instagram, YouTube and TikTok.