
Adobe’s Lightroom Classic has been a staple for photo editing for photographers worldwide. It was back in 2017 that Adobe split Lightroom into two different applications, namely Lightroom Classic, and Lightroom. Both are part of Adobe’s Creative Cloud package, but Lightroom (CC) is also designed to work on mobiles, tablets, and desktop computers. Lightroom Classic is the new name for the original Lightroom software, and remains my favourite choice for editing lots of photos quickly.

Quick overview:
| Lightroom Classic | Lightroom (CC Cloud) | |
| Adobe subscription | Yes | Yes |
| Develop tools | Yes | Yes |
| File storage | Local desktop | Local / Cloud (1TB storage – can be upgraded) |
| Mobile editing | Laptop/Desktop only | Desktop/Laptop/Mobile/Tablet |
| Import dialog | Advanced | Basic |
| Albums or collections | Collections (smart) | Albums |
| Search | Local keywords | AI intelligent search |
| Dual monitor support | Yes | Yes (limited) |
| History | Yes | No |
| HDR / Photomerge | Yes | Yes |
| Video editing | No (Slideshow can export as video) | Yes |
| Modules | Library, Develop, Map, Book, Slideshow, Print, Web | Develop and limited slideshow feature. |
All of this and more is explained in more detail below:
1. What’s in a name?
Long-term users and beginners alike may be confused about the Lightroom options. It now exists in two main forms: Classic and CC. Lightroom Classic (previously LR CC) is the same app many LR users have been enjoying for years. By contrast, the new Lightroom CC departs from the traditional method of storing photos on a local drive, and replaces the old Lightroom Mobile. Instead, original photos are uploaded to online cloud storage so they can be accessed, edited and synced across your desktop, tablet and phone.
2. Picking a plan
Adobe offers three Lightroom and/or Photoshop plans. At $19.99 a month, the Photography Plan gets you both versions of Lightroom – Classic vs CC – plus Photoshop CC and 1TB of cloud storage. The second option, which is $11.99 a month, gets you LR CC and LR Classic with a healthy 1TB cloud storage, but no Photoshop CC. 1TB may sound like a lot, but if you shoot thousands of images, you may need to upgrade at some point.

3. Important similarities
Both versions share a range of useful features. The Develop controls are mostly the same: there are near-identical tonal sliders, selective adjustments, tone curve, split toning, HSL controls, black & white tools, presets, profiles, spot removal and more. Both also let you organise photos with flags and stars. However, there are fundamental differences. The question is, which version is right for you?
4. Cloud vs local storage
Do you want to store all your photos on the cloud or locally on a hard drive? This decision goes to the heart of the Classic vs CC debate. The cloud offers ease of use across devices and is arguably safer than local storage (unless you’ve adopted a rigorous backup routine). However, even with Adobe’s 1TB of cloud storage, space will be more limited on the cloud and uploading photos may take time.
5. Integration with mobile
Lightroom CC has been designed to work seamlessly across all your devices. All changes sync and update, so you can begin editing on your desktop, then switch to your tablet or phone – and everything is synced. For those who edit on the go, the seamless workflow offered by CC is the better option.
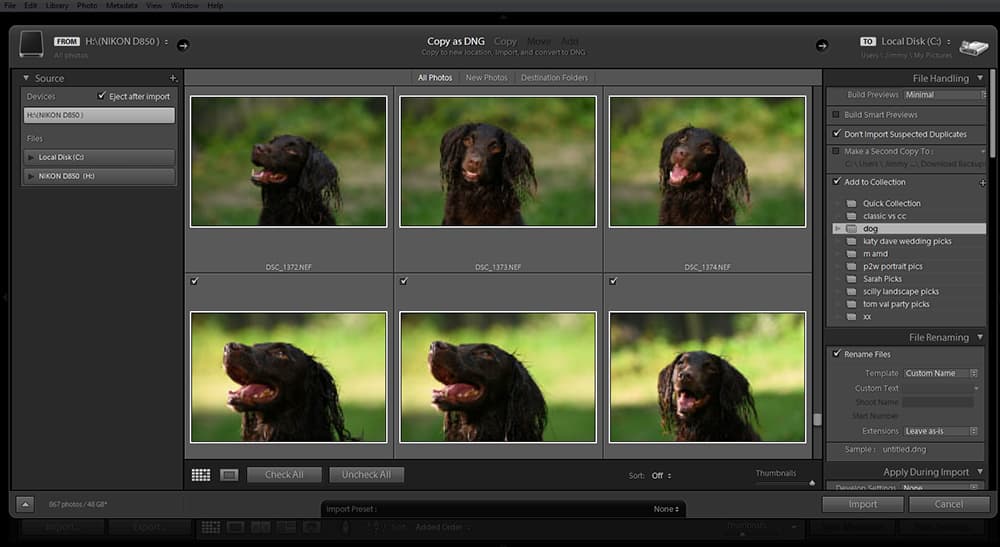
6. Import dialog
The Import dialog is one of the cherished features of LR Classic (when Adobe tried to ‘simplify’ it a couple of years ago the uproar caused an immediate U-turn). Among the comprehensive options, you can apply presets on import, convert to DNG, add keywords, create collections and much more. By contrast, other than an ‘Add to an album’ option the CC import dialog is completely bare.
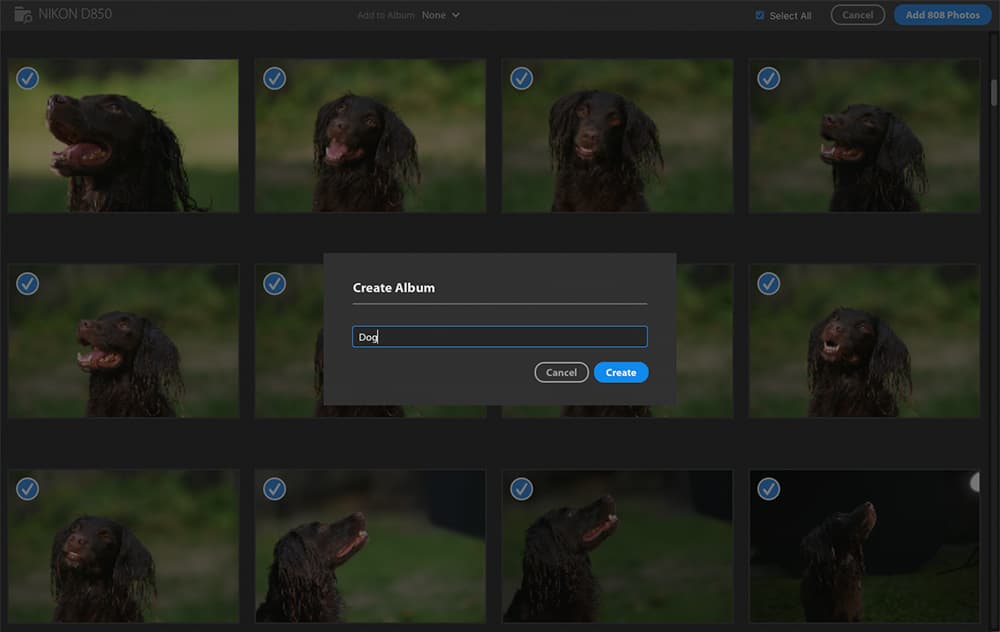
7. Albums or Collections?
Experienced Lightroom Classic users will be aware of the power of Collections. They let you create groups and categories of images without shifting around files or making copies. LR CC doesn’t have Collections, but it does have Albums, which work in the same way. However LR Classic’s Collections are more advanced, with options to create Smart Collections based on parameters like camera data or star ratings.

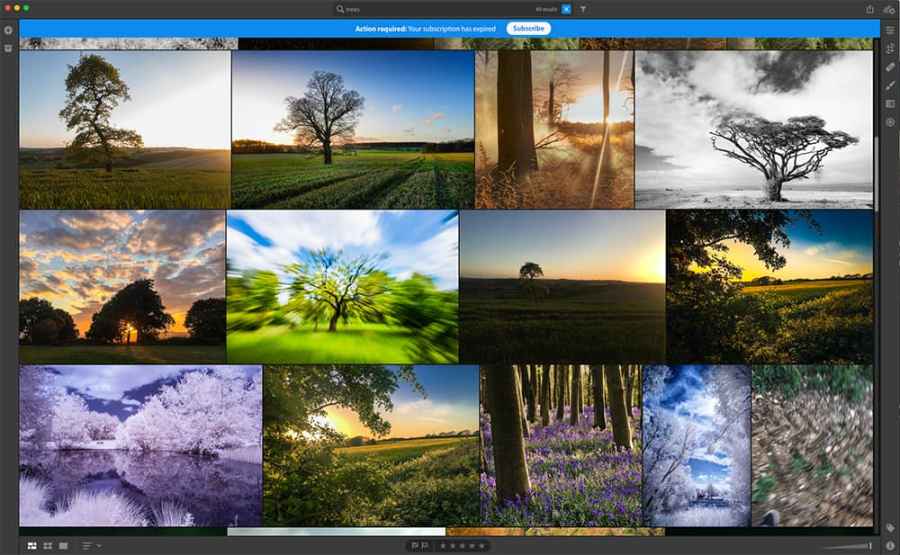
8. Clever searches
One of the stand-out features in LR CC that isn’t available in LR Classic is the Search bar – for searching your image library. The clever thing is that it can recognise subjects and types of scene – like the search for trees here – even if there are no keywords or tags attached to the images. Powered by machine learning, this is the future of image cataloguing – and great news for those tired of keywording.
9. Dual monitor support
Using dual monitors is essential to many photographers. It means we can place all our panels and tools on our secondary screen, leaving our main display free to display the image as large as possible. Unfortunately, it’s only an option with LR Classic – LR CC’s single window interface doesn’t work across dual monitor set-ups, but does let you use a second monitor for limited views.
10. Slider locations
Many of the tools and settings found in LR Classic (and Photoshop’s Camera Raw plugin) are also present in LR CC, although in some cases they are grouped together differently. For example, the sliders found within the Classic Basic Panel are laid out in terms of Light, which includes Exposure, Shadows, Highlights, and then in terms of Color, which includes white balance and saturation.
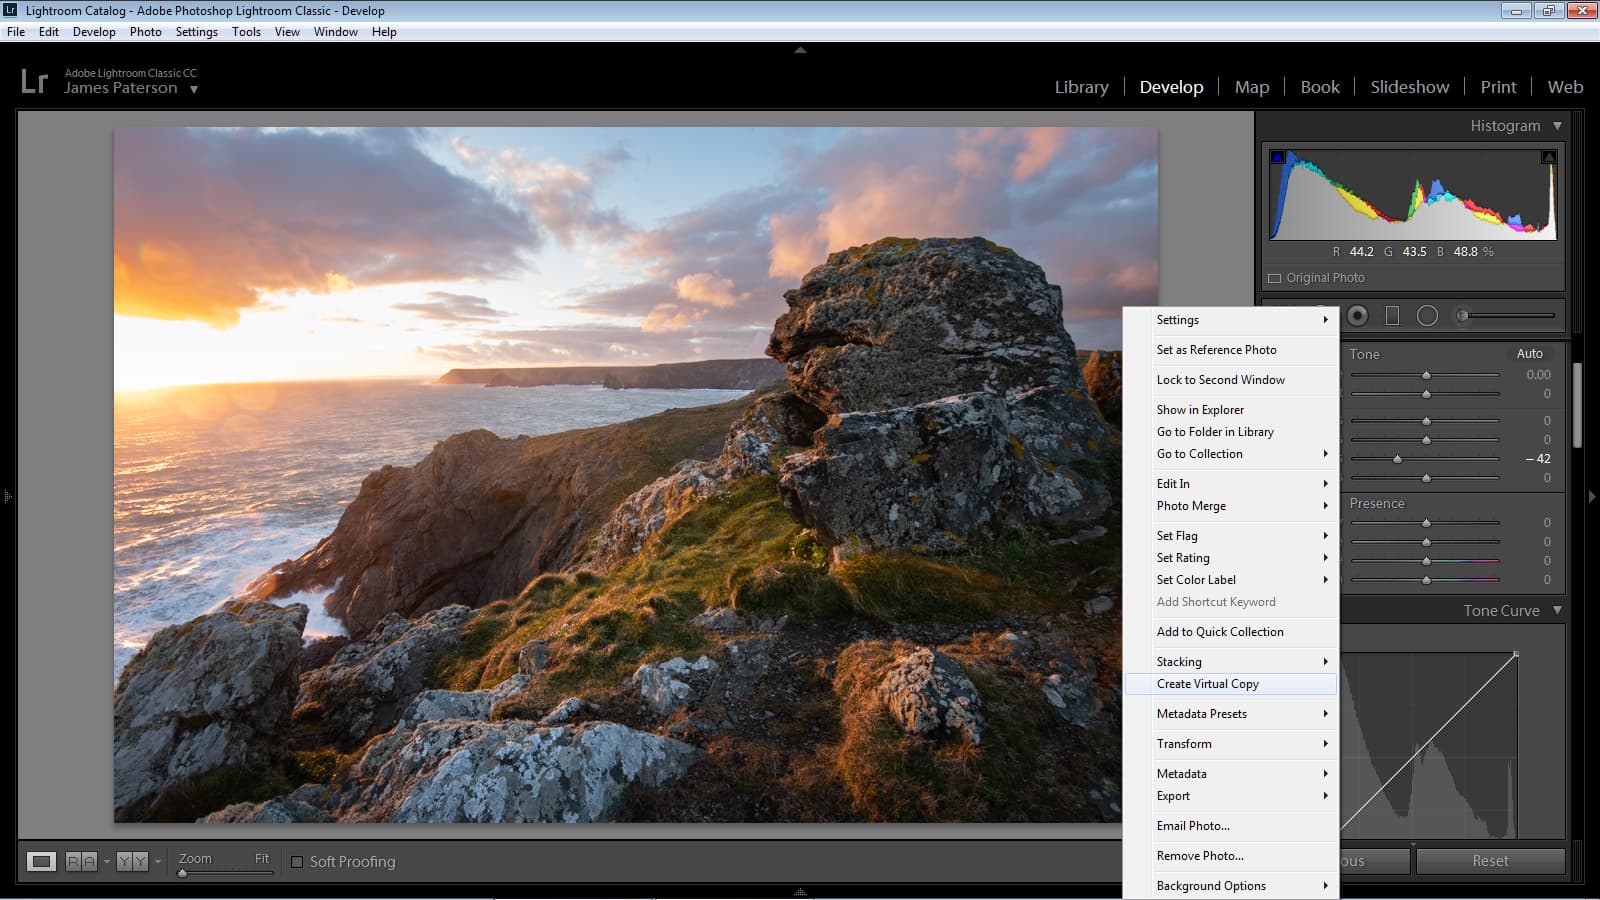
11. Workflow tricks
Lightroom edits images by changing their appearance within the program rather than altering the pixels in an open-edit-save workflow that Photoshop employs. As such, the approach brings several workflow benefits such as Virtual Copies, which let you make several versions of an image without creating memory-sapping copies on your drive. It’s another useful workflow feature that isn’t on offer in LR CC.
12. History panel
Found on the left side of LR Classic’s Develop Module, the History panel remembers every single edit you make to an image, so it’s useful if you need to retrace your steps or restore a previous version of your image. LR CC lacks this helpful feature.
13. Syncing
If you adopt the LR CC cloud-based workflow, then your original photos are stored in the cloud, and any edits are synced to your library instantly. LR Classic works differently – you can still edit synced photos on mobile devices using LR Mobile, but rather than the originals, you work on Smart Previews, which are then synced back to your main image library the next time you open LR Classic on your desktop.
14. Syncing in LR Classic
With Classic, you have to manually choose which collections you’d like to sync by clicking the double arrow sync icon to the left of the collection within the Collections panel. When using LR CC, all images are synced automatically across your devices for a seamless workflow. As such, LR CC’s synced workflow is much slicker.
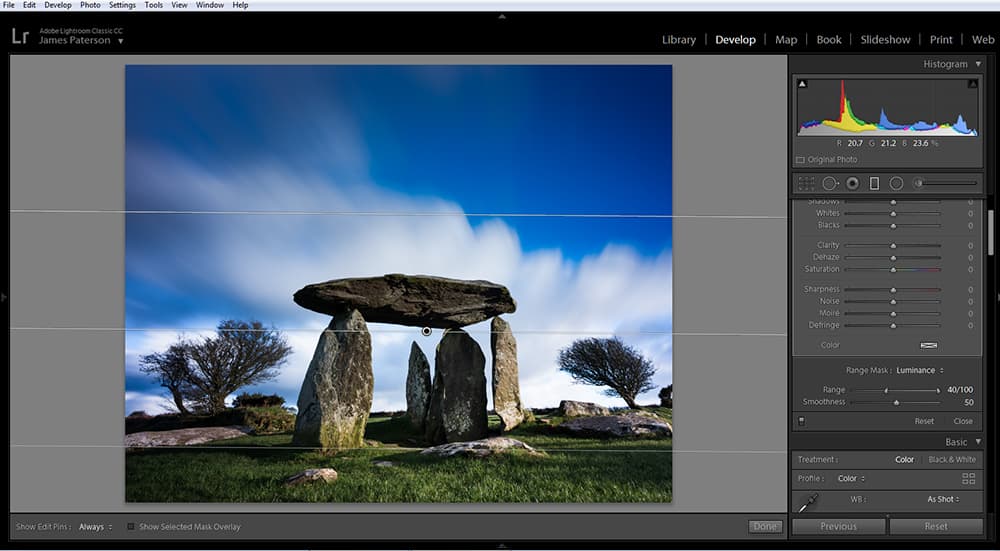
15. Range Masking
One of the best recent additions in LR Classic are the Range Mask controls. These let you create precise local adjustments by zeroing in on parts of an image based on their tonal or colour values, making it easy to isolate and adjust objects or areas of a photo in seconds. Unfortunately, the feature has yet to make it into LR CC.
16. Classic modules
The LR CC interface is akin to a mixture of LR Classic’s Library and Develop Modules (the two most-used modules), but none of the other modules get a look in. So if you like to geotag photos, create photobooks, slideshows and print, you still need to use Classic.
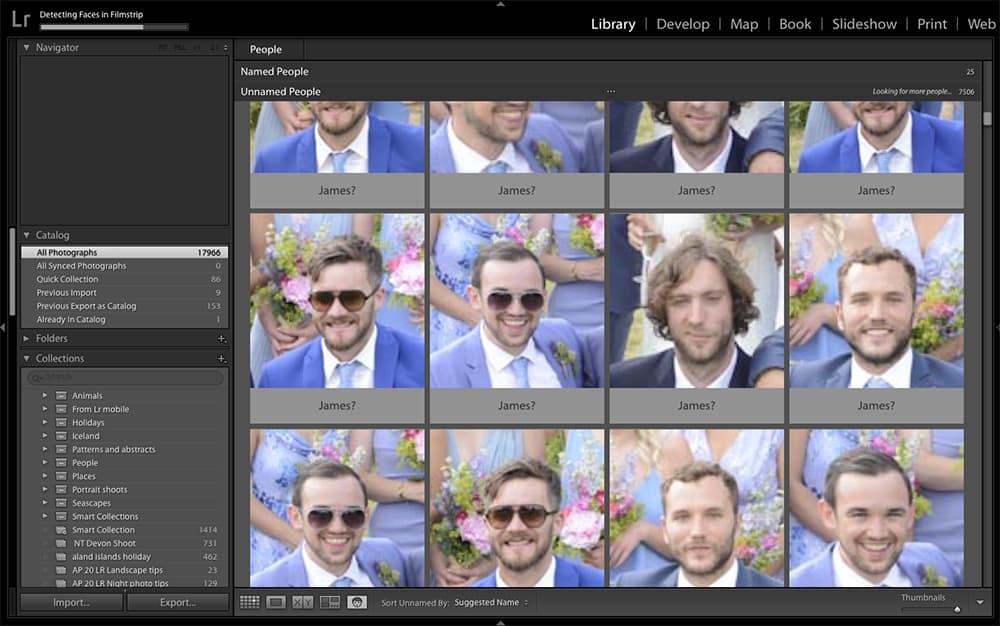
17. Face recognition
LR Classic can’t match CC’s intelligent search bar, but it does offer one clever library-searching benefit that CC lacks: facial recognition. This works by searching your image library for similar faces, letting you quickly group photos on the basis of who appears in them. Click the face icon in the Library Module to switch it on, then start naming faces to begin compiling.
18. HDRs and panoramas
Creating HDRs or panoramas in Lightroom Classic is quick and easy with the Merge controls found under the Photo menu. Simply choose a set of photos, start the command, work through the simple options, and at the end, Lightroom creates a detail-rich DNG file of the HDR or panoramic image. These features have now been added to Lightroom CC.
19. Export options
Like almost everything in LR CC, the Export options are very minimal: you can either save as a JPEG or as ‘original + settings’. There’s no option to export as a TIFF or PSD, but you’ll find these in LR Classic’s more advanced Export dialog. With Classic, you can also set up export presets.
20. Advanced features – Map, Book, Slideshows and more
Lightroom Classic has always featured an advanced Library feature, along with Develop, Map, Book, Slideshow, Print and Web tabs. This lets you create photo projects (and more) from within the program. In comparison, Lightroom (CC) is primarily the “Develop” section, along with some additional features such as a very simplified slideshow feature.
Verdict
For organising an image library, Lightroom Classic wins hands down. Besides the Albums feature, Lightroom CC offers minimal control, and you can’t even rename your images; however, CC does have its amazing Search bar. For editing images, Classic and CC are equally good: Classic offers more advanced workflow options, but CC is slicker, and you can edit video.
Of course, CC is designed for a different audience than those of us who’ve been using Lightroom for years. There’s a reason that certain features aren’t there – things like Smart Collections, Import options, Range Masking, Soft Proofing – they are tools that the casual user doesn’t need.
As such, for professional and advanced photographers and those familiar with Lightroom already, Classic is still the best choice. For beginners, smartphone shooters, casual enthusiasts and anyone who wants to edit on-the-go, Lightroom CC is the friendlier, slicker option.
Related reading:
- Best photo editing packaged – subscription free
- Best photo editing apps for your smartphone
- Adobe Photoshop Review
Follow AP on Facebook, Instagram, YouTube and TikTok.


