
If you want to capture detail in all areas of a high-contrast scene, there’s only one technique you can rely on – high dynamic range. HDR is a technique where you take a series of exposures – three, five, seven or nine – one or two stops apart. This then allows you to capture detail throughout the shadows, midtones and highlights, and these exposures are blended together into a single image using special software.
Many cameras these days have a dynamic range covering somewhere in the region of 12 to 14 stops, but even with this impressive ability to record detail, some scenes are simply too contrasty for a single exposure, even with ND grads. And this is where HDR comes to the rescue. Love it or loathe it, it’s here to stay. And if you’re in the latter camp, it’s my intention to change your mind with this technique that’s all about shooting and processing HDR images quickly with truly natural results.
How to shoot HDR images
Shooting HDR couldn’t be simpler – it can be as uncomplicated as pressing a button. Simply set Auto Exposure Bracketing by working out the base exposure; next the total number of exposures to be taken, which can be set to three or five exposures on most cameras; and then exposure increments to two stops.
Set the camera to aperture priority mode at ISO 100 and f/11 for a large depth of field. Aperture priority is best because when shooting HDR the shutter speed can change, but a change of aperture would mean that the resulting exposures would have a different depth of field and wouldn’t blend together during editing.
Take test shots and apply exposure compensation as necessary for correctly exposed midtones. Once this has been established, set Auto Exposure Bracketing to three shots at two stops apart. When you release the shutter, the camera will automatically shoot three exposures, although some require the shutter to be released for each individual exposure.
Manually focus one-third of the distance into the scene beyond the foreground interest for a large depth of field. If the scene is shallow, simply focus on the subject. Manual focus is important because it must remain fixed on the same focal plane for a successful blend.
Natural exposure blending in Lightroom
Reduce the variables
For a successful exposure blend, it’s essential to allow only one setting to change between exposures, and this should be shutter speed. It’s imperative that ISO, aperture and focus remain fixed at the same setting because any variance here will mean exposures won’t blend seamlessly together. Sticking to inanimate objects such as landscapes and cityscapes rather than subjects that are moving, like people, is always best too.
Another essential here is to keep the camera fixed in the same position using a tripod. Any movement between exposures will also result in blending problems. Some specialist HDR software options have the ability to blend handheld bracketed exposures, but even with this it’s not always possible for the software to line up the different images accurately.
When to shoot HDR
There’s a time and a place for HDR photography, and – as the nature of the technique suggests – it’s most suited to subjects such as landscapes, interior and architecture photography. There could, of course, be elements of movement within each of these scenes, such as running water, moving clouds or foliage blowing in the wind, but this minimal type of movement should not be too much of a problem.
In situations where there’s too much contrast in a scene, even with the use of neutral-density grads, or when you don’t have your filters with you, HDR is the obvious technique to use for replacing ND grads; however, for long exposures it has to be said that even though they can be mimicked in post, the answer is to make sure you use ND filters at all times.
Natural HDR as a tool
Having every technique possible at your disposal is just one way to guarantee that you can capture great results in tricky conditions, whether that’s using a specific accessory or applying a shooting and/or editing technique. HDR is a sure way to capture detail in exposure situations that exceed the dynamic range of your camera and filters.
HDR photography should be seen as a useful tool rather than a technique. Approach it for obtaining a correct exposure of all parts of a scene to maintain detail, rather than a visual effect or style in itself. A natural approach to HDR becomes a much more likely result. As long as you can see detail in most areas of the scene, and the image is punchy with plenty of contrast, there’s a greater chance your image will look natural.
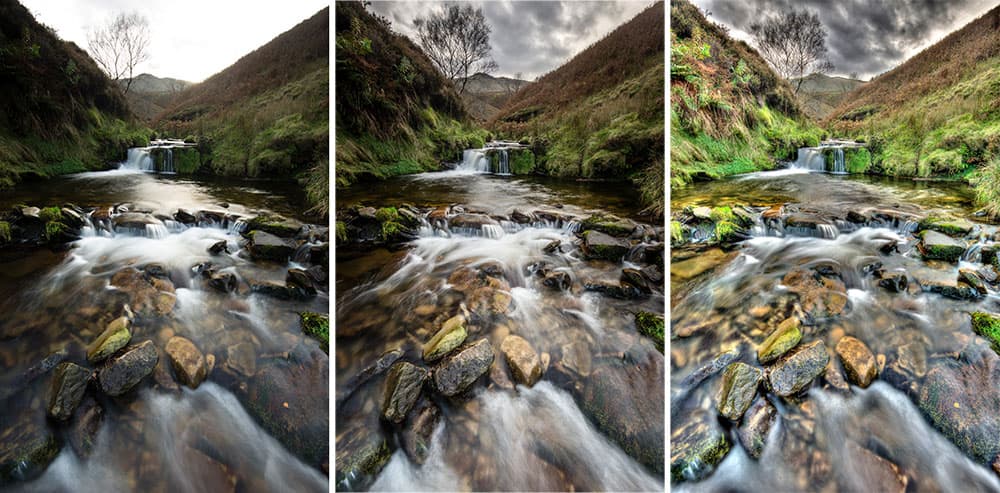
No HDR (left):A standard exposure gave underexposured shadows and overexposed highlights. Natural HDR (middle): A natural-looking HDR scene with subtle detail in the shadows and highlights. Nasty HDR (right): An example of unsuccessful HRD, – tones are over-compressed
The good, the bad and the ugly
Unfortunately, this technique has something of a bad reputation owing to over-processing. The result is over-compressed tones and too much texture accentuated. Midtones look flat, halos form along subject edges where there’s contrast, and colours look unnatural. In this scene, the contrast between the sky and foreground was huge, and even using the equivalent of six stops of ND grads didn’t capture detail throughout. The standard exposure just didn’t look right, whereas for a successful HDR, it should be so natural that you can’t even tell the technique has been used, and that’s exactly what we’re aiming for here.
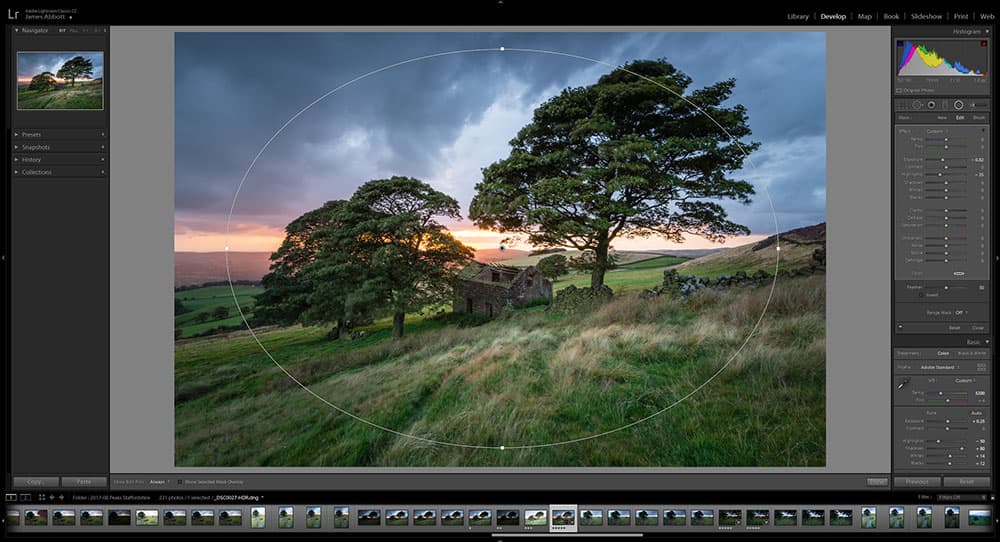
Step by step: how to obtain a successful HDR image
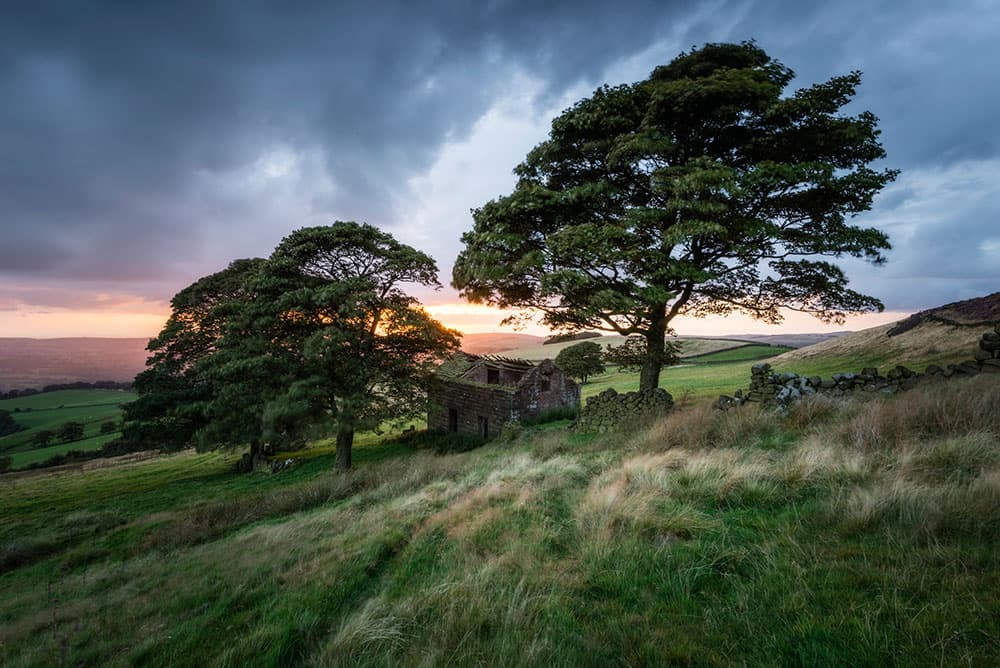
This stormy summer sunset was burning hot on the horizon, but shooting three HDR exposures allowed for all detail in the high-contrast and moody scene to be captured. Nikon D610, 16-35mm, three bracketed exposures f/11 at ISO 100. Credit: James Abbott
HDR is a technique with one foot firmly in shooting and the other in editing. The two are inextricably linked and can’t be separated. Well, that’s not entirely true because some cameras can shoot HDR images in-camera, but the results there are inferior to taking a more manual approach.
There are a number of software options available for blending HDR exposures together and each provides a slightly different end result. Since most people use Lightroom, we’ll use the HDR Merge function here because it’s convenient and luckily, highly effective, too. The great thing about using Lightroom is that when merging images, it merges them into a single new DNG file. This DNG is larger than a standard raw file from your camera because it contains all the image data from each exposure, which basically means you can push and pull exposure, shadows, highlights and more to extract as much detail as necessary.
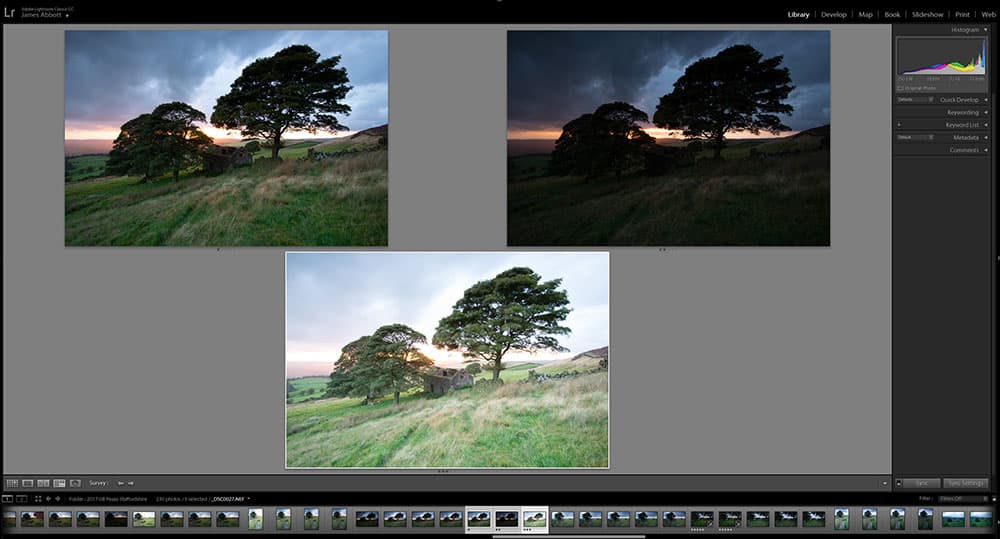
1. Select images
In Lightroom, locate your three or five exposures in the Library Module. Star rate the images according to their position in the sequence. Left mouse click on the first image, hold down the Shift key, and then click on the final image in the sequence. Now go to Photo>Photo Merge>HDR.
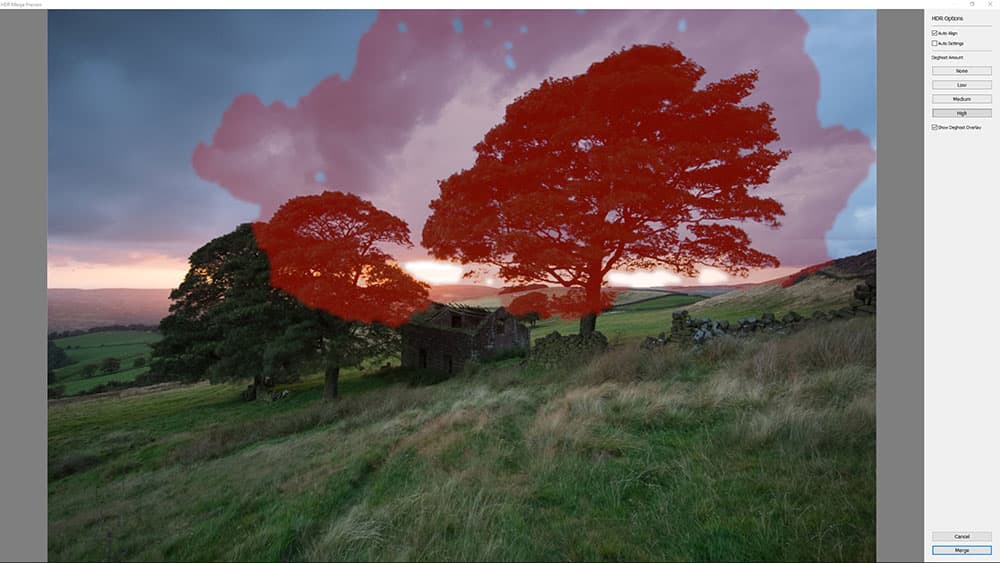
2. Set HDR options
Make sure Auto Align is checked in the dialog window but Auto Settings is not. The latter applies a poor set of adjustments. Ensure Show Deghost Overlay is checked and set the lowest Deghost Amount you can. On the basis of the movement in the scene, select a setting, and if no red overlay is added, reduce the amount.
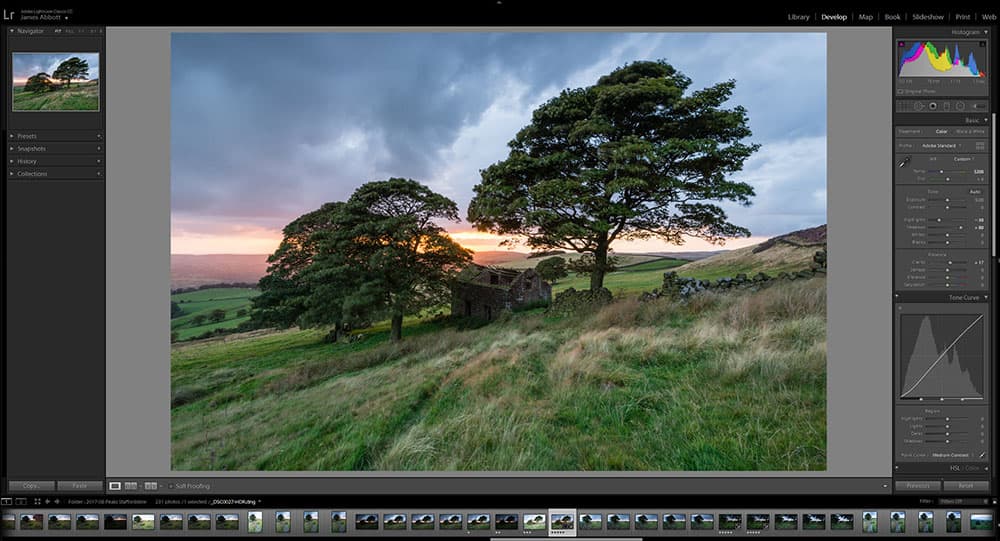
3. Apply basic adjustments
In the Develop Module, locate the new HDR DNG created by Lightroom in the thumbnail strip. Once located, set Tone Curve to Medium Contrast, and both Shadows and Highlights to between 50 and 100 depending on what looks best. Boost Clarity to accentuate overall detail – between 10 and 20 works well for HDR.
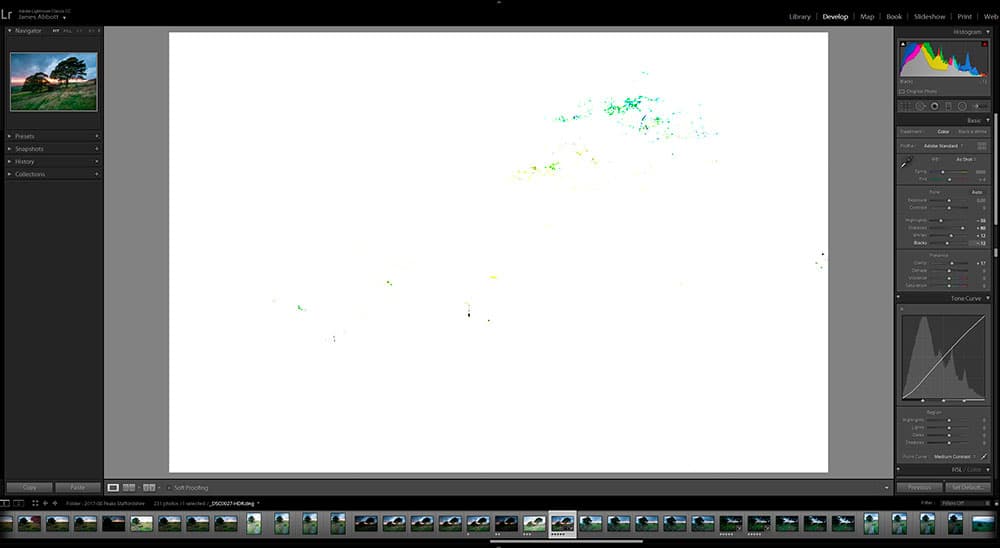
4. Blacks and Whites
After applying Shadows and Highlights, which is a type of tone compression, the image will have a muddiness to it, even with the Tone Curve set. The way to fix this is by adjusting the blacks and whites points. Hold down the Alt key and left mouse click on each slider, drag whites to the right and blacks to the left – colour shows blown detail.
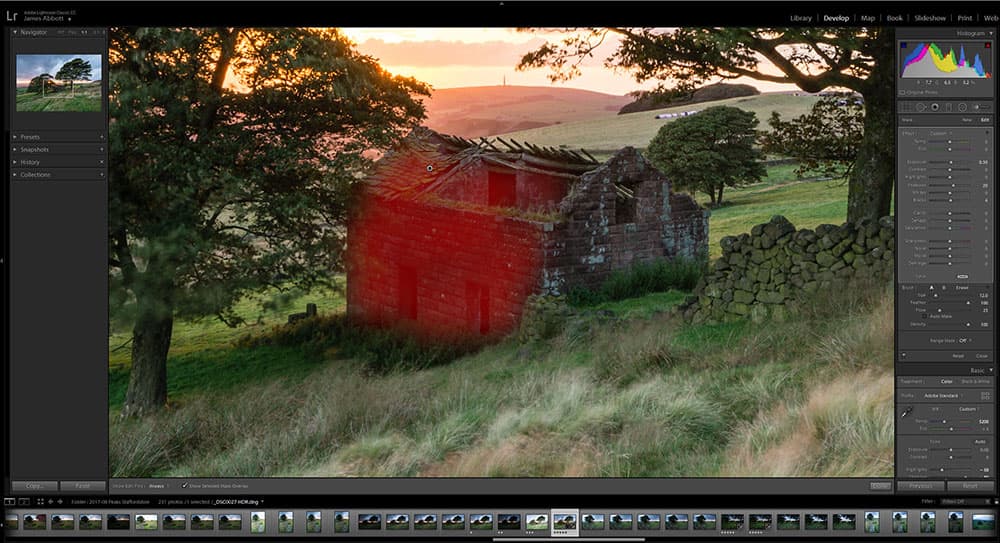
5. Localised adjustments
Most often, simply applying Shadows and Highlights adjustments to the image globally isn’t enough to make the image look its best. At this stage, use the Graduated Filter, Radial Filter and the Adjustment Brush to add adjustments to only the desired areas. For this shot, the Adjustments Brush allowed for the derelict barn to be lightened.
6. Stack local adjustments
The secret behind successful HDR in Lightroom is to use as many localised adjustments as necessary to push and pull the brightness of the scene. For this image, the Radial Filter was the perfect way to a controlled vignette that could be used to add emphasis to the focal point of the shot. Reducing shadows and exposure works well here.
Try something different with HDR
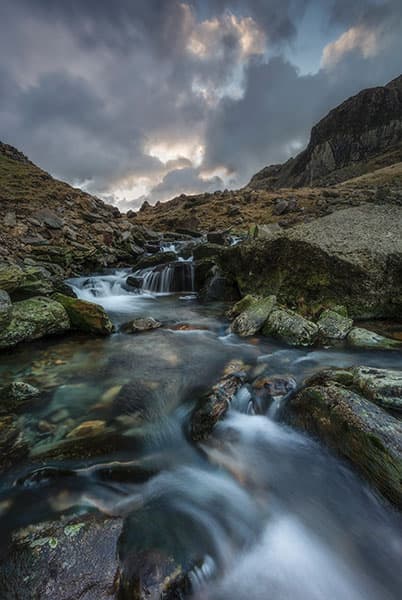
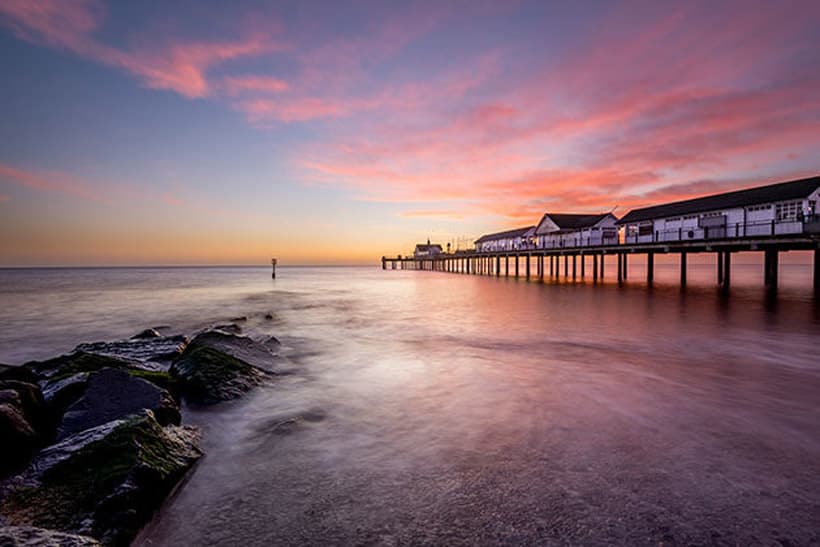
Sunrise at Llanberis Pass. Nikon D610, 16-35mm, bracketed exposures at f/11, ISO 100. Credit: James Abbott
Moody HDR
One way of making your HDR images look natural is to process dark and moody scenes in a dark and moody way. Using HDR doesn’t mean that you change the atmosphere of a scene by making it brighter with less mood. There’s a common misconception that you have to eke out every drop of detail from images when using HDR, but this is far from the reality. You really don’t need to show detail in the deepest shadows, and allowing these to remain black will help towards a natural end result. And if the scene and the mood of the image allow for it, don’t be afraid to use a touch of underexposure during processing.
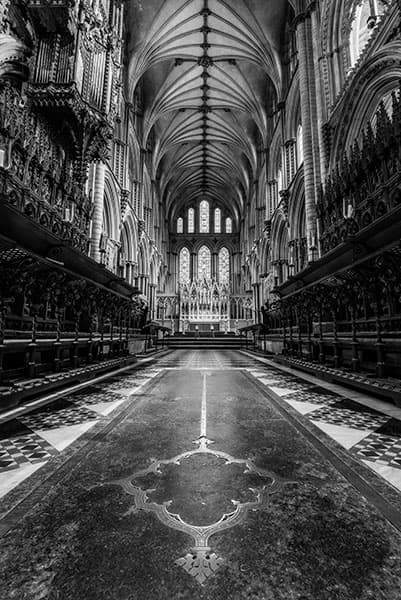
Black & white HDR works well for interior shots. Nikon D610, 16-35mm, bracketed exposures at f/11, ISO 125. Credit: James Abbott
Interior and black & white
Interior photography is one area that always looks good when given the HDR treatment, as these locations often feature high-contrast light; bright windows set against the darker interior corners will always be a difficult exposure to contend with. It can also be a challenge owing to mixed lighting. Areas lit by different light sources can make post-processing difficult, so converting an image to black & white can help because mono naturally removes colour inconsistencies.
Regardless of whether you have a seemingly impossible image where black & white seems like the only option, or when you believe the scene requires a particular treatment, almost any HDR image could work with this treatment – they just seem to go together.
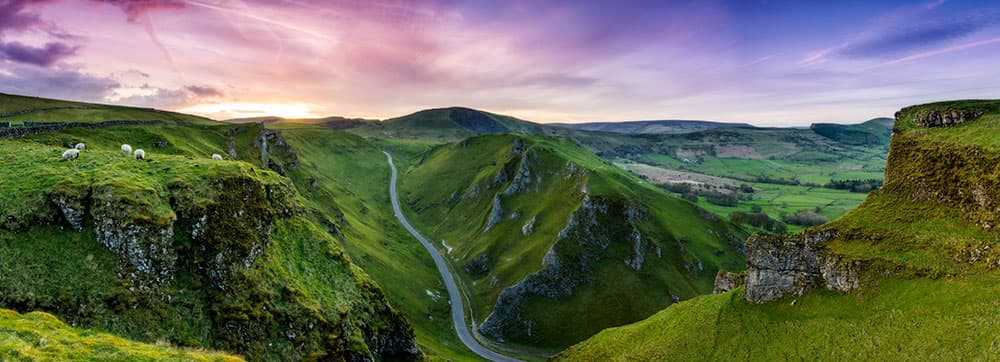
Winnats Pass in the Peak District at sunset. Nikon D610, 16-35mm, bracketed exposures at f/22, ISO 100. Credit: James Abbott
HDR panoramic
Once you’ve mastered the art of HDR, you’ll begin to see the potential for applying the technique, where appropriate, to other shooting and editing techniques. The first and most obvious place to try it out is when shooting panoramic images.
With Auto Exposure Bracketing, the camera will take care of exposures for you – all you need to do is rotate the tripod head. You’ll get larger image files with more detail by shooting in portrait format, and don’t forget to assess exposure each time you move the camera because this inevitably changes and may need to be adjusted for a correct base exposure.
Kit list
- Camera and lens Any camera that has manual mode and aperture priority can be used for this technique. The lens choice will depend on the subject and composition.
- Tripod The camera needs to remain in a fixed position between exposures, so a tripod is essential for supporting the camera and ensuring a successful blend.
- Shutter remote Pressing the shutter-release button can introduce camera shake when shooting longer exposures to capture shadow detail, so use a shutter remote.
- Software To blend HDR images, you will need a special software that can merge your image files together. Adobe Lightroom is capable of this using raw files.
James Abbott is a landscape and portrait photographer based in Cambridge. He’s also a freelance photography journalist and editor specialising in photography techniques, tutorials and reviews. If you can think of a subject, he’s probably photographed it. Visit www.jamesaphoto.co.uk.
More reading:
- How to get more dynamic range in your images
- How to retain highlights for flawless exposures
- How to achieve optimum exposure in your photos


