

The term ‘dynamic range’ is much used in photography, but what exactly does it mean, and how can you ensure your images have enough of one? Read on for James Paterson’s straightforward guide to getting maximum resolution and tonal range in your images.
What is dynamic range in photography?
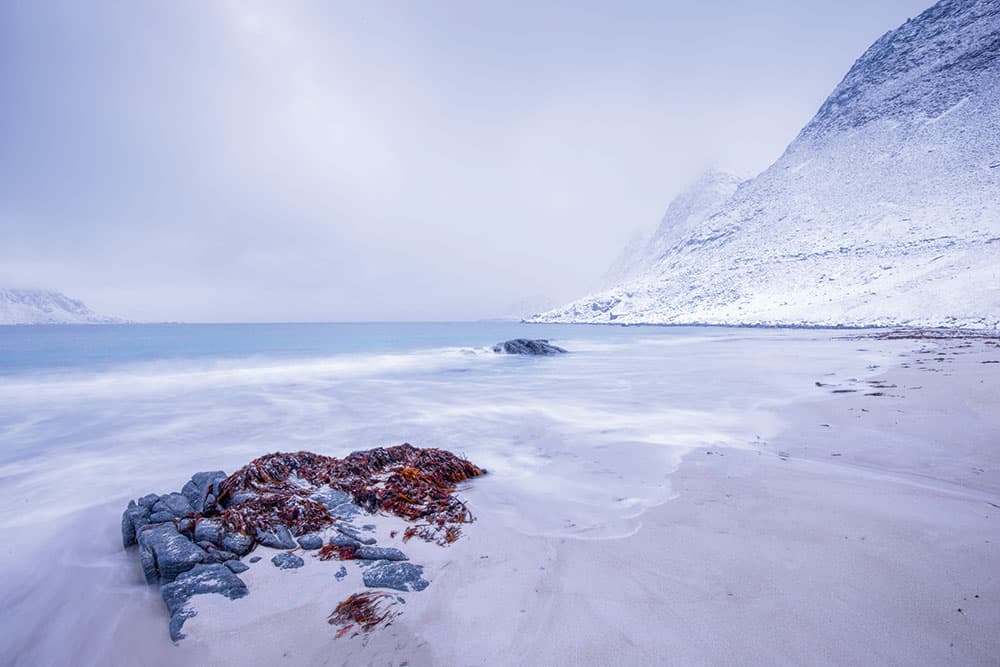
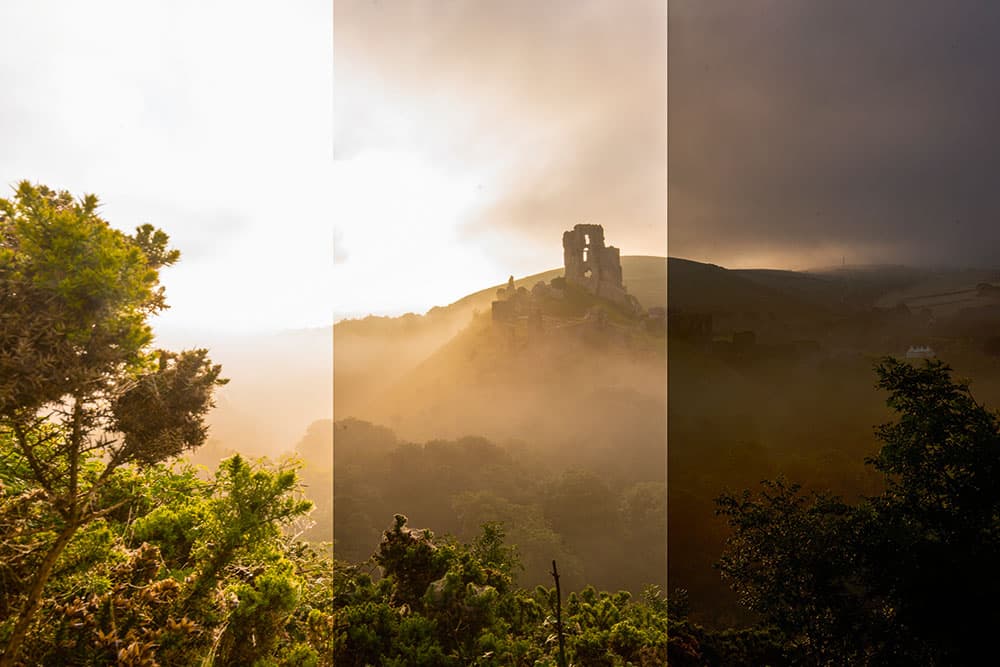
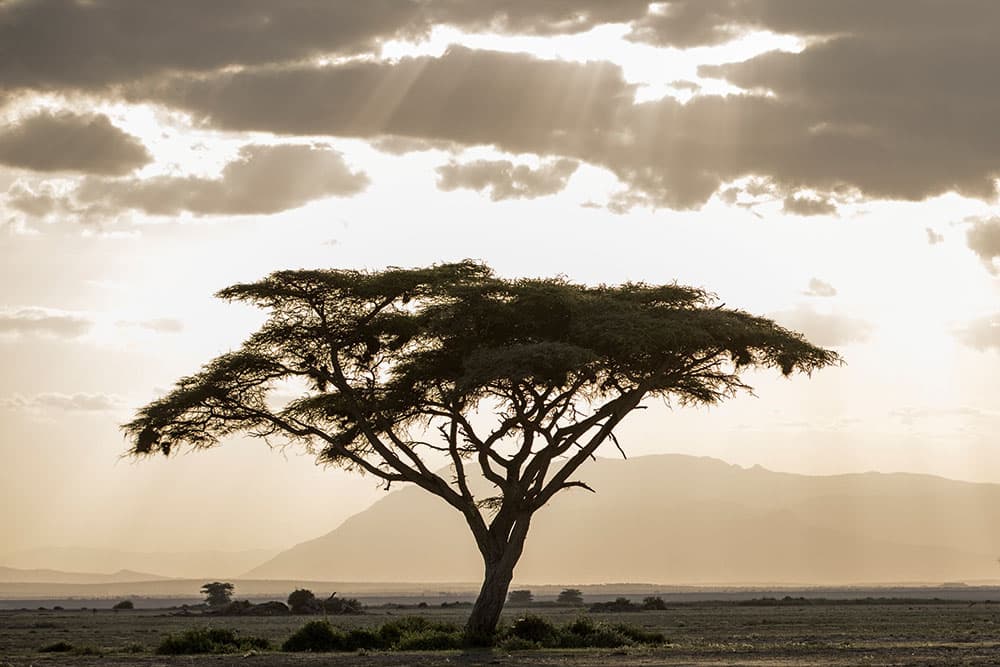
In any given scene there are two opposing extremes of light: the brightest and the darkest. Let’s say we’re shooting some landscape photography, and have hiked to the top of a mountain range at sunset. Pointing our camera westwards, the brightest point in the frame will almost certainly be the sun. Meanwhile the mountains in the foreground are in shade, so the darkest part of the scene might well be deep inside a cave in the face of the rock. The difference in brightness between these two points is a scene’s dynamic range.
The term is not specific to photography: it is applied to other ranges of values, like the quietest and loudest noise made by a musical instrument, the fluctuating current of an electronic signal etc. In photographic terms, it’s a measure of luminance, so naturally we can think of it in terms of stops of light. A stop is either double or half the light. The more stops a camera is capable of capturing without clipping either the shadows to black or the highlights to white, the greater the dynamic range.
Eye vs camera
With the naked eye, we could probably discern detail in the sunset sky and the dark cave. But our cameras aren’t capable of capturing the same range of light that the eye can. So in high-contrast situations like our sunset scenario, the dynamic range capability of the camera can’t match that of the scene. The camera won’t be able to record details in both the highlights and shadows at once, so we have to compromise and expose for one or the other. Inevitably, this means that part of the scene will be recorded as pure white or black, and be completely lacking in detail.
How do cameras compare?
Modern cameras continue to implement new ways to improve image quality, and these days most of us have as many pixels as we need. Attention to dynamic range and low-light performance are now high on the agenda of camera innovation (especially on smartphones), and some cameras are ahead of others in this regard.
So which cameras offer the greatest dynamic range? Typically the larger the sensor size, the greater the dynamic range, as well as a great area to capture light. In general full-frame DSLRs will outperform APS-C and Micro Four Thirds sensors. That said, keep in mind that newer sensors have advantages over old ones, and the steps made in improving dynamic range with computational photography. It’s not always as clear-cut as simply buying a larger sensor.
- See our guide to different sensor sizes: Full-frame vs APS-C vs Micro Four Thirds.
You will not find a dynamic range specification in your camera’s manual, partly because it can be difficult to quantify. For example, the statisticians at sensor analysis site DxOMark place Nikon and Sony cameras (which share the same Sony sensors) ahead of Canon cameras, while other sites put Canons on a par.
The confusion may stem from differing testing benchmarks. At the lowest part of the range there comes a point where noise takes over detail in the shadows, so the acceptable level of noise is open to interpretation. It might be stated that a certain camera has 14 stops of dynamic range, but in practice, they may not all be usable stops.
What’s more, dynamic range performance can vary depending on the ISO setting. For example, according to DxOMark the Canon EOS 5D Mark IV lags slightly behind the older Nikon D810 at ISO 100, but at ISO 400 it has the edge.
The subject of dynamic range also plays a fascinating role in the film vs digital debate. Interestingly, when it comes to usable dynamic range, it took a good while for DSLRs to catch up with analogue film, due to the capacity of film to hold a staggering level of detail in the highlights.
Later DSLRs and more modern mirrorless cameras exceed the dynamic range offered by film, which max out at around 13 stops. By contrast, modern DSLRs typically reach the 14 stop mark and full-frame mirrorless cameras reach 15. However, the raw files these cameras produce often look flat straight out of camera, as the manufacturer expects the photographer to want to manipulate the dynamic range in their own way afterwards. By contrast, analogue film can give a rich range of tones straight away.
Shrinking dynamic ranges
It’s not just the dynamic range of the camera that is important; it plays a part in all stages of image-making. First, there’s the scene’s dynamic range – the actual luminance values present. Then there’s the camera’s dynamic range – the range of luminance the sensor is capable of recording. After this, there’s the smaller dynamic range of your computer screen – even the best screens max out at about 10 stops under perfect viewing conditions.
Then finally there’s the much more limited dynamic range of a print, which of course can only ever go as white as the paper.
If our screens and prints aren’t capable of displaying the dynamic range our sensor records, then why should we be concerned about how much our camera can pick up? It matters because of the extra latitude a wider dynamic range affords when editing the photo. We can compress that wide dynamic range captured in a way that suits our vision for the image. This involves making local adjustments to lighten or darken parts, such as applying a graduated filter in Photoshop to darken an overexposed sky.
Should we be concerned?
This depends on what you are shooting. For the majority of subjects and scenes the difference between the brightest and darkest point is not so great that our camera will struggle to capture detail in both the highlights and shadows. As long as we expose correctly, we’re fine.
It only becomes a problem in scenes with very high contrast. This is why dynamic range performance is more important to landscape photographers – who could be confronted with scenes that have a dynamic range of 20 stops or more – than it is to studio photographers, who can control the light as they please.
Greater dynamic range is also very handy when our metering slips up, as detail can be extracted from shadows or highlights to rescue the image. So it gives us a welcome safety net in tricky lighting conditions or fast-paced shooting scenarios when there’s little time to get exposure spot-on.
How to maximise your camera’s dynamic range
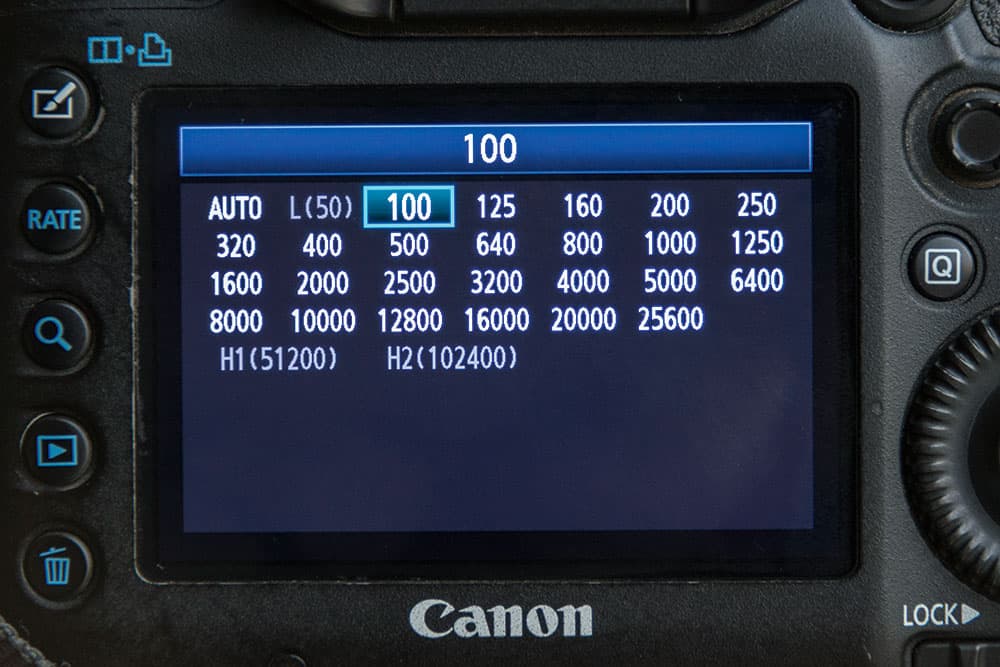
1. Use a low ISO
Lower ISOs result in images with a higher dynamic range: the less noisy, the greater the detail held at the tonal extremes. There’s one caveat – extended low-ISOs such as Canon’s ISO 50 may actually result in less dynamic range, as the image is effectively overexposed on capture, then corrected.
2. Shoot in raw format
Raw files contain greater information in shadows and highlights because they hold all the raw data the sensor is capable of recording, whereas JPEGs discard excess data. So raws give you greater dynamic range than JPEGs, which is especially useful for high-contrast landscapes.

3. Expose to the right
Shadows contain higher noise levels than highlights. Create a higher-quality image by making it as bright as possible without clipping the highlights, before correcting it afterwards. This effectively lowers the base ISO. It’s known as ‘exposing to the right’, as the histogram will pile up towards the right side.
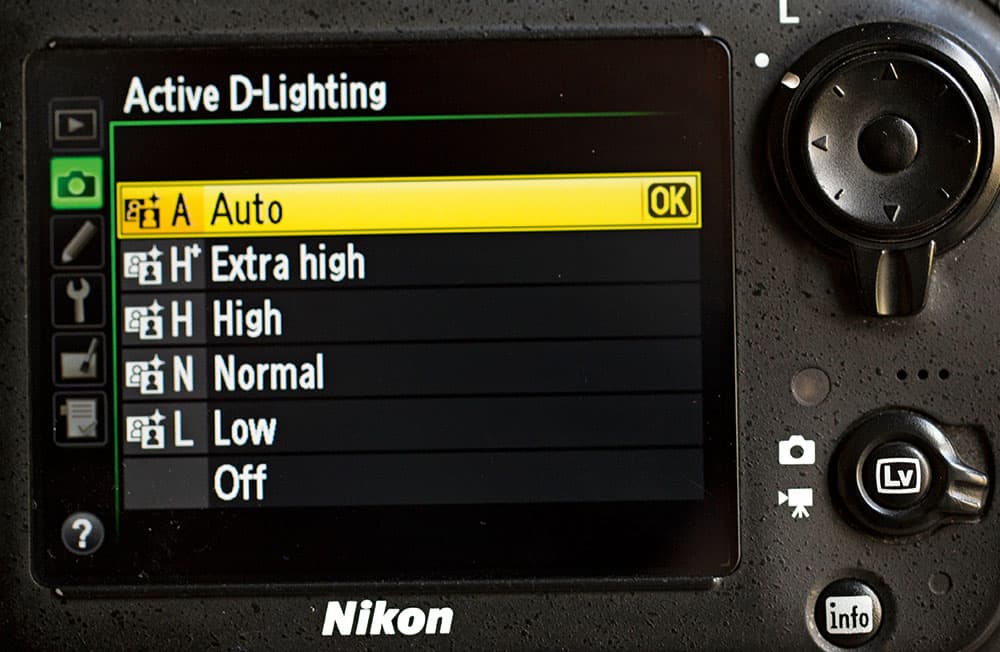
4. Extend the range
Some cameras have features that maximise dynamic range: Canons offer Auto Lighting Optimizer and Nikons have Active D-Lighting. You might also have a ‘flat’ or ‘neutral’ picture style, which can be useful when shooting video, as it produces a flat image that offers greater latitude for editing later.
5. Bracket your exposures
When using a tripod, safeguard against clipping by bracketing your exposures. Afterwards, you can choose the file that gives the best dynamic range. What’s more, it gives you the option to blend the exposures together later on or make an HDR image from the set.
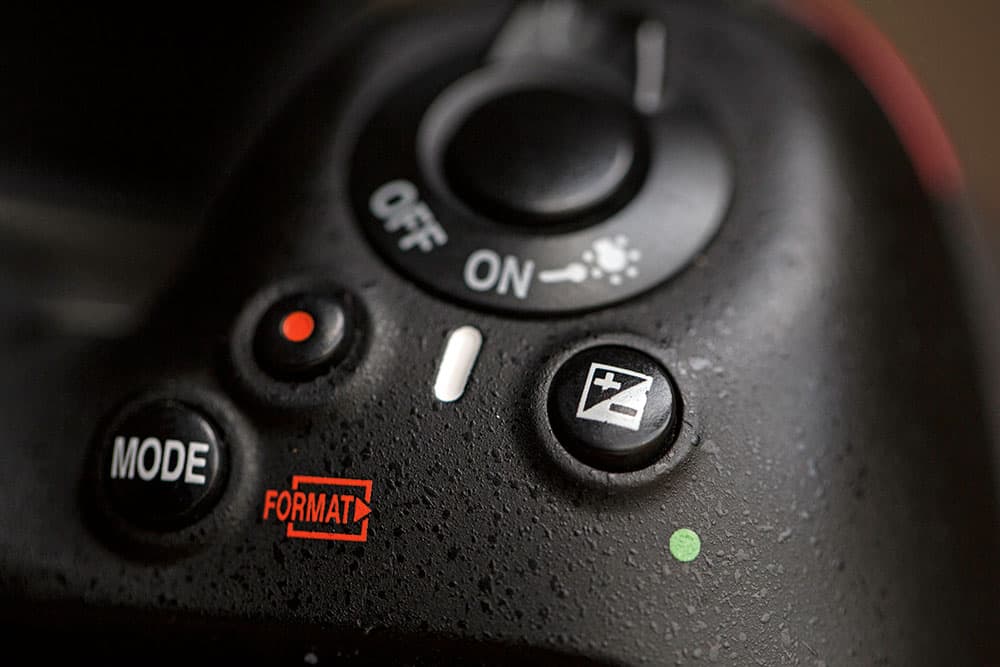
6. Use exposure compensation
Your camera’s exposure compensation dial can be very useful for controlling dynamic range, as it lets you dial in more or less light. When employing the ‘expose to the right’ technique, try using exposure compensation together with highlight warnings to push the histogram as far to the right as possible without clipping.
7. Highlights and shadows
Understand your histogram to avoid clipping highlight and shadow details.
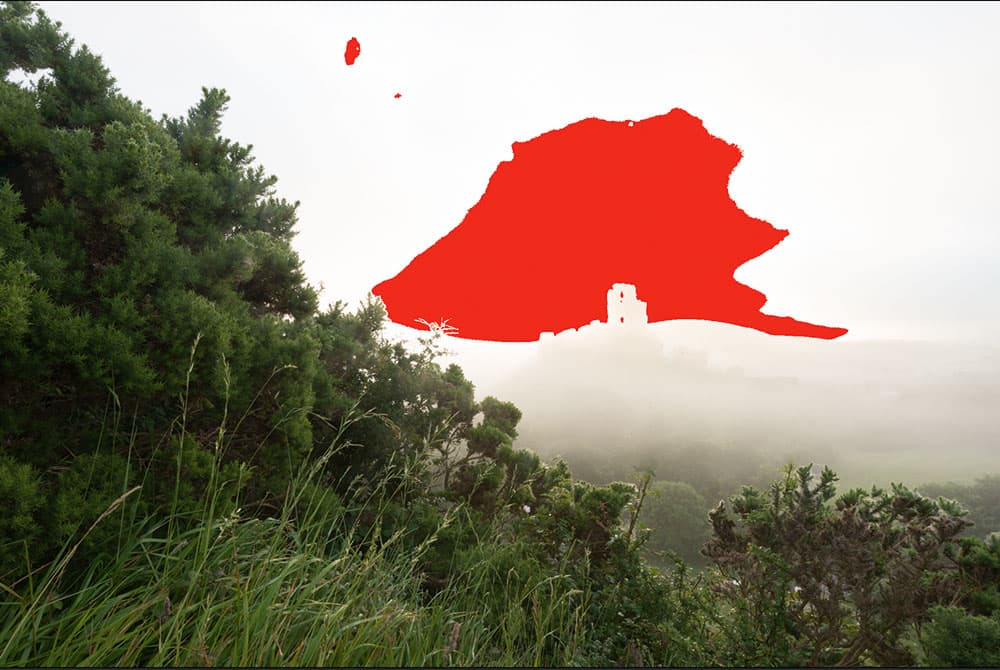
What is clipping?
If areas of a scene are too bright or too dark for your exposure, then they’ll be ‘clipped’ to pure white or black. This trips these areas of detail. You often see it happen in landscapes with bright skies, where the brightest part of the sky can be blown out to pure white like this.
Deep shadows
Metering systems are biased towards highlight protection. As such, high-contrast scenes might look slightly underexposed as the camera will attempt to preserve the highlights. It’s easier to tease detail out of deep shadows in post-processing than it is to rescue clipped highlights.
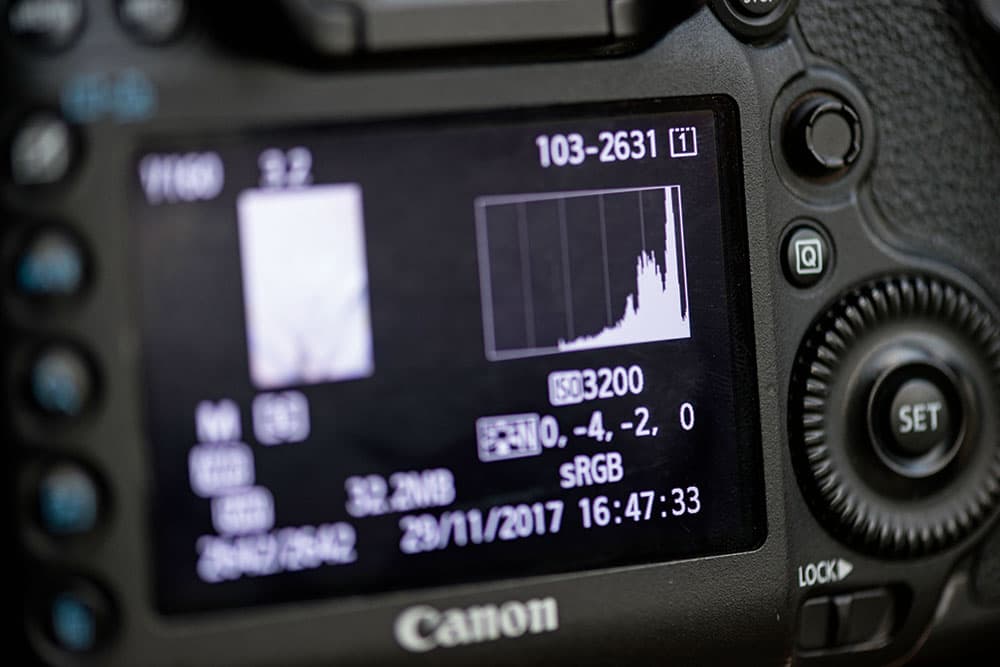
Read the histogram
The histogram represents all the tones in our image, stacked in terms of brightness from black on the left to whites on the right. A healthy histogram is one that reaches down to ‘sea level’ at both ends. If the peaks intersect on either side of the graph it means some pixels are clipped, like the highlights here.
Check camera warnings
Many cameras will display warning symbols for under or overexposure in the viewfinder. You can also turn on clipping alerts that flash over the frame when you’re reviewing. There are different ways to enable them – on a Canon press the Info button, and on a Nikon press the down arrow to see the file info.
Is clipping always bad?
We photographers can be a little obsessive about detail. But if an area of an image is meant to be very dark or very light, ask yourself whether it really needs to hold detail at all. There’s nothing wrong with clipped pixels if that’s what you intend for the subject or scene.
How to correct shadows and highlights
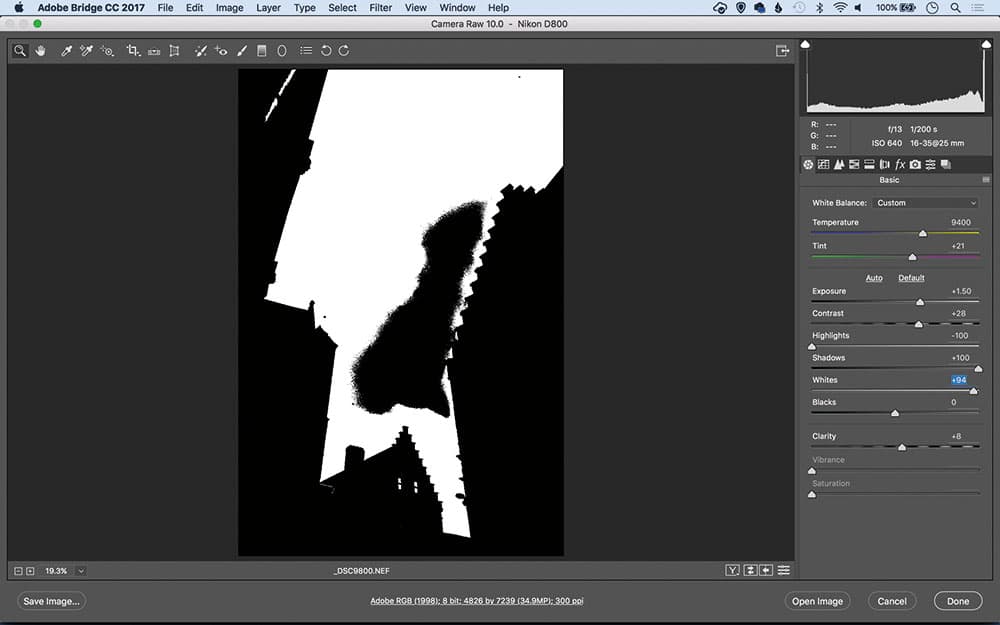
1. Set black & white points
In Lightroom and Photoshop’s Camera Raw we can check for, and sometimes rescue, clipped pixels by holding Alt while dragging the whites or blacks sliders. This gives us a view that shows clipped pixels as we drag. We usually want whites and black on the very edge of clipping, as this gives us a tonally rich image.
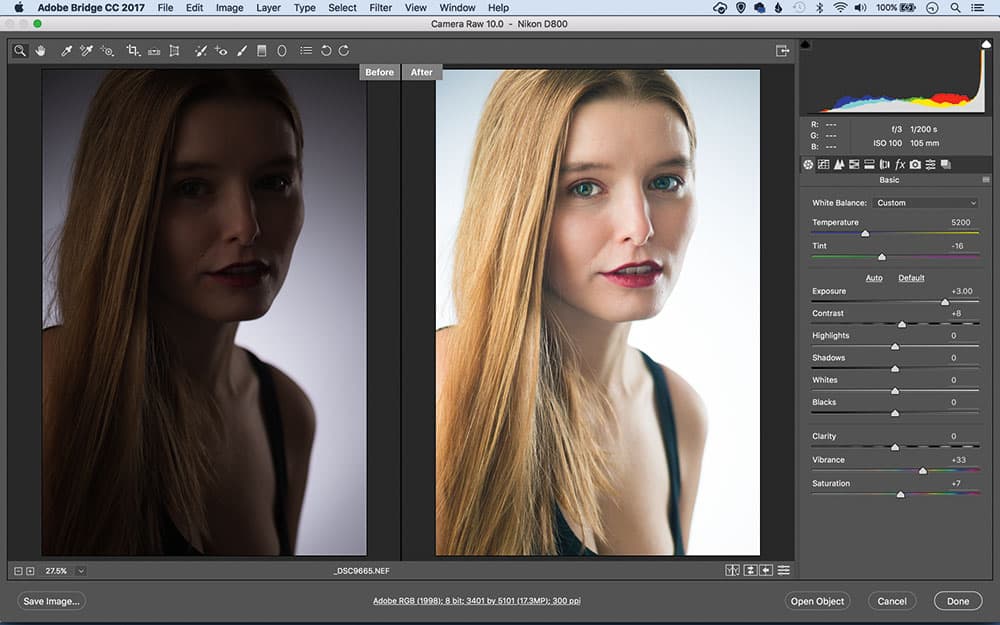
2. Fix any underexposure
Modern sensors are capable of recording an incredible amount of detail in the shadows. Even a badly underexposed image like this (3 stops underexposed) can be rescued. After increasing the exposure by +3 and applying noise reduction, the image – while not as good as a correctly exposed frame – is still usable.
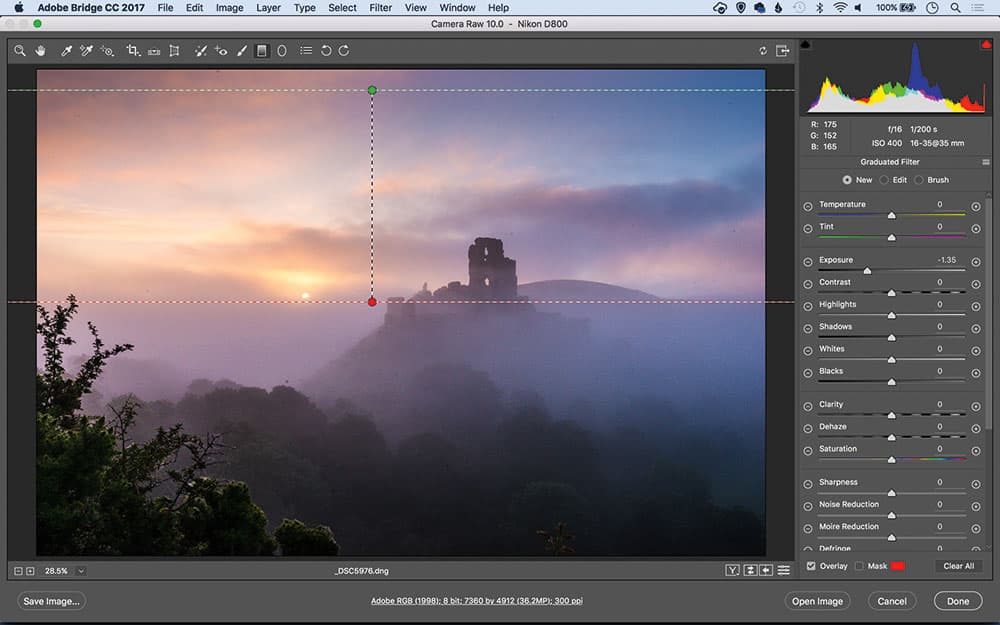
3. Correct any overexposure
Landscapes are a good test of a camera’s dynamic range, as skies tend to be brighter than land. If a sky looks too bright, it’s easily adjusted in Lightroom or Camera Raw with a Graduated Filter adjustment. We load the tool with negative exposure and a little Clarity and Contrast, then drag through the image.
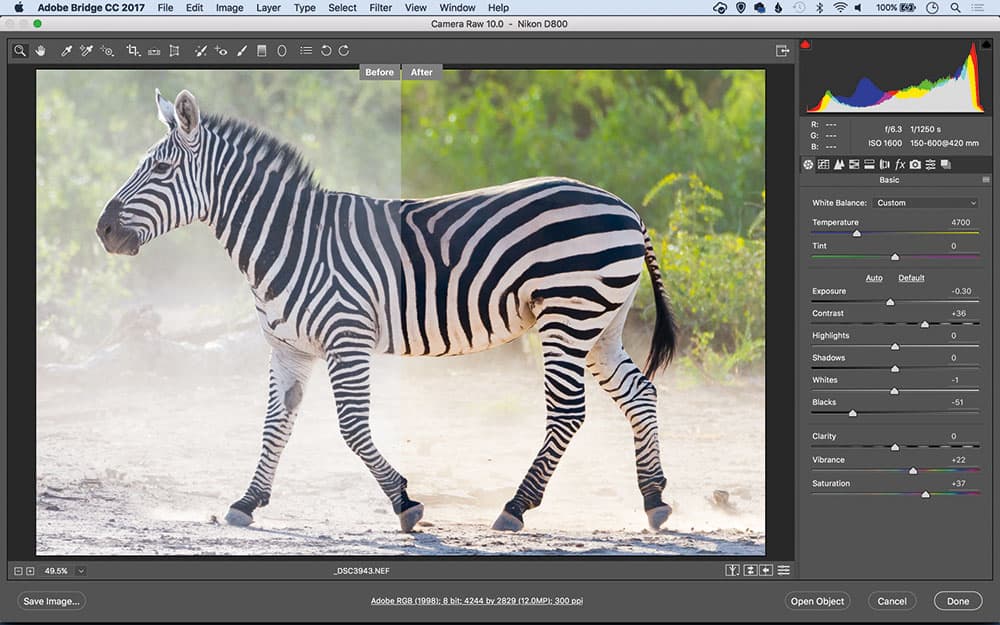
4. Tone bright images
To correct overexposure, or compensate for exposing to the right, we simply knock back the exposure in our chosen image-editor. If areas are blown out we can pull back a little detail (especially with raw files), but clipped highlight pixels can’t be fixed; they’ll simply go slightly off-white.
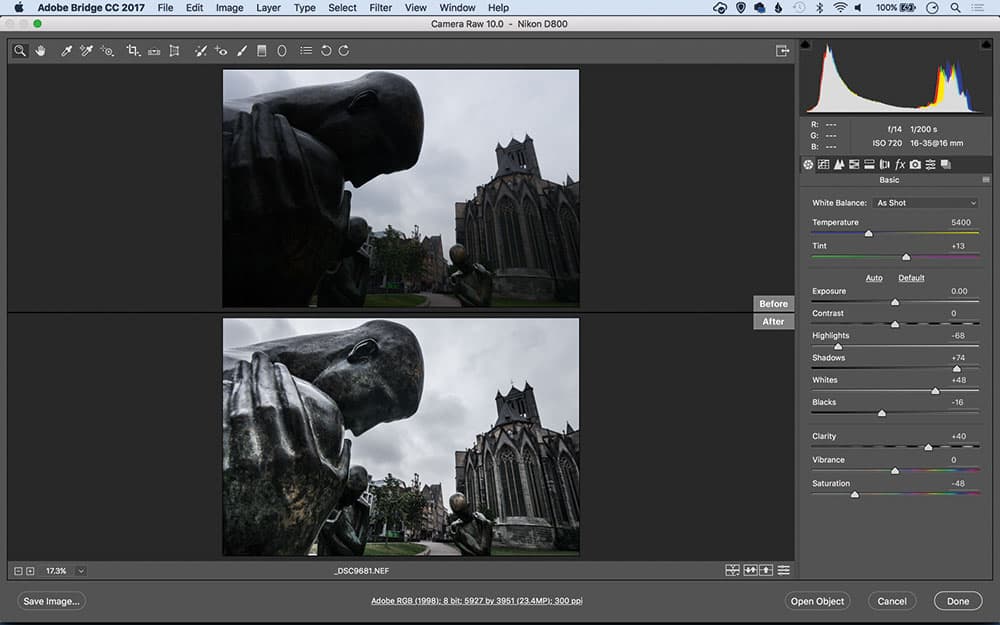
5. Tease out the shadows
It’s easier to pull detail out of shadows than rescue blown-out highlights. In Lightroom or Camera Raw we can use the Shadows slider to lift the darker tones, or selectively lighten areas with local adjustment tools. Lifting shadows can lead to increased image noise, so counteract this with noise reduction.
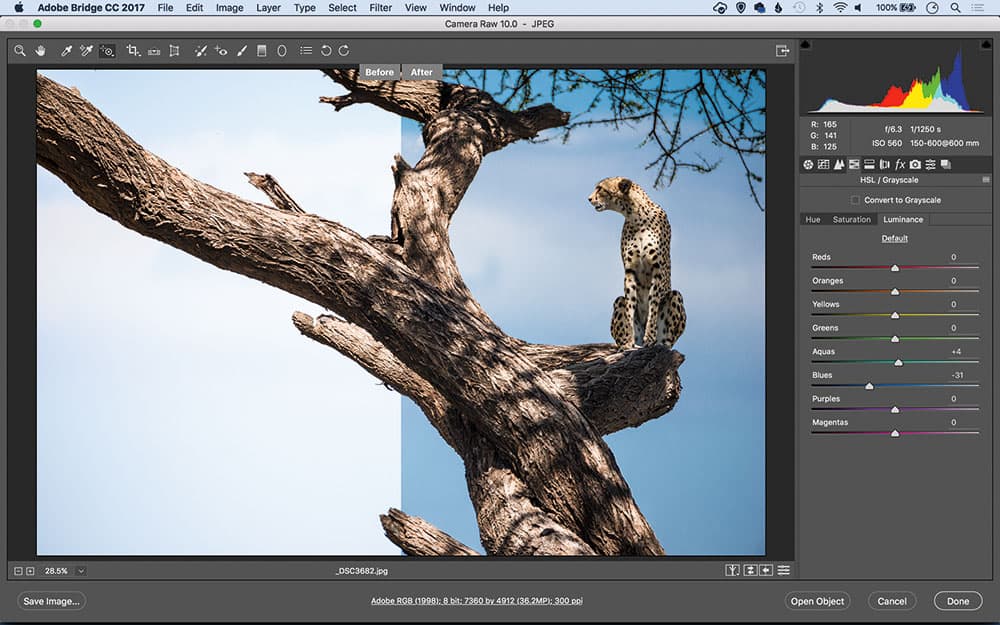
6. Colour luminance
Colour luminance settings can give you control over dynamic range. In Lightroom and Camera Raw this can be done with the HSL/Color Panel’s Luminance tab. We can either use the sliders or drag over the image with the target tool. Darkening the blues here dramatically improves the sky.
Tasteful HDR
Mention dynamic range and many will instantly think of high dynamic range photography, or HDR. This is the process of taking several bracketed exposures – using a tripod to keep them in alignment – then blending them into one detail-rich frame. HDR images are often regarded as overcooked and unrealistic, festooned with garish colours and halo-inducing edge details. This is a look that’s become synonymous with HDR photography, but it’s just one of many potential treatments.
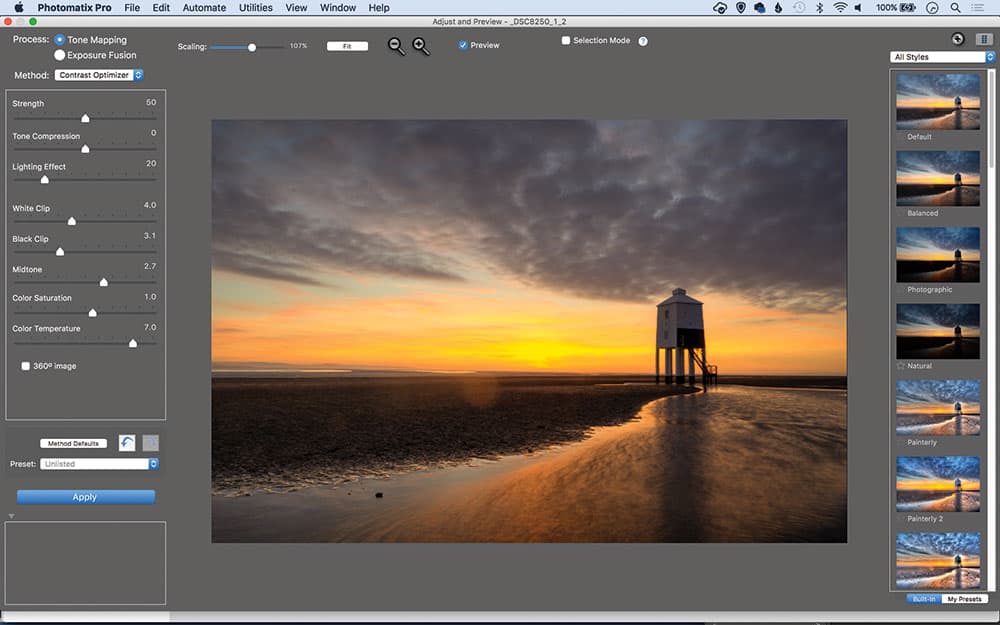
HDR is more than just a look, it’s a function that allows you to extend dynamic range beyond the capabilities of your camera. In fact, in this sense one could argue that HDRs are more realistic than normal images. Our eyes have a higher dynamic range than our cameras, so when processed in a natural way, an HDR image has the potential to resemble more closely how we view the scene.
It’s this natural look that’s key, so how do we create tasteful HDRs? There are several dedicated HDR programs and plug-ins that offer natural-looking presets, such as Photomatix’s Balanced preset here. Lightroom and Camera Raw also include an HDR Merge feature that results in a natural-looking blend. Once you create your HDR it’s worth getting stuck in with local adjustments, as there’s far more hidden detail that can be teased out.
James is a skilled photo editor and photographer. His work has appeared in countless magazines and books, and in 2014 he was appointed editor of Practical Photoshop magazine. Visit www.patersonphotos.com.
Further reading
- Read our complete guide to landscape photography
- How to retain highlight details for perfect exposures
- Get optimum exposure in your images
- ‘The results can be amazing’ – Photoshop’s Super Resolution feature
Follow AP on Facebook, Twitter, Instagram, and YouTube.


