Capturing wildlife, especially birds in flight, is a skill that one masters through practice. It takes both patience and perseverance to get those dramatic and mesmerising images. Ben Hall guides us through everything you need to know about capturing crisp images of wildlife in motion.
You don’t have to travel to far-flung, exotic places, as opportunities for action photography are all around us – from birds in our back garden and your local park to the sea cliffs up and down the coastline. As with any type of wildlife photography, researching and observing your subjects is paramount, and will ultimately help to get you into the right place at the right time.
There are other important techniques, however, which will help you on your way to capturing spectacular action images of wildlife.
How do you photograph birds in flight (BIF)?
Mastering the capture of birds in flight is difficult. Success demands plenty of perseverance, not to mention the tolerance of many failures, but practice some simple techniques and you will soon find yourself taking successful action shots of flying birds. Ideally, you will need to shoot in relatively bright light, since this will allow you to use a fast shutter speed – which is paramount if you hope to freeze the movement of a fast-flying bird.
However, you should avoid harsh, midday sunlight, as the resulting images will be spoilt by harsh shadows and bleached highlights. Shooting during the first and last hours of sunlight will give the best results, as the low sun will light up the underside of the bird, revealing important detail that would otherwise be lost in deep shadow.
Read more about how to take photos in summer light.
What shutter speed should I use for birds in flight?
Aim for a shutter speed of at least 1/1000sec and select the predictive auto focus setting. Expanding your focus points to a group is a handy way of increasing your margin for error when it comes to tracking your subject. You will lose some accuracy, however, so you may need to stop down to a smaller aperture to increase the depth of field in case the focus point picks out the wing instead of the head.
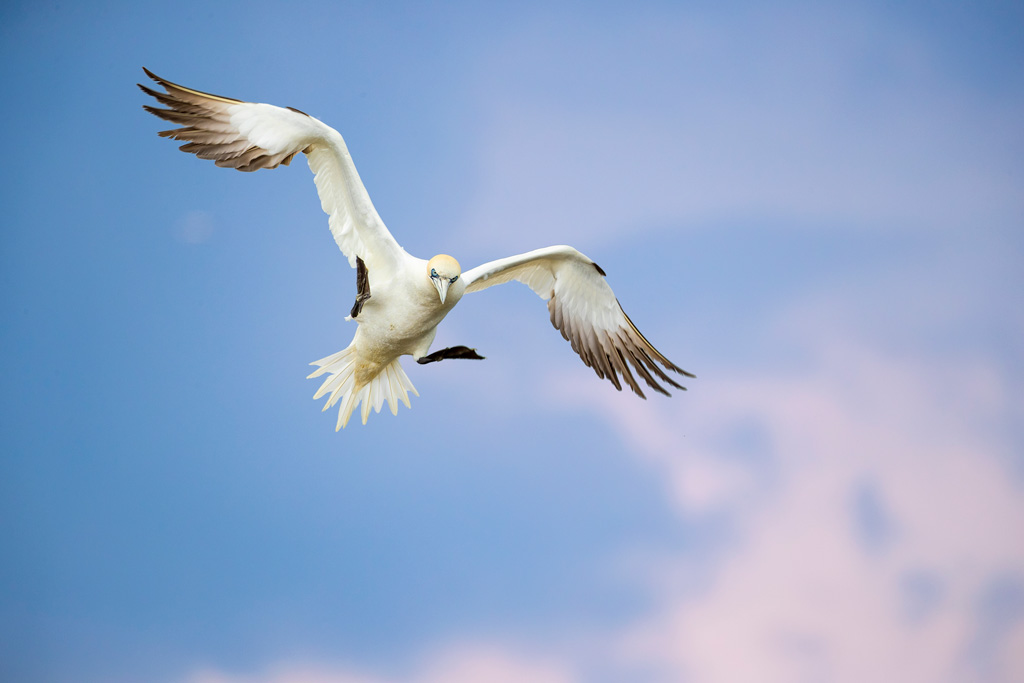
A good panning technique will result in sharper images, and obtaining critical sharpness is perhaps the trickiest aspect of flight photography. The key to successful panning lies in smoothness and anticipation. To adopt the correct posture, stand with your feet shoulder-width apart and tuck your elbows into your side to increase stability.
As your subject passes, swivel your upper body smoothly, matching the speed of the bird. Wing position can make or break a shot, so fire a burst of frames using the high-speed drive mode to give you a sequence to choose from.
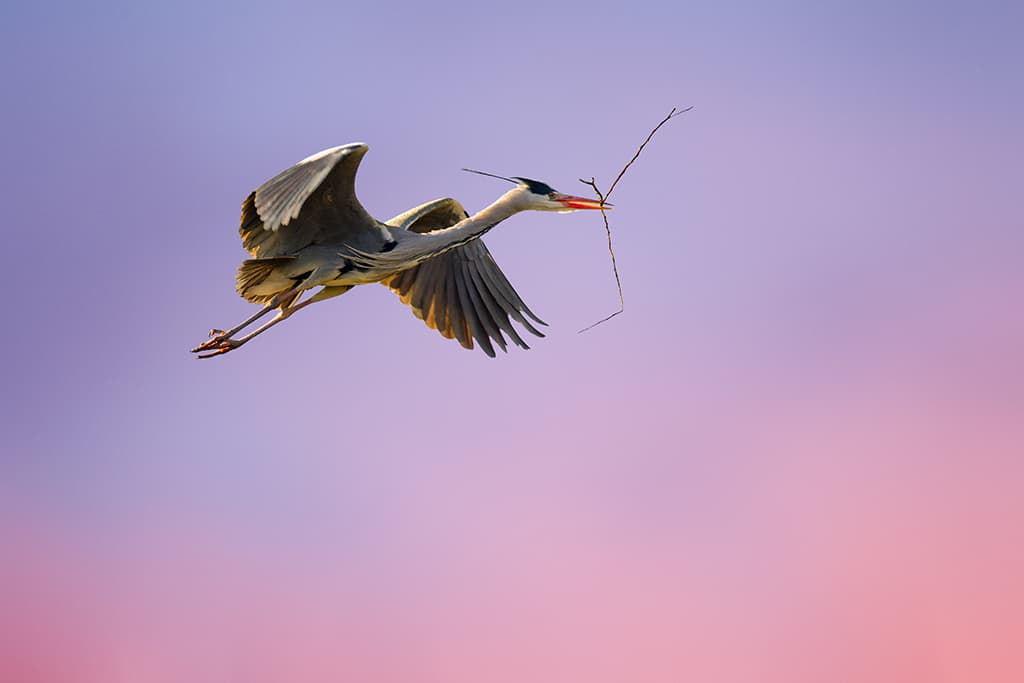
Capturing courtship displays of fasting-moving birds
Images that depict wildlife behaviour, such as a breeding pair of birds performing a courtship display, bonding, or passing food to each other connect with the viewer on an emotional level. They tell a story and offer a glimpse into the subject’s life cycle. When tackling a project like this, you must be prepared to put some time in.
Researching and observing your subject’s behaviour will be the key to success. Pick somewhere local, ideally offering easy access, such as a city or country park. This will allow you to make numerous visits over a period of time.
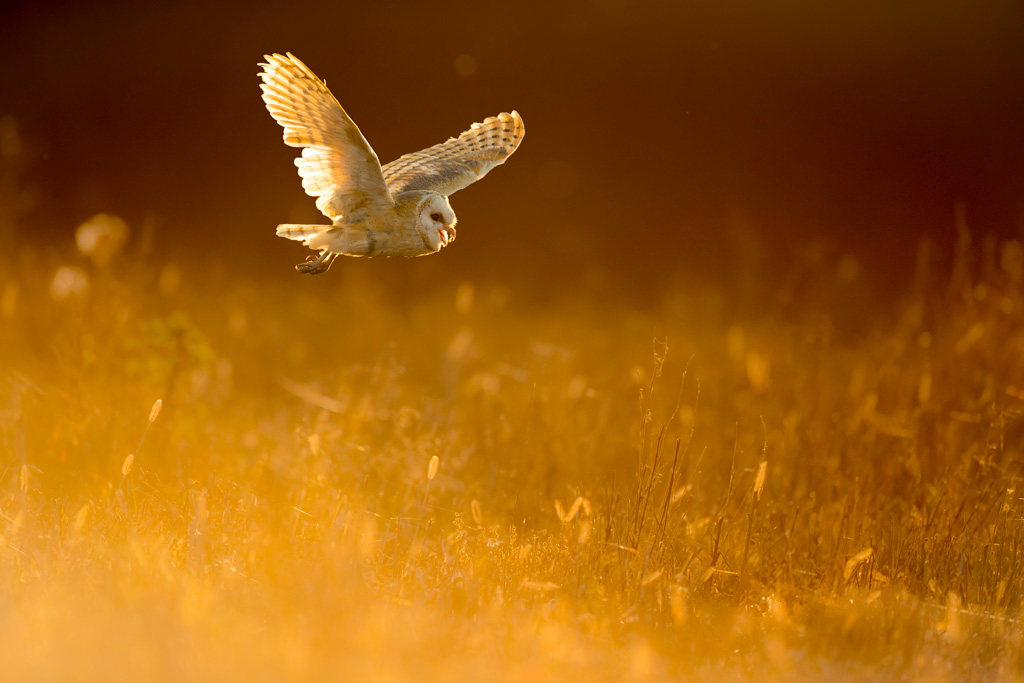
Start by simply observing potential subjects, and noting down any patterns that you see. Search out possible backgrounds and pay attention to how the light changes throughout the day. You should soon be able to visualise the type of images that might be possible. Being armed with as much information as possible will pay dividends in the long run.
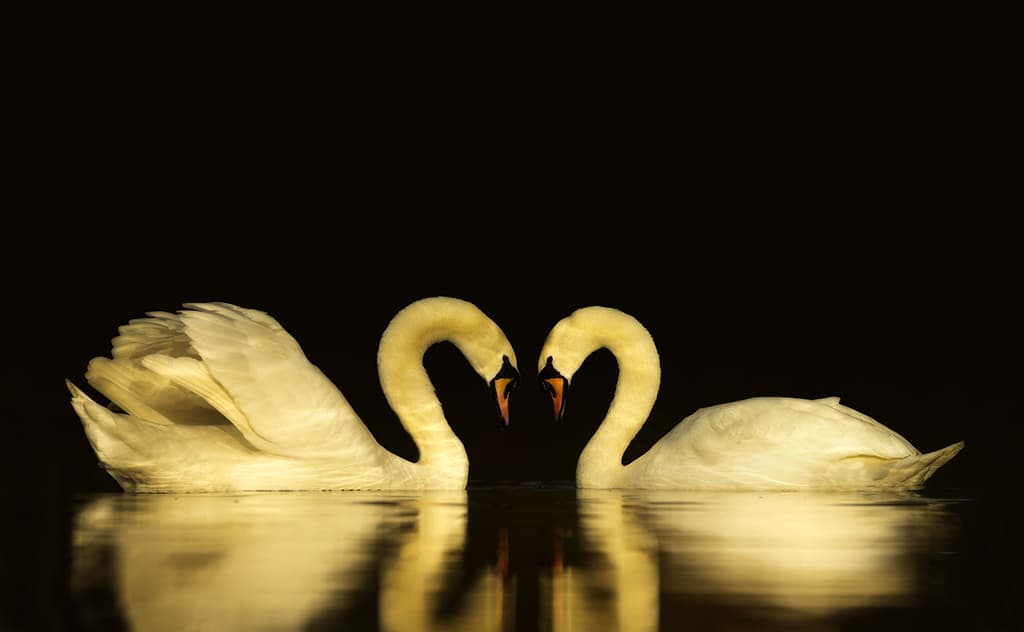
When photographing birds on water, such as displaying grebes or swans, shooting from a low angle will immediately create a more intimate feel. With the help of a large aperture, a low viewpoint will also make it easier to blow the background out of focus, separating your subject from any potential distractions.
For ground- or water-level subjects, a beanbag is a great choice of support and should allow you to get down low enough to include a foreground which will immediately create a sense of depth.

Birds in flight: Action in motion
Pin-sharp images of wildlife in action undoubtedly hold arresting impact but revealing the movement of your subject using a slow shutter speed can be a great way of capturing a sense of motion and energy. Pick an overcast day and select shutter priority to give you control over the shutter speed.
You will need to experiment to find the best results for your chosen subject, but between 1/15 and 1/60 sec is a good place to start. Birds in flight or shaking water from their wings can work well for this technique, their wing beats resembling brush strokes on canvas.
Dropping your shutter speed to over 1 second and intentionally moving the camera during the exposure can result in some interesting and abstract effects. There are no rules here, so don’t be afraid to experiment with different shutter speeds and camera movement.
Abstract images connect with the imagination, so your subject doesn’t even have to be recognisable for the image to work.
A mammal in full sprint can look equally impressive, so why not visit your local deer park to experiment with panning? By using a similar technique to flight photography, but using a slower shutter speed, you should find it possible to create a motion blur effect in the background, whilst keeping the subject relatively sharp and distinct.
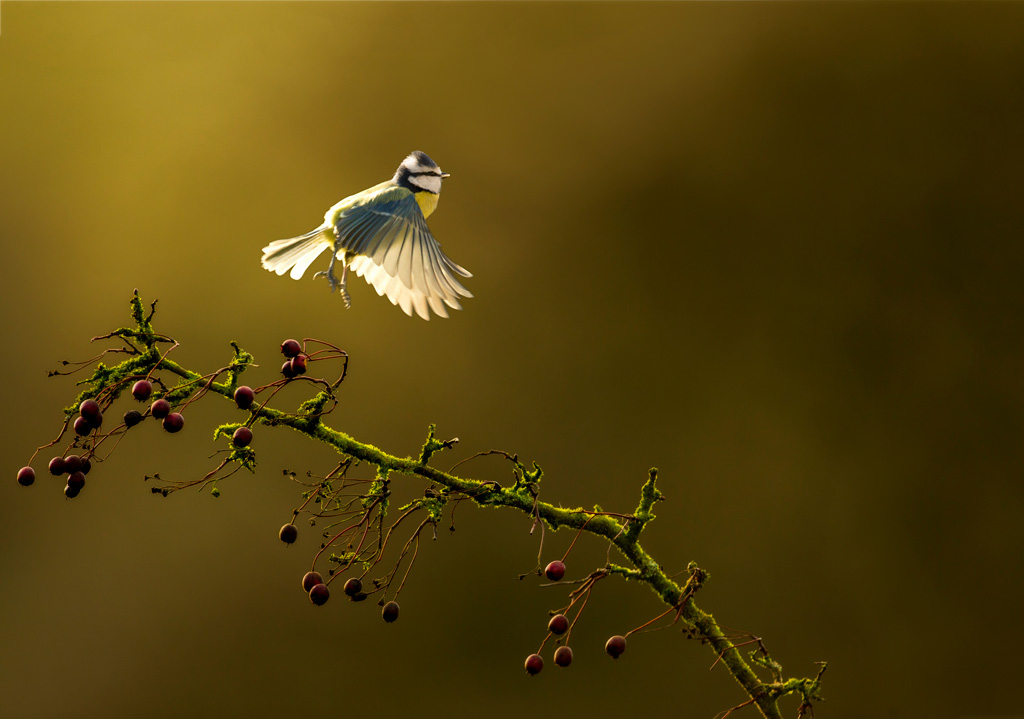
Birds in flight in the garden
With a bit of preparation work, even your own back garden can become a haven for wild birds, providing endless opportunities for action photography all year round. By placing a simple feeding pole in your garden, you should find it easy to attract a variety of subjects within range.
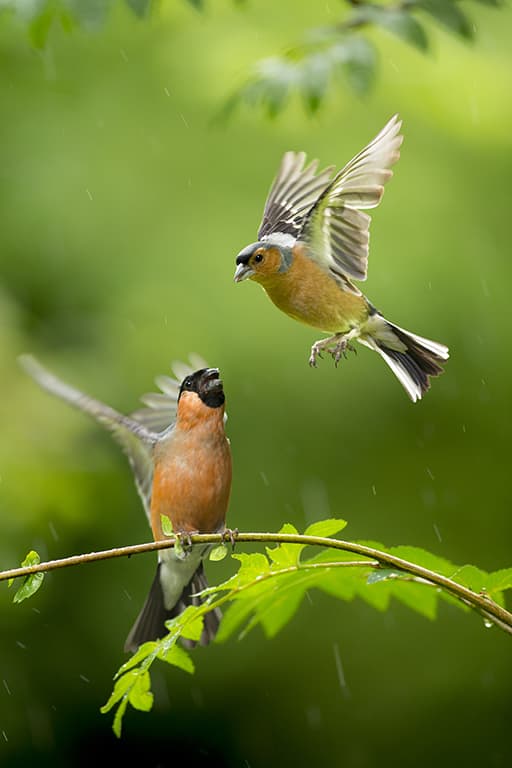
For natural-looking shots, search for some attractive perches and use a spring clamp to attach these to the pole. You should find that, after some time, the birds will land on the perches momentarily before hopping down to the feeder. Action can be fast-paced at a feeding station, so look out for moments when the birds squabble over the food and be ready to fire at a moment’s notice.
You will need very fast shutter speeds to freeze the movement of small birds, at least 1/2000 sec, so keep your aperture wide and use a suitable ISO. To capture flight shots, try pre-focusing on the perch using manual focus, and fire a burst of shots as the bird takes off, or comes in to land. You may need to stop your aperture down to increase the depth of field but be careful with your shutter speed and raise the ISO if necessary.
Read more about capturing garden birds in flight here.
Camera kit for capturing birds in flight and animals
Telephoto lens – For most wildlife subjects, a tele or tele-zoom lens will be needed, especially for wary subjects. For any fast-moving action, a lens with a large maximum aperture such as f/2.8 or f/4 will be useful, but it is not essential.
Beanbag – For low-level subjects, a beanbag is an excellent choice of support. It will offer a rock-solid platform for your lens while allowing good freedom of movement.
Tripod and gimbal head – When using a tripod, a gimbal head is a great way of supporting long telephoto lenses. A gimbal will take all of the weight out of the lens, whilst also allowing a smooth panning movement – which is perfect when you’re photographing birds in flight.
Portable hide – When photographing garden birds, unless you can shoot from an open window, a portable hide will be useful. You can alter the position of the hide easily to take advantage of different backgrounds and the changing light.
How Ben captured a fast-moving bird in action
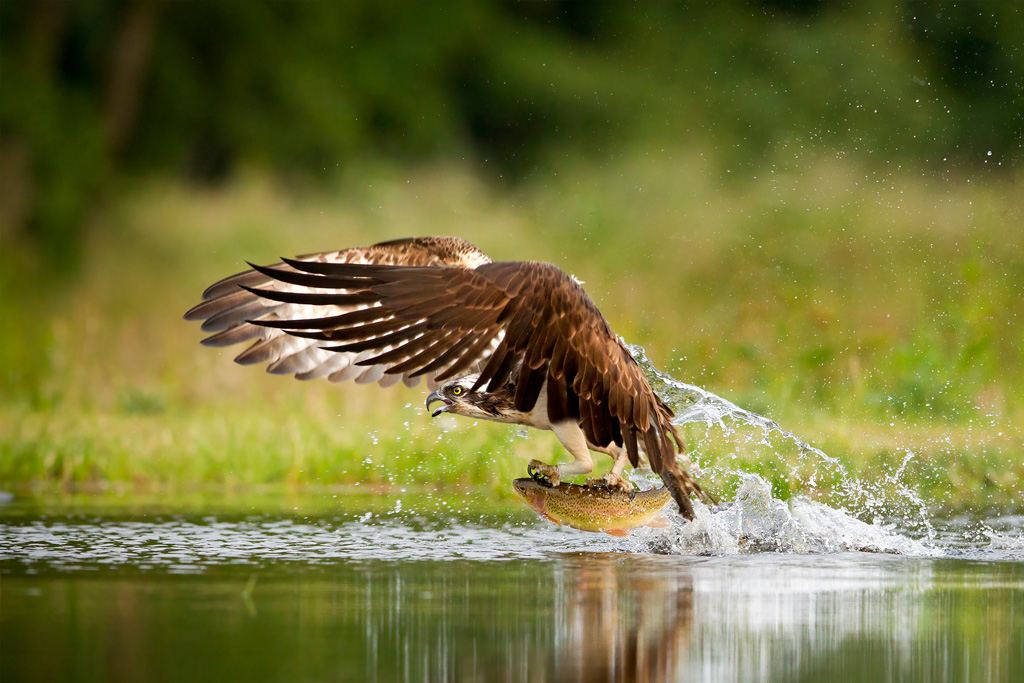
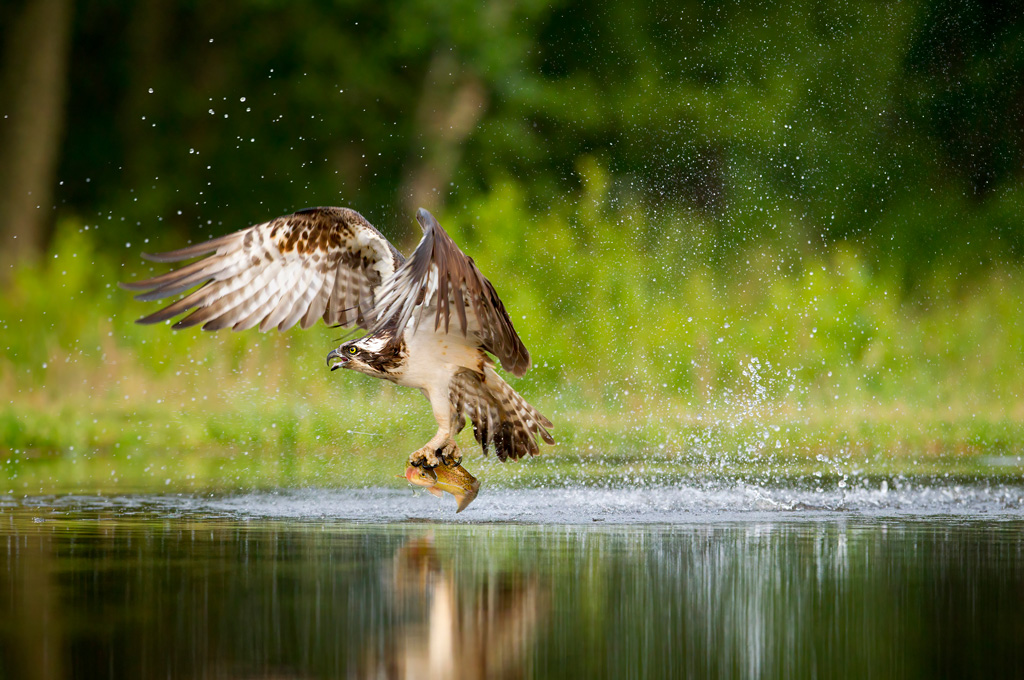
I used a fast 300mm f/2.8 lens to capture this osprey as it dived for its prey. I selected an aperture of f/4 and shot from a very low angle to the water which created a diffused foreground and background, helping the bird to ‘pop’ and eliminates any distracting elements from the frame.
The light at the time was bright but overcast, so there is plenty of detail underneath the wings and no harsh shadows on the water. Compositionally, I broke the usual rule and placed the bird to the left-hand side of the frame, so it is exiting the picture. This would usually create an unbalanced feel to an image, especially with a moving subject, but my aim here was to show the impact on the water and include as much of the water droplets as I could, so in this instance, it works.
Ben’s top tips for capturing birds in flight
- When panning, be sure to switch your image stabiliser to setting 2; this only corrects vertical movement and should help to speed up the autofocus.
- Switch to predictive focus mode, because this will allow you to track your subject, keeping it in focus at all times.
- When panning, expanding your focusing area will give you a greater margin for error when it comes to keeping your focus point on a moving target.
- If the light is bright enough, try stopping your aperture down to f/8. This will increase depth of field, making focusing accuracy a little bit less critical.
- Shooting in high-speed drive mode will allow you to fire a sequence of frames, giving you the best chance of capturing the optimum wing position.
- When shooting birds against the sky, you will need to increase the exposure to prevent your subject from becoming a silhouette – unless that is your intention, of course. Up to two stops of positive exposure compensation should result in a
nicely balanced exposure. - To compose in-camera, move your focusing points to one side of the frame: right if your subject is travelling left, and vice versa. This will leave space in front of the bird, creating an effective composition.
- The histogram is a powerful tool. Make a habit of checking it regularly to prevent under- or over-exposure, especially when shooting in changing lighting conditions.
- Using back button focus means that you can leave your focus set to predictive mode at all times. To lock focus, press and release the back button, to track a moving subject, simply hold your thumb down.
- When attempting silhouetted flight shots, use a spot meter and take your meter reading from a bright area of the sky. This will prevent any highlights from overexposing.
How to capture fast-moving animals
These two images are from a similar sequence. My aim was to use a slow shutter speed and pan to capture the motion of this fallow deer as it sprinted across the bracken.
This can be a very hit-and-miss technique, the success relying on both the choice of shutter speed and a smooth panning technique.
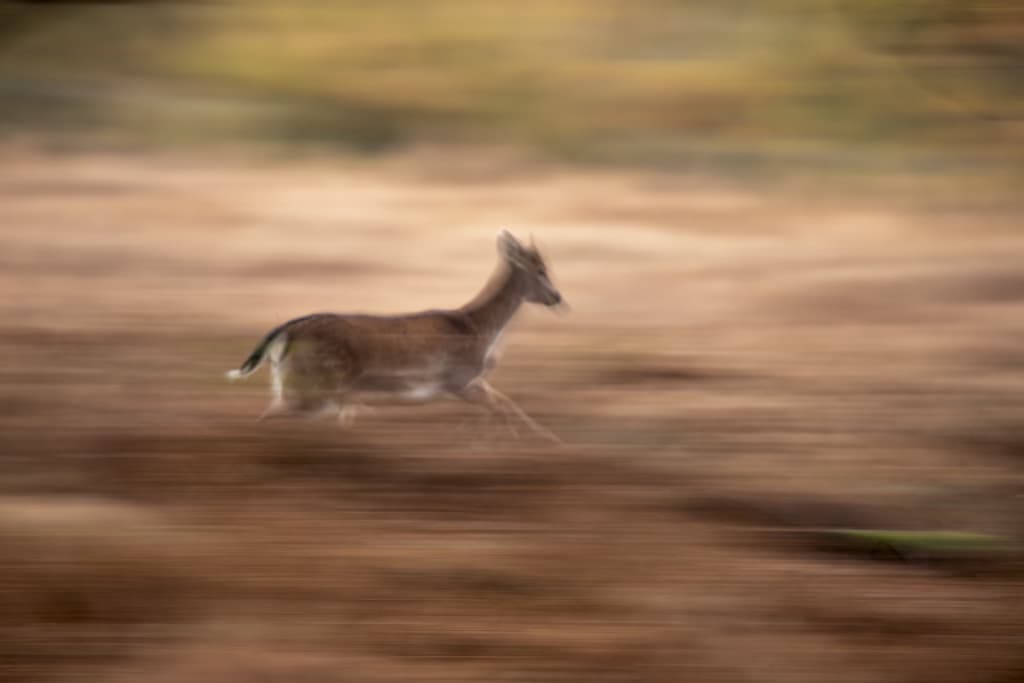
The first image (above) was taken with a shutter speed that was too slow and resulted in a poor definition of the deer. In the second image (below), a better choice of shutter speed combined with the panning movement has created a motion blur effect in the background whilst still rendering detail in the subject.
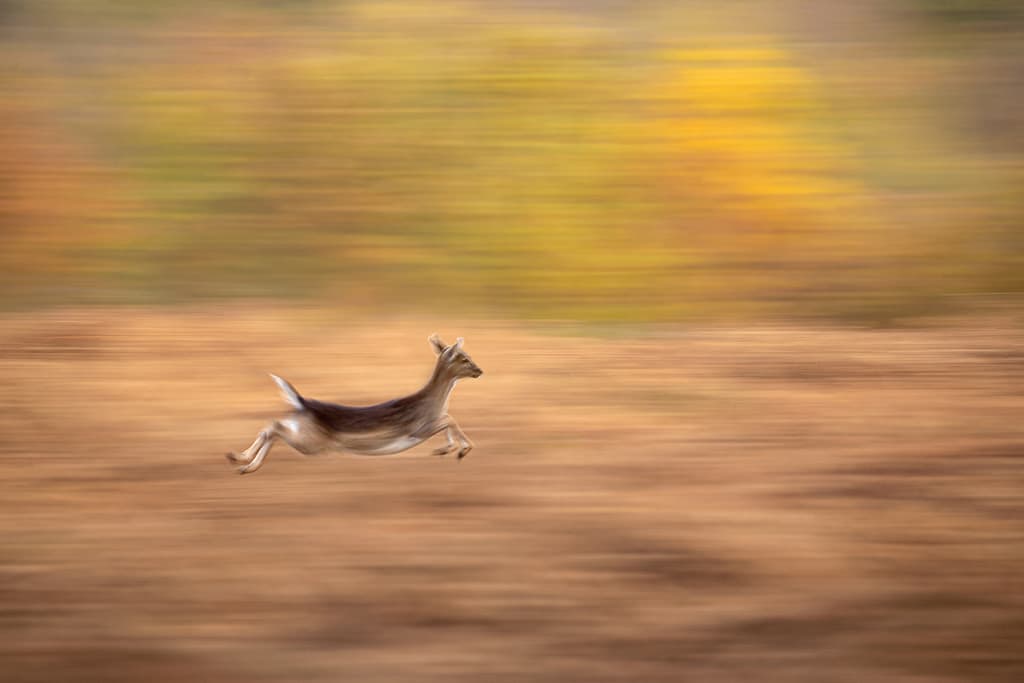
The position of the deer is also more effective, conveying a real sense of speed and energy.
How to set up a garden bird feeding station
A feeding station for garden birds can be as simple as you wish and should be a relatively inexpensive project. The beauty of a set-up like this is you will have ultimate control over the positioning, the background and its orientation to the light. You could take advantage of both front-lighting and backlighting opportunities by simply moving your shooting position.
This easy step-by-step guide will help you to set up an effective feeding station in no time and therefore provide you with a steady influx of garden visitors that you can photograph all year round.
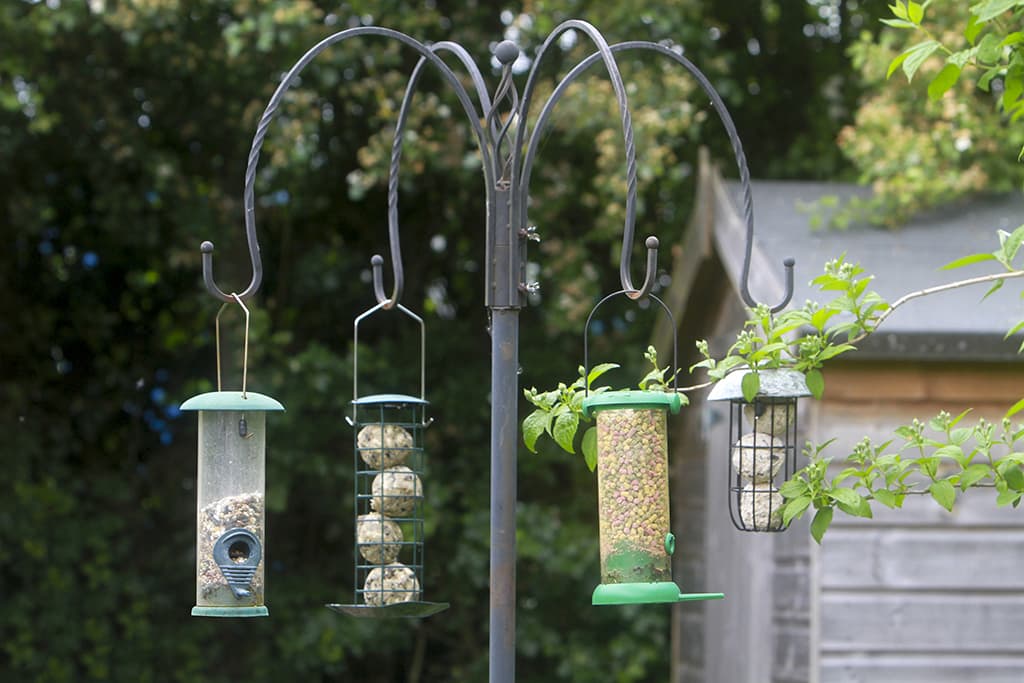
Set up a feeding station
A feeding pole will need to be fixed into the ground. On this, you can then hang one or more feeders. Make sure the background is distant enough to blow out of focus with a wide aperture.
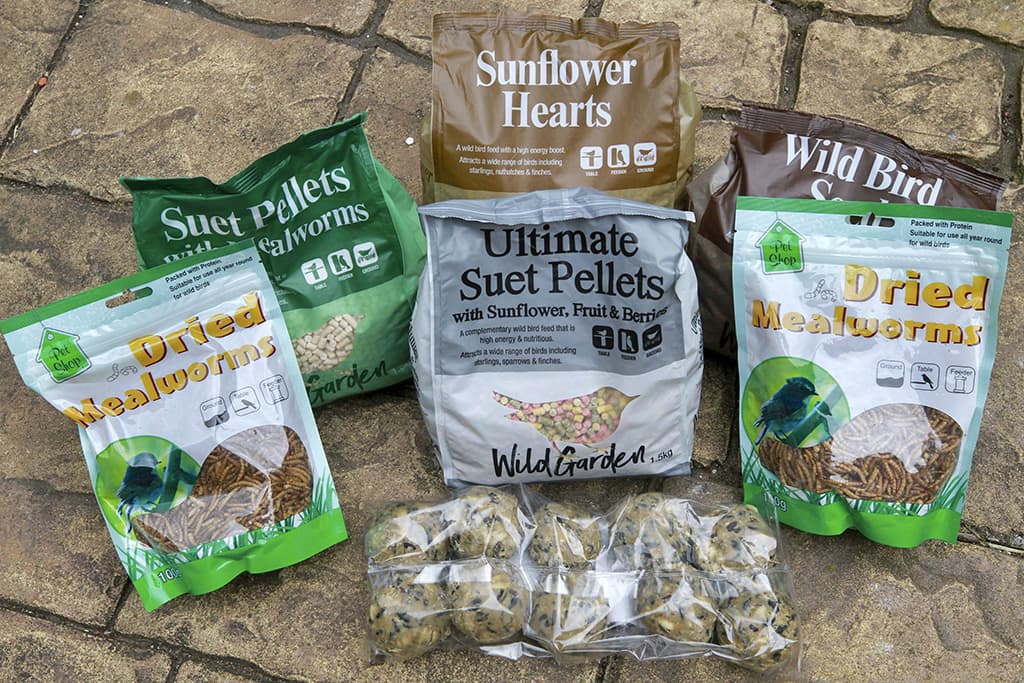
Offer a variety of bait
Try a variety of bait in your feeders such as sunflower hearts, peanuts and fat balls. This should attract a variety of species to your garden, creating more opportunities for capturing action shots.
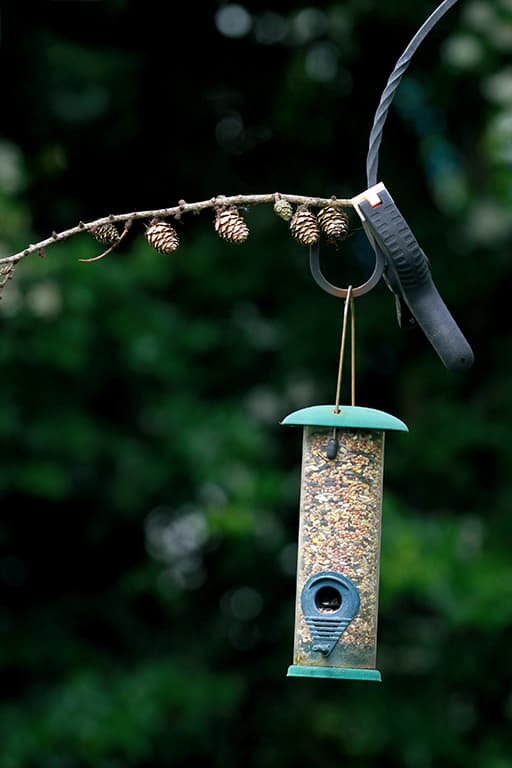
Clamp a natural perch to the feeding pole
Clamp a natural perch to the feeding pole to give the birds a place to sit before dropping down to feed. Look for attractive perches covered in moss or lichen to add interest. For authenticity, make sure the perches are in keeping with the birds’ natural habitat.
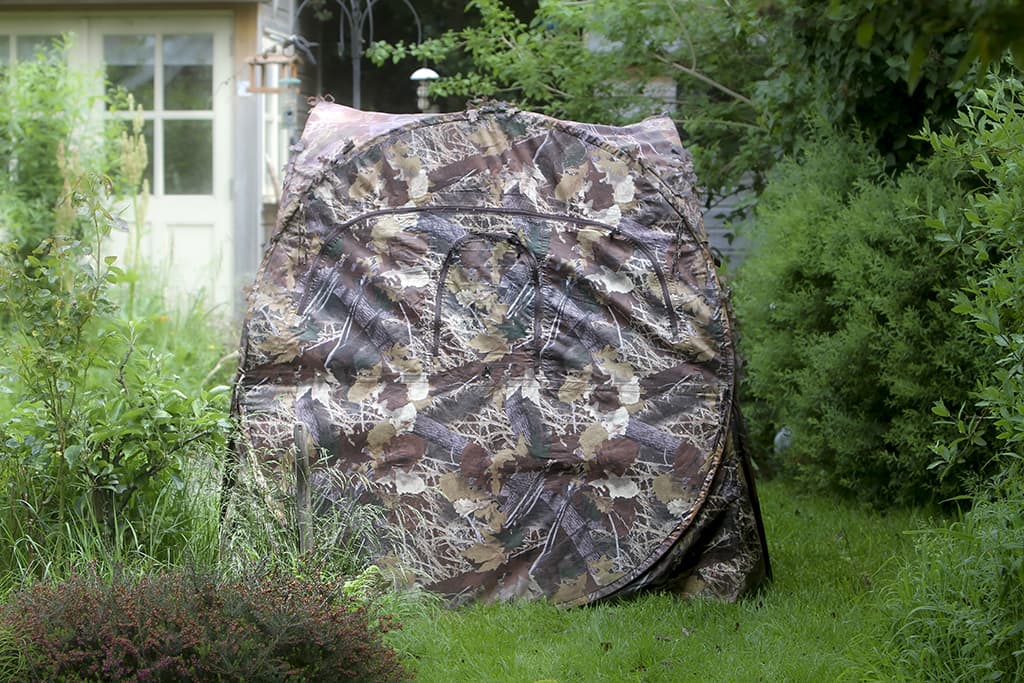
Invest in a hide
If you are not able to photograph from an open window you will need a hide from which to shoot. The advantage of using a hide is its flexibility. You will be able to move position at will, allowing you to experiment with a variety of backgrounds and lighting conditions.
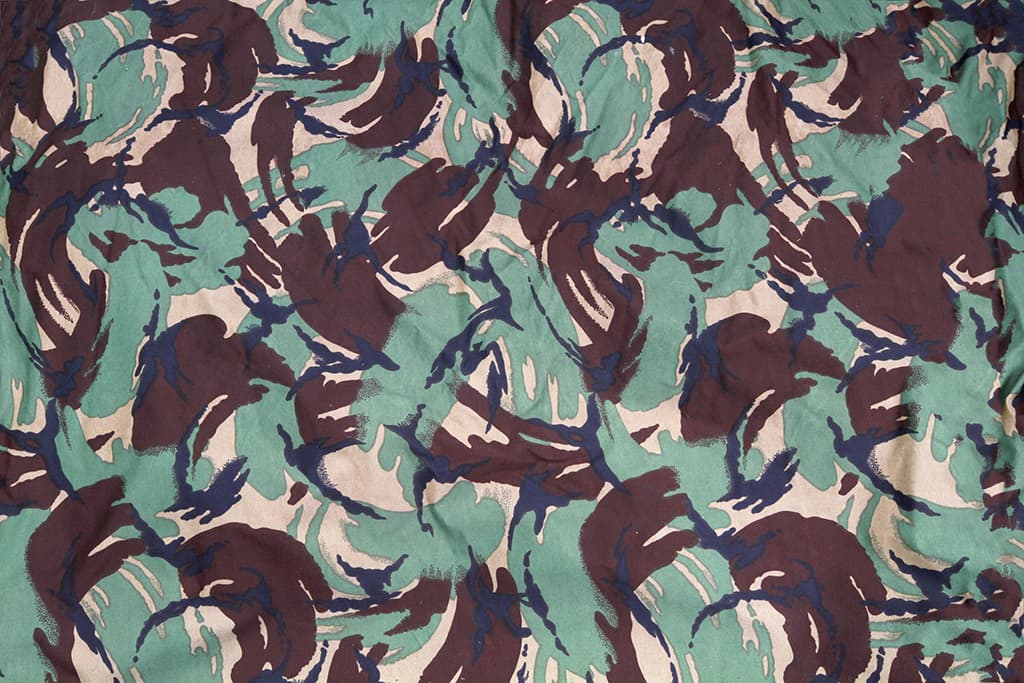
Create your own backdrop
If you are struggling to find a natural background, a large canvas can be attached to a garden wall or shed to create a faux background. Choose muted colours such as greens and browns to keep your shots looking as natural as possible.

Ben Hall is one of the UK’s leading wildlife photographers with many international awards to his name. His images are widely published throughout the world, he has co-authored two books and runs photography workshops in the UK and overseas. Visit www.benhallphotography.com.
Further reading
- Wildlife photography tips and techniques
- How to capture garden birds in flight
- How to photograph animals
- Best lenses for wildlife photography
- Photograph garden birds on a budget
- How to photograph the Snettisham spectacular and wading birds
Follow AP on Facebook, Twitter, Instagram, YouTube and TikTok.


