
With a little forethought, patience, and perseverance, you can transform your own back garden into a haven to photograph wild birds, on a budget, providing you with endless photographic opportunities all year round, says Ben Hall
Garden birds are perhaps the most accessible of all wildlife subjects, but with the rising cost of modern cameras and long lenses, it can become hugely expensive. With some careful thought and cost-cutting measures, however, you could be taking fantastic images of your garden visitors in no time – all without having to re-mortgage your house!
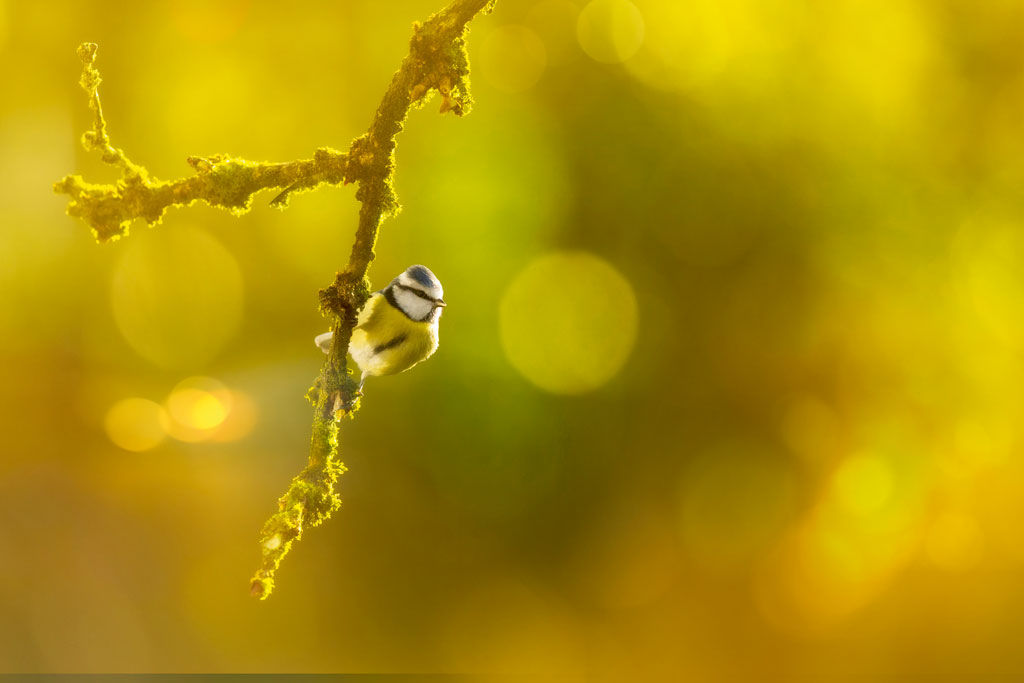
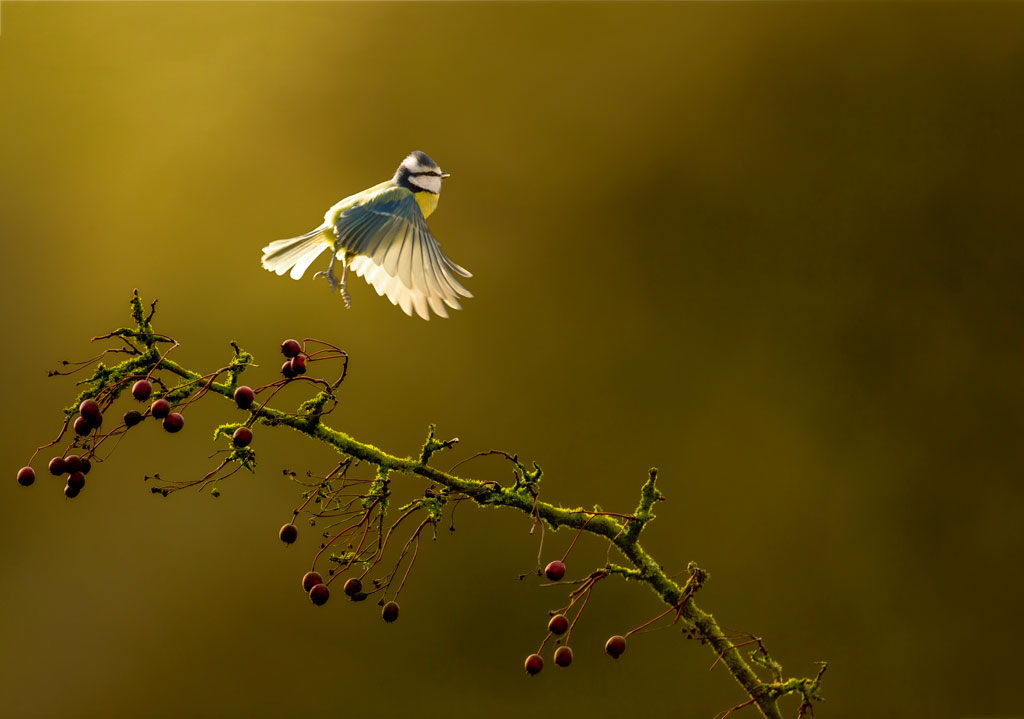
Blue tit (Cyanistes caeruleus) perched on moss-covered branch backlit. Canon EOS-1D X, 500mm, 1/2000sec at f/5, ISO 1250
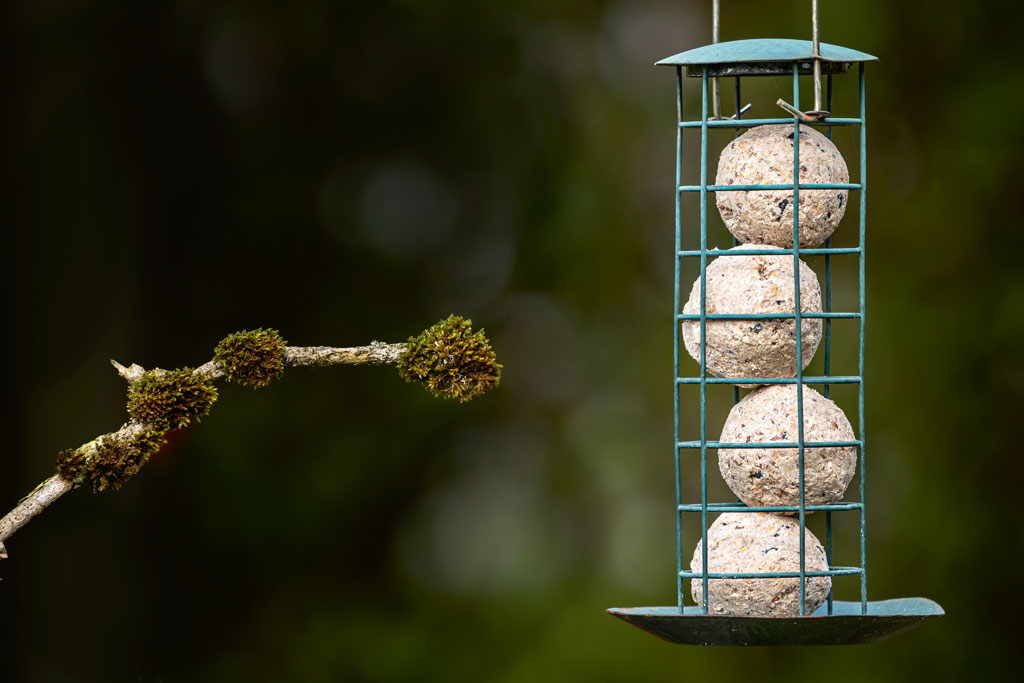
Creating a feeding station for birds
The simplest and most effective way of photographing garden birds is to attract them into position using some carefully situated feeders and natural perches. A garden feeding station does not need to be a complicated set-up – a simple pole with a variety of feeders attached is enough to attract the birds.
Some thought will need to go into the positioning to ensure optimal background and light. The first point to consider is the proximity of the feeders to the background. If possible, place your feeders at least ten metres away from the background to ensure that blurred backgrounds are possible when using large apertures.
If you are struggling for room, a large sheet of material can be used to create a false background. This should be coloured to mimic the natural habitat of the birds such as muted browns and greens but experimenting with bolder colours can yield interesting results.
Think carefully about the available light and the direction of the sun. Backlighting can work wonderfully for birds, but the sun will need to be close to the horizon to ensure relatively low contrast levels. Perches can be clamped to the pole using a spring clamp. Choose photogenic perches that are in keeping with the natural habitat and swap them for variety.
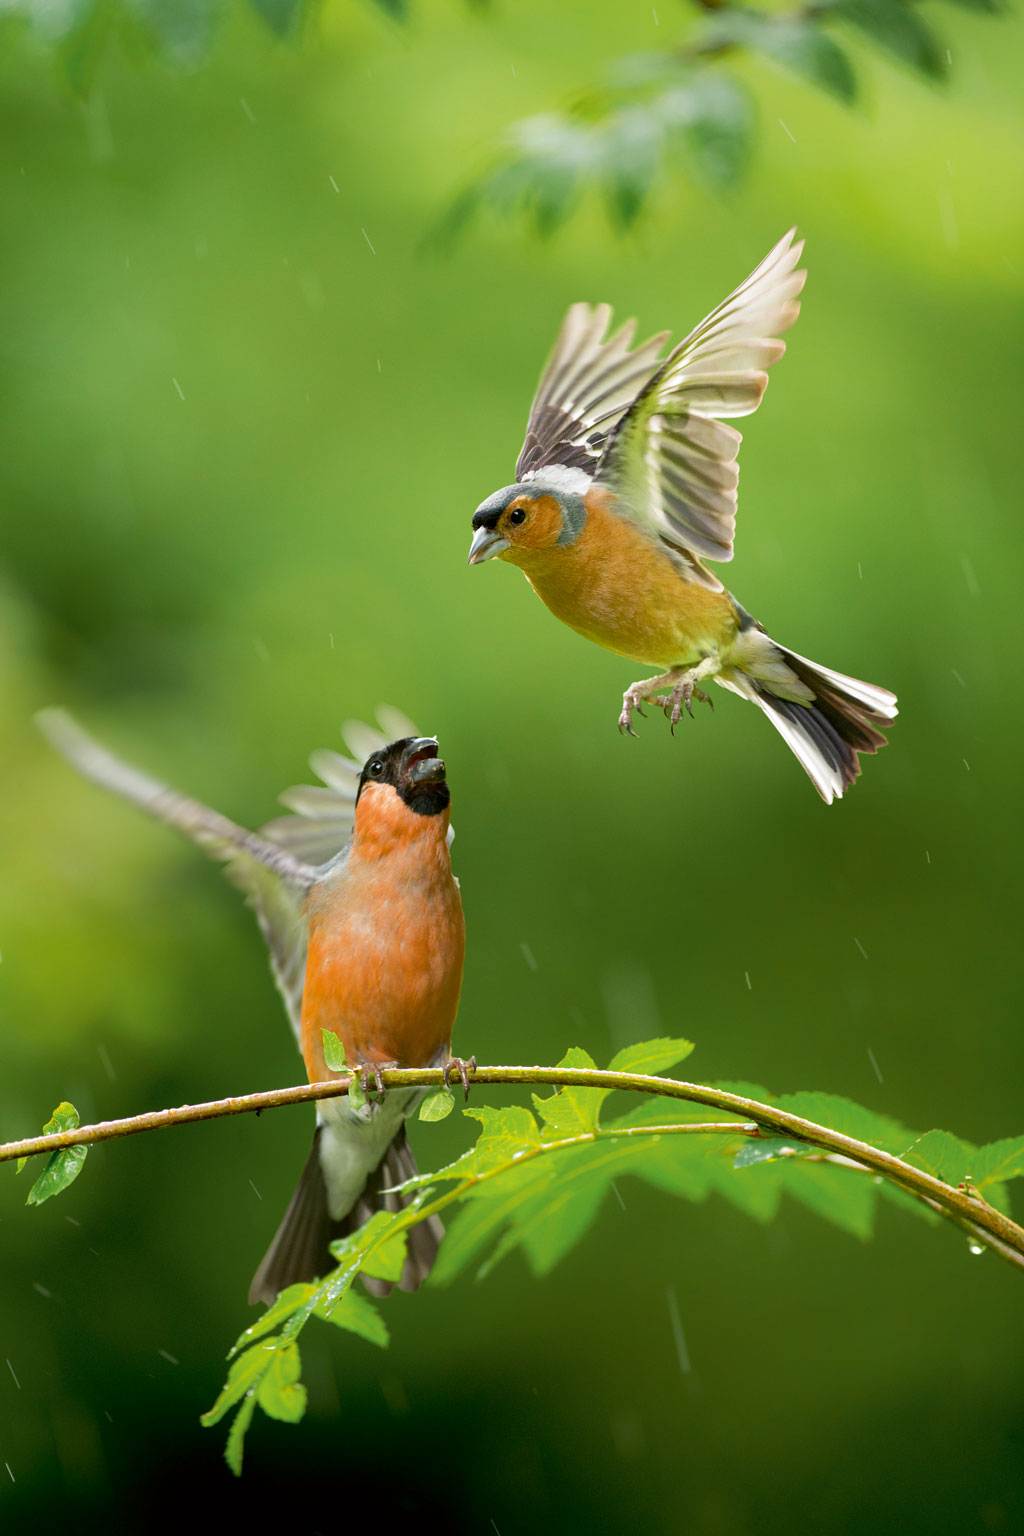
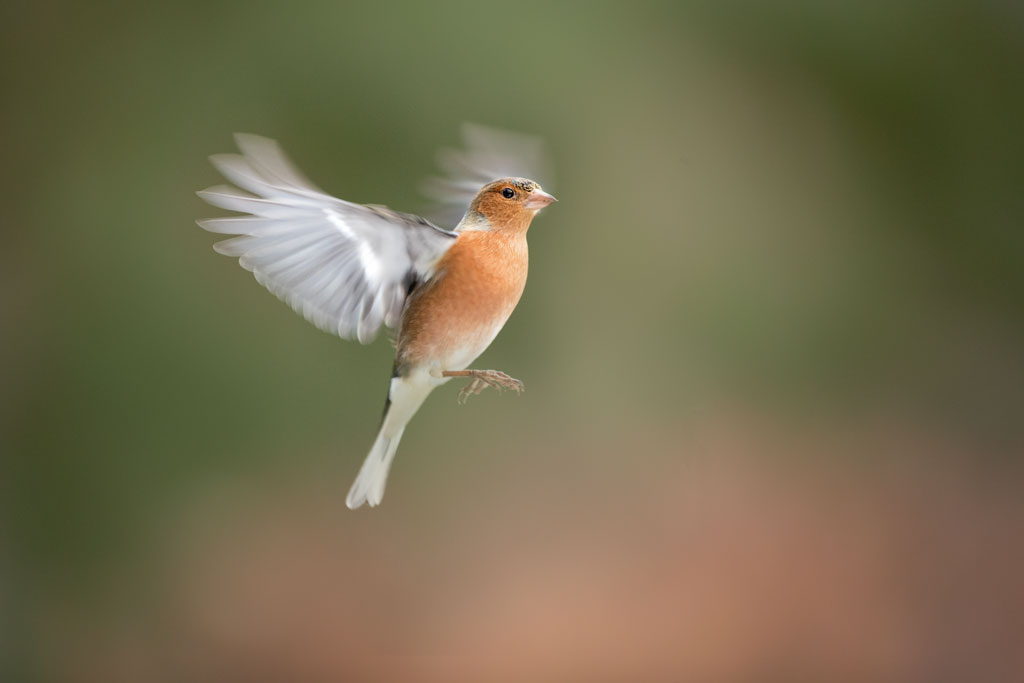
Bullfinch (Pyrrhula pyrrhula) and chaffinch (Fringilla celebs) in flight. Canon EOS-1D X Mark II, 500mm, 1/2000sec at f/8, ISO 3200
Buy used camera gear
Fast lenses that open up to f/4 or even f/2.8 are of course more suited to bird photography, but they are expensive, and by no means essential. It is perfectly possible to take stunning images with more-affordable lenses and cameras, and if you are prepared to buy used and shop around, there are bargains to be found both online and in stores. Ebay is the obvious place to search but buying second-hand equipment from a shop with a warranty and return policy will be safer and afford you more peace of mind. Consumer lenses such as tele-zooms in the range of 75-300mm can be bought for well under £500, and whilst not being particularly fast, many are capable of producing sharp images, provided your camera settings are optimal.
Lenses made by third-party manufacturers can also be more cost-effective, such as Sigma or Tamron. The Sigma 100-400mm F5-6.3 DG OS HSM for example can be bought second-hand for around £500 and, if used correctly, can produce great results. One of the main benefits of garden bird photography is the control that you have. For this reason, I would not recommend using a teleconverter if you are struggling for reach. Instead, simply move yourself or your feeding station within range, and manipulate your surroundings. Most garden birds will soon become used to the sound of a camera shutter, even from a close distance.
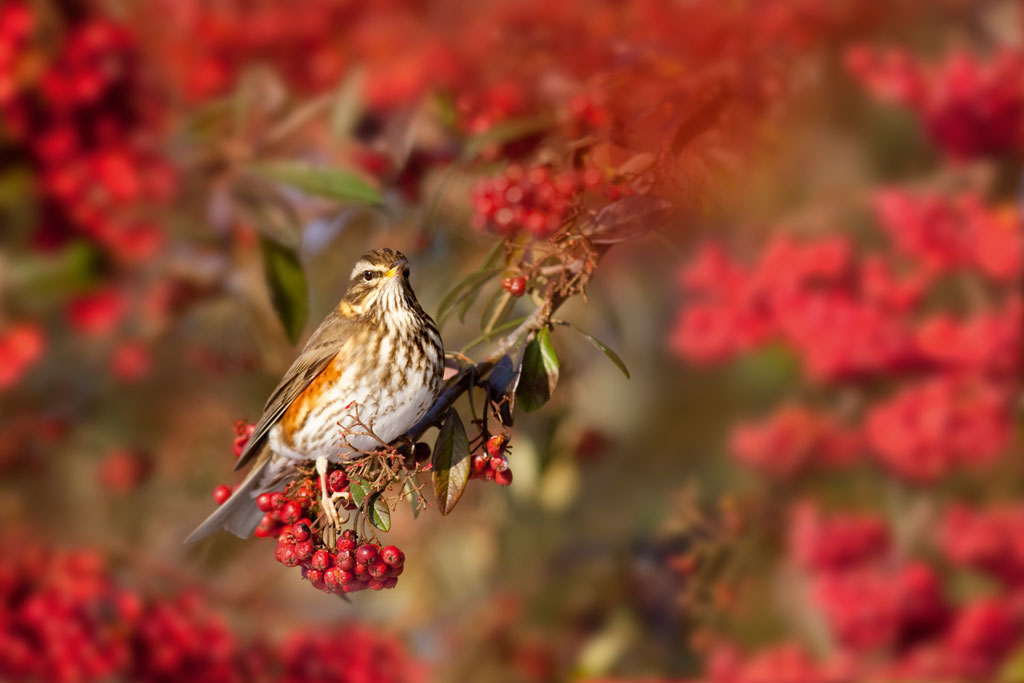
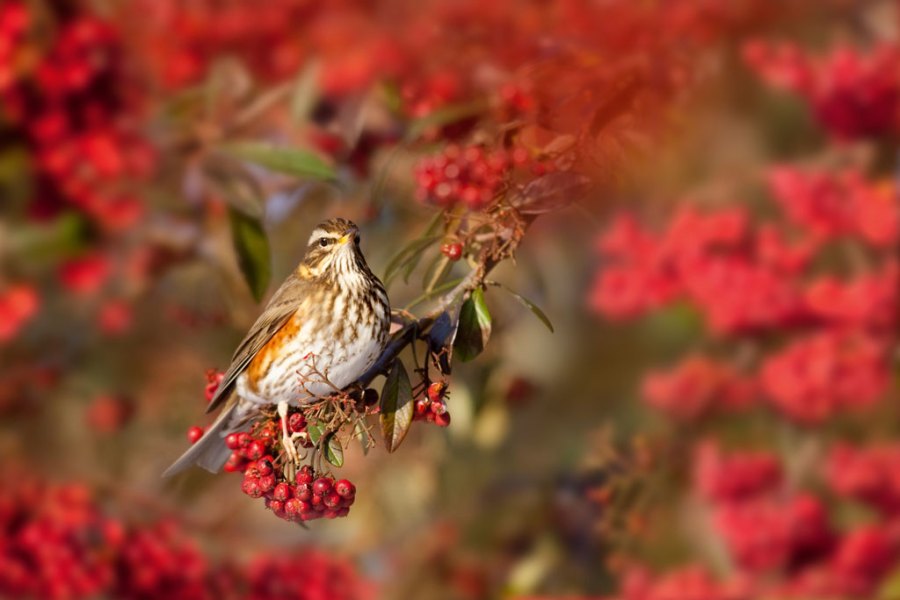
Redwing (Turns iliacus) amongst rowan berries. Canon EOS-1D Mark II, 500mm, 1/500sec at f/5.6, ISO 250
Shoot from an existing building
Rather than spend money on a purpose-built hide, you may find it convenient, and certainly more cost-effective, to shoot from the open window of your house or shed. When shooting from a window, a beanbag will be the most effective form of camera and lens support and could even be hand- made with relative ease. To disguise your movements, you will need to drape some material over the window. Scrim netting from an army surplus store is inexpensive and works well. You will still be able to observe the birds easily through the netting, but it will disguise your movements enough for all but the most sensitive of garden birds.
If you don’t have the luxury of shooting from a house window or outbuilding, a cheap children’s tent can be easily converted into an effective hide. Simply cut an opening into the tent for your lens, and another to look through and you have a hide which can be moved around to take advantage of different backgrounds or lighting situations. Look for a tent that has a relatively high roof so that you can shoot from a comfortable level, preferably the same height as your perches.
Chaffinch (Fringilla celebs) in flight. Canon EOS-1D X Mark II, 500mm, 1/1000 sec at f/8, ISO 2500
Camera settings for photographing birds
Small birds move incredibly quickly so you will need to pay careful attention to your shutter speed. Use your widest aperture to let as much light as possible into the lens and try to keep your shutter speed to a minimum of 1/1000 sec.
Depending on the light levels you may need to raise your ISO setting, or switch to auto ISO if your camera allows. Predictive focus mode will track your subject as it moves but be careful to always keep your focus point on the bird to prevent it from jumping to the background.
Back-button focus can be a big advantage, as it will allow you to lock focus by pressing and releasing the focus button. To then track a moving subject, simply hold the focus button with your thumb. With back-button focus enabled, you should keep your camera set to the predictive focus mode at all times but remember to disable the focus from the shutter button or you will counteract the effect.
Setting your camera to the high-speed continuous shooting drive mode will allow you to fire a burst of frames, increasing your chances of capturing the perfect moment.

Great tit (Parus major) perched on a twig and Blue tit (Cyanistes caeruleus) in flight in heavy snowfall. Canon EOS-1D X, 500mm, 1/1600sec at f/4, ISO 2500
Observe your feathered subjects
When using more cost-effective cameras, you may not have the luxury of shooting at over ten frames per second. It is still perfectly possible, however, to capture action images on slower cameras and lenses. You may need to work a little harder and learn to predict the movements of your subjects to time the shutter release accurately, but these are skills that every budding wildlife photographer should develop.
Spend time simply observing the birds coming and going from the feeders, watch their movements and note down any obvious patterns. Birds are creatures of habit, and you should soon start to be able to predict their direction of flight.
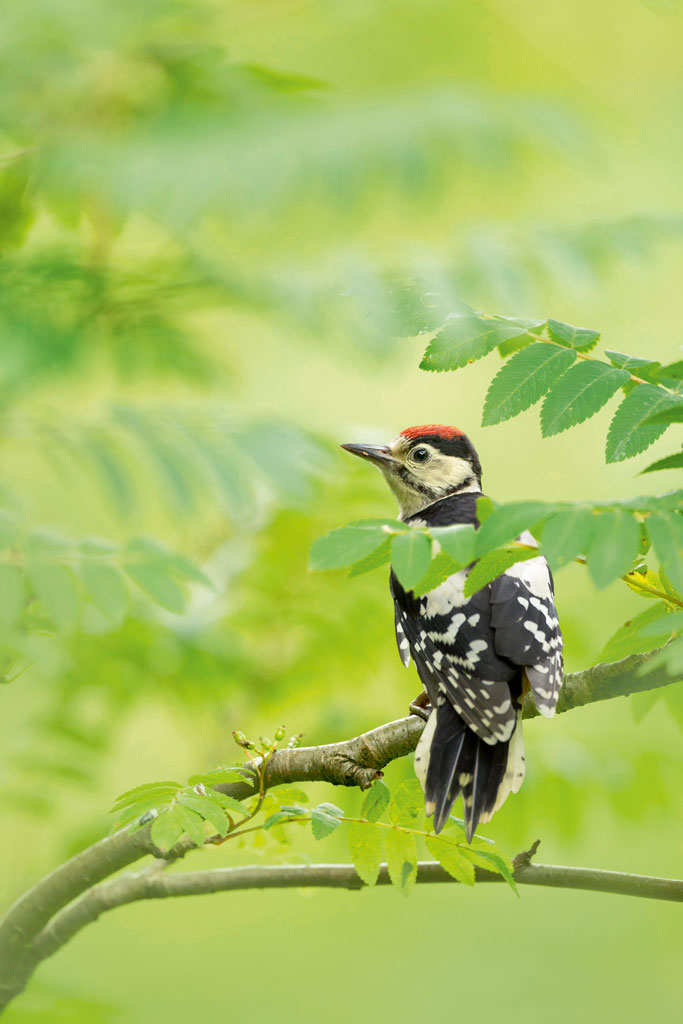
Great spotted woodpecker (Dendrocopos major) perched in tree. Canon EOS-1D X, 500mm, 1/800sec at f/5, ISO 1250
How to set-up your camera for birds in flight
1. For this technique you will not need autofocus and will be pre-focusing your camera at a set point. Ensure that your camera is set to manual focus.
2. Activate the continuous shooting mode on your camera and make sure it is set to the fastest frame rate possible. This will increase your chances of capturing a pin-sharp image.
3. To freeze the movements of a small bird you will need a very fast shutter speed. I would recommend setting a minimum of 1/2500sec.
4. If you have been shooting with a wide-open aperture, stop down to f/8 or f/11. This will give you a greater depth of field and in turn will increase your margin for error.
5. Place a perch roughly one metre away from the feeder and remove any other perches that you have set up.
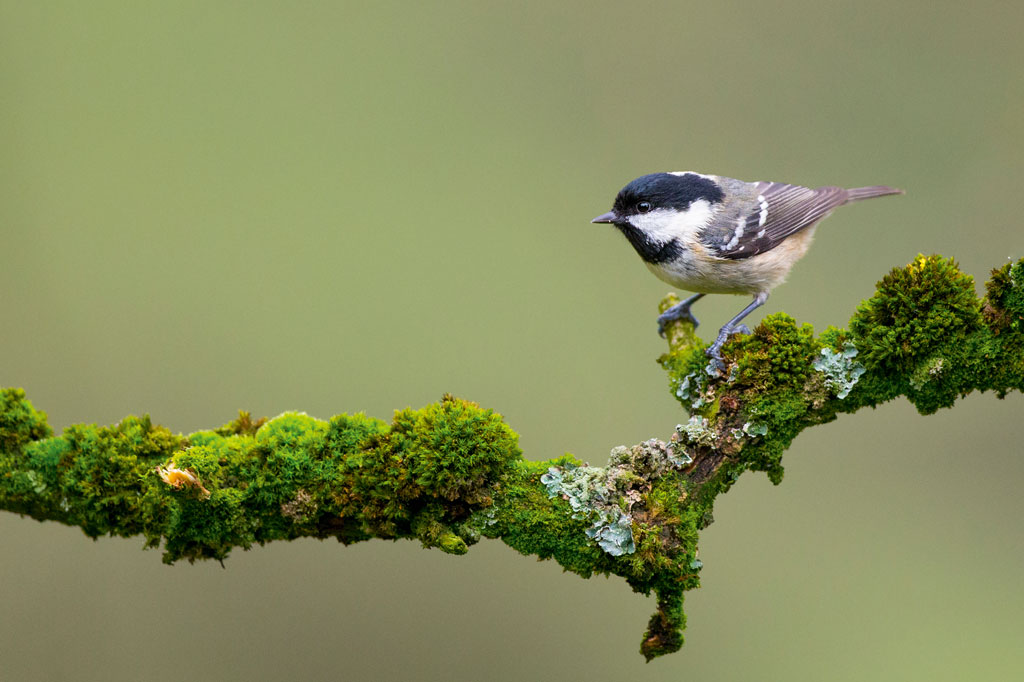
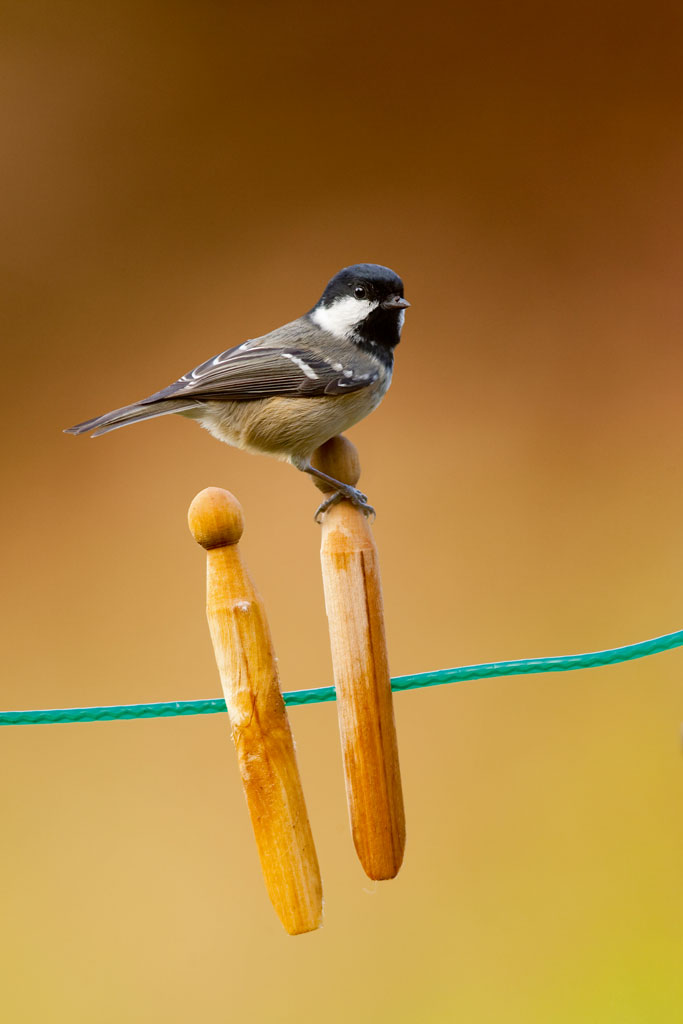
Coal tit (Periparus ater) perched on moss-covered branch. Canon EOS-1D X, 500mm, 1/320sec at f/4.5, ISO 2000
6. Place a garden cane roughly equidistant between the perch and the feeder. This should be on the flight path and will act as your focusing marker.
7. Pre-focus on the tip of the cane to set your focus point, making sure you are set to manual focus. Your camera should be fixed either to a tripod or beanbag so that it cannot move.
8. Remove the cane and you are all set.
9. When you see a bird fly from the perch to the feeder, fire a burst of shots. Wing position can make or break a shot, and the faster the frame rate the more likely you are to capture the optimum moment.
10. Check your images for sharpness. If you are struggling, stop down to a smaller aperture to increase your chances of capturing the bird on the plane of focus. Keep an eye on your shutter speed as you may need to increase your ISO setting, depending on the light levels.
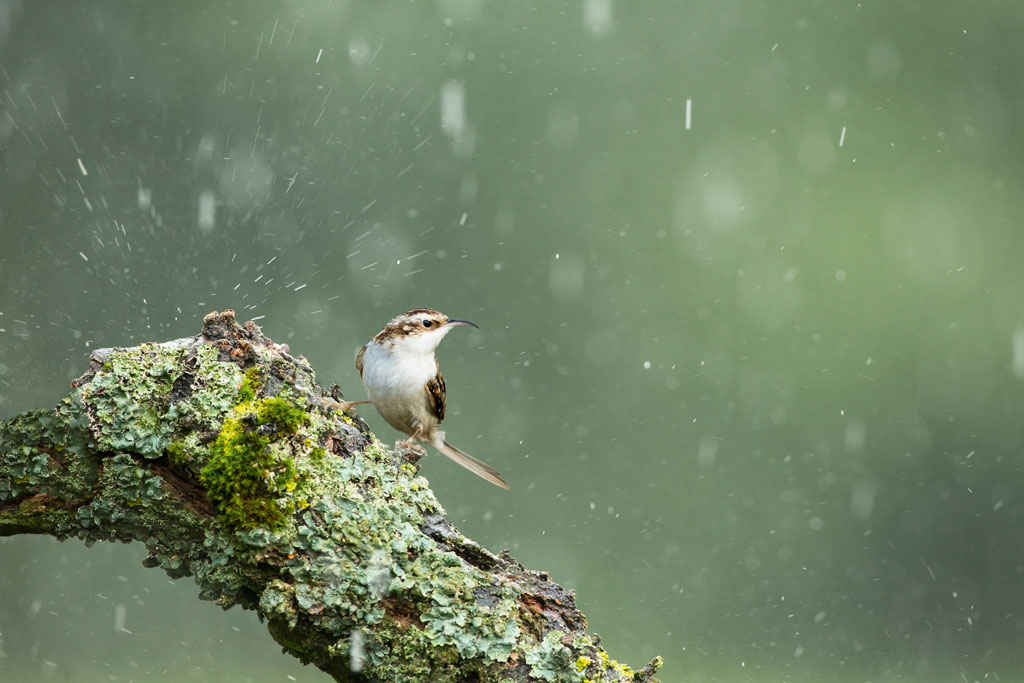
Tree creeper (Certhia familiaris) perched on moss- and lichen-covered branch in heavy rainfall. Canon EOS-1D X Mark II, 500mm, 1/500sec at f/8, ISO 1600
Ben’s Top Tips for photographing garden birds
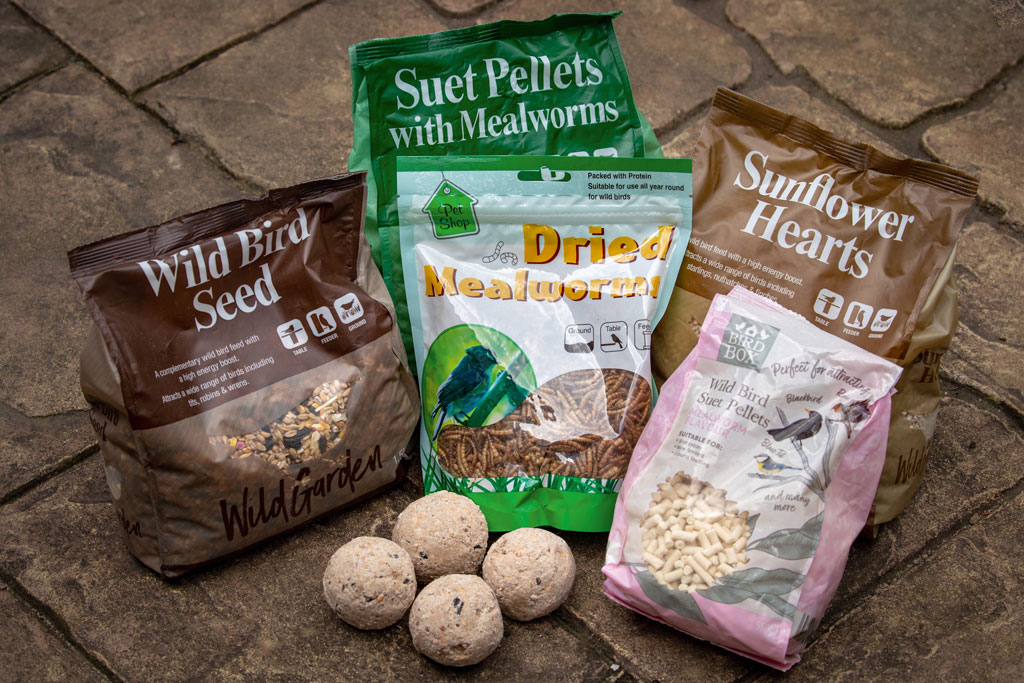
Offer a variety of bird food
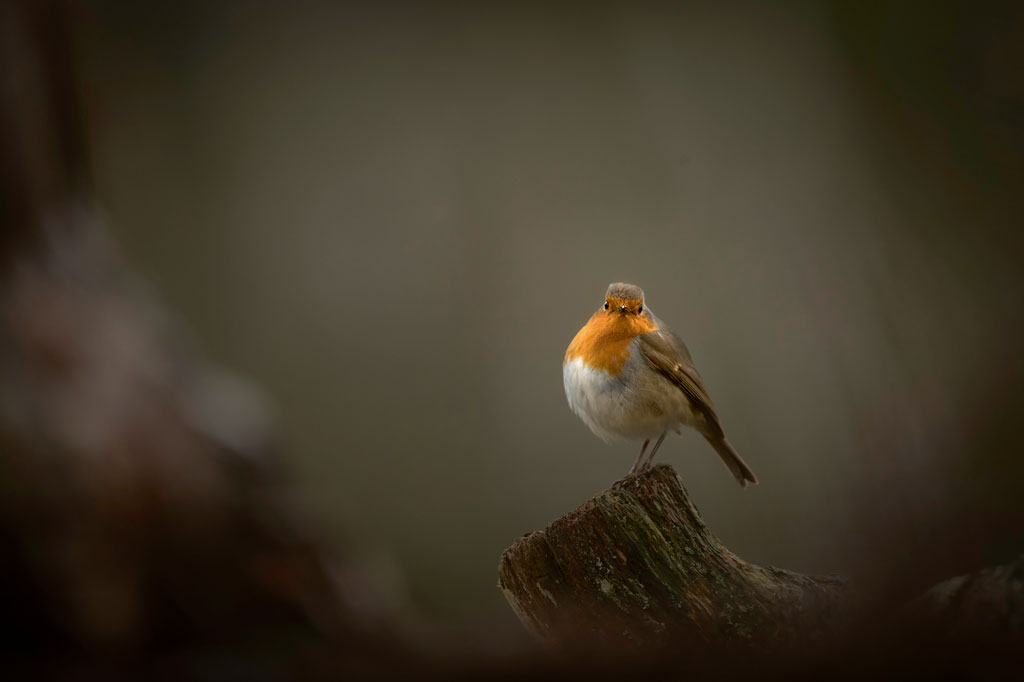
Peanuts and sunflower seeds will entice members of the tit family, while niger seed is a goldfinch favourite. Mealworms should attract thrushes and robins, and apples can be used which might just bring in fieldfares and redwings, depending on the time of year.
Increase traffic
When you are shooting, remove all feeders and perches except for the one that you are focused on. This will drive more traffic to your preferred perch and therefore increase your chances of capturing interesting subject interaction.
Try backlighting
Experiment with the direction of light. Backlighting can work wonderfully for birds, especially in flight. The light will burn through the wings, highlighting shape and form. This is best attempted when the sun is low in the sky and contrast levels are reduced.
Change the backdrop
Colour can be used as a strong visual element in your compositions and can be either contrasting or complementary. Dark backgrounds cloaked in shadow can work well, adding mood and eliminating distractions, helping to isolate your subject.
Garden props
One of the advantages of a garden feeding station is the control that it offers you. To introduce a contextual element, include garden tools as perches, or even your own house as the background to tell the story of urban wildlife.
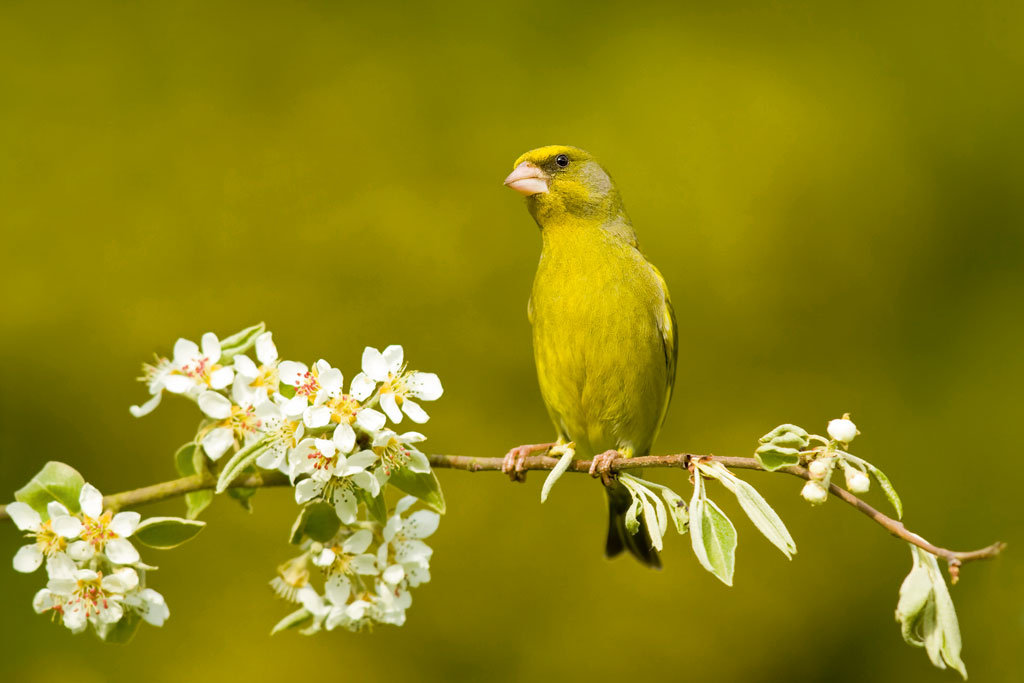
Why this photograph of a garden bird works
I photographed this stunning male greenfinch perched on a sprig of blossom during the golden hour. The low angle of the sun has cast warm, even light over the bird, helping the colour to pop and eliminating any potential harsh shadows. I chose a background which complements the colour of the bird to create a balanced and harmonious feel. Focusing on the eye of the bird and using a wide aperture of f/5.6 has thrown the background out of focus, isolating the bird from potential distractions.
When composing the image, I was careful not to crop off the end of the perch, and I left plenty of space around the bird to allow it to ‘breathe’ within the frame. The perch I chose was an attractive sprig of blossom to symbolise spring.
Recommended Kit need to garden bird photography
Lens
Garden birds can become accustomed to shutter noise easily, so long telephoto lenses are not essential. An inexpensive 300mm is perfectly capable of producing great results.
Support
A beanbag is the ideal choice when shooting through an open window. Place the beanbag on the windowsill and you will have a solid support that will allow excellent freedom of movement, making it easy to fine-tune your compositions.
Spring clamp
A spring clamp can be used to attach different perches close to your feeders and will allow you to swap perches easily to add variety to your shots. These can be bought cheaply from most DIY shops or online.
Scrim netting
When shooting through a window, attaching some scrim netting to the opening will keep you hidden from view as well as muffling the sound of the shutter. It can be bought from most army surplus stores for relatively little outlay.
Ben Hall is one of the UK’s leading professional wildlife photographers with multiple international awards to his name. He is the author of two wildlife photography books. Ben leads workshops both in the UK and further afield and lives with his family on the edge of the Peak District National Park. Follow him on Instagram.
Related reading
- The best cameras for wildlife photography
- The best cameras for bird photography
- Photographing birds with the Olympus OM-1
Follow AP on Facebook, Twitter, Instagram, and YouTube.


