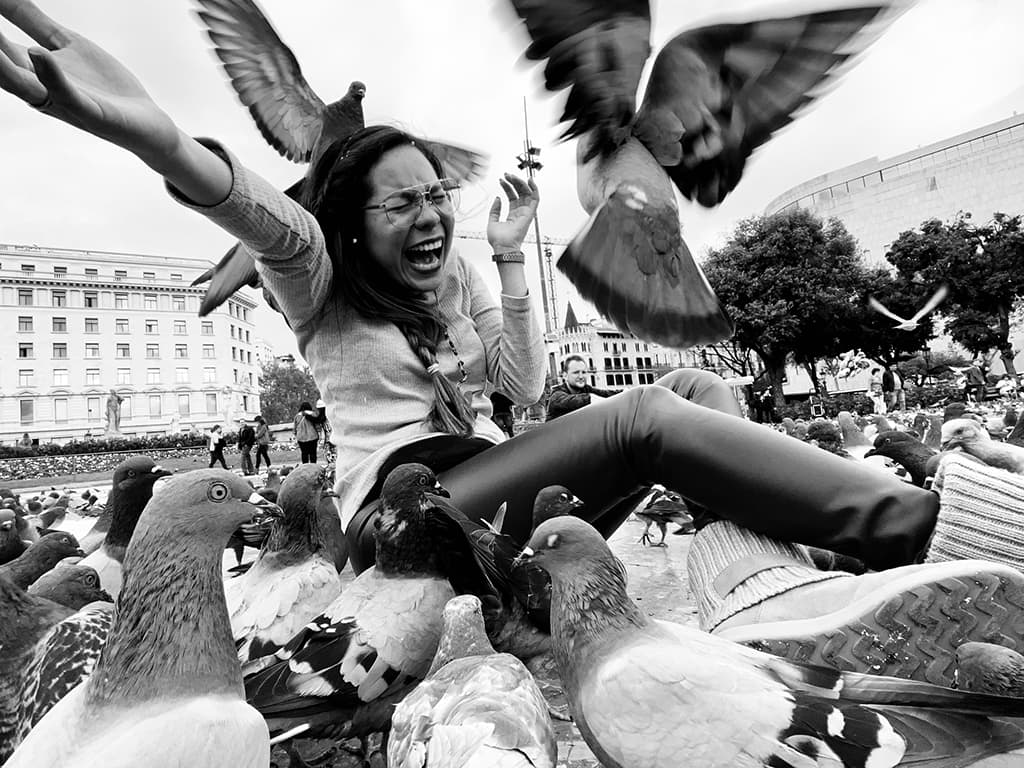
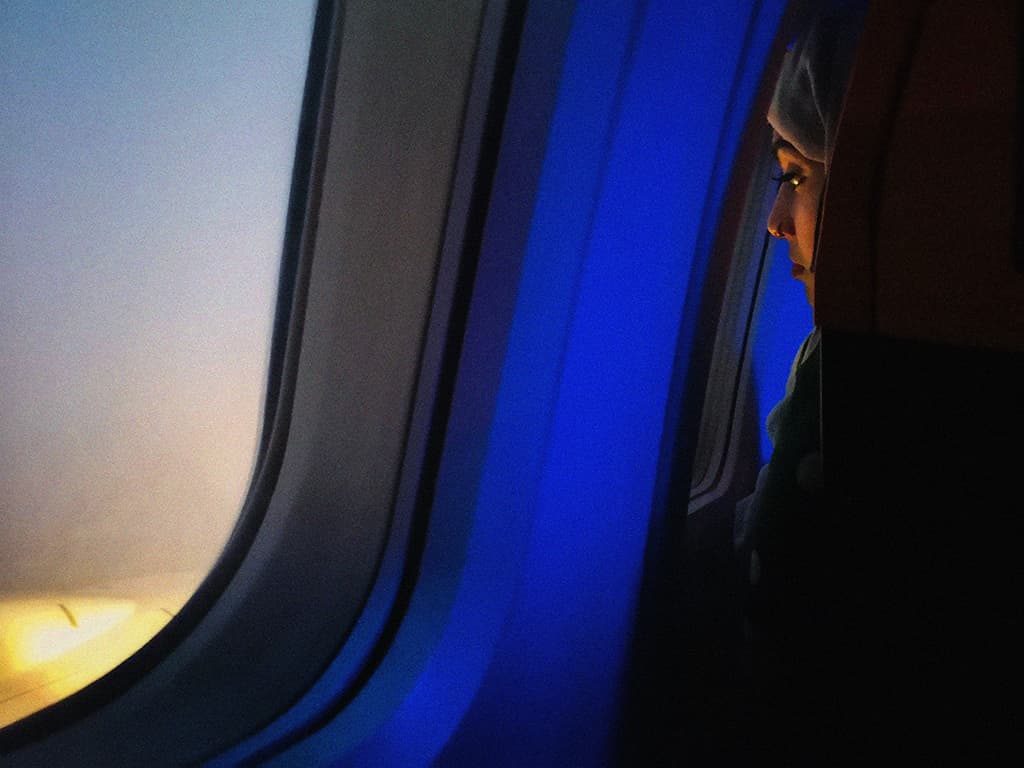
Smartphones are the perfect tool for capturing life on the street: convenient, discreet and easy to master. In this guide, Amy Davies explains why smartphones are great for street photography.
Why are smartphones good for street photography?
Smartphones – especially flagship models – are great for a variety of photography genres. Their quality is good enough for subjects such as landscapes, portraits, and even macro. For street photography, their ubiquity is their blessing – with so many people out and about using them, you won’t stand out using yours.
This allows you to capture natural moments and be undisturbed by those who would otherwise notice you. We still need to be mindful of ethics with a smartphone, as with a camera, but it certainly helps in documenting the action unfolding in front of you without influencing it.
Lenses
Most modern smartphones employ different lenses, including a reasonably wide-angle main lens of around 24-28mm. It’s a good focal length for urban photography, but if you find one with a zoom lens, you can also shoot from a distance and emulate the look of 50mm or perhaps even an 85mm lens.
Flagship models usually include three or four. This means you can choose to include a lot of the scene, or isolate certain sections or characters. You can even shoot ultrawide for an alternative approach. Most smartphones also have several shooting modes, such as black & white, which have classic applications for street photography.
Creative control
Several smartphones now on the market allow users to take greater control of settings – for example, choosing shutter speeds and adjusting exposure compensation. These provide plenty of creative control when adjusting the look of your street photos – some stylistic choices, like emphasising bold shadows, are easy and quick to create in camera.
You will also find plenty of editing options available in most models, ranging from extensive adjustments to using a quick filter for a specific effect.
Being instantly connected to social media networks also makes smartphones great for street photography. Many like to share what they’re shooting ‘live’ from the scene without waiting to get home to make edits. Some may use their smartphone to shoot social media-ready content for quick uploading to complement whatever they’re doing with their main camera, too.
In this guide, we share a variety of advice to help get you started with using your smartphone for street photography. We’ve got general tips to get you going and insights from photographers who use their smartphones for exactly this task – including from iPhone and Android users.
And before you step out with your phone, you may want to check on the law around street photography.
Street photography with a smartphone: top tips from photographers
Anthony Young
Anthony uses the Google Pixel 6 Pro for his street photography. He loves how quick to access and easy to use it is, as well as its other functions – such as maps – as you walk about. He also loves the freedom away from heavy camera bags and tripods.
He explains, “Using my phone gives me some freedom to explore without the worry of carrying around DSLR equipment. I also use a DSLR for street photography and find myself taking the same shot with my phone.
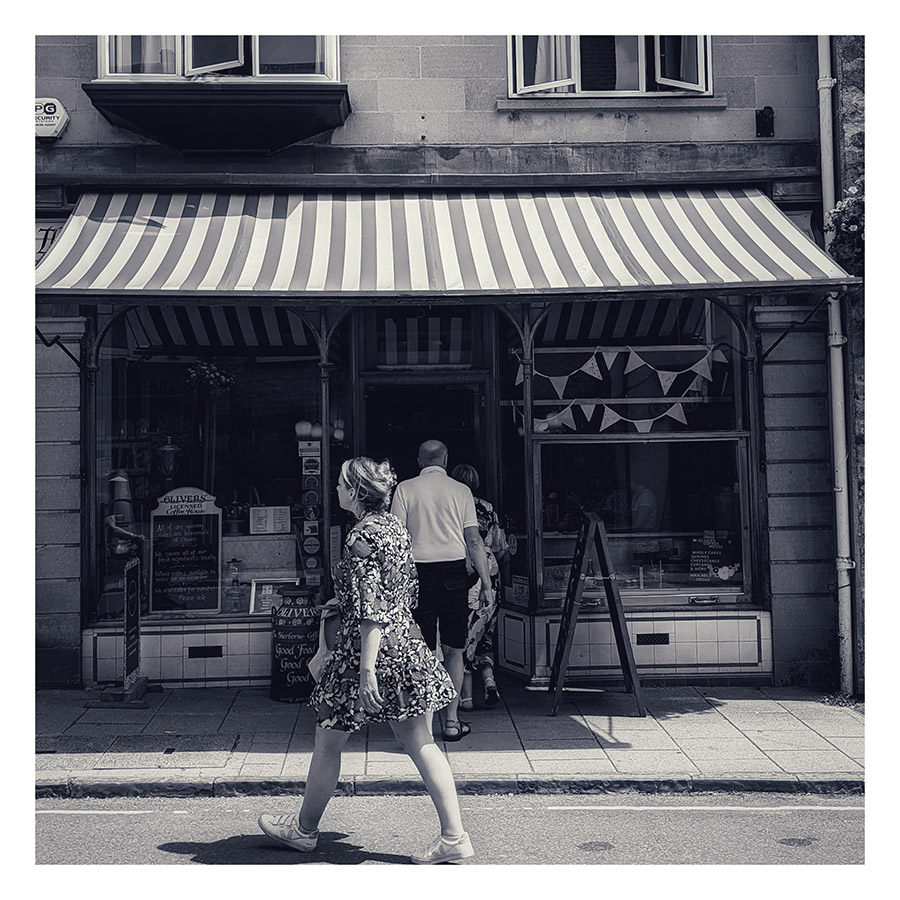
“The best bit is when I’m enjoying a coffee, I can edit and post within minutes of taking the picture. Phones are getting better with megapixels that surpass some older DSLR cameras – as I own both, I find that lenses for street photography are expensive, especially if you want a prime lens.
“I tend to use either the standard Photo mode or the Portrait mode, the latter of which comes in handy for creating a shallow-depth-of-field effect. There is so much you can do with a DSLR, but with a phone, you don’t have to worry about this. There are options for things like “professional” modes on some phones, but this never quite feels as creative as you might have with a DSLR sometimes. Most phones convert the image to JPEG, but I like that you can shoot in raw with the Pixel 6 Pro to keep more detail and save as a JPEG after editing.
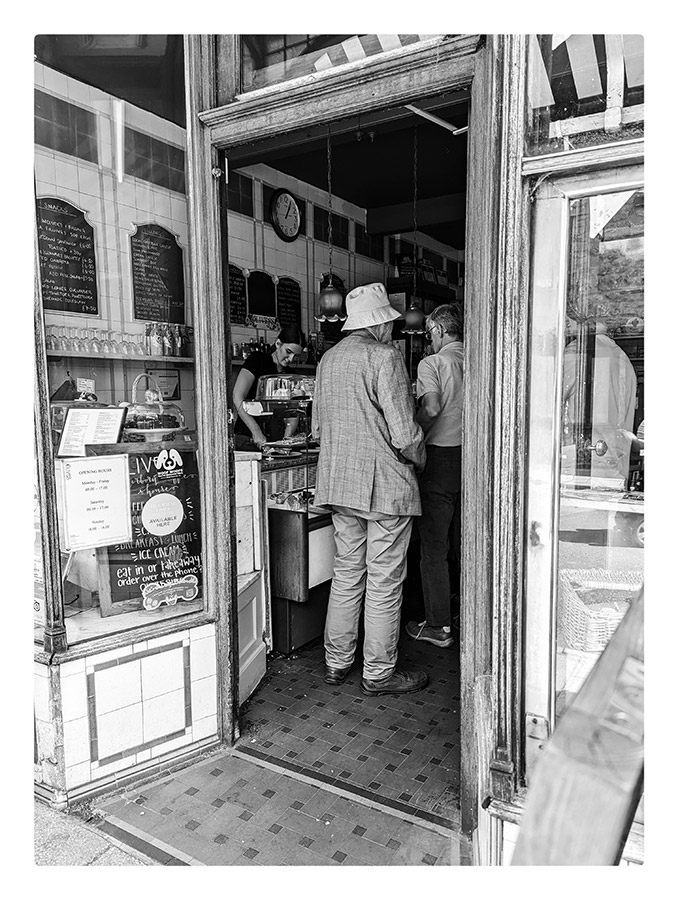
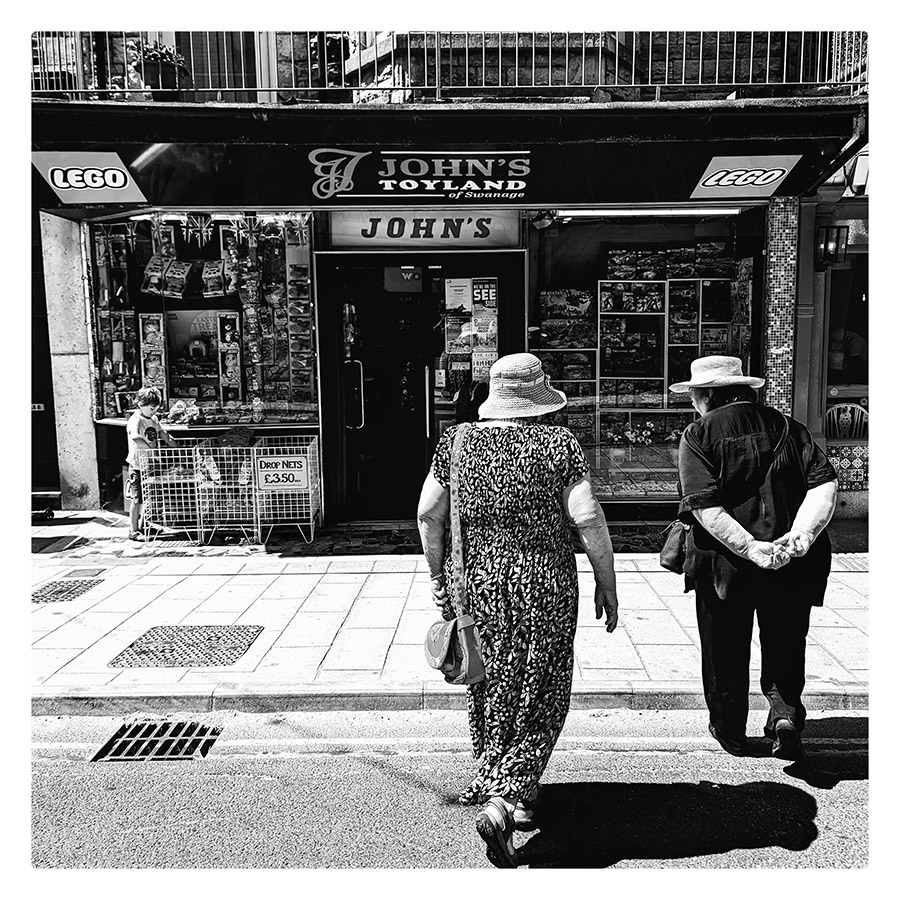
“I like to use Snapseed, which adds various filters to fit your creativity. I also like to shoot in 1:1 ratio ready to include on my feed with a white border. Shooting in the ratio helps me to frame it rather than cropping afterwards. On social media, things that tend to do well include capturing the moment between people as they go about their day, photos that tell a story or a moment in time. Street photography is about the world we live in and how we interact with each other.”
Anthony’s top tips for smartphone street photography:
- Anyone can do this! Everywhere you look, people are using their phones; just take the time to look up and take a picture that makes you smile.
- Go with your instinct and don’t be afraid to take a picture of something random – you never know, it could be the best picture you’ve taken.
- Let the phone do all the work with regards to settings. You can just focus on telling a story and capturing that moment.
About Anthony:
Anthony Young is a photographer who uses his campervan to travel around for photography. See more of his work on Instagram.
Dina Alfasi

Why use a smartphone for street photography?
Currently using an iPhone 12 Pro, Dina favours the smartphone because it’s always with her and doesn’t attract attention. That’s particularly important in the small and crowded spaces in which she takes the majority of her pictures. She says, “It’s quite different from using ‘standard’ equipment. In addition to being easy to carry, the response speed is much better. I can capture special moments very quickly. I also choose not to mess with different parameters in the camera settings like in standard equipment.

“Besides the ‘standard’ mode, I also like to use portrait mode. The results obtained in it create a special intimate atmosphere, especially when photographing people. It puts the focus on the character I am photographing and draws the viewer’s attention to the story of this character. ‘The only limitation for me is a distance problem. Sometimes I see from afar a wonderful situation to photograph, but because of the distance, I cannot always photograph the moment as I would like.
“Shooting in natural light makes all the difference. With it, you get wonderful results. For social media, try to find your own personal language. For my Instagram, my personal style is very prominent and I think it’s something that people connect with. I often get responses from people who say they’ve recognised me in my style before they even know who took the picture. Sometimes they even point out that my photos remind me of paintings, which is wonderful to hear.”
Dina’s top tips for smartphone street portraits:
- I usually start editing with the iPhone’s built-in editor or Snapseed. To finish editing, I almost always use VSCO, I really like the final touch obtained with this app.
- Take lots of photos and try different styles. It’s a matter of experience and with time it will come naturally.
- Most importantly, try to take your photos in natural light to make the most of the smartphone’s limitations.
About Dina:
Based in Israel, Dina Alfasi has become well-known for her portraits of everyday moments on public transport.
For more of her work, visit her Instagram.
Rachel Hannah
Rachel uses an iPhone 14 Pro, and sometimes uses a small and lightweight smartphone tripod. She enjoys the ease with which you can pull your phone out of your pocket and take pictures without too much effort, and says that while she agrees that smartphones aren’t yet quite a competitor for DSLRs or mirrorless cameras in terms of image quality – for use on social media and the like, rather than making very large prints, they’re just as good.
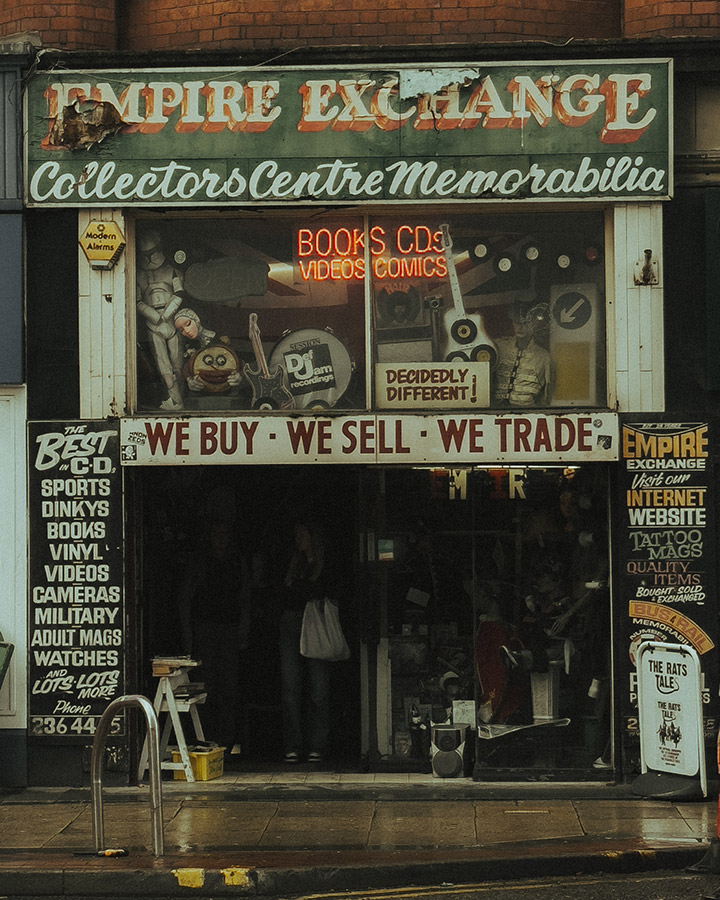
Describing her shooting method, she explains, “I use the standard ‘Photo’ option, but I take advantage of shooting in raw format. The three different lenses of the iPhone 14 Pro make it incredibly versatile when out on the street. I also use the “Live” feature to capture a moving photo, which can be turned into a small video or even a long-exposure shot. I like that for social media purposes, you can take photos in 16:9, 1:1 or 4:3 aspect ratios, as well as shooting in night mode for those dark nights in the city.
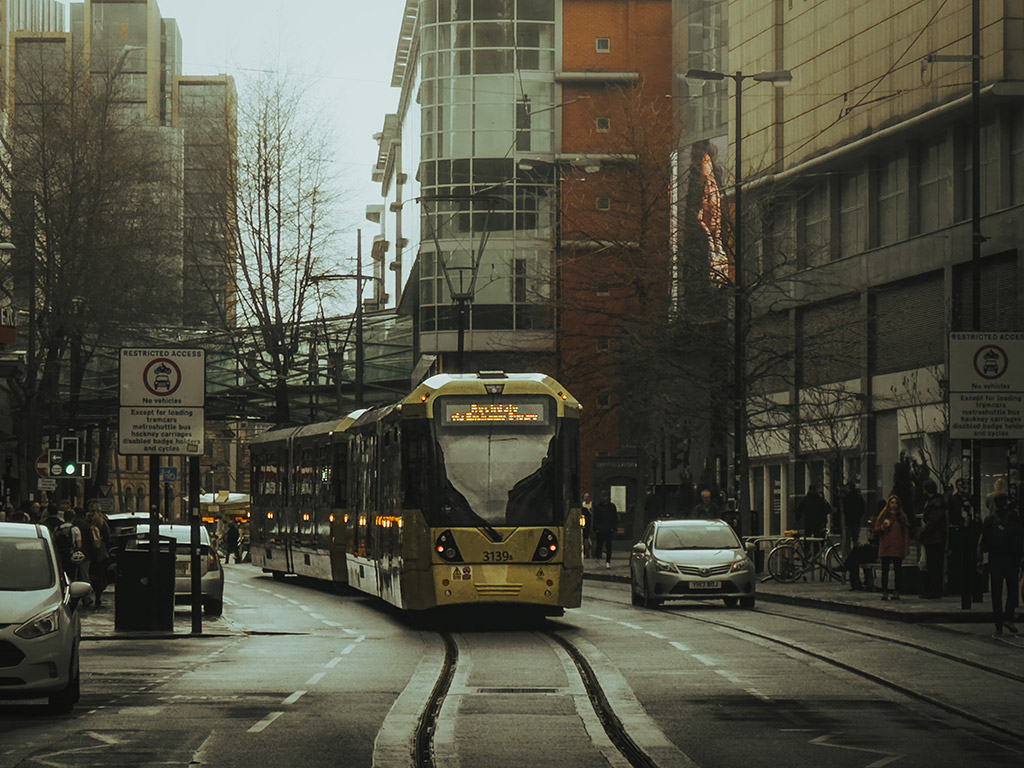
“To ensure I get the best quality, I make sure the camera settings are set up correctly. On the iPhone 14 Pro, you need to head into the phone settings, where there are a number of options to switch on to help you get better quality, including Prioritise Faster Shooting, Lens Correction, Macro Control, Most Compatible (which doesn’t reduce the file size), Apple ProRAW and ProRAW resolution (set to 48MP). I also don’t zoom in too much, and I will use a small tripod to keep the phone completely still while it takes a long exposure in night mode.
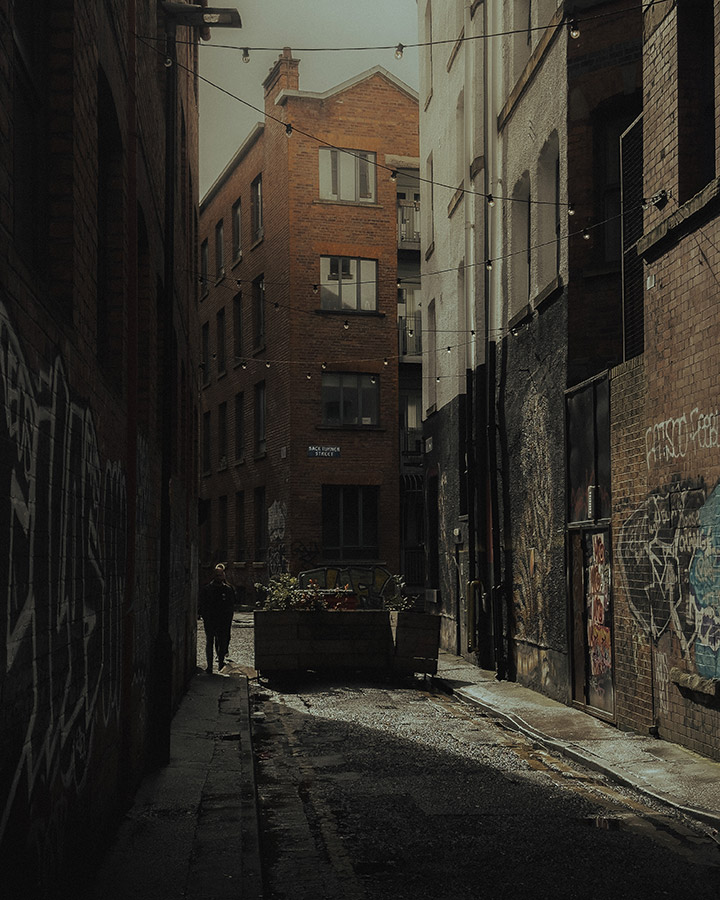
“I use Lightroom mobile for all of my work, including off my main camera. You can also take raw photos from within the Lightroom mobile app itself, which can save you an import job afterwards.”
Rachel’s top tips:
- If you have raw mode, switch that on. Tap the screen to focus on the subject, rather than letting the phone decide for you.
- If the photo is too bright, tap the screen and pull downwards on the sun symbol to darken the exposure. Vice versa if the image is too dark. (These tips are for iPhones but most Android phones work in a similar way).
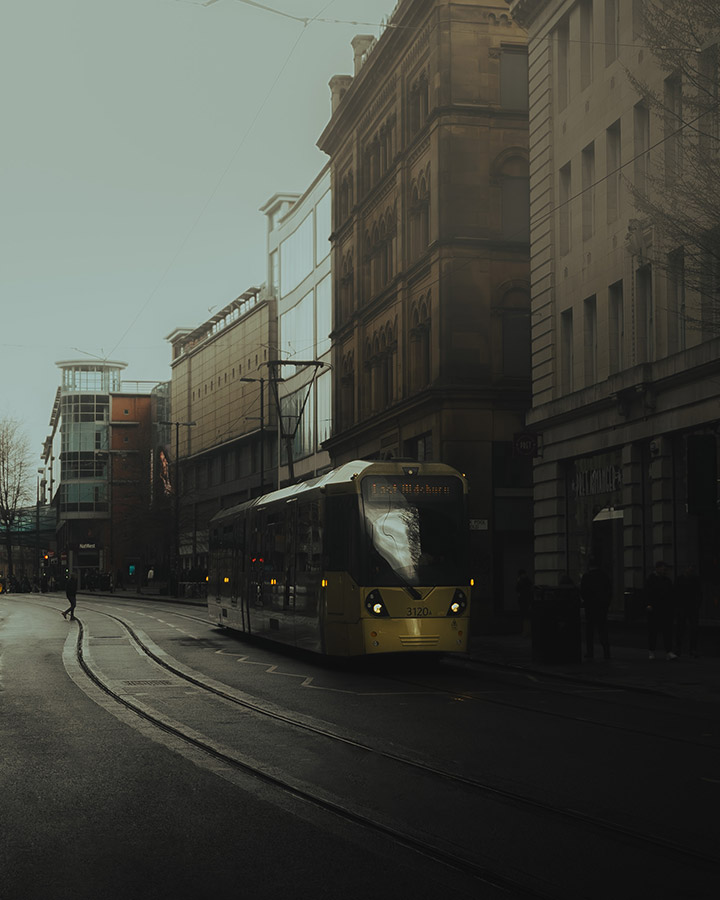
About Rachel
Rachel Hannah is a photographer and content creator. You can see more of her work on her Instagram.
Dimpy Bhalotia
Dimpy’s top tips for smartphone street photography:
- Look outside your subject: “Explore the different mediums of art and craft. Read books outside the subject of photography, too. Photographing organically means not just sticking to what you think you already know. Sticking with what you are already familiar with will only suppress the creative vision you have inside.”
- Capture the moment: “Presence of mind with acute observation and perception is the key to capturing moments on the street. For me, that means I make a point of living consciously in the present, with my eyes fixed on the world. When taking pictures, I merge myself into the crowd, letting no moment miss me – this always helps to capture the unpredictable moment.”
- Know yourself better to develop your own style: “I travelled a lot around the world and arranged my thoughts to figure out what makes me happy. As I keep discovering myself, and what I like, it helps me to develop my style. It is very important to understand oneself. Your work always reflects who you are – so make sure to spend time with yourself and let the energy of self-understanding be reflected in your work.”
About Dimpy:
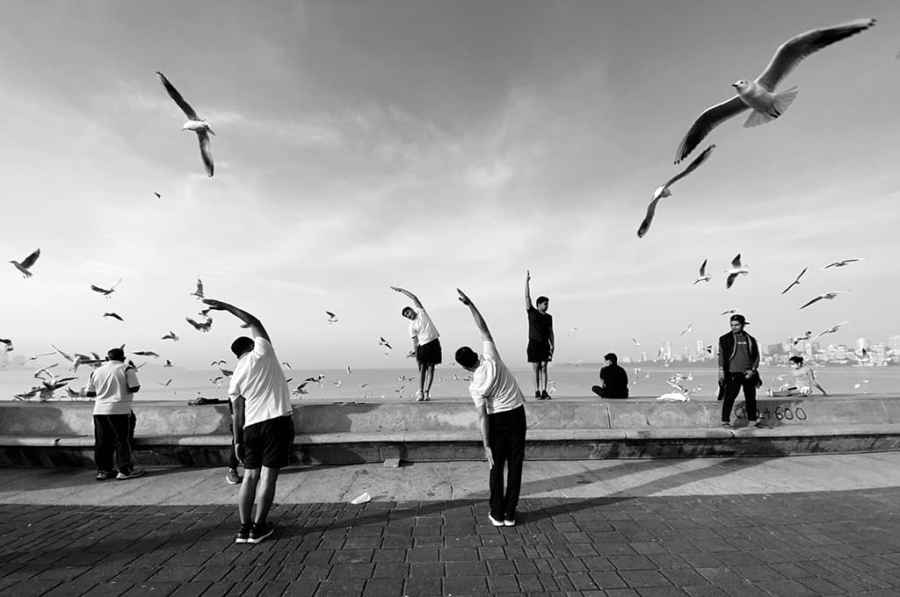
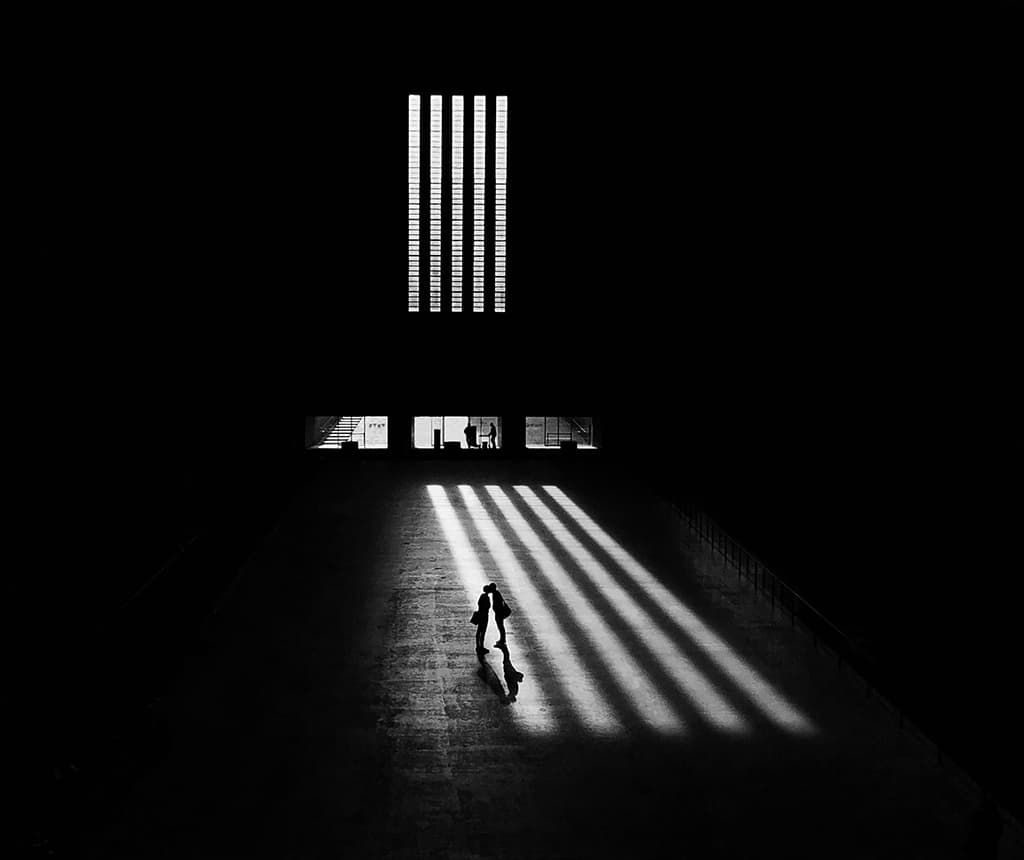
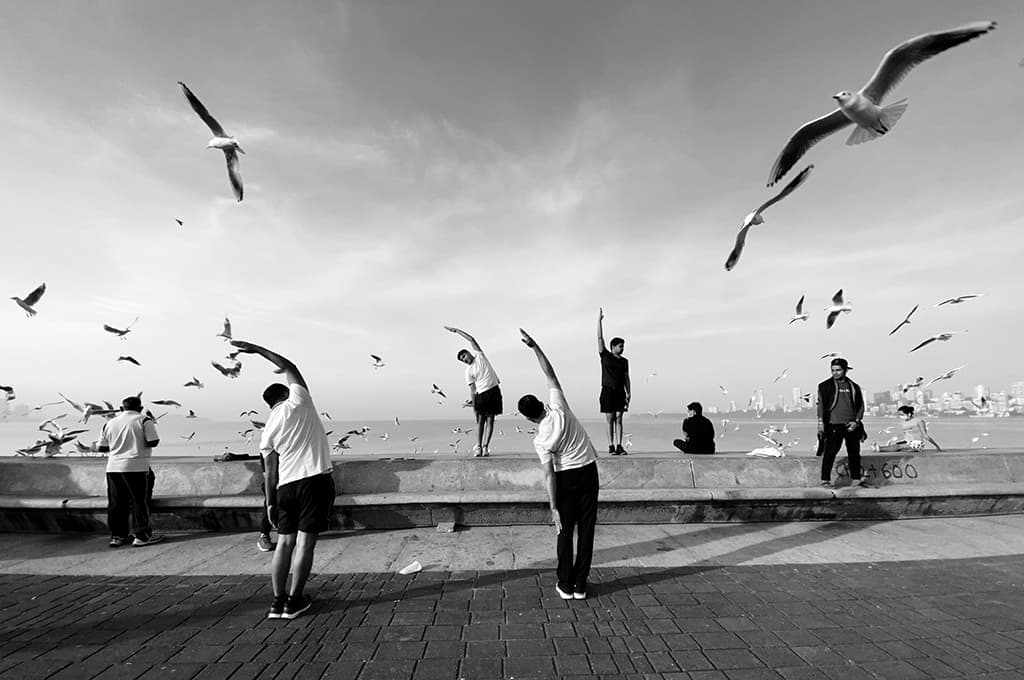
An award-winning photographer based in both London and Bombay, Dimpy Bhalotia is best known for her street photography work, all of which is taken using a smartphone – in her case, the iPhone. She is the IPPAwards (iPhone Photography Awards) Grand Prize Winner and has also won the British Journal of Photography’s Female in Focus Award.
Her work has been published in a variety of international publications including The Washington Post, Forbes, The Guardian, BBC News, GQ magazine, Elle, NPR, The Telegraph and much more. In 2021, she was named as one of the 30 Most Influential Street Photographers of the Year. She focuses more on the philosophy of street photography, rather than getting bogged down in technical aspects – for which a smartphone must surely be perfect.
To see more of Dimpy’s photos, visit her website.
Damien Demolder
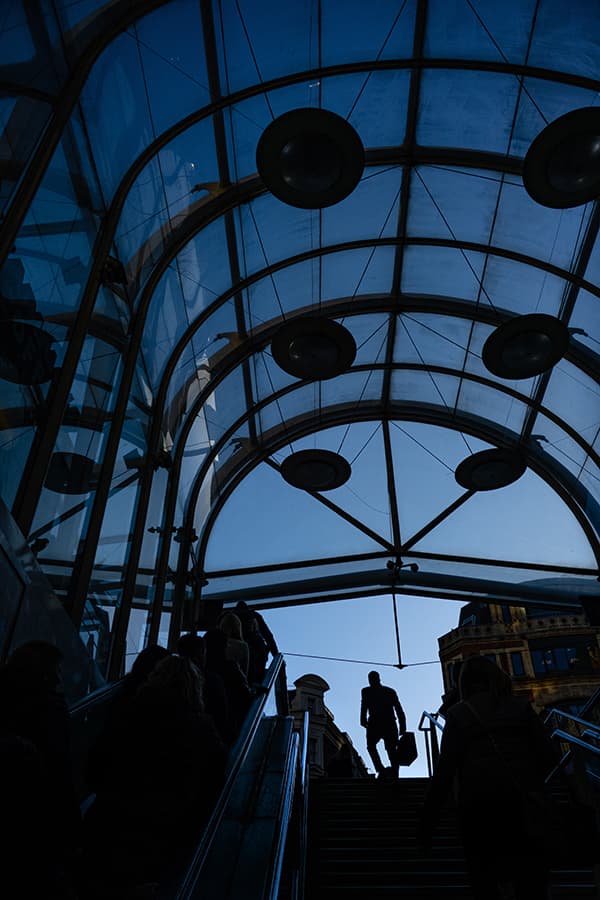
Why use a smartphone for street photography?
“They are not only available when we can’t be bothered to take a ‘real’ camera but also when it wouldn’t seem appropriate – such as on a trip to the doctor’s or the loo (I once shot a man dressed as a chicken in the loo at Stansted Airport once!). Smartphones also help us to blend in, so other people won’t pay us any attention.
A ‘proper’ camera can sometimes make it obvious we are photographers, and clearly real photographers don’t use their phones to take pictures – this means you’ll be ignored when out with your phone.”
How do I edit my photos on my smartphone?
“It stands to reason that if you’re shooting with your smartphone on the street, you might also want to edit your work while on the go and share it via the plethora of social networking apps currently available.
“Editing the street pictures you take with your smartphone is as crucial as it is with pictures you shoot with any camera, so find an editing app you like that offers the controls you need. I tend to use Pixlr and Photoshop Express, as both provide detailed controls of contrast, colour, shadows, highlights and the ability to add ‘looks’ if you want to.
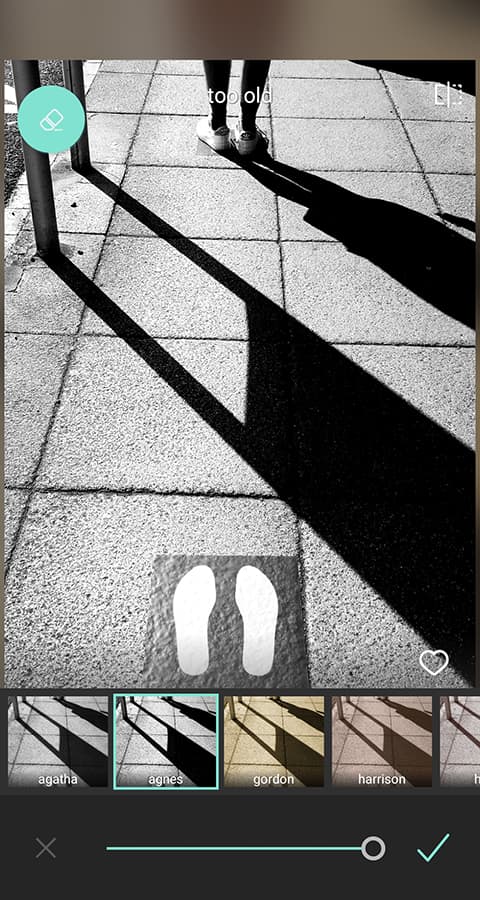
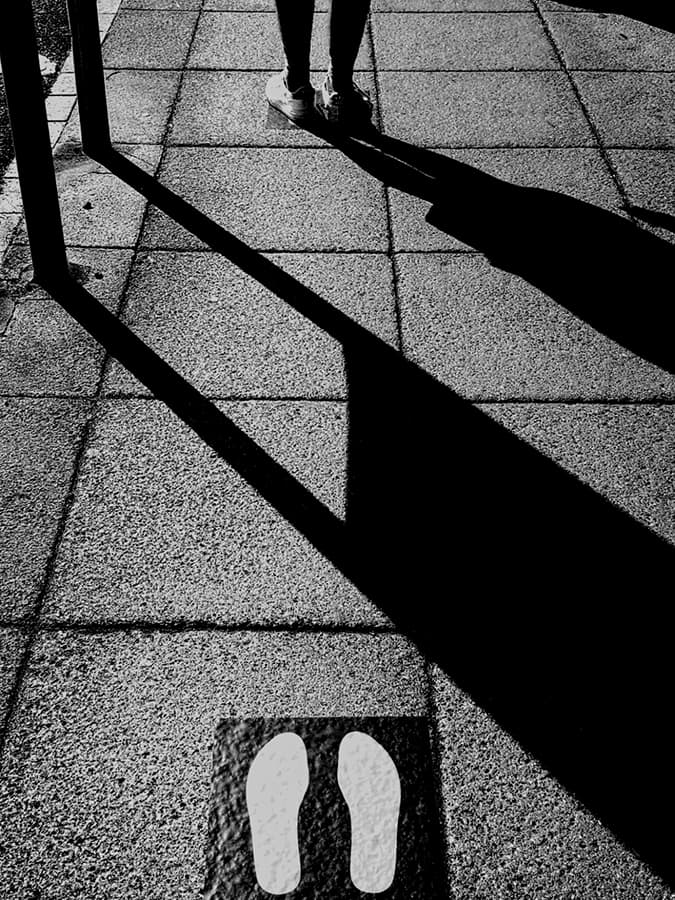
“Here’s a shot I took while waiting in the queue for Sainsbury’s. I liked the shadows of the late afternoon and the structure of the paving, along with the feet sticker and the actual feet. It’s called Social Distancing For Dummies. I didn’t have time to switch to Monochrome mode, so I shot it in colour and tried to use the exposure controls to make the most of the shadows. The picture recorded is still too bright, though.”
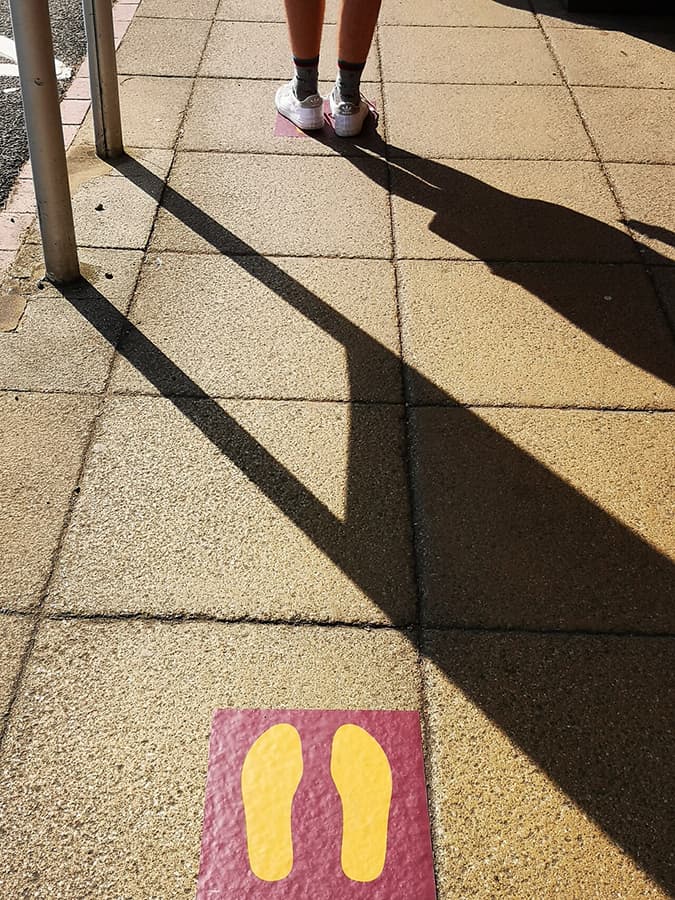
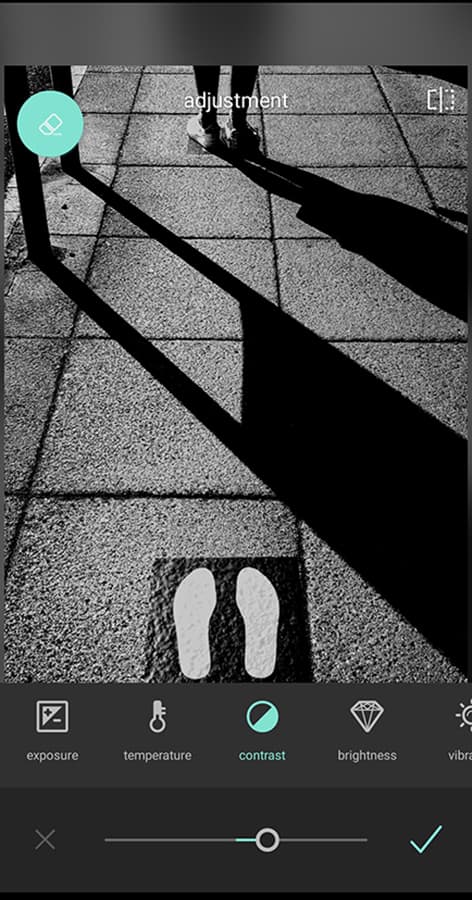
1. I took the picture into Pixlr and used the ‘agnes’ preset to turn it black & white. This preset boosts contrast a bit too and showed that the picture is a little brighter than I want. I used the Exposure control in Adjustments to make it a fraction darker (-12).
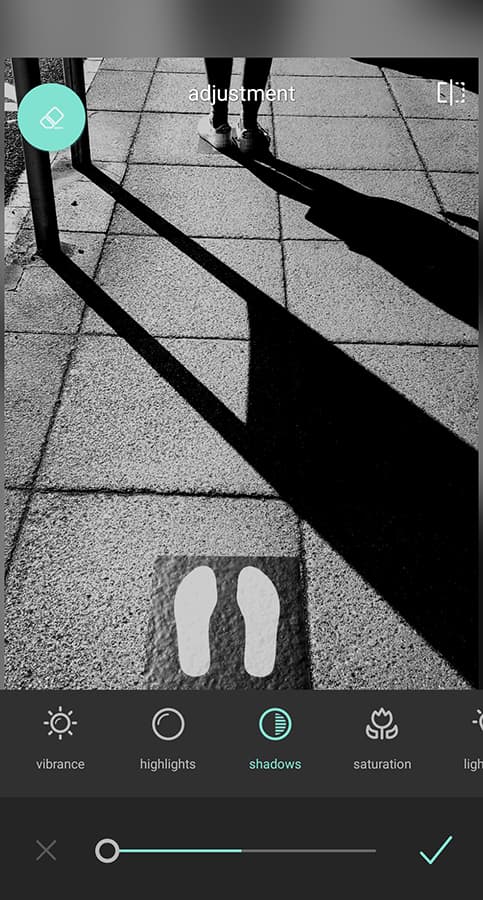
2. Now to darken the shadows. Selecting Shadows in the Adjustment menu, I pulled the slider all the way down to the left to make the shadows as dark as I could. This worked quite well, but they needed to come down a bit more. Before I did that, though, I pulled the highlights down a bit (-10) to introduce more detail to the brighter areas where the sun is on the pavement.
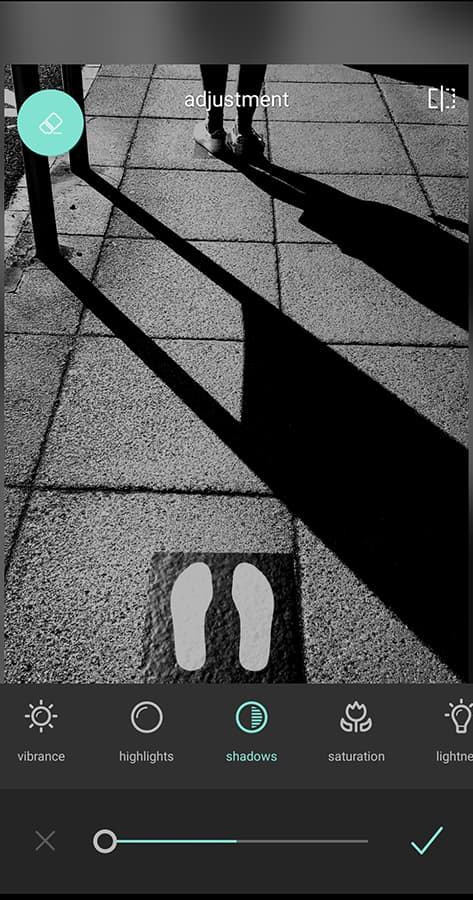
3. I saved these settings and re-opened the Adjustments menu and, returning to the Shadows slider, I again dragged it all the way to the left to make them as dark as I could. This was about right as it gave the shadows plenty of body and added a lot of depth to the image.
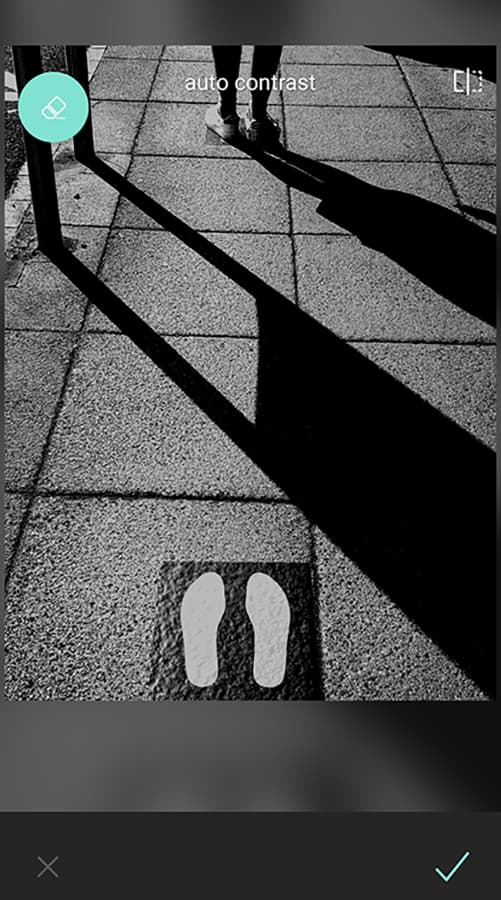
4. Pixlr has a function called ‘auto contrast’. It doesn’t adjust contrast as we might expect. It adds contrast to micro details that crisps things up in a way that appears a mixture of clarity and sharpening. It can overdo things, and you can’t regulate the effect, so I use it with caution. Here, though, it has enhanced the texture of the stones and sharpened the edges of the shadows.
5. When I shot this, I was concentrating on getting the sticker straight and didn’t notice it wasn’t level with the paving joints. So I used the rotate tool (1.2°) to partially correct this. On correcting it completely, I lost too much of the sticker to the crop, and the sticker looked wonky. The partial correction gives the impression things are straight, even if they aren’t quite.
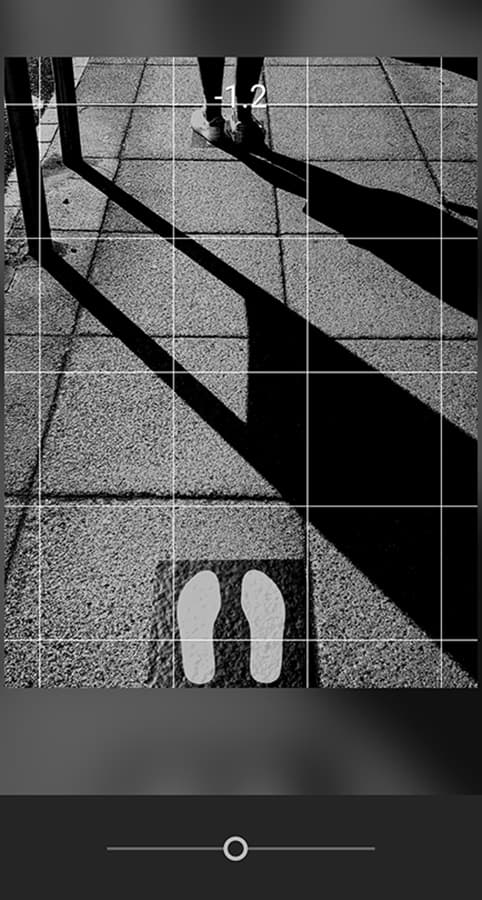
6. I lifted the contrast a tad to deepen the blacks and brighten the lightest tones. I generally pull contrast down and use the shadow and highlight sliders to create impact without boosting the very extreme tones, but here, in pulling down the exposure at the beginning of the process, I’d created rather grey highlights. This contrast boost adds the sparkle back without losing any tonal detail.
Check out this guide for more on how to edit photos in black and white photos on your smartphone.
Damien’s top tips for street photography:
- Keep it straight: Street photography often contains some architecture in the background or foreground, and we all know getting buildings straight is very important if we aren’t shooting a dramatic angle. When we are in a hurry, we can easily forget this and end up with slightly wonky backgrounds and falling-over buildings. With the wide lenses that smartphones tend to have, wonkiness will be exaggerated, so do your best to avoid it at the shooting stage. Of course, these things can be fixed afterwards, but this means losing pixels and also a crop that your composition may not welcome. Some smartphone lenses are a bit primitive and will distort at the edges, so when you straighten a picture in software, you can end up with some strange effects.
- Be in control: Smartphones don’t really understand what atmosphere is, as they are inclined to make happy, bright exposures that average people will be pleased with. Learn how to use exposure compensation, if you have it, or to meter from a bright area to influence the exposure. My street photography relies a lot on the way shadows look, and I have to take control of the camera to make it do what I want it to do.
- I can shoot in Pro Mode which offers raw files and exposure compensation, or tap on the screen in normal Photo mode and drag my finger down to deepen the exposure. I try to work in Portrait mode when I’m just shooting JPEGs, as this gives me softer contrast and more moderate colour that looks realistic. Left to their own devices, smartphones will produce too much contrast and colour saturation as they want to impress us with impactful images. These are then hard to correct.
- Know the reaction time: A lot of street photography is action photography, and capturing exactly the right moment can be critical to the success of the image. Most smartphones have some sort of lag between the shutter button being pressed and the picture actually being recorded, so you need to understand what that lag feels like. It may vary according to the mode you are using – my phone records the moment before I hit the button in one mode, and well after it in another. With practice, I’ve learnt how far in advance I need to hit the button to get the picture I want. I have also come to understand which shots are impossible for my phone to capture, so I save myself stress by not attempting them and concentrating on what it can do.
About Damien:
Regular contributor and ex-AP editor Damien Demolder is a keen exponent of using smartphones, being particularly keen on using them for street photography. He says, ‘Smartphones are great for this type of photography as we always have them with us, and they allow us to capture moments we would otherwise just have to look at.
You can see more of his work on his website.
David Ingraham
Why use smartphones for photography?
David uses the iPhone 12 Pro, and prefers to keep things as simple as possible. In the past, he has used attachable third-party lenses, but finds that with the advancements in smartphone technology, these are now unnecessary. The only accessory he currently uses is a Mophie battery charger to ensure he always has power available.
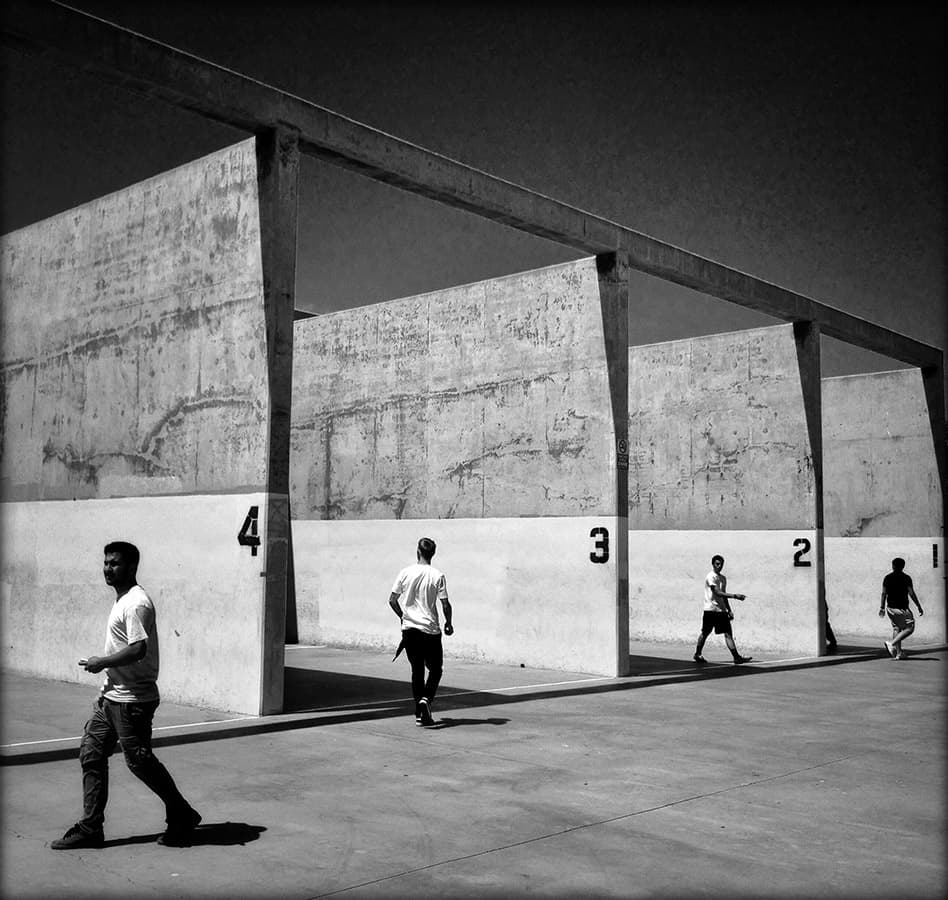
Speaking about using smartphones for street photography, he says, “I realised that, due to their small size and the fact that everyone owns a smartphone these days, they are the ultimate street camera.
“It gives me a level of invisibility that I never achieved with a large, conspicuous camera. Even if someone notices I’m taking a picture, they don’t take me that seriously and are more likely to ignore me.”
How does using a smartphone compare to using a DSLR/mirrorless camera?
“Even with the continuous improvement in image quality and file size with today’s phones, they still fall short of what a DSLR/mirrorless camera can do, but there are trade-offs. For me, the simplicity and convenience of my iPhone make sacrificing some of the creative control and image quality of a more advanced camera worthwhile. On the occasions when I do tire of the limitations of my smartphone, I will use a Ricoh GR II.
“I used to shoot using the Hipstamatic app quite a bit. I loved the shoot-from-the-hip simplicity and how it was reminiscent of shooting with film. Now I tend to use the native camera app, zooming or widening the lens depending on my subject. I do miss the shallow DOF I’d get with my old DSLR, using wide aperture settings.
“While portrait mode does a decent job of recreating that look, I’ve found it doesn’t work that well for street – at least not with my particular style, so I’ll usually try to create that look in post.
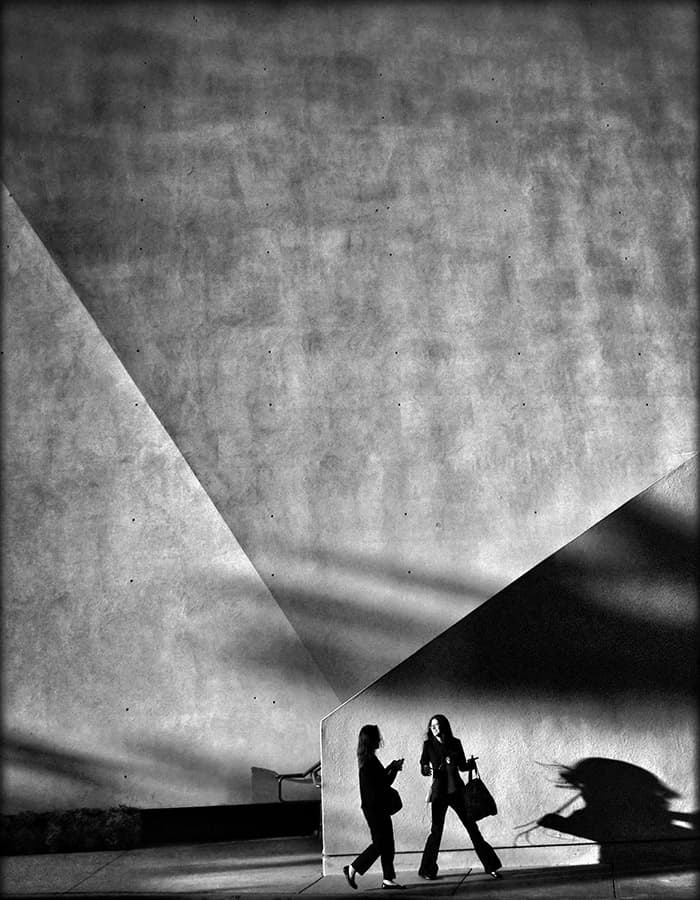
What apps do you use for editing your street photography?
“I enjoy the post-processing stage; it’s an important step in the creative process. I like to give my images a bold, punchy look, so they jump off the screen or page. I do my processing in-phone, using Snapseed and a few texture apps like Stackables and/or Mextures, just to add a bit of a tactile, film-like grit.”
David’s top tips for smartphone street photography
- Keep it simple: a smartphone, a battery charger and a good pair of shoes. All photographers need to develop their eye to “see”. This takes time. Until you’ve developed a certain level of visual literacy, the gear itself isn’t that important.
- Composition rules: Despite all the cat videos and TikTok trends, there’s still an appreciation for good old-fashioned quality photography, whatever the genre. If it’s well composed, maybe a decisive moment, or just a simple beauty – then it should still resonate.
- Check your motives: If you want to pursue street photography (or any genre), are you doing it to get lots of likes on social media or are you doing it out of sincere curiosity and a passion for the art form? If it’s the latter, it will provide you with a lifetime of creative fulfilment.
About David:
David has won a number of awards for his iPhone photography and has had his work displayed at various exhibitions. He lives in Los Angeles but runs workshops which can be accessed online and cover shooting streets with your smartphone, creating composites and post-processing.
Check out more of David’s work on his website and Instagram.
Eric Mencher
Why use a smartphone for street photography?
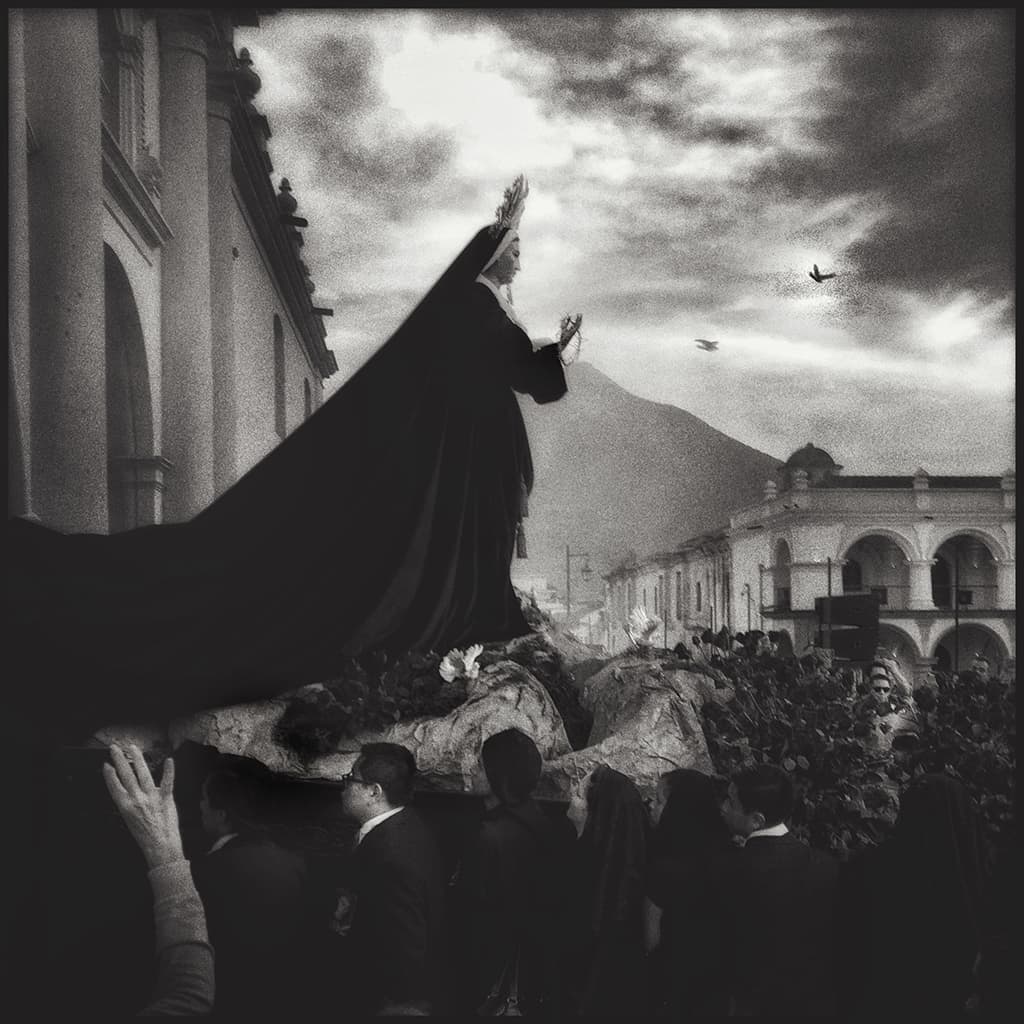
LA-based Eric Mencher shoots exclusively with an iPhone. He says, “Back when film was not only king but was really the only option, I was a Leica devotee. An M6 loaded with Tri-X was my constant companion. In today’s photographic epoch, also known as the digital age, I am an iPhone devotee. It is my camera and companion.”
What apps do you use to edit your street photography?
“Now, I dirty my thumb not in developer, but on my iPhone screen as I select, edit and tone my images using Snapseed, Hipstamatic, and iPhone filters. The Leica was simple and intuitive, and the iPhone – for me – follows in that same tradition. While at times I miss my Leica, when I photograph these days, I try to take advantage of what an iPhone is and how it operates.”
Eric’s top tips for smartphone street photography:
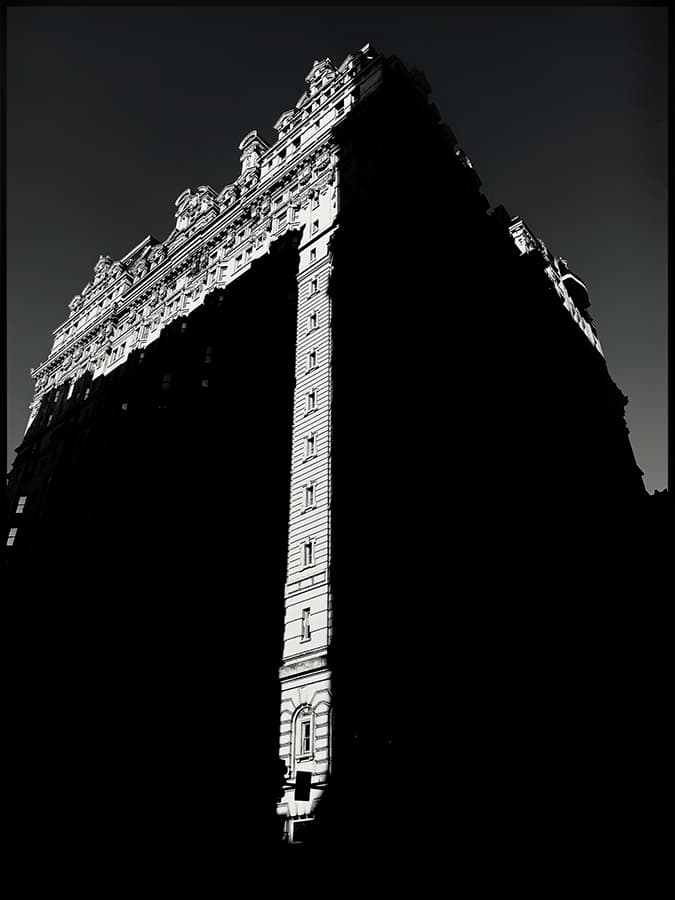
- Explore your phone’s different settings: ‘It’s worth exploring the advantages of the different camera modes your smartphone generally provides, including options such as panorama mode and night mode. Shooting at dusk with the camera set on the Vivid filter can be incredibly striking, while the various “lighting” filters in portrait mode can provide a distinctive look. Spend time getting to know the different options available – both iPhone and Android models will have various modes other than the generic “photo” mode to explore.’
- Try shooting one-handed: ‘For all kinds of shooting, but in particular, street photography, I use either the native iPhone camera [app] or Hipstamatic. I typically hold the camera in my left hand and use the volume up button as the shutter release. That makes it a one-handed operation (allowing me to break the cardinal rule that Bresson so vehemently espoused – do not carry parcels), which is much quicker than using the regular shutter button, which requires two hands (and is tricky for klutzes like me).’
- Get the exposure right: ‘Because the cameras in smartphones typically have very small sensors, it’s imperative to get a good exposure in camera when you can. It’s worth using the exposure lock. For iPhones, you can access this by long-pressing on the screen in the native iPhone camera app and manipulating exposure compensation by dragging the slider up and down. For Android, the process is very similar, or you can often access an exposure compensation setting in “professional” or “advanced” modes. If highlights are burned out using a smartphone camera, it’s very hard to get them back – but it’s much easier to get details back from shadows, or darken shadows for added drama. For this reason, underexposing your images slightly – ready for editing later – can be helpful.’
For more of Eric’s work, visit his website.
Laurence Bouchard
Why use a smartphone for street photography?
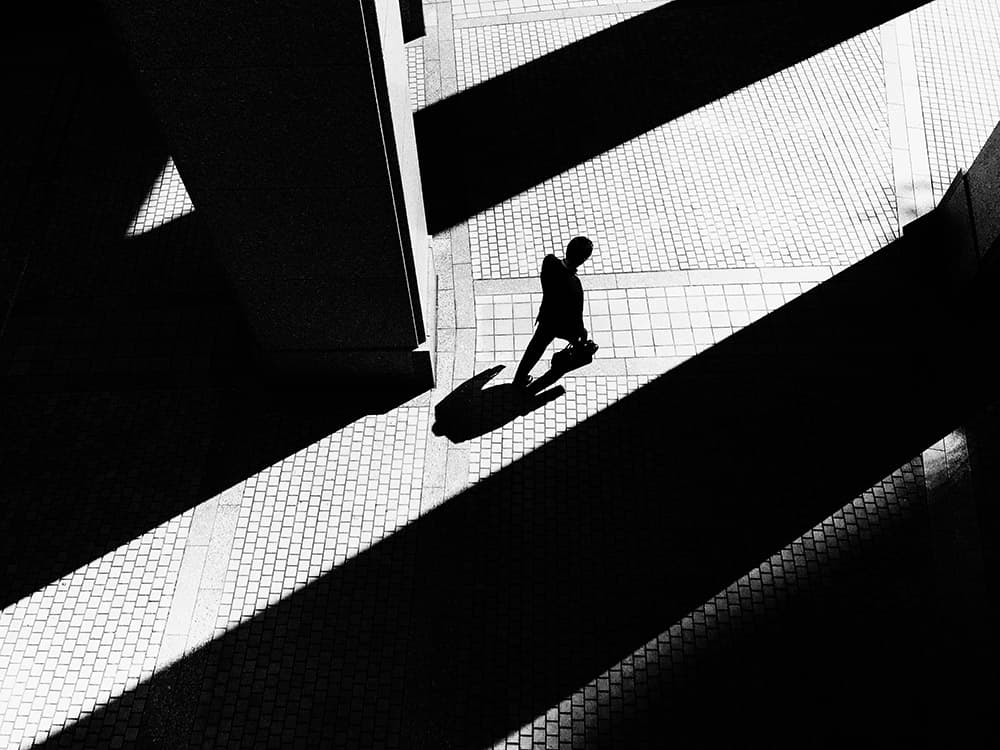
At the moment, Laurence is using an iPhone 13 Pro Max, with which he will occasionally use clip-on lenses from Reeflex – the fisheye one is a particular favourite of his. He also uses a Sony A7R II, but loves the convenience and flexibility of a smartphone, as he says, ‘In some situations, by the time I’d have taken the camera out of my bag, I would have probably missed the shot.
‘It’s a lot simpler to use, and it’s much easier to take candid photos with a smartphone – there’s no shutter sound, and it’s a lot more discreet.
How is shooting with a smartphone different to shooting with a camera?
”I would say that quality is, of course, the main limitation – that of shooting in zoom mode, and what you would get with a telephoto. But so long as you are aware of those limitations, you can work around them. On a bright sunny day, it can be difficult to choose between the quality of the iPhone and my Sony camera. I always try to shoot a few photos with both cameras, and sometimes I’ll get home and prefer the iPhone pics to the Sony pics.”
How do you edit photos on a smartphone?
“As for editing, these days my philosophy is less is more. I catch as much in camera as possible – and cringe to see how much I over-edited old photos. I mainly use Lightroom and Snapseed to edit. I’m not entirely sure what works well on social media any more. Instagram has turned into “reelstagram”. I’ve kind of gone back to Flickr, as Instagram seems kind of pointless for photography these days. Vero looks good, and I’ve recently started posting on there.”
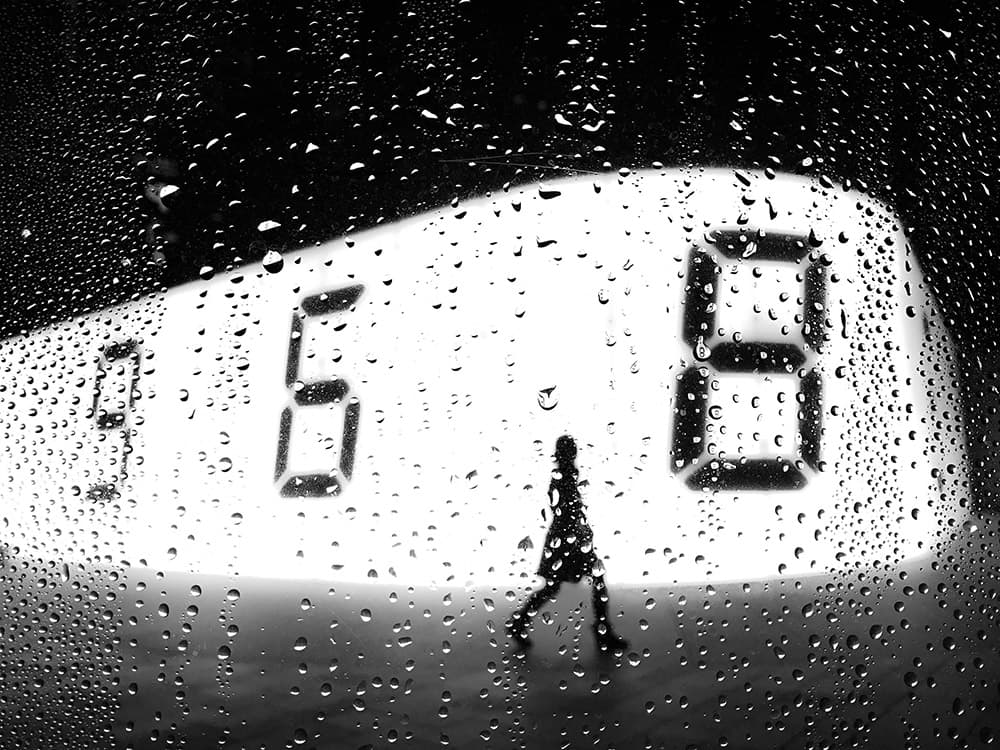
Laurence’s top tips for smartphone street photography:
- Experiment as much as possible: Don’t be afraid to look stupid when trying out interesting shots like ‘puddlegrams’.
- Be aware of light and when light hits a location: A great app for that is the Sun Surveyor app.
About Laurence:
Laurence is a fine-art street photographer, currently based in Tokyo. He has worked with Apple on advertising campaigns and runs workshops.
See more of Laurence’s work on his website and Instagram.
7 simple tips to boost your street photography with your smartphone
Street photography is a great genre to experiment with, using your phone – you won’t necessarily need to invest in expensive additional kit and you’ll probably always have it with you. Give these tips a go next time you’re out and about.
Use burst mode
The ‘decisive moment’ might not always be immediately obvious, but using some well-timed bursts gives you the flexibility to pick the perfect timing later on. Most phones will even pick out what it considers to be the best shot – though you can override it and make your own decisions. With most phones, you’ll need to simply hold down the virtual shutter button to record lots of images in quick succession.
Switch on the grid
Lining up elements of a street photography scene can be tricky, especially when you’re trying to capture a fleeting moment. Make life easier for yourself by switching on a composition grid. This will usually either be found in the camera app’s settings or the general phone settings.
Pretend to be taking a selfie
If you’re worried about being ‘spotted’ while recording street shots and therefore affecting the behaviour around you, one ‘trick’ you can try is to pretend to be taking a selfie. Smiling as if you’re posing yourself – but while using the outward-facing camera – hopefully won’t give the game away.
Try different filters
Black & white is a classic choice for street photography. Most smartphones have the ability to either record directly in black & white or add a filter after you’ve taken the shot. Even better, you can often record in black & white and change it back to colour after the fact if you decide that it didn’t quite work.
Switch on raw shooting
Many people recommend shooting in raw format, even with your smartphone. It’s worth switching it on to give yourself the scope to make adjustments later down the line, whether in-phone or on your computer. Almost all phones will shoot a JPEG or HEIF image simultaneously so you’ll have such an image to work with for social media and so on if you don’t need the raw.
Get a portable battery charger
If you’re going to be out pounding the pavements all day, your smartphone’s battery will certainly suffer. And if you’re using it during the same session for things like maps, checking social media and so on, even more so. A portable battery charger for boosting power on the go helps ensure you never run out of juice at the critical moment – whether that be photographically or otherwise.
Be aware of your smartphone’s limitations
As great as they are, smartphones haven’t mastered everything yet. Generally speaking, zoom is a little limited, night-time shooting is best with non-moving subjects, and there can sometimes be a lag between pressing the shutter button and it taking the shot. So long as you spend some time getting to know what works well – and what doesn’t – with your phone, you can utilise it to your best advantage. General rules are: shoot in good light, stick with the main lens for best results and time your shots appropriately.
New to street photography? Check out our guide to street photography.
Further reading
- How to take great macro photos on a smartphone
- How to take amazing portraits on a smartphone
- Best smartphone photography apps to download now
- The law around street photography

