If you’re looking to learn how to photograph waterfalls, then this is the how-to guide for you.
Waterfalls are simple, elegant features to shoot and you don’t need one the size of Niagara Falls to get good images. A waterfall of 4ft-5ft (1.2-1.5m) or even a few feet across can be just as photogenic – sometimes more so than a great roaring giant that is producing so much spray you can’t get near it.
Welcome to the AP Improve Your Photography Series – in partnership with MPB – This series is designed to take you from the beginnings of photography, introduce different shooting skills and styles, and teach you how to grow as a photographer, so you can enjoy producing amazing photography (and video), to take you to the next level, whether that’s making money or simply mastering your art form.

Each week you’ll find a new article so make sure to come back to continue your journey, and have fun along the way, creating great images. If you’ve found these articles helpful, don’t forget to share them with people you know who may be interested in learning new photography skills. You’ll find a whole range of further articles in this series.
Waterfalls in the UK: We’re lucky to have a huge variety of waterfalls across the UK, especially in Wales, Scotland and the North of England. Southern England isn’t short on these cascades of water, either, with some excellent examples on Exmoor in Somerset. You’ll even find some waterfalls in local parks or nearby rivers.
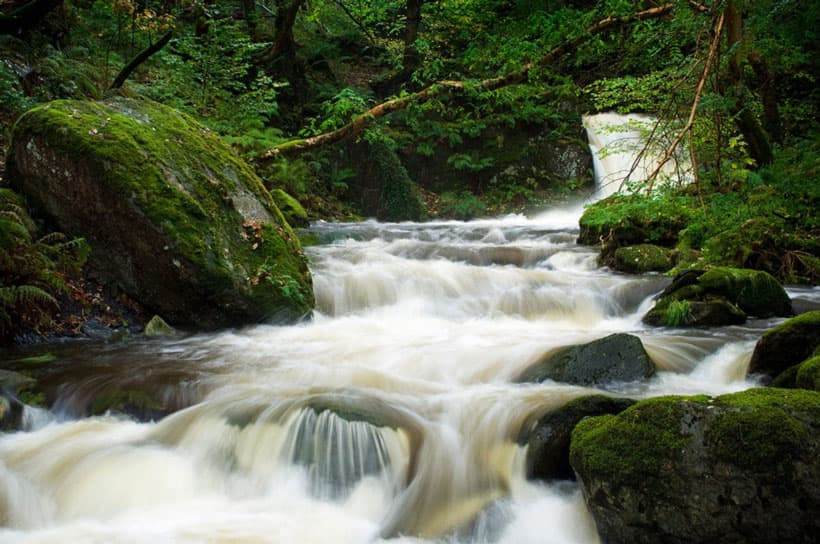
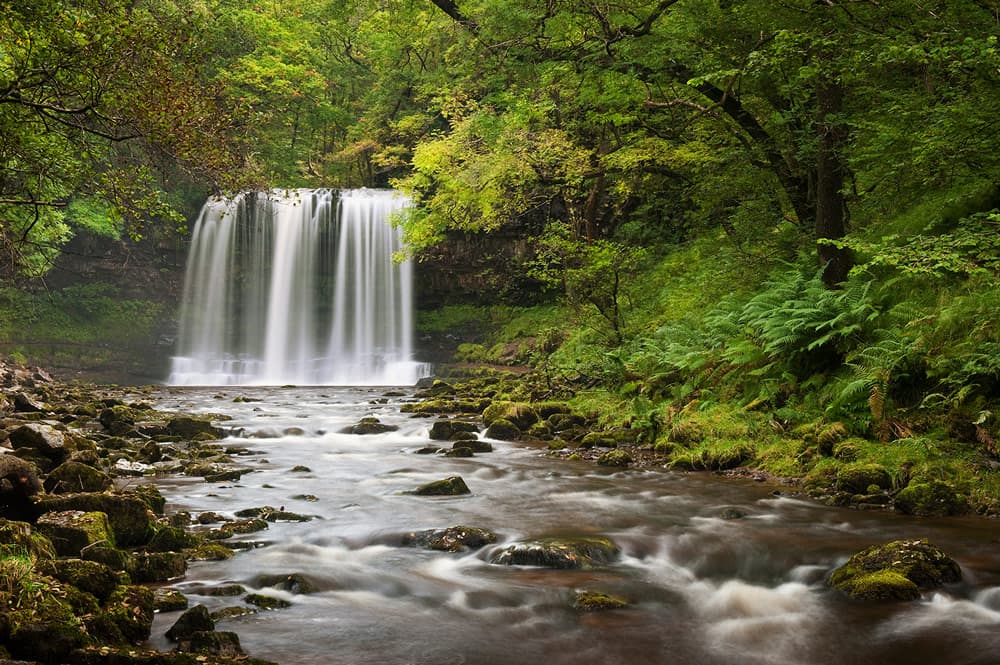
Lead image: River and waterfall in woodland, Brecon Beacons National Park, Wales. Photo: Jeremy Walker
How to photograph waterfalls
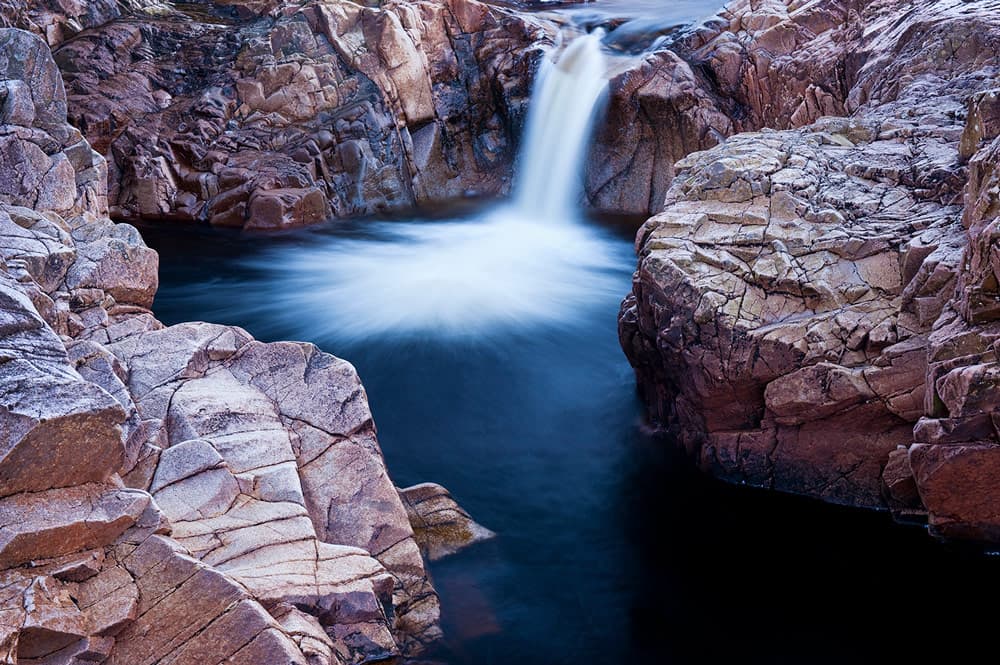
On first seeing a waterfall, look around your location and take time to study the flow of water. Waterfalls are living entities and they will pulse with the flow and volume of water. Don’t fall into the trap of trying to shoot the waterfall in its entirety, as you’ll find many excellent images by looking for sections, abstracts, details or close-ups. Try to identify individual rivulets within a fall, curtains of water, or rocks and boulders that will add shape, direction and flow to your shot.

Take time to study the flow of water. Sgwd Gwladus waterfall, Brecon Beacon National Park, Wales. United Kingdom. Photo: Jeremy Walker
Health and safety
Before you shoot your waterfall, be aware that you’ll probably be working in a wet environment, with spray from the falls making the surrounding area very slippery. Take care when climbing over rocks to get in position and carry your kit in a camera bag. Moving around a wet, slippery location with thousands of pounds’ worth of camera kit on a tripod is asking for trouble. If there’s spray coming from the waterfall you’ll need to protect the front of your lens with a lens hood. If moisture is falling on the camera, try using a chamois cloth to wrap around it and help protect it and the barrel of the lens.
Be careful when shooting as the slippery surfaces can be dangerous. Sgwd yr Eira waterfall, Brecon Beacons National Park, Wales. Autumn. Photo: Jeremy Walker
There are probably two main approaches to shooting a waterfall: the big, wide view, perhaps showing the whole of the falls, going for the dramatic in its landscape setting; or the closer, more intimate portrait showing the finer detail that’s easily missed when struck by the grandeur of a big fall. Both approaches can work well, but look for a composition that helps to tell a story, such as fallen rocks at the base of a waterfall, a dead tree across the river or even plant life growing in the rock face.
The most simple tool for composition is, of course, the camera itself, and don’t be afraid to turn the camera through 90° to shoot upright. It sounds so simple, but when faced with a long, wide subject it’s tempting just to use the camera horizontally.
Look for details and shapes within the waterfall. Waterfall, blurred motion. Glen Etive, Scotland, winter. Photo: Jeremy Walker
Best time to shoot
The light at the beginning and end of the day is usually regarded as best for shooting landscapes, and this can also work for waterfalls, but they do present a unique set of problems. Many waterfalls will be in V-shaped river-cut valleys, and early morning and late evening light won’t hit the falls unless the valley is facing roughly east or west. When the sun is high, direct light on the water can be too contrasty and the highlights will lose all detail. The water will also look mottled and messy.
Unusually for a landscape subject, soft light from a grey, overcast sky can be the ideal conditions for shooting waterfalls. Soft light lacking contrast will always illuminate the water evenly and make it look much smoother. Also, if the waterfall is surrounded by trees and heavy foliage, a soft light will prevent unsightly shadows forming across what is the most important part of the image.
Unusually for a landscape subject, soft light from a grey overcast day is often best. Photo: Jeremy Walker
One of the big problems when shooting waterfalls is being able to convey their size and scale. It may not be obvious from adjacent boulders, trees and other objects in the shot just how big or small a waterfall is. The best way to convey the message of scale is to include a human figure, as we can easily relate to the size of a person. If you really want the figure to stand out, get them to wear a brightly coloured jacket!
Exposure and camera settings
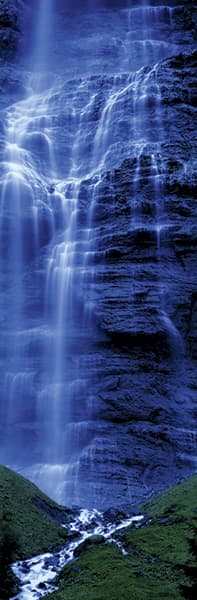
Don’t be afraid to play with the white balance of the image to add a sense of mood. Photo: Jeremy Walker
There are two schools of thought when exposing for a waterfall, or any shot where flowing water is an issue. Do you shoot with the fastest shutter speed possible and ‘freeze’ the motion, perhaps capturing every droplet of water with a shutter speed of 1/2000sec or higher? Or do you go for an exposure of several seconds, perhaps even minutes, and capture a smooth flow and silkiness to the water? Both techniques have their merits and can to help convey a story or message.
How to freeze motion
If you choose the fast shutter speed approach, you may want to bump up the ISO, so you can have a high shutter speed and still shoot at a reasonable f-number for depth of field, such as around f/8 or f/11.
Using a flashgun will also ‘freeze’ the motion of water, but you’ll only be able to cover a relatively small area of the waterfall with this technique. You may also have unwanted and very false-looking highlights.
How do you shoot smooth waterfalls?
To prolong your exposure and create the silky-smooth-flow effect, you’ll need to increase the exposure by dropping the ISO down to as low as it will go (ISO100 – ISO200 depending on your camera), and then using an ND filter such as the Lee Filters Big Stopper (or similar 10 stop ND filter). This will increase the indicated exposure by 10 stops, with a 1sec exposure, for example, becoming 17mins.
However, you don’t actually need 17mins, as anything from a few seconds to a couple of minutes will start to look good, depending, of course, on how fast the water is moving, and an ND filter with less stops such as 3-6 stops will be easier to manage.
Remember to meter for a midtone grey, rather than the pure white of the waterfall for an accurate reading. If you meter for the white of the water, you’ll end up underexposing the shot.
Before and After
Compose and set up your shot as normal, metering for a midtone grey. Shoot with the indicated exposure, checking the histogram to ensure that the highlights and shadows aren’t clipping. Apply a Lee Big Stopper / ND filter and recalculate the exposure. In the case of a Big Stopper (and other 10 stop ND filters), it would be 10 stops, (for example, 1/30sec would become 32secs). Expose at the new recalculated exposure and the water should become blurred or smooth and silky, depending on how fast it is flowing.

Before and after, fast shutter speed vs slow shutter speed. Photos: Jeremy Walker
Shooting waterfalls can be fun, and to a certain degree therapeutic and soothing, but a final word of warning: shoot from the bottom of the waterfall and look up.
Climbing to the top of a waterfall and looking down is rarely the best view and you risk standing on wet slippery rocks right next to a long drop. It’s not the fall that hurts you – it’s the landing!
One that didn’t work – or did it?
Simplicity is often the key to success. Every now and then we’ll see an image, shoot it, think we quite like it and then, a few minutes later, a nagging doubt sets in and we try to ‘improve’ the shot. I’m never averse to a little ‘gardening’ if it helps an image, such as removing a distracting twig, stone or leaf. However, if you have to start building the foreground there may be something wrong. Does the image need a pile of nicely shaped boulders? Should there be more stones in the pile or should I have just lived with the foreground as it was?
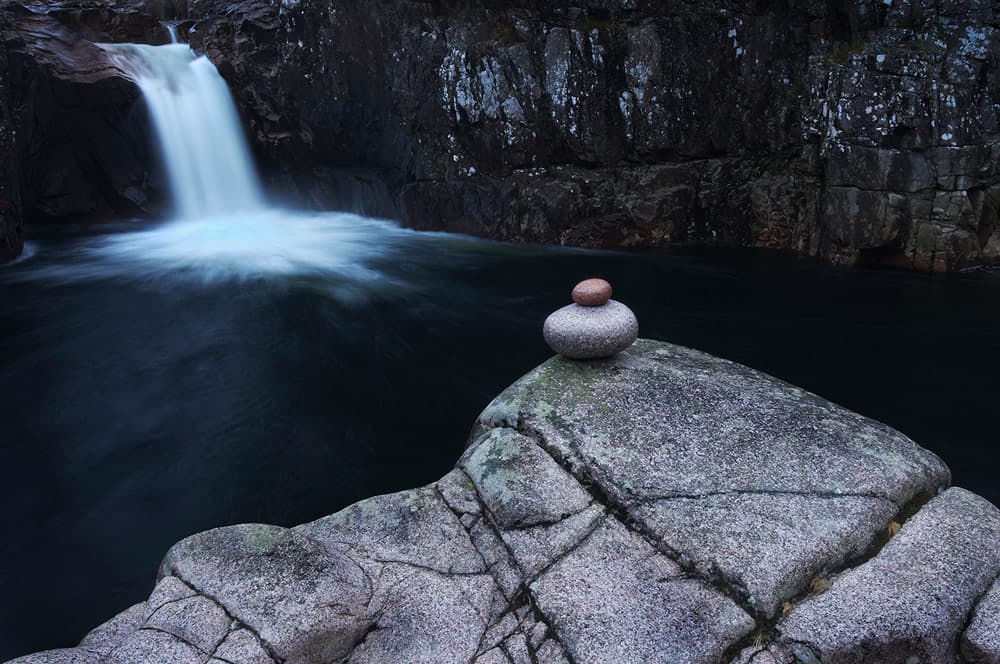
Waterfall photo with foreground detail. Photo: Jeremy Walker
Jeremy’s Top Tips and ideas to photograph waterfalls
1. Sense of scale
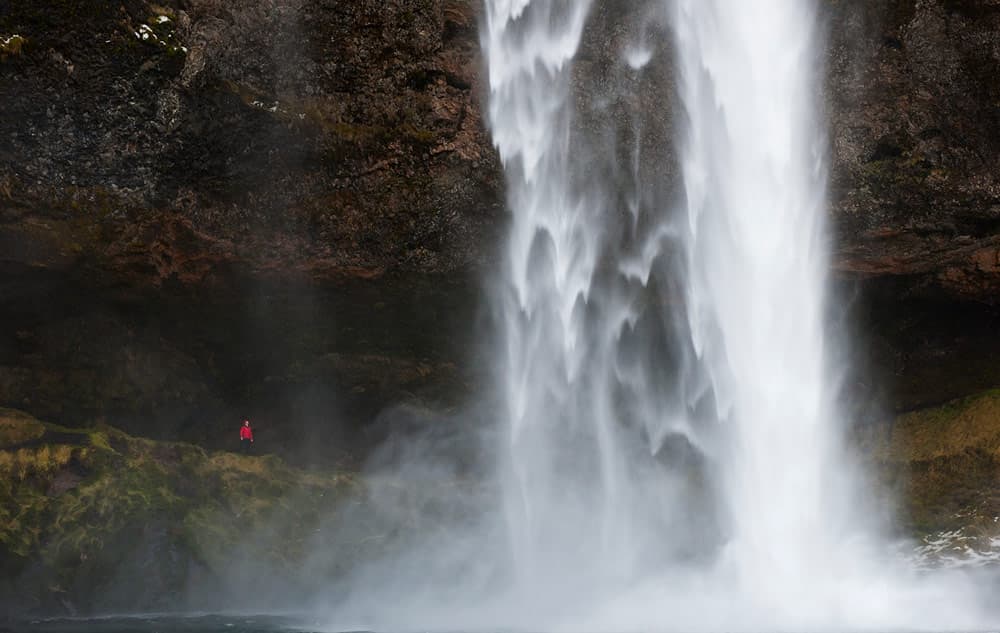
Man in red jacket standing next to tall waterfall. Photo: Jeremy Walker
It can be difficult to convey the size and power of a waterfall. Because we can relate to the size of a human, use a person, preferably brightly dressed in a red jacket (as seen above), and have them stand near the waterfall.
2. Enhance colour
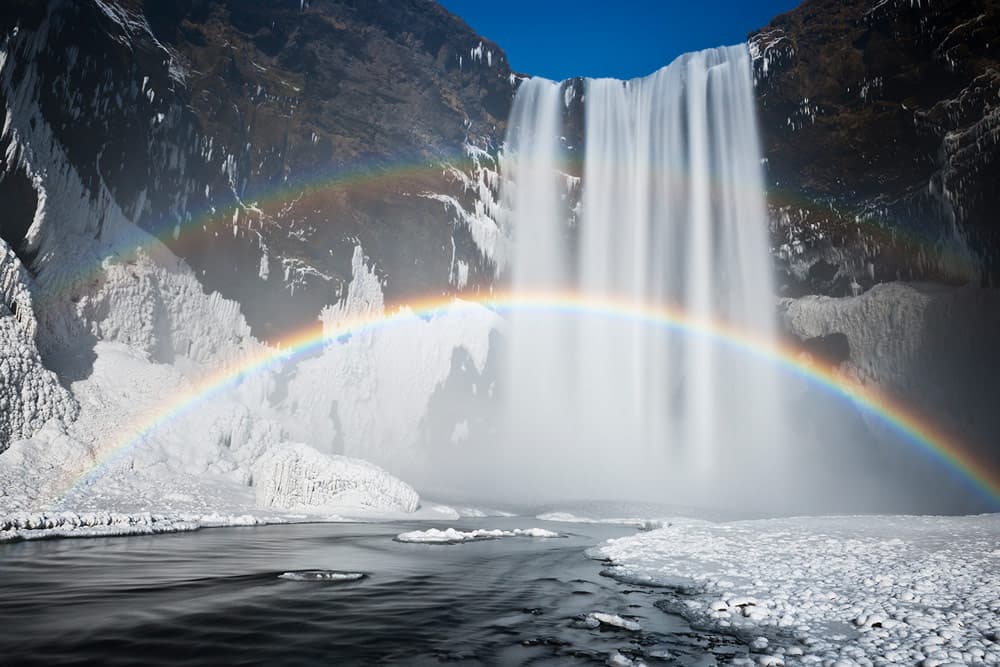
Waterfall with double rainbow in winter. Skógafoss, Iceland. Photo: Jeremy Walker
If there’s enough spray, and you can get the right angle relative to the direction of sunlight, you’ll get a rainbow. Use a polariser to enhance the colours, but be aware that the polariser increases your exposure by up to 2 stops.
3. Close-ups
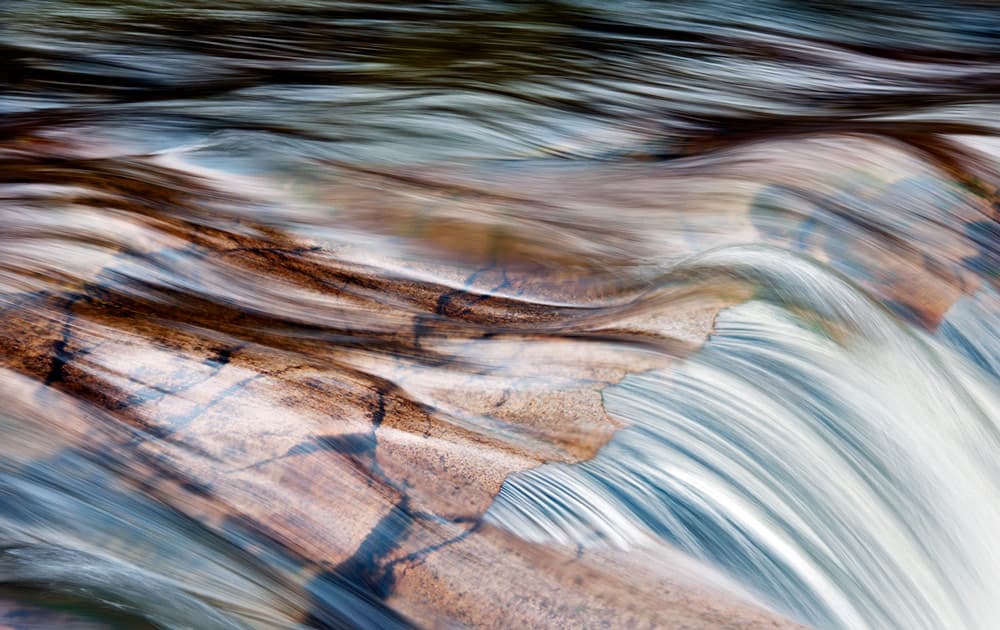
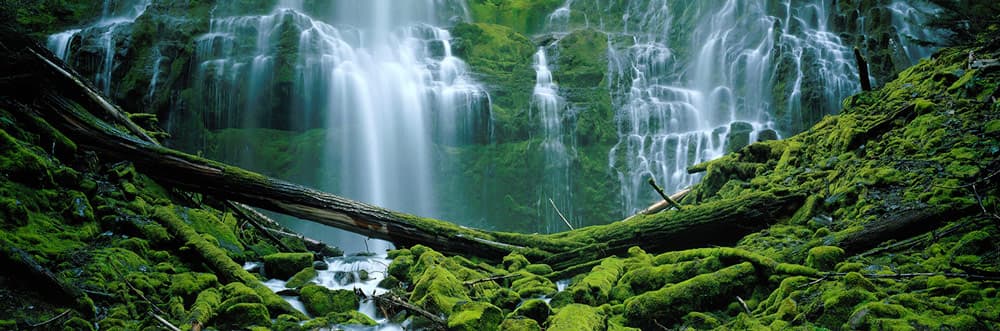
Close-up of water flowing over rocks. Photo: Jeremy Walker
If you can’t take a ‘big view’, showing the waterfall in all its splendour, look for smaller ‘micro’ alternatives. Search for close-ups or abstracts and use long exposures to show the flow of water that the human eye can’t see.
4. Don’t give up
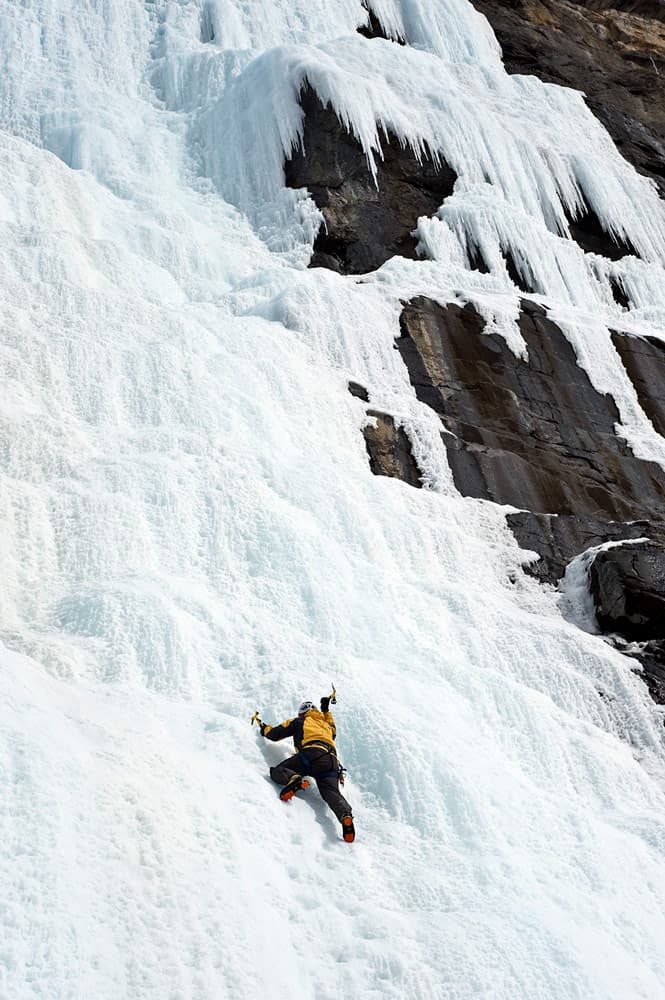
Ice climber on frozen waterfall. Photo: Jeremy Walker
If you turn up to shoot a waterfall and things aren’t as you planned or hoped, don’t just walk away with nothing. Look for the offbeat or even bizarre. Think ‘outside the box’ and consider how you can use what is around you to your advantage.
5. Add mood
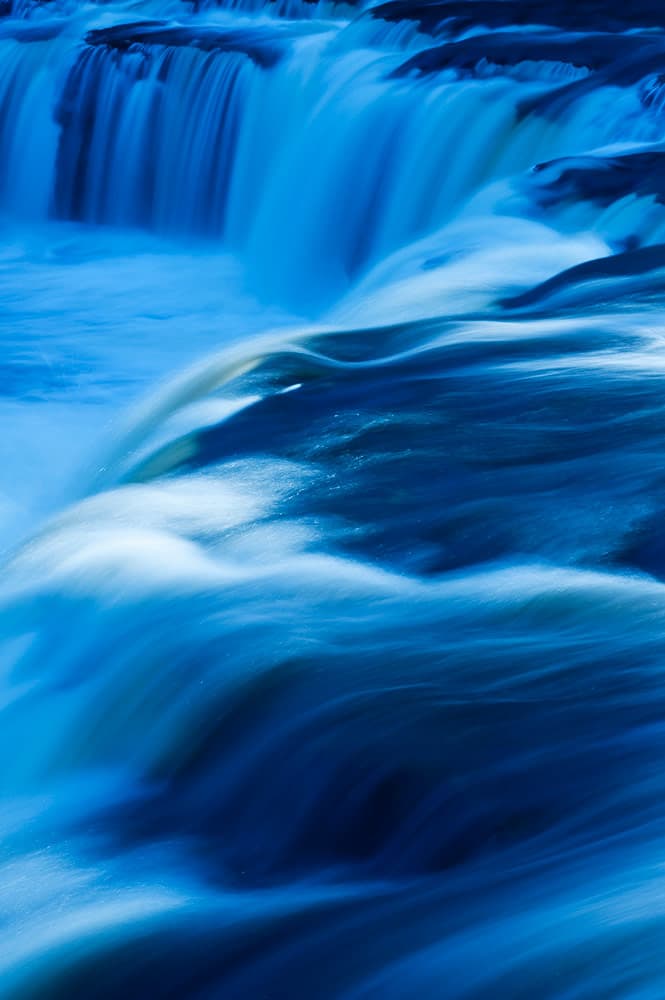
Fast flowing waterfall. Water, blurred motion. Photo: Jeremy Walker
Use the camera’s white balance control to alter the mood, look and colour of an image. Blue will suggest cold and wintry conditions (3200K or lower), while a higher setting makes the image warmer. This technique works best when there’s no other colour in the image.
Top kit to photograph waterfalls
You don’t always need to buy new when getting kit to photograph waterfalls, with second-hand camera gear often being great value, and you may already have what you need to get started.
Once you’ve got your camera sorted, there are a few essential items that will make your waterfall photography even easier, and more enjoyable. Here are our suggestions on what makes for some essential kit.
Lens choice
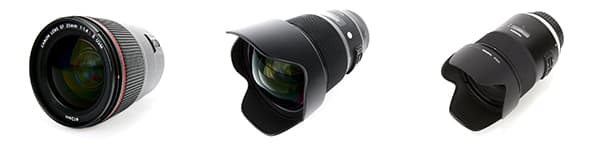
A good range of focal-length lenses will be useful, depending on how close you can get to the waterfall. A 24-70mm and 70-200mm lens will cover most eventualities, but an extreme wideangle, such as a 14-24mm f/2.8 zoom (or equivalent), will work well for closer shots. If you’re looking for a great wide-angle lens, have a look at our guide to the best landscape lenses.
Tripod

For long exposure photography, you’re going to need a tripod. This will allow you to extend your exposure time, whilst keeping the camera steady and stable while you shoot. Use of the self-timer, or a remote release can help here, and be sure you clean your tripod afterwards to keep it dry. Read our complete guide to tripods.
Filters

A circular polariser is useful for enhancing the colour of any rainbows, but also for taking the sheen and reflections off the surface of the water and increasing contrast. A 6-stop or 10-stop filter is also handy to increase the exposure length to create blur and motion. Have a look at the top 3 filters needed for landscape.
Chamois cloth

A chamois cloth of the type available at motoring accessory shops is useful for wrapping around your lens and camera to protect your kit from spray. It’s also useful for wiping moisture off your camera kit should it get wet. Make sure you keep your camera and lenses clean after shooting near water, have a look at our guide to cleaning your camera kit.
Wellies
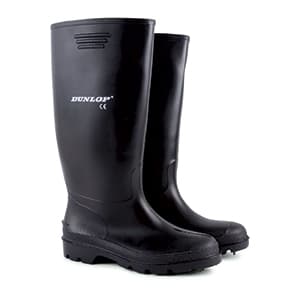
At some stage you’ll probably want to shoot from the wettest place possible, and you’ll end up in a puddle or a tributary of the river. If you need new wellies, choose the neoprene-lined thermal variety. Warm, dry feet are essential, and will extend your comfort, and ability to keep shooting. Wet feet don’t make for a happy photographer.
Jeremy Walker is an award-winning professional photographer with many years’ experience specialising in high quality landscape and location photography from around the world for use by advertising, design and corporate clients. His belief in ‘quality is everything’ serves his clients well. www.jeremywalker.co.uk
More reading:
20 top tips for photographing water
The best Landscape photographs
Tune in next week, for the next article in the series of the AP Improve Your Photography Series – in partnership with MPB.
- Part 1: Beginners guide to different camera types.
- Part 2: Beginners guide to different lens types.
- Part 3: Beginners guide to using a camera taking photos.
- Part 4: Beginners guide to Exposure, aperture, shutter, ISO, and metering.
- Part 5: Understanding white balance settings and colour
- Part 6: 10 essential cameras accessories for beginners
- Part 7: Beginners guide to the Art of photography and composition
- Part 8: Beginners guide to Photoshop Elements and editing photos
- Part 9: Beginners guide to Portrait Photography
- Part 10: Beginners guide to Macro Photography
- Part 11: Beginners guide to Street Photography
- Part 12: Beginners guide to Landscape Photography
- Part 13: How to shoot Action and Sports Photography
- Part 14: How to shoot wildlife photography
- Part 15: Raw vs JPEG – Pros and cons
- Part 16: How to create stunning black and white images
- Part 17: How to photograph events and music
- Part 18: Pet photography – how to photograph pets
- Part 19: The ultimate guide to flash photography
- Part 20: The ultimate guide to tripods
- Part 21: Create awesome photos with light painting
- Part 22: Beginners guide to file and photo management
- Part 23: How to shoot food photography
- Part 24: Complete guide to outdoor light
- Part 25: Top tips for stunning car photography
Find the latest Improve Your Photography articles here.
Follow AP on Facebook, Twitter, Instagram, and YouTube.