Flash photography is widely accessible thanks to built-in pop-up flash in modern cameras and the availability of Speedlite flashes with TTL auto exposure. Ian Pack is your guide.
Learning how and when to use flash is an important part of mastering light, particularly when it comes to portraits. Ian Pack shares an insight into flash and his tips for using it in your photography:
Pop-up flash
Many crop-sensor DSLR and mirrorless cameras have a pop-up flash on top of the camera. This is used a little by few photographers, and not at all by others. But with care it can be used outdoors to fill-in shadows and create catchlights in the eyes of the subject.
Pop-up flash is a small, hard and direct light source which doesn’t create flattering light on its own: but several diffusers are available which profess to soften the light from a pop-up flash. They are still a relatively small light source close to the flash, which alone doesn’t provide optimum diffusion.
Pop-up flash can also be used to control off-camera flashes, but is limited to short range line of sight. Dedicated flashes and wireless triggers will give better results.
Hot shoe flash or Speedlites
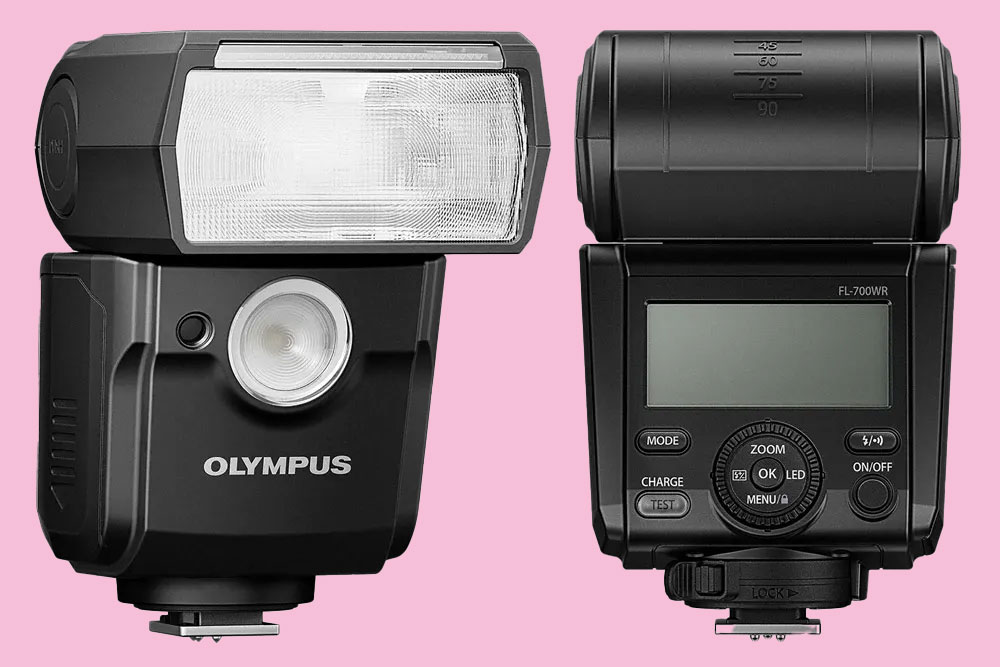
Many photographers own a hot shoe flash or Speedlite and mainly use it as a convenient way to illuminate a photo. There’s so much more to Speedlites. When fitted to the camera hot shoe there will be the facility for TTL (through-the-lens) auto exposure which can be adjusted independently of the camera with the exposure compensation facility.
Most Speedlites have a flash head that swivels allowing you to bounce the light from nearby ceilings or walls, to create a large, flattering, soft light. Do remember that any bounce surface that is not white will create an overall colour cast in your photos.
There are many light modifiers for Speedlites ranging from $20 / £14 to hundreds. One of the least expensive is the white translucent, shoot-through umbrella which diffuses the light from a Speedlite and is ideal for lighting solo portraits or small groups. Don’t be put off by the low power of Speedlites which average 50-60Ws (Watt seconds). Used with mid-range ISO settings and an aperture of f/4 or f/5.6, a Speedlite is a versatile tool.
Indoors simple solo portrait set-up
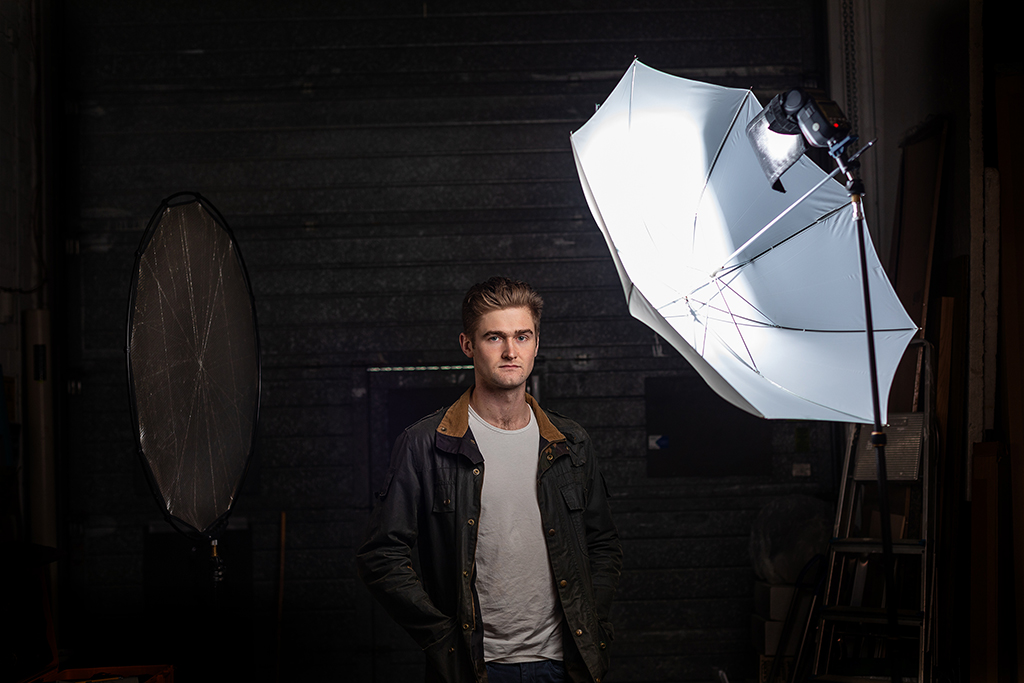
All you need to start creating beautiful portraits are a Speedlite, wireless trigger, a white shoot-through umbrella, an umbrella swivel, a light stand and a reflector to bounce light into shadows. This is my go-to headshot set-up.
Using the following settings as a starting point you can create portraits or head shots within just minutes. With your camera set to manual, set the shutter speed around 1/125sec to 1/250sec depending on your camera’s flash sync speed. ISO 320, aperture f/5.6, daylight white balance. For flattering results without much distortion use a short telephone lens or a zoom setting from 70-85mm.
The Speedlite should be set to manual with the power at 1/16th. This is normally done with the wireless trigger. The spread of the beam from the Speedlite can be changed using the zoom setting. This does not affect the hardness of the light; just the coverage. 50mm is a good starting point when photographing with a shoot-through umbrella.
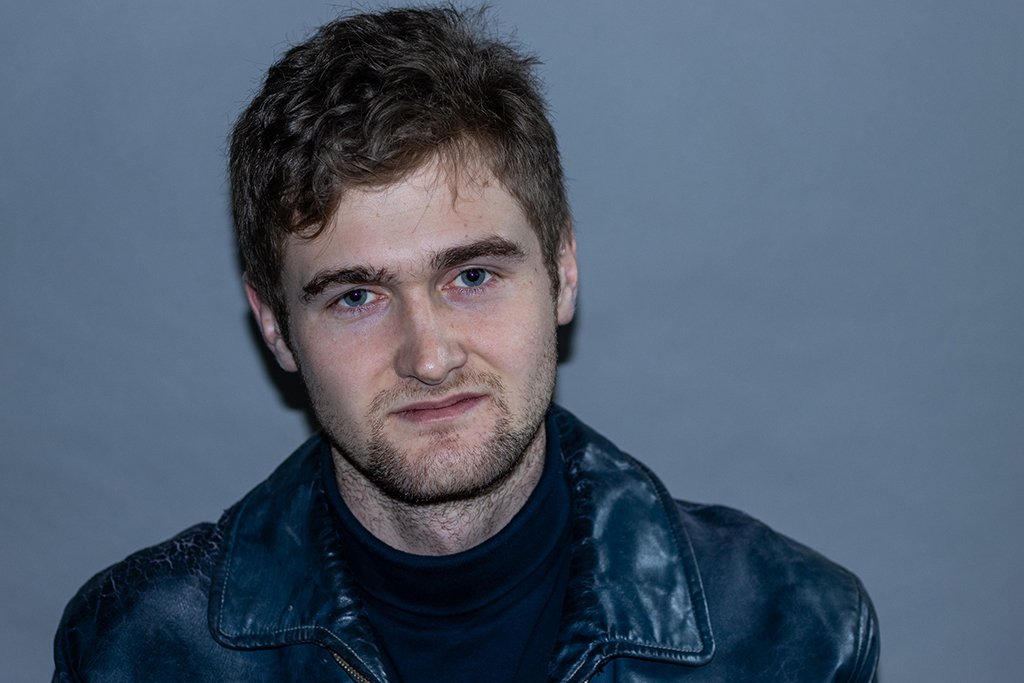
With the Speedlite, umbrella and light stand assembled, set the umbrella slightly above head height to one side of the subject, pointing the umbrella shaft at the subject’s nose. Turn the umbrella slightly toward the camera – this is known as feathering. Take a test frame to judge the exposure, lighting and pose. Adjust as necessary using the camera histogram to judge the exposure.
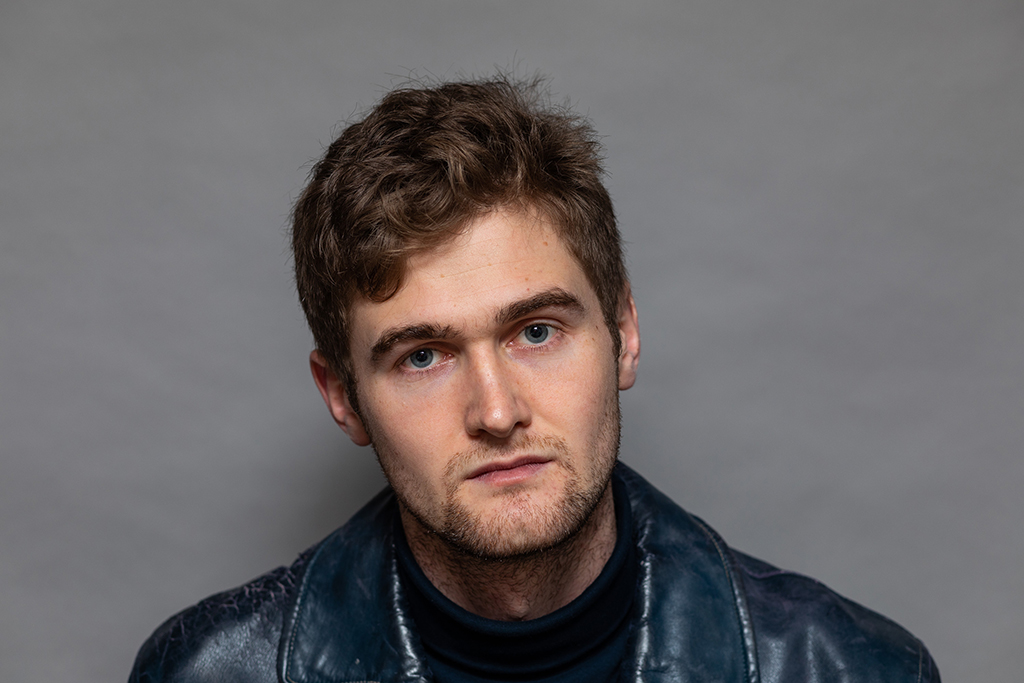
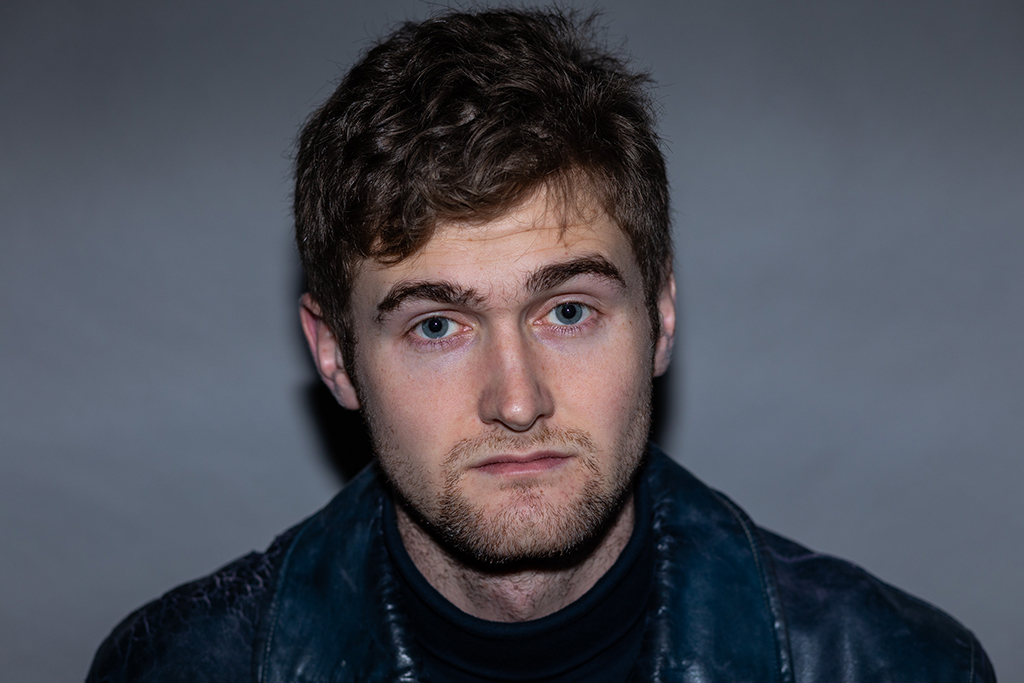
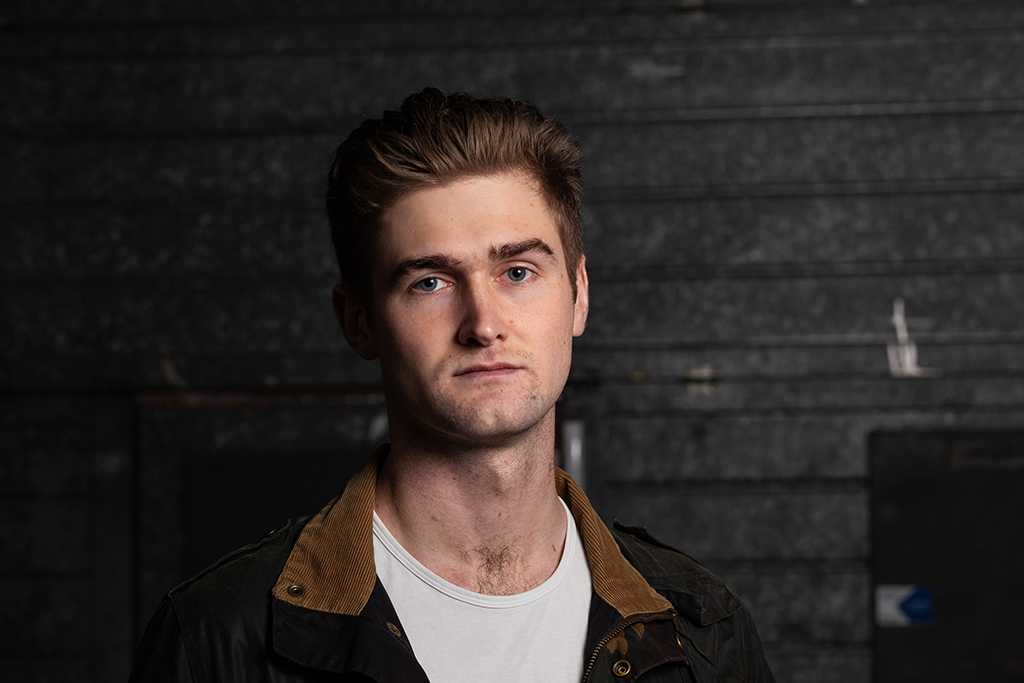
In the first frame with the shoot-through umbrella the background is lighter and busier than expected. I moved the Speedlite closer to my model, Max, and flagged one side of the flash to reduce the light falling on the background. The photos you see here are straight out of camera with basic raw processing.
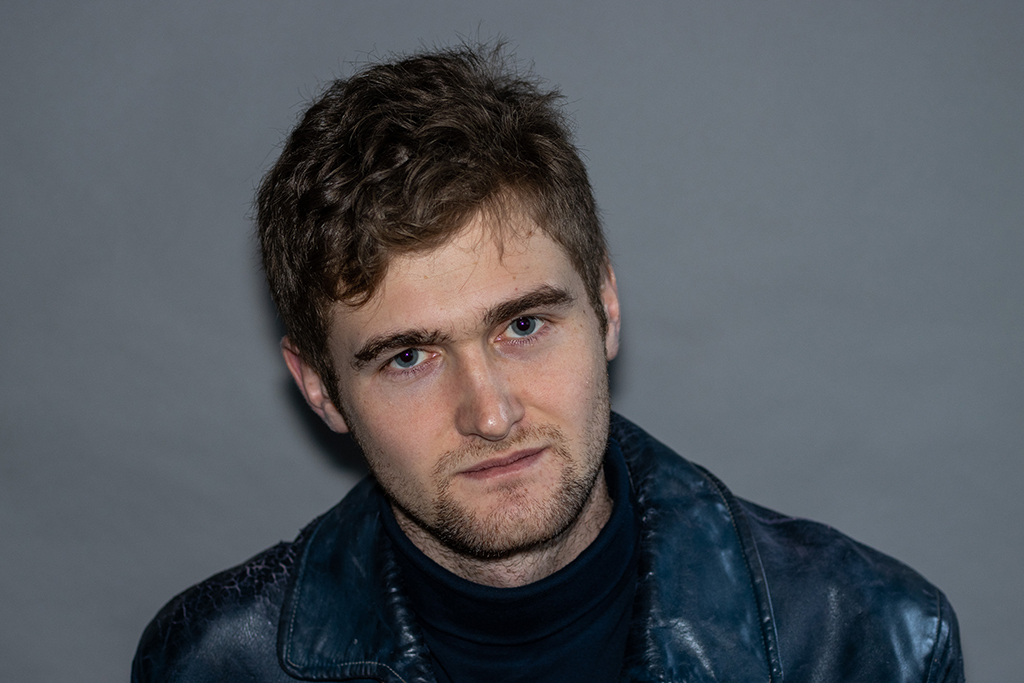
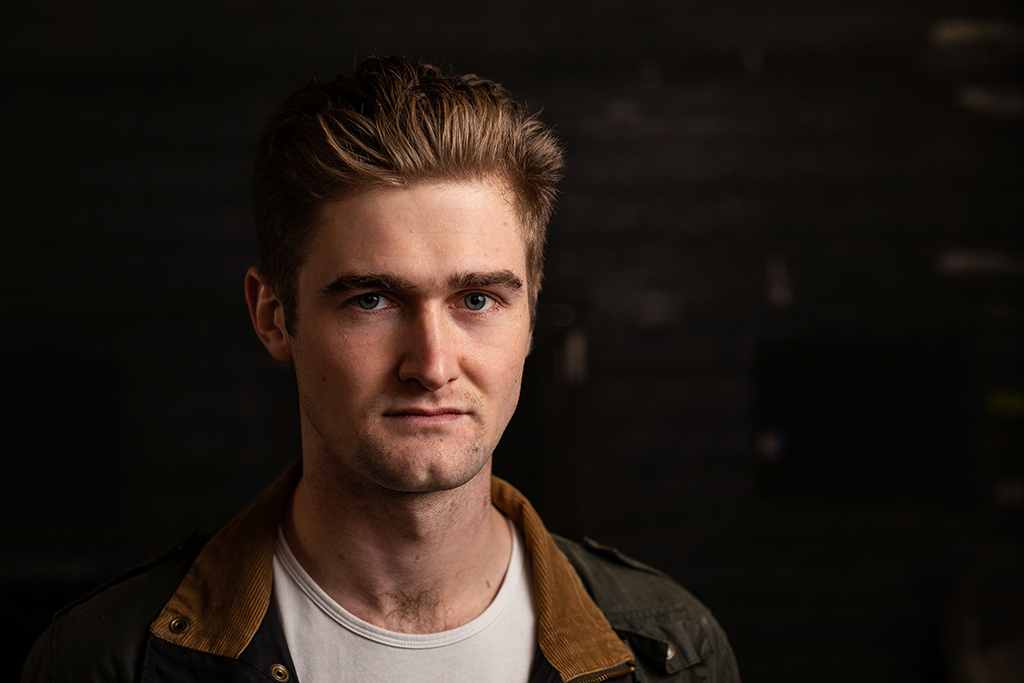
In the final frame I’ve added a soft gold reflector to open the shadows or give them more detail as they were too dense for my liking. The reflector has also warmed the skin tone on the shadow side of Max’s face.
Outdoor portrait
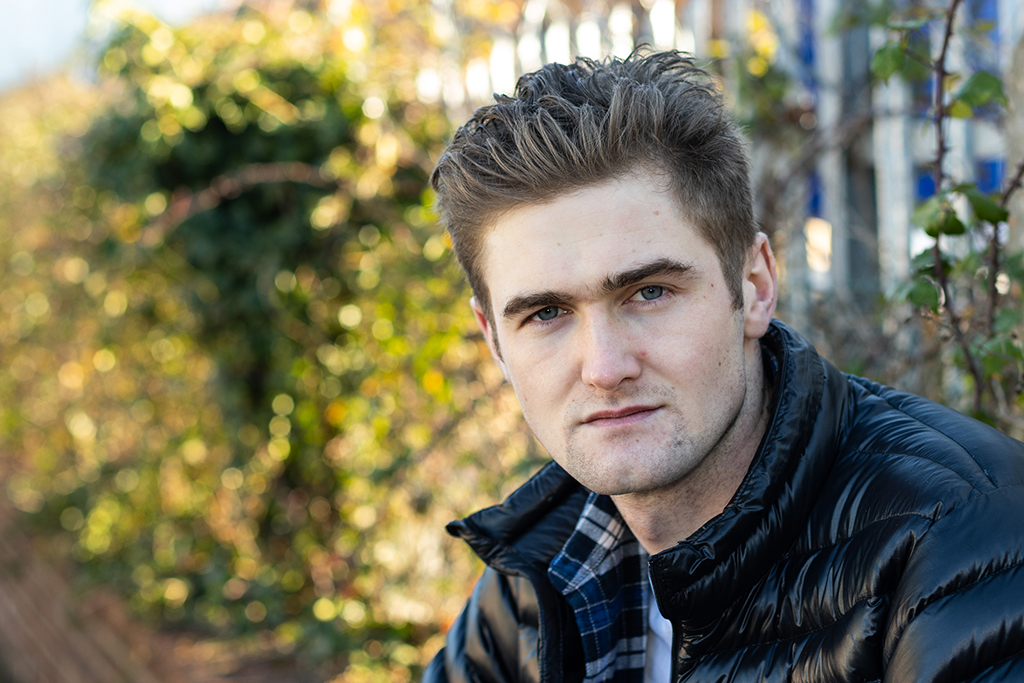
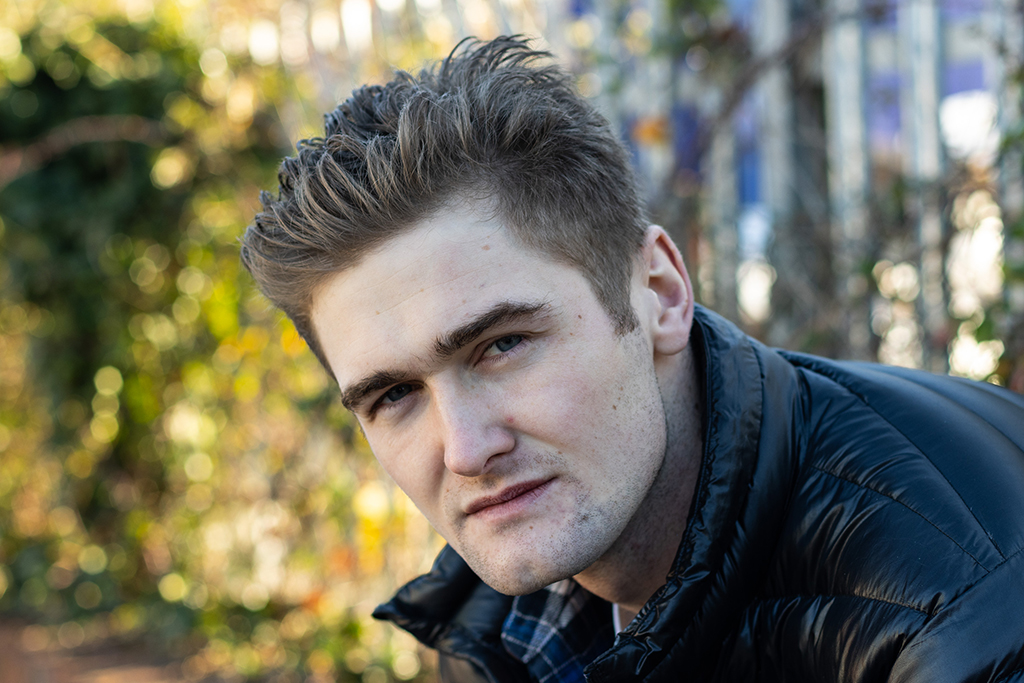
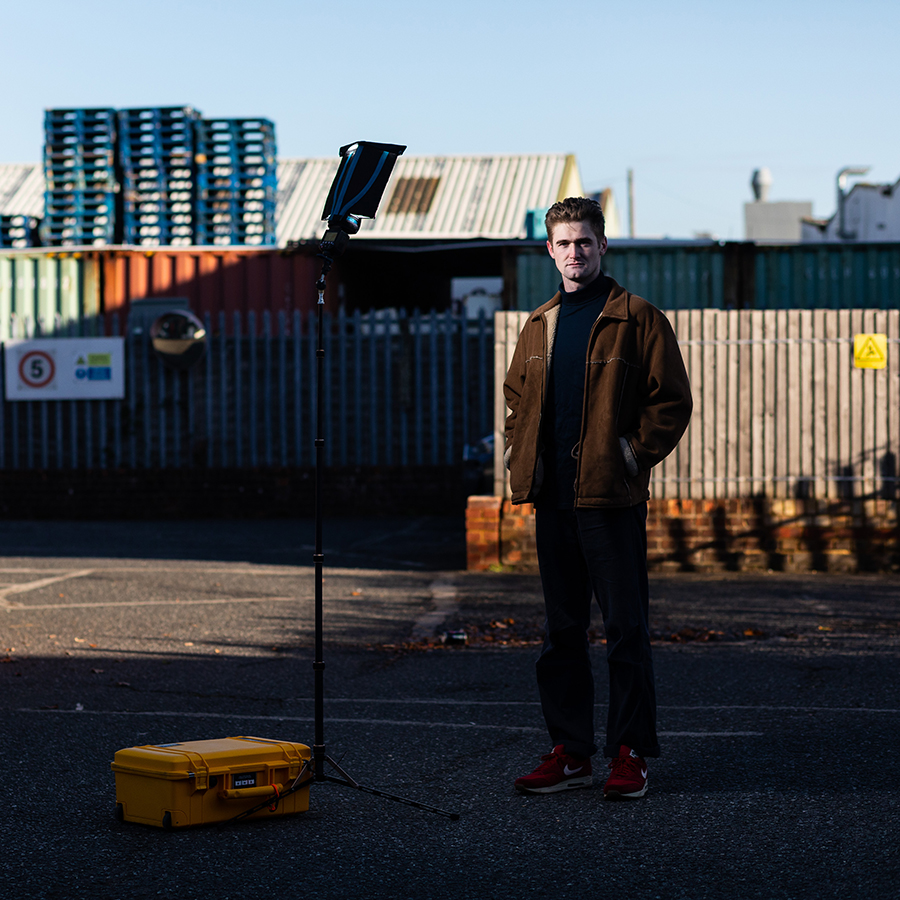
It’s also possible to create stunning outdoor portraits with a little thought and planning. Here I positioned Max in the shadow of a building to reduce the ambient light falling on him. The camera was set to Av, the Speedlite set to TTL and modified with a RogueFlashBender 3 Large Reflector with diffuser panel giving me a 25cm soft box.
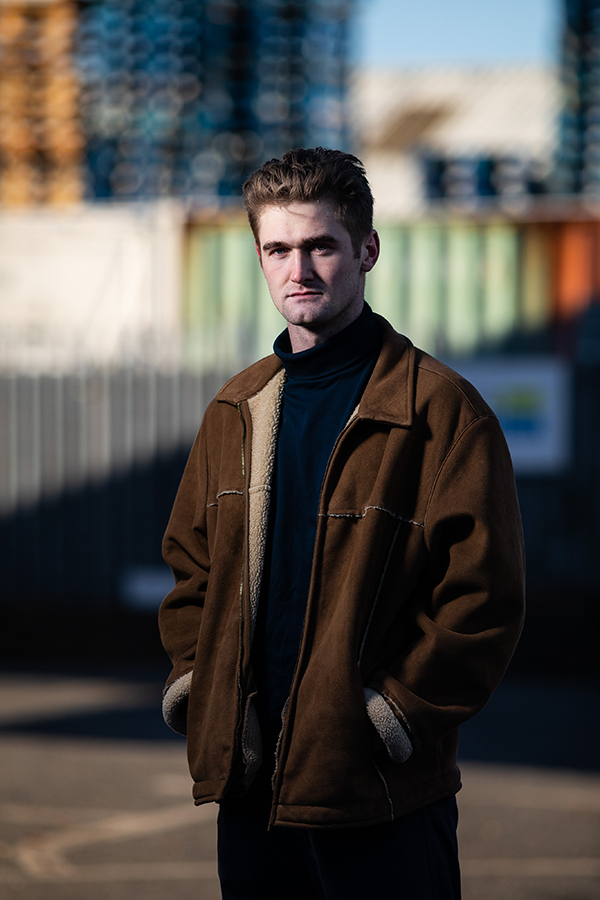
Using the small soft box meant that Max was lit only to his waist. If you have a Speedlite, don’t let it gather dust, take it out and use it. If you want to begin using off-camera flash, a Speedlite is a great introduction to flash photography, both indoors and outdoors.
Ian’s top tips for flash photography
Creative coloured gels
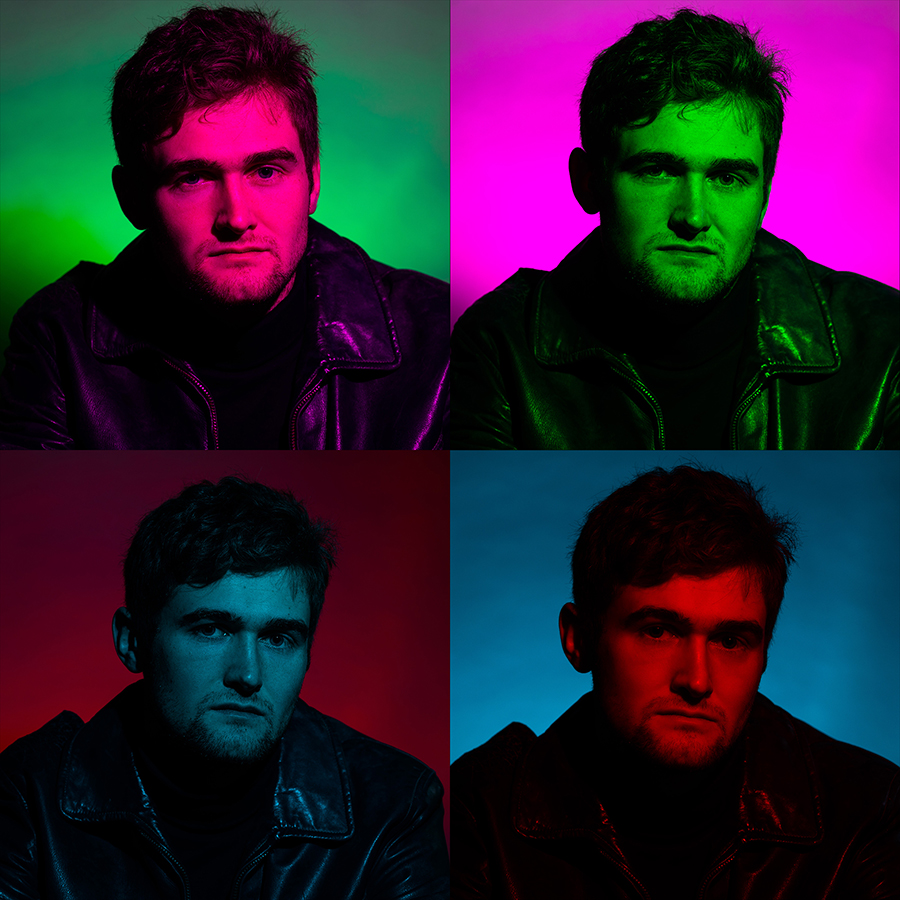
Coloured gels are an inexpensive accessory and great fun to experiment with. They can be used to add colour to shadows, as an accent light for portraits, the key light for added interest or a background light.
Flag the light
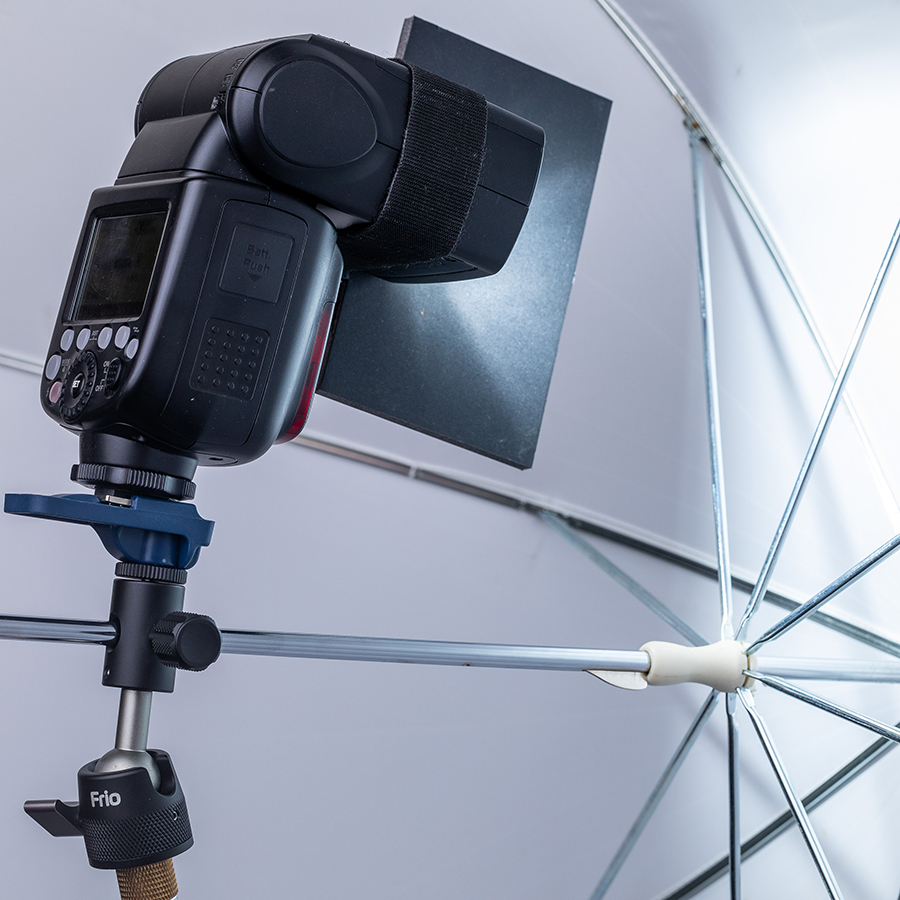
Light from umbrellas can be controlled by attaching a black board or flag to the Speedlite head. I use foam core board held in place with a strip of hook and loop fastener.
Get in close
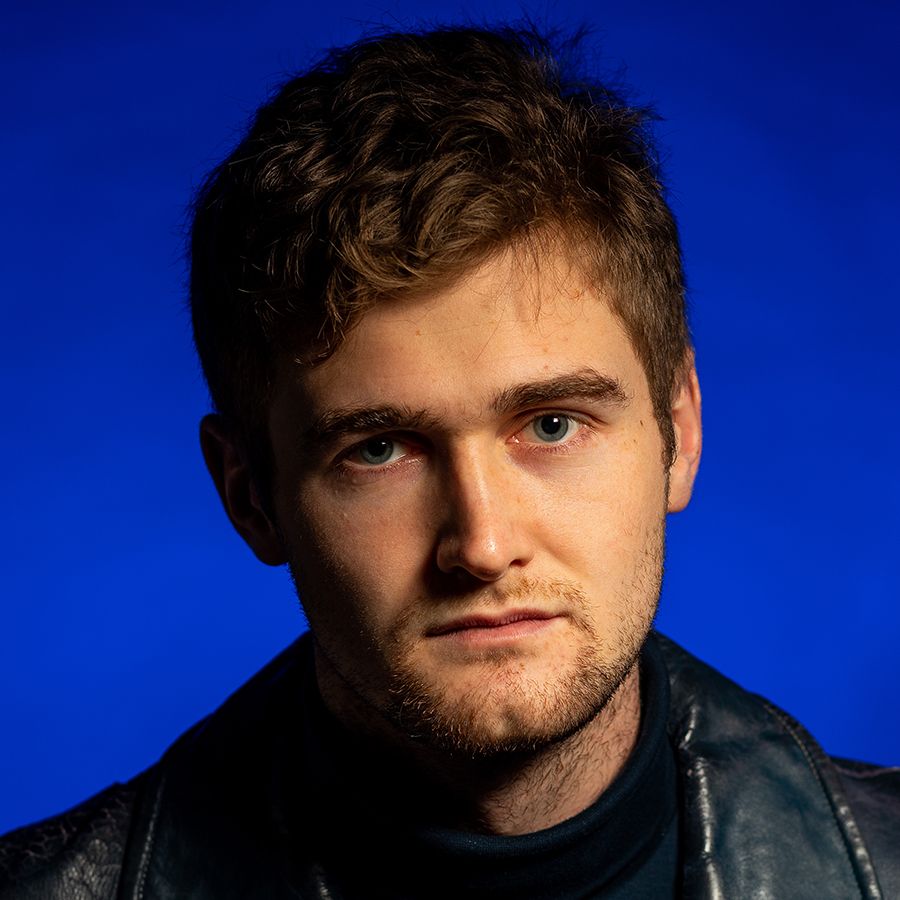
By moving the light closer to the subject the background becomes darker and the light more flattering when using light modifiers like soft boxes/umbrellas. The ideal distance for a light modifier from the model is equal to the longest dimension of the light modifier.
Stabilise the stand
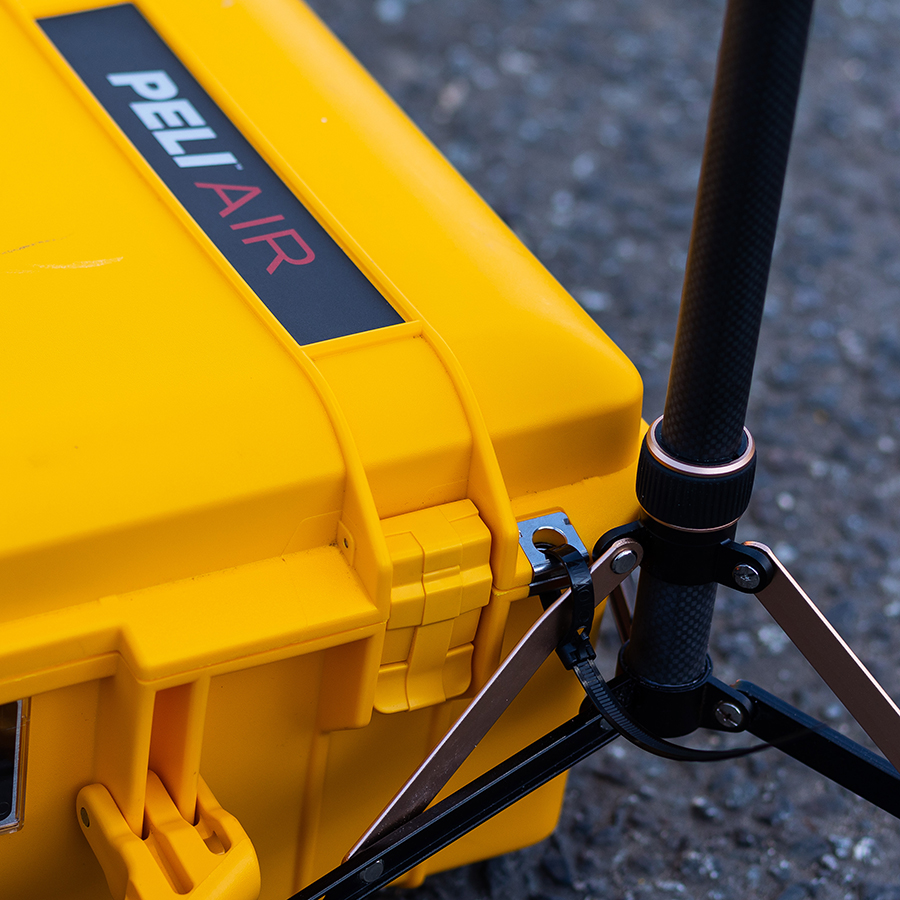
It’s good practice to ensure that your light stand is stable when you’re working alone. You can put the light stand riser through the handle of your camera bag. When using a hard case I attach the case to the light stand with reusable cable ties.
Use an umbrella swivel
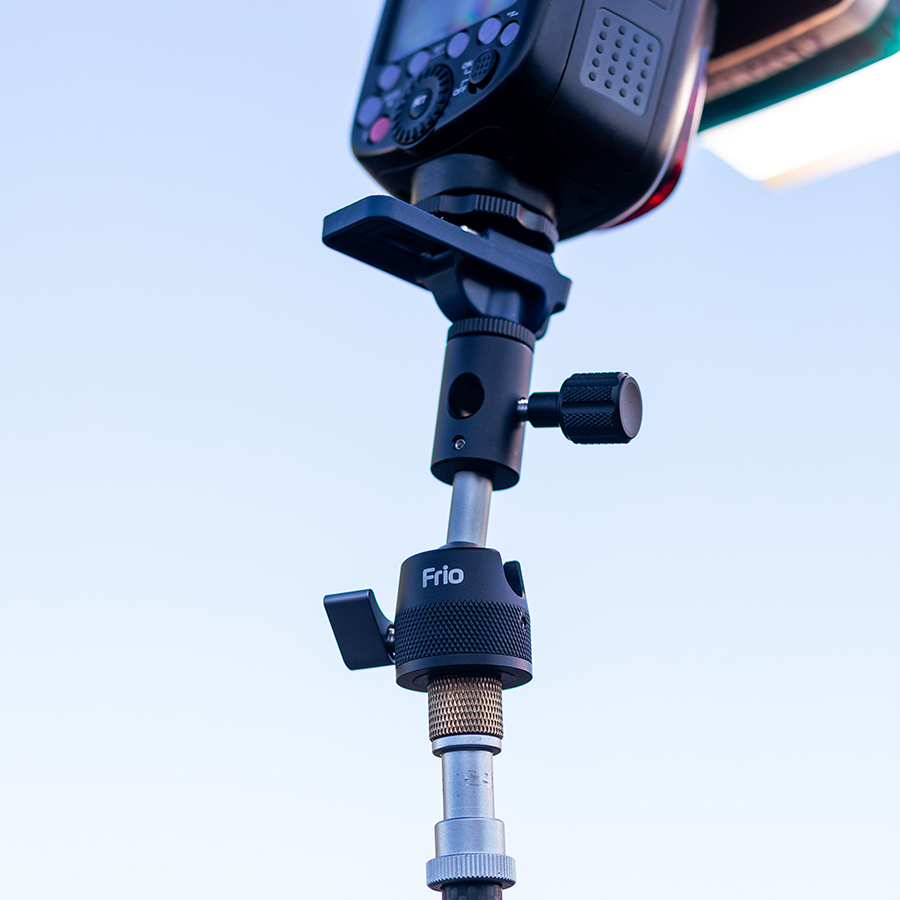
For any photographer who works with Speedlites off-camera, a means of mounting to a light stand is essential. Umbrella swivels are essential. Most only tilt, and some have a ball head which aids accurate positioning of the Speedlite.
Choice of background
With care, even unpromising locations can create usable backgrounds. The piles of pallets created the industrial dockside feel I wanted. I used a 200mm prime to isolate Max from the surrounding distractions and a wide aperture threw the background out of focus.
Kit list for flash photography
Pixapro Li-Ion580 MkII Speedlite
This compact hot shoe flash can be used on and off camera with a wireless trigger. It has TTL auto exposure linked to your camera exposure meter, manual setting for ultimate control and a multi-flash function for creating stroboscopic images.
Rogue FlashBender 3 Large Reflector
These reflectors fold flat, so slip easily into a camera bag. With the addition of a diffusion panel you have a small soft box. Smaller soft boxes are ideal when working outdoors in windy conditions as they have a smaller surface area than umbrellas.
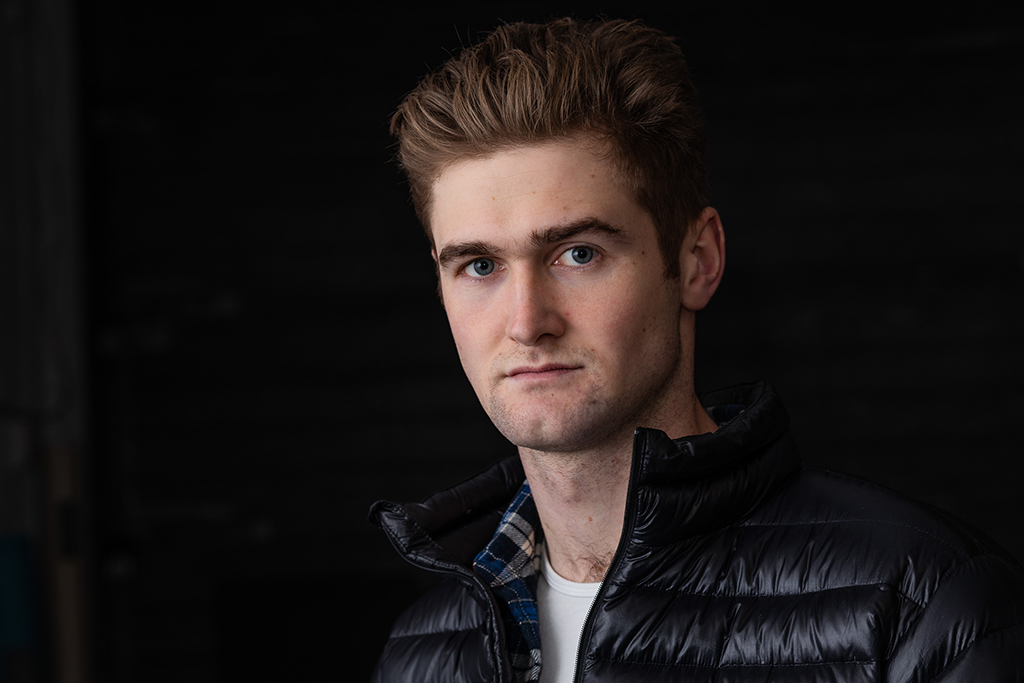
Nam Grip LS-255C Carbon Fibre Light Stand
Weighing 500g this stand is ideal for mounting your Speedlite. It extends to 220cm and closes to 48cm. Where weight and bulk are an issue, it’s possible to carry a single Speedlite kit weighing around 1,500g.
White Translucent Shoot – Through Umbrella
One of the first light modifiers for anyone who works with Speedlites or other flashes. Available in sizes from 80cm to 200cm. Some fold down small enough to fit inside a camera bag, making them ideal for photographers on the move.
Related articles
Essential guide to using flash
How to use flash on location
Essential guide to off-camera flash
Best flashgun soft boxes
Further reading for beginners:
- Beginners guide to different camera types.
- Beginners guide to different lens types.
- Beginners guide to using a camera taking photos.
- Beginners guide to Exposure, aperture, shutter, ISO, and metering.
- Understanding white balance settings and colour
- 10 essential cameras accessories for beginners
- Beginners guide to the Art of photography and composition
- Beginners guide to Photoshop Elements and editing photos
- Beginners guide to Portrait Photography
- Beginners guide to Macro Photography
- Beginners guide to Street Photography
- Beginners guide to Landscape Photography
- How to shoot Action and Sports Photography
- How to shoot wildlife photography
- Raw vs JPEG – Pros and cons
- How to create stunning black and white images
- How to photograph events and music
- Pet photography – how to photograph pets

