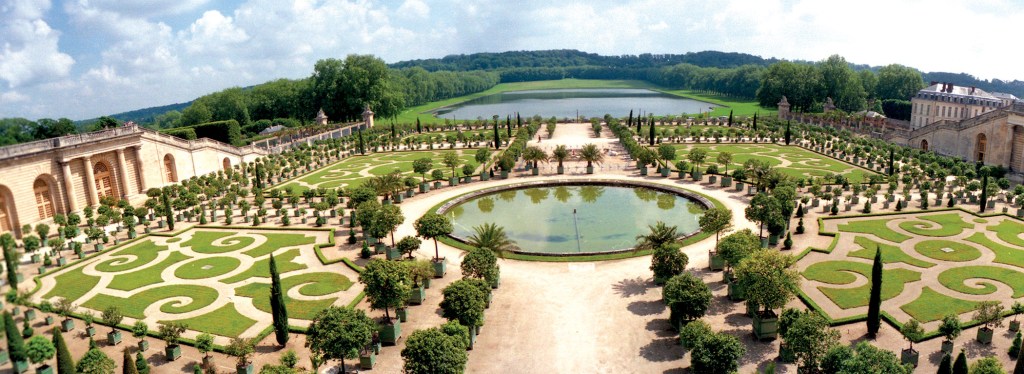
If you have ever switched your smartphone camera to Panorama mode and swept it across a scene to produce a super-wide panoramic picture of the view before you, it might come as a surprise to learn that you are using a technique that goes back even beyond the very earliest days of film photography. The difference is that originally it was the lens that moved, not the camera.
This is the world of swing-lens cameras, a style that lasted for more than 150 years. Some of these cameras have fascinating histories, making them of interest to collectors. Others can still be found and easily operated today, making them of equal interest to users.
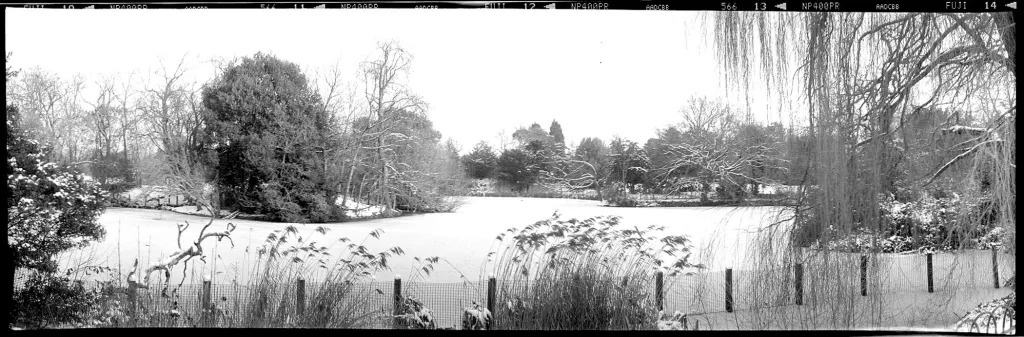
The principle is simple. The camera lens is positioned at the front of a short compartment that extends back into the body. When taking the picture, the camera is aimed straight ahead as usual, but the lens points to one side. As exposure is activated, the lens swings in an arc and, as it moves, it gradually builds up a panoramic image on film wrapped around a curved surface at the back of the body. While vintage swing-lens cameras that took now obsolete film sizes are difficult (though not impossible) to use today, models for 35mm and 120 roll film sizes are out there on the second-hand market for the panoramic enthusiast. But first…
A little history
In 1843, just four years after the announcement of the daguerreotype process, the earliest practical method of photography, Austrian pharmacist Josef Puchberger and optician Wenzel Prokesch were the first to patent a swing-lens camera. They called it the Ellipsen-Daguerreotype, but no evidence exists that the camera was ever made. The following year, Italian-French photographer, engraver and inventor Frédéric von Martens came up with his own version which he called the Megaskop. That one was commercially produced, and has therefore gone down in history as the first panoramic camera.
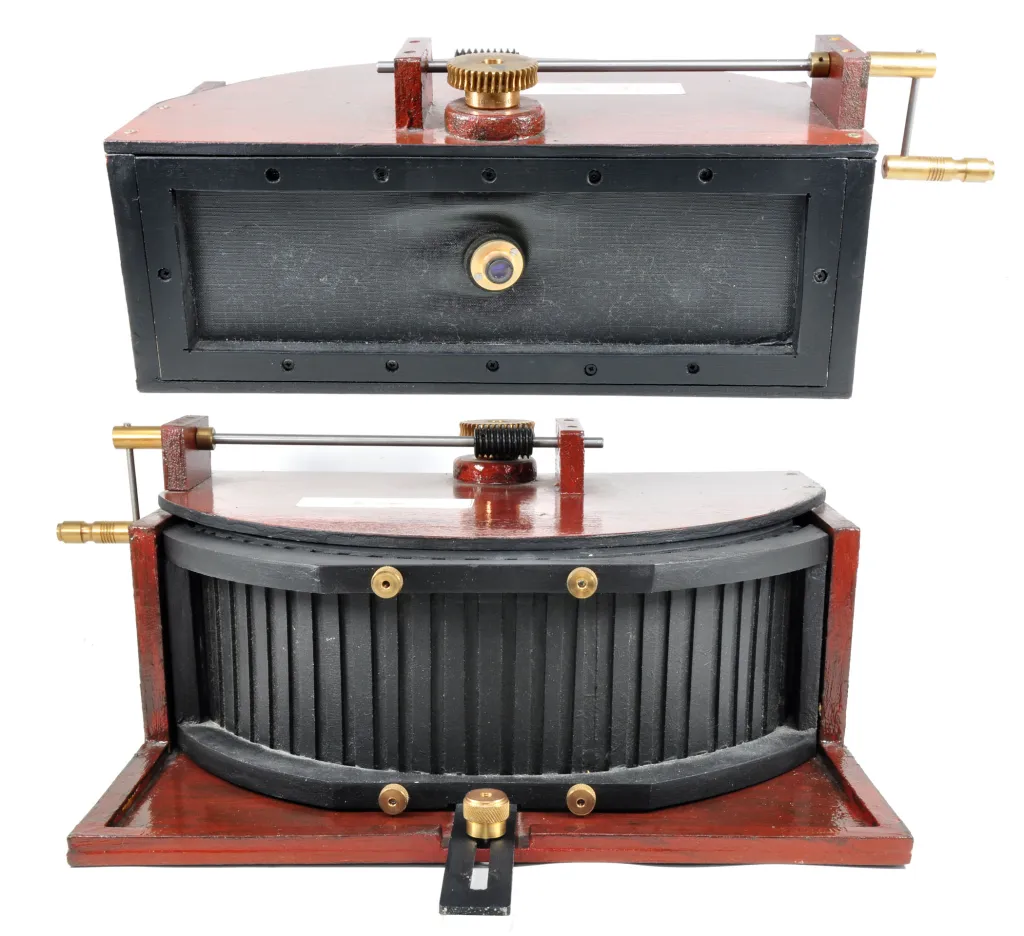
Whereas the Puchberger and Prokesch patent showed a fairly complex mechanism, the Martens version was very basic. It comprised a wooden box with a swivelling lens and curved back. Because daguerreotypes were made on flexible sheets of silver-plated copper they could be bent to fit around the curve where they were held in place by clamps. The lens, mounted in the centre of a flexible material stretched across the front of the body, was mounted on a vertical shaft that protruded from the top, culminating in a gearwheel which mated with a worm-wheel gear at right angles on a spindle running across the top with a handle on the end. Turning the handle swung the lens on its axis. Exposure depended on how slow or fast the handle was turned and the lens therefore moved across the daguerreotype plate. The image size was 4½x15in.
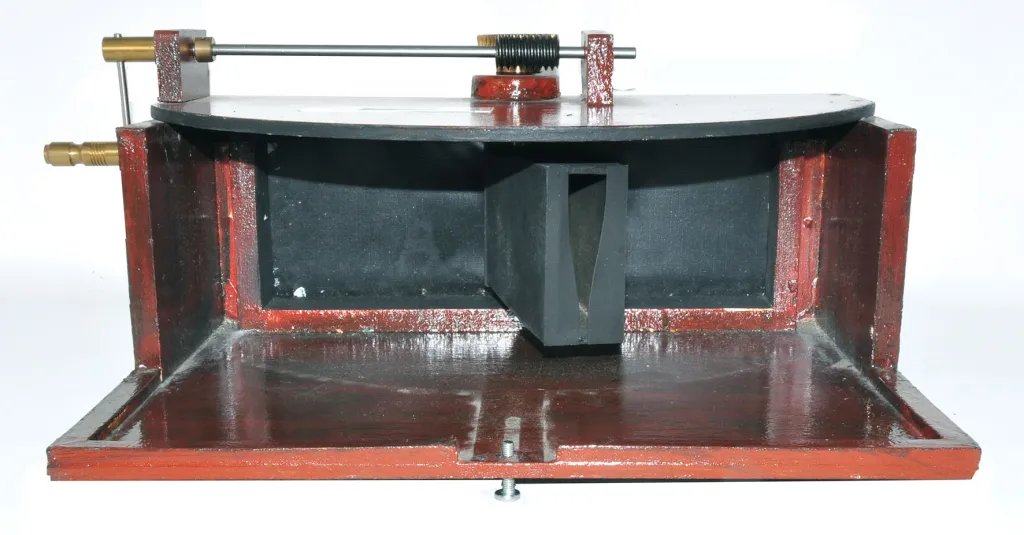
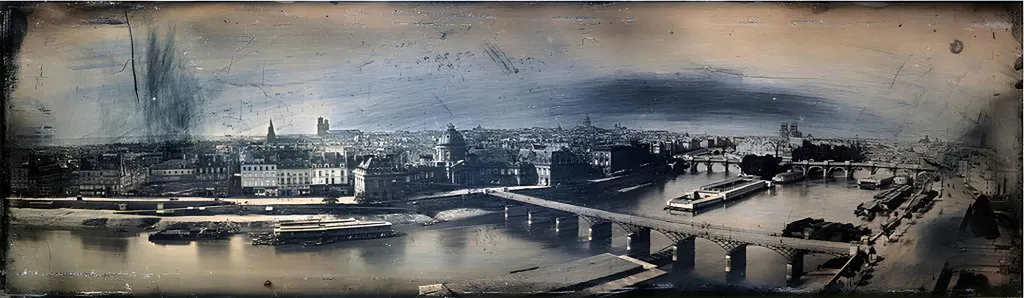
As photography advanced, swing-lens cameras became less popular for one good reason: metal plates from the daguerreotype process could be bent in a curve; glass plates which soon followed were rigid. So swing-lens cameras did not become truly viable until the advent of flexible film, first seen in a camera called The Kodak in 1888.
American swing-lens cameras
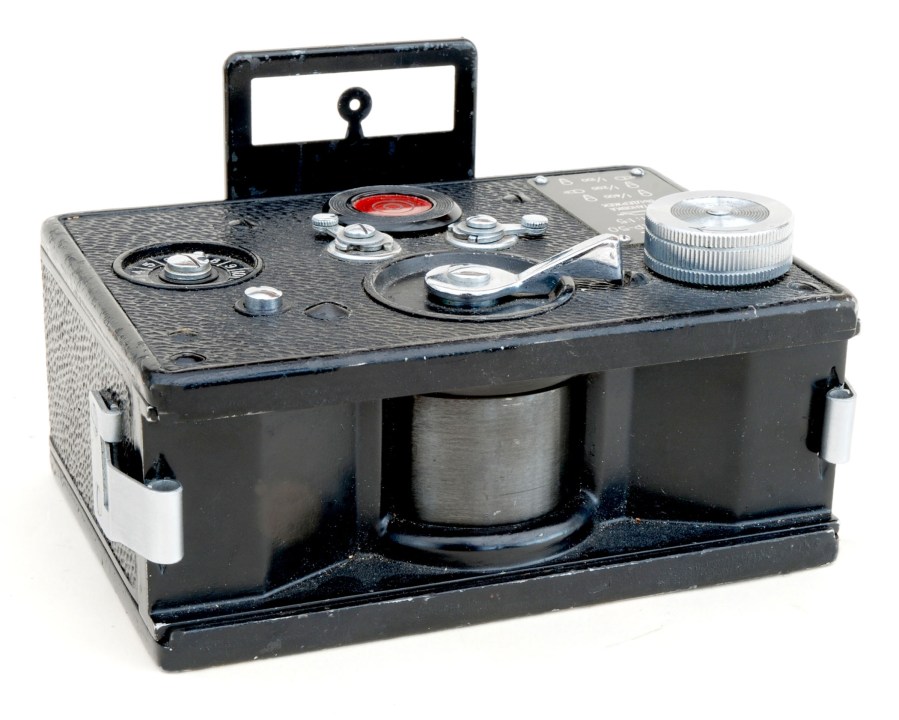
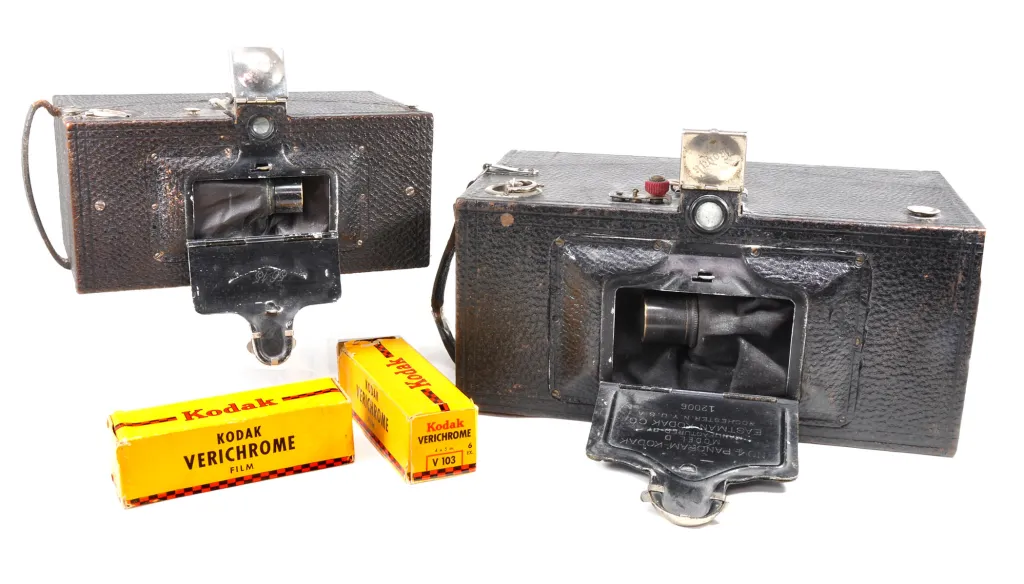
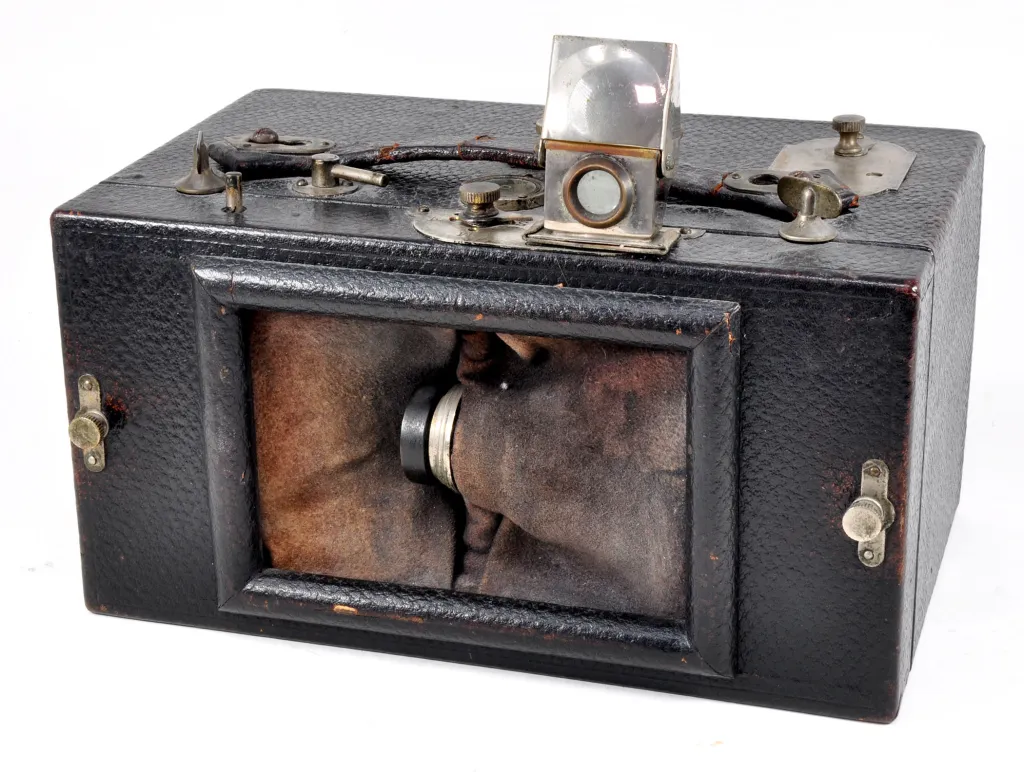
In 1899, Kodak introduced the No.1 Panoram swing-lens camera. It took the shape of an oblong box inside of which the film was wound around a curved surface. The lens was held in a kind of leather bag that allowed it to swing in alternate directions each time the shutter button was pressed. Its movement was tensioned by a rotating lever on the top of the body, while a viewfinder reflected its image onto a magnifier similar to those found on folding cameras of the day, and a spirit level on top of the body helped keep the camera level during exposure. Film was initially 105 size, but after 1901 many were adapted, and can still be found today, to use the more common 120 film. The No.1 model took pictures 2¼x7in. Kodak also produced the No.3A that shot 3¼x10½in images on 122 size film and the No.4 that shot 3½x12in on 103 size film. The speed of the lens swing on Panoram cameras allowed only one shutter speed of around 1/30-1/50sec.
In 1907, the Multiscope & Film Company introduced the Al-Vista. It followed the usual swinging lens and curved film path style, but added a few extras over the Kodak cameras. The speed of the Al-Vista’s lens sweep, which controlled the shutter speed, was adjusted by vanes of different sizes attached to the internal spring-driven mechanism. The camera was also unusual among others of this type for offering different widths of image, according to the way a lever on the body top was set to control the sweep of the lens.
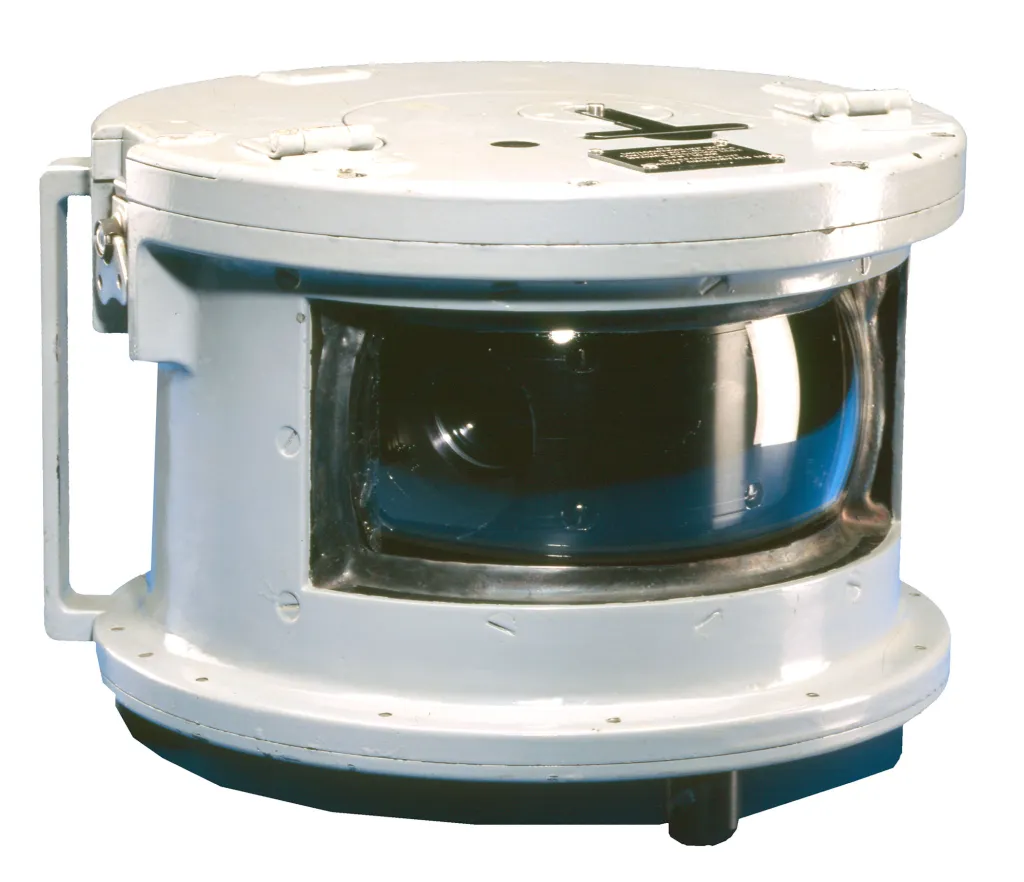
The most unusual swing-lens model to emerge from America was the Underwater Panoramic Camera produced by Photogrametry in 1950. Made of metal in the shape of a large drum, one third of its circumference was taken up by an expanse of convex glass in front of the lens. The camera took 70mm wide sprocketed film loaded into cassettes, and the f/2.4 lens had apertures down to f/16, adjusted by a water-tight T-shaped lever that lifted up from the top of the body. In use, a lever on the base was advanced in a semi-circular sweep, then returned to its original position to tension the shutter and wind the film. The shutter was released by a large lever on the side of the body and, as it was depressed, the lens swung first in one direction, then back again, the exposure being made on the first sweep. The camera was very heavy, but would have seemed lighter to use underwater.
Other than No.1 Panorams that have been converted for 120 film, these cameras are more for collectors than users. If you want to shoot swing-lens panoramas today, read on…
Swing-lens 35mm cameras
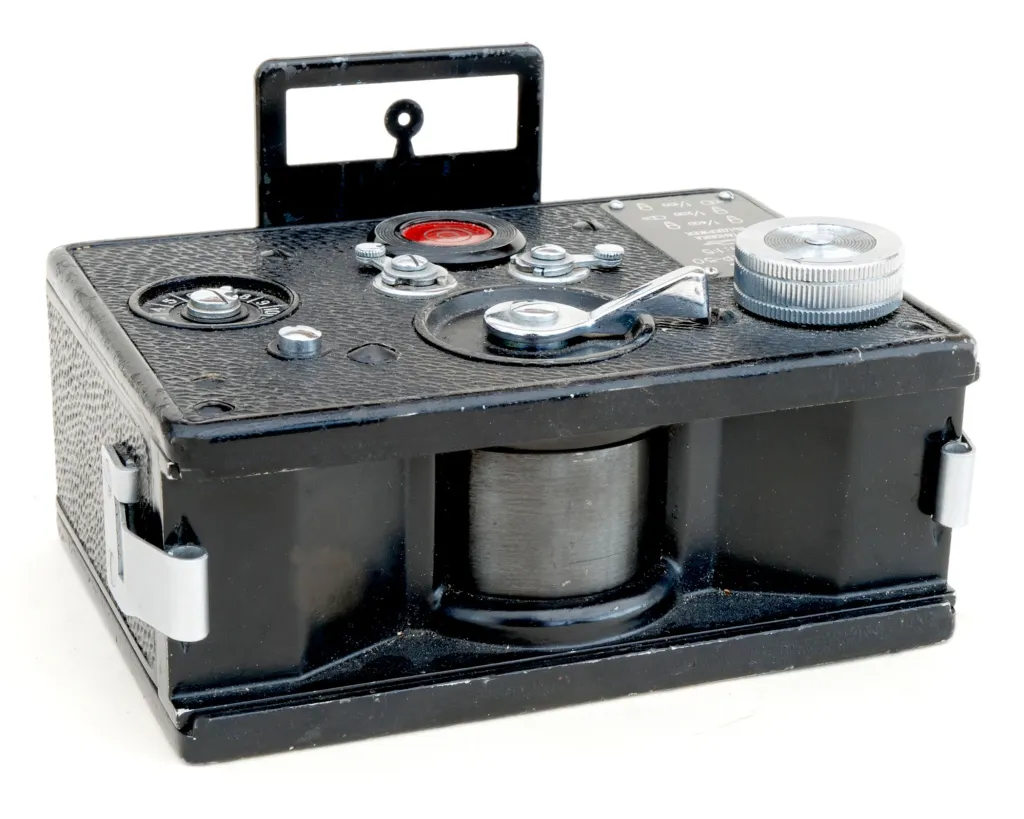
First up is the FT-2, made in 1958 by the Russian Krasnogorsk Mechanical Factory, famous as makers of Zenith 35mm single lens reflexes. Looking like a small, flat, black brick, the FT-2 takes 35mm film pre-loaded into its own cassettes. The wind knob uses the film’s sprocket holes to pull the film from one cassette and push it into the other. It shoots 12 pictures 24x105mm, equivalent to three 35mm frames side by side. The lens is fixed focus with a fixed f/5 aperture, but three shutter speeds are offered in an unusual way. On top of the body two small levers are turned through 90° to control the speed of the lens’s swing and therefore the shutter speed. When both point down, the speed is 1/400sec; left lever pointing down and right lever right pointing right gives 1/200sec; left lever pointing left and right lever pointing down gives 1/100sec.
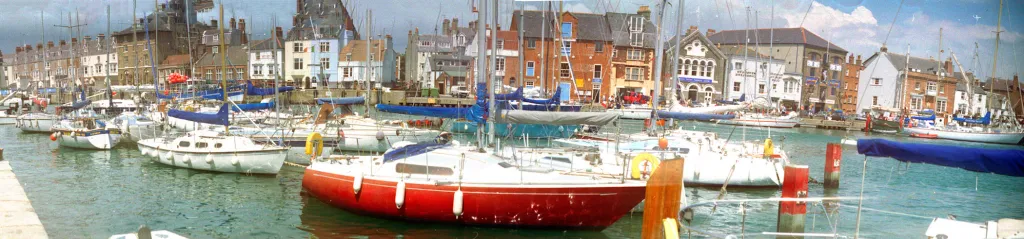
The FT-2 shoots super-wide panoramic pictures, but if buying one for use you need to ensure that it has both its cassettes and be prepared to load them yourself in a darkroom or changing bag. Other 35mm swing-lens cameras are much easier to load with standard cassettes, but only offer a moderate panoramic image the equivalent of about one and half conventional 35mm frames. Here are four to consider.
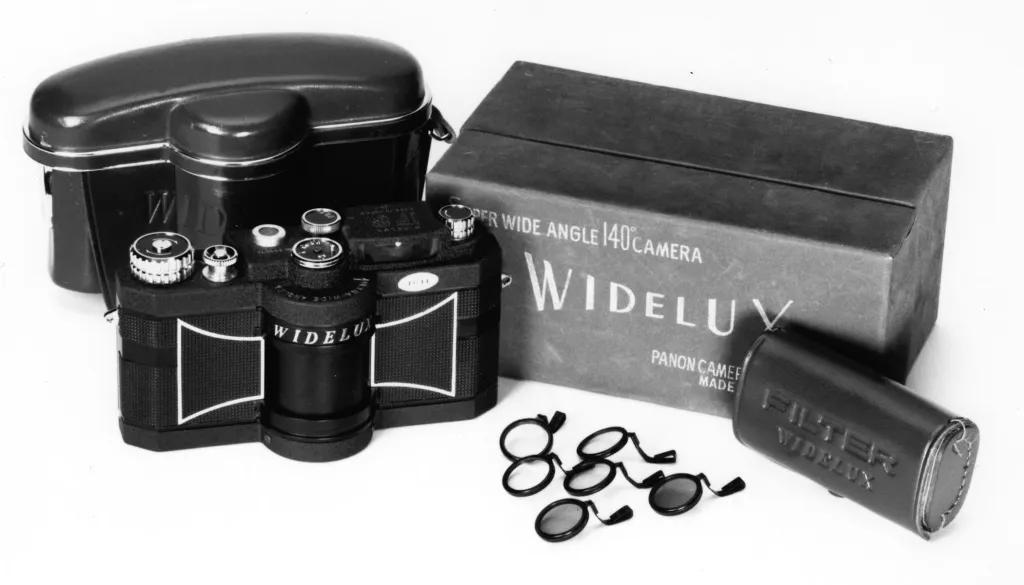
The Widelux was made in 1959 by the Japanese Panon Camera Company and looks like a conventional 35mm camera with a bulge in the centre. This contains a circular blind behind which a lens lines up with a slit. As the shutter release is pressed, the blind rotates and the lens scans the subject to produce a 24x59mm image. The Widelux offers shutter speeds of 1/15–1/250sec, and the lens is a Lux 26mm f/2.8. The company made several variations on the 35mm Widelux with only minor differences, as well as models for 120 roll film.
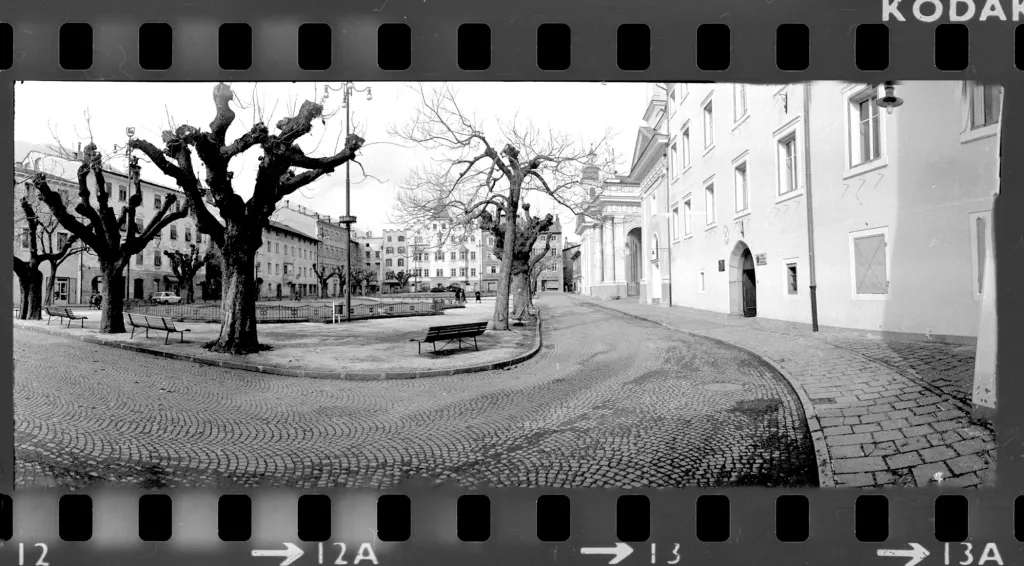
The Russian Horizont, made by FT-2 manufacturers Krasnogorsk in 1967 takes a similar design to the Widelux to produce 24x58mm images. Whereas the Widelux uses a built-in viewfinder, the Horizont’s extra wide-angle viewfinder is a separate accessory that slips into a holder on the front of the body. Shutter speeds are 1/30-1/125sec and the f/2.8 lens stops down to f/16. For use today make sure the camera comes with its viewfinder and also a small handgrip that screws into the tripod bush. Without this, if you hold the camera by gripping the body on each side of the lens in the conventional way, you could discover out-of-focus fingers on both sides the picture.
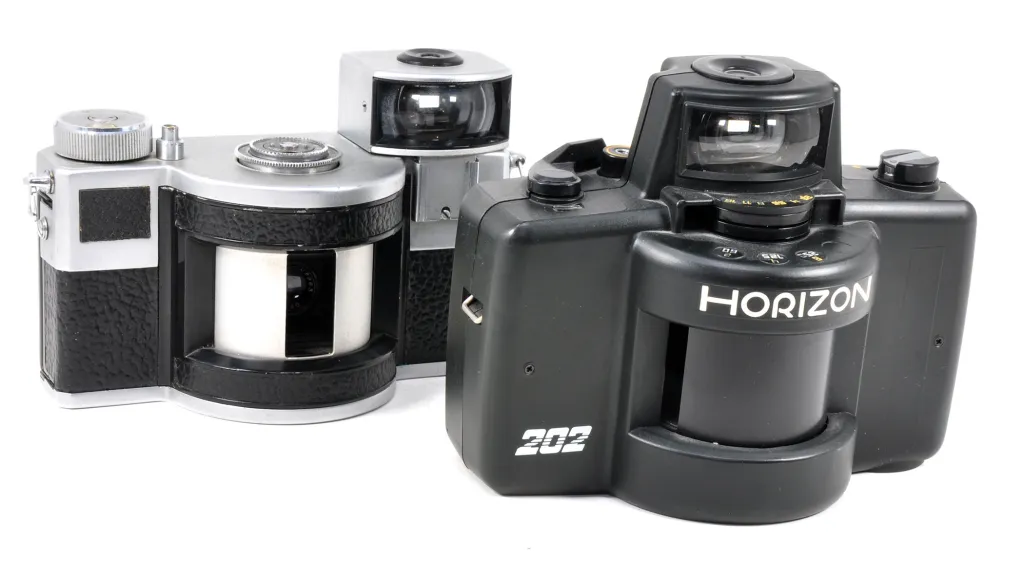
In 1989, Krasnogorsk updated the Horizont, made it from black injection-moulded plastic instead of metal and called it the Horizon 202. Like the Horizont, apertures run f/2.8-16, with film wind changed from knob to lever and a new range of shutter speeds of 1/2-1/250sec. These are set on a double scale: yellow for slow speeds, white for fast, selected according to whether a lever on the camera top is set against a yellow or a white dot. The Horizon 202 was one of many variants, some with only minor differences, produced until relatively recently.
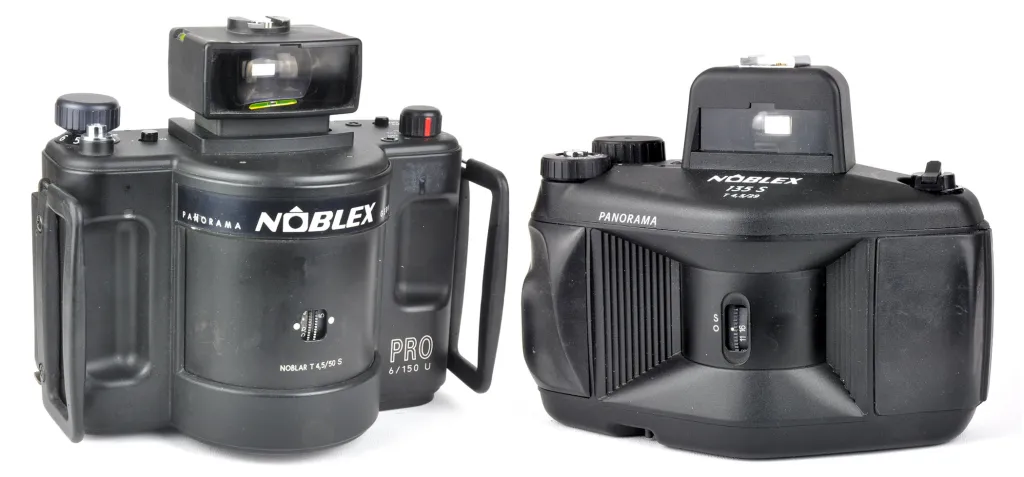
The latest and the best of the modern(ish) swing-lens cameras is the Noblex 135, made in Germany by Kamera Werk Dresden in 1992. Unlike its predecessors that relied on clockwork, the Noblex uses a battery-driven motor to turn the lens which is contained within a cylinder. This rotates 360° as the shutter is fired, but the movement begins before the start of the actual exposure. In this way, by the time the exposure begins, the mechanism has accelerated to its optimum speed and the resulting picture is more evenly exposed across its width. The Noblex 135 shoots 19 24x66mm images on 35mm film. A larger version, called the Pro 6/150, shoots six 5x12cm images on 120 film.
Swing-lens curiosities
Let’s move on to three oddities, one for historians only, a second that is usable but only with a little tenacity and a third which is surprisingly easy to use if you are prepared for a little exposure trial and error.
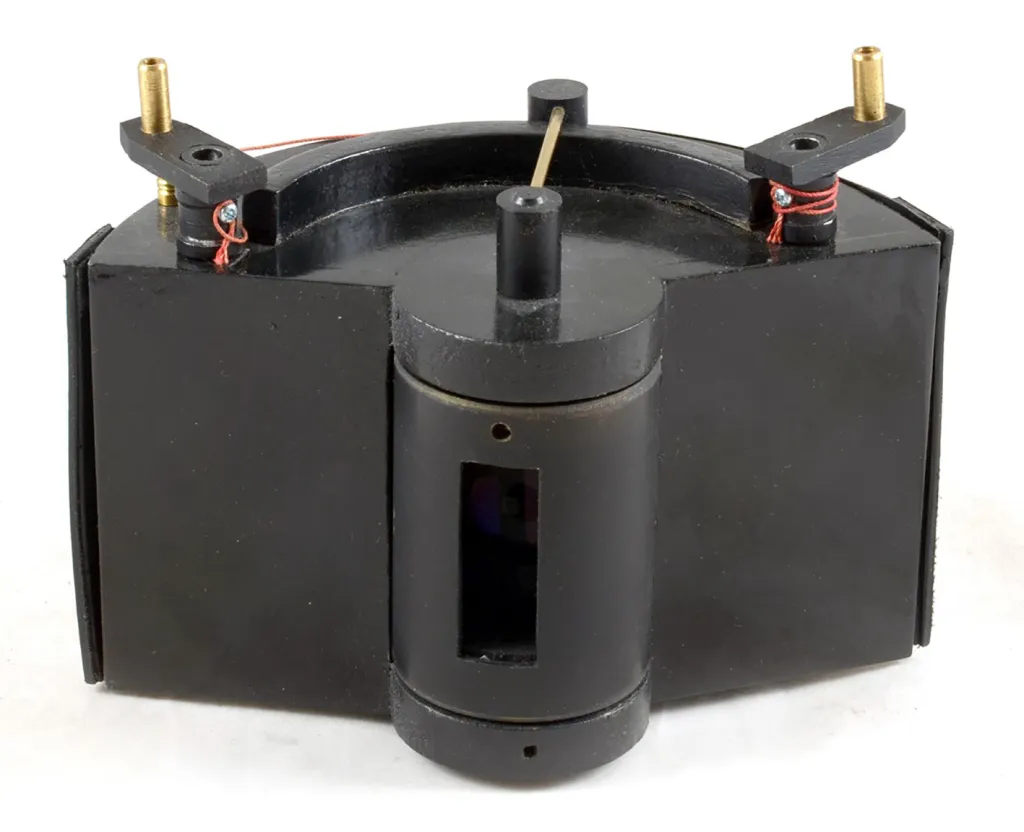
Number one is a swing-lens camera which, for reasons we’ll come to in a moment, is called the Anonymous. It came 20 years after the Martens camera was announced, but only as a plan published in an unsigned letter in The Photographic News, published in July 1865. In it, the writer described the usual swinging lens in front of a curved surface on which exposure was made on a sensitised flexible material called mica. The lens was rotated by turning a handle at one end of the body which pulled a thread attached to a lever that turned the lens. Another handle on the opposite end rotated the lens back in the opposite direction. In all probability, the camera never existed, but a replica, based on the originally published plan, was built at the Horsley Camera Works in around 2015 by specialist camera maker Mike Rignall, of whom more in a moment. This was illustrated in the book Photography at Length, published in 2019. The book, which is a masterclass on everything anyone ever wanted or needed to know about panoramic cameras, was written by panoramic expert Brian Polden who named the camera the Anonymous. The replica sold at auction earlier this year. Brian’s book is sadly out of print.
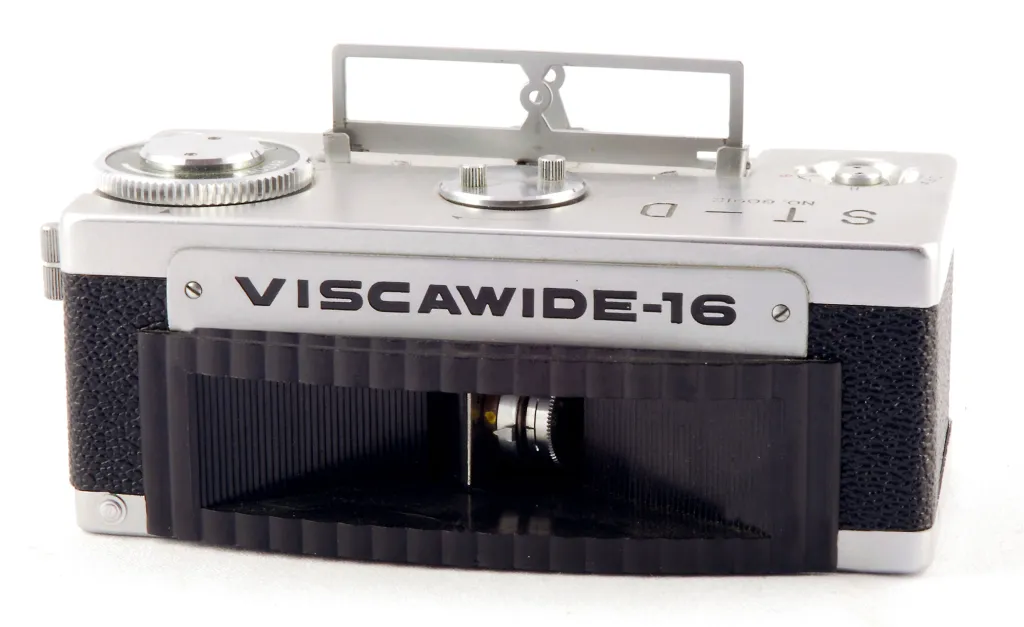
Number two is the Viscawide ST-D, made in 1961 by Taiyokoki Ltd in Japan, the only swing-lens subminature camera to use 16mm film. The Lausar 25mm f/3.5 lens offers apertures down to f/16, and two shutter speeds are designated only as ‘H’ for high and ‘S’ for slow to control the speed of the lens’s swing. The camera uses 16mm film in its own cassettes which, for the avid enthusiast, can be loaded with cine film still available from specialist dealers. Film is wound by a large knob, then the shutter tensioned by turning a wheel in the centre of the top plate and exposure made by a lever on the side. A panoramic viewfinder flips up from the top and a plate on the back of the body indicates exposures for 100 ASA (ISO in today’s parlance) film.
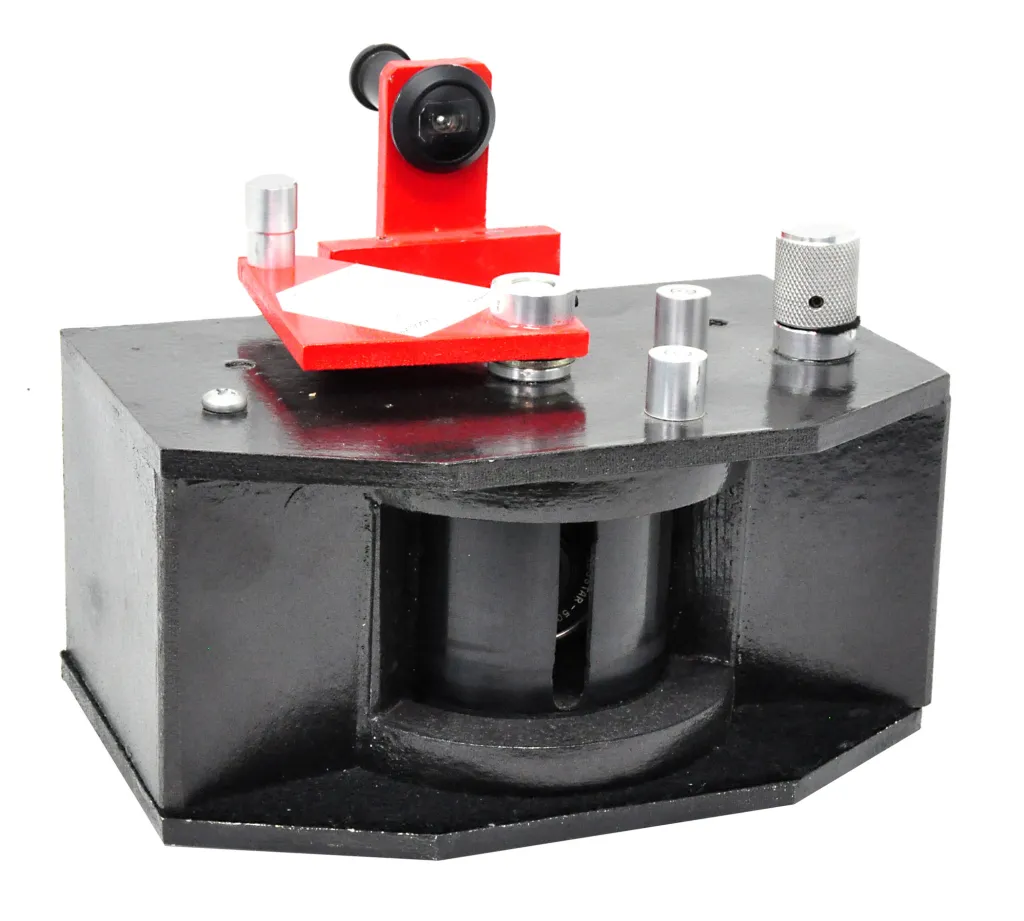
Number three is the work of the aforementioned Mike Rignall of the Horsley Camera Works. Back in 2002, after a professional life in electronics and a life-long love of photography, Mike set up a workshop to make cameras for special purposes, soon becoming known for his own designs of panoramic models. The Wideboy is his best known. It takes 120 roll film, producing eight exposures 90x43mm to a roll. A panoramic viewfinder, adapted from a door spy lens, is attached to the back. The 45mm f/16 fixed focus, fixed aperture lens is swung through its arc manually by use of a lever on top of the body, with exposure controlled by the speed of the swing. A one second swing is reputed to give 1/150sec, three seconds provides 1/50sec and six seconds offers 1/25sec.
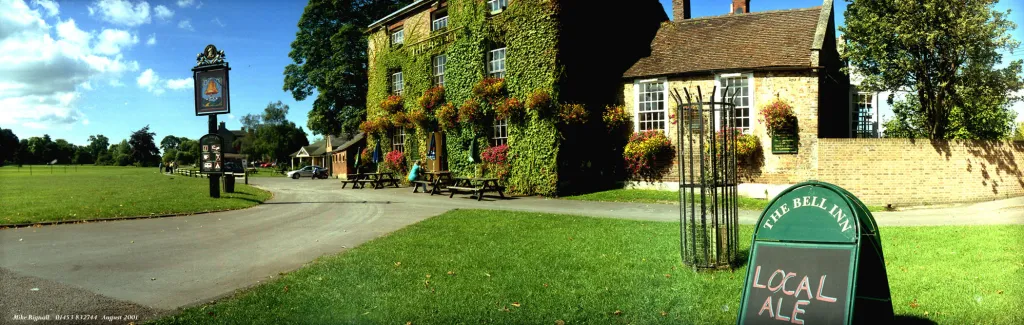
Six tips for using a swing-lens camera
- Be aware that swing-lens cameras produce pictures that appear to bulge forward in the centre. This is due to central objects being closer to the camera than those at the edges. The effect is less noticeable on distant subjects than on those closer to the lens. The trick is to shoot so that the bulge looks as natural as possible. Stay away from things like straight walls or fences across the foreground where the bulge will be most noticeable.
- Keep the camera level at all times. A spirit level built into many panoramic models helps here.
- Do not tilt the camera up or down.
- Avoid scenes where one side of the panorama is in bright sunlight and the other in deep shadow. Lightly overcast sunlight to give an overall softer light is a better bet.
- Use small apertures whenever possible to maintain a deep depth of field as peripheral areas will be further away from the camera than central objects.
- Panoramas don’t always have to be horizontal. Try shooting vertical panoramas on subjects like trees, towers or church steeples.
Doing it digitally
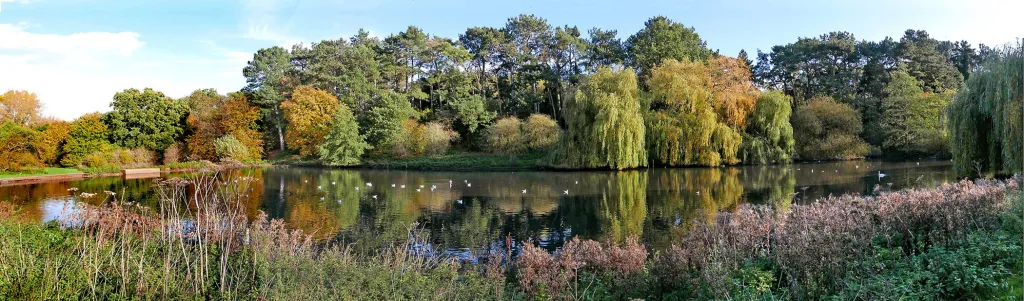
Swing-lens panoramic photography is still alive and well in the digital world. The difference is that instead of holding the camera still and letting the lens rotate as in film cameras, you now need to rotate the whole camera. But the theory and the results are much the same. There are two methods.
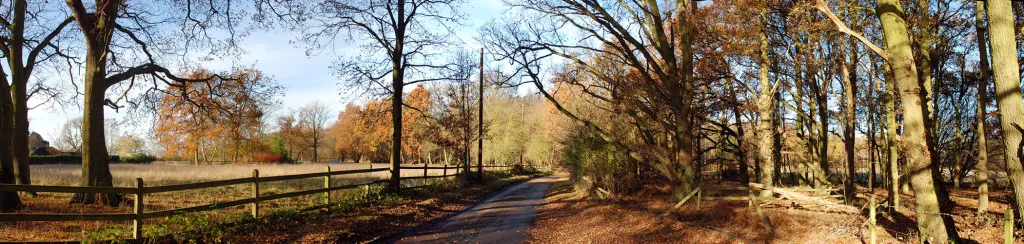
Using panoramic mode
If your digital camera or smartphone has a Panoramic mode, it’s easy to emulate early swing lens cameras. Facing what will be the centre of your picture’s composition, turn to the left. Use the viewfinder or LCD screen to frame the subject in the usual way, but also to check that the camera is absolutely level. Press the shutter release and immediately start to turn back, making a panoramic sweep through the central position and as far as you need to the right, then press the shutter release again. As you were turning, the camera was shooting a series of pictures side by side, which it automatically and immediately stitches together to make one long panorama.
Making a joiner
Select your panoramic view as before and, keeping your feet in the same place throughout, turn as far as is required to the left and take a picture. Then keep turning right, taking more pictures as you rotate your body and the camera. As you take each picture make a mental note of some object that occupies the extreme right of the frame, then keep that same object in the extreme left of the following frame. This will ensure that the pictures will overlap correctly without gaps. Load the picture sequence into Photoshop’s photomerge tool (file>automate>photomerge) and let the software do the rest. This might result in peculiar shapes top and bottom. Use the crop tool to select the panoramic image from the centre of the picture.
Related reading:
- Classic film cameras: this amazing spy camera is smaller than a pack of cigarettes and was a favourite of police and detective agencies
- These are the most important cameras of all time – 200 years of photography from 1826 to 2026
- Ignore the haters, film photography is alive and kicking – Analogue in the Age of Digital
Do you want to win some great prizes for your photography? Enter your photos in our International Amateur Photographer of the Year competition. Free entry for photographers aged 13-21.
Follow AP on Facebook, Instagram, YouTube, TikTok and Irys.