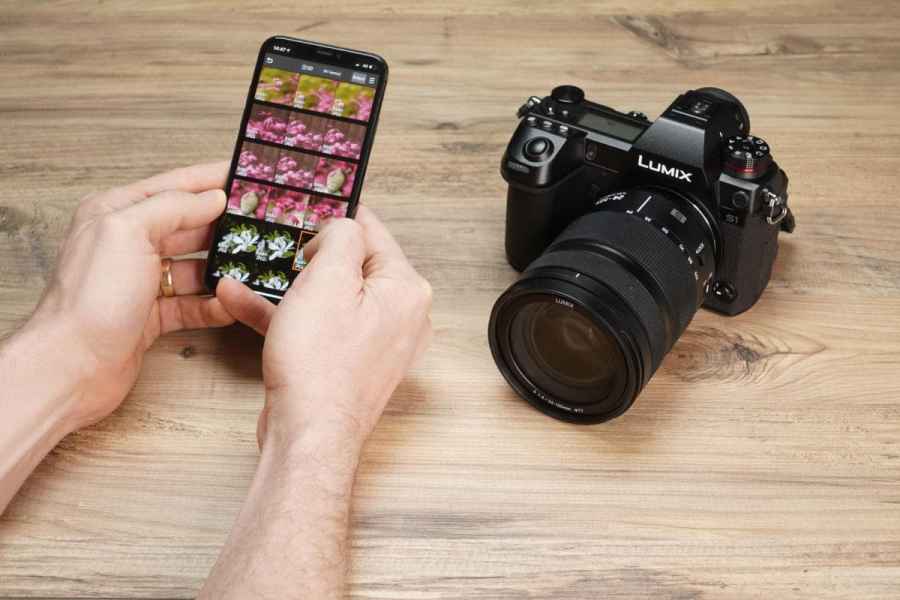
Like other manufacturers, Panasonic continues to update it’s smartphone app for its latest generation of mirrorless cameras. As per the earlier Panasonic Image App, Panasonic Lumix Sync allows for remote camera control and wireless image transfer between current cameras, such as the Lumix S5, S5 II, G9 II, and smartphones and tablets.
The list of cameras compatible with the app is increasing with every new camera: the S5 II and S5 IIx are now included, as well as other Lumix cameras such as the S1, S1R, S1H, S5, and BS1H fully supported. There’s the G series, too, with the G9 II, G100, G110, GH5 II, BGH1 and GH6 fully supported.
The Panasonic GH5, GH5S and G9 can take advantage of remote recording and image transfer, but are not fully compatible with all of the features. It is recommended to use the Panasonic Image App for those and other Lumix cameras supporting wireless connectivity.
Panasonic Lumix Sync is now the default app for all new Panasonic cameras, although I would expect support for the Panasonic Image App to continue for some time yet.
Panasonic Lumix Sync Connectivity
One of the reasons for a completely redesigned app is no doubt to take advantage of connectivity improvements in both cameras and smart devices. As is the standard nowadays, the Lumix Sync app takes advantage of a low energy Bluetooth connection between the smart device and camera.
The connection that is created allows the smart device to be able to pair quickly and stay connected where necessary for transferring small volumes of data, such as current time or GPS coordinates. When greater bandwidth is required, such as when using remote shooting or transferring images, the Bluetooth connection can then instruct the camera and smart device to connect via Wi-Fi.
For those who don’t want to connect via Bluetooth, there is the option to use a standard Wi-Fi connection, which can be set up manually using a hotspot and password. Alternatively for ease of use a QR Code can be displayed on the camera and captured on the smart device. I would recommend that setting up via Bluetooth is by far the more preferable option, as it will subsequently be faster to reconnect.
However, I did run into some issues when connecting a Panasonic Lumix S1 with an iPhone XS running iOS 13.3.1. Following the very simple and straightforward instructions given in the Lumix Sync app, it took me multiple attempts to connect the camera and phone over Wi-Fi.
The connection via Bluetooth was seamless and took a matter of seconds, however when it then switched to wanting a Wi-Fi connection, the process stalled to the point that it gave up and cancelled.
Having read some recent reviews of Lumix Sync on the Apple App Store it appears that this is not an isolated issue; other users have experienced similar connection problems when automatically shifting from Bluetooth to Wi-Fi. After around 10 minutes of trying to get beyond the Bluetooth connection I finally established a connection between my iPhone and the S1.
Depending on the camera you’re using, and the phone you’re using, your connection experience may vary, so don’t be put off by this, as we’ve got tips below on what to do if you have any problems connecting.
How to Connect a Panasonic S-series Camera to your phone using Panasonic LUMIX Sync
1. Download the Lumix Sync app
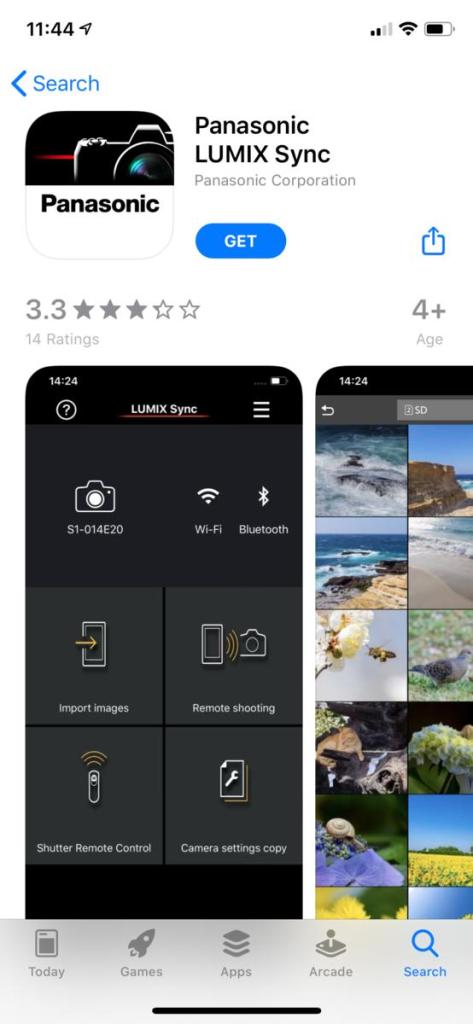
Download the Lumix Sync app from the Google Play or iOS App Store on your phone or tablet. Go into your mobile device settings and double check that you have Bluetooth and Wi-Fi turned on.
2. Open the app
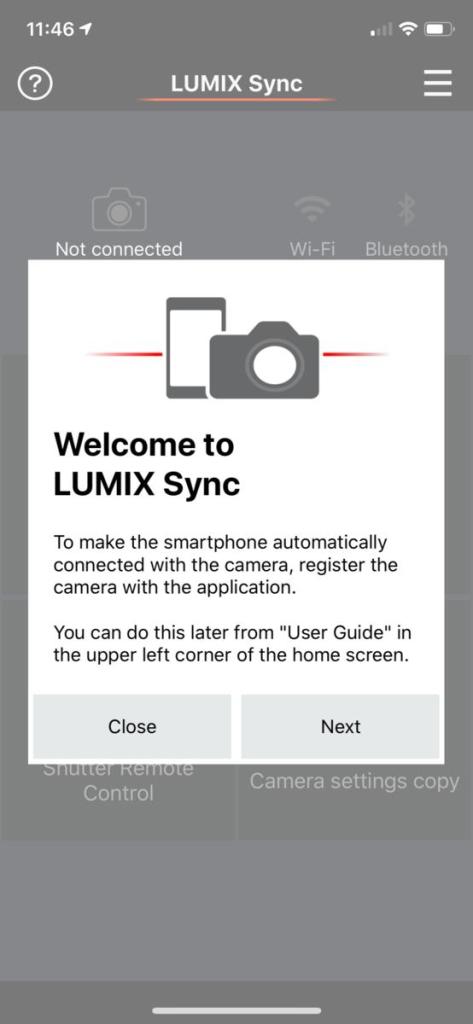
Next, click on the Lumix Sync app icon on the homescreen of your mobile device. Opening the app for the first time loads a guide that’ll explain the various steps and will walk you through the connection process.
3. Bluetooth menu
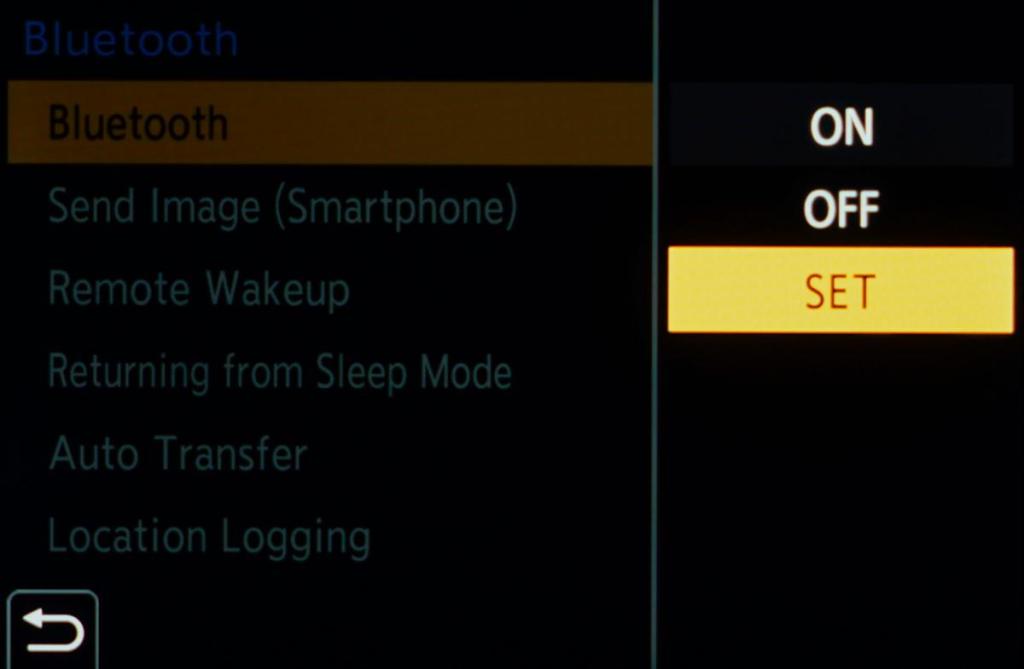
Press the Menu button on the camera and go to the Bluetooth Menu. Select Set and then Pairing and check the camera’s Device Name.
4. Select the camera
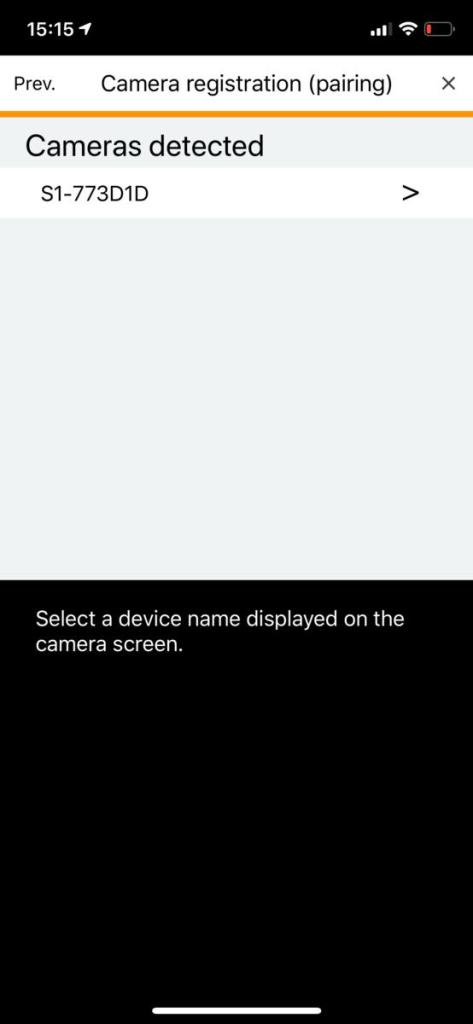
The Device Name should now be displayed in the app, underneath the ‘Cameras detected’ heading. Select it to start the Bluetooth connection.
5. Establish the connection
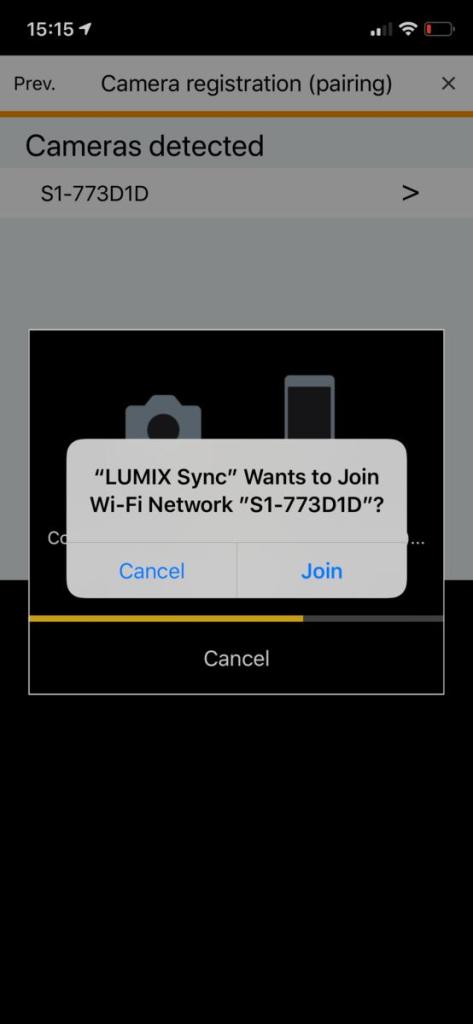
Once the Bluetooth connection has been established, the app and camera will attempt to connect via Wi-Fi. When prompted, simply click ‘Join’ to allow the connection to take place.
6. Successful connection
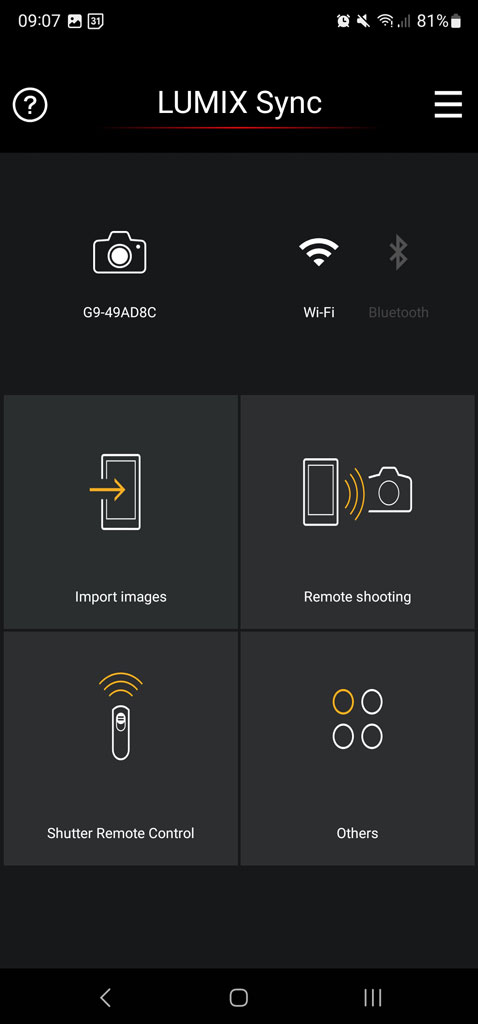
After a few moments the connection should be made and the app will alert you that the connection has been successful. You can now use all of the features of the app. The screenshot (above) shows the homescreen with its various different options.
Save camera settings
A useful feature found within the Lumix Sync app is the ability to save and transfer camera settings. This very simple-to-use mode transfers the current camera settings to a smartphone, where they are then saved. By default the settings are named after the camera used and then the date and time, but they can be renamed, making it easy to create your own custom settings.
For example you could create and save your own wildlife, street, landscape, portraits or sports settings and save them to the app. When you want to use them on the camera simply hit transfer and the settings will be sent and immediately activated for use.
Live View and remote shooting
Once the S1 and iPhone XS were registered with each other, connecting on subsequent occasions via Bluetooth took a matter of seconds. However, pressing the remote shooting button in the Lumix Sync app once again proved problematic in getting the Wi-Fi connection to pair successfully. The Bluetooth part worked fine – my iPhone asked if I wanted to turn Wi-Fi on and connect with the S1 – but then, like the initial set-up, the Wi-Fi connection hung for a minute or so before giving up.
Switching to a manual Wi-Fi connection often proved to be the better option. On the camera select Wi-Fi > Wi-Fi Function > New Connection, which switches on the camera’s Wi-Fi. Next, simply connect to this Wi-Fi hotspot in your phone settings. It should be noted that by default there is no password for the Wi-Fi, and whilst the chances of someone managing to connect to your camera are slim, setting up your own password is a good idea.
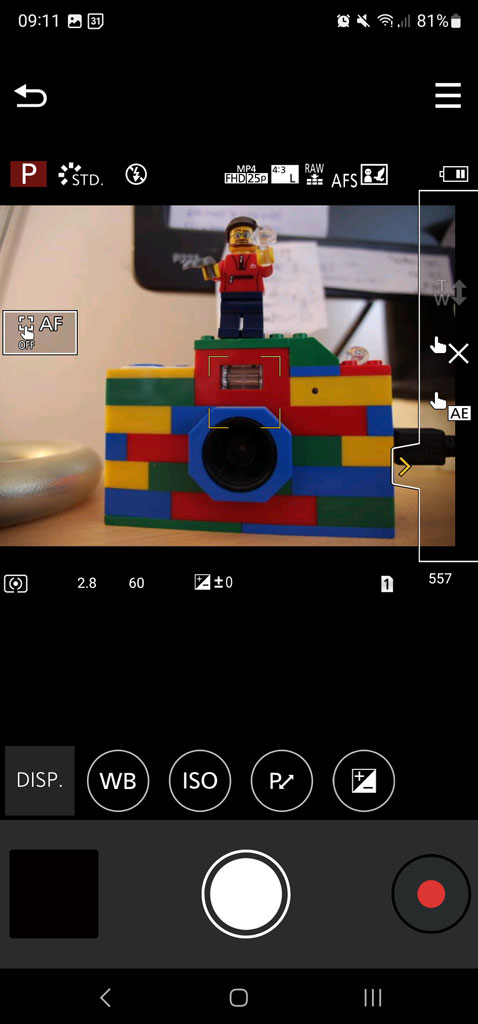
With the Wi-Fi connection now made I could open remote shooting in the app and begin shooting away. In use I found there was minimal lag between reality and what I was seeing on my smartphone’s screen.
Panasonic Lumix Sync offers some of the best remote shooting features we have come across so far. The layout of the app is clear and straightforward to understand, and you can even switch to a Quick Menu style display. There is a huge array of options to control your shooting; every exposure setting can be changed, as well as a whole host of other features, including Photo Style, Metering Mode, Aspect Ratio, Picture Quality, not forgetting the various High Resolution shooting modes.
To top off the excellent remote shooting experience, the shutter button is responsive. It fired the Panasonic Lumix S1 that I used for testing with virtually no discernible lag.
Autofocus
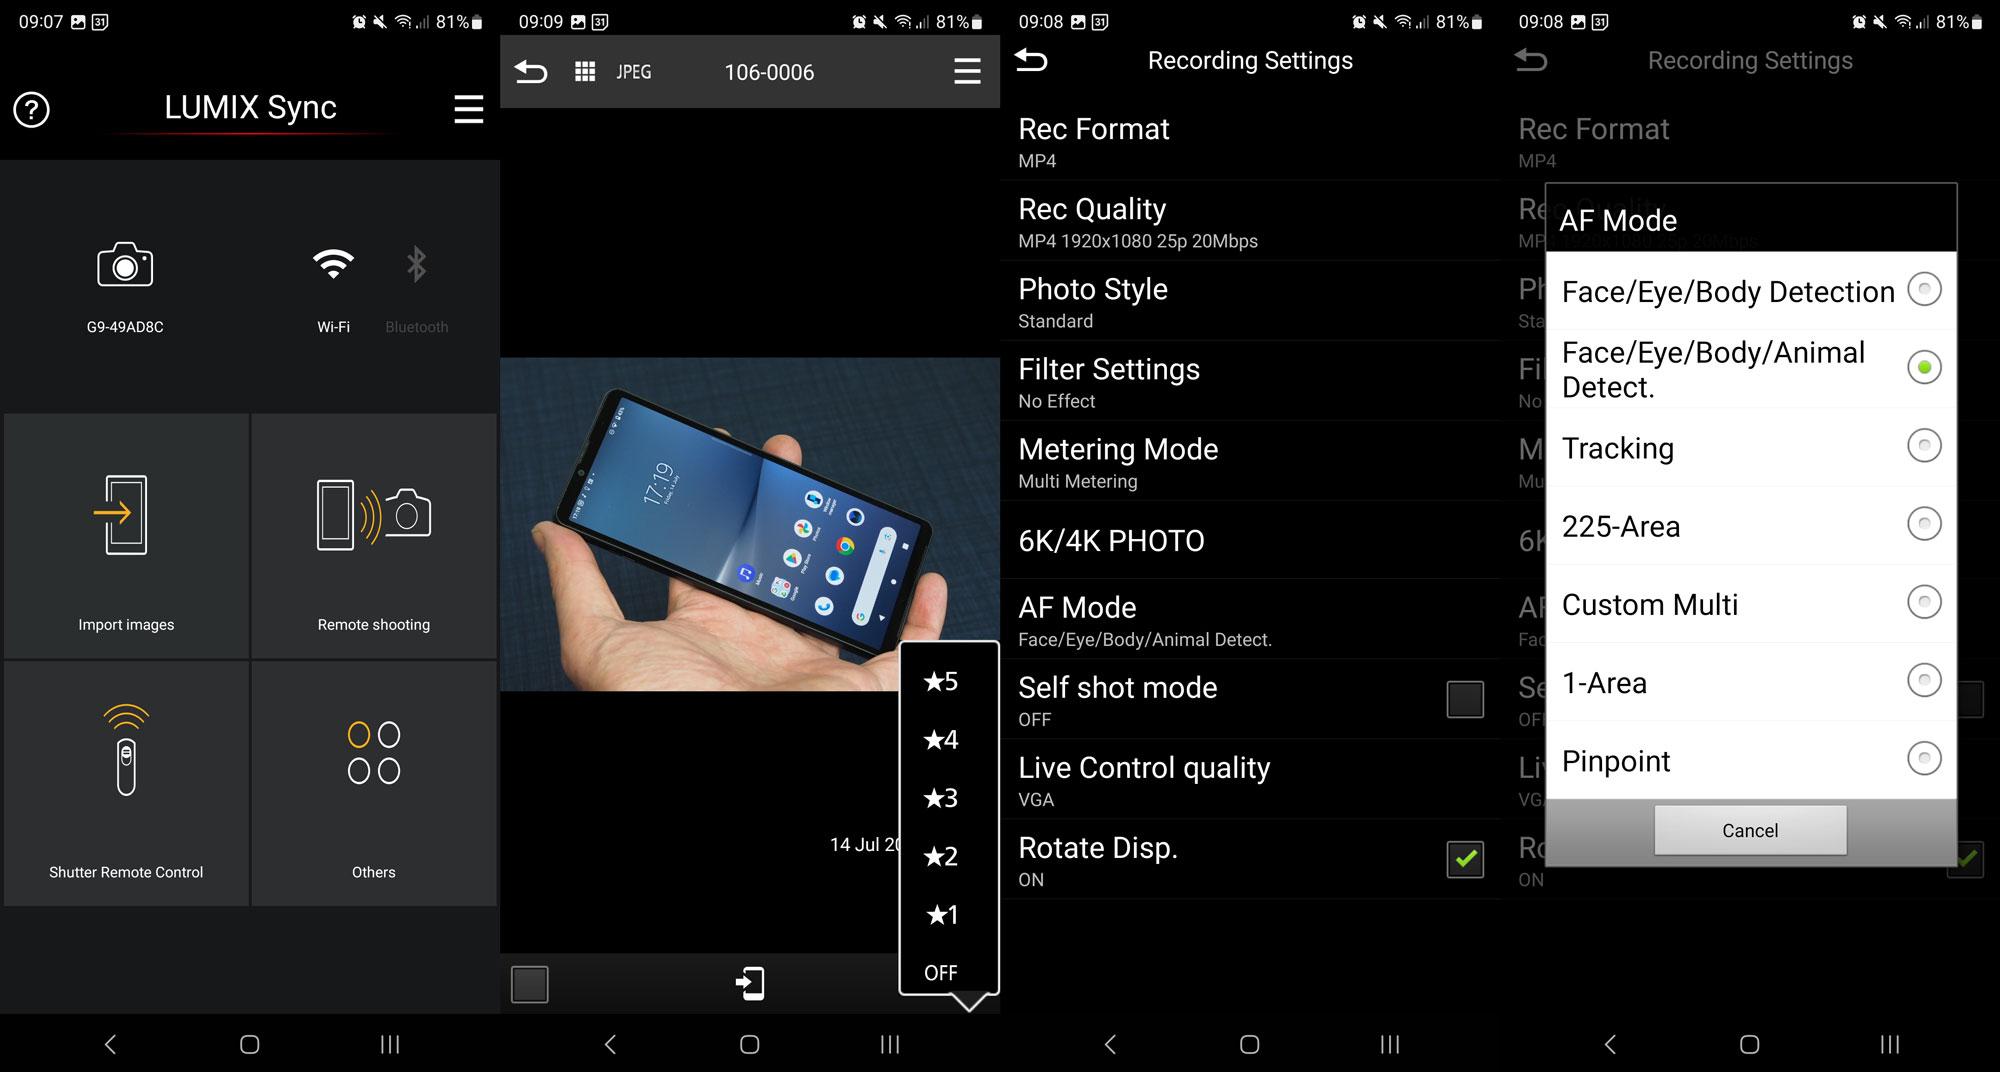
With access to all of the different AF area settings via remote shooting, it is easy to switch between Pinpoint, 225-Area or Face/Eye/Body/Animal AF and the other options.
Touchscreen autofocus works well, with a quick tap on the iPhone screen shifting the AF point or area. The speed of focusing is smooth, rather than snappy, but proved accurate and usable for non-moving subjects.
Video recording
Video is comprehensively covered by Lumix Sync. A variety of different recording formats can be captured, and the full complement of different exposure settings is available. There is no separate function for video capture, it’s a red record button within the remote shooting feature.
Impressively it is possible to change the exposure whilst recording, and the app also allows use of touchscreen AF for focus pulling. Here the slow smooth motion of the AF comes into its own, making it a great option for videographers wanting to change focus without touching the camera and risking it moving.
Recorded video clips can be played back via the Lumix Sync app, and it’s also possible to transfer video clips from the camera to the smartphone. Whether you will be able to play the clip depends on the format you use.
Image transfer
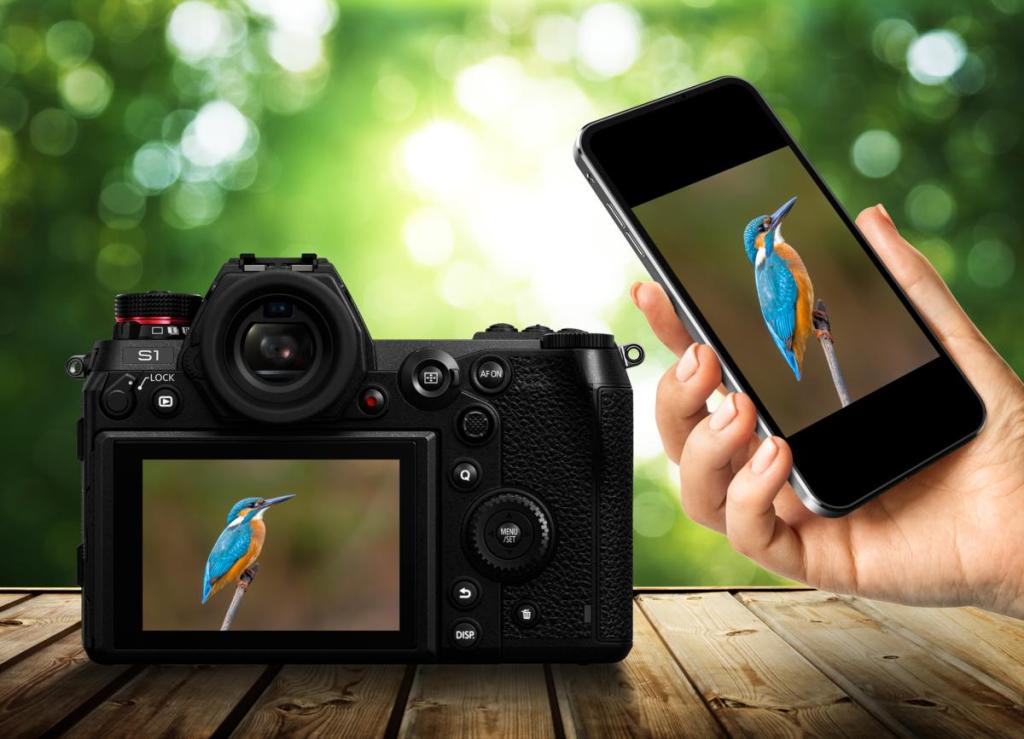
Panasonic hasn’t skimped when it comes to transferring images, with a choice of size and format for the best possible flexibility when editing and sharing images on the move. Small (6MP), medium (12MP) and large (24MP) JPEG sizes are available, and you can choose whether you’d like to transfer raw files, JPEGs and raws, or just JPEGs.
A full size 24MP JPEG image transferred in just under 5secs, a medium size JPEG in less than 3secs and a small JPEG in less than 2secs. Meanwhile, full size JPEG and raw files take around 23secs, and for those who just want to transfer a raw file, this takes 20secs .
Within the image section menu there is the option to select multiple images for transfer, and you can also apply a 0-5 star rating to images, either individually or to a selection.
Location data
Adding the time and location is straightforward, and is about as easy as I have found to date on any camera system. It’s a simple matter of going to the Bluetooth menu and turning Auto Clock Set and Location Logging to ‘ON’. After this the camera will add location data and current time from the connected smartphone via Bluetooth.
Panasonic Lumix Sync Pros:
+ 24-million-pixel JPEG transferred in 5 secs (Panasonic LUMIX S1 + iPhone XS)
+ iOS and Android compatible
+ Raw file transfer
+ Extremely straightforward and well-designed app
+ Supports Touch AF
Panasonic Lumix Sync Cons:
– Only fully compatible with more recent cameras
– Current app has automatic Wi-Fi connection issues on iOS
Article: Richard Sibley
Related reading
- Best Panasonic cameras to buy
- Best photo apps for editing on a smartphone
- Best photo editing software

