Amateur Photographer verdict
A brilliant camera that produces wonderful image quality, contains modern technology, yet remains portable and versatile with its range of available lenses.- Impressive subject detection autofocus system
- Improved image quality over older 20MP MFT cameras
- Excellent control layout
- Phenomenal in-body image stabilisation
- Very usable high-resolution multi-shot mode
- Control dials are under-employed out of the box
- Uninspiring colour output at default settings
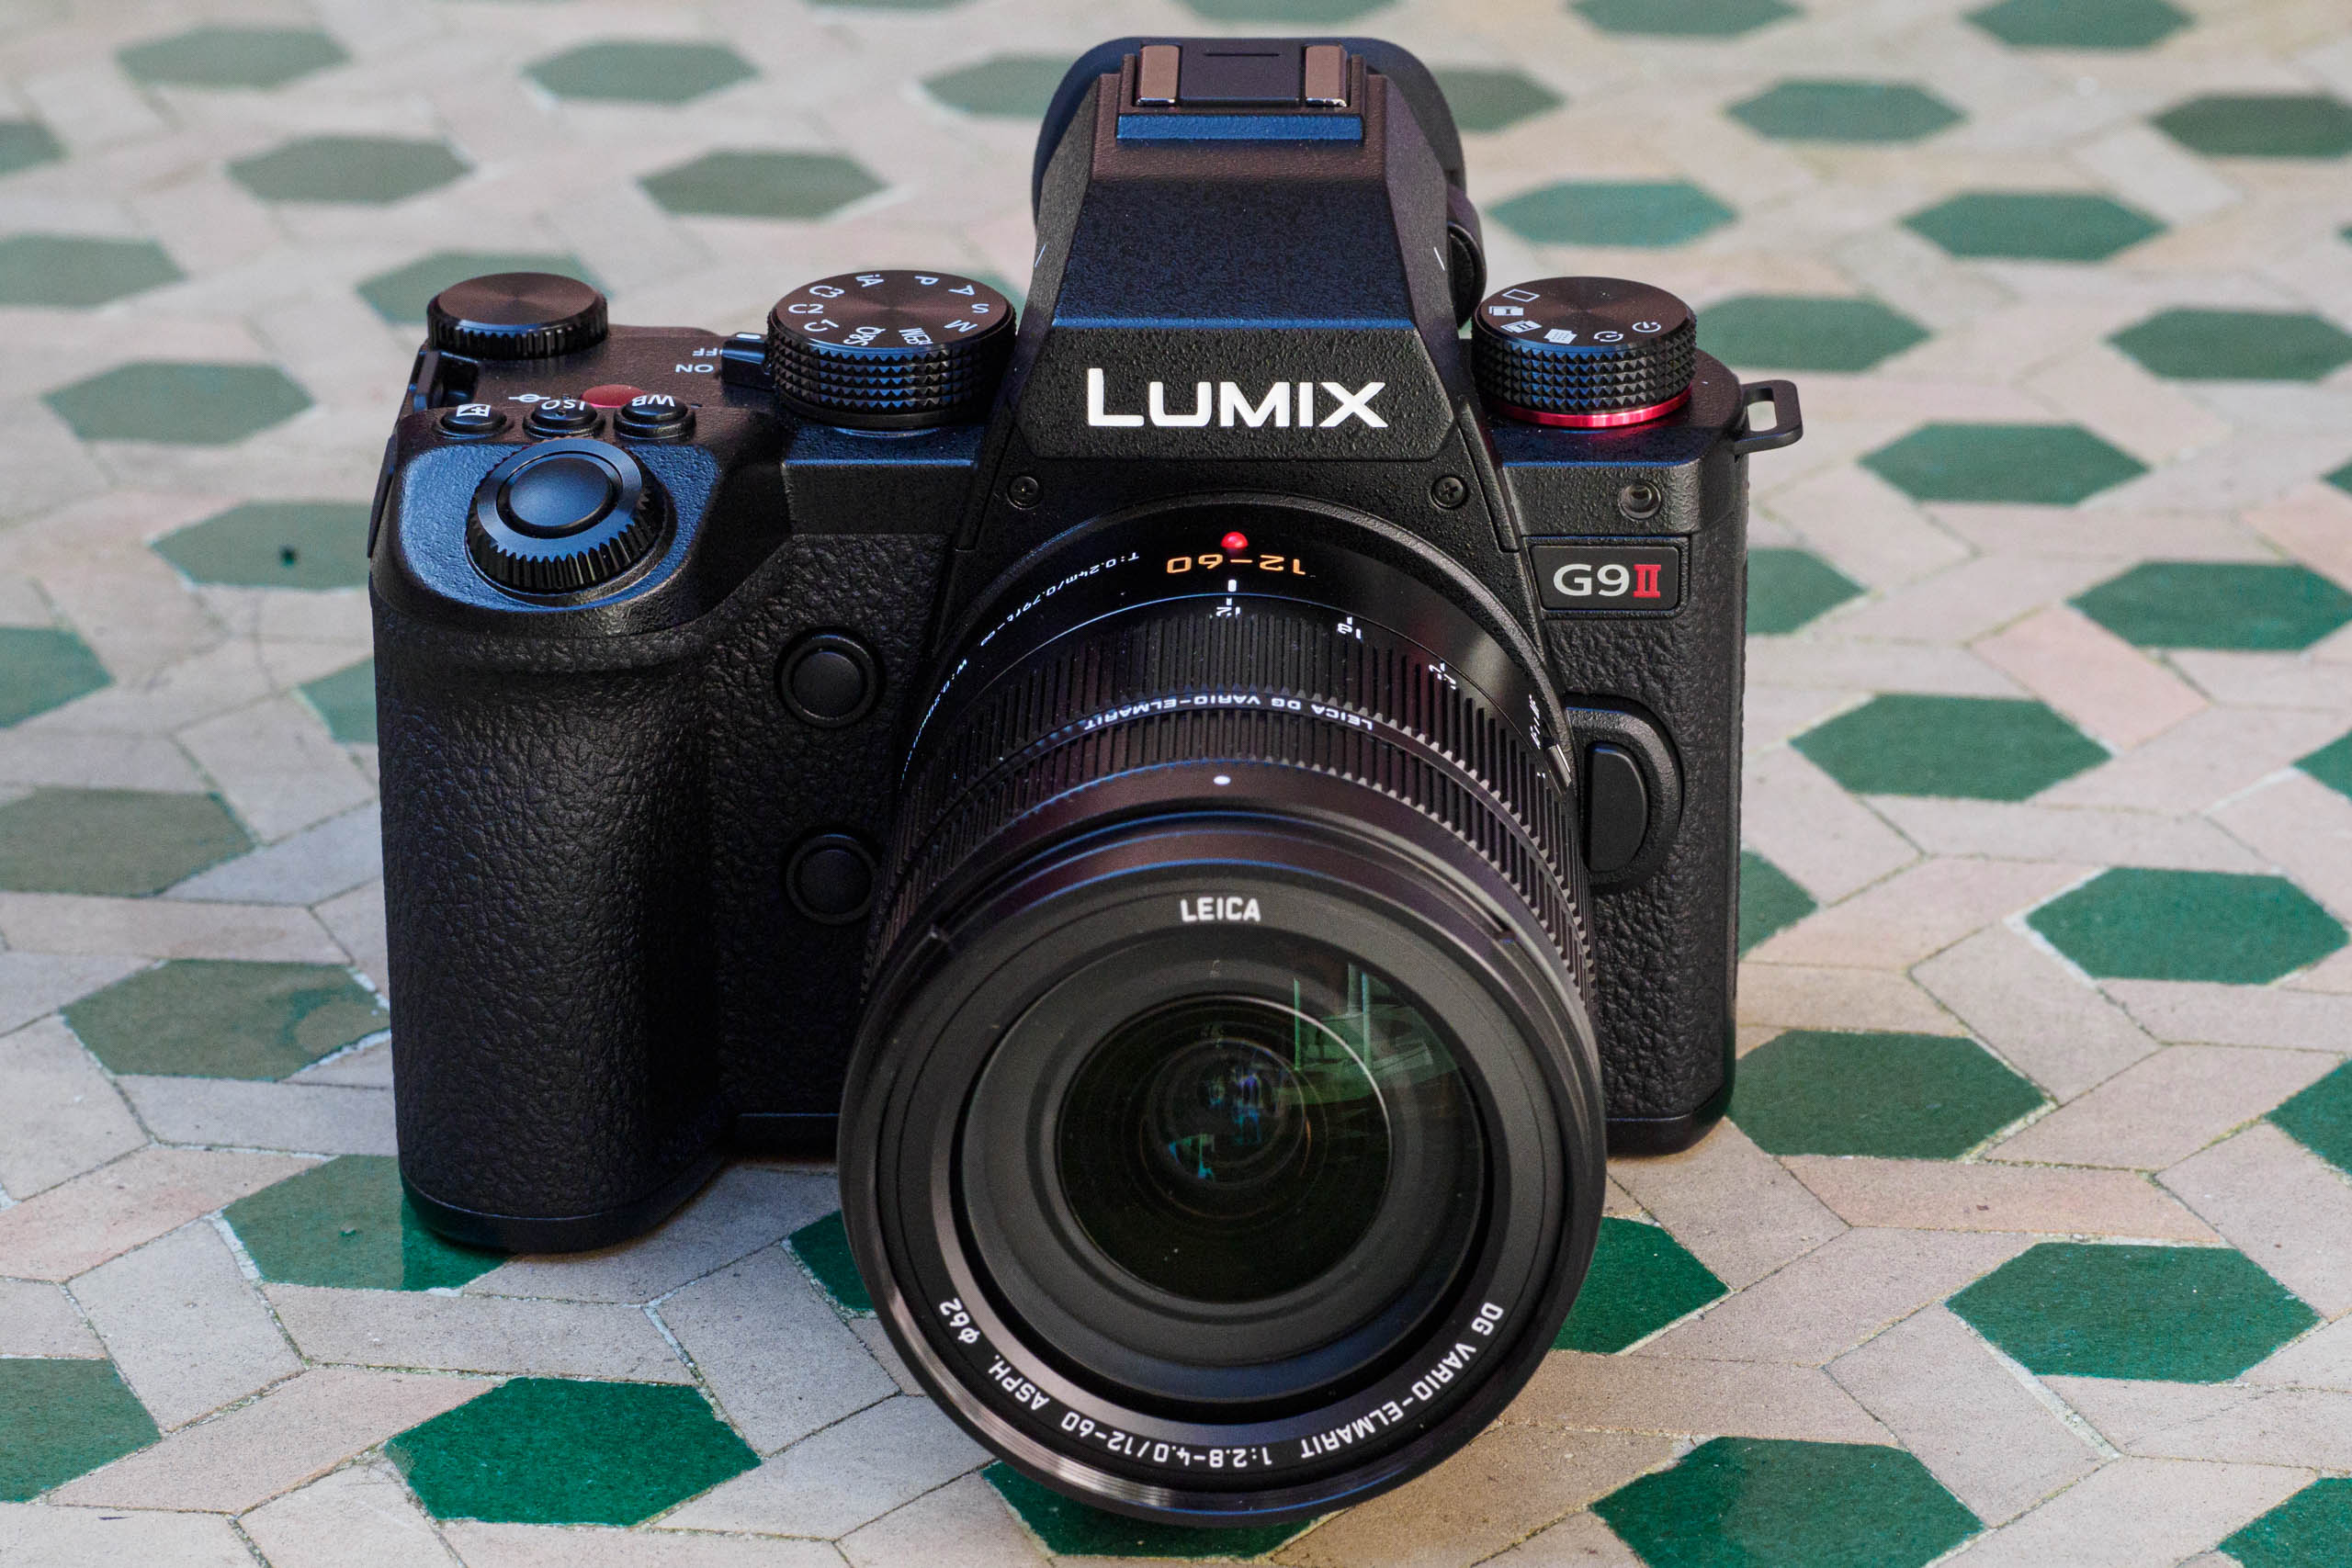
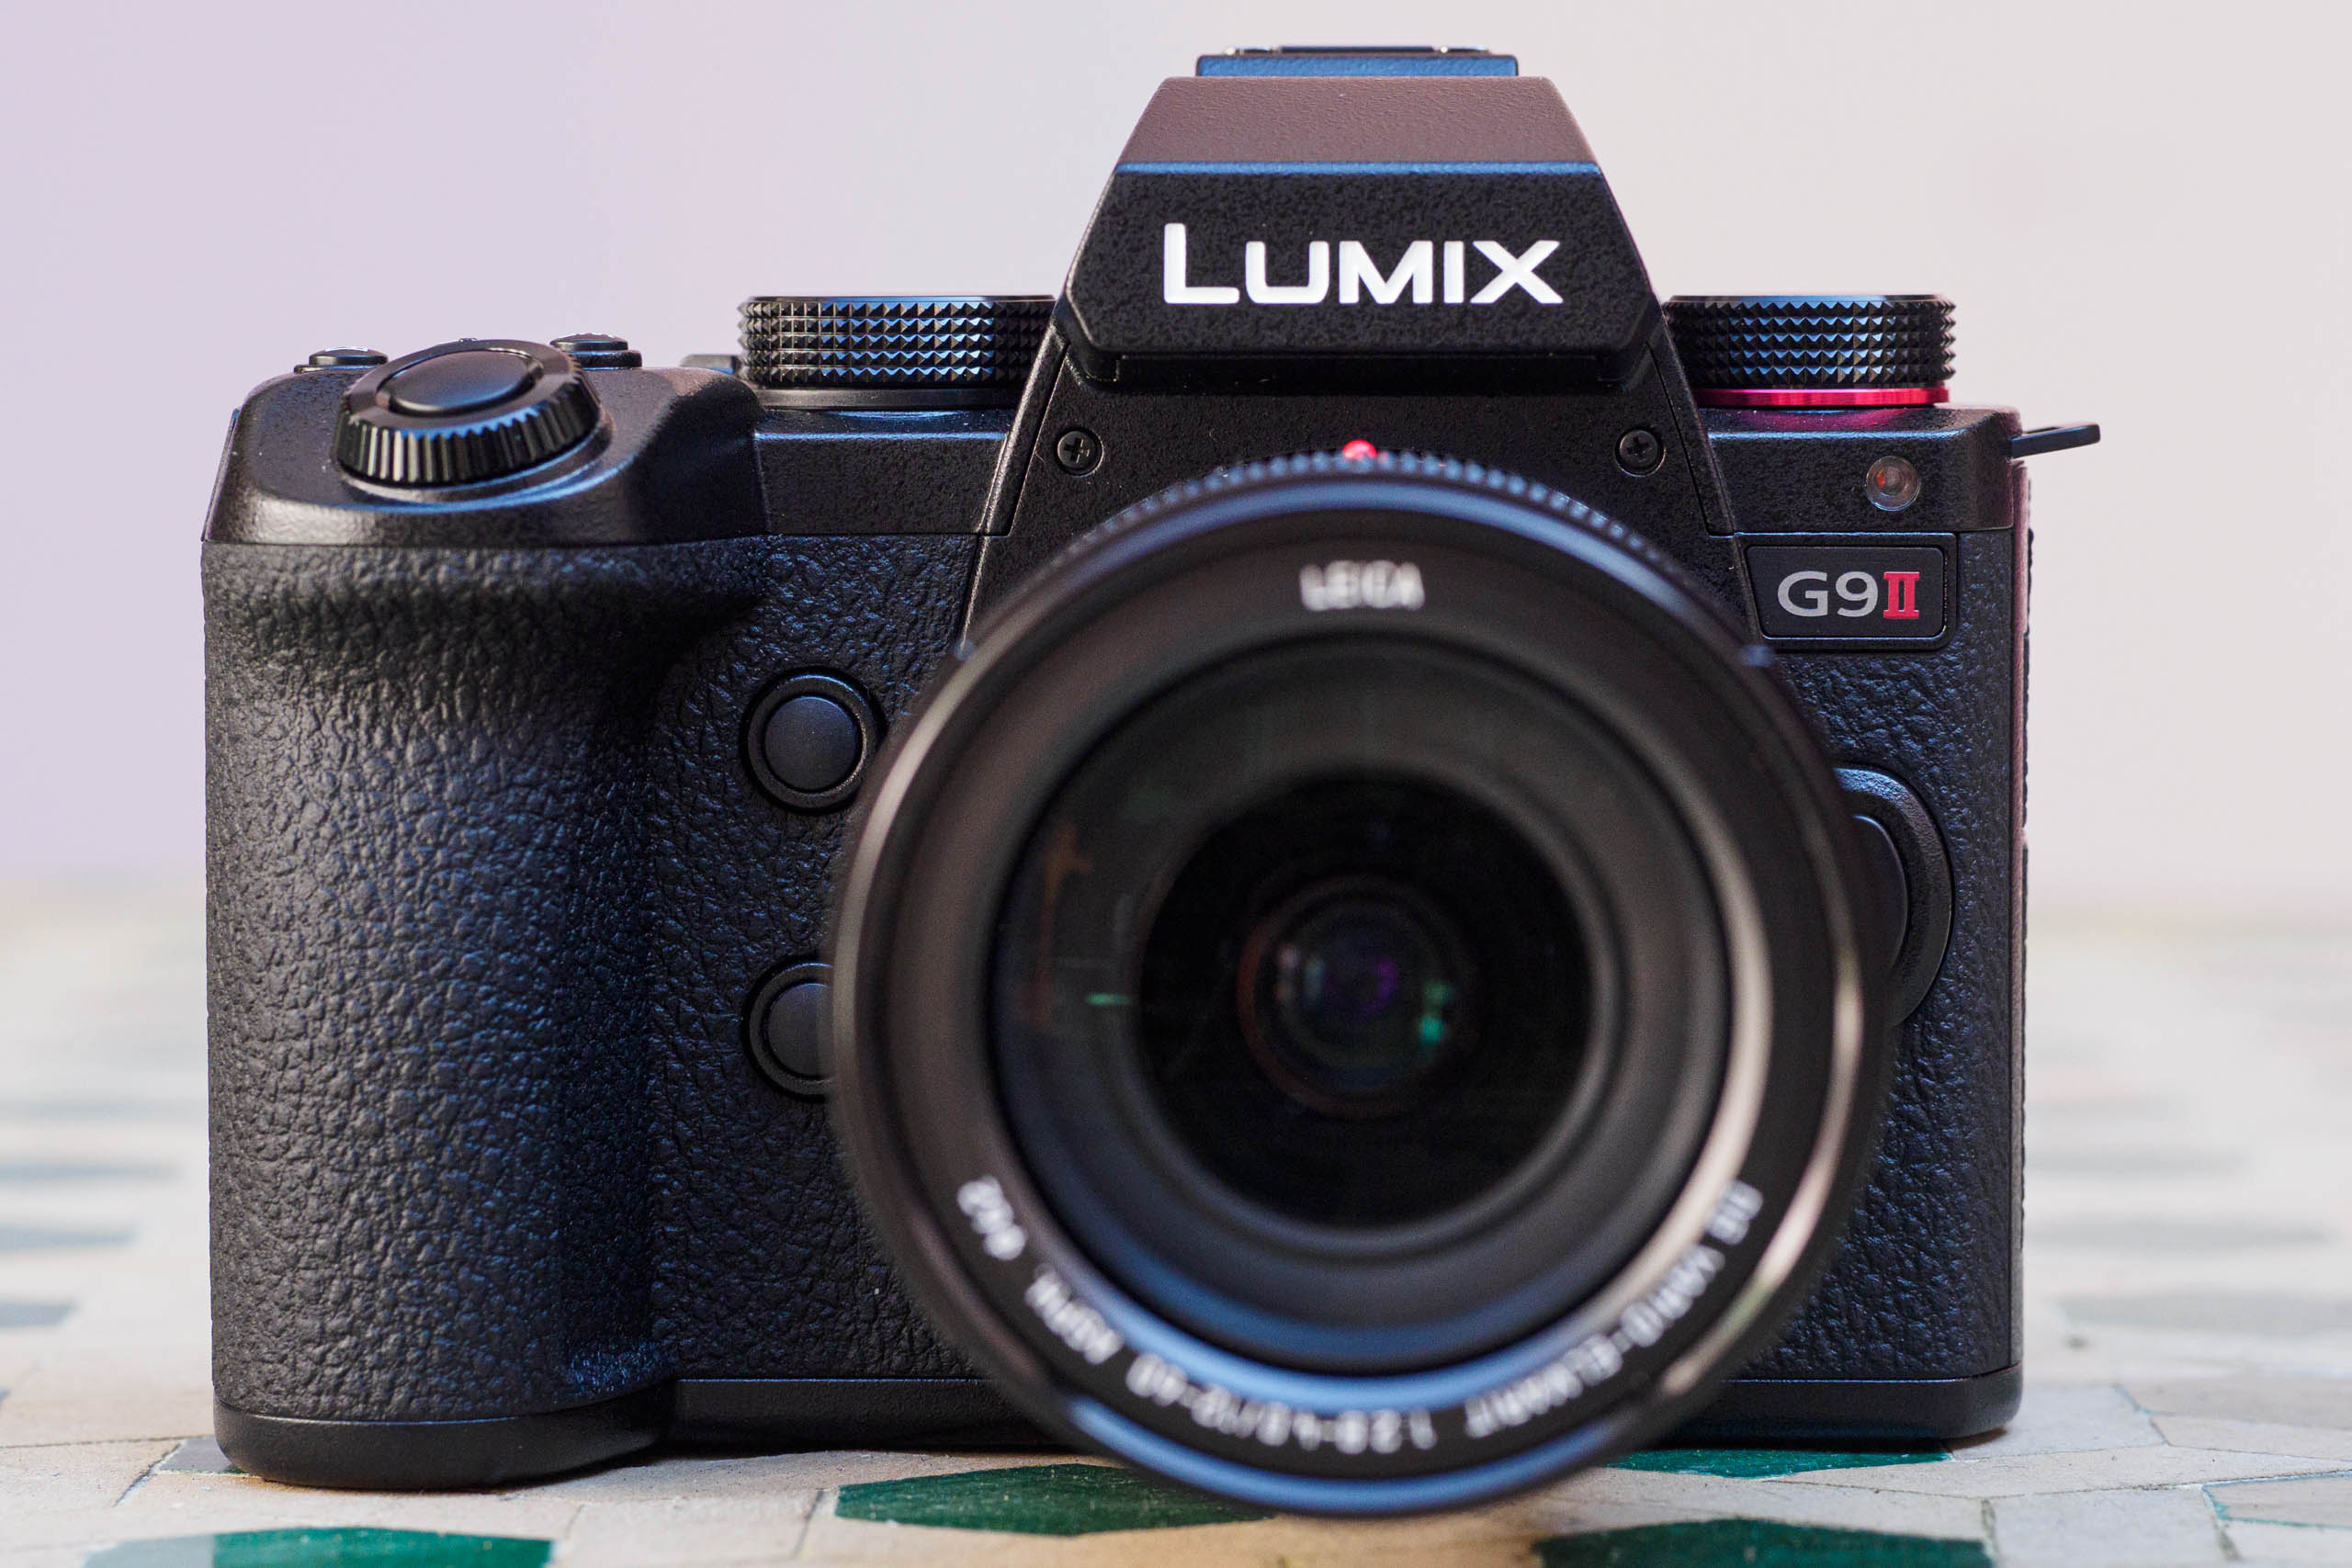
The Panasonic Lumix G9 II is a stills/video hybrid camera designed for serious enthusiast photographers. Released in September 2023, notionally, as successor to the Lumix G9 from late 2017, in reality, it’s a very different camera. It can be seen as a Micro Four Thirds version of the full-frame Lumix S5II, sharing almost exactly the same body design. With all of Panasonic’s latest technology on board, it’s without doubt one of the firm’s best cameras yet.
Panasonic Lumix G9 II at a glance:
- $1,898 / £1,689 body-only
- $2,589 / £1,999 with 12-60mm F2.8-4 lens
- 25.2MP Four Thirds sensor
- ISO 100-25,600 (standard)
- Up to 75 fps shooting
- 3.68m-dot, 0.8x OLED viewfinder
- 3in, 1.84m-dot vari-angle LCD
- 5.7K 60p and 4K 120p video
- 8-stop in-body image stabilisation
Built around a new 25.2MP Four Thirds sensor, the G9 II boasts an impressive spec. It can shoot still images at up to 75 frames per second and recording video at up to 5.7K resolution and 60fps. However, its headline update was the addition of phase detection autofocus, rather than the proprietary depth-from-defocus (DFD) system Panasonic used before. This is joined by the firm’s latest subject detection system, promising a huge leap in capability over the original Lumix G9.
The Lumix G9II is available either body only for $1,900 / £1,700, or in various lens kits, with the premium Leica DG 12-60mm F2.8-4 ASPH OIS being probably the best option ($2,200 / £1,849 kit price). While this is higher than the G9’s current street price, it’s cheaper than its closest Micro Four Thirds competitor, the OM System (Olympus) OM-1.
However, it’s in the same ballpark as both top-end APS-C cameras such as the Fujifilm X-H2, and affordable full-frame models like the Canon EOS R8. But with its smaller image sensor supposedly placing it at a disadvantage for image quality, is there still space for a high-end Micro Four Thirds model like the G9II in a competitive market?
Features
Panasonic has based the G9 II on a new 25.2MP Four Thirds sensor which, presumably, is related to that used by the video-focused Lumix GH6, but now with phase detection added for autofocus. Measuring 17.3 x 13mm, it’s about 60% of the area of APS-C, and 25% of full-frame. This smaller area brings disadvantages in high-ISO image quality, but allows for smaller and lighter lenses in return.
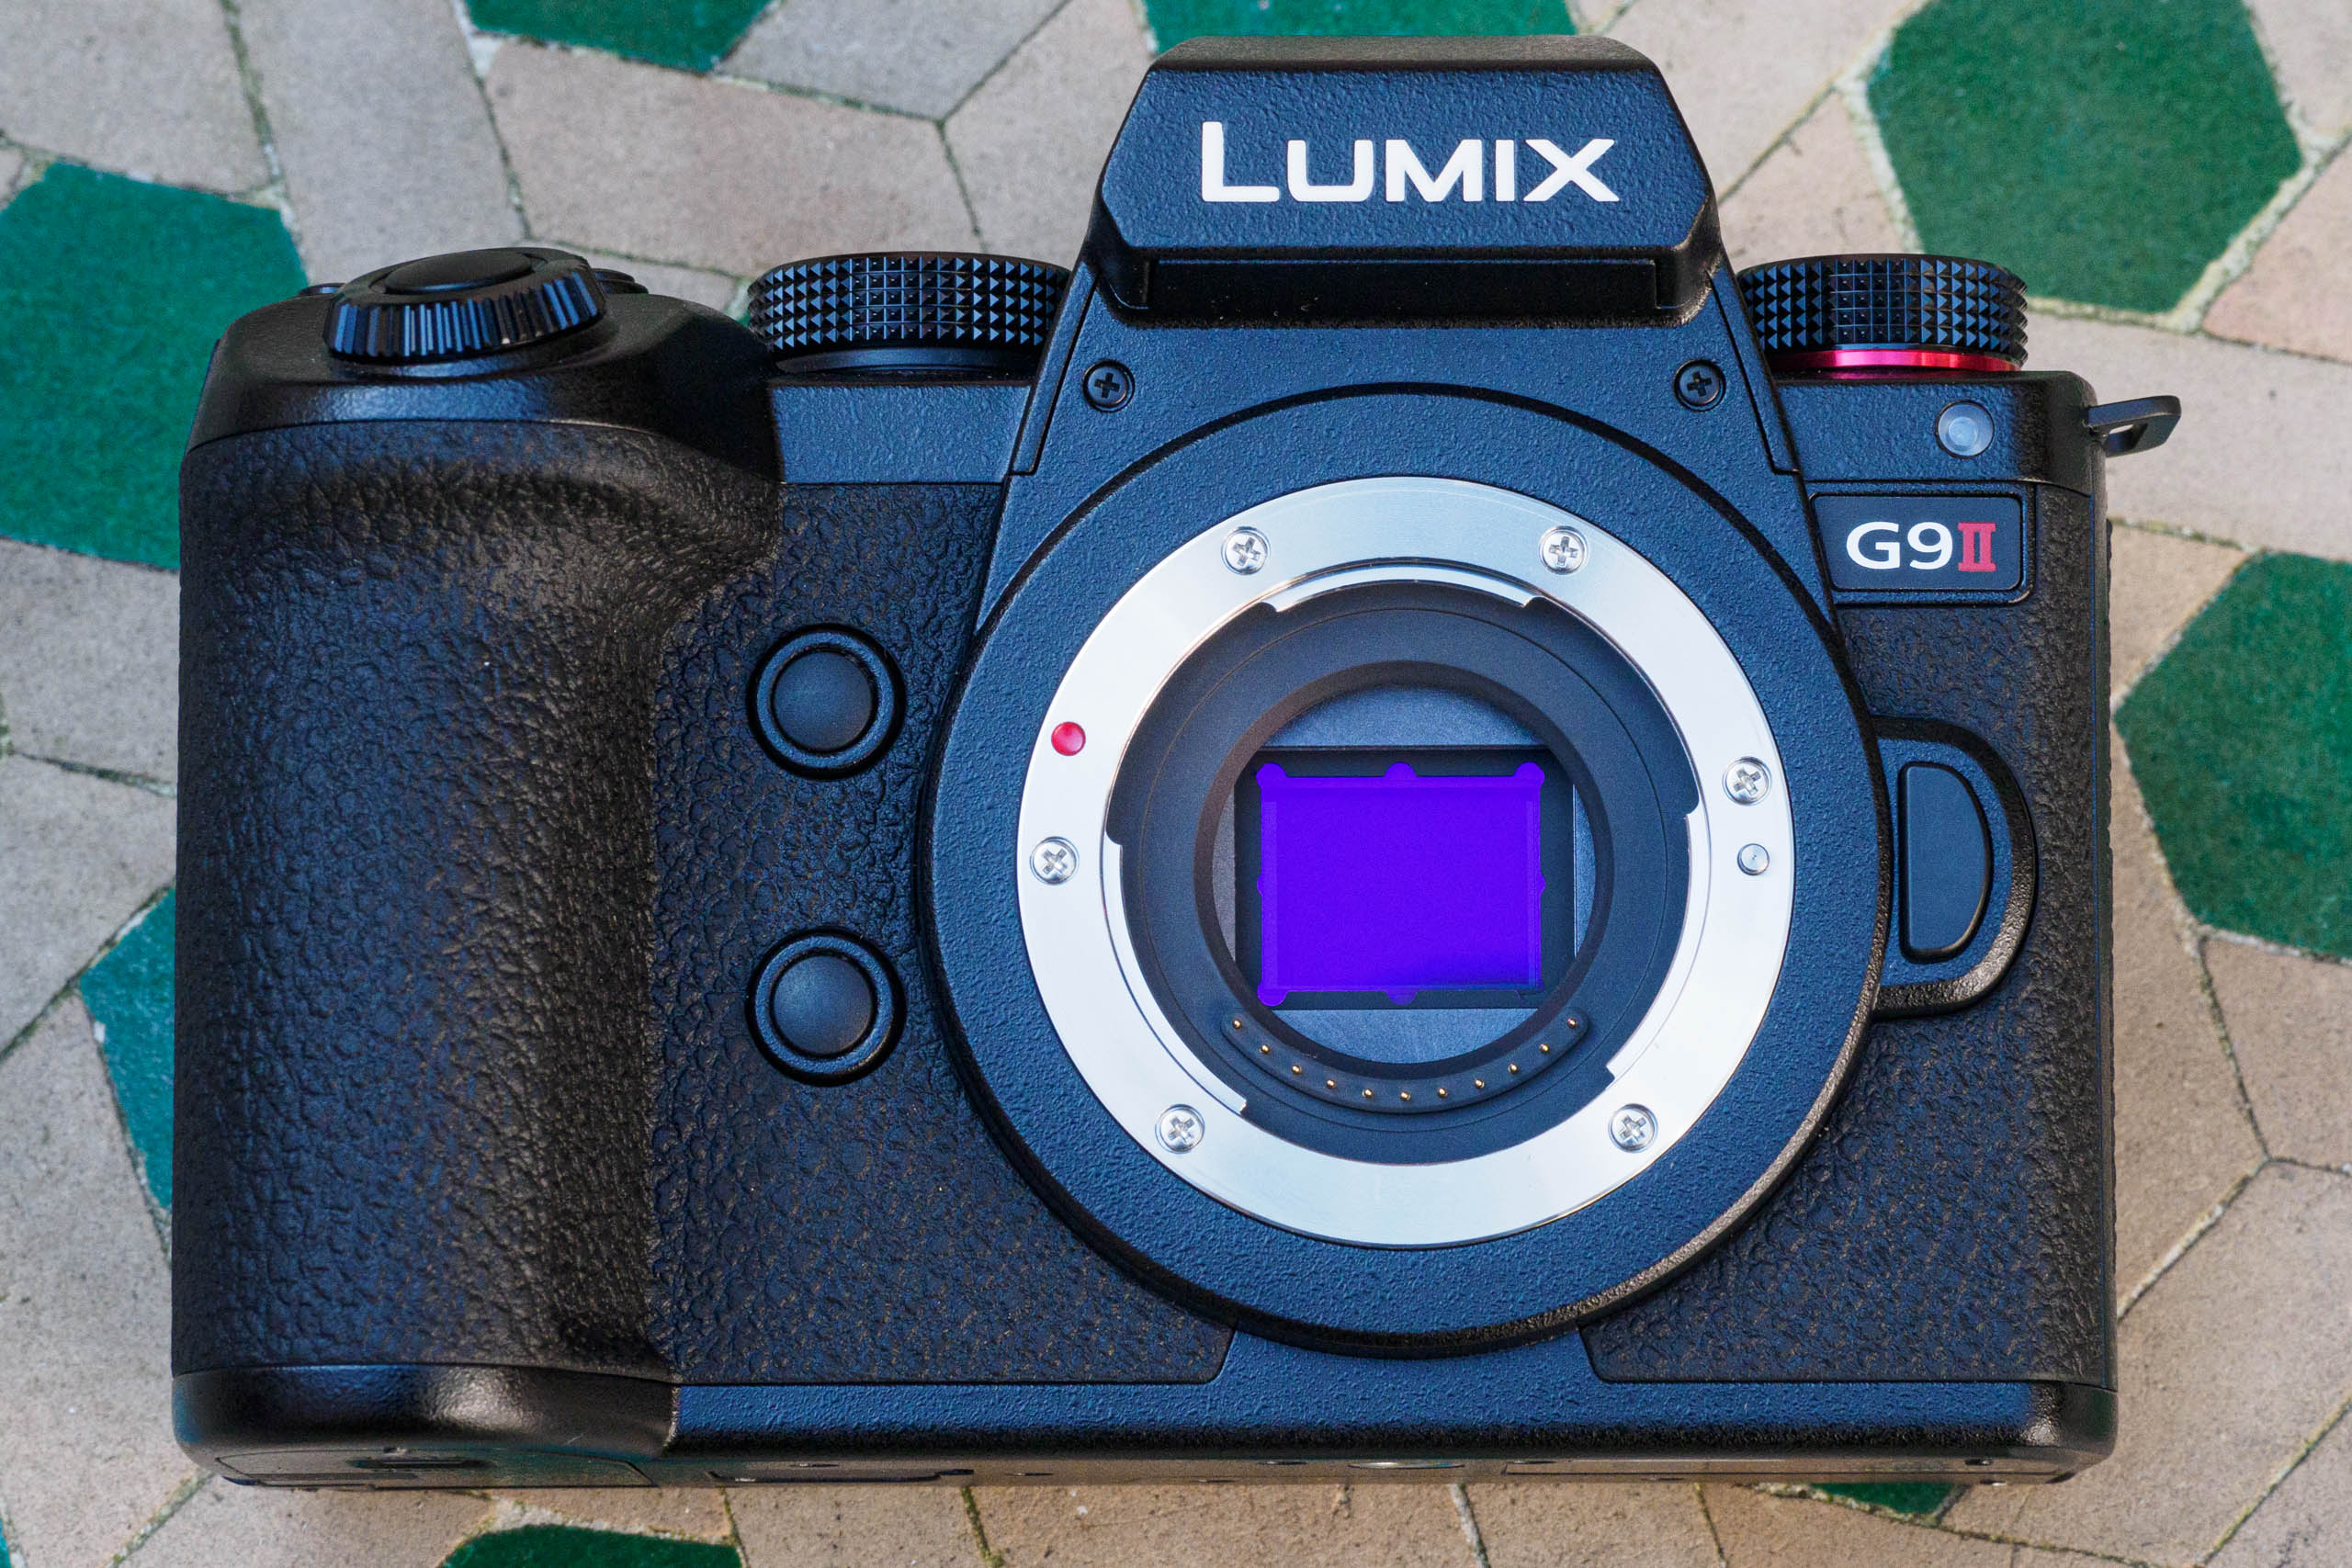
With a standard sensitivity range covering ISO 100-25,600, the sensor promises improved image quality compared to older 20MP MFT models, which had a base ISO of 200. The top shutter speed is 1/8000sec, or 1/32,000sec with the electronic shutter.
Autofocus employs 779 phase-detection points arranged across the entire frame. The hybrid phase/contrast AF system promises faster, more decisive focusing, and should also eliminate unpleasant ‘wobbling’ effects during video recording. The camera also gains the firm’s latest subject detection system that can now recognise cars and motorcycles. Its human and animal recognition algorithms have been updated, too.
Continuous shooting is particularly impressive, with the camera capable of a remarkable 75fps using the electronic shutter with focus fixed, or 60fps with continuous AF. Switch to the mechanical shutter, and this drops to 14fps with AFS and 10fps with AFC. In all cases, Panasonic states a buffer of at least 160 frames even when shooting raw+JPEG files together.
Pre-burst shooting has also been extended, so the camera can now buffer 1.5 seconds worth of images from before the shutter button is fully pressed, which should be useful when you want to capture unpredictable action.
In-body image stabilisation (IBIS) is rated for 8 stops of shake reduction, enabling hand-held shooting with slow shutter speeds. This drops slightly when using Dual IS with long telephoto lenses, but only to 7.5 stops.
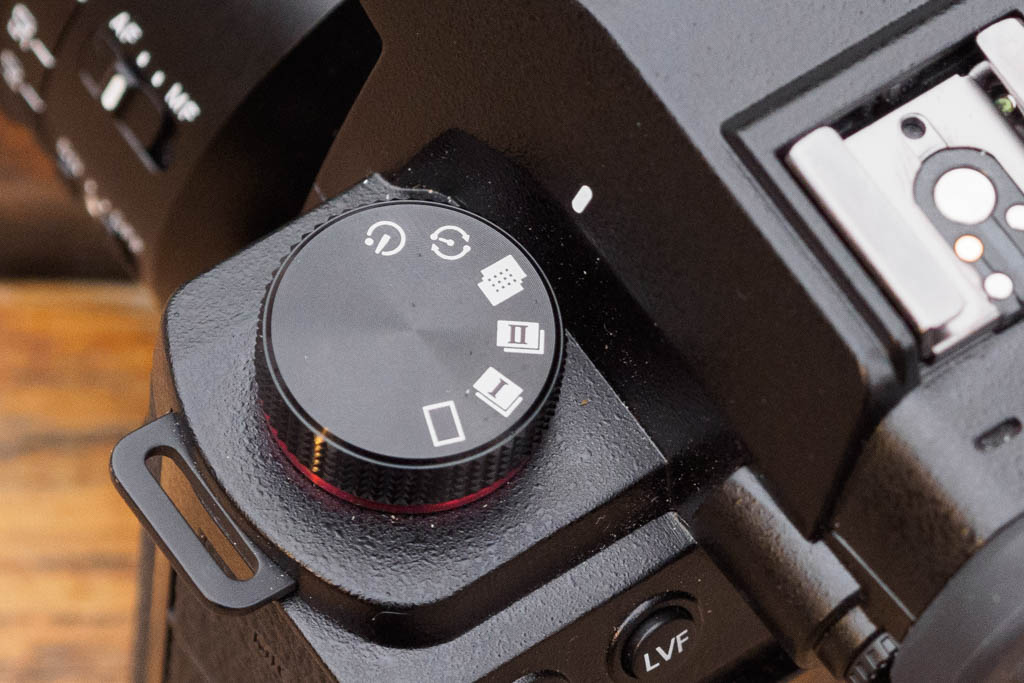
Panasonic has included a high-resolution multi-shot mode, which is easily accessed from the drive mode dial. There’s a choice of hand-held or tripod modes, with the latter also giving a choice of how the image processing deals with objects that move between frames. The camera records a conventional single-shot file alongside, just in case.
Other notable features include an automatic Dynamic Range Boost function, which exploits the sensor’s built-in low-gain and high-gain circuits in a bid to generate raw files and video footage with improved shadow detail. Panasonic’s Real-time LUT feature allows installation of preset looks, to apply to both still images and video footage. There’s also a new Leica Monochrome picture mode.
Smartphone connectivity is provided via built-in Bluetooth and Wi-Fi, using the free Lumix Sync app. This is nicely laid out, provides a comprehensive feature set, and works very well. You can either use your phone as a simple shutter release, or take full control of the camera remotely, complete with a live view feed. Then after shooting, it’s possible to import images from the camera to your phone for sharing. A particularly well-designed in-camera raw converter lets you tweak images as desired first.
While G-series cameras have traditionally been aimed at stills photographers, Panasonic hasn’t really held much back in terms of video. The G9II can record in 5.7K resolution at 60fps; 4K at 120fps; or Full HD at 240fps. It’s even possible to record directly to a USB-C SSD, which allows use of the ProRes format that provides more flexibility in post-processing.
Panasonic is promising 13 or more stops of dynamic range when shooting in V-log mode, and it’s possible to record 4-channel audio using the DMW-XLR1 microphone adapter.
Key features
- Autofocus: Enhanced subject detection now has settings for humans, animals (including birds), cars, and motorcycles
- Lenses: The long-running Micro Four Thirds mount gives access to a wide range of compact, high-quality lenses
- Battery grip: Panasonic offers the DMW-BG1E vertical grip ($348 / £279), which holds an extra battery and includes a duplicate set of controls
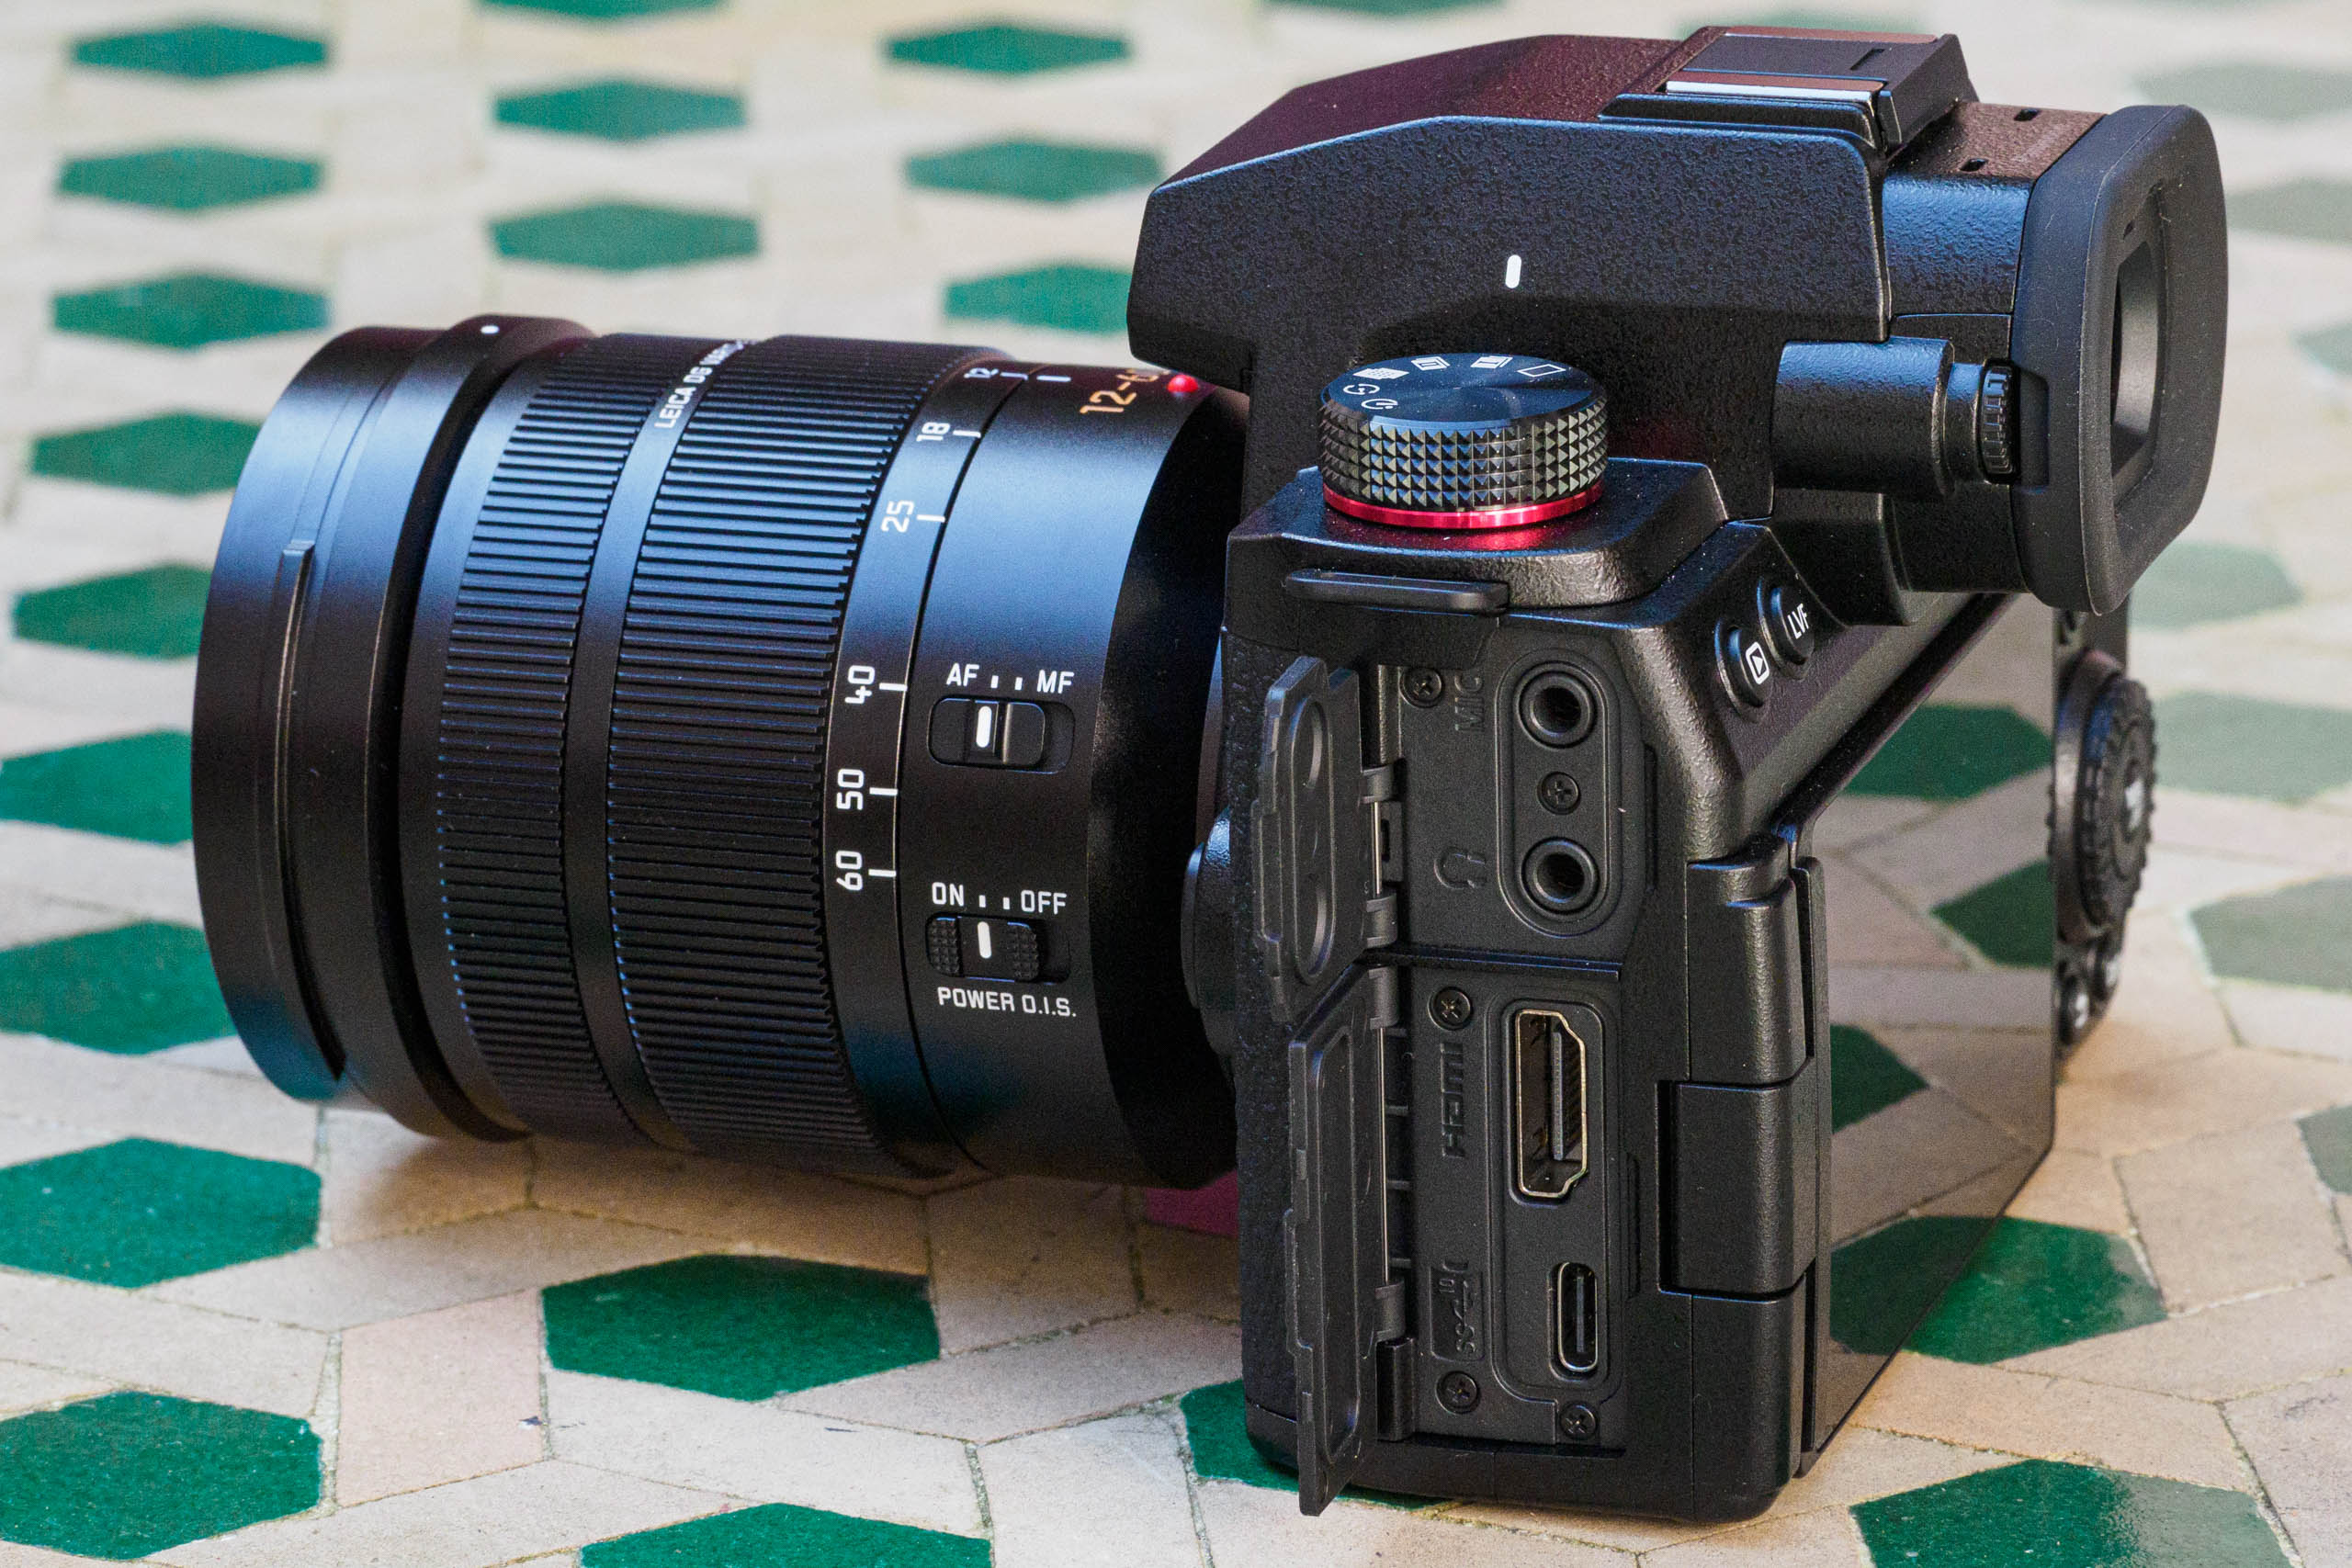
- Connectors: There are microphone, headphone, USB-C and full-size HDMI ports on one side, plus Panasonic’s proprietary 2.5mm cable release connector on the other
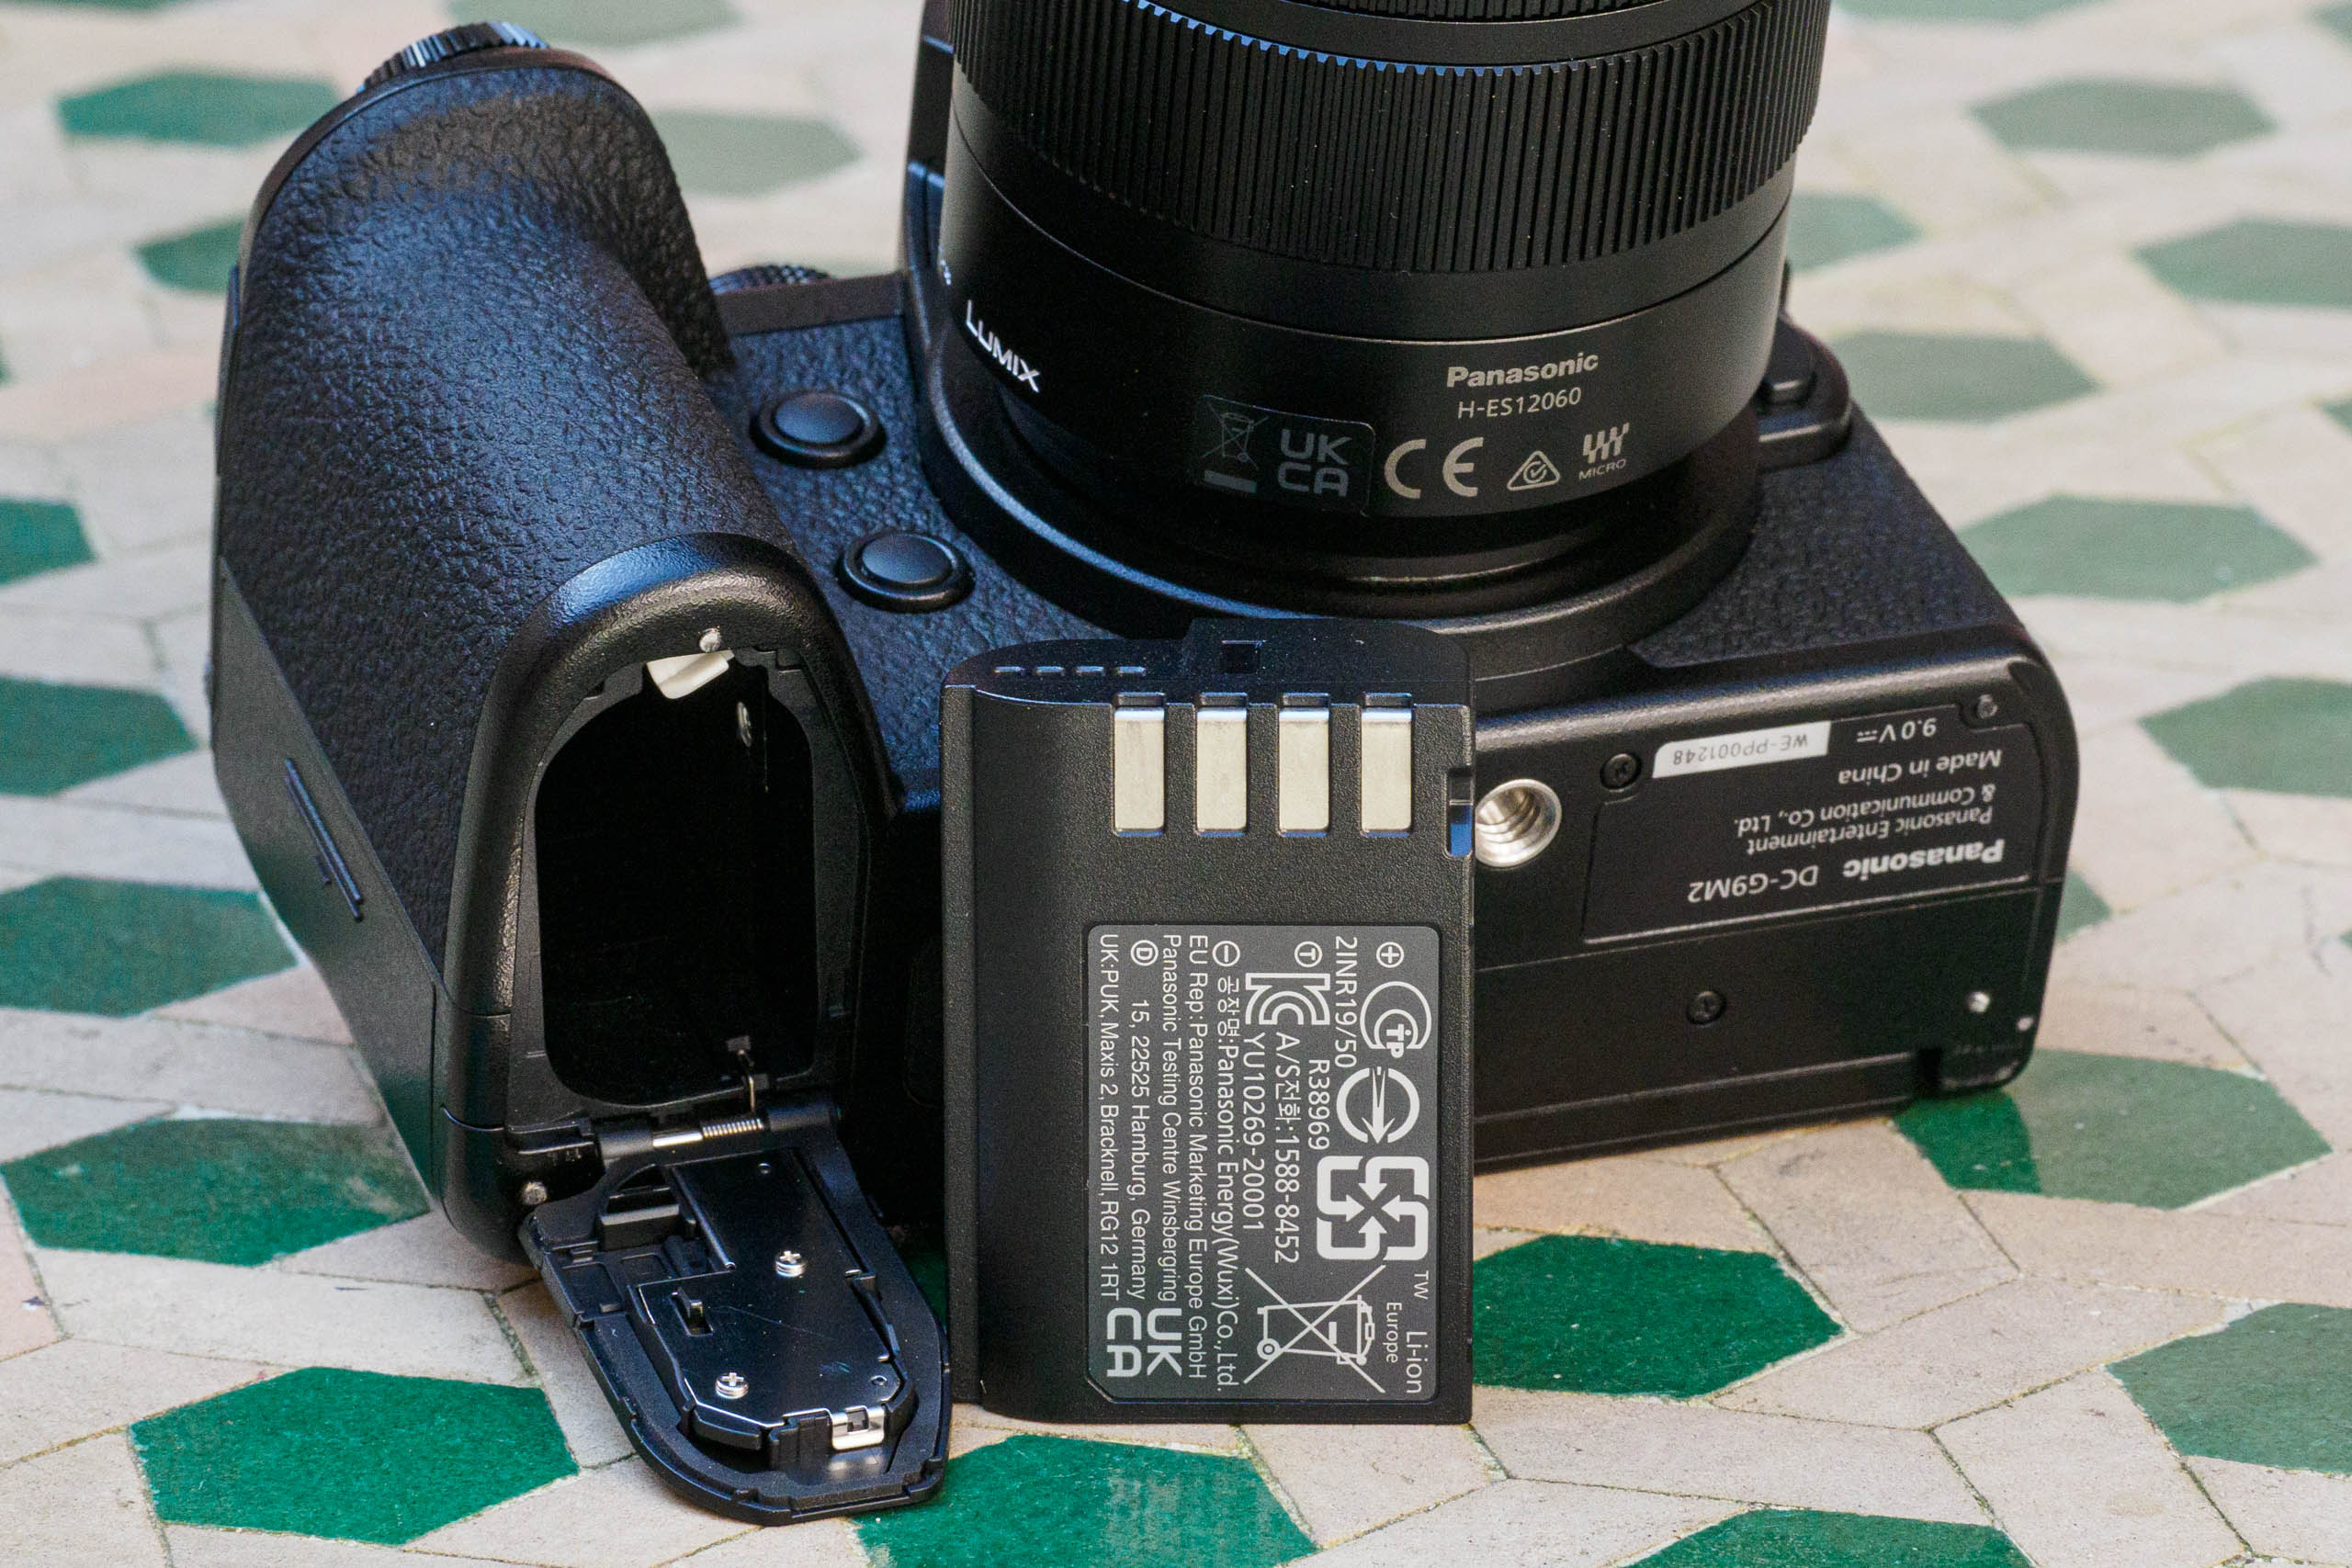
- Power: The G9II uses the same DMW-BLK22 battery as the S5II, promising around 400 shots per charge. The battery can be charged, and the camera powered, by USB-C
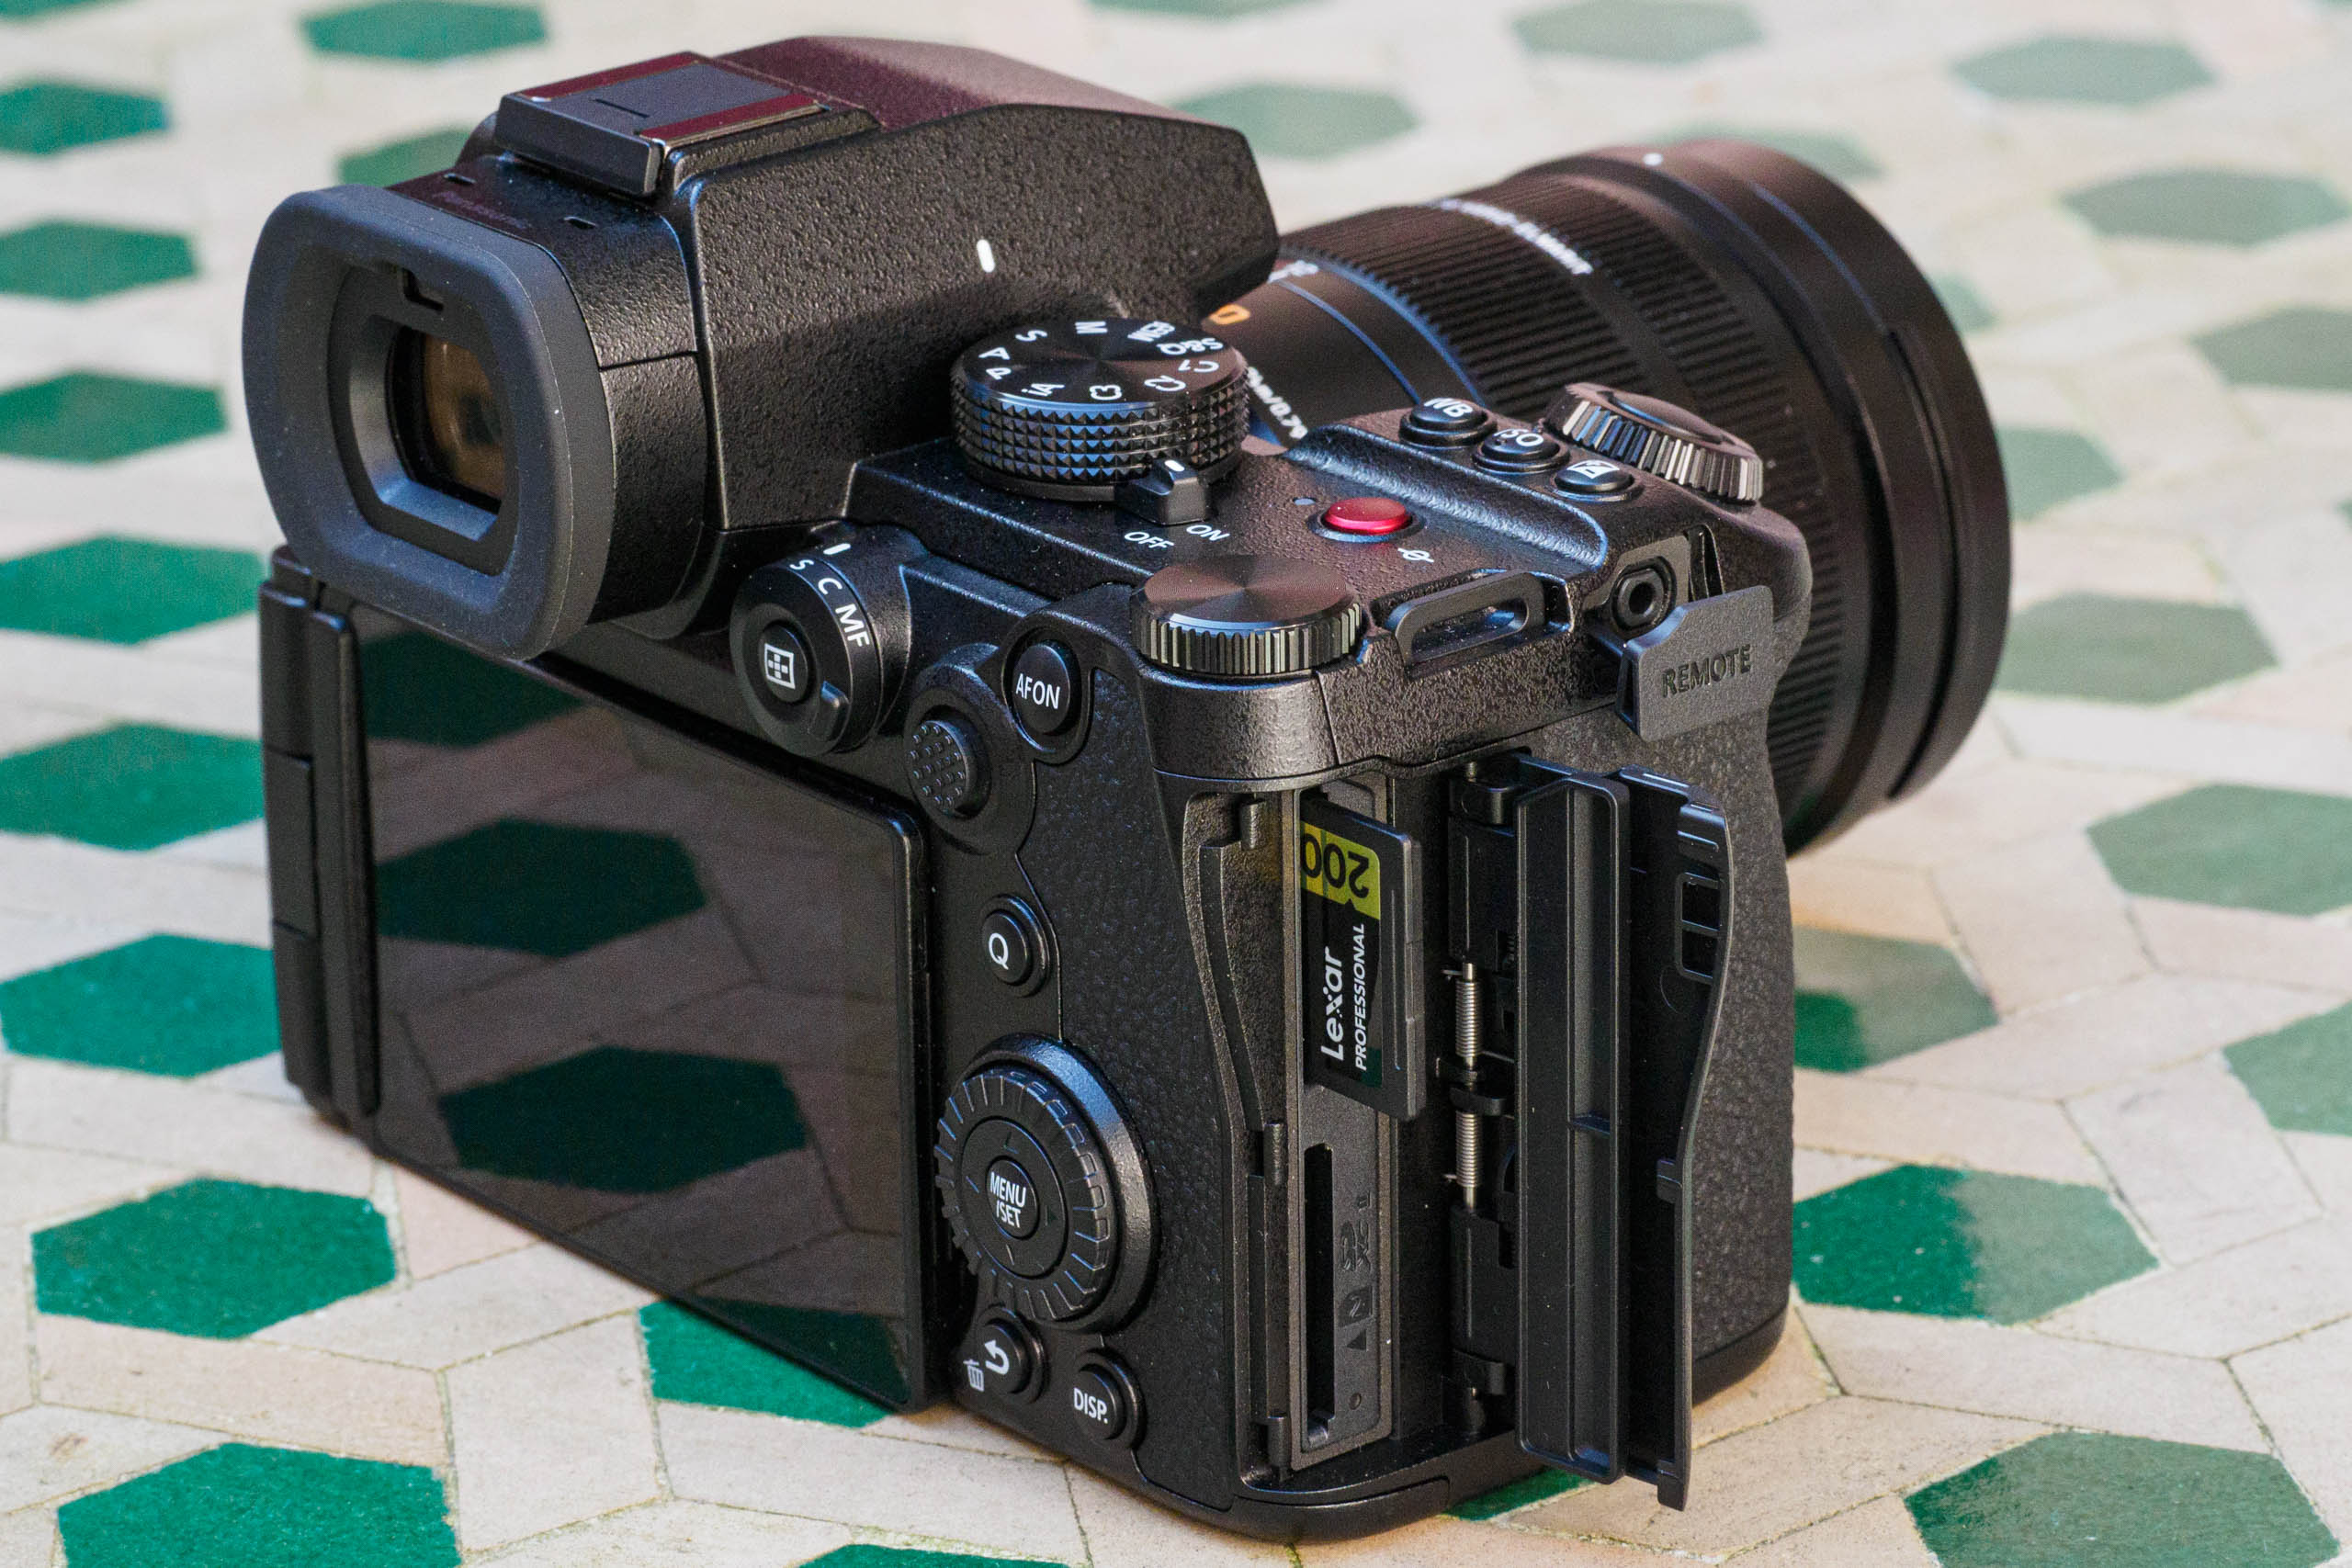
- Storage: Files are stored using a pair of UHS-II SD cards, which can be used either simultaneously for backup, sequentially, or recording different file types to each.
Build and handling
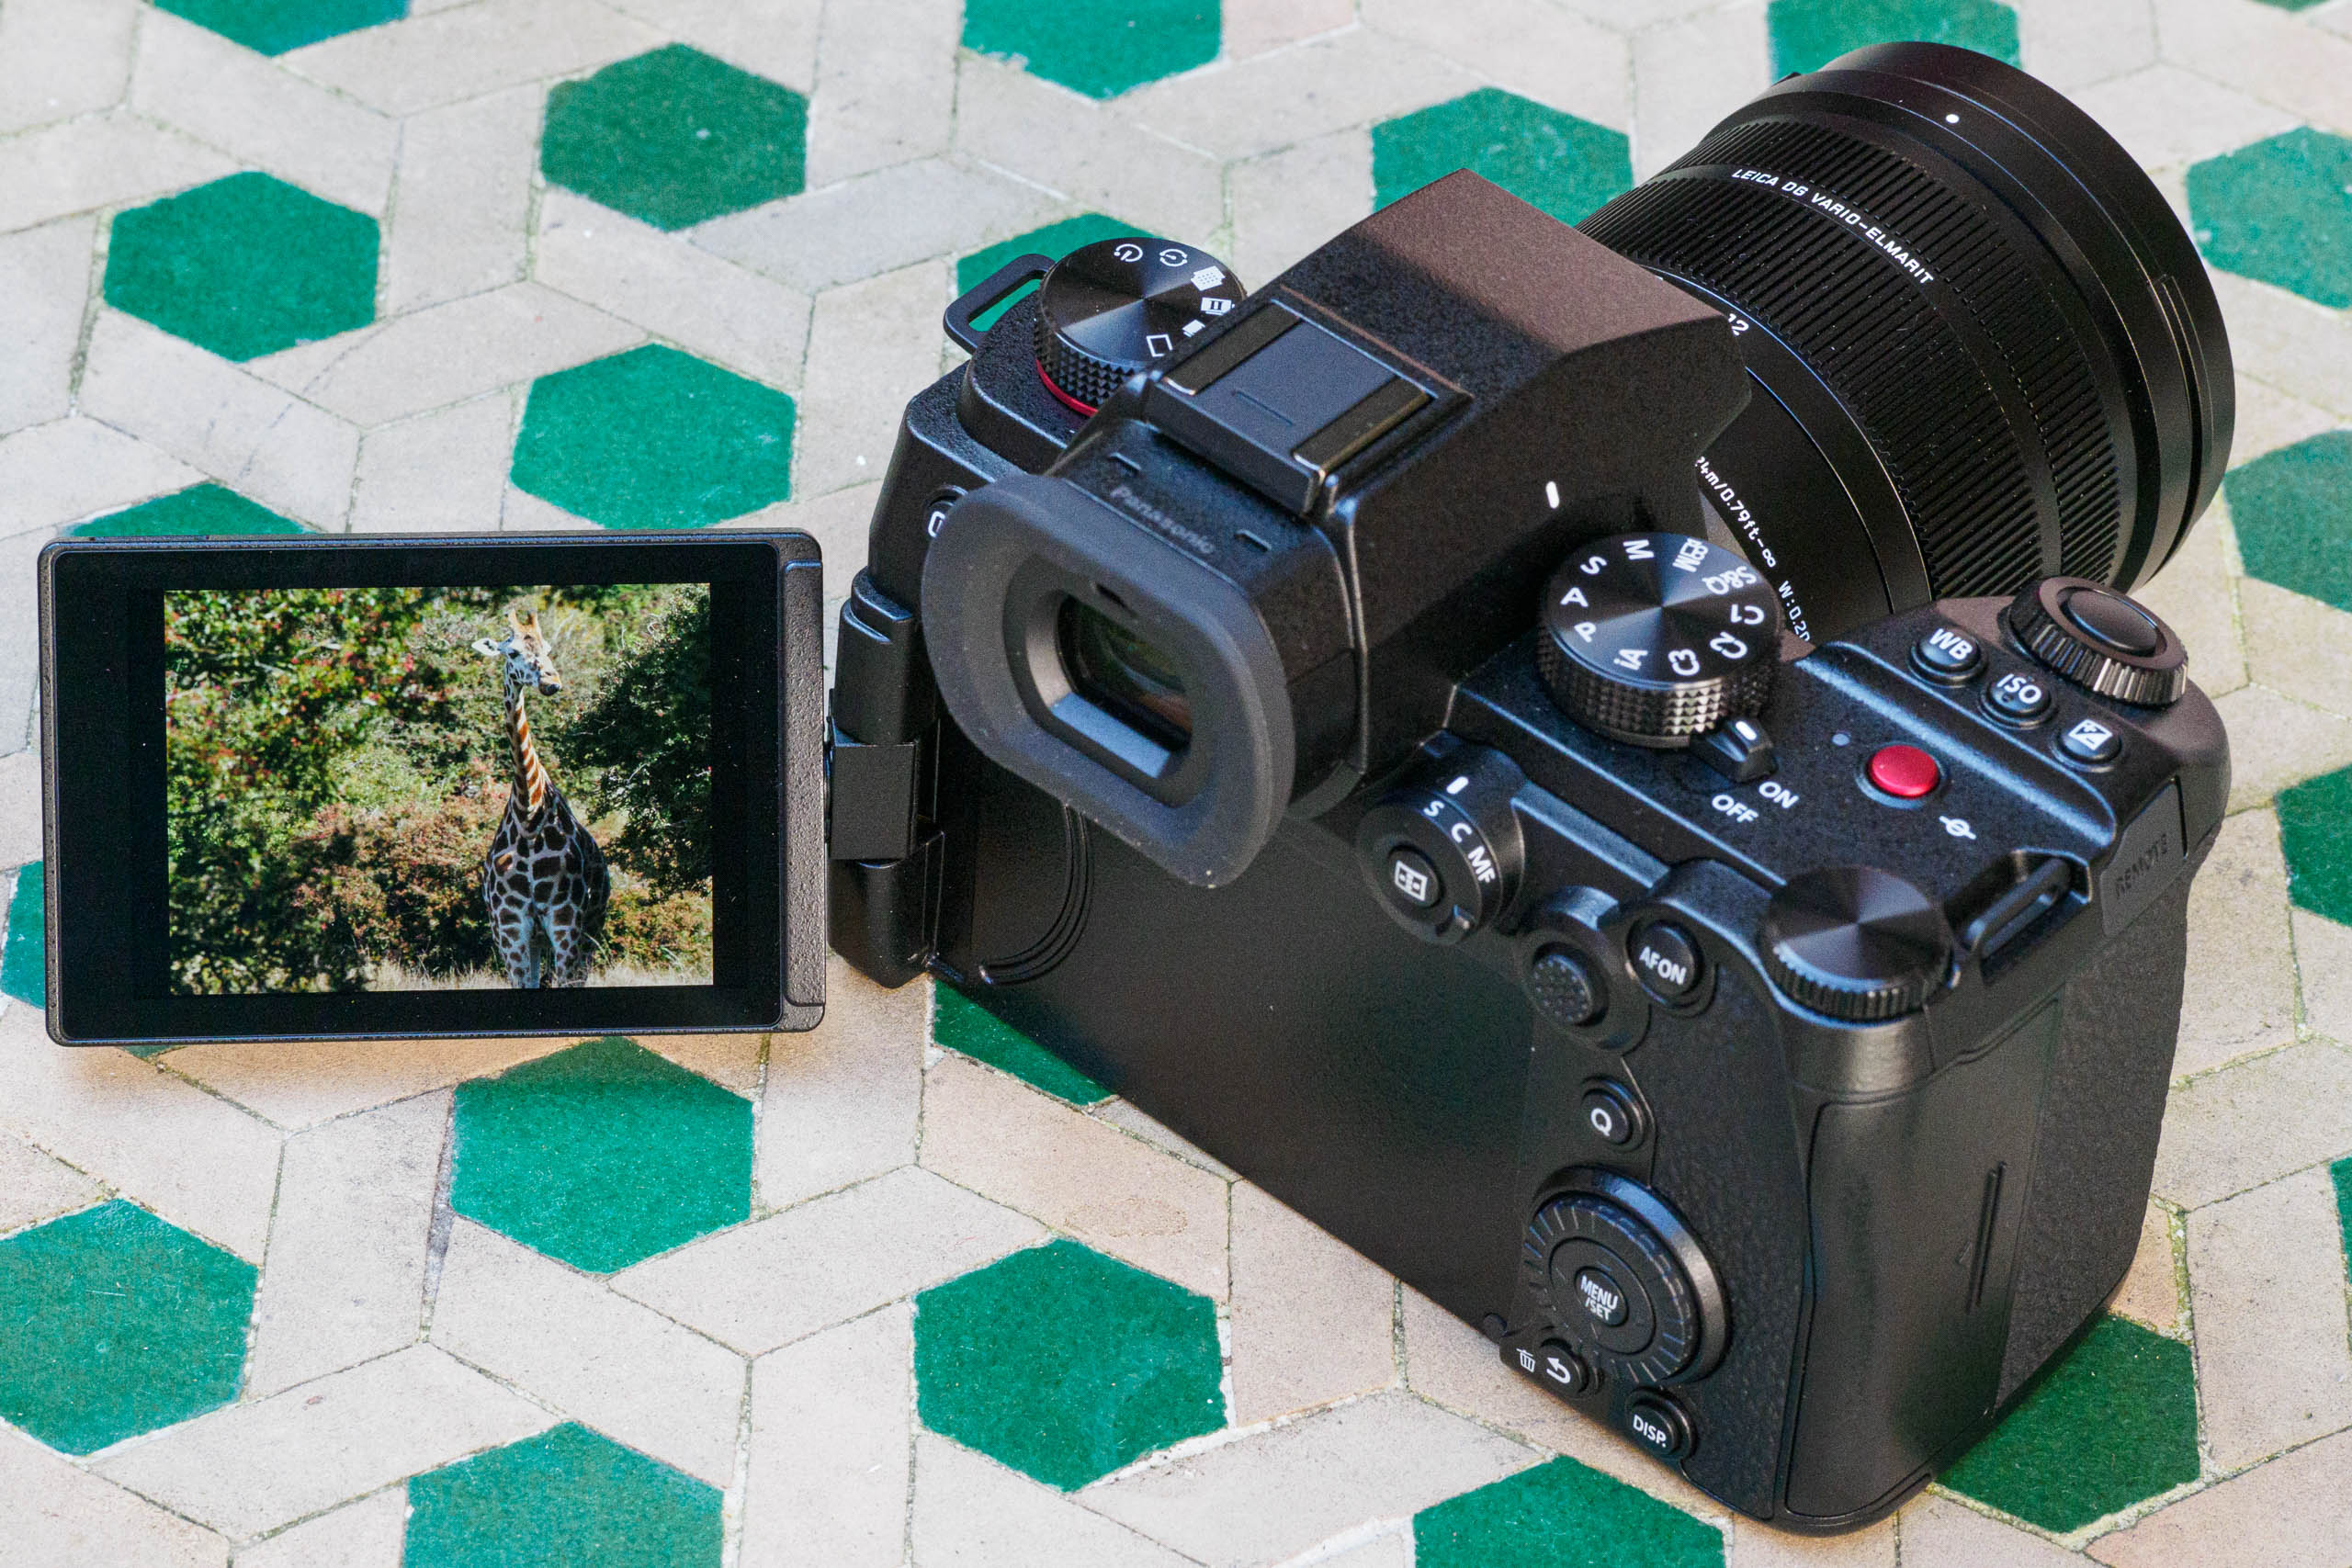
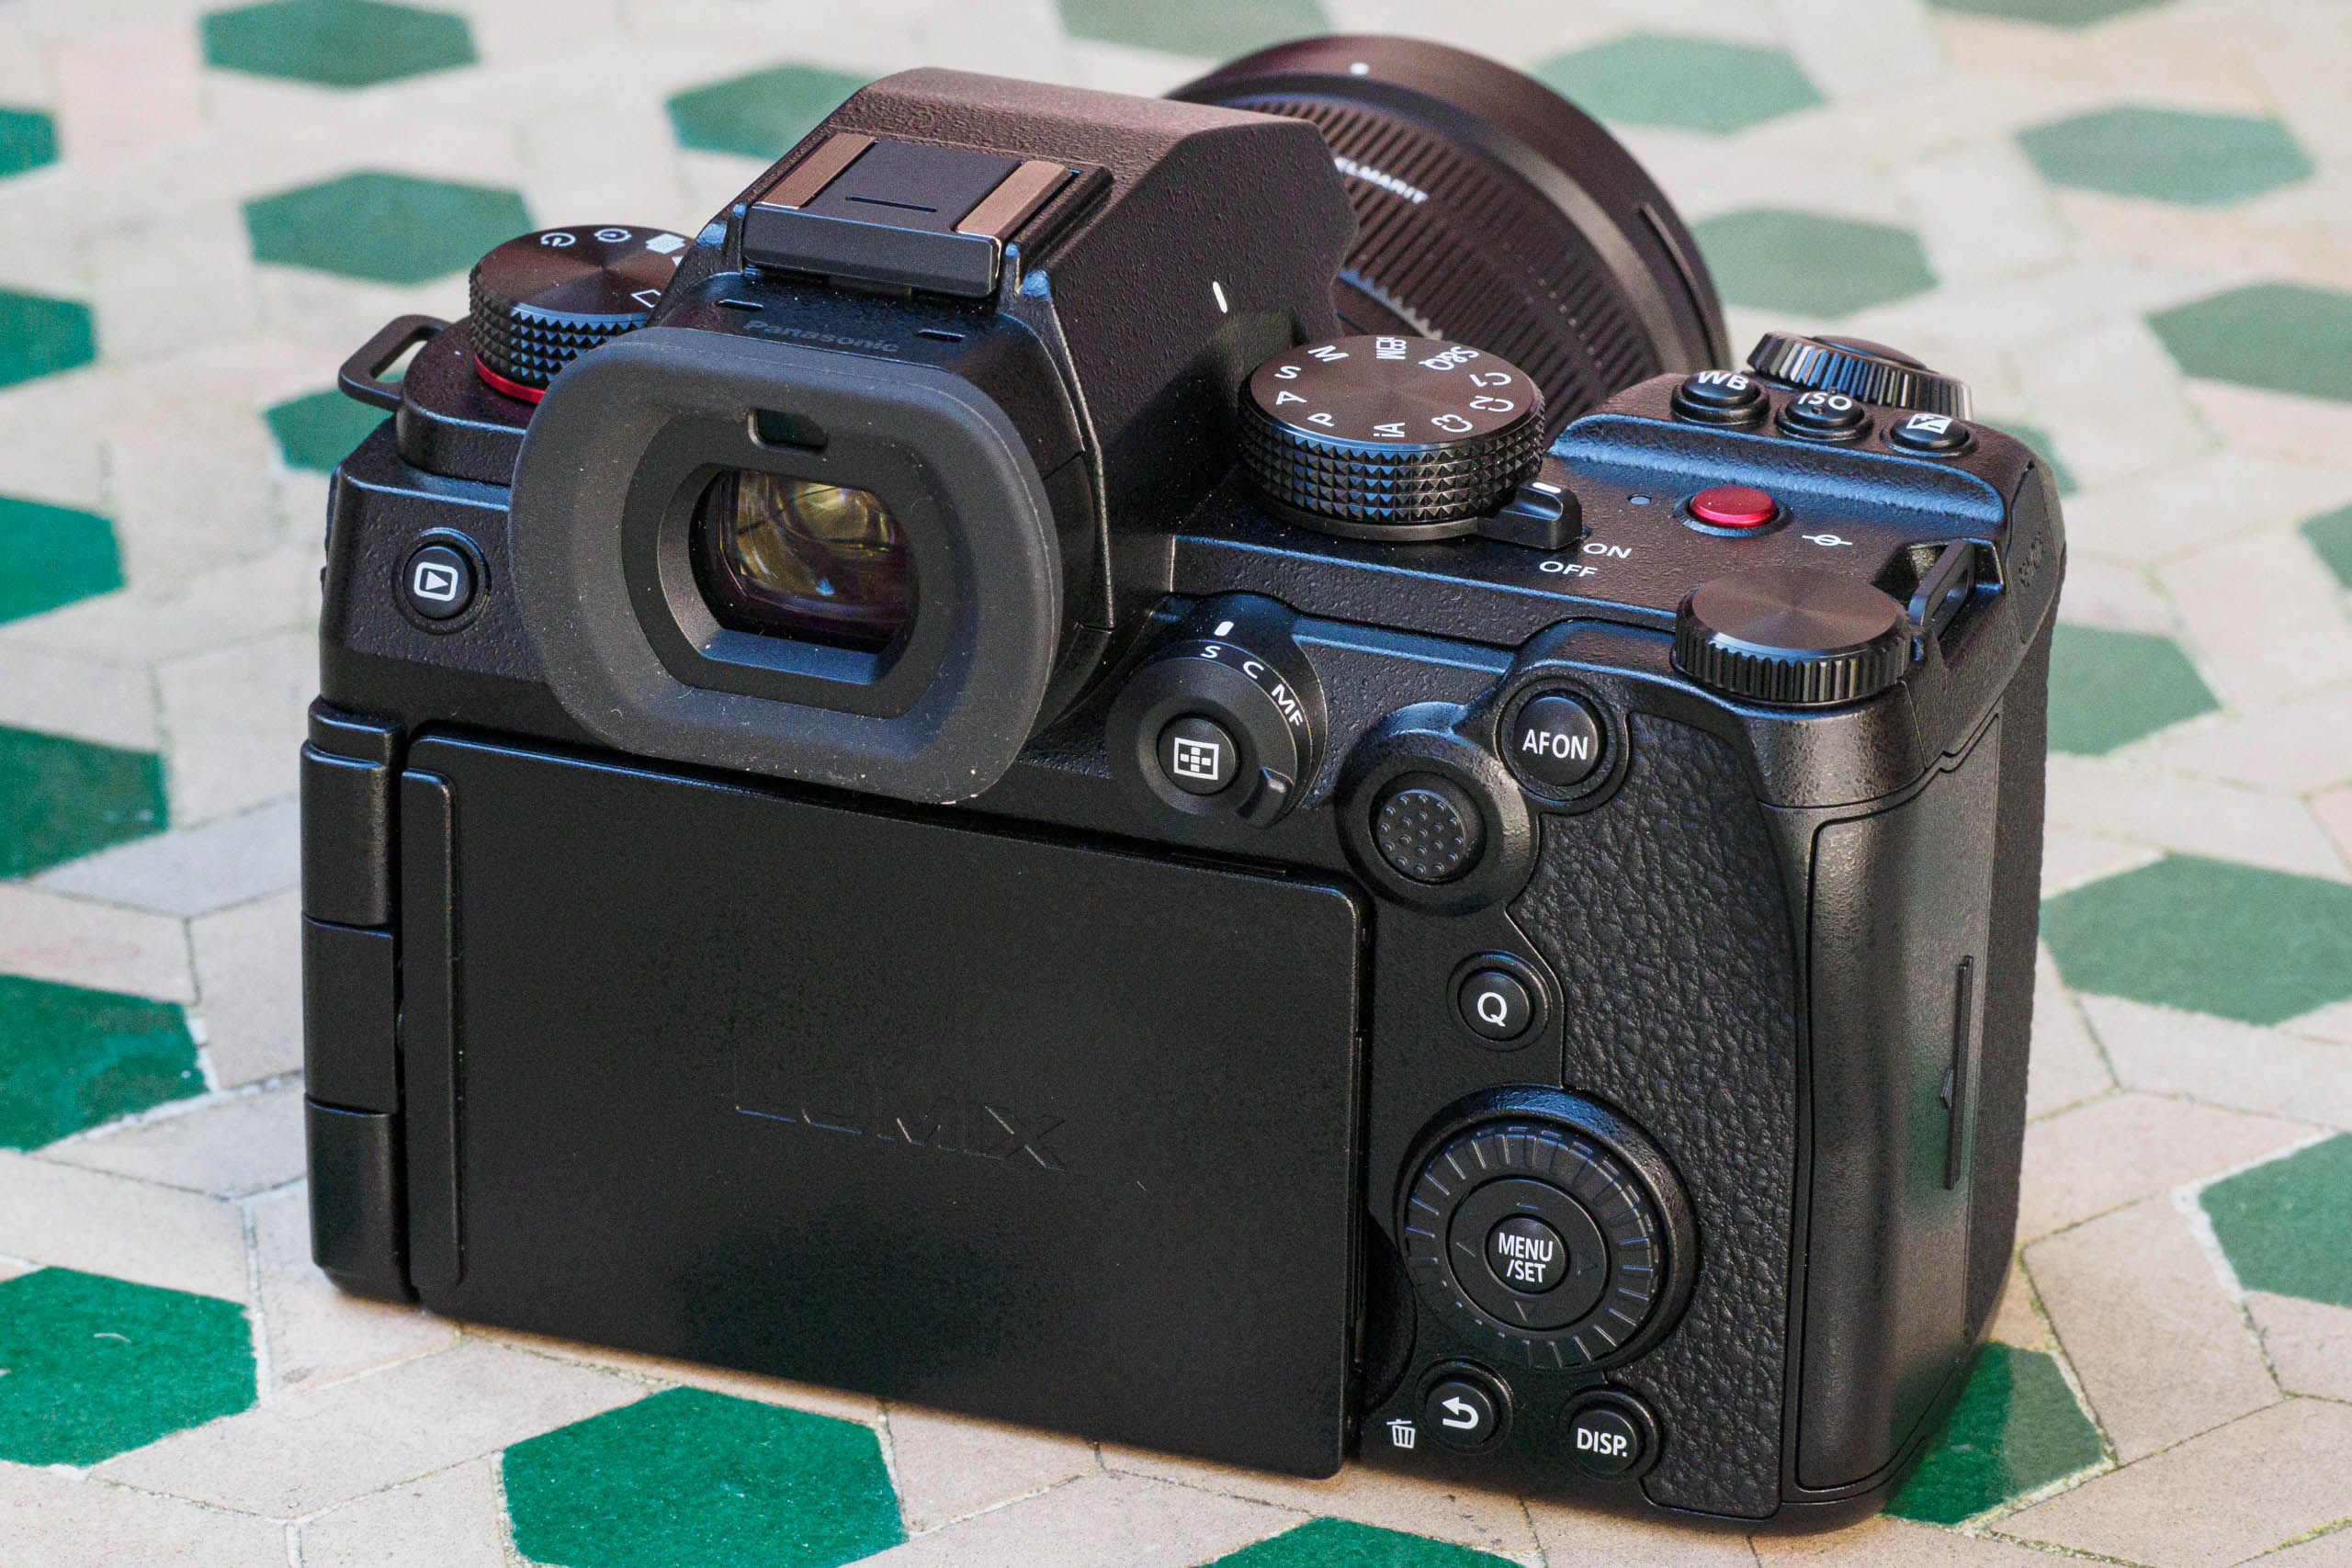
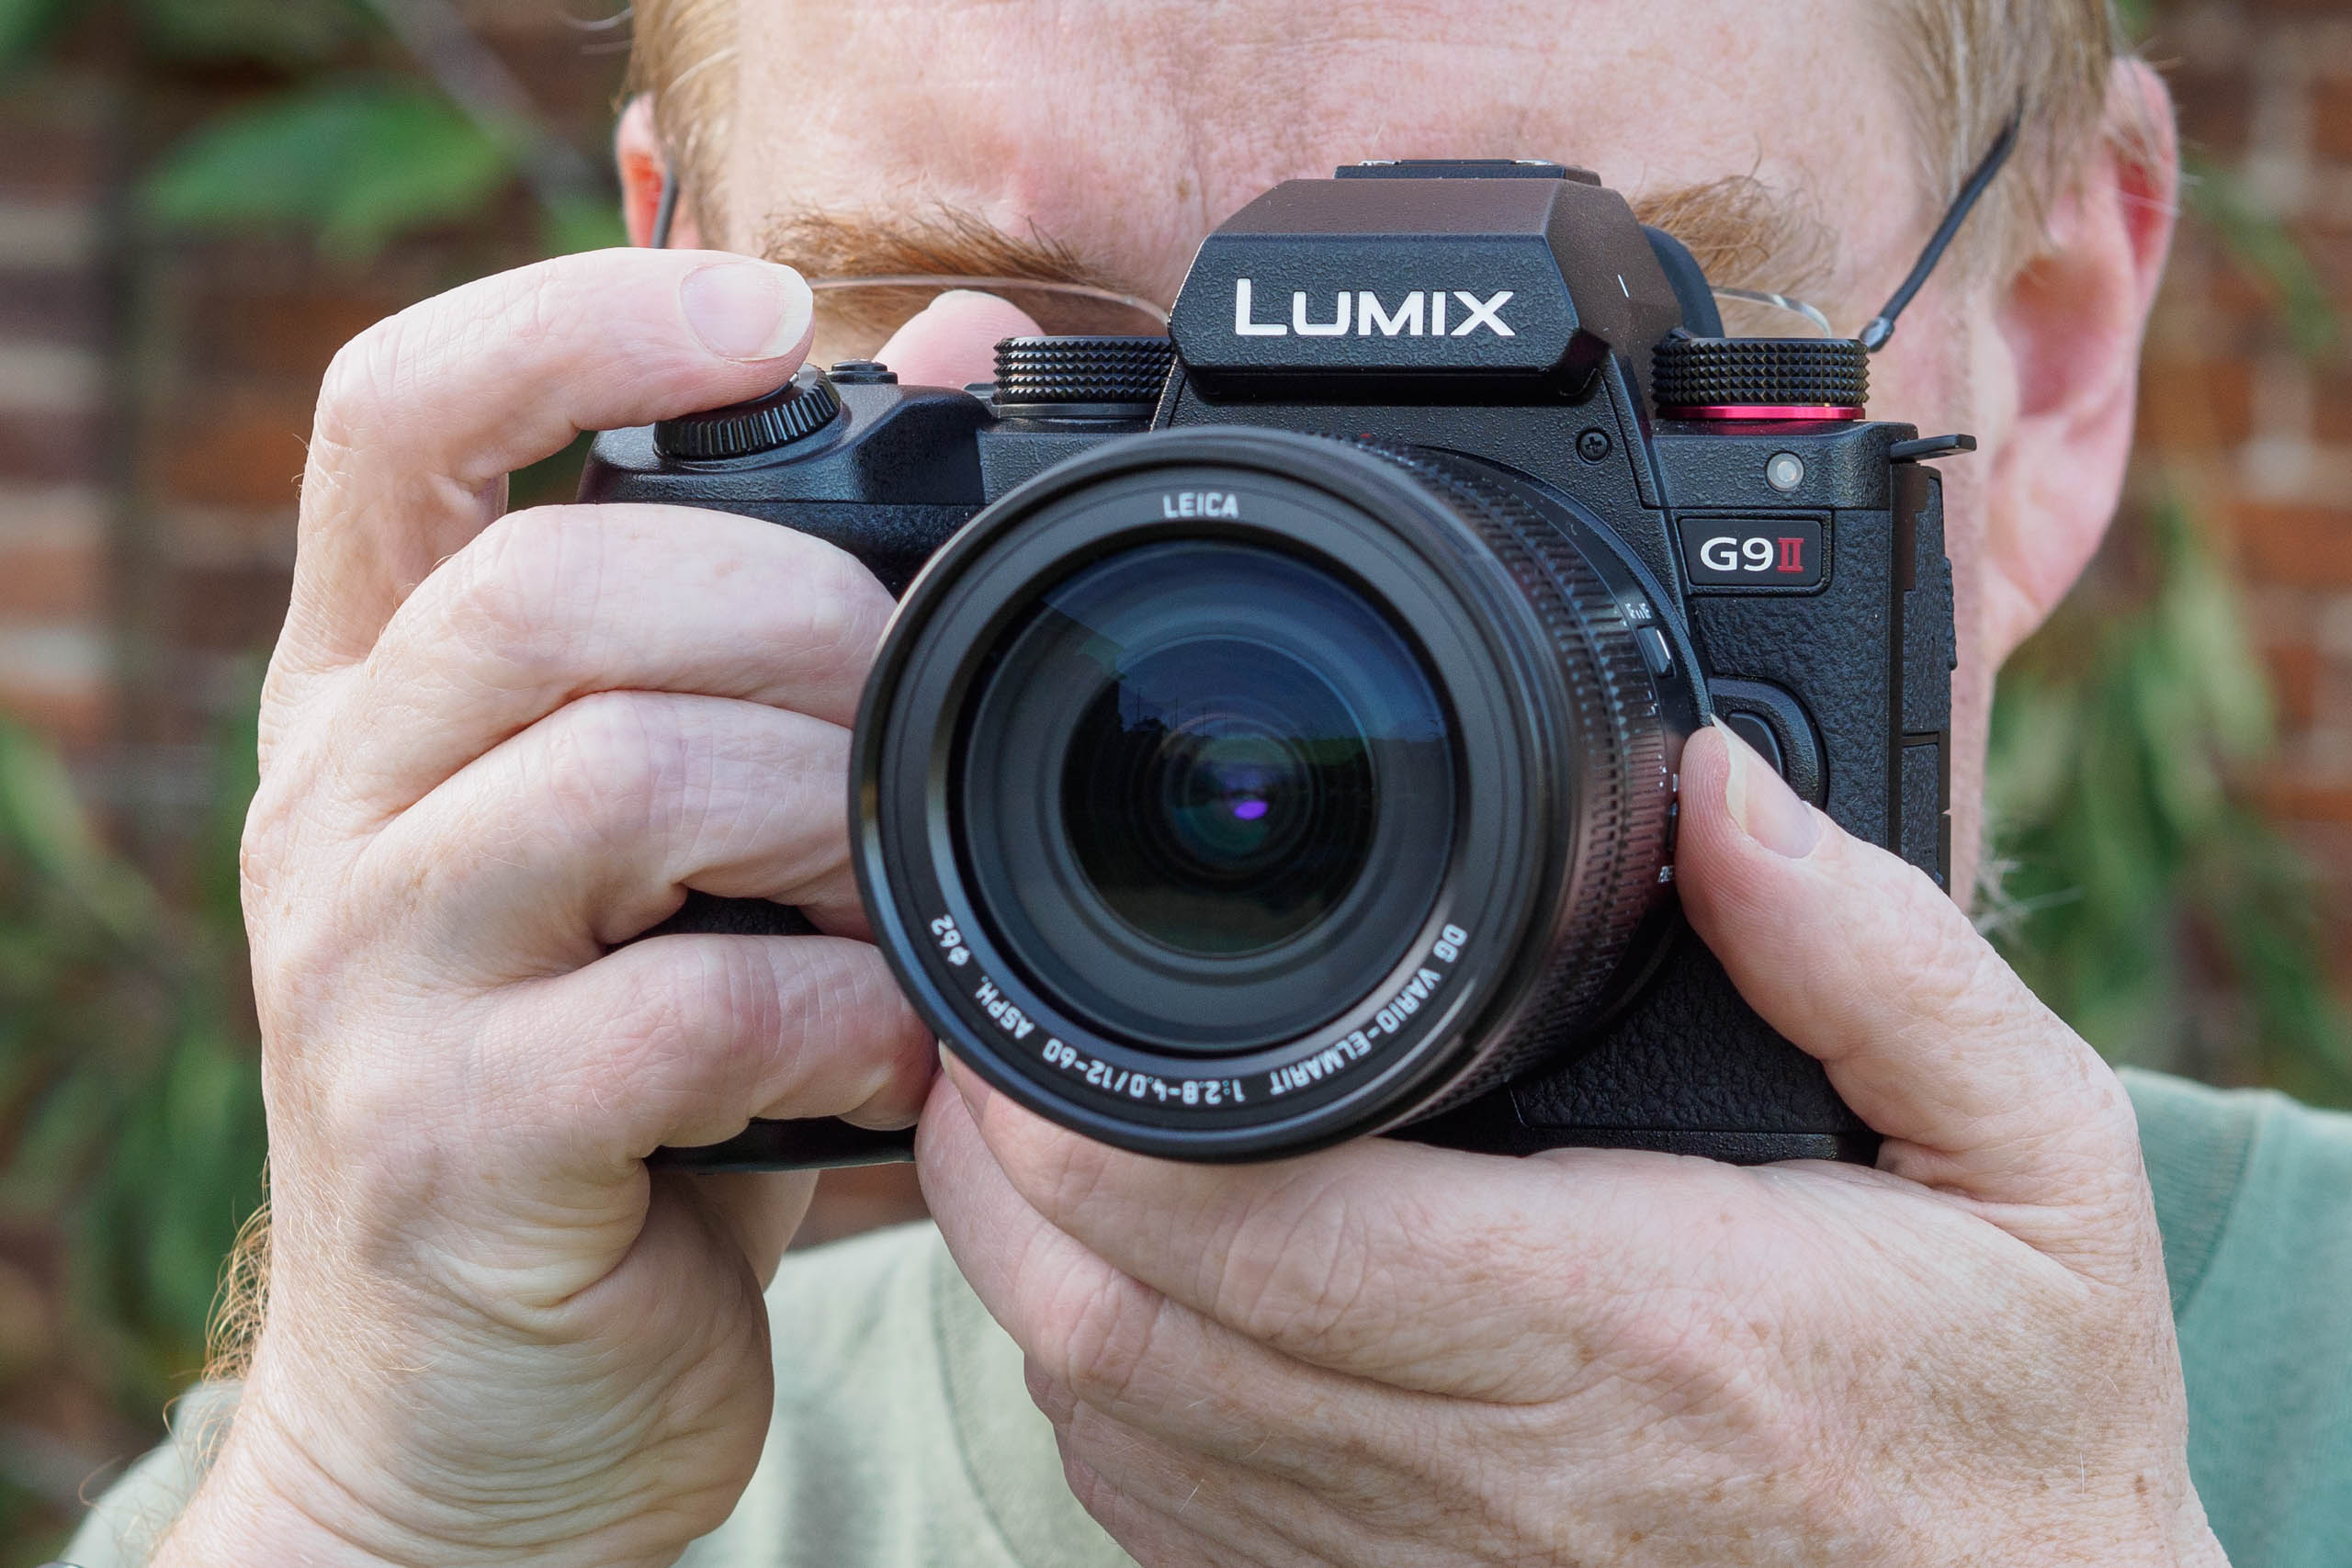
As for design, Panasonic has used the same body as the full-frame Lumix S5II. There are some detail differences – the G9II doesn’t have a cooling fan in its viewfinder housing, and the smaller Micro Four Thirds mount creates space for a second function button on the front – but overall, the two cameras work almost identically. This is good news for those who wish to use full-frame and MFT systems alongside each other.
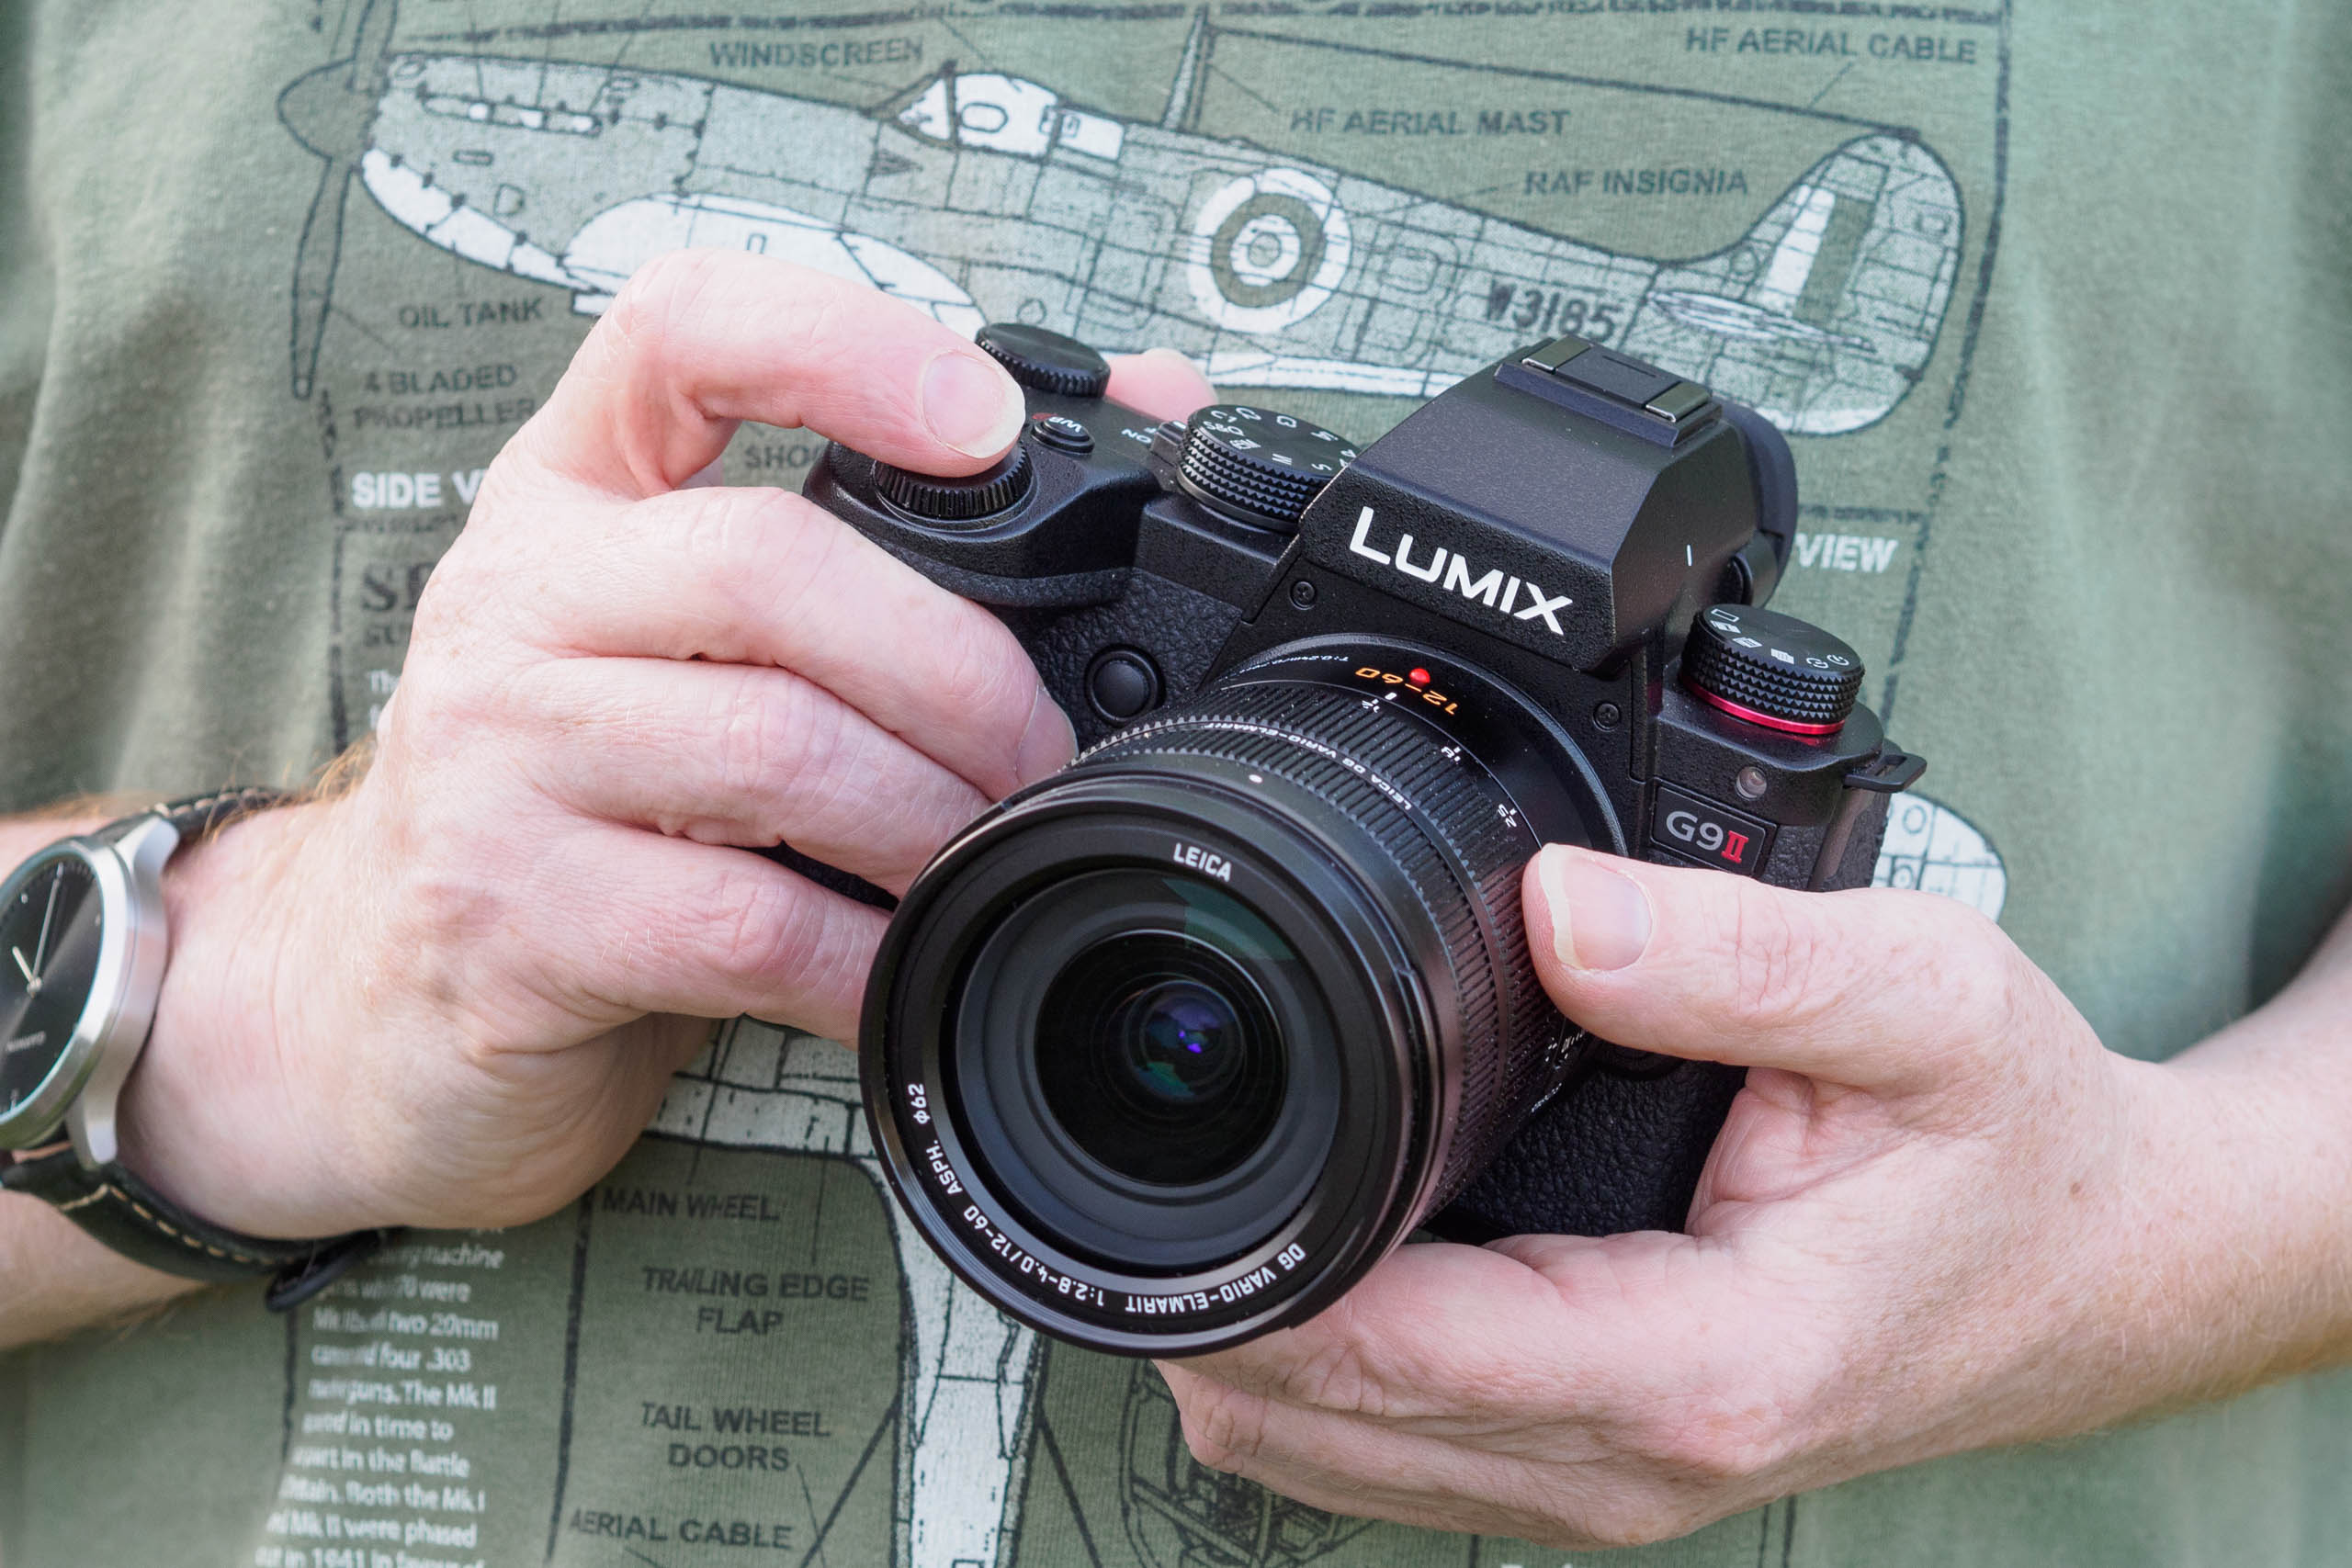
As a result, the G9II doesn’t look much like its nominal predecessor, and neither does it feel like it in your hand. The body is narrower but slightly taller, at 134.3 x 102.3 x 90.1 mm, although exactly the same weight (658g). Personally, I prefer it over the original G9, as it fits more comfortably in my hand and all the controls are really well placed.
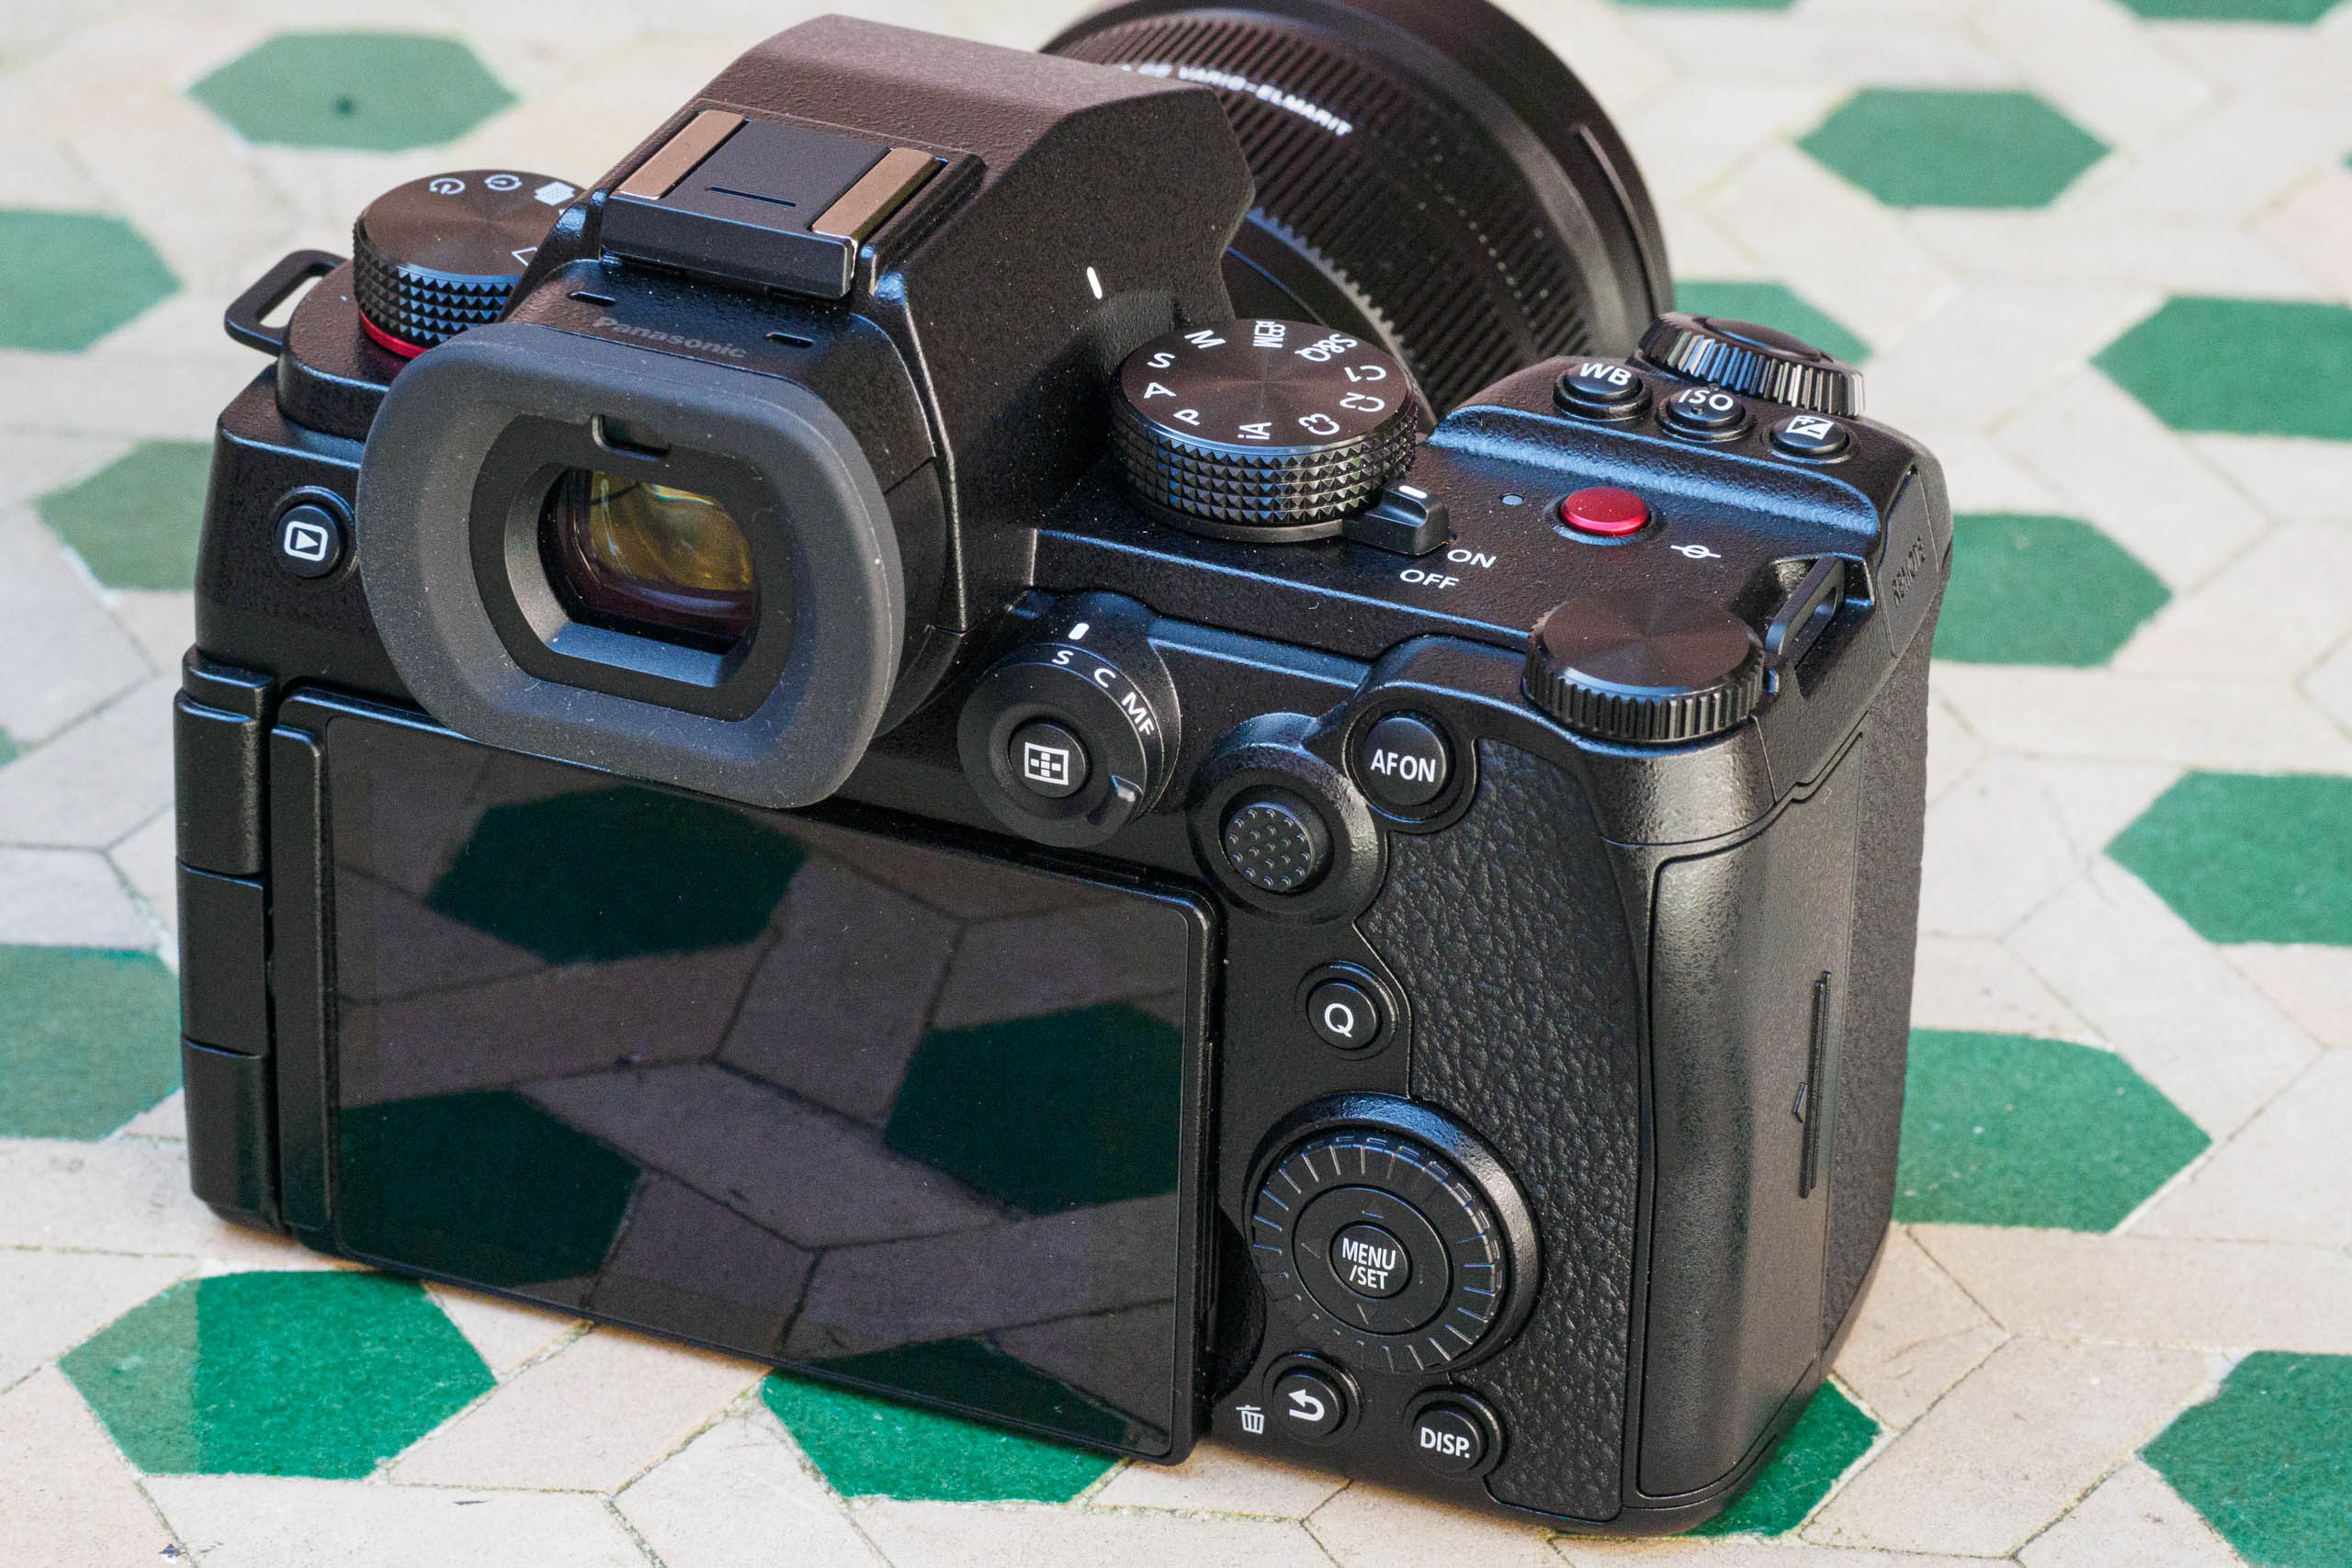
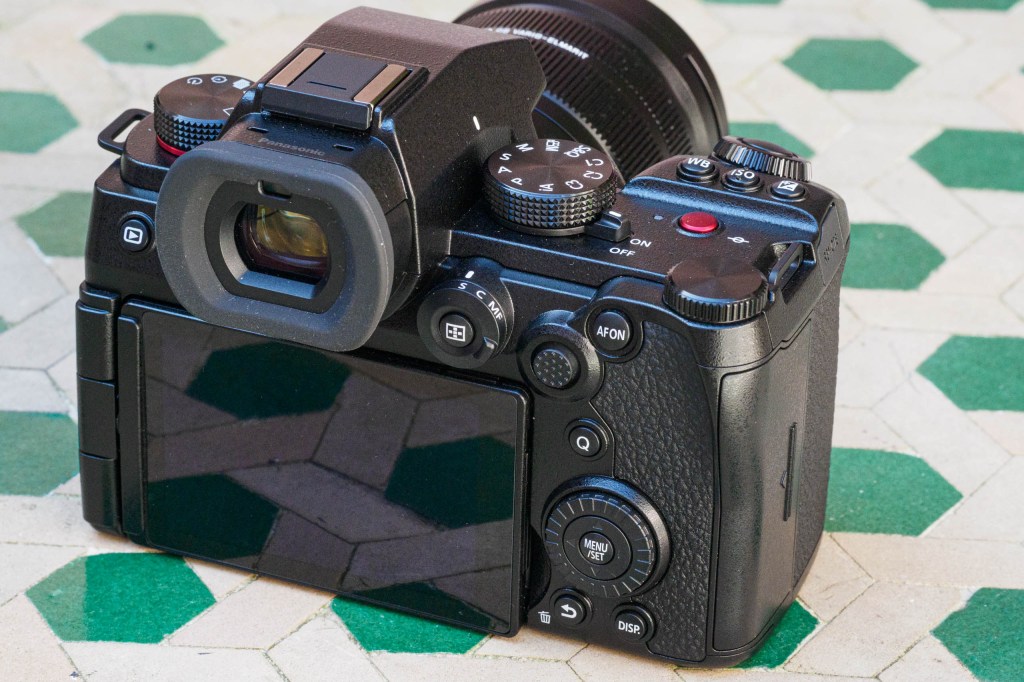
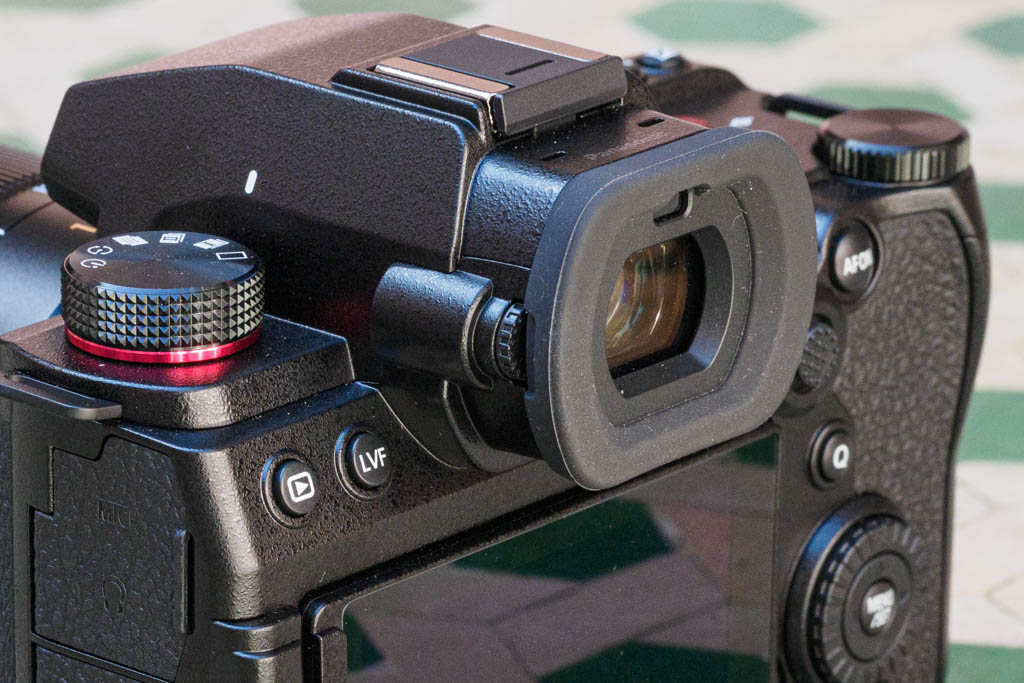
Notably, the AF joystick is now much more conveniently positioned within the arc of your right thumb. It’s also an 8-way design that supports diagonal movement, which makes repositioning the AF point considerably quicker.
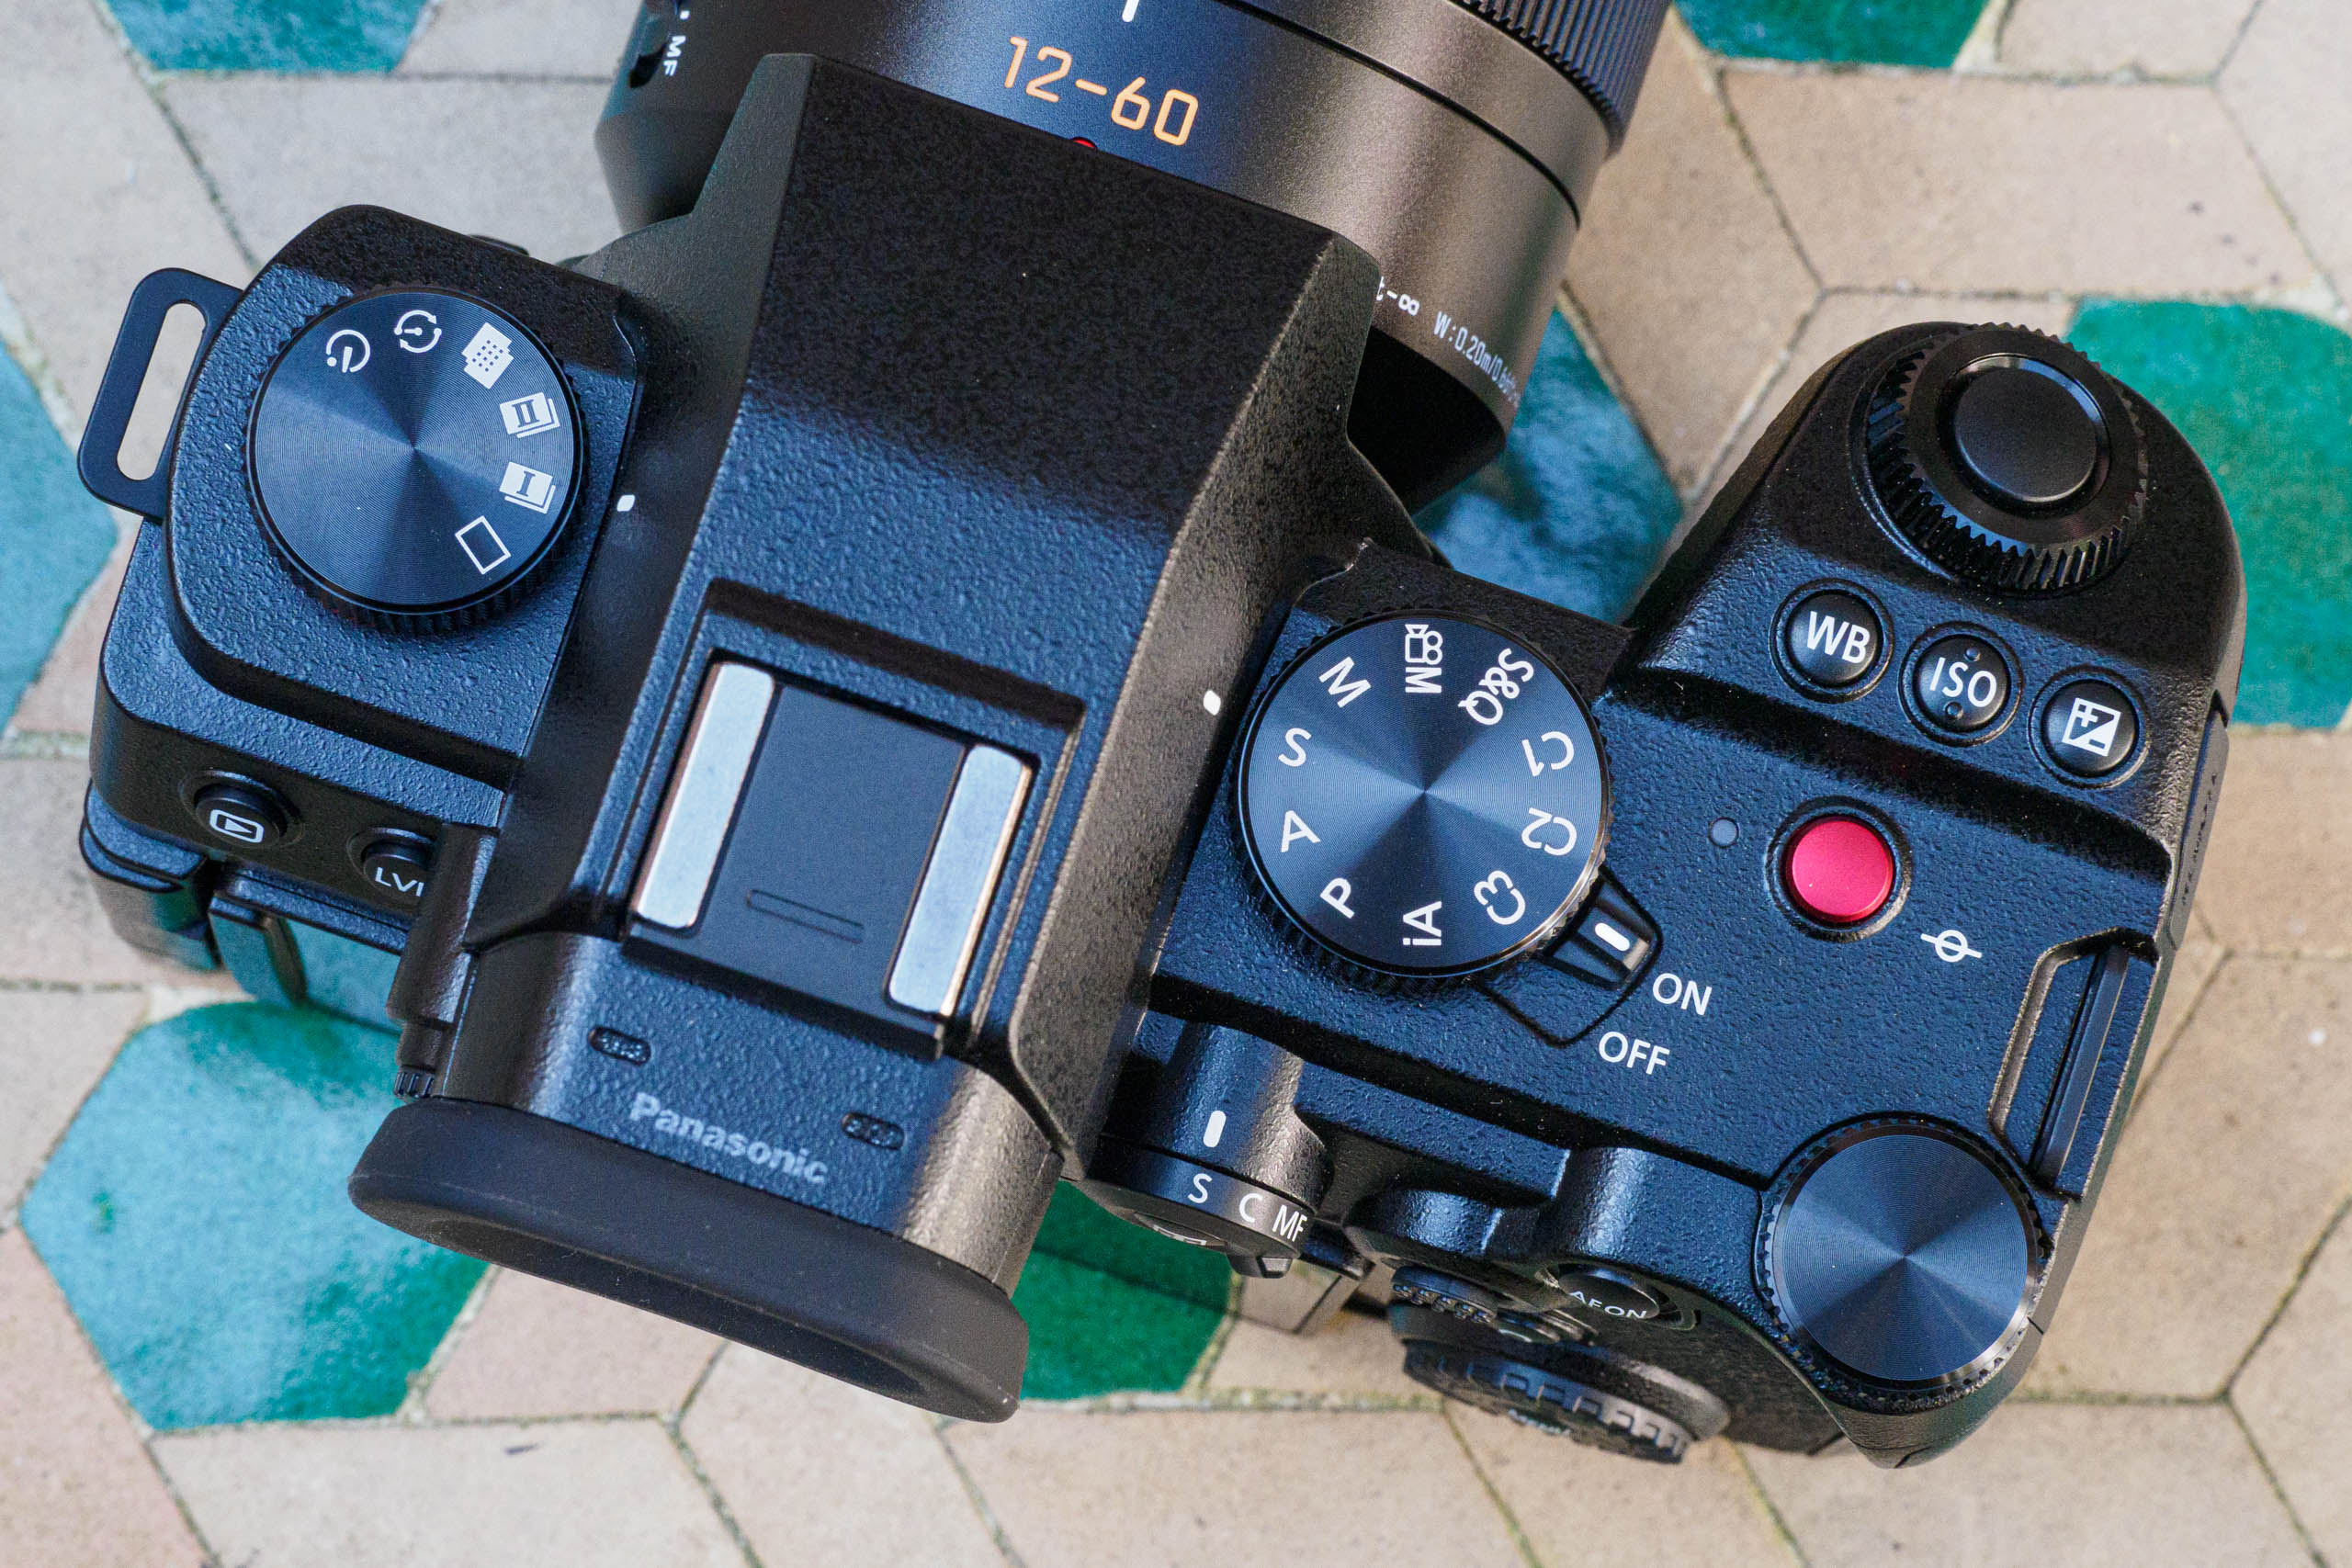
Operationally, though, the G9II behaves in a similar way to the G9 in most respects. You get three electronic control dials for changing settings, two on the top and one at the back, plus Panasonic’s signature row of buttons behind the shutter release for white balance, ISO and exposure compensation.
Another button in the centre of the focus mode switch gives quick access to all the focus area and subject detection options. As a result, all of the most important shooting settings are readily accessible from dedicated external controls, while other options can be set by pressing the Q button.
I don’t much like how Panasonic sets up the control dials out of the box, though. The top-plate finger and thumb dials do the same thing in all exposure modes except manual, while the back dial does nothing at all; which feels like a waste. But the camera is highly customisable, so I set the thumb dial to exposure compensation and the back dial to ISO.
Some will doubtless bemoan the loss of the G9’s top-plate LCD panel, with the mode dial switching to the top right in its place. But this rearrangement has its advantages; it’s easier to change the exposure mode while supporting the lens with your left hand, while the drive mode dial is also much quicker to read and set. The focus mode switch is now labelled on its top, so you can check all these settings just by glancing down at the camera: good design.
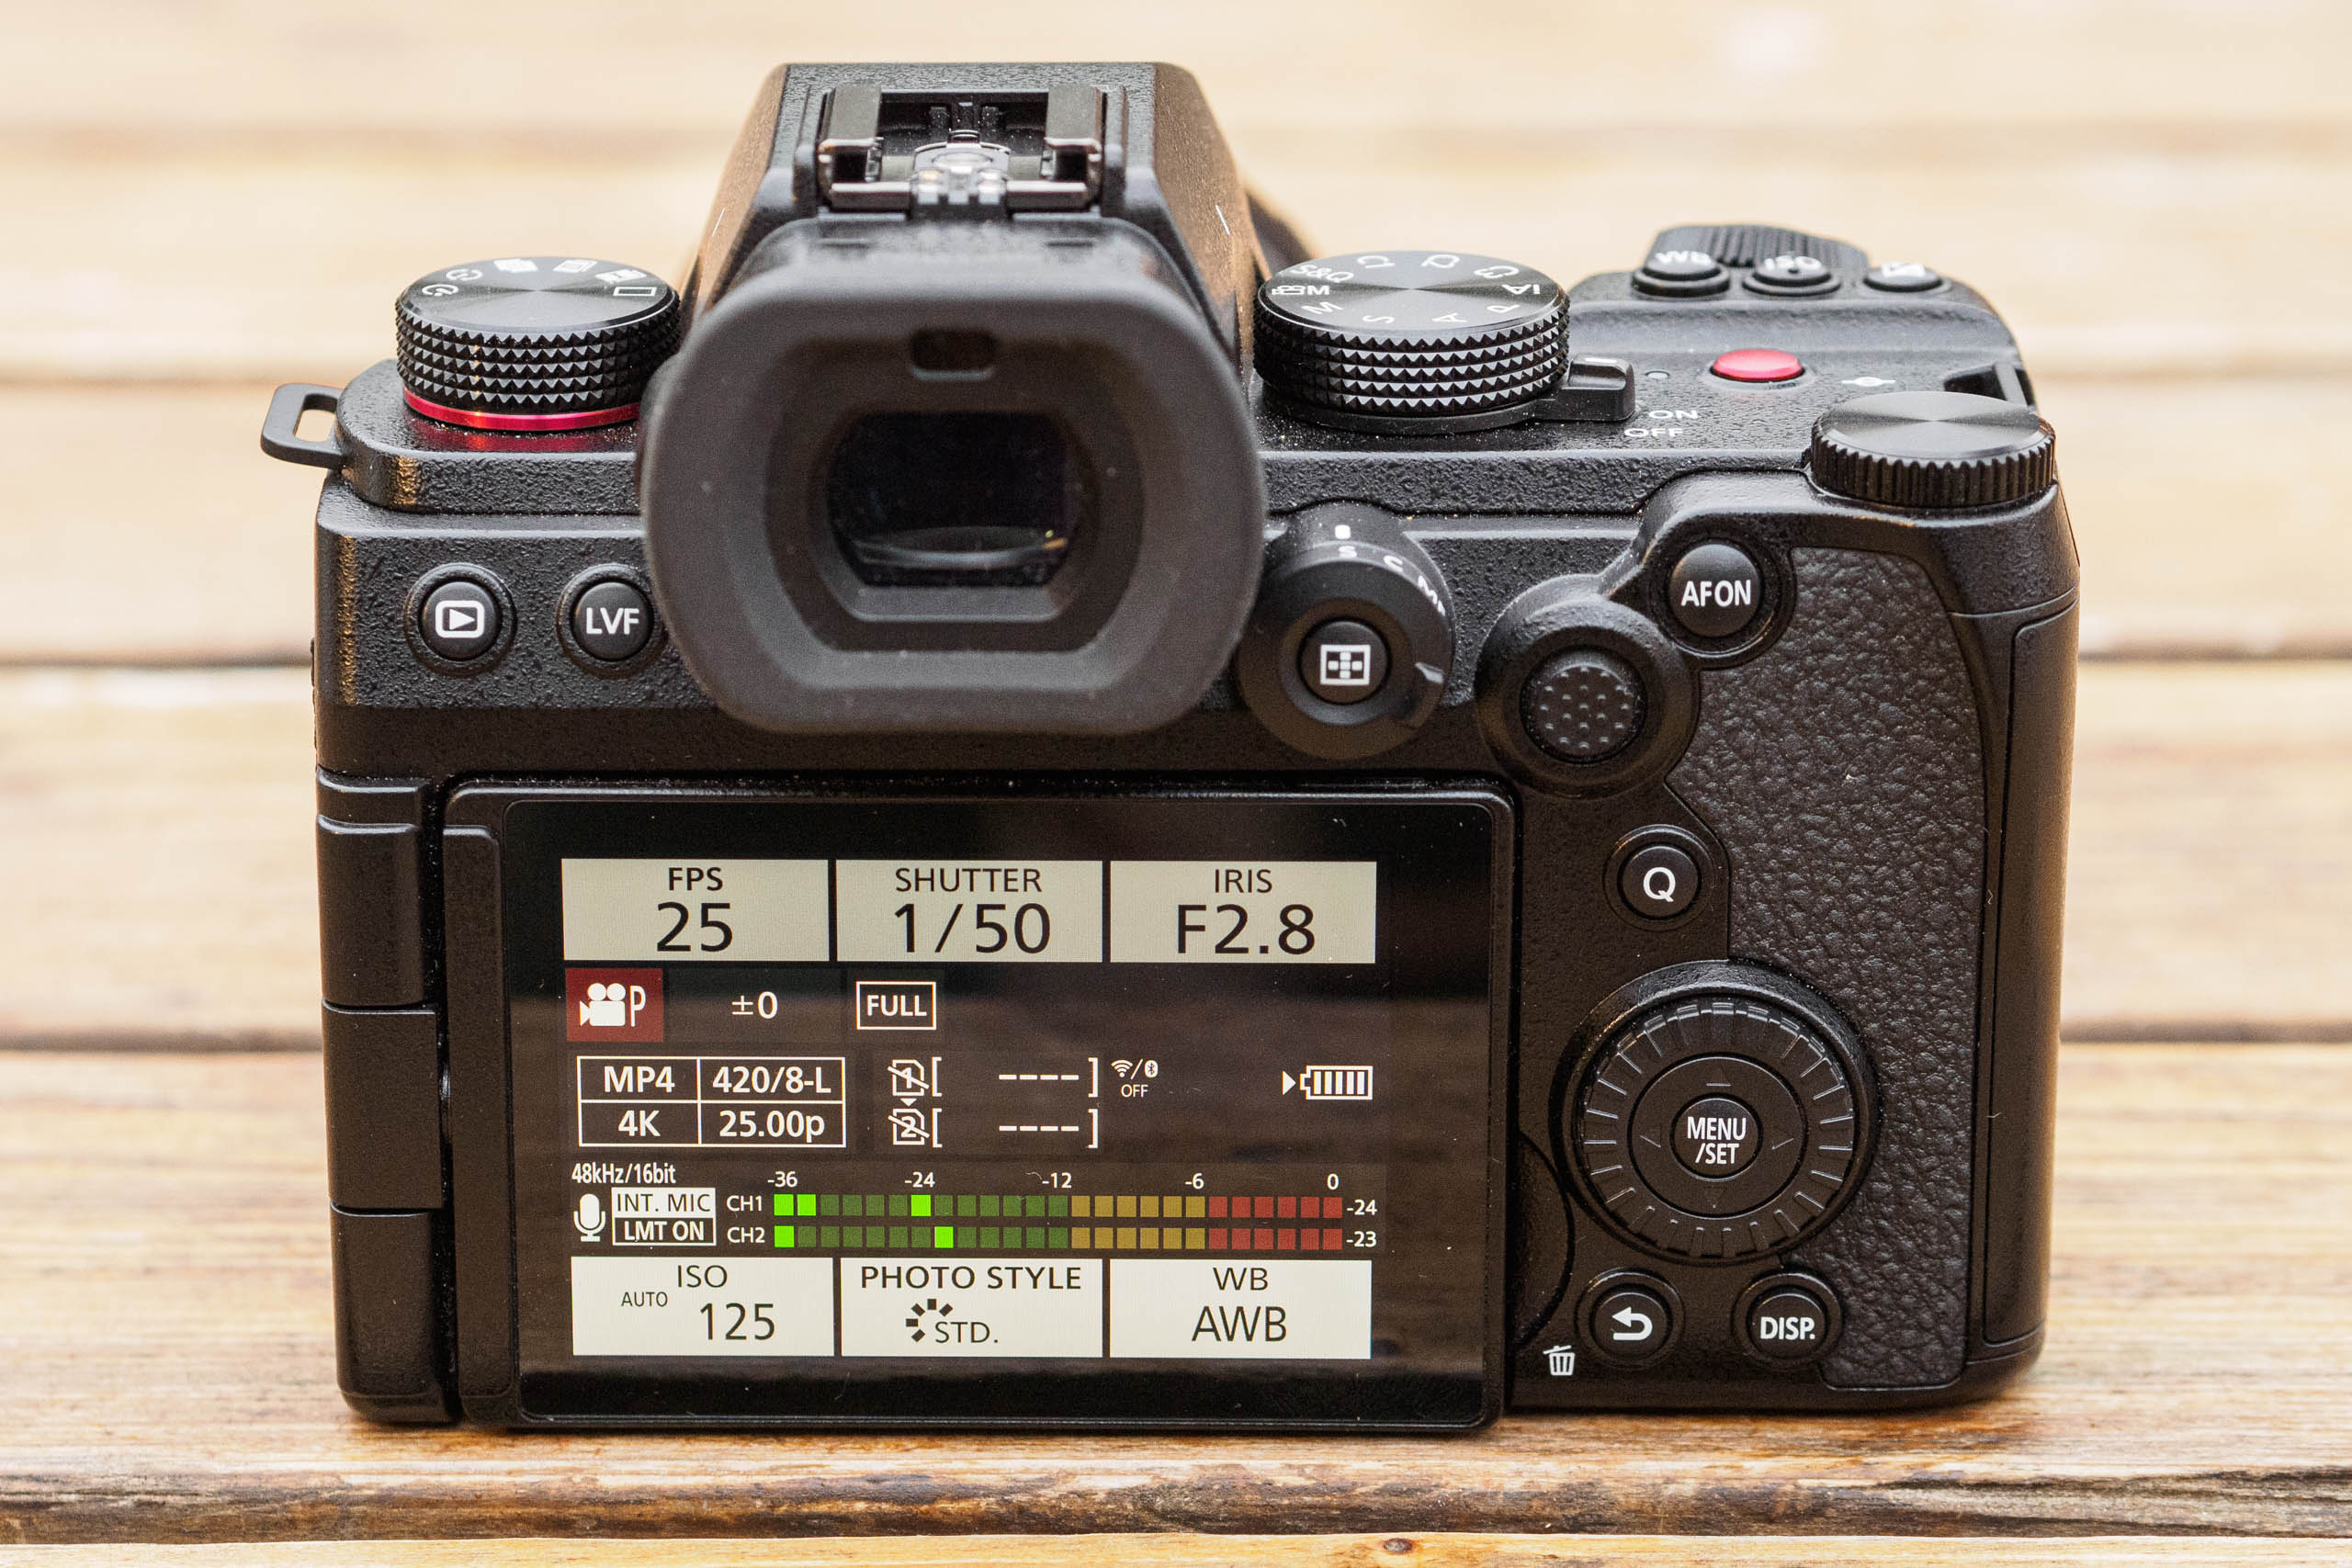
For video shooters, the bright red video record button is well placed so it’s just as easy to use either when holding the camera normally, or pointing it towards yourself. However, unlike some other recent models, the G9II doesn’t have a photo/movie mode selector switch. Instead, there’s a manual movie position on the mode dial, along with S&Q for slow and quick motion.
Here you get a separate interface, with a video-specific status panel and menus. Exposure settings are shared between photo and video modes by default, which some users might find annoying, but this can be fixed via the obscurely titled Creative Video Combined Set menu.
Overall, though, aside from a few minor gripes, Panasonic’s control logic and onscreen interface is notably straightforward and easy to use. What’s more, pretty much everything can be operated just as easily using the touchscreen as the physical controls. It’s difficult not to conclude that this is one of the best designed cameras around for user experience.
Viewfinder and screen
On paper, the G9 II’s viewfinder looks like a small step back from the G9: it has the same 3.68m-dot resolution but slightly lower magnification, at 0.8x compared to 0.83x. But this is only part of the story, and in practice I found it sharper and easier to see into the corners.
The view is clear and detailed, previewing both colour and exposure across a +/-3EV range. Depth-of-field preview is provided by a button on the front, with a second tap of this button also previewing any motion blur effects from your selected shutter speed.
You can display all the usual shooting aids such as gridlines, a level gauge, and a live histogram. When shooting video, you can also enable vectorscope and waveform displays for judging colour and exposure, although the latter occupies a large proportion of the screen.
Other less-common, but potentially useful options include an IS scope that helps visualise how steadily you’re holding the camera, and the ability to provide a real-time readout of the luminance value when using spot metering so you can judge the brightness variation across the scene. What you don’t get, though, is the option to show a more neutral preview akin to an optical viewfinder, as some other brands have offered for years.
Underneath the viewfinder, the 3in, 1.84-dot vari-angle screen delivers a welcome step up in resolution compared to the G9. It can be set to face almost any direction, which makes it handy for shooting at awkward angles or on a tripod. Set facing directly forward, it’s useful for selfies or vlogging. In the latter case, it’s now possible to display a bright red outline as visual confirmation that the camera is recording. The screen can also be folded facing inwards to protect it from scratching.
One minor, but nice change is that the viewfinder eye sensor has also been repositioned above the eyepiece. This makes it a little less prone to switching off the LCD when you move your hand across the back of the camera.
Autofocus
Clearly, the G9 II’s headline update is the addition of phase detection for autofocus. But equally importantly, it also gains Panasonic’s subject detection system. In an advance over the full-frame S5II, this is now capable of recognising cars and motorcycles, as well as humans and animals.
Images in this review are out-of-camera camera JPEGs, edited lightly for colour, contrast, brightness, tonality and cropping etc. Click on any image to see the full-size version.
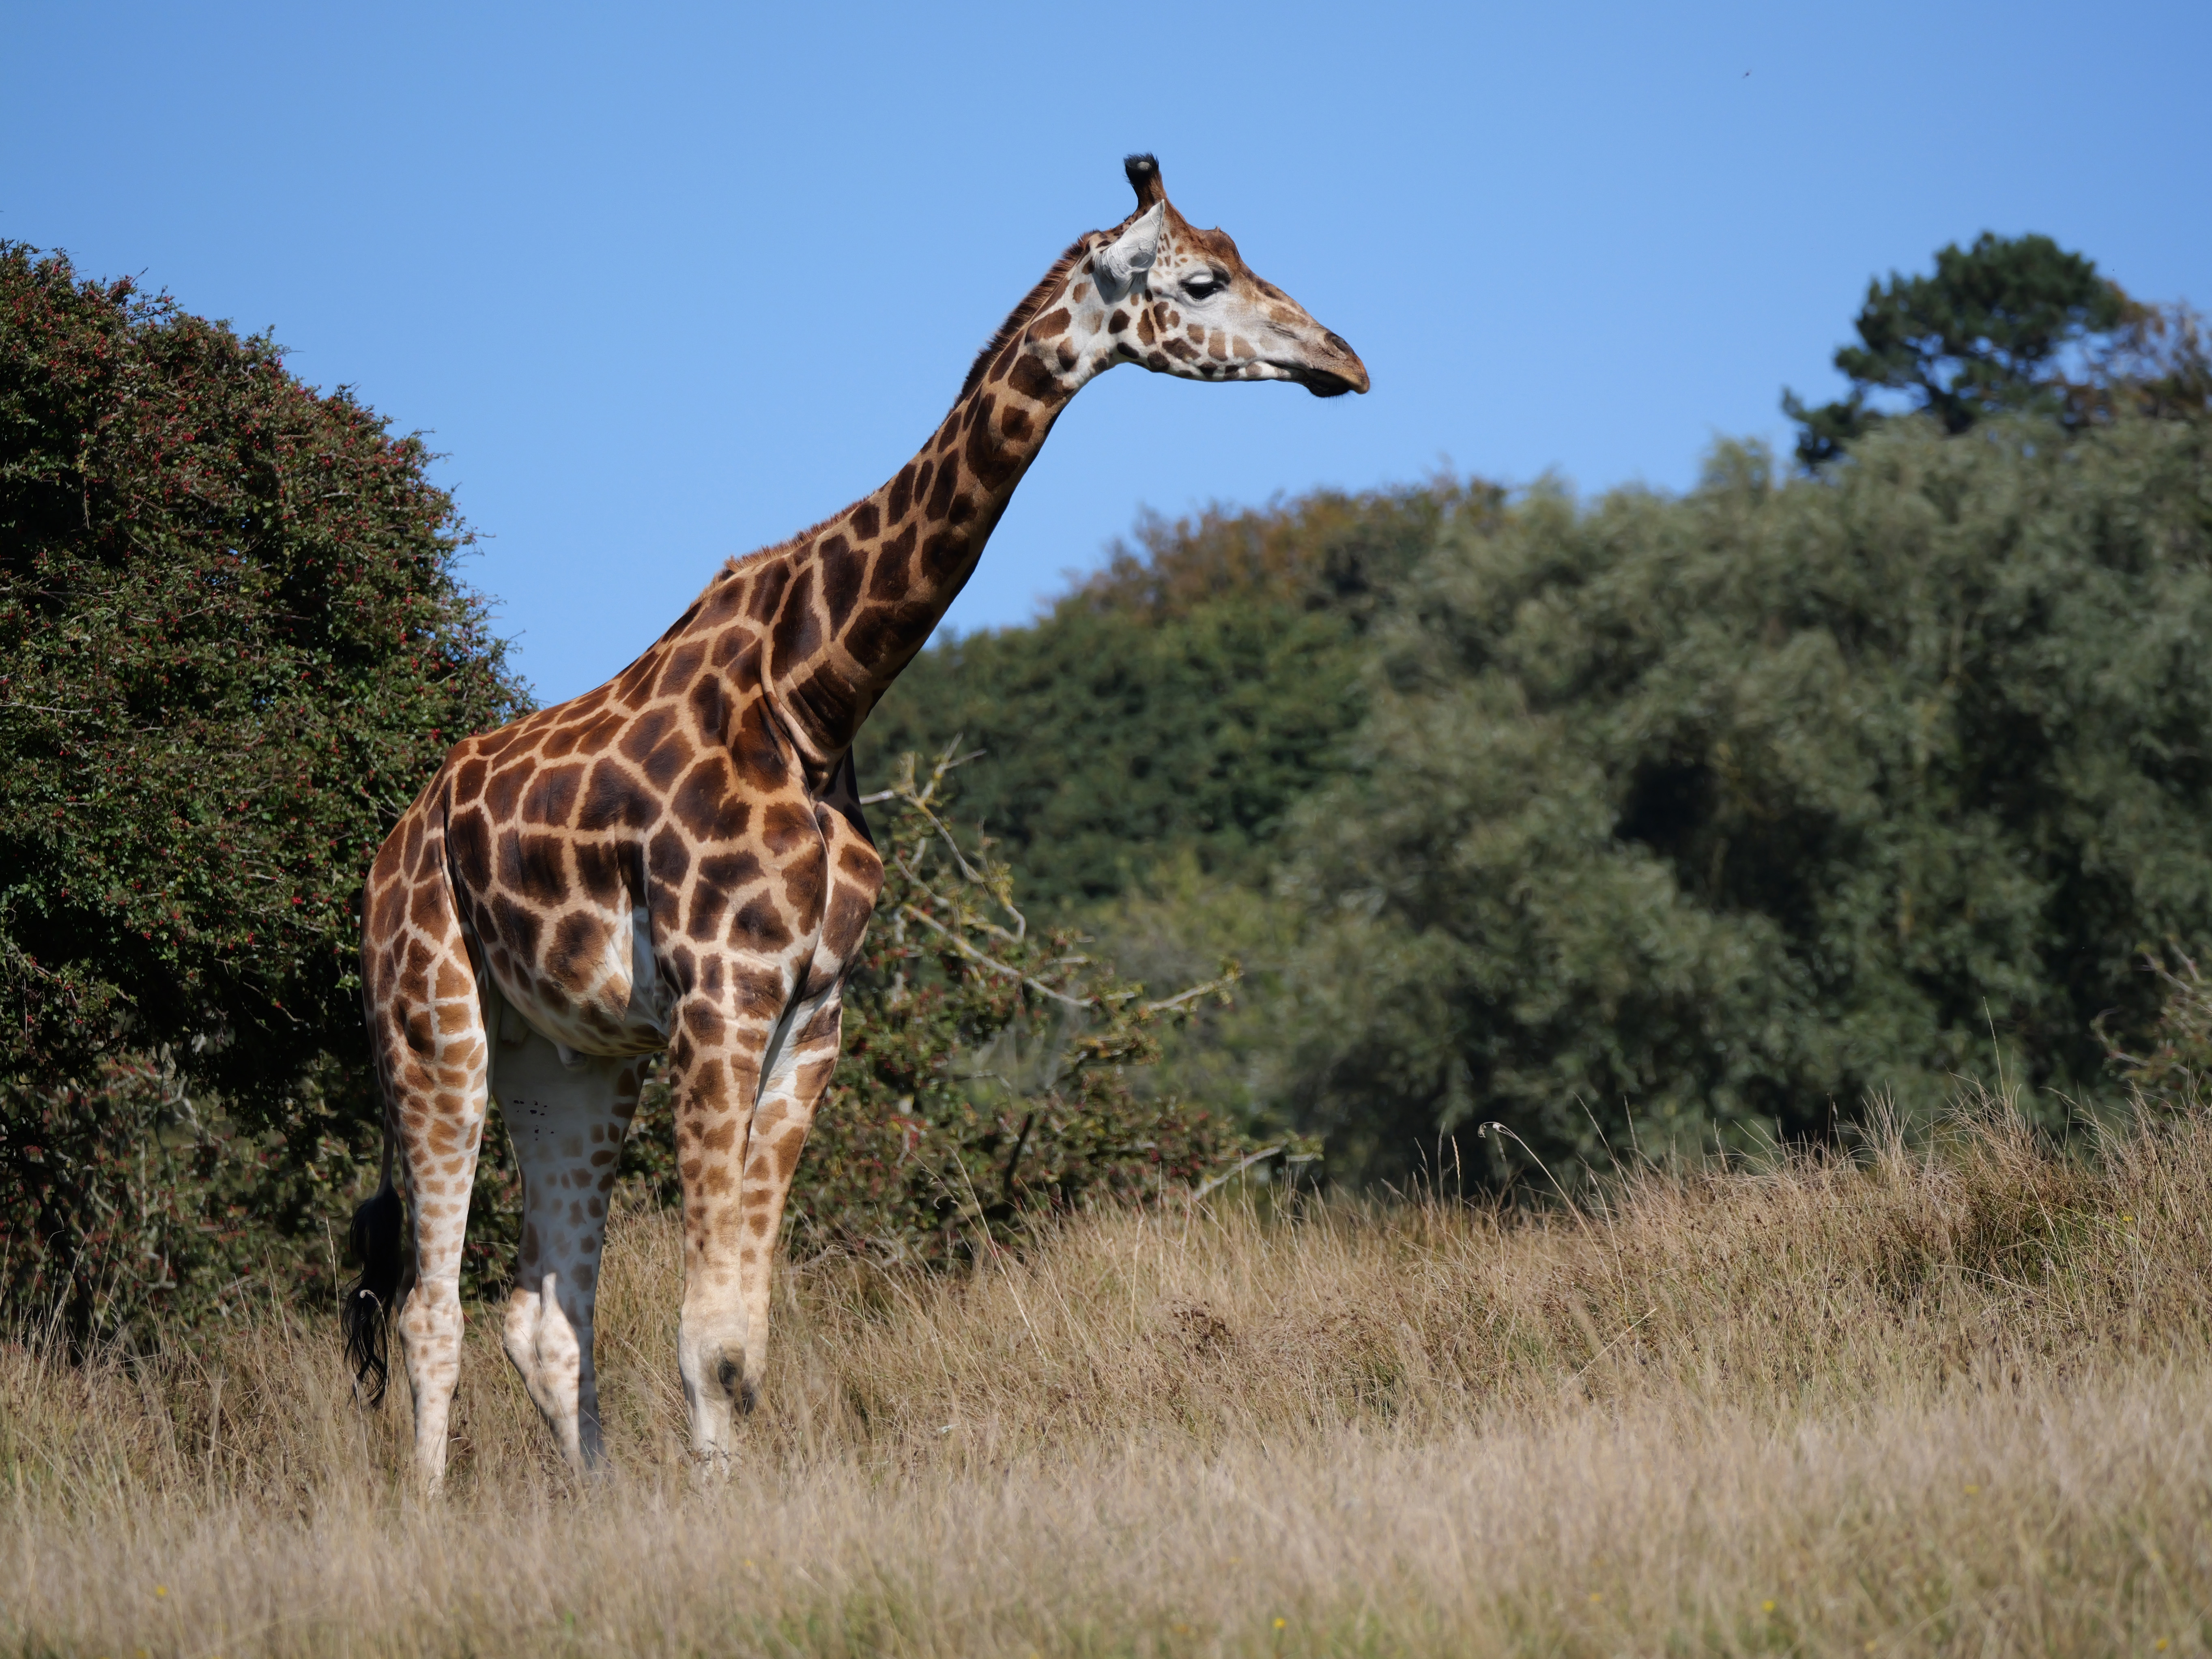
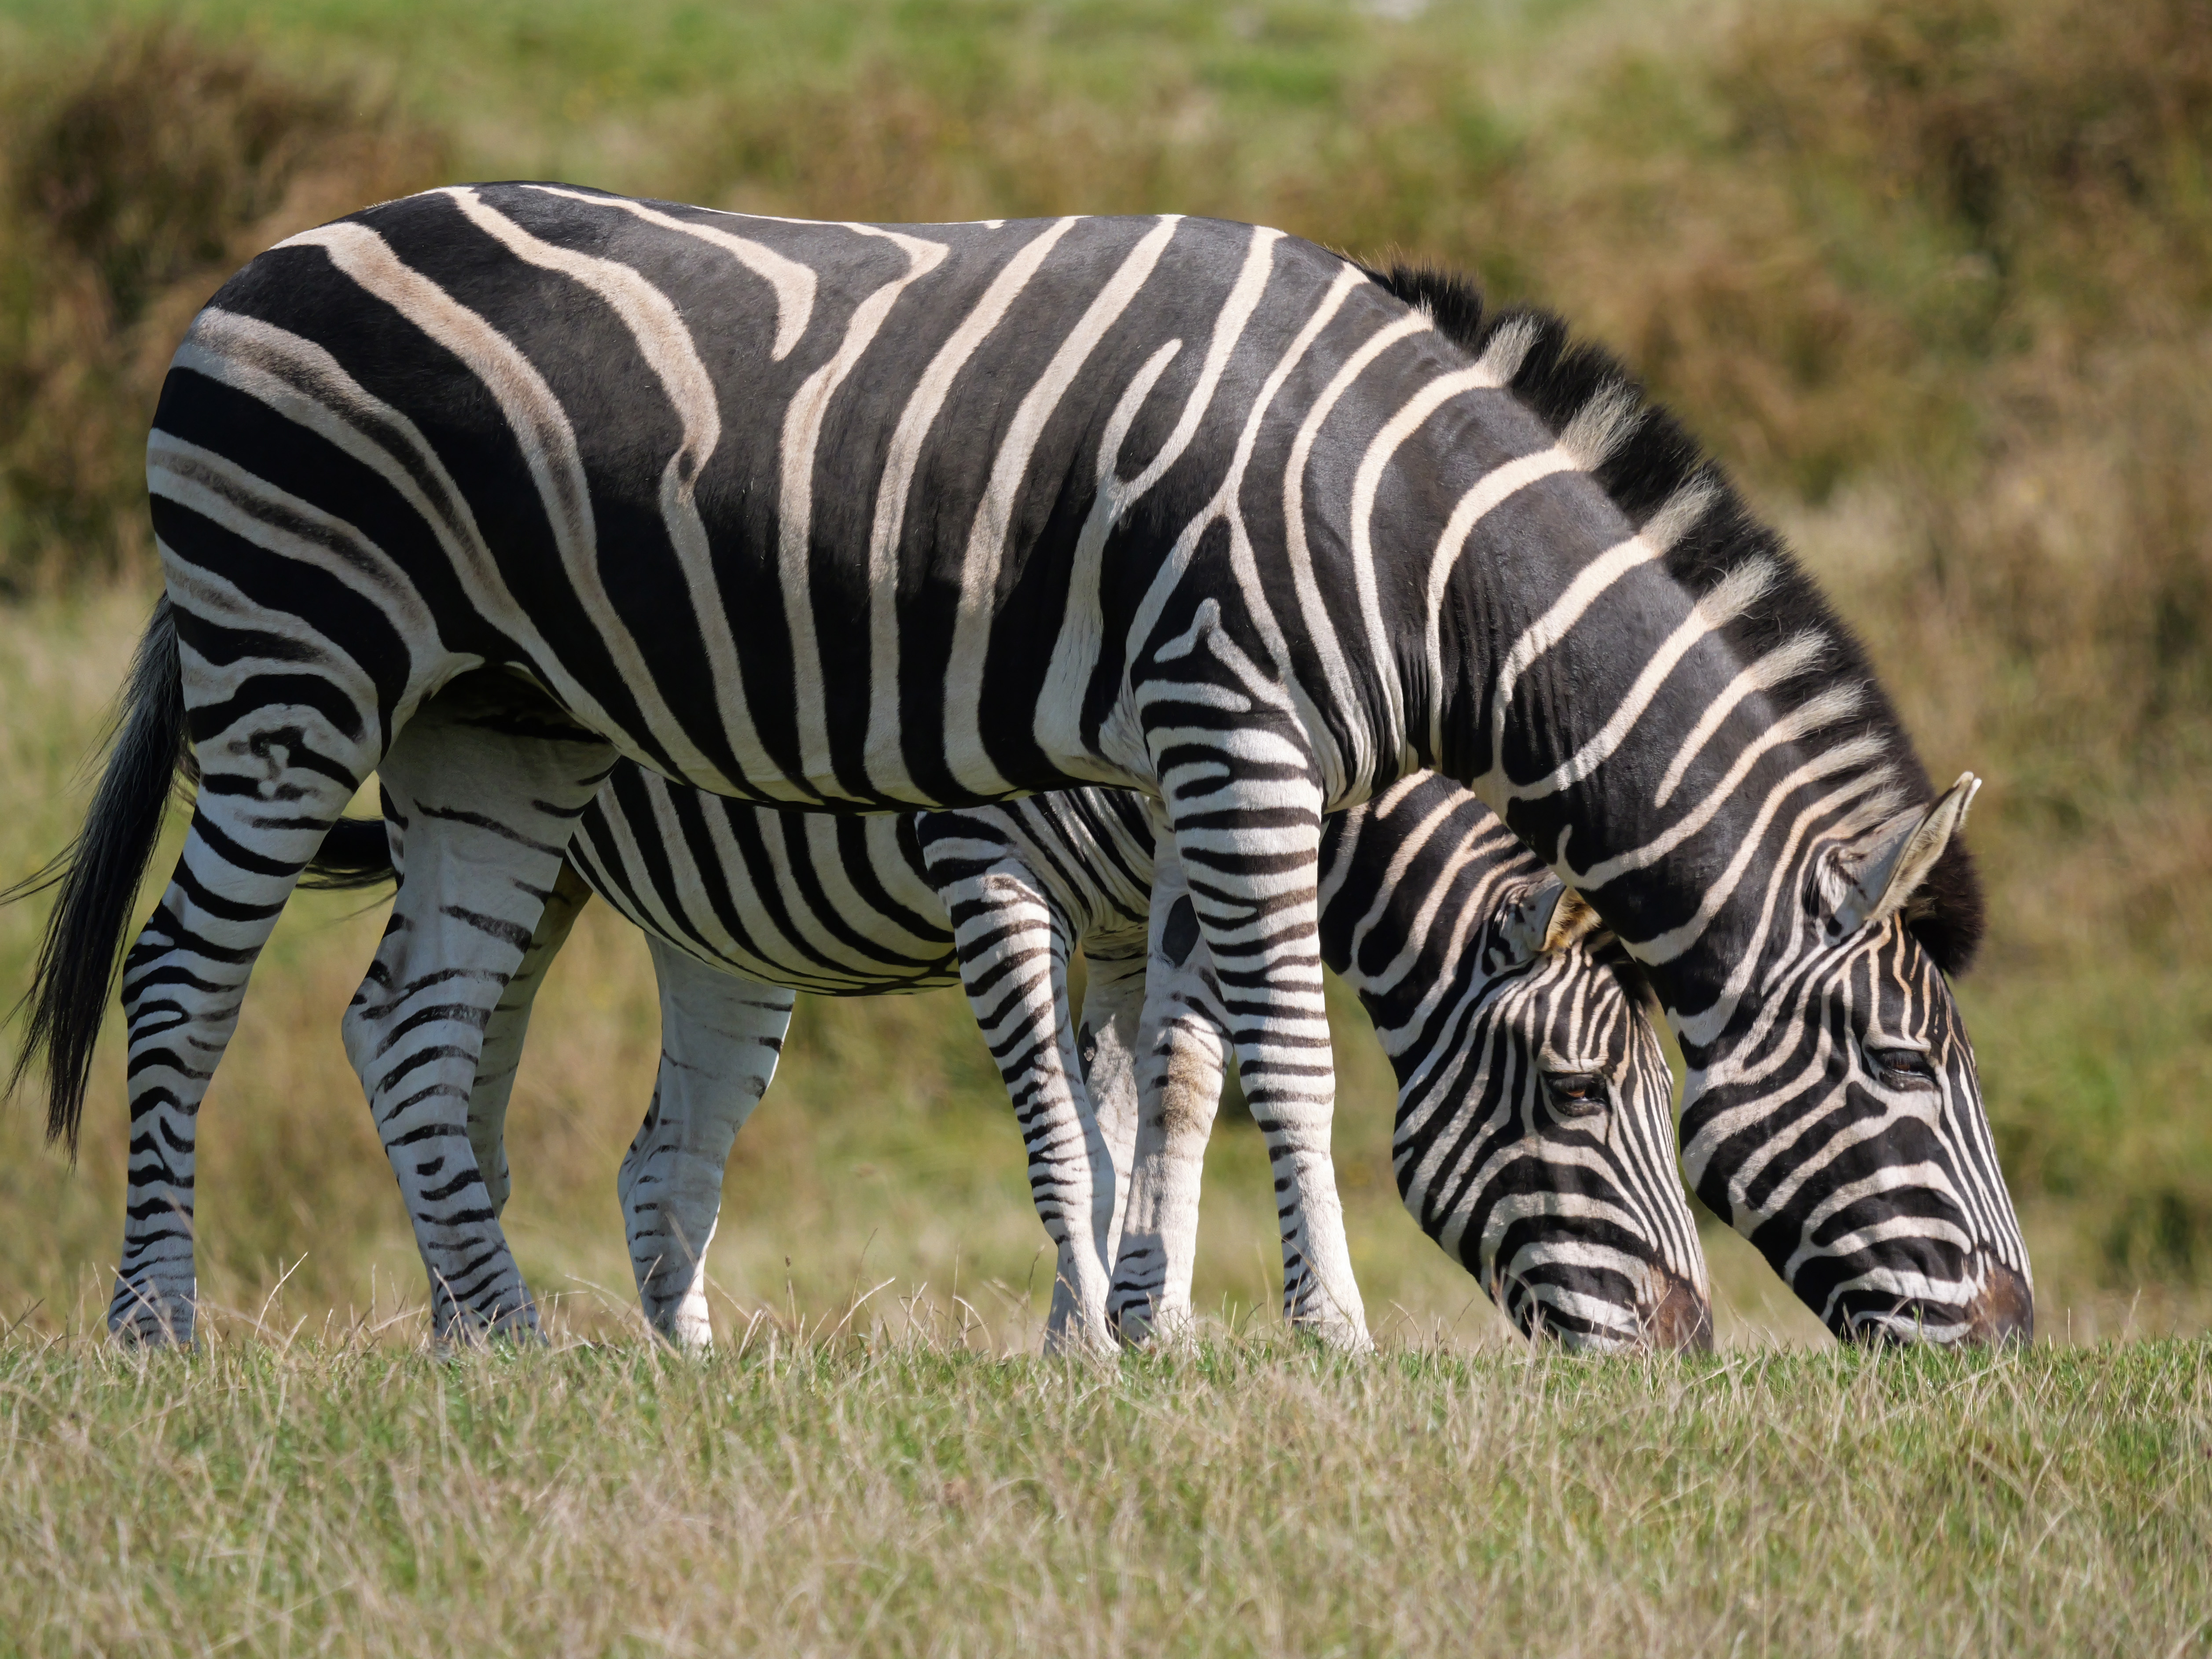
When set to its animal mode, the camera will recognise and track both birds and mammals, which is obviouly great for wildlife photographers. Human subject detection is also now more sensibly integrated with the face and eye detection, where previously they used to be separate settings.
When the camera finds multiple possible targets in the scene, it will prioritise whichever is largest and closest. This will be outlined in yellow, and the others in white. To shift focus onto a different subject, this can be easily done by nudging the joystick.
While this subject recognition system is slightly limited in its scope compared to other cameras – for example, there’s no setting for aircraft or trains – it’s still a huge advance over the conventional autofocus system in the G9. For shooting the kinds of subject that the camera understands, it’s a godsend that can transform how you work; allowing you to delegate focusing almost entirely to the camera and concentrate on composition instead.
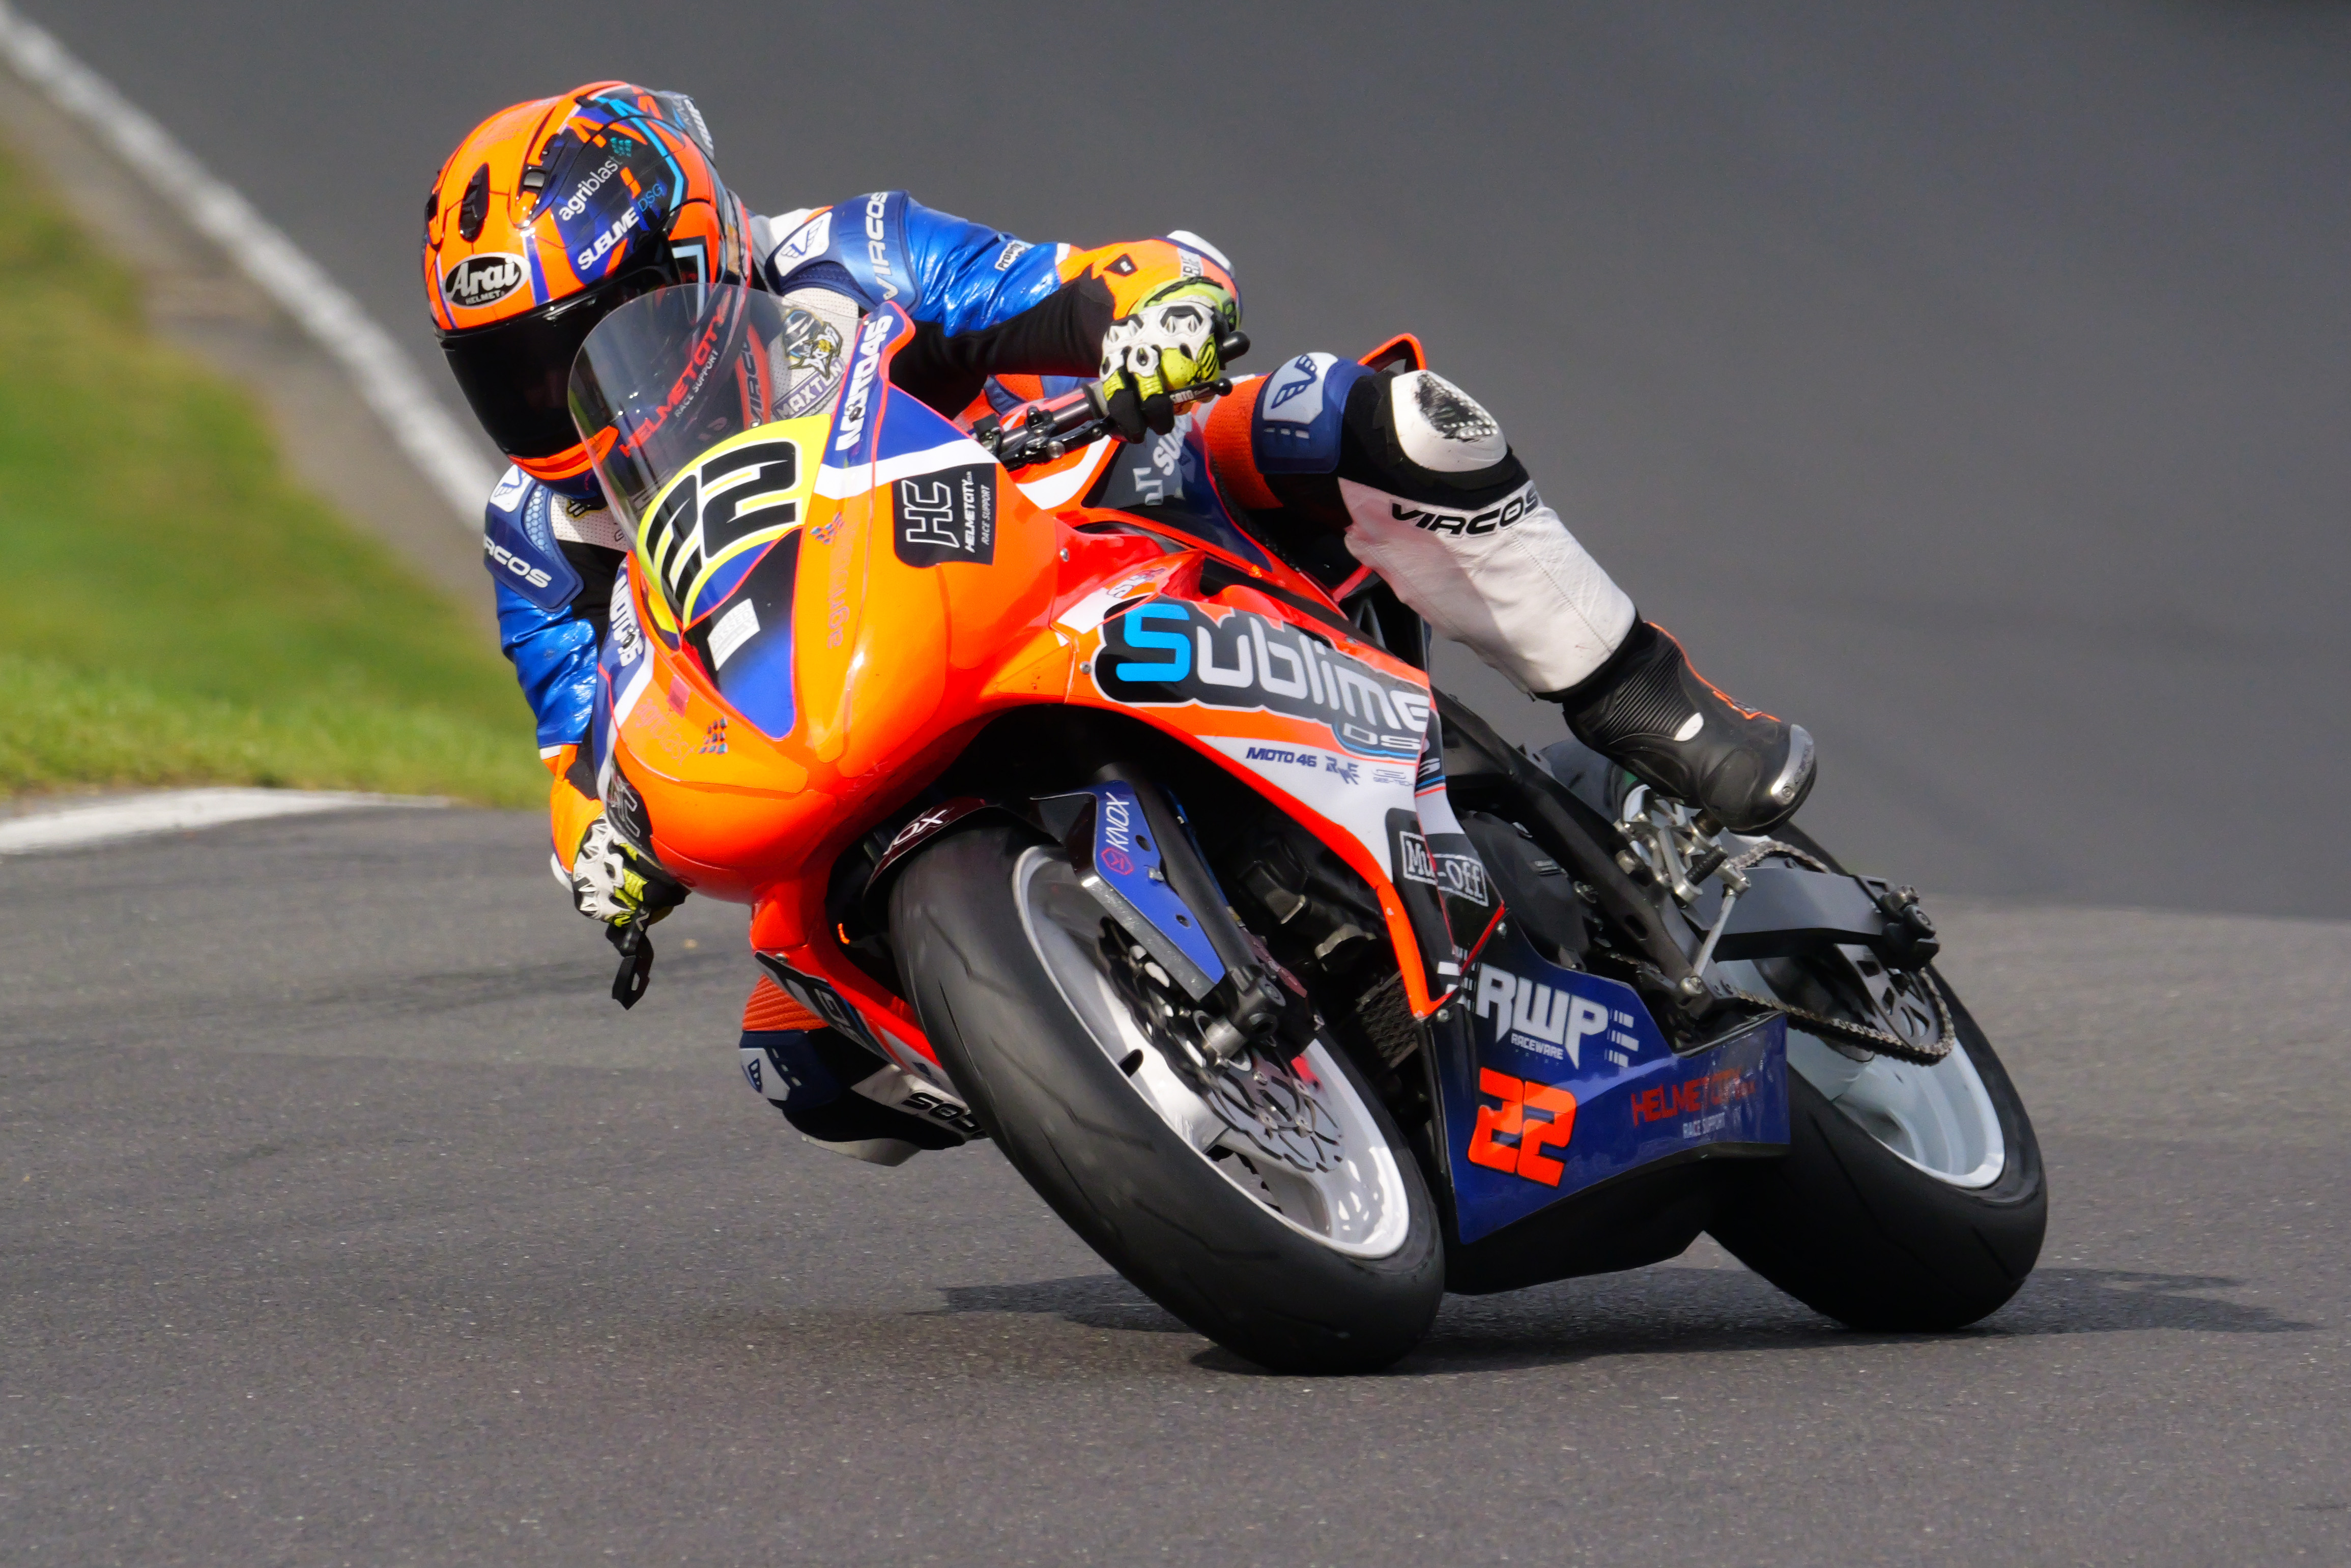
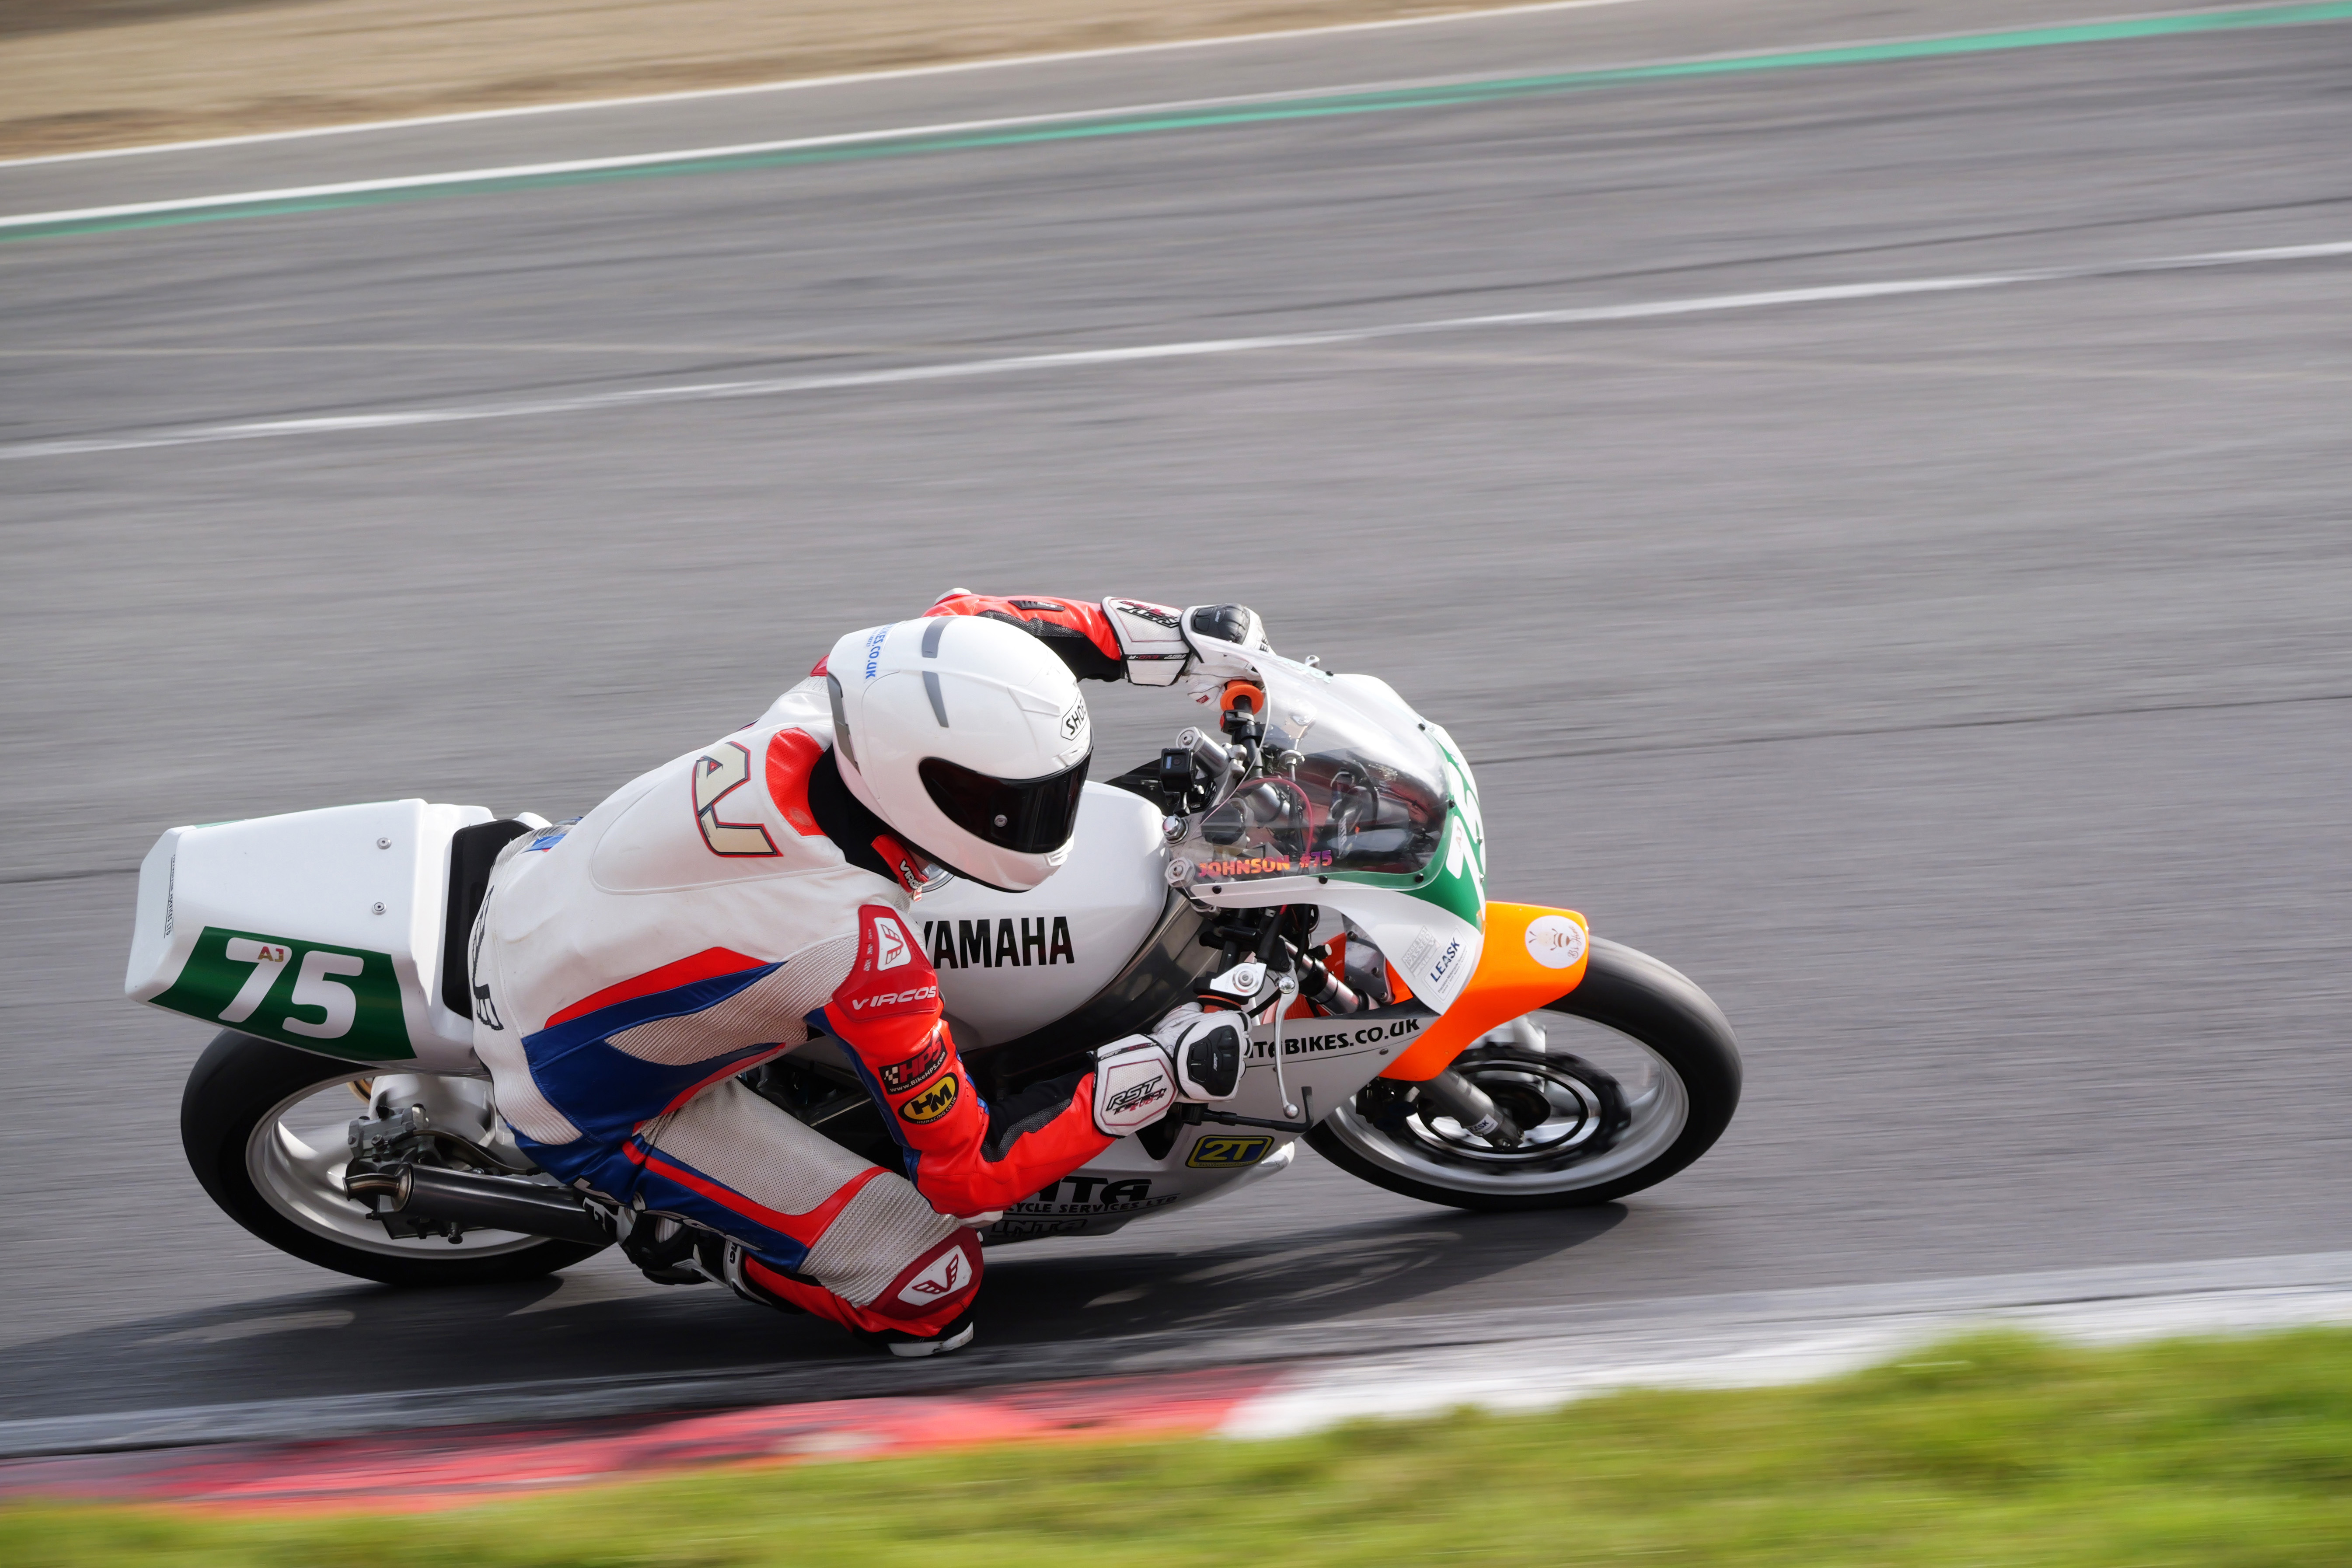
I tested the AF system using the original Panasonic Leica DG 100-400mm F4-6.3 OIS lens with a range of subjects, and found it worked extremely well. (An updated version of this lens was announced alongside the G9II.) For example, shooting motorbike racing at Brands Hatch, the subject detection worked reliably, while the phase detection provided an impressively high hit-rate with even fast-moving vehicles approaching the camera head-on during high-speed bursts.
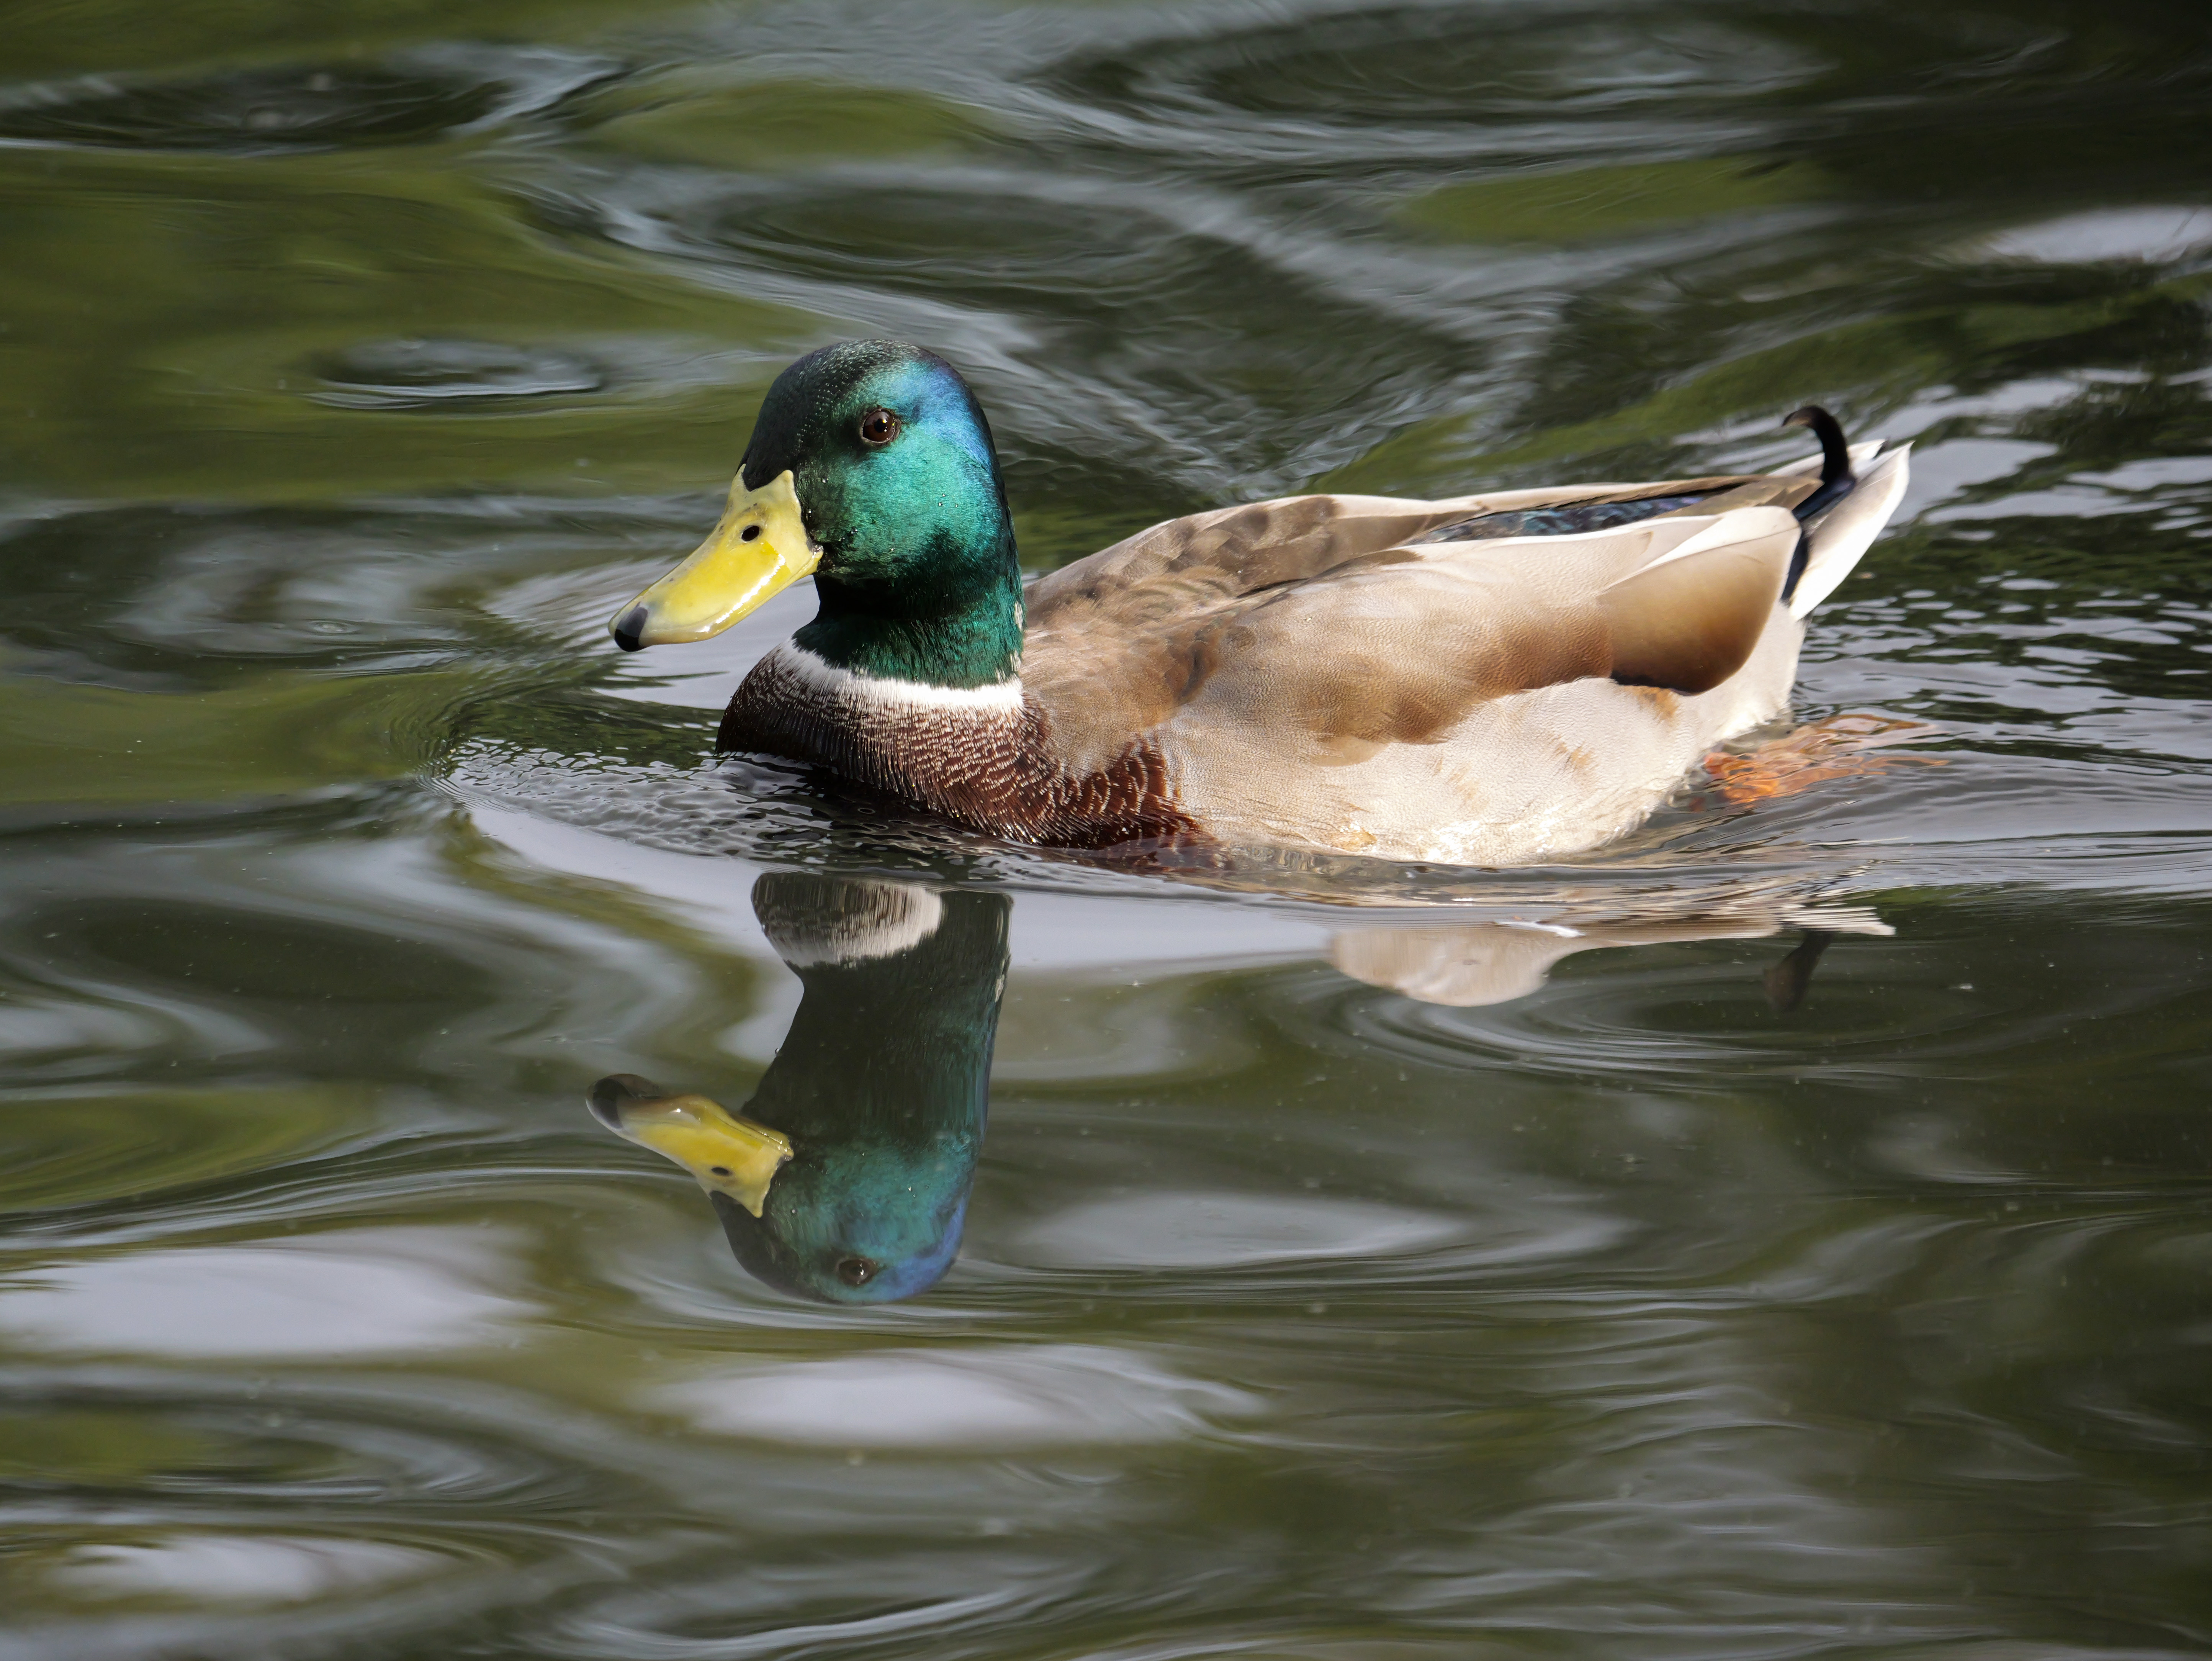
Likewise, when shooting local wildlife, the G9II did a creditable job of keeping up with birds in flight, which are notoriously erratic. Overall, it’s fair to say that the G9II’s autofocus is now pretty much at the same level as its competitors.
Even if you completely ignore the subject detection and use the conventional AF system, the G9II is an excellent performer. You get a comprehensive choice of focus area sizes and shapes, which can be cycled through easily just by pressing the AF area button. There’s also a conventional subject tracking mode based on pattern and colour. Again, it’s all notably easy to use and works very well.
Performance
When you set about working with the G9II, it turns out to be a very likable camera that rarely gets in the way of your shooting. Strangely, I found that the first time I turned it on each day, it took four or five seconds to wake up. But subsequently it would fire up instantly, and be every bit as responsive to the controls and touchscreen as I’d expect.

It’s unobtrusive, too, with the shutter operating with a quiet snick. Switch to the electronic shutter, and then it’s completely silent. Rolling shutter effects are low, so there’s little potential compromise to image quality here.
Continuous shooting performance is very impressive. In my tests, the G9II was capable of shooting a burst of at least 170 frames at 14fps, which should be more than enough for most purposes. There’s no live view at this speed, though, with the camera instead playing back the images it just shot in the viewfinder. For the most part this works well enough, but it does bring a slight lag, which is a problem when trying to track erratic subjects.
One solution is to drop back to the medium speed setting, but this is just 6fps and comes with a disconcertingly pronounced viewfinder blackout between frames. The other option is to switch to a faster speed with the electronic shutter, which reduces the apparent lag, but means you’ll fill up your memory cards even quicker.
Battery life is something of a mixed bag. Panasonic specifies 390 shots per charge, although as usual, you’ll get many times more than that when shooting high-spec bursts. On the other hand, when I was taking occasional shots while walking around with the camera, the battery depleted unexpectedly quickly.
I’d recommend enabling the ‘Power Save LVF Shooting’ setting, which drops the camera into standby more quickly when the eye sensor detects that you’re not looking through the viewfinder.
I’ve generally found that smaller sensors equate to better in-body image stabilisation, and the G9II continues this trend for both stills and video shooting. Using the matched Panasonic Leica 12-60mm f/2.8-8 zoom, I was able to get consistently sharp hand-held shots at shutter speeds as long as 2 seconds, and occasionally at 4 seconds.

This places the G9II on a par with high-end Olympus/OM System cameras for having the best IBIS around. In contrast, with most APS-C and full-frame cameras, I find 1 second to be the practical limit. Equally for for video shooters, the IBIS does a really good job of stabilising hand-held footage.
In other respects, the G9II behaves in a similar way to the S5II. Its metering tends to be quite conservative, which means you’re unlikely to lose highlight detail irretrievably, but conversely can lead to slight underexposure. The default auto white balance option leaves things a little cool for my tastes, while Panasonic’s default Standard Photo Style is also decidedly neutral in its rendition. Taken together, this means that out-of-camera JPEGs can easily end up looking dull and uninspiring.

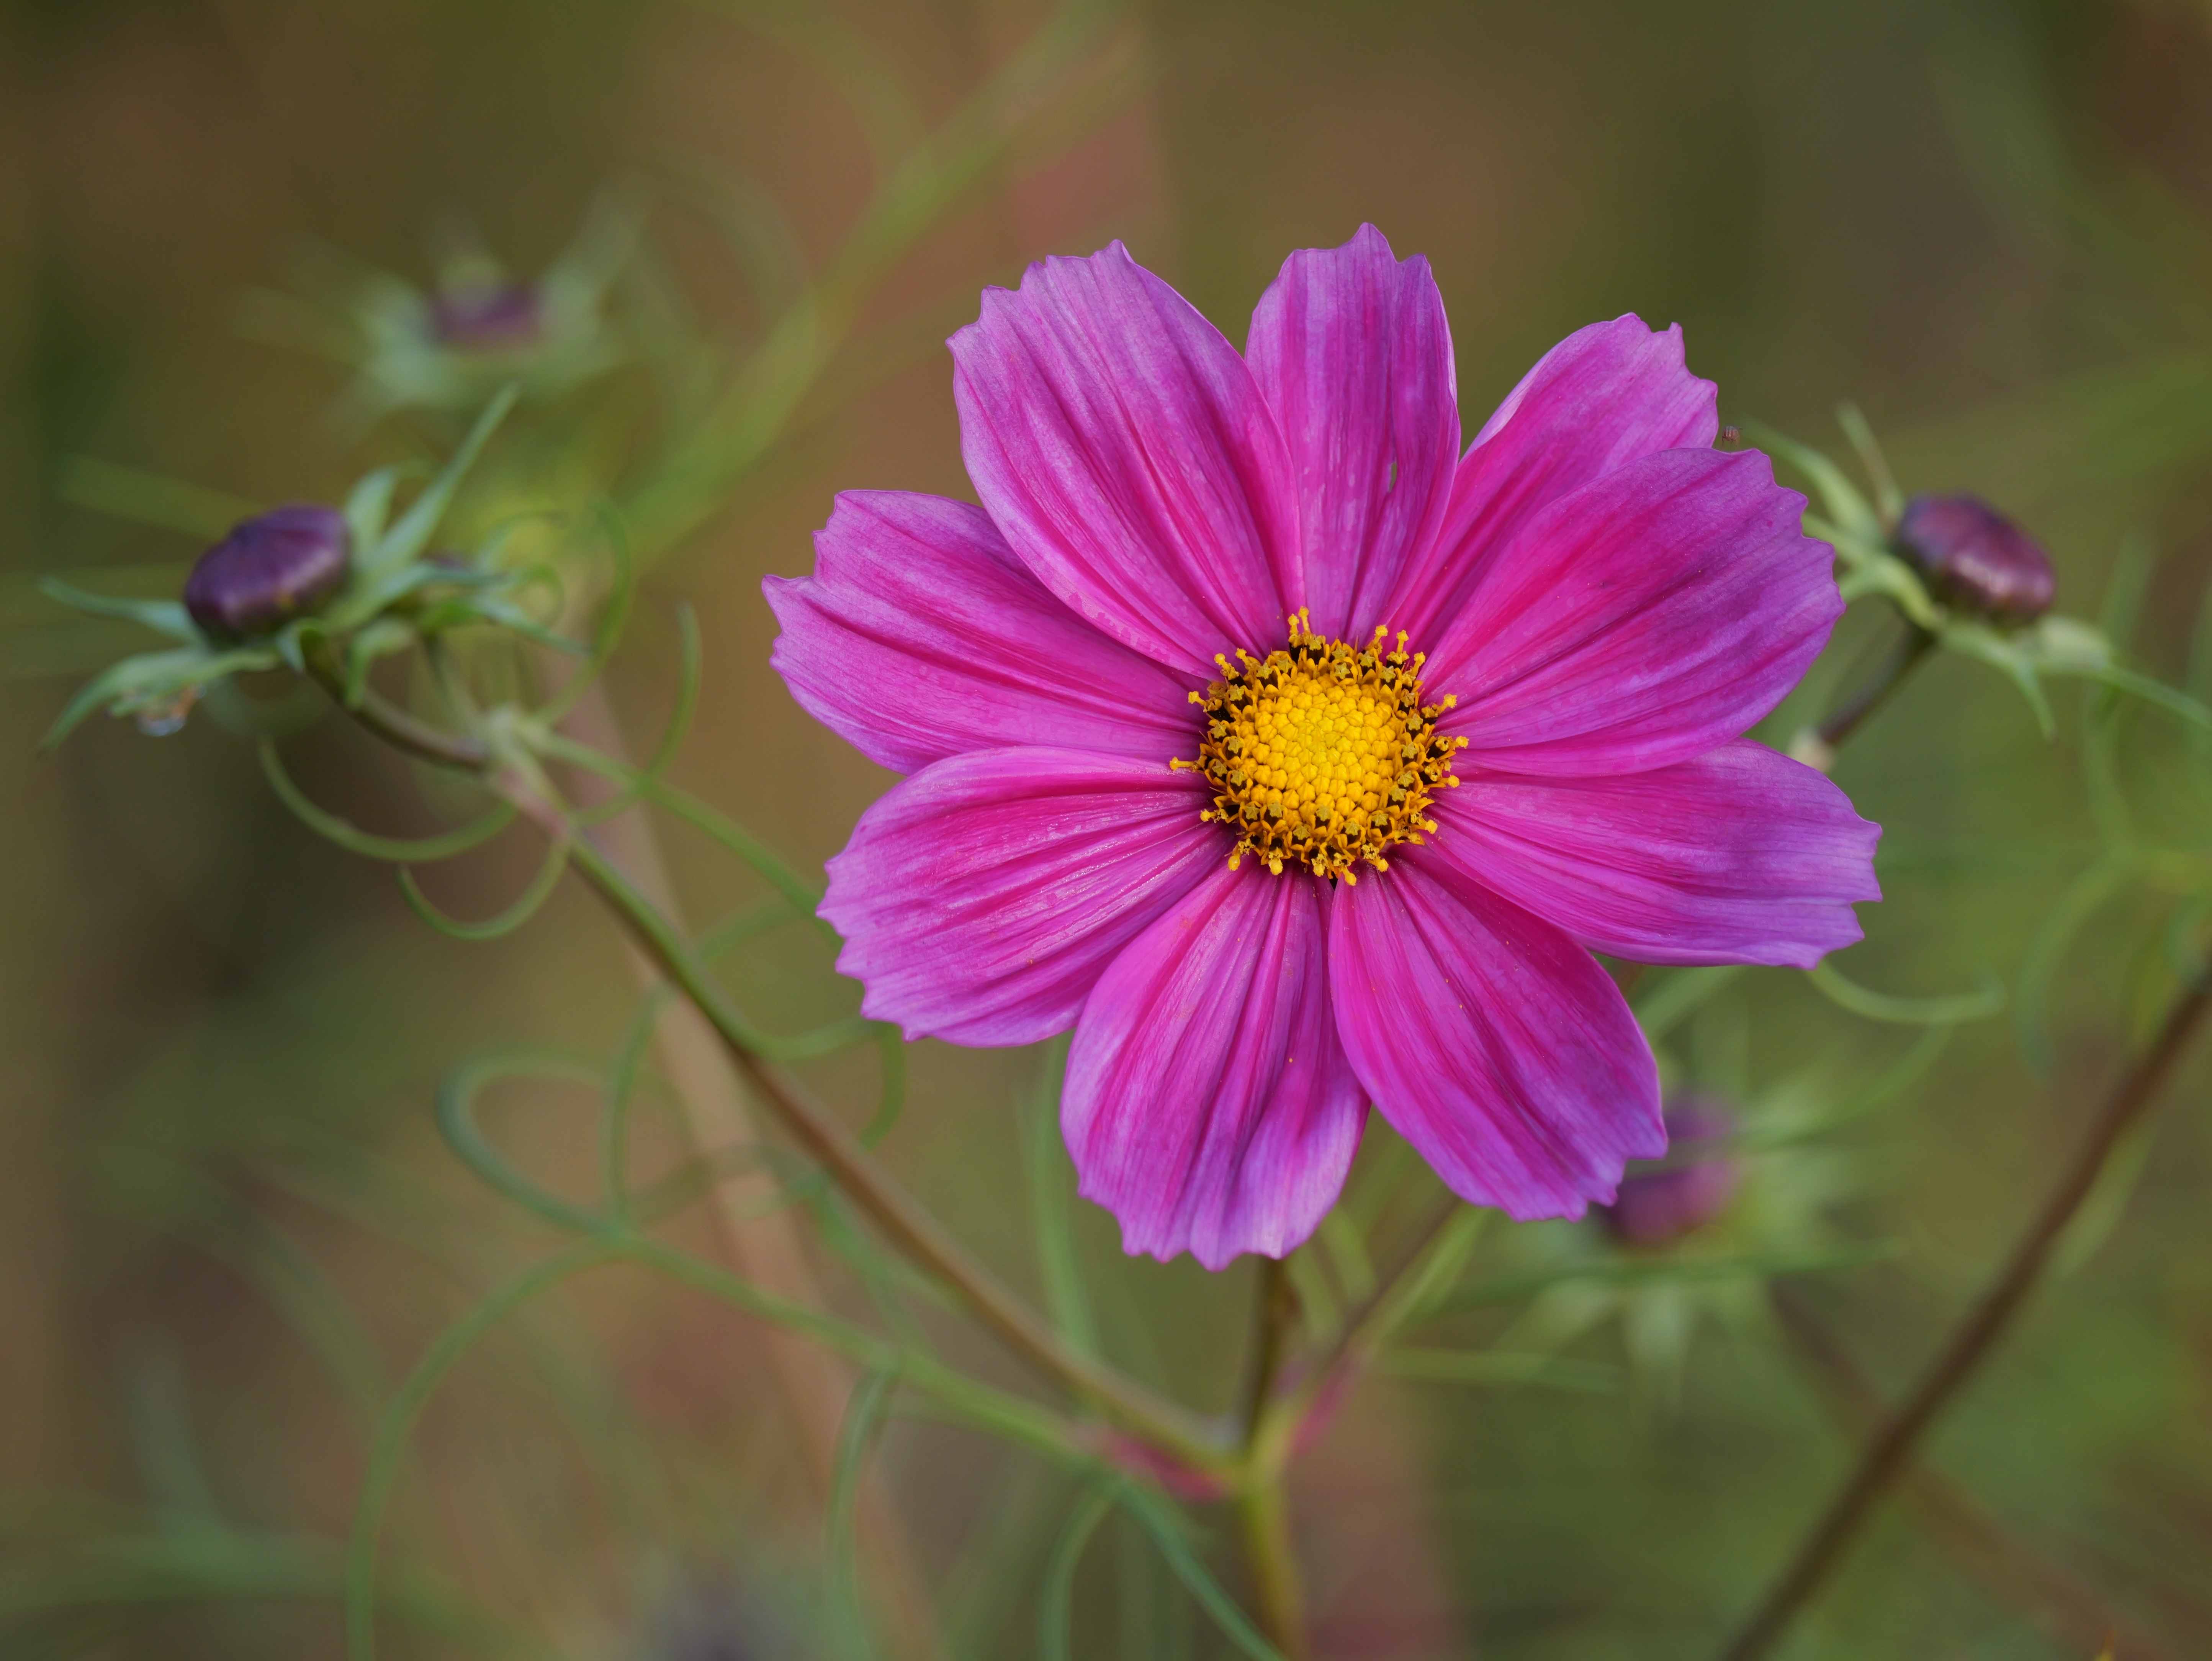
As a result, it’s worth experimenting with the settings if you’d like to use JPEGs directly. I was far happier with the warmer AWBw auto white balance option, and much preferred the colour from the Landscape Photo Style, although it’s rather prone to clipping the red channel with such things as flowers. It often pays to apply a little positive exposure compensation, while keeping an eye on the live histogram to avoid pushing things too far.
Of course, the big question is whether the MFT format results in a serious image quality penalty compared to larger sensor systems. But here’s the thing – yes, you get noisier images when comparing studio-shot images ISO-for-ISO. But that doesn’t necessarily translate directly to getting worse images in real-world use.
I shot the G9II across a range of shooting situations and was very happy with the image quality from its 25MP sensor. In some lower-light situations I might have got technically better images with an APS-C or full-frame camera, but I’d have had to carry around proportionally larger and heavier lenses to do so. With Micro Four Thirds, you can carry around a bagful of different lenses for different purposes without being particularly weighed down.
High-resolution multi-shot mode
Panasonic’s high-resolution multi-shot mode on the GH5II is much more useful than most of its competitors. It’s readily accessible via the mode dial and works well in both its hand-held and tripod-mounted iterations. The camera locks up for several seconds while it’s processing the image, but the results can be impressive, with useful extra detail. It’s not quite like having a 100MP camera, but it’s really not far off a 50MP one.
It’s important to understand that tripod and hand-held modes are completely different processes. The former combines 8 frames while shifting the sensor fractionally between each, while hand-held combines 16 frames, most likely via a super-resolution process. So it’s crucial to select the right one, which is most easily done via the Q button.
Shooting outdoors using tripod mode, I also found that it pays to select Motion Blur Processing Mode 2, which suppresses any ghosting of subjects that move between the exposures.
Panasonic offers a choice of 50MP or 100MP output for each mode, but this only affects the dimensions of the image generated in-camera. Both appear to use exactly the same processing and deliver raw files that are the same size. I’d probably leave it set to 50MP.
ISO and Noise
With its 25MP sensor, the G5II delivers just as much detail as its similarly priced peers, such as the 26MP APS-C Sony Alpha A6700 or 24MP full-frame cameras including the Lumix S5 II. At low ISO settings, image files are impressively clean and noise-free, although it’s worth noting that (as expected) the extended ISO 50 option clips highlights a stop earlier than ISO 100.

Noise first starts to degrade the image visibly at ISO 800, and by ISO 3200, most of the finest detail has been blurred away. I’d still be quite happy shooting at ISO 6400, and maybe even ISO 12,800 at a push. But ISO 25,600 is a step too far.
Below are 100% crops of our standard studio test scene, here out-of-camera JPEGs prior to Adobe raw support for the Panasonic Lumix G9 II. Click on any image to see the full-size file.


Panasonic Lumix G9 II: Our Verdict
It’s perhaps easy to be dismissive of the Panasonic Lumix G9II. After all, here is a Micro Four Thirds camera that costs almost twice as much as its predecessor, while being as large as many full frame models. But to me, this argument is a red herring. It’s really not that much different in size to the original G9, and the body provides space for a comprehensive control setup without feeling cramped. Likewise, by sharing its design and technologies with the S5II, Panasonic has surely been able to bring this advanced MFT model to market at a lower price than if it had used a different, smaller body.
Some might even question whether there’s still any point to the MFT format, when full-frame mirrorless systems are now so well established. It’s a fact that the smaller sensor brings practical disadvantages in certain situations: if you find yourself shooting moving subjects at low light, or are seeking shallow depth-of-field, it won’t be the best choice. Instead, MFT’s strengths lie elsewhere; in particular, the ability to assemble a lightweight, portable setup that in many situations will deliver image quality you’ll probably struggle to distinguish from full-frame models like the S5II.
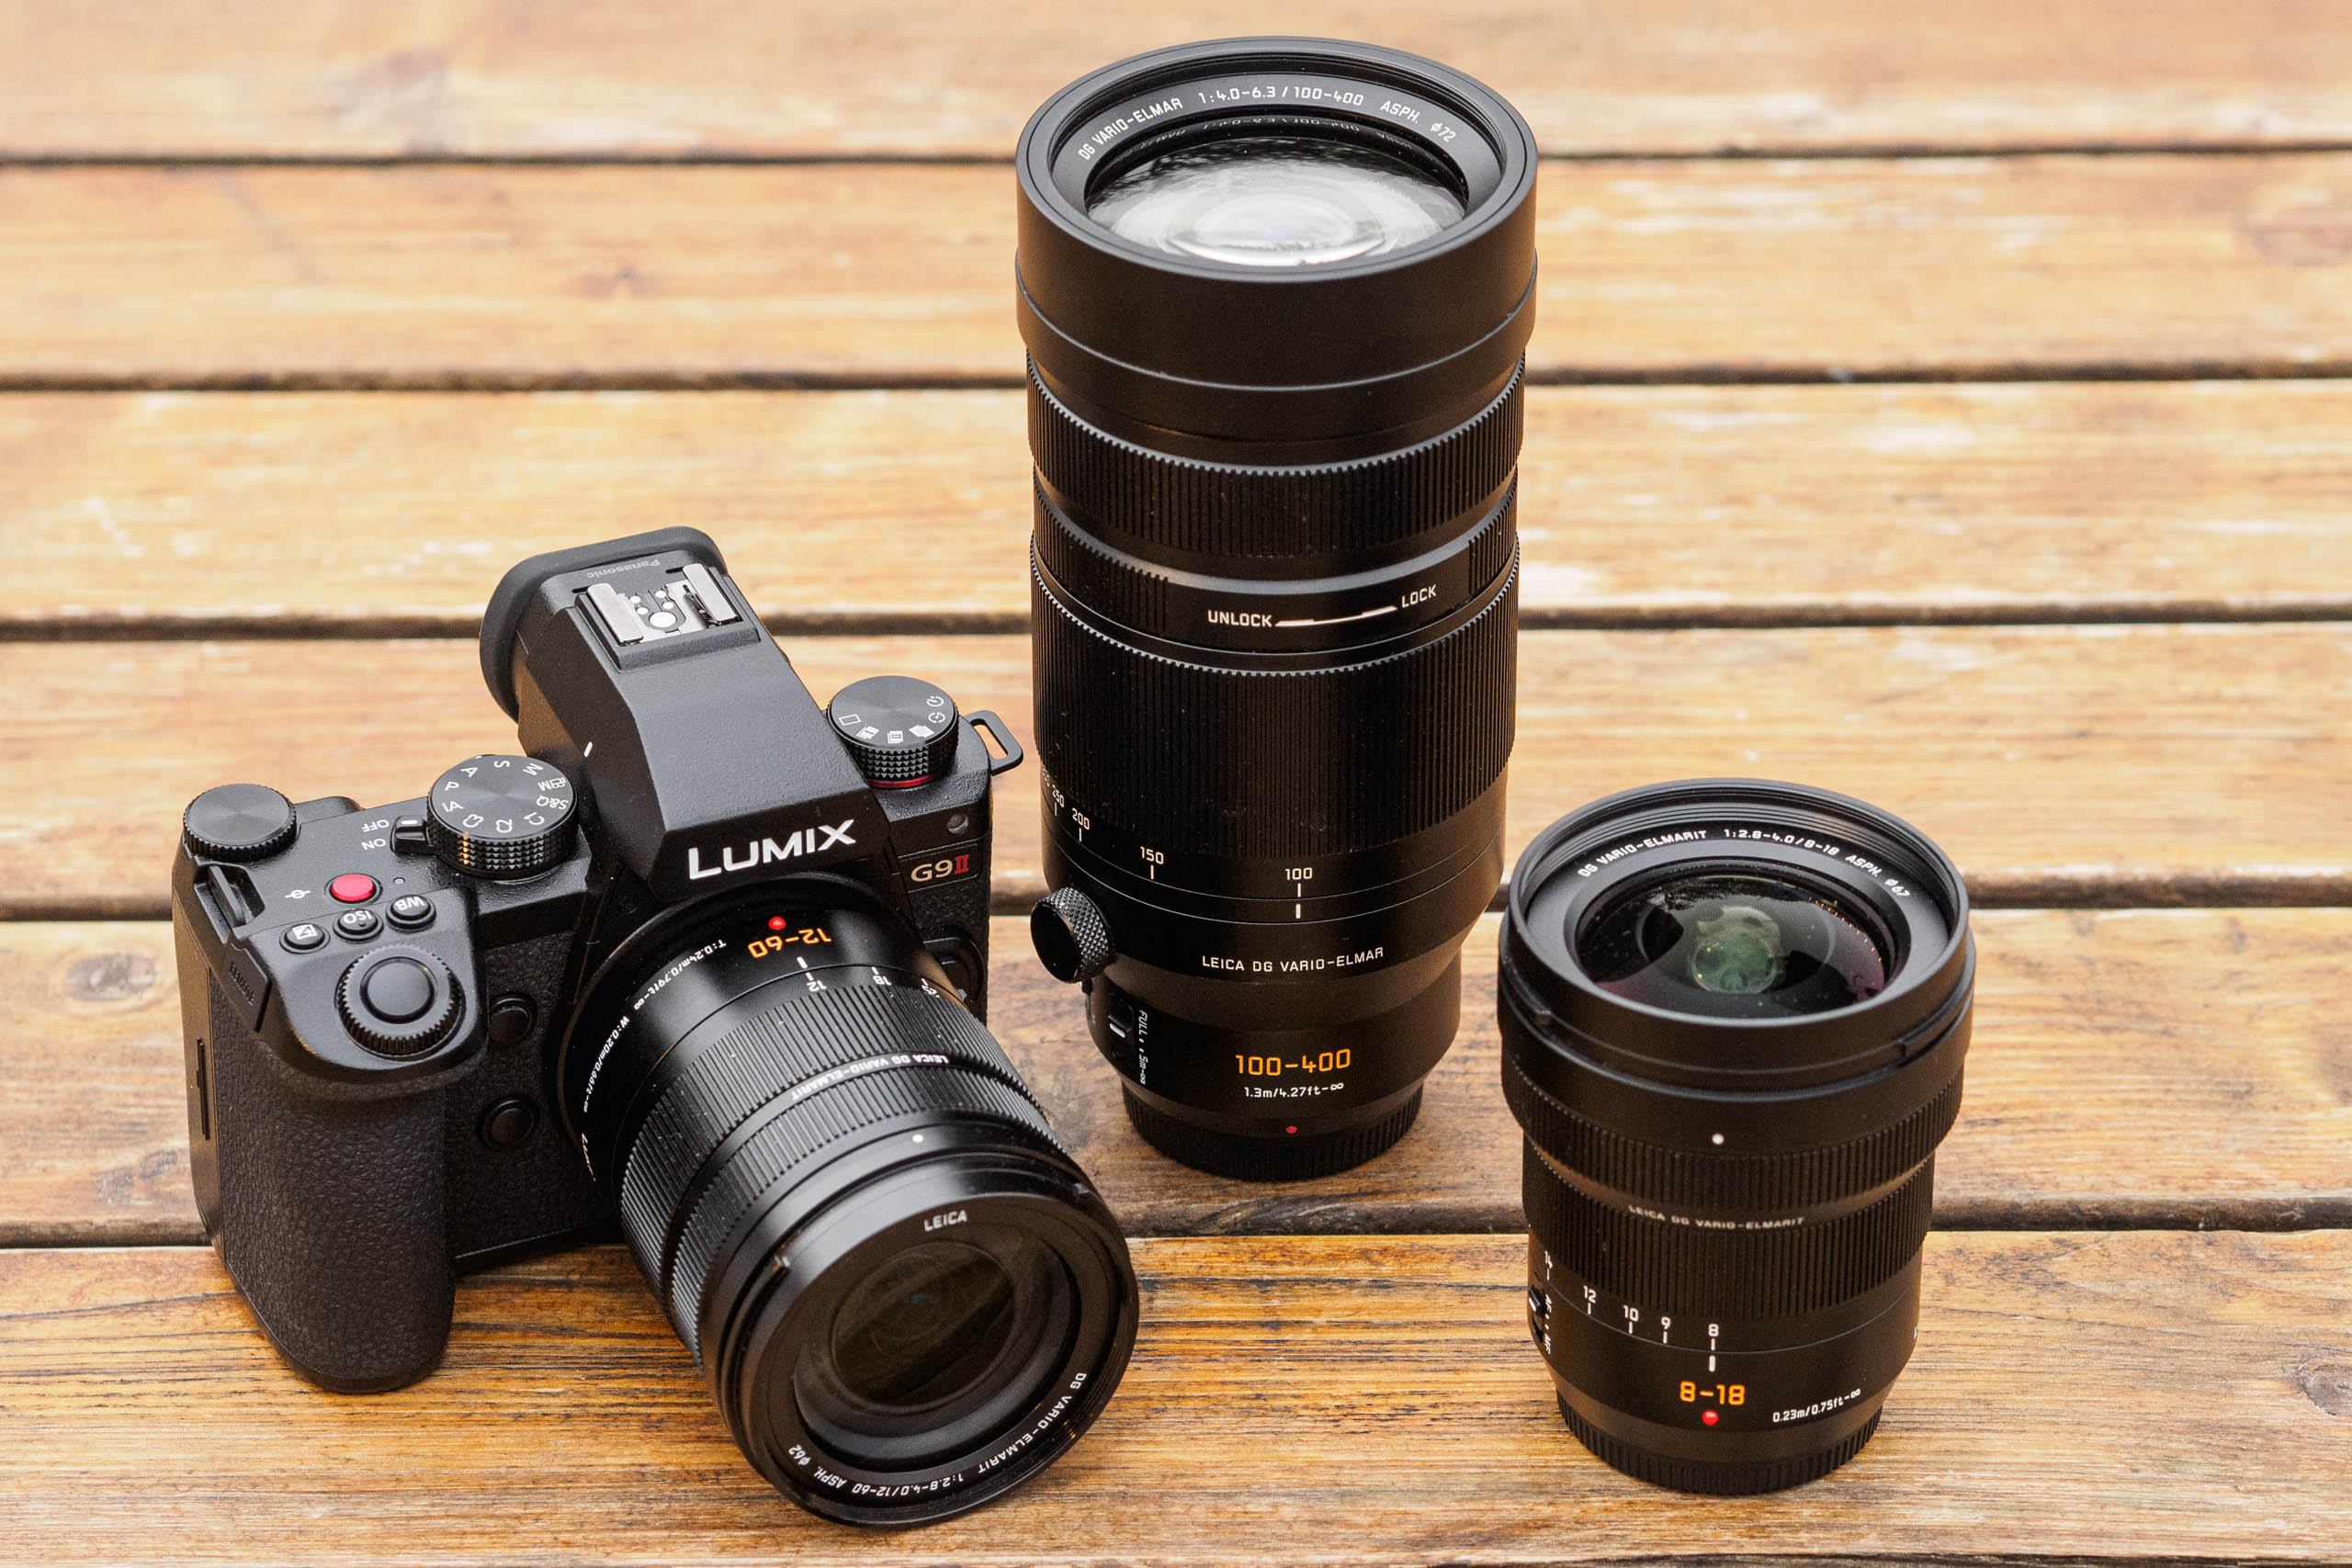
Key to this is the way that MFT enables smaller lenses, without compromising on optical or build quality. This is exemplified by Panasonic’s superb Leica DG line-up, which provide a compelling combination of small size and excellent optics. I spent most of my time carrying the G9II with the 8-18mm f/2.8-4, 12-60mm f/2.8-4, and 100-400mm f/4-6.3 zooms, giving a 16-800mm equivalent range for a total weight of 2.3kg. You simply couldn’t match that with a larger sensor system. And if you don’t like the lenses Panasonic has to offer, you can mix and match with Olympus / OM System’s equally stellar M.Zuiko line-up.
Overall, the G9II is quite simply a brilliant camera, and using it for a couple of weeks simply served to remind me why I like Micro Four Thirds so much. For existing MFT users looking to upgrade to the latest technology, it’s an obvious recommendation and a very strong alternative to the OM System OM-1. But equally, it would be an excellent choice for anyone interested in assembling a portable yet highly capable setup, just as long as you can tear yourself away from the cult of full-frame.

Follow AP on Facebook, X, Instagram, YouTube and TikTok
Full Specifications