
While many of us are rightly concerned about the impact of AI – not just on photography but on many aspects of life – it can have many positive effects on our photo editing. In recent years the best photo editing software, like Photoshop and Lightroom have benefitted from a range of new AI-powered tools.
Many of these employ machine learning to recognise and isolate objects in photos, like people or skies. As tools these are purely functional, speeding up processes that may have once taken us hours. Then there are the newer generative tools. This is probably the point where photography and AI go their separate ways, as generating new objects or scenes is more about prompt-ography than photography. Still, there’s much fun and many advantages to be had from mastering the various AI-powered tools in Photoshop and Lightroom.
Here, in no particular order, are ten of the best tools…
Adobe Generative Fill
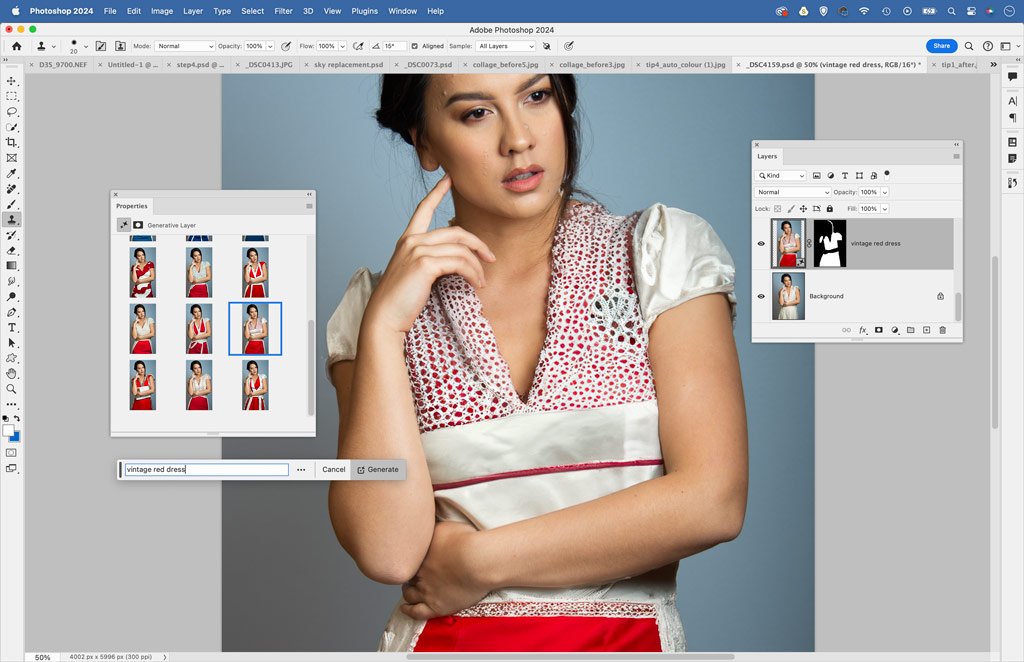
Generative Fill is the big one: the first tool in Photoshop that can generate images in a similar way to MidJourney or Dall-E. But the key difference is that you can work selectively in parts of an image; enabling use of the Lasso tool, Quick Selection tool or Object Selection tool to make a rough selection, then you simply type a text prompt and choose from three variations.
The shape of the selection is important, as it dictates the shape of the object generated. Here, for instance, we made a precise selection of the subject’s clothing then typed the prompt ‘Vintage Red Dress’ in the Contextual Toolbar (Window>Contextual Toolbar). Generative FIll is great at some things, like changing a person’s clothes or adding accessories, but less so at others like adding a completely new object to a scene. Sometimes the results are almost reassuringly bad – so much so, that as a photographer you feel that the day AI usurps photography for image creation is still some way off.
Photoshop Generative Expand
This could be the one generative AI tool that photographers truly embrace. Have you ever photographed a scene and then, later on, wish that you’d left more room around the edges, perhaps for a different crop, or to straighten the horizon, or leave negative space for type? Generative Expand lets you crop outside of the original bounds of the image, and new content is generated to fill in the boundaries. You can either make a tiny adjustment, or experiment with vast expansions.
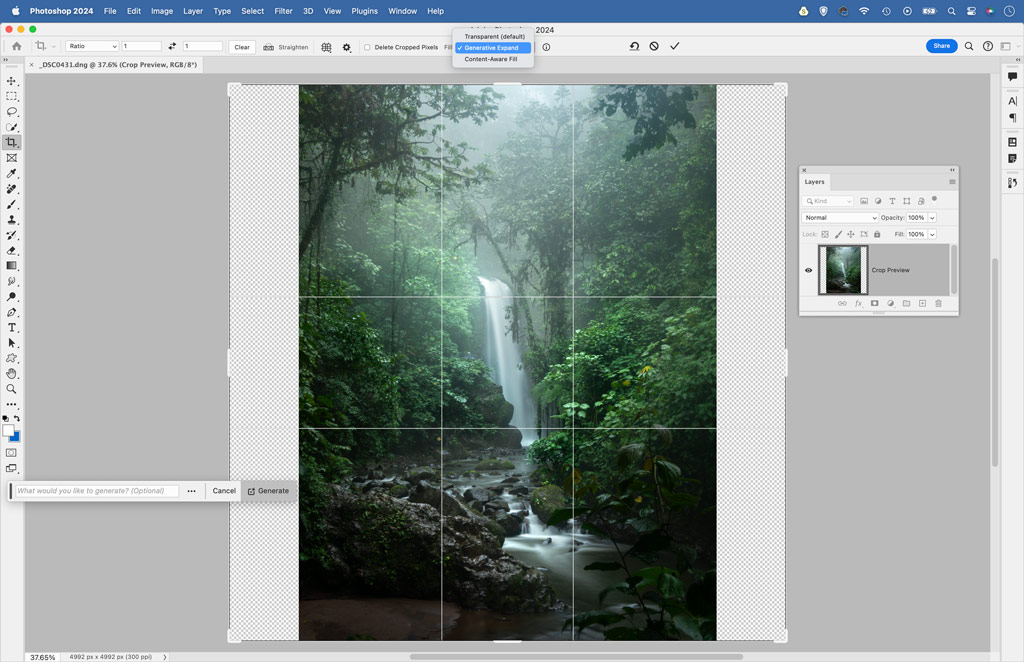
The endless expand game can be fascinating. Simply grab the Crop tool in Photoshop and drag the crop box outside the original image. Set the Fill option to ‘Generative Expand’ at the top, then either choose one of the three variations generated, or hit the Generate button to try again.
Sky Selection
The imbalance in brightness between land and sky has forever posed a challenge for photographers, but these days it takes mere seconds to correct our outdoor photos thanks to a range of intelligent sky-fixing tools.
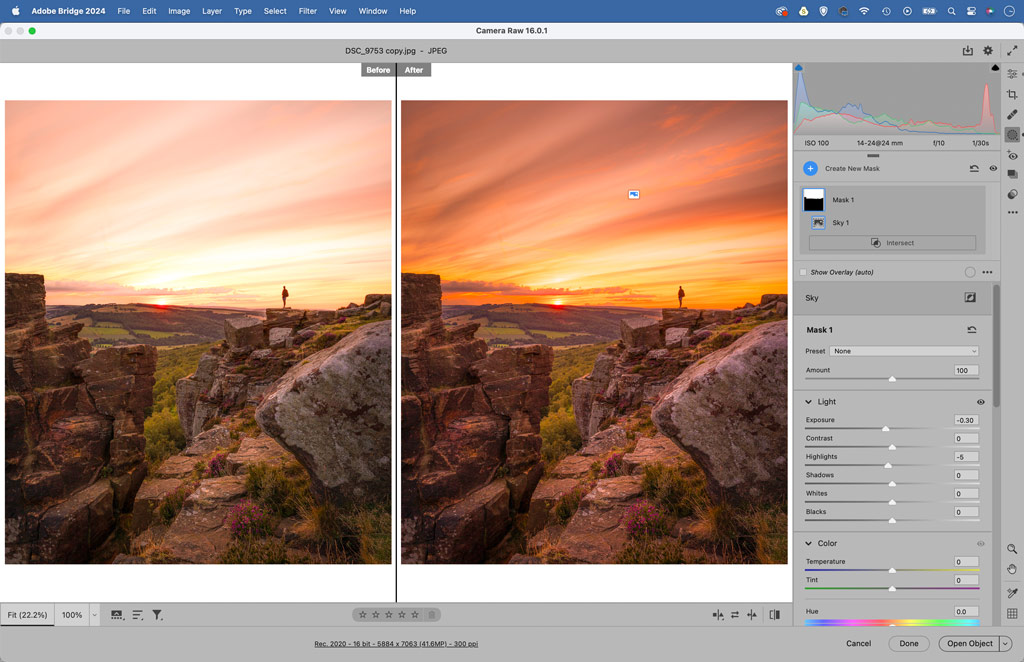
First, there’s the Sky Masking feature in Camera Raw/Lightroom Mask Panel. This is one of the best tools for clawing back detail in overexposed skies. Simply make a mask then lower Exposure and Highlights until the sky is improved (it’s best to work with raw photos as they hold far greater highlight detail than jpegs). There’s a similar feature in Photoshop (Select>Sky) that automatically makes a selection for you.


Photoshop AI Sky Replacement
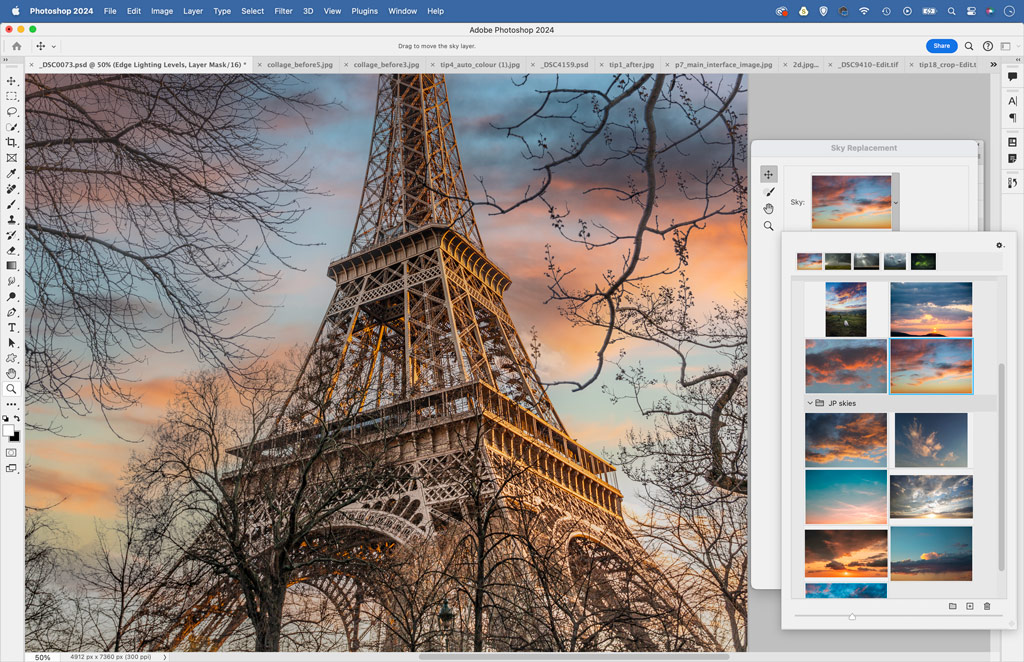
As well as sky selection tools there’s also the slightly more contentious Sky Replacement feature (Edit>Sky Replacement). This will isolate the original sky for you and drop in a new one. You can choose from a range of default skies in the command, and find a wider selection by clicking the flyout menu and choosing ‘Get More Skies’. But these skies will be used by all and sundry, so perhaps you’re better off loading in your own original sky images. Click the plus icon in the skies dropdown and choose Import Skies.


AI Select Subject
There’s nothing sinister or threatening about this particular use of AI, it’s just a really fantastic timesaver. No longer do we have to spend hours painstakingly cutting out areas or making precise selections. We just hit the Select Subject button. The button appears whenever a selection tool is active, and you can also go to Select>Subject. Once done, it’s worth heading into the Select and Mask command (Select> Select and Mask) to check and improve the selection edge. If you’re selecting a person, then try the Refine Hair button within the command.
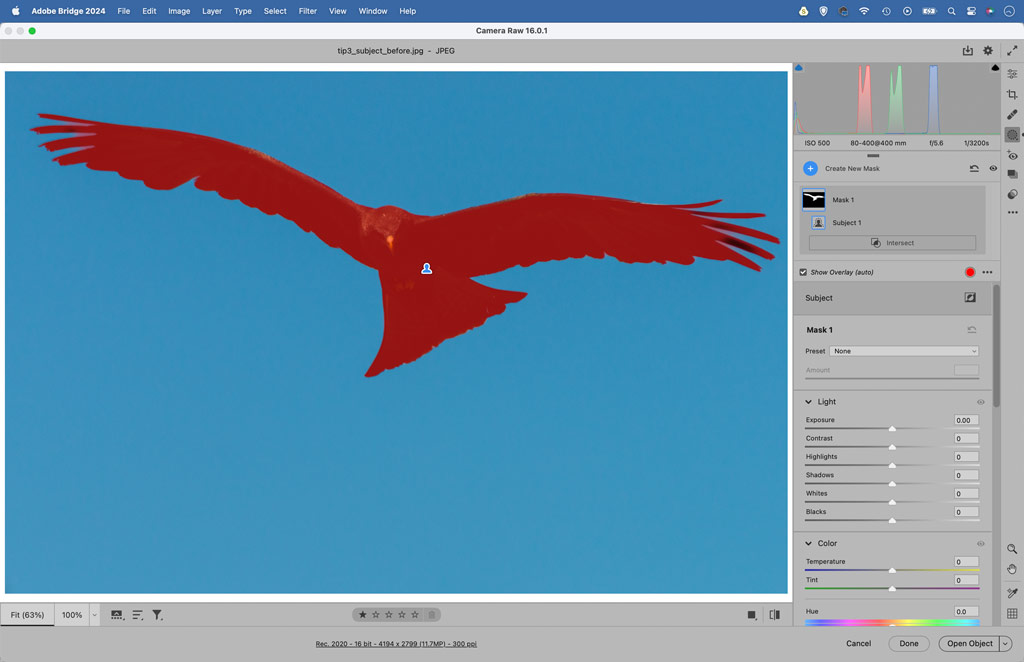
It can give you a much better selection around flyaway hairs and fuzzy edge details. As well as the Select Subject feature in Photoshop, you’ll also find subject selection within Lightroom and Camera Raw’s Masking tools. These make it a doddle to quickly create a mask over your subject, then make tonal adjustments to boost the area.


Automatic People Masking
Portrait retouching is one of the most monotonous of editing tasks, but thankfully machine-learning tools can speed things up for us. The portrait retoucher often needs to isolate parts of a face in order to make tailored adjustments to different areas, perhaps to lighten the whites of the eyes, soften the skin or add texture to the hair.
In this regard the People Masking feature in Camera Raw and Lightroom is a huge timesaver. It automatically creates masks for these different parts of a face, so you can quickly apply tonal adjustments to them.
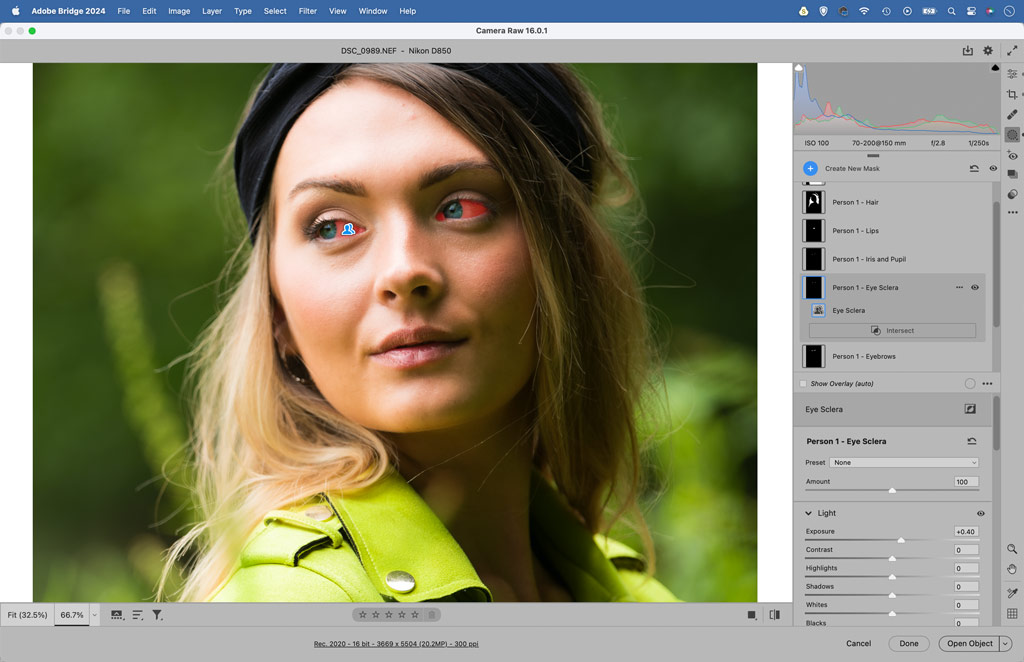
Simply go to the Masks Panel, click on the person’s face and choose which masks you want to generate (eg Facial Skin, Body Skin, Eyebrows, Eye Sclera, Iris, Lips, Teeth, Hair, Clothes). A touch of negative Texture can enhance skin but if you want more control, there’s also the excellent Skin Soften Neural Filter in Photoshop (Filter>Neural Filters).


Photoshop Photo Restoration
Few editing tasks are more rewarding than restoring old photos. Photoshop’s Photo Restoration Neural Filter is a great aid for restoration work. Scan an old print, open it in Photoshop and go to Filter> Neural Filters then turn on the Photo Restoration filter. The feature is exceptionally good at enhancing facial details (although it’s easy to push it too far).
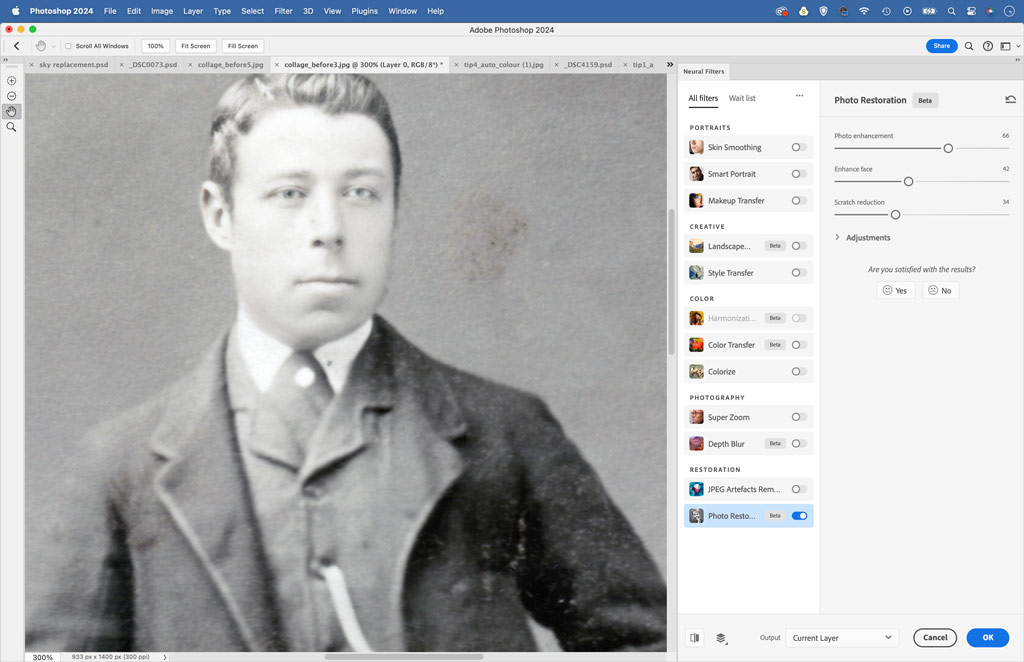
The Scratches slider is helpful as it seeks out and fixes dirt and scratches for you, which can save many hours of painful retouching. It’s also worth experimenting with the Colorize Neural Filter, which applies an effect akin to hand-colouring in your old monochrome photos.


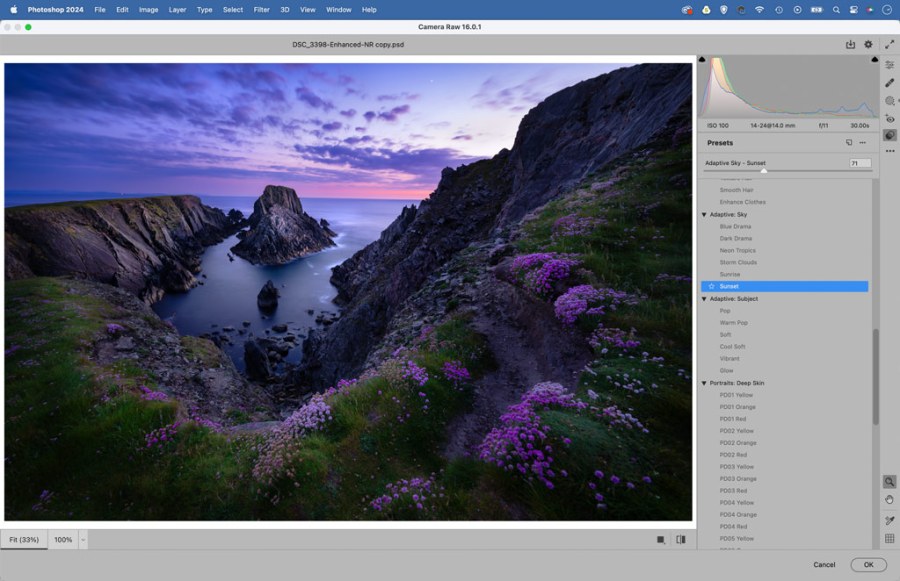
Adaptive Presets
Presets have long been one of the best things about Lightroom and Camera Raw. They allow you to save a set of adjustments made on one image and apply them to other images with a single click. The recently introduced Adaptive Presets go one step further, by allowing you to build AI-generated masks in your presets. So you can, for instance, make a preset to target and boost colours in a sky then apply it instantly to any other image with a sky.

Simply go to the Masks Panel in Camera Raw or Lightroom, generate a mask to isolate something (you can make AI masks for Subject, Sky, Background and facial features). Once done, adjust the area using the tonal sliders, then head to the Preset Panel and click the New Preset icon to create your Adaptive Preset. You’ll also find a range of inbuilt Adaptive Presets created by Adobe within the Preset Panel, under the headings Adaptive Portrait, Adaptive Subject and Adaptive Sky.

AI Denoise
Able to clean up noise to an astonishing degree, this is fast becoming my favourite AI-powered tool. If you have images shot at high ISOs then the Denoise button in the Camera Raw/Lightroom Detail Panel can vastly improve them. It goes beyond anything you could achieve with standard noise-reduction tools. Set Denoise going and a new DNG raw file will be generated alongside your original (it only works with raw files). It’s especially brilliant when used on older photos. Try it out on an old photo shot at a high ISO like 6400 ISO and you’re likely to be blown away by the results.


See: Adobe’s AI Noise reduction tool compared.
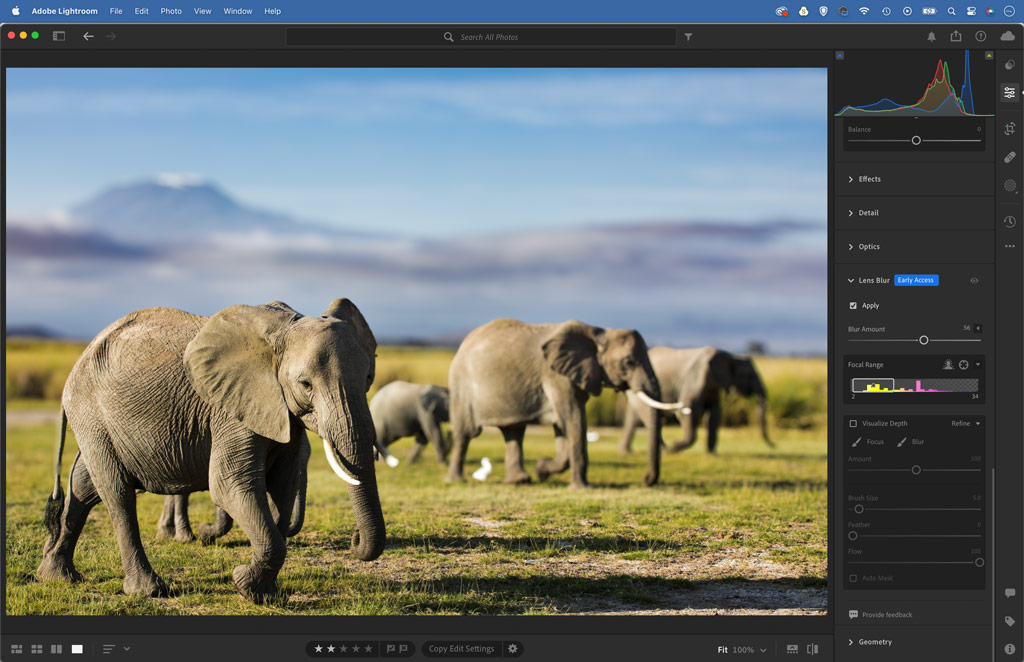
Lens Blur
At the time of writing, this is Adobe’s newest AI-powered photo editing tool (others are currently in Beta – watch this space). Found in Camera Raw and Lightroom, the new Lens Blur panel allows you to blur the foreground and background in your photos. It automatically creates a depth map for the scene, then applies realistic fall-off in front of and behind the point of focus. By default, this point is where the main subject is, but you can target different parts of the scene to be ‘in-focus’ if you choose. Focal Range controls let you fine-tune the blur, so you can have a very shallow depth of field, or leave more of the scene sharp. Focus and Blur brushes let you manually fine-tune the results.


James Paterson is as skilled a photo editor as he is a photographer. His work has appeared in countless magazines and books, and in 2014, he was appointed editor of Practical Photoshop. His subjects range from portraits to landscapes, architecture and underwater scenes. For James, Photoshop is more than just a work tool. Visit www.patersonphotos.com.
Related reading:
- AI-powered tools for Photoshop and Lightroom
- Getty images launches AI image generator
- With generative fill Photoshop takes AI to a whole new level
Follow AP on Facebook, Twitter, Instagram, YouTube and TikTok.


