

A big feature of the latest update to Adobe Lightroom 12.3 is AI-powered Denoise, which promises to be a big help when reducing noise in images taken at higher ISOs. Will Cheung compares it with two of the best enhancement programs around, DxO PureRAW 3 and Topaz Denoise AI. How will the updated Lightroom get on?
Adobe Lightroom Denoise comparison: Introduction
Digital noise is not the visual pain in the neck it used to be in the early days of digital photography. If you are of a certain age, you will remember desperately trying to avoid shooting beyond ISO 400 because of the unpleasant colour mottling, random splodges, poor saturation and banding that plagued early sensors.
Of course, sensor and signal processing technology has come on hugely and today we can shoot at ISO 3200 and beyond, knowing the files will be more than suitable for critical use. Given this freedom, you may be wondering – quite rightly – what is relevance of noise reduction software in today’s imaging world.
The thing with using a denoising and demosiacing software is that it can improve files of any ISO speed – even those at base ISO – giving crisper detail and enhancing sharpness, so it’s not just about digital noise. Of course, such softwares come into in their own when you need to ramp up the ISO and help you achieve acceptable results.
Denoise is a very welcome addition to Lightroom and in this test, it showed itself a very capable tool, a notable achievement given its first generation status, so it’s only likely to get better. Image credit: Will Cheung
However, it was perhaps strange that two of imaging’s most iconic programs, Adobe Photoshop and Lightroom Classic, were less capable when it came to dealing with noisy files. The manual noise reduction tool in the Detail palette of Lightroom was usable and better than nothing, but it lagged behind what was available, so many photographers resorted to paying extra for third-party solutions. We recently ran a full review of the latest Photoshop
This anomaly, finally, has been corrected by Adobe with its latest updates, Camera Raw 15.3 and Lightroom v12.3, and both have the new AI-powered Denoise function. In this comparison, we took a selection of files – shot mostly at high ISOs from older and new cameras – and put them through the three programs with a particular emphasis on Adobe’s Denoise used in Lightroom – as that is the new kid on the block.

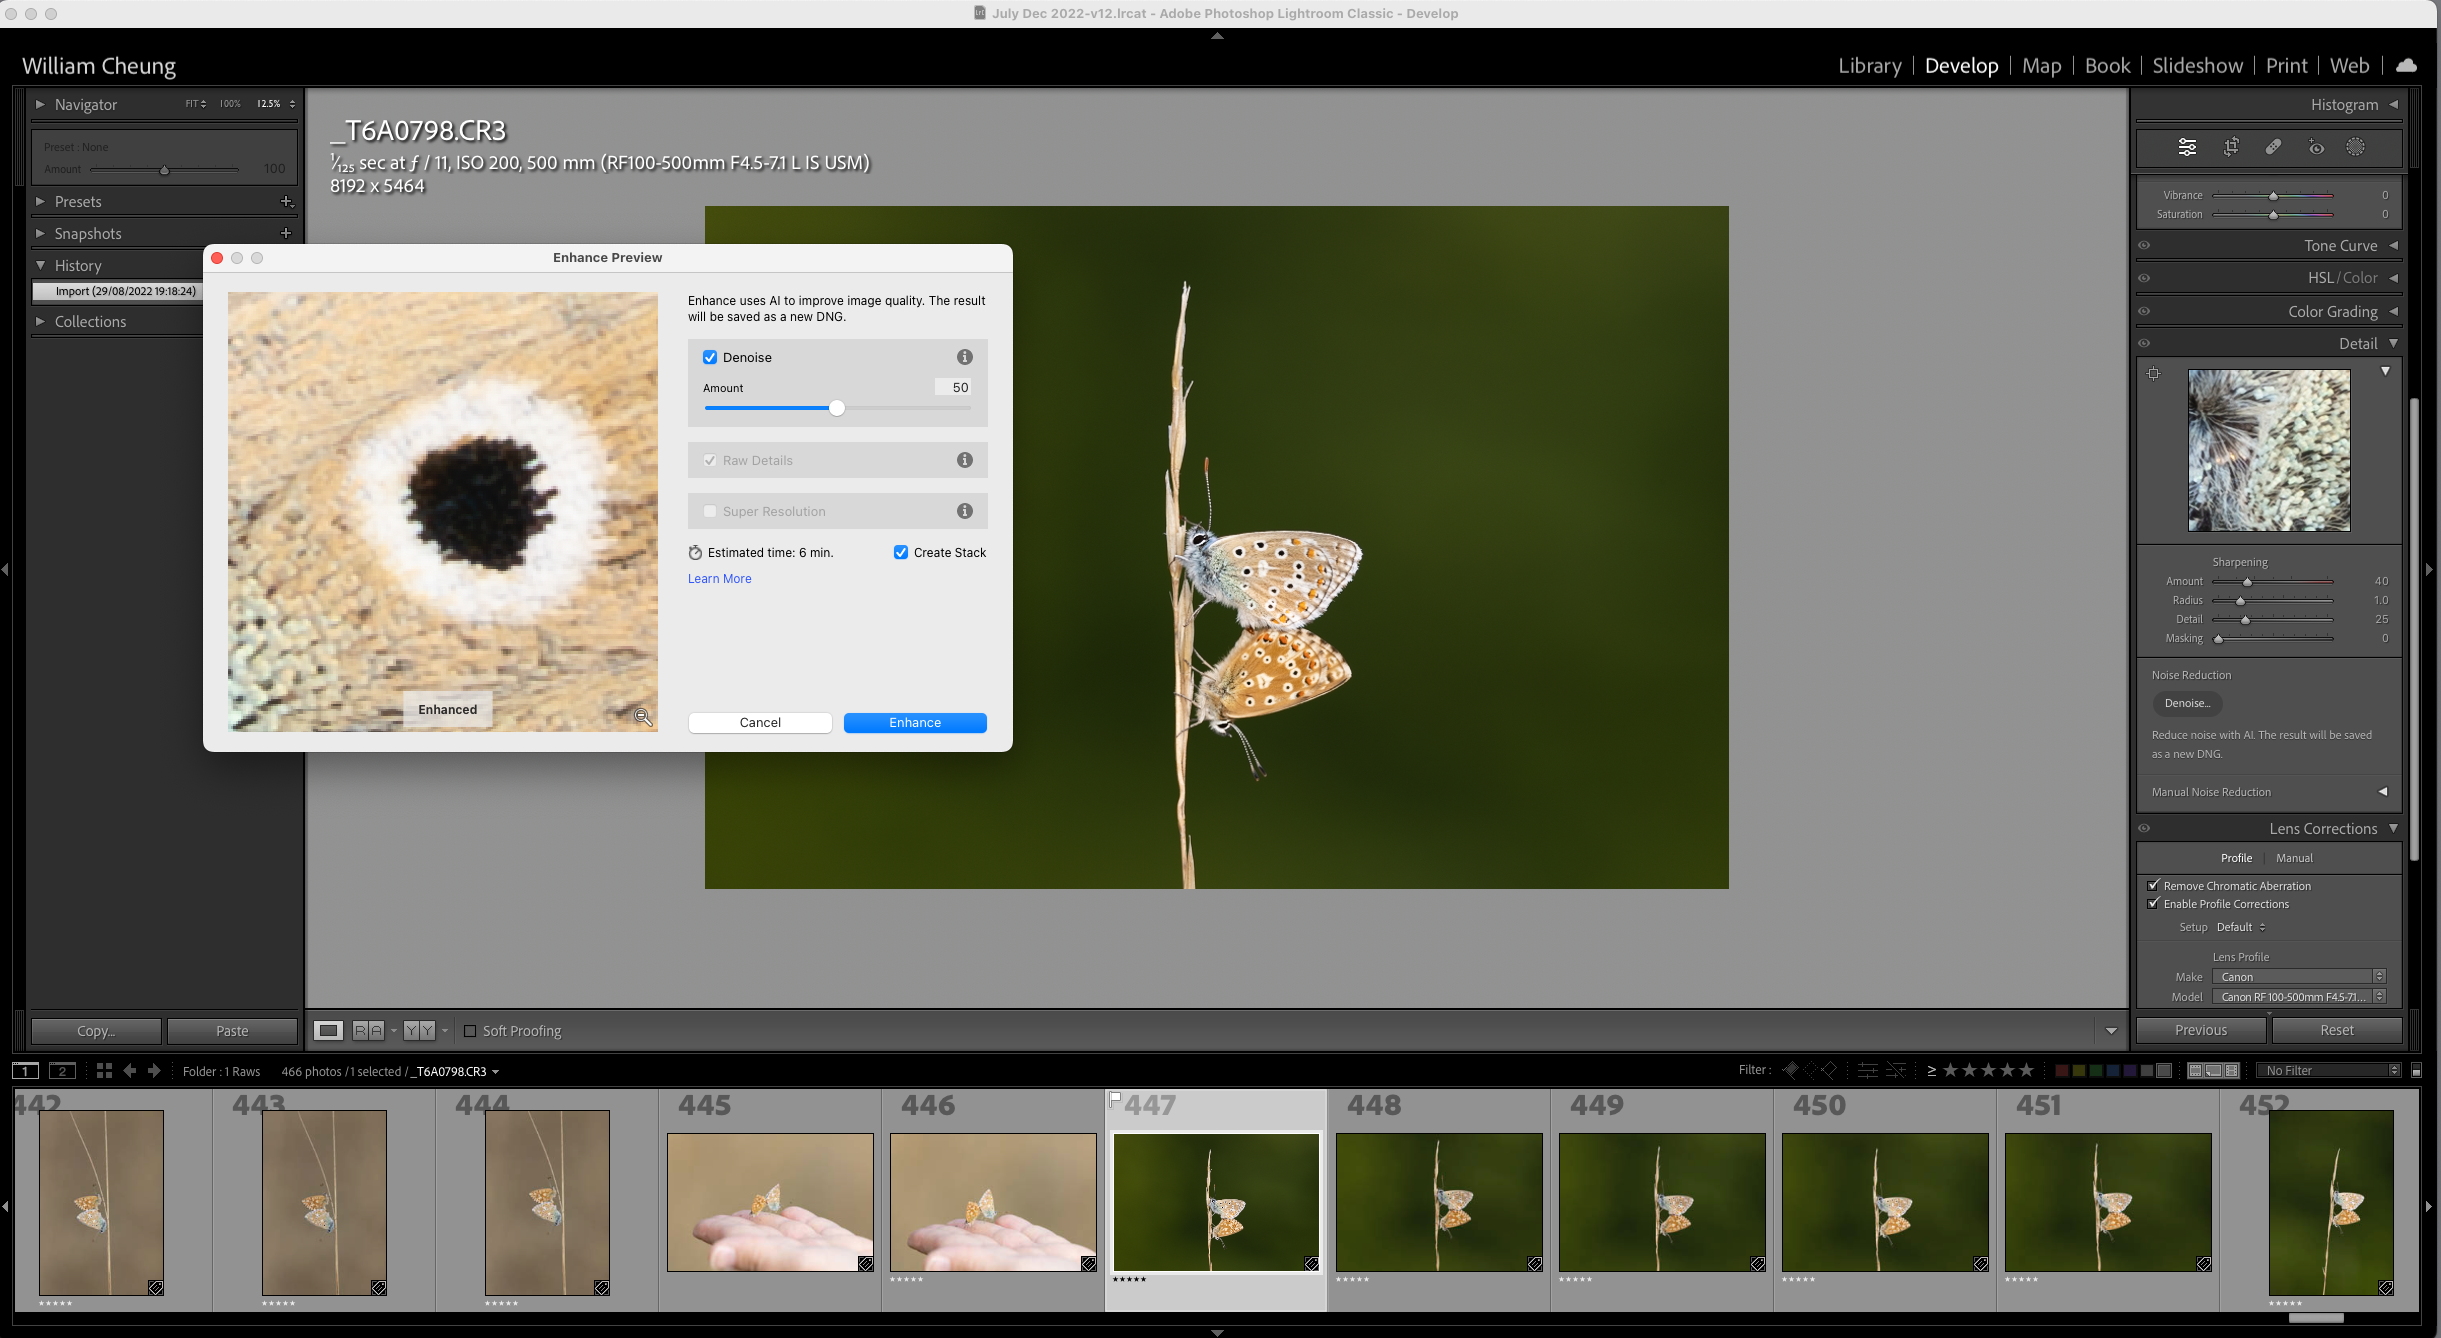
Denoise sits in Lightroom’s Detail palette. With Denoise ticked you get Raw details ticked too. Untick Denoise and you get raw details and the option of Super Resolution. Ticking Create Stack and the processed DNG is automatically stacked in the Lightroom catalogue, otherwise it sits alongside the original
Adobe Lightroom Denoise in detail
Adobe Lightroom is a workflow program par excellence and used by photographers and image creators the world over. It takes you all the way from import, cataloguing and keywording through to editing and finally to output.
Naturally, as it’s available on subscription only, it is regularly updated and in recent times Adobe has focused its attention on Lightroom’s masking tools. They have gone from strength to strength with greater accuracy, more control and awesome detection skills.
The masking tools have taken another significant step forward in v12.3 but here I will concentrate on testing its Denoise tool. It works with raw files and DNGs but only those created by Bayer and Fujifilm X-Trans sensors; so raws from mobile phones, TIFFs, JPEGs and previously edited DNGs won’t benefit. Treated files are saved as DNGs only.
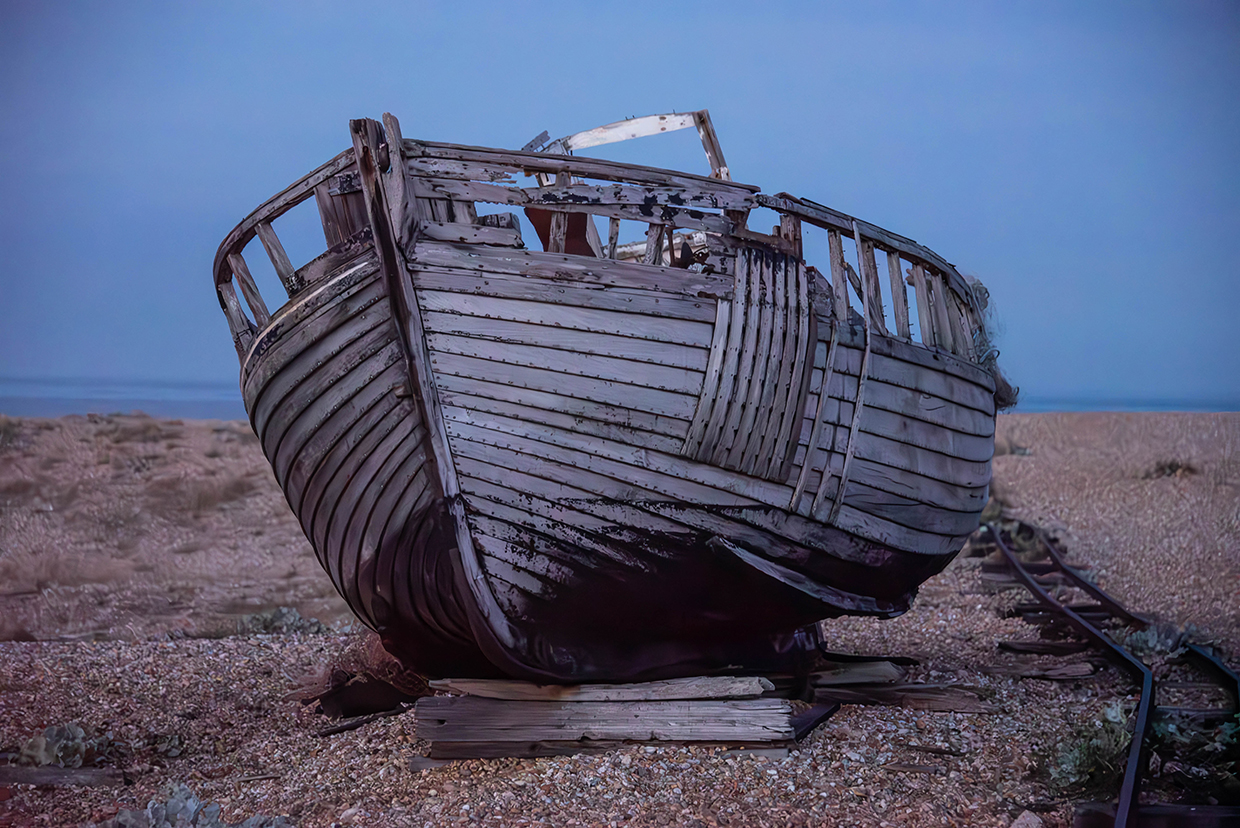
Shot on a Nikon D750 with a Tamron 28-300mm lens, exposed at 1/25sec, f/5.6 and ISO 25,600. Shown full frame, with sectional enlargements below.
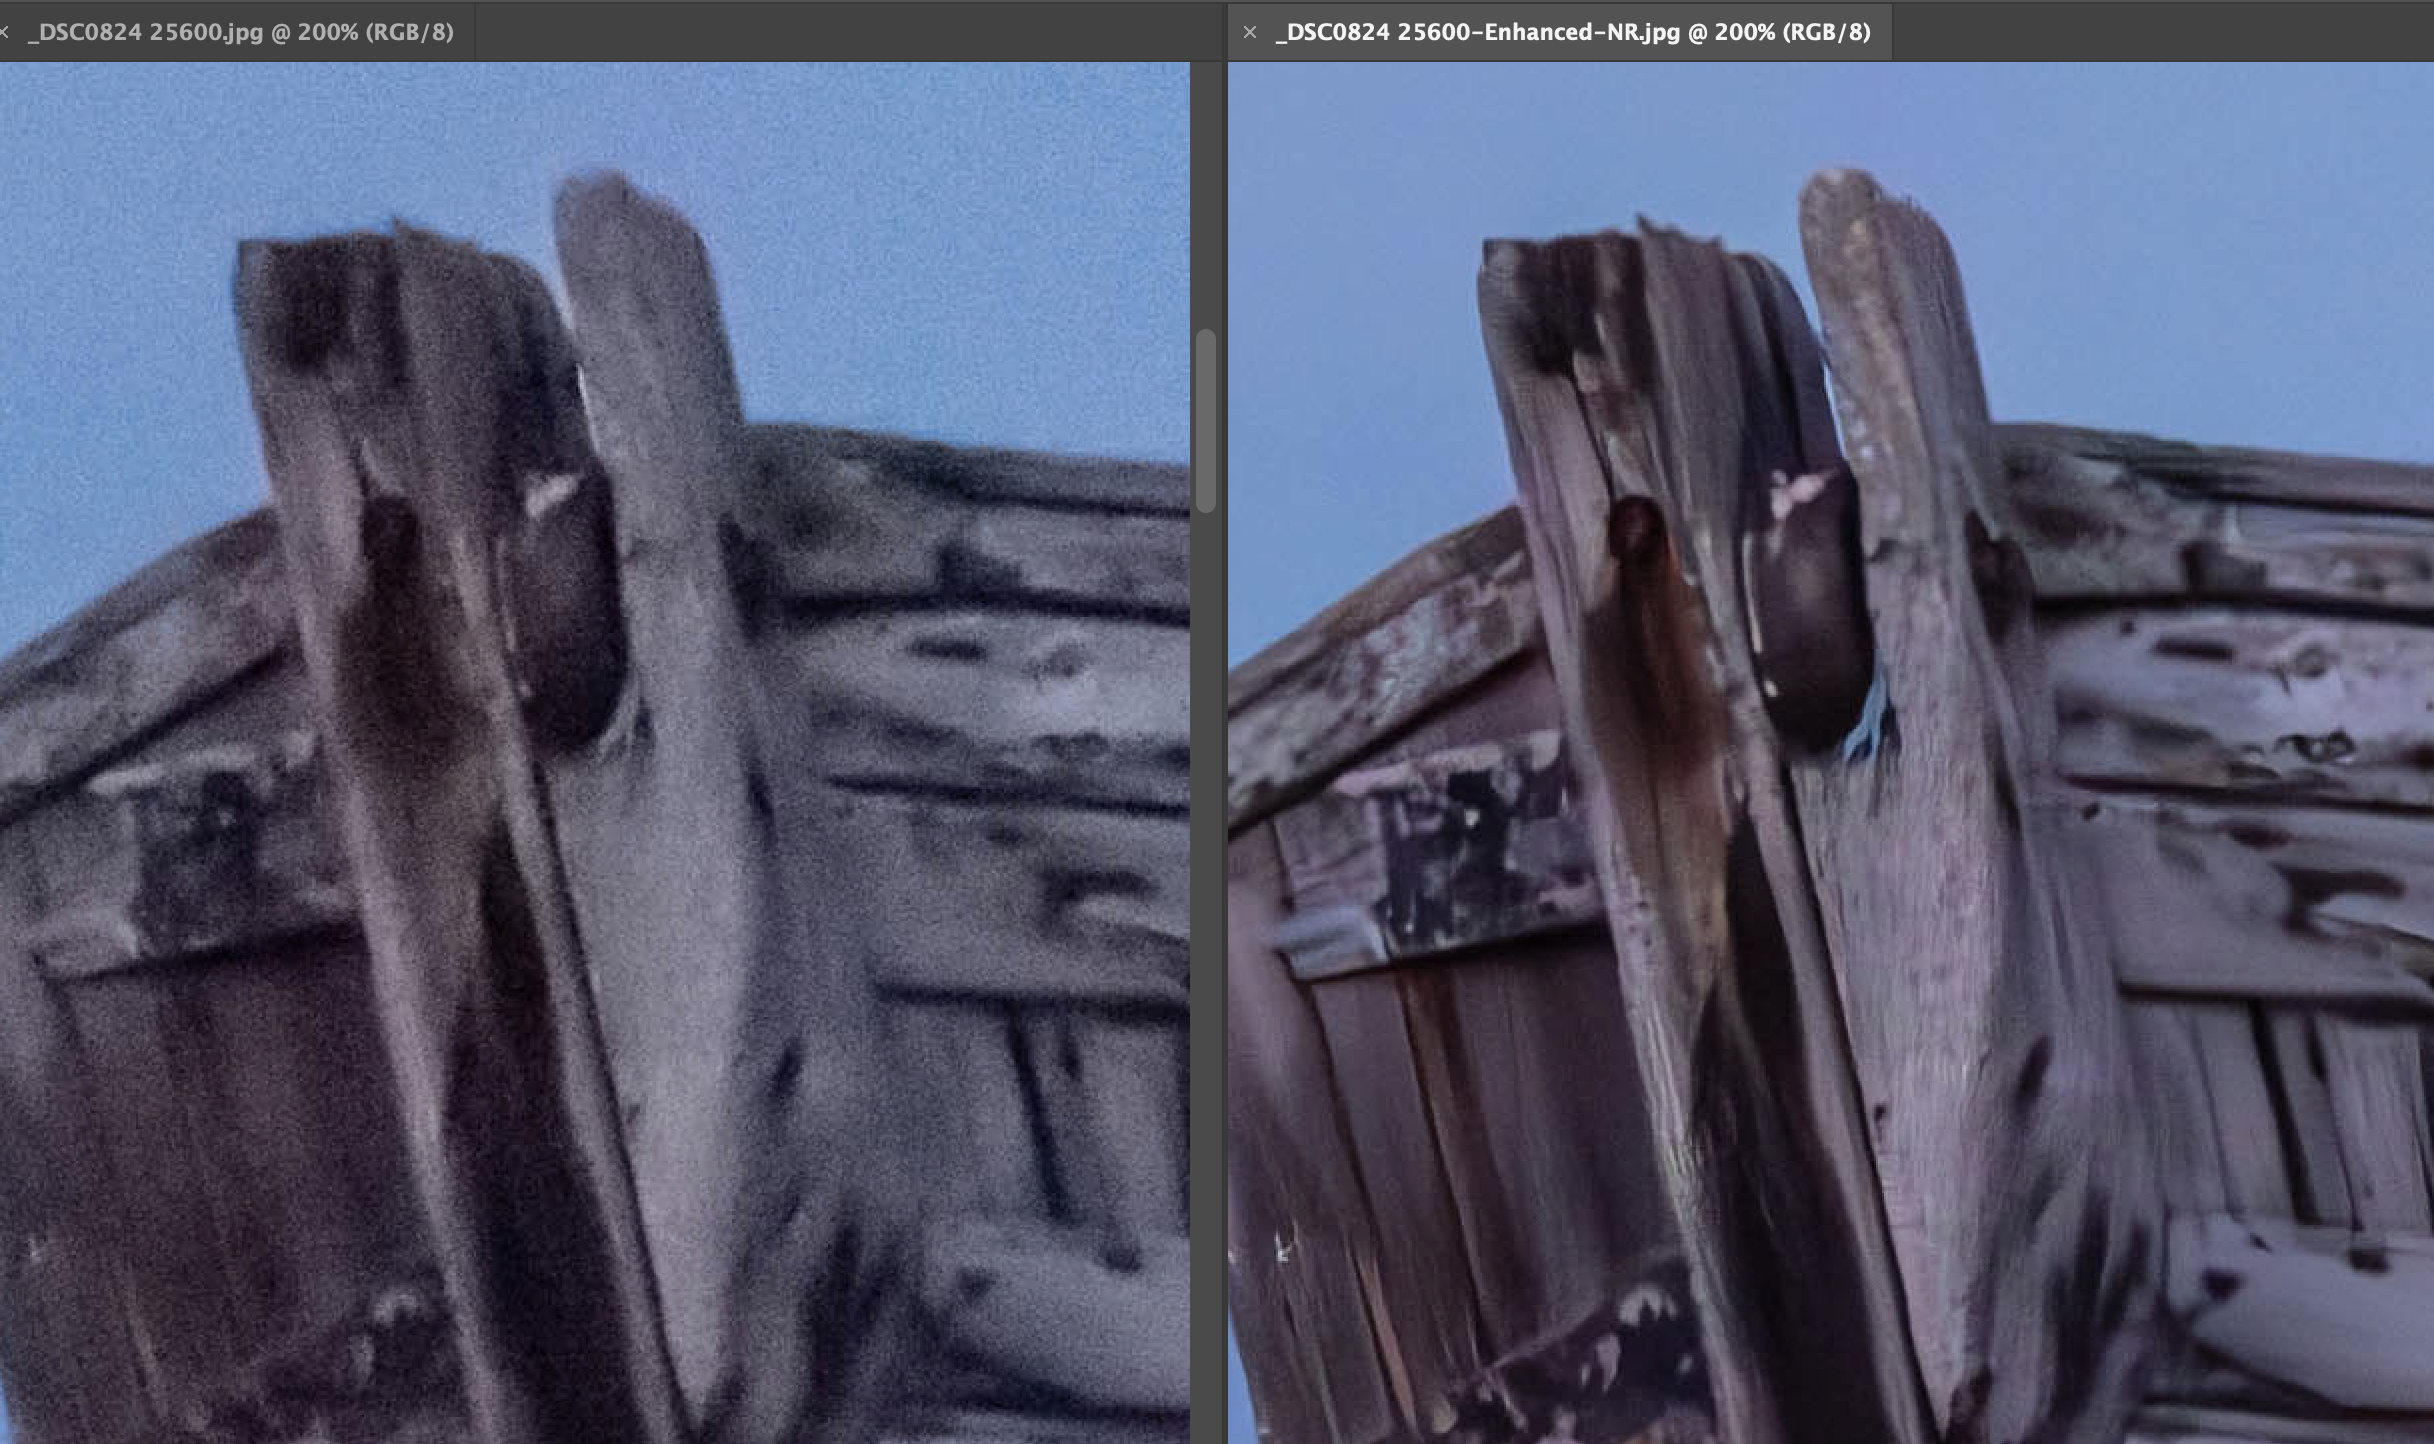
The image above was enlarged to 200% for these sectional enlargements. On the left the Raw was treated with Lightroom’s current manual noise reduction tool compared with on the right the new AI-powered Denoise with an amount of 88. The lower noise levels and improved detail achieved by Lightroom’s new tool is clear.
Denoise sits in the Detail palette, just like Lightroom’s original noise reduction feature which is still available by clicking on the arrow opposite the words Manual Noise Reduction. Click on the Denoise button and a preview window appears. Denoise can also be accessed by right-clicking on the image and selecting Enhance or via the top menu, Photo>Enhance. Whichever path you take, a preview window appears with the settings retained from any previous editing session.
The default amount on the Denoise slider is 50 and the preview image refreshes instantly as you adjust the Amount slider. Clicking and holding the mouse down on the preview shows a ‘before’ image as well as enabling you to navigate around the image quickly. As you do this, the image takes a second or two to refresh. For a view of the whole image, hit the magnifying glass bottom right and then you use the cross hairs that appear to zoom into an area.
Adobe Lightroom Denoise test: DxO PureRAW 3 and Topaz Denoise AI
Before we get to processing some images, let’s introduce the two popular programs we tried alongside Lightroom v12.3. DxO PureRAW 3 (v3.1 was used here) and Topaz Denoise AI (currently v3.7.2) can both be used as standalone softwares or as plug-ins in Photoshop/Lightroom.
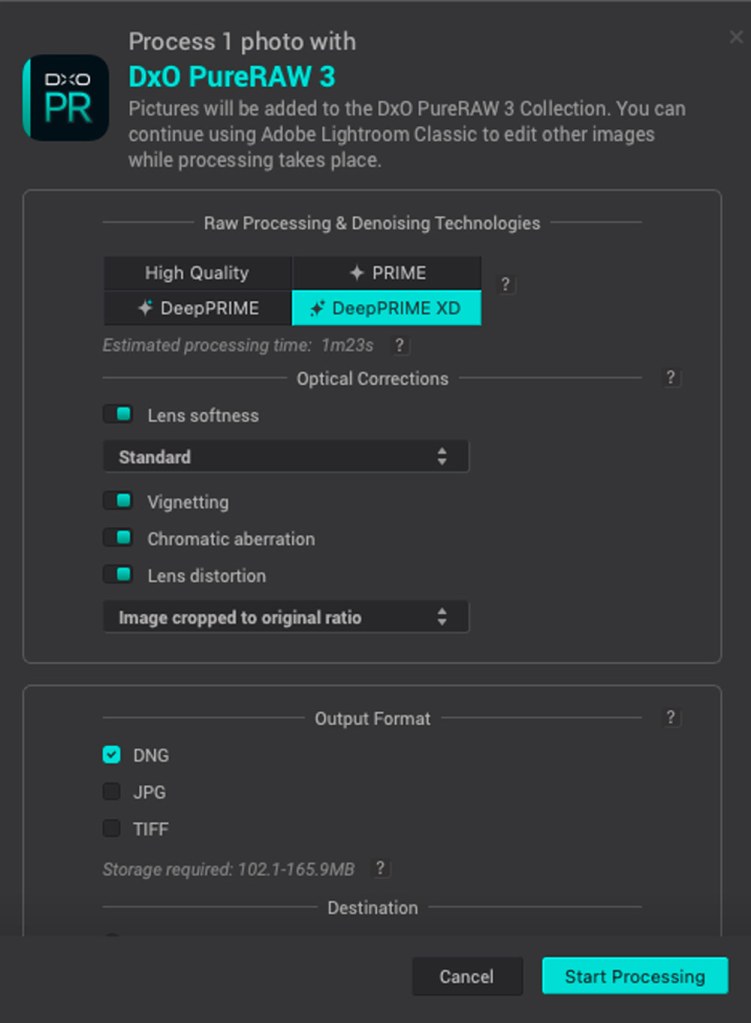
DxO PureRAW 3 offers more control than v2 plus batch processing is available. Headline feature, though, is DeepPRIME XD, a very powerful denoising and demosiacing process.
DxO PureRAW 3 is a raw enhancement program giving a claimed improvement of up to 2.5EV in respect of digital noise. As well as dealing with noise, it improves sharpness and generally produces cleaner, crisper images. What’s more, images benefit from DxO’s huge bank of correction profiles from camera/lens combinations going back many years.
Files treated through PureRaw 3 can be exported as DNG, JPEG or TIFF or all three at once. DxO PureRAW costs $129/£115 so it’s not cheap for a software with just one job.
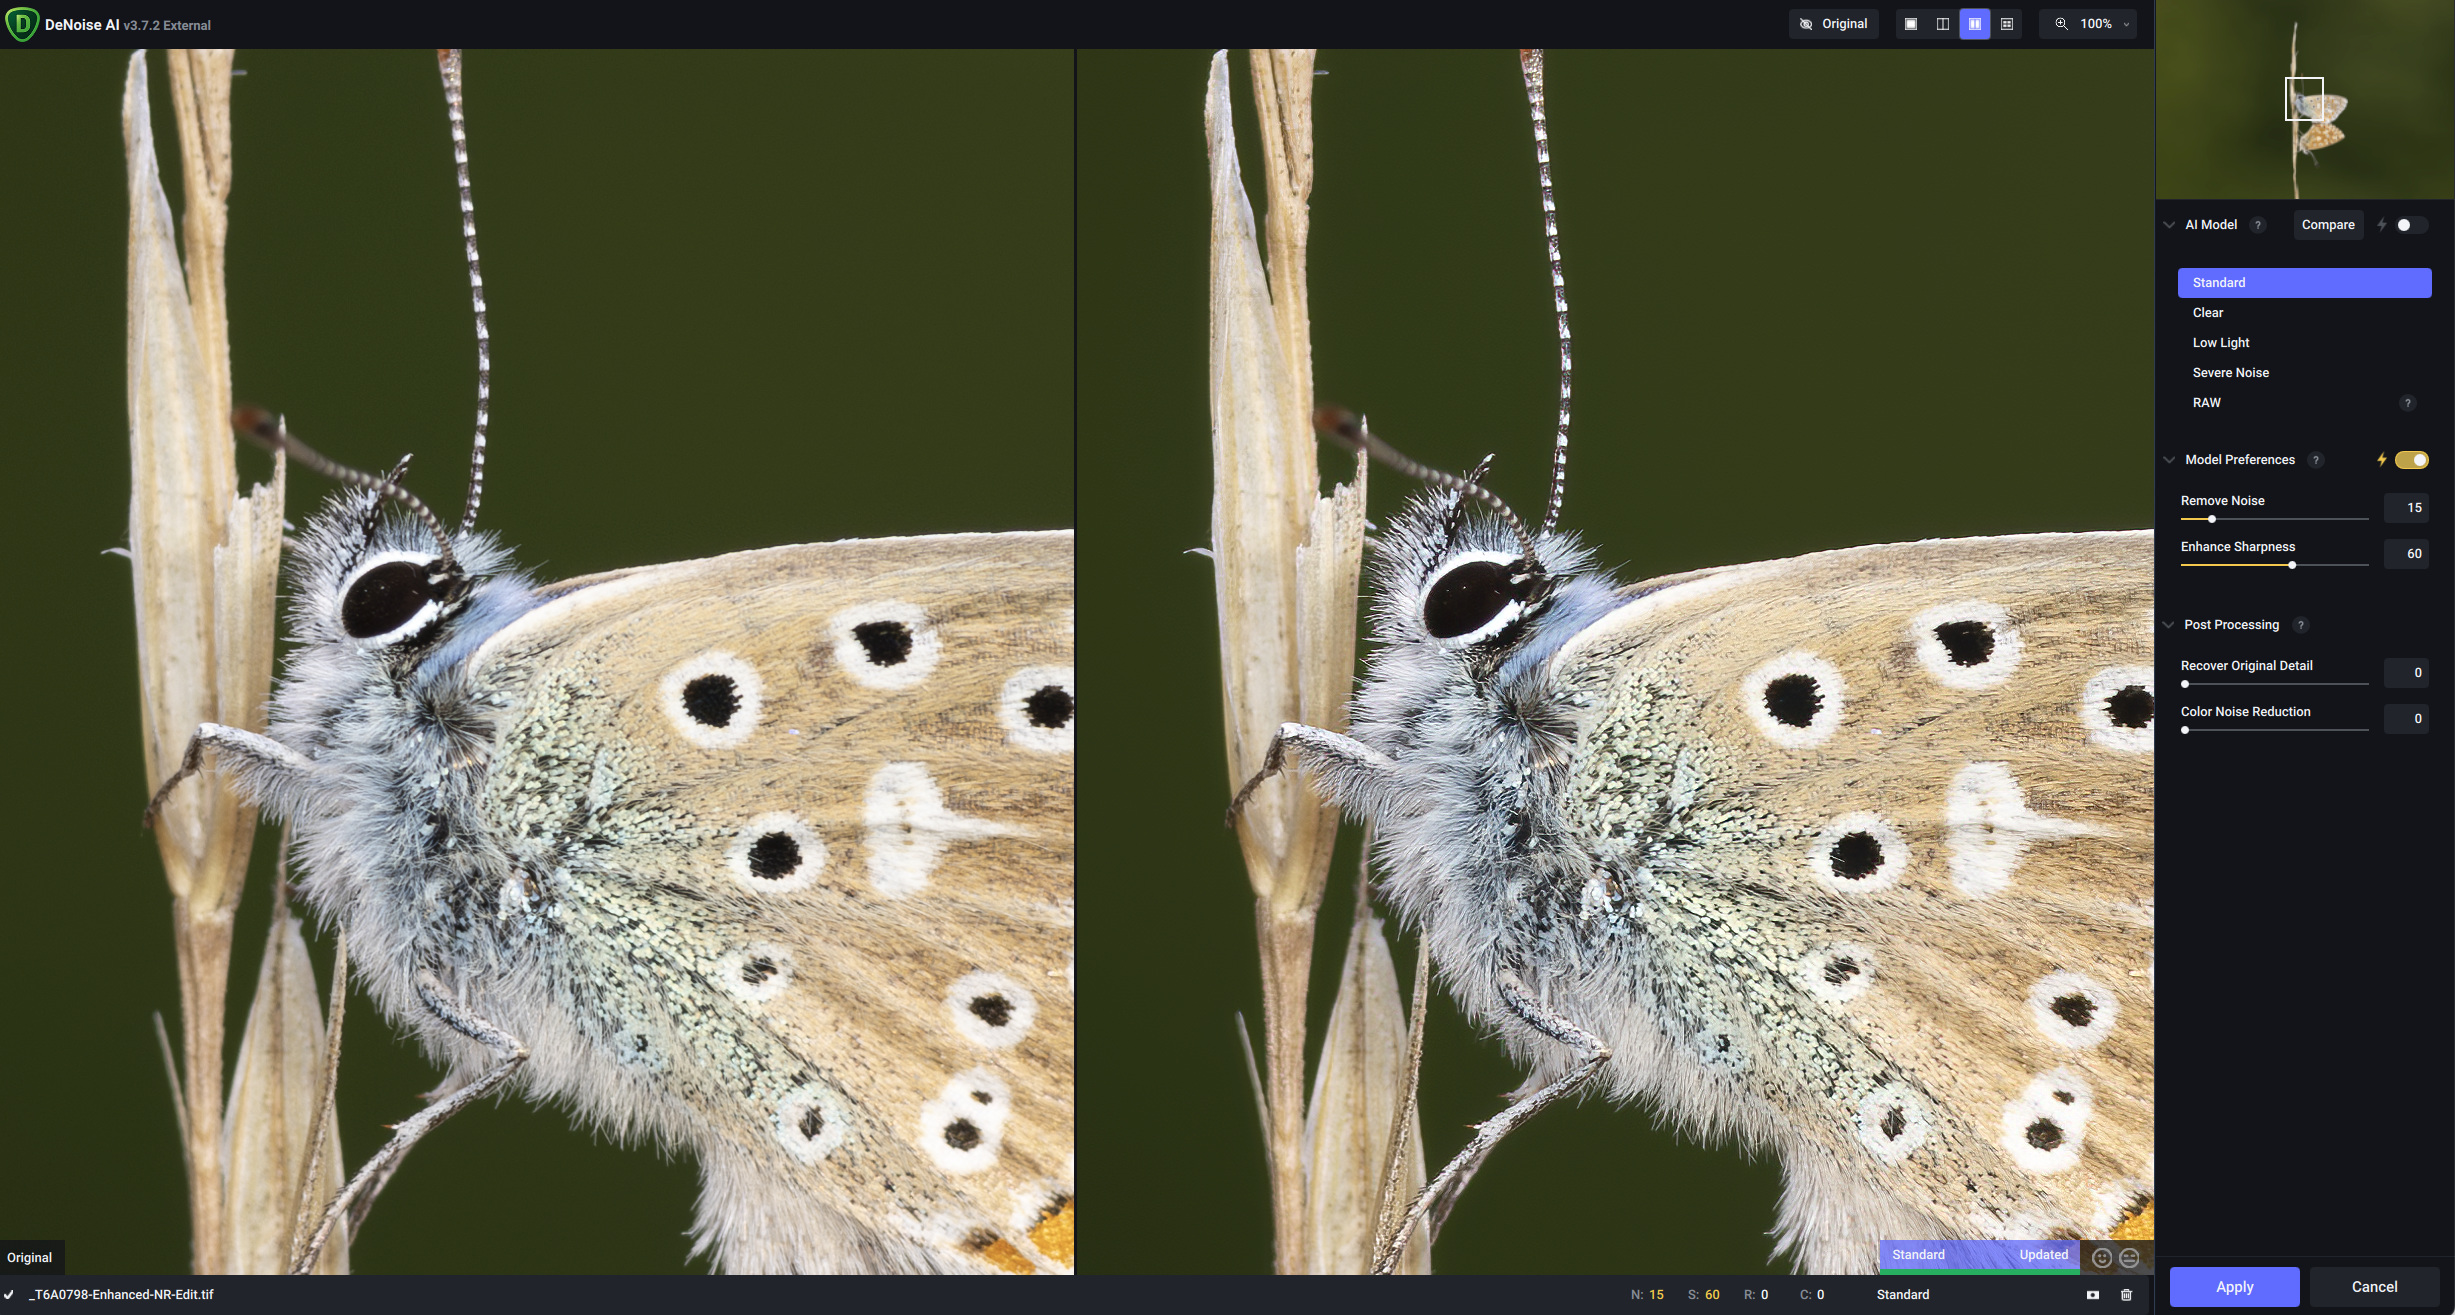
Topaz Denoise AI is a good value noise reduction software available as an outright purchase. It rates highly for its user-friendly nature. Image credit: Will Cheung
Topaz Denoise AI, meanwhile, uses deep learning AI and factors in the type of subject being treated so rather than processing the whole image it applies noise reduction to areas where it is needed. Topaz’s software is much more versatile then both PureRaw 3 and Lightroom Denoise in that it works with JPEGs, TIFFs as well as raw files so that is a clear advantage and gives Denoise AI a broader appeal.
It is a good value product too, costing $79.99, so much cheaper than PureRAW 3 as a one-off purchase and that price allows you to use the software on two machines. The price also includes one year of unlimited upgrades.
Adobe Lightroom Denoise test: high ISO
Below is probably the most challenging image used for this test. It was taken at English Bay in Vancouver from a moving boat on a Nikon D800 with an exposure of 1/40sec at f/4 and ISO 6400. Given the scenario, it’s no surprise that it’s not as sharp as it should be and with not much light around the noise levels in the shadows are very high indeed.
To salvage what I could, I put the image through the three programs, including a file through Lightroom with minimal editing for the benefit of comparison. In terms of processing time, it took Topaz 25 seconds to produce a TIFF; PureRAW 3 took 85 seconds; and Lightroom Denoise took 94 seconds for the 50 and 100 amounts.
I used an M1 MacMini with 16GB of RAM for all the images featured in this comparison. Once denoise processing was complete I edited the results to taste in Lightroom.
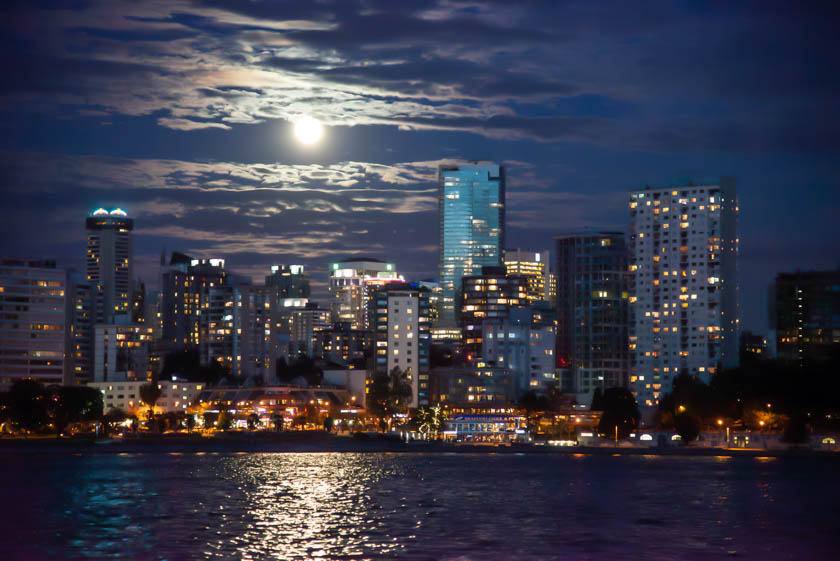
Full frame image processed through Lightroom with Denoise at 100 amount. The Vancouver skyline was shot on a Nikon D800 with 24-120mm lens with an exposure of 1/40sec at f/4 and ISO 6400. Image credit: Will Cheung
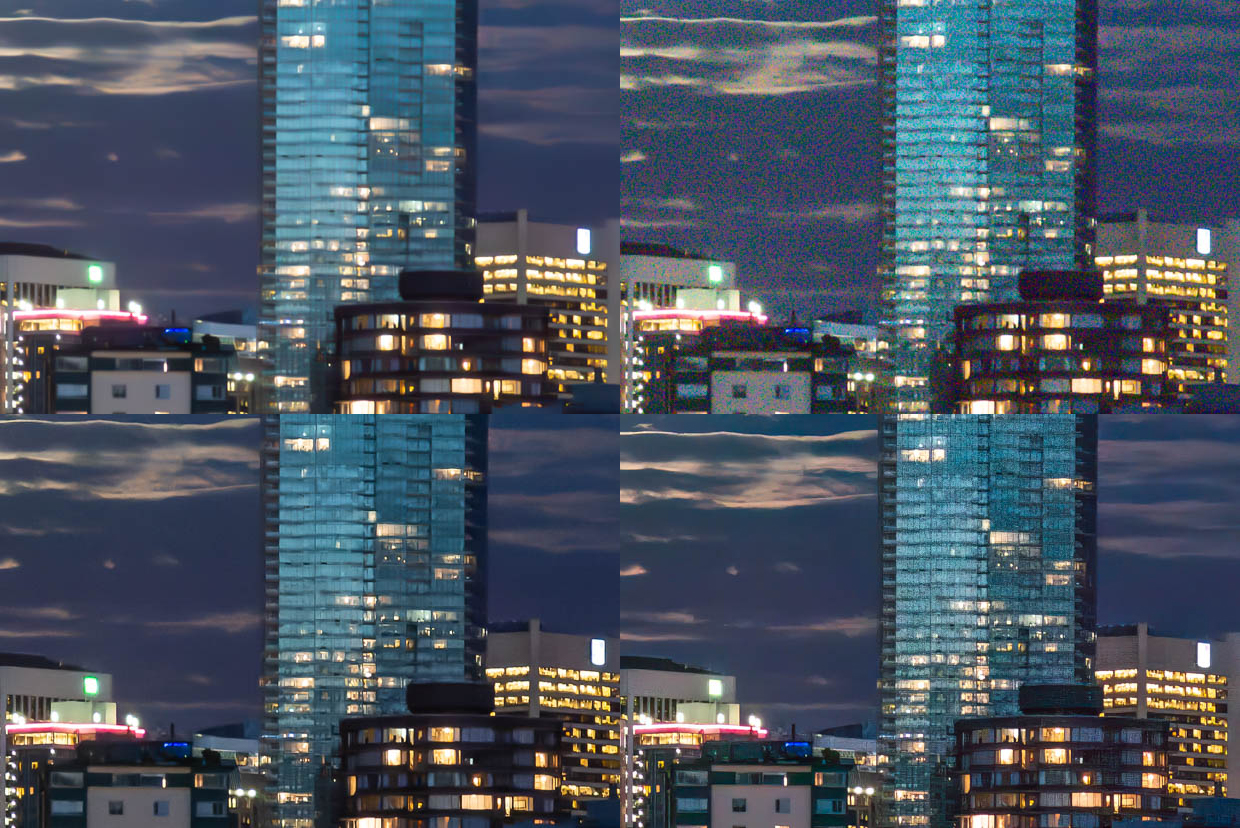
Vancouver skyline shown at 100%. Top left: Adobe Lightroom Denoise at 100. Top right: Adobe Lightroom, no noise reduction. Bottom left: DxO PureRAW 3. Bottom right: Topaz Denoise AI.
To be fair, the three denoised pictures looked pretty good and significantly superior to the control image. Viewed at 100% on screen, the Topaz image was the least successful and there was some artefacting in both top corners. The Denoise image with an amount of 50 looked acceptable but there was grain patterning in the sky and shadow areas, although it wasn’t objectionable.
With an amount of 100, there was barely any noise in the shadows and while the result looked slightly over-sharpened, the effect, as you can see above, still looked very good.
An amount between 50 and 100 would probably give an optimal result. As far as this image is concerned, the winner by some way was produced by PureRAW 3. There was some artefacting in the sky and water but less than that seen in the other images here. The way the software eliminated all the noise and really sharpened up the image so it actually looked properly sharp was quite extraordinary.
If I hadn’t done the processing myself, I would have said it was a fix, but I did, so a massive thumbs up for PureRAW with this image.
Adobe Lightroom Denoise test: an even higher ISO
So, our three denoising programs did a decent job with a difficult file, and PureRAW 3 did especially well. My next shot was a street image taken on a Nikon D800 at ISO 25,600; the camera’s top native ISO was 6400.
Again, I put the original raw file through the denoising programs with a control image processed in Lightroom without any noise reduction. The treated files were then edited to taste and that what’s shown here.
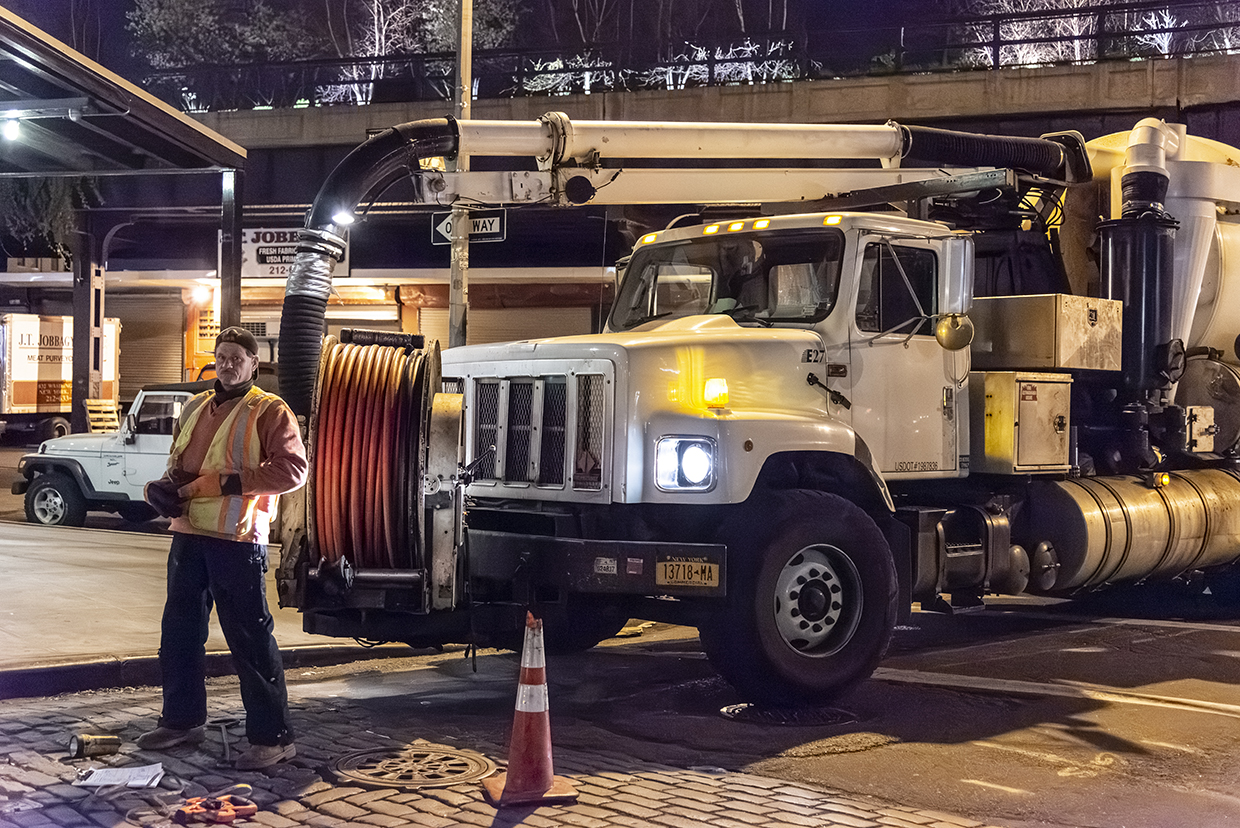
Full-frame image – this was the version processed through PureRAW 3. New York night worker was photographed on a Nikon D800 with a 24-120mm lens. The exposure was 1/125sec at f/4 and an ISO of 25,600. Image credit: Will Cheung
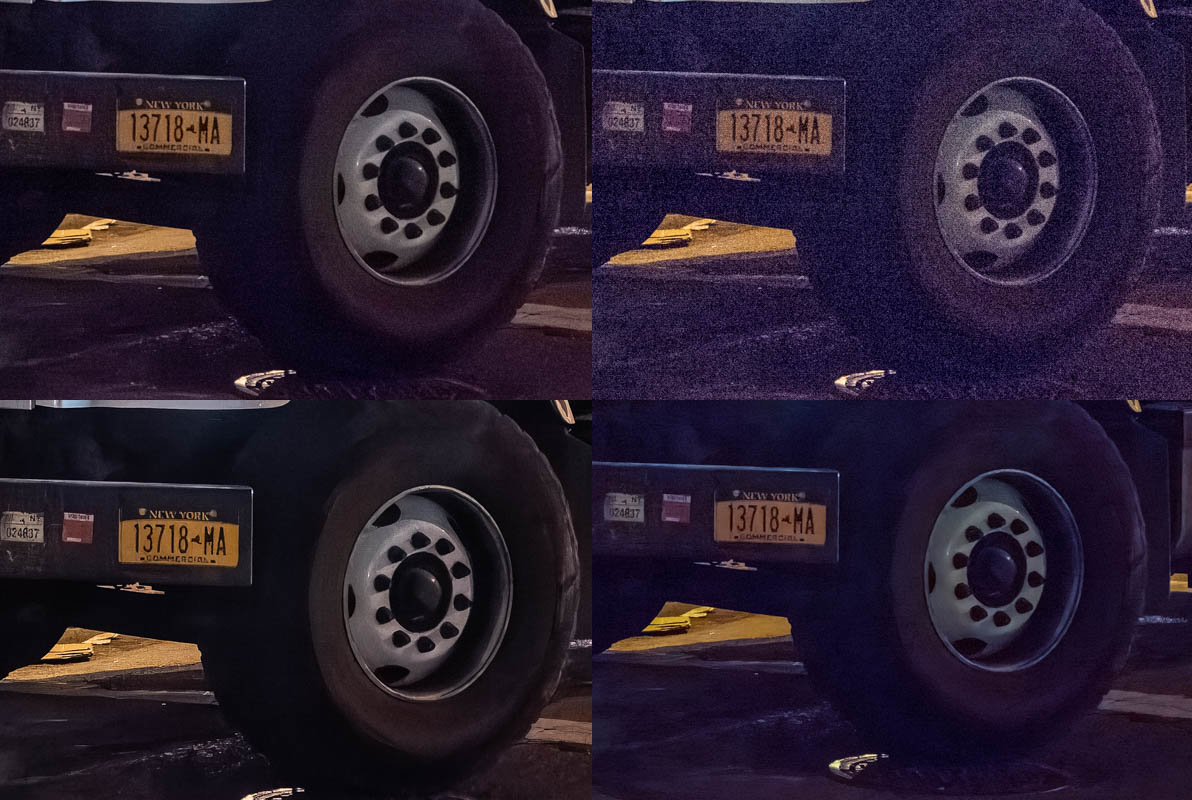
A section of New York night worker image representing a 100% blow-up. Top left: Adobe Lightroom Denoise at 100. Top right: Adobe Lightroom, no noise reduction. Bottom left: DxO PureRAW 3. Bottom right: Topaz Denoise AI.
After being treated in the denoising programs, the resulting files looked impressively clean considering the original raw file. All three delivered a more than acceptable performance in respect of digital noise removal and the vehicle’s registration plate was much cleaner and more eligible.
Lightroom Denoise and PureRAW 3 produced the best look with this image. PureRAW 3 definitely did best with noise removal and the number plate is really crisp but the effect looked perhaps a little too edited. Perhaps a revisit of the raw file and some fine-tuning would be in order. Lightroom Denoise was less successful in terms of noise removal but on this showing produced the most realistic look, so this was the best result.
Adobe Lightroom Denoise test: With slower ISO settings
From our test images above you can see that Lightroom’s Denoise has a significant benefit, although it seems that it’s not quite as good as DxO’s PureRAW 3, so it’s time to try it with a slower ISO shot. This pair of mating butterflies was shot at ISO 200 on a Canon EOS R5. As you’d expect, digital noise is not a big issue on the original image but again I processed the file through the three programs.
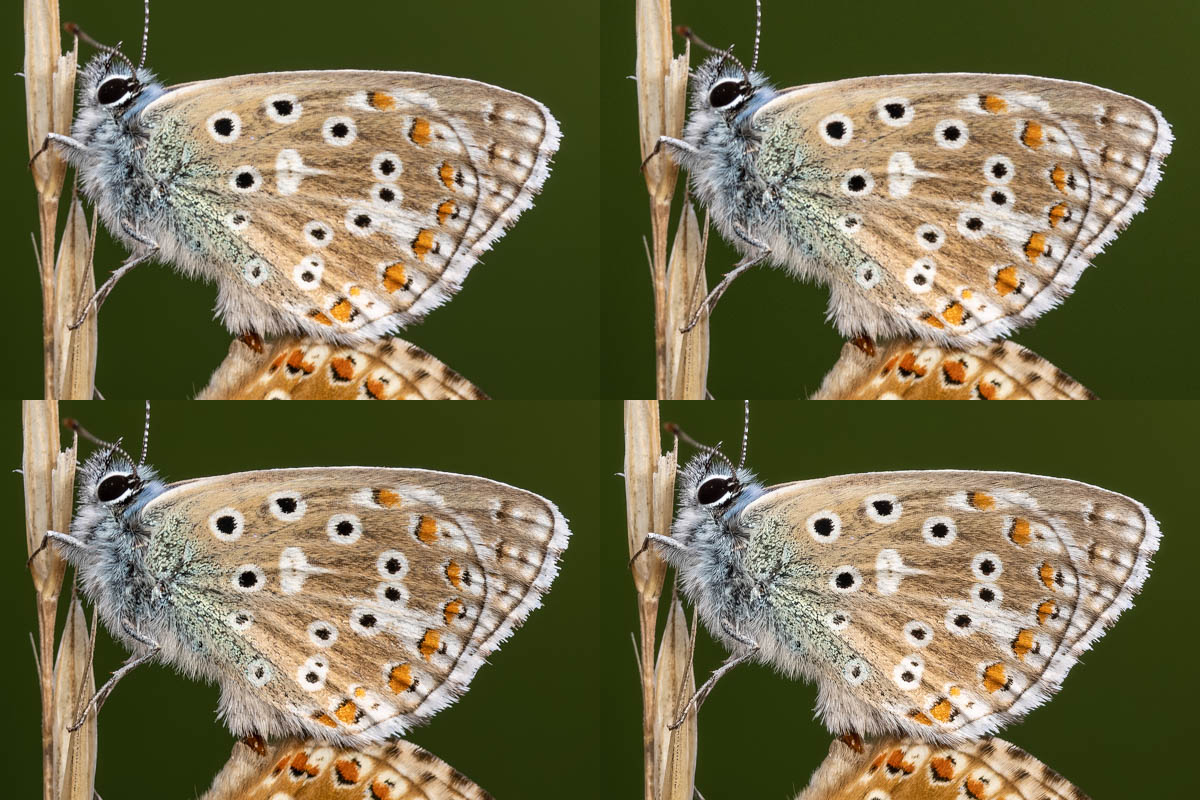
Adonis blues shown at 100%. Top left: Adobe Lightroom Denoise at 100. Top right: Adobe Lightroom, no noise reduction. Bottom left: DxO PureRAW 3. Bottom right: Topaz Denoise AI.
Adobe Lightroom Denoise test: Verdict
Investing in editing software, whether as a one-off purchase or via a subscription, is generally a very good thing for most photographers, and for those needing a capable workflow solution, Adobe Lightroom with its powerful cataloguing and processing skills is leading player. However, while it had noise reduction skills the fact remained that if you wanted the cleanest, most detailed results the third party route was the way to go, with Topaz Denoise and DxO PureRAW two popular choices.
In this comparison, DxO PureRAW 3, Topaz Denoise AI and Lightroom Denoise all produced better results than Lightroom’s manual noise reduction. Of the three, I thought Topaz was the least good and while it reduced noise significantly, its overall effect was not as impressive as PureRAW 3. On the plus side it works with JPEGs and TIFFs as well as raws and at $79 for an outright purchase it’s good value too.
PureRAW is more expensive but with most of my test raw images, its DeepPRIME XD mode produced the best results with great noise removal without sacrificing detail. On occasion it can deliver an over-cooked result but v3 does have greater control as well as the options of Prime and DeepPRIME.
With Lightroom v12.3 with Denoise it’s a good opportunity to revisit Raws in your archive. This was an ISO 25,600 picture taken on an Olympus OM-D E-M5 and cleaned up very nicely in Lightroom Denoise with an amount of 100.
So, where does that leave Lightroom with its new Denoise feature? Based on the results here, it has very capable noise reduction skills, just a tiny bit short of PureRAW’s deepPRIME XD.
For Lightroom subscribers, having Denoise is a huge benefit. That’s great news if you rely solely on Lightroom, and potentially even better news if you’ve invested in extra noise-reduction solutions. When these need updating, you might decide to save the money and stick with Lightroom.
Further reading
- Best Adobe Lightroom presets
- How to convert images to black and white in Lightroom
- DxO PureRAW 3 review
- Adobe Photoshop Review
- Don’t be afraid of shooting at high ISO
Follow AP on Facebook, Twitter, Instagram and YouTube


