
Any landscape photographer looking for a creative challenge and to capture unique images should consider woodland – if you live near some. It is generally seen as a difficult genre of photography to master. But with time and patience, it is most enjoyable; even therapeutic. While some people are drawn to shooting sunsets and sunrises with dramatic light and colour, I’ve always taken more enjoyment from atmospheric scenes of this type.
How to start shooting moody woodland landscape photographs
A woodland can be bewildering at first approach with a camera: you cannot see the wood for the trees, literally. They make for a busy and intense scene where it can be difficult to know where to look for a shot. Almost certainly the best place to start is by going on a few scouting missions – so do them locally, if possible.
Travel light, go with no expectations, and tune in to the environment – habituate the eye to space and light. I guarantee you will find some scenes with potential to return to. Work the edges of the woodland first. Looking into the wood can often reap rewards and is an easier way to spot compositions, especially if you haven’t shot this genre before.
Once you’ve found a scene, give it some time by checking out various angles and taking reference shots, so you are fully prepared when the conditions are right. You may not capture any shots you wish to keep on your first outing. It could happen, as anywhere, but I suggest that it will take some time and several visits to develop a feel for the task.
Check weather conditions
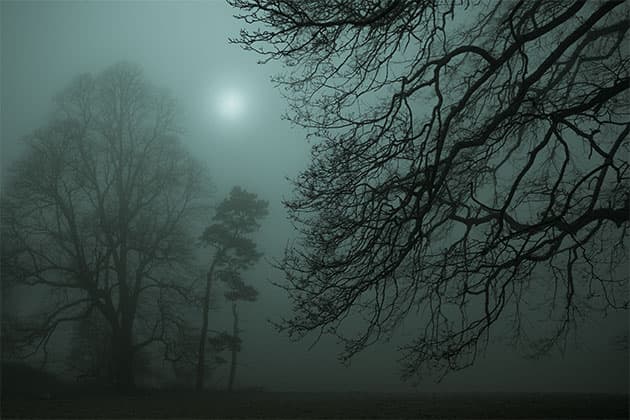
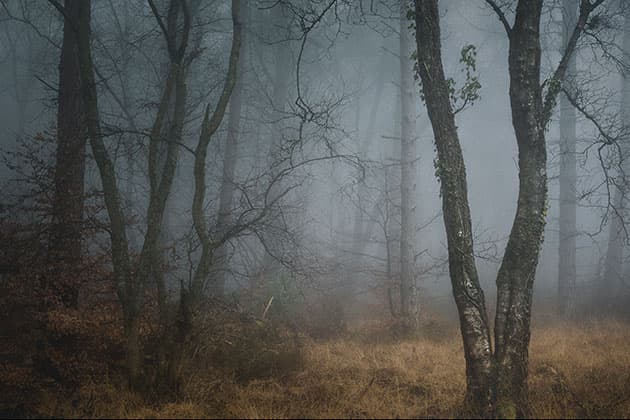
As one can see here, fog or mist is an essential ingredient in the majority of my atmospheric woodland images. These conditions are not only essential to create mood, but also help dramatically when it comes to picking out compositions and isolating subjects of interest. The time of day is also key. For my own images, I prefer the softer muted light of blue hour, especially when the objective is mood.
Of course, there are other ways to isolate subjects, like using fast lenses wide open to create a shallow depth of field, but if you want that atmosphere, head out on those misty days.
Research locations for moody landscape photography
There are several places I enjoy shooting and exploring when I want to try and create atmospheric images.
The first is Wistman’s Wood in Devon. It’s an amazing location and one that every photographer who likes to shoot woodland should visit at least once. It’s very small and can be extremely difficult to shoot and negotiate your way around, but if you get lucky with the conditions it really is a magical place.
The second spot is Haldon Forest in Devon – a place I’m only just finding my way around. It has massive potential and I’m hopeful I will shoot some keepers there this year. The wood itself has an abundance of various species from gnarly oak to silver birch, providing great variety and endless opportunities for photography.
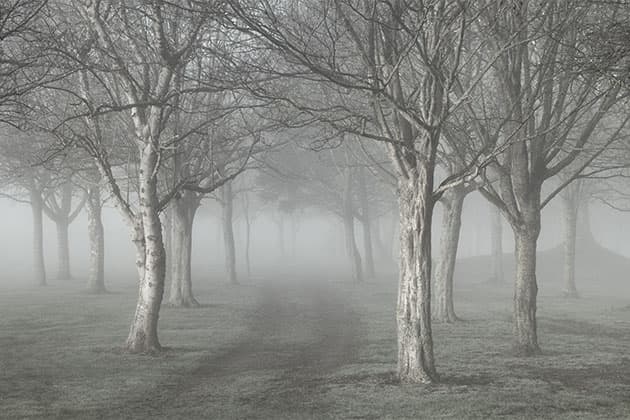
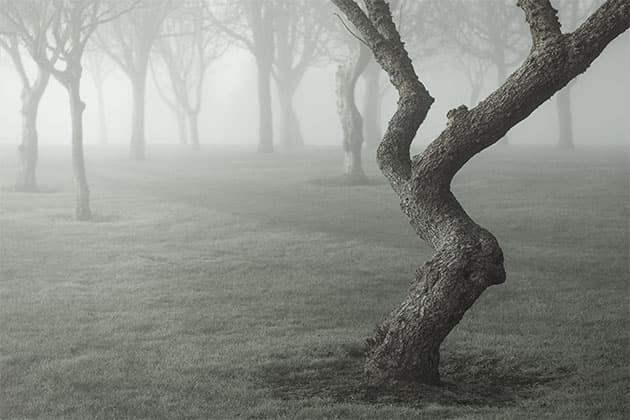
Another great Devon location is Churston Woods. There are a few small woodlands close to my home and on the rare occasion there is fog locally I will head to Churston Woods. (There are also some nice trees on the local golf course, which I have shot in some thick fog, after seeking permission from a greenkeeper.)
Camera equipment and accessories
My typical woodland set-up has recently changed, as I’ve collected a few old Nikkor AIS lenses. I currently use a Nikon Z 7 and FTZ adapter with 50mm f/1.2 AIS, 85mm f/2 AIS, 105mm f/2.5 AIS and 135mm f/2.8 AIS lenses; a 3 Legged Thing Winston tripod with Zelda L-Bracket; another 3 Legged Thing tripod; Vanguard Alta Sky 51D bag; Kase Polariser; and Nikon cable release.
You can also check out this list of the best cameras and lenses for landscape photography.
How to process moody woodland landscape photography
When it comes to processing, we all have our own style. Over the past two to three years mine has changed dramatically, as I’ve been inspired by various photographers. For me, the most important thing is to experiment and get a feel for the type of image I want to create, using the sliders to see how they affect an image. Don’t be scared to push the colours in a direction that suits your tastes.
As my Mystical series was all shot during the blue hour, I really wanted to emphasise that soft blue light. I did this by using a mixture of tweaking the Colour temperature and Split tones. I’ve also added a fair bit of noise to the images, which were originally shot between 100-800 ISO – this is just something I liked at the time as I felt it added to the mood of the image.
Finally, I flattened the tones slightly using curves and desaturated. I feel the end results really represent how I visualised the scenes in my mind when I was there shooting.
Why it works
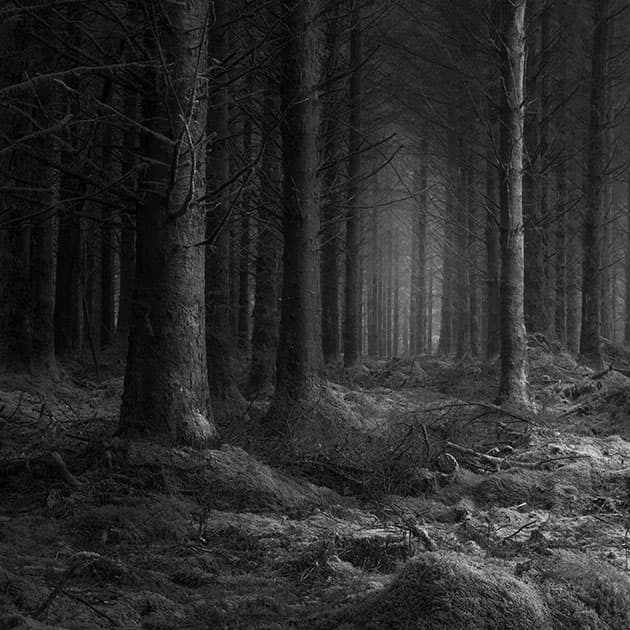
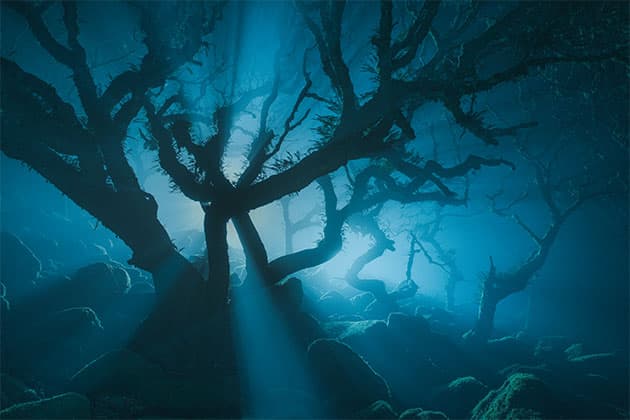
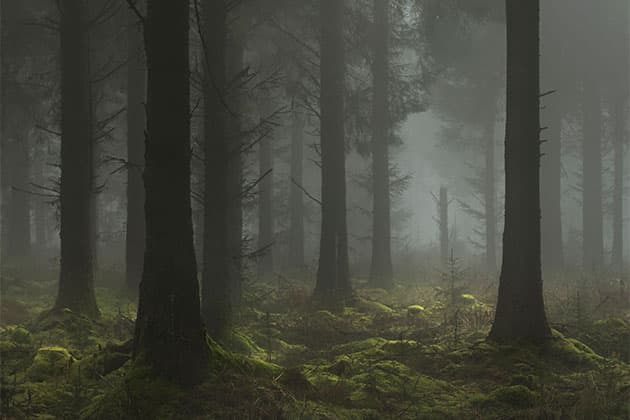
‘Follow the Light’ was shot near Pixie Land in a small pine woodland as the mist was clearing. The light at the time was coming from my right-hand side and it really did bring the scene to life. I’m particularly pleased with the composition of this image and how the light and the soft mist creates depth and a clear passage to guide the viewer’s eye through.
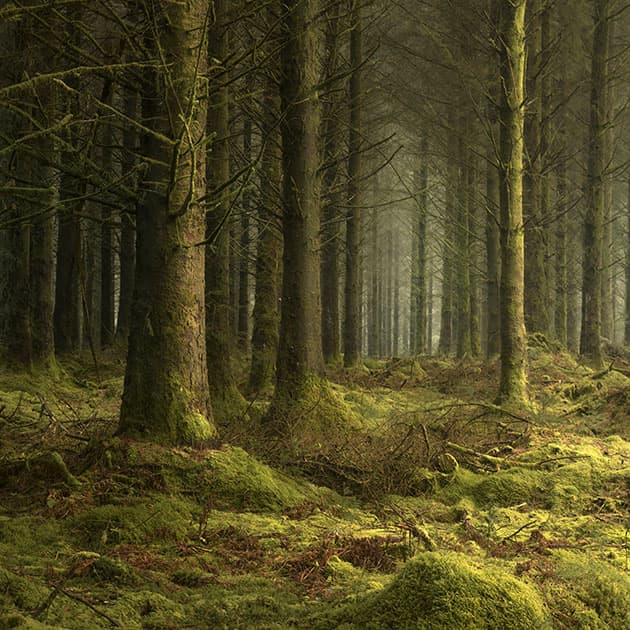
In my opinion, both the colour and black & white work particularly well for this image, which isn’t always the case. Having said that, I’d slightly favour the monochrome – I feel the textures and tones in the mono really draw you into the frame.
Top tips for shooting moody landscape photographs
Simplify the scene
I’ve learnt from trial and error that certain elements within a scene will only cause distraction. I avoid large gaps in the tree canvas, which can often be very contrasty even in good conditions. Venturing out in thick fog or mist is the easiest way to isolate a subject, and it’s often easier to find isolated trees on the edges of a wood.
Shoot what you see
Approaching a wood with an eye for a photograph can seem almost ominous at first. The density of life in there can be overwhelming to the eyes looking for a photograph. Better to stop, pay attention to, and breathe in the surroundings for a while to attune your vision and soak up the atmosphere.
You’ll start to notice light, shapes, angles and who knows what? There is no perfect scene. What catches your eye and gets you keen to shoot will be something unique to you in that moment – when it comes. Keep an open mind before discounting any scenes and, above all, enjoy the time you take there among the trees. Great photos will follow!
Try shooting at blue-hour
The soft light at the blue hour is my favourite time of day. While I can appreciate some people prefer the golden hour for shooting, I’d advise those people to go out a little earlier and try shooting when the light starts to break through. The subtle light of the blue hour really can be magical in a woodland. Combine it with some mist or fog and you’re onto a winner!
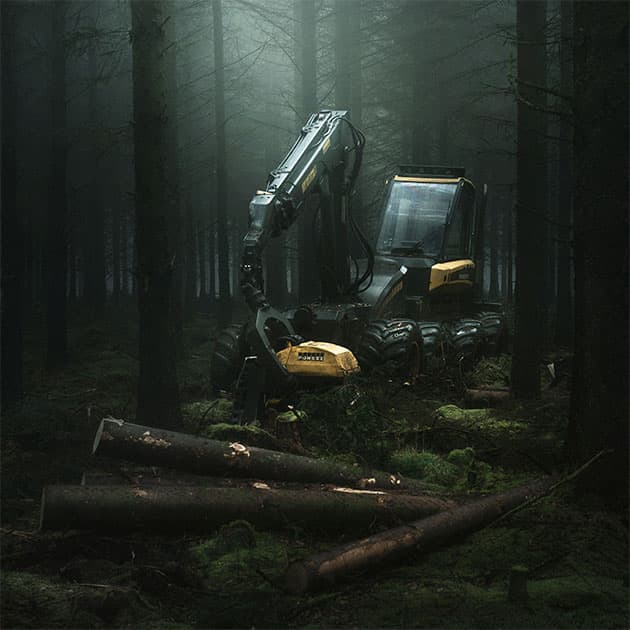
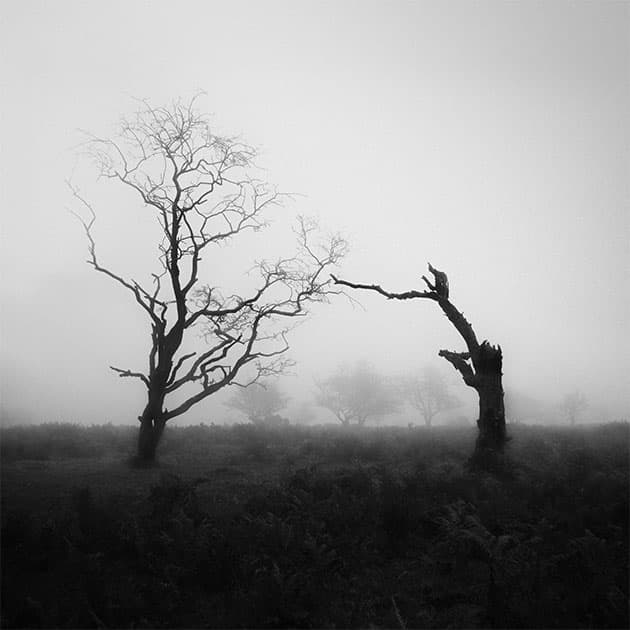
Find a focal point
It’s quite common to find a different-shaped tree or even a different species of tree that breaks the uniformity that surrounds it. There are also other elements that can work in a woodland scene – maybe the placement of a lone figure or a man-made element. This forestry logging machine in woodland on Dartmoor made a great subject.
Embrace imperfections
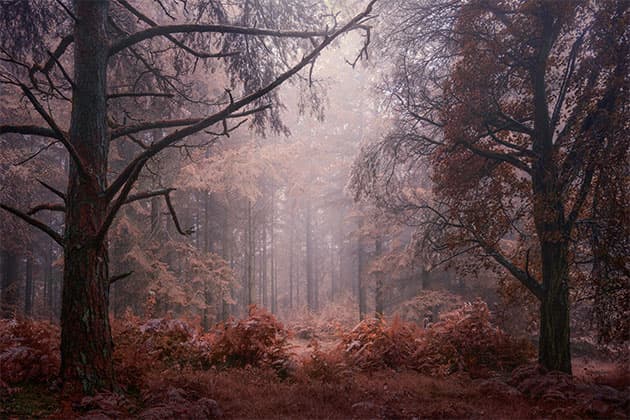
When I shoot woodland I’m not looking to get a clean sharp image over 100% of the frame. Often imperfections, higher ISO (grain/noise) and shallow depth of field can add to the mystery and mood of a photograph, in my opinion. I shot this scene with various different apertures but settled on the slightly softer look of shooting wide open.
Look for small scenes
Sometimes it’s best to look beyond a full scene and look at the closer details. Using a slightly longer prime lens and using the viewfinder to look around a scene can often help when I struggle to find wider landscape shots. Taking this approach can often help to focus on the details and eliminate the distractions that can often be prevalent in larger scenes.
How to navigate moody woodland landscapes
- Scout your area It’s often best to scout a location several times before taking your full list of equipment.
- On the outside Resist the temptation to walk straight into a woodland. It’s often easier to spot scenes or areas of interest while looking into the woodland from the outside.
- Take your time Shooting woodland can be daunting, so don’t rush straight in. It will take time to get your eye in so walk slowly and enjoy your surroundings.
- Be inspired I often look for inspiration and enjoy viewing images from masterful photographers I follow on social media. There are so many talented UK landscape photographers who shoot beautiful woodland scenes.
- Know the direction of the light Even with flat light or mist I find it useful to know where the light is coming from when I shoot a particular scene I’ve scouted. I tend to prefer shooting in a backlit scene or with sidelight to add drama.
- Compose your scene Don’t just look with your eyes; sometimes it’s also a good idea to look through the viewfinder. Even if you’re not sure of a scene there’s sometimes something there when viewed through the camera.
- Lens choice I’ve found shooting with a focal length between 35mm and 100mm to be most common within my photographs. I often walk around with a 24-70mm, but I very rarely shoot wider than 35mm.
- Get out there and try Many people avoid woodland because they have been led to believe that it’s one of the more difficult landscape genres. I, for one, have embraced the challenge over the past few years and have found it to be very enjoyable and rewarding.
- Experiment with processing Over the years I’ve learnt Lightroom and Photoshop by experimenting! It’s important to create your own vision in photography, and through years of watching countless YouTube tutorials and experimenting, I am more confident in producing an image I envisaged from the shoot. Split toning is a great place to start, but don’t be scared to use the HSL colour sliders and really experiment until you reach your own vision.
- Stay safe Try going to a new woodland with a friend or tell people where you’re going.
Kit list for moody woodland landscape photography
- Cable remote You’ll often shoot moody images in darker conditions so the shutter speed can be a few seconds. A remote will help eliminate any shake; the other option is to use the timer on your camera.
- Polariser Wet leaves and damp tree bark can often cause distracting highlights even in the softest light. Controlling the highlights is made easy by using a rotating polariser – a great accessory when shooting moody woodland.
- Tripod Keeping your camera stable while shooting longer exposures in near-dark conditions is a necessity. I use a tripod that can extend to my own eye level and can also be adjusted to shoot only inches from the ground. This helps me shoot at any angle.
Neil Burnell is a multi-award-winning photographer from Devon. He studied art and photography at college in the early 1990s and pursued a career in graphic design and marketing. It’s only in the last five years that he has rediscovered his passion for photography and is particularly drawn to the atmospheric landscape, woodland and seascape scenes.
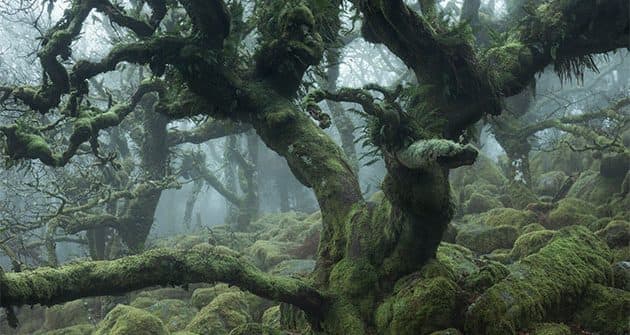
Featured image: ‘Tangle’ shot at Wistman’s Wood in Devon. Nikon Z 7, 24-70mm lens, 1/10sec at f/5.6, ISO 64.
Read more
- Our best-ever landscape, portrait and still-life photography tips
- A guide to night landscape photography
- Best lenses for landscape photography in 2025: our picks of wide-angle zooms
Follow AP on Facebook, Instagram, and YouTube.


