

Making a video is one thing, but to give video footage that professional look, LUTs are a powerful yet straightforward tool for converting ‘flat profile’ footage to the correct colour profile. Stylish colour grading effects can also be applied in an instant, if you have the right camera for video.
Using LUTs, or Look Up Tables, saves so much time compared with grading colour manually; an acquired skill that takes plenty of practice.
While here check out our guides to the best cameras for video and vlogging and best video-editing software.
LUTs for video – the background
Video capture has come a long way since first making its way into DSLR and mirrorless designs. Arguably, the Canon EOS 5D MKII of 2008 became the DSLR of choice for videographers. Back then, the ability to capture FHD (1920 x 1080p) at 30fps was a game-changer. Video functionality has come a long way since then, however.
Now that modern cameras offer professional-level video specs, anyone can shoot and create high-quality footage. The ability to capture up to 4K (3840x2160p) video at up to 60fps or higher has seen many photographers branch out into video. LUTs are a powerful means to render a professional-looking colour grading effect to your video footage.
Check out these YouTube guides to see how LUTs can transform your video
But what exactly are LUTs for video?
You’ve probably seen the term “LUT” if you’ve considered shooting video with a DSLR or mirrorless camera. These Lookup Tables are essentially presets for video, used to apply colour space conversions alongside colour and tone effects to video footage, instantly. LUTs are mathematical formulas that tell the software how the input values of brightness, contrast, saturation and colours should be converted.
Of the various types of LUTs available, the most common – and those that will be relevant to most readers – are 3D LUTs that have a .cube file extension. 3D LUTs can convert RGB values alongside tonal information in a three-dimensional grid which essentially means that they can hold much more adjustment information than a 1D LUT, for example.
LUTs are incredibly useful for the sheer amount of time they save in achieving specific effects – including converting footage from one colour space to another and/or applying a specific look or effect to video. This could be mimicking a traditional film stock or applying a colour grading effect. Colour grading is an art form in itself, and LUTs make it possible to achieve cinematic colour effects quickly without the skills of a colour grading expert.
Where to find LUTs
Correction/conversion LUTs can often be found on the website of the manufacturer of the camera you’re using. These make flat Log/Cinelike footage look normal by converting it to a specific colour space, typically Rec. 709. Stylistic LUTs are used to apply colour and tonal effects to video. It’s even possible to find LUTs that mimic the colour grading of famous movies.
Stylistic LUTs can be purchased online and there are also hundreds, if not thousands of free LUTs available. Many filmmakers and colourists create paid-for and free LUTs. A quick internet search will reveal the options.
You can even load LUTs into photo-editing software including Photoshop and Affinity Photo, to enjoy their effects in both photos and videos. You can also create LUTs in video and photo editing software to save effects and apply them to other photos and videos in that software you use.
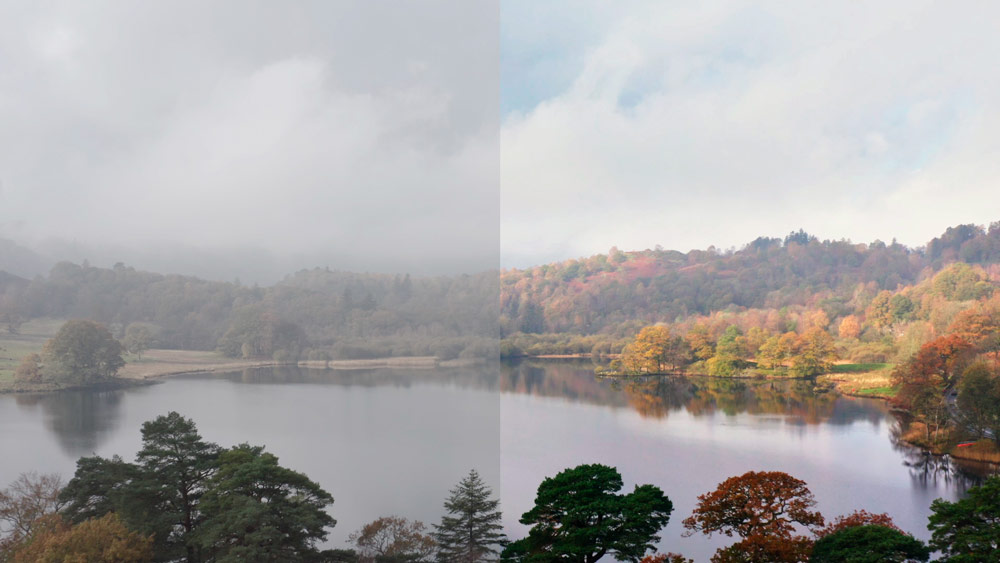
Flat versus Standard colour profiles
To capture the optimum video footage, with most scope for making adjustments and applying LUTs, you’ll need to shoot in flat Log or Cinelike colour profiles – provided your camera offers this function. These profiles offer greater latitude for making adjustments; something like a raw file in photography. File sizes are typically larger than video shot in Standard/Normal profiles though, and require more processing work at the editing stage – but don’t let that put you off.
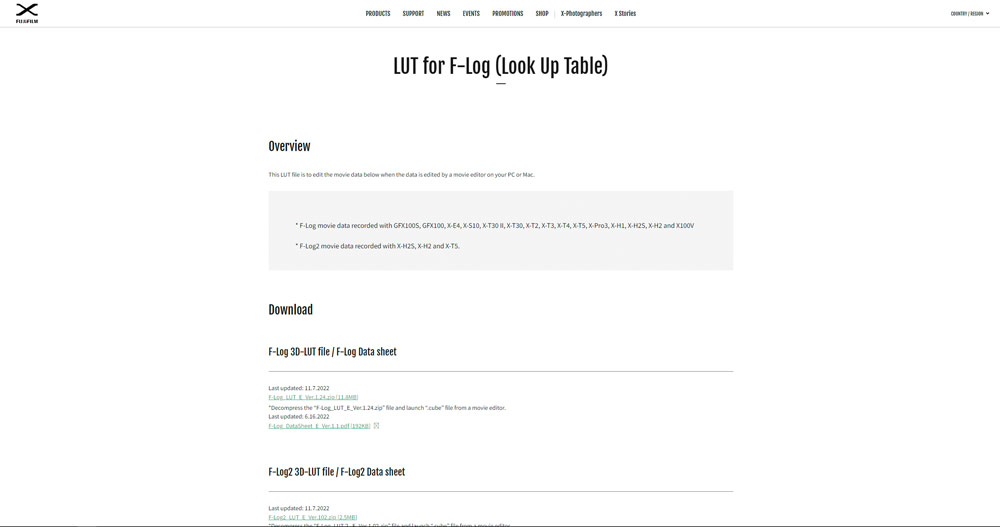
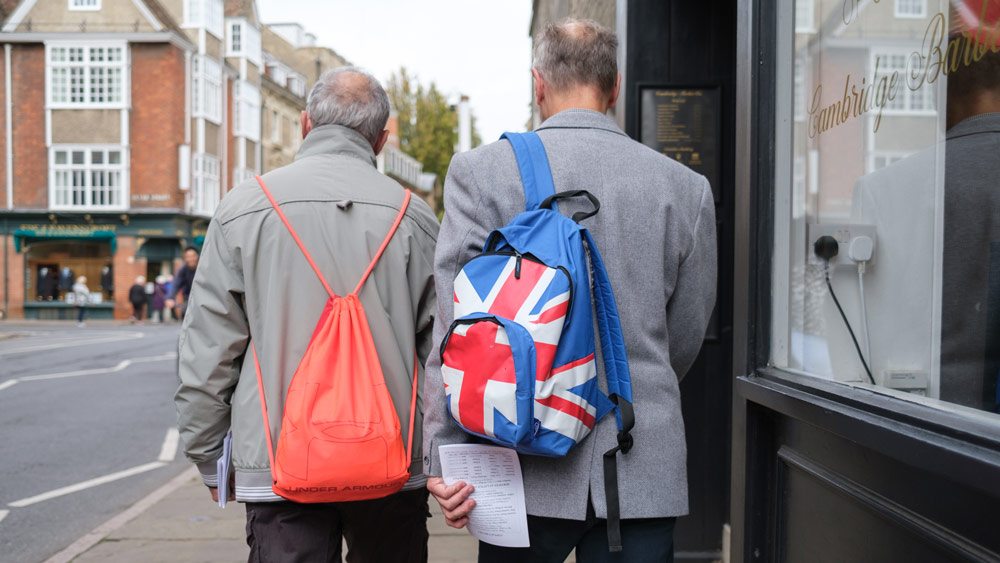
Log profiles are available on many cameras with each manufacturer having its own version eg. S-Log for Sony, F-Log for Fujifilm and D-Log for DJI etc. Some cameras and drones may alternatively have a Cinelike flat profile, so look for these options within the video section of your camera’s menu. Log and Cinelike profiles appear flat and washed out with lifted shadows and retained highlights, to utilise the dynamic range of the camera sensor and retain as much detail as possible.
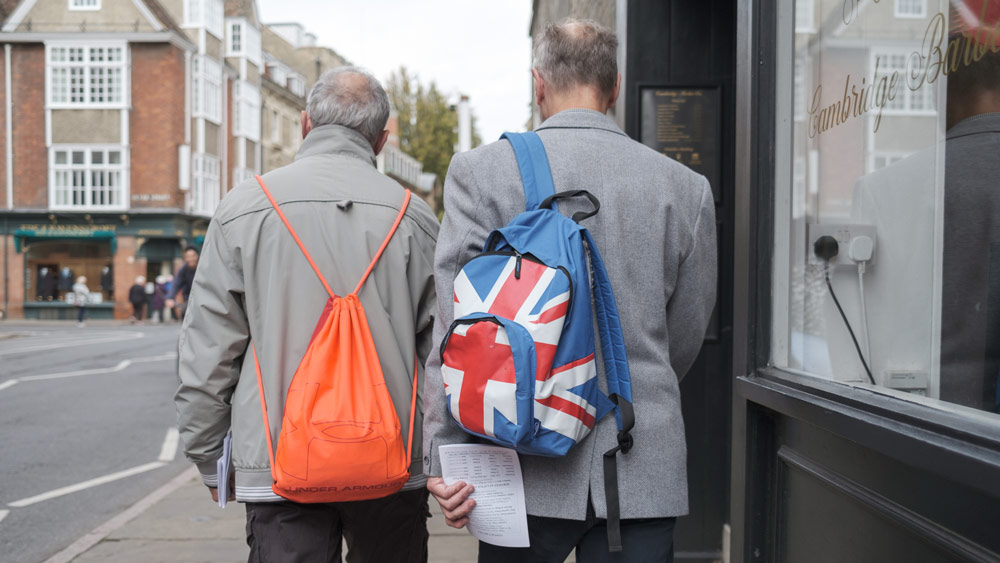
This footage needs to be converted to Rec. 709, which is a colour space, and then corrected in video-editing software so it looks normal rather than washed out; with adjustments made to brightness, contrast and white balance before stylistic LUTs or manual colour grading are applied. The first step can be achieved with a conversion LUT from the camera manufacturer or a third party if available, or by setting up input and output colour spaces for transforming/converting colour in the video editing software.
Standard colour profiles
If you’re not comfortable shooting with a flat Log/Cinelike, or your camera doesn’t offer these profiles, many cameras have a ‘Neutral’ or similarly named Picture Style option. These afford the flattest video possible as a starting point for making creative adjustments. Alternatively, select any of the Picture Styles available for a straight-out-of-camera look.
There is a downside to this approach compared to shooting with a flat Log or Raw video format. A Picture Style/standard colour profile is the video equivalent of shooting JPEGs, while Log and Raw formats are more closely aligned with shooting photos in raw – with much more control over processing. You can colour grade video shot in one of the Standard profiles, but this approach is much more limited than footage shot in a flat profile.
With Standard colour profiles, it’s best to get factors such as exposure and white balance correct at the point of shooting. You can correct these in video editing software, but just like JPEGs there’s much less latitude for making adjustments. Image degradation becomes a problem if they are over-adjusted in this way.
Fujifilm camera owners have a slight advantage in this area because they can select any one of the Film Simulations to be applied to video. More advanced users can also choose to capture in the flat F-Log colour profile, but the ability to apply Film Simulations is an easy way to achieve traditional film effects. Users of other camera systems can take advantage of Picture Styles with the ability to make adjustments to their parameters such as Sharpness, Contrast and Saturation etc.
How to apply LUTs and colour grade with the free DaVinci Resolve software
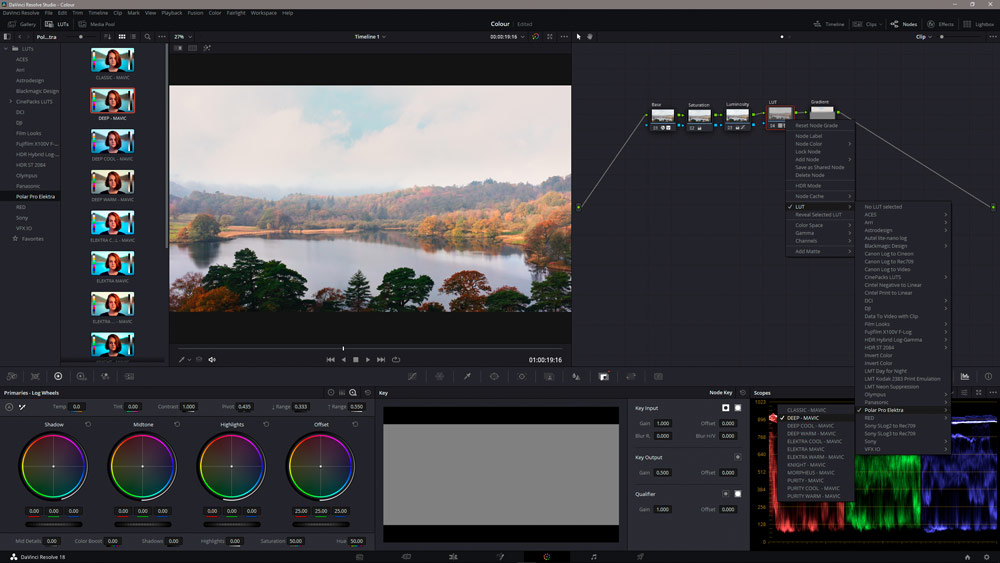
Applying LUTs is incredibly simple but it differs slightly depending on the video-editing software you’re using. In some software it may be as simple as using a dropdown menu. In others, LUTs can be applied to Layers; while in others it will be to a Node. The software used here is DaVinci Resolve, which uses Nodes – these are essentially the same as Layers, but look more complicated.
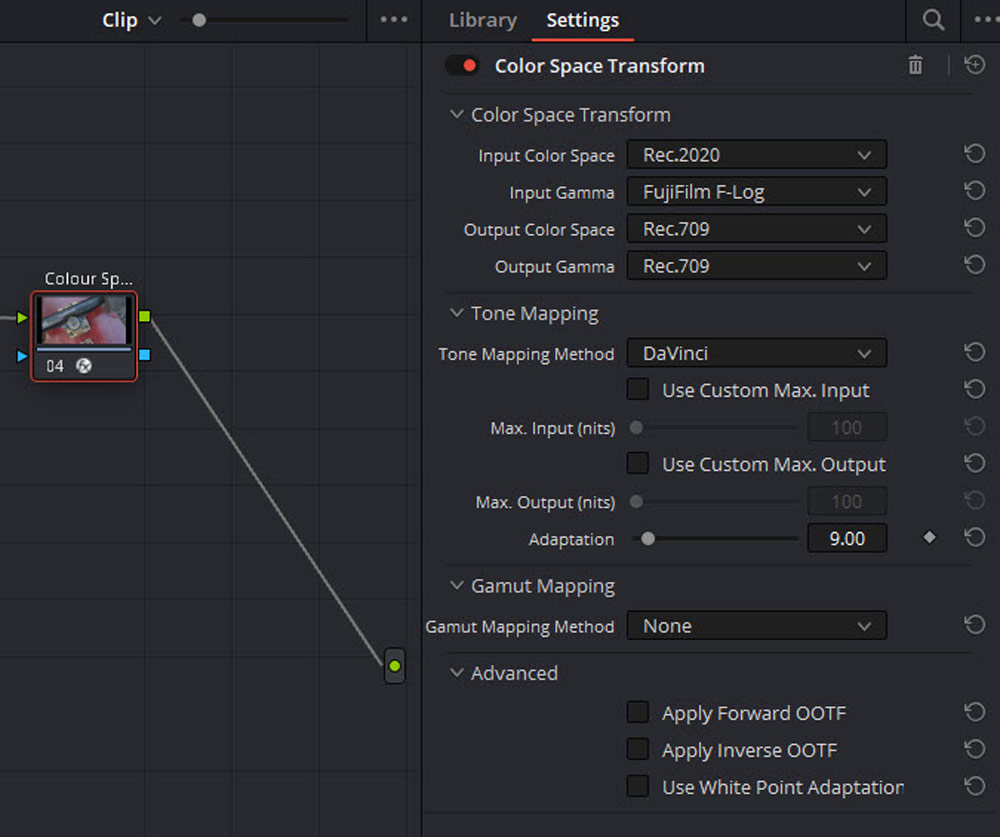
Before applying a stylistic LUT to Log footage, it’s important to either apply a conversion LUT to convert the video to the Rec. 709 colour space or do this manually setting the Input and Output Color Space and Gamma. Once this has been done, the footage will immediately look punchier, but you also need to make additional adjustments to white balance, exposure and contrast to create a colour-corrected and neutral starting point before applying a stylistic LUT or manual colour grading.
Grading colour manually is a rewarding process, and even if you plan to apply a stylistic LUT to add a colour effect to your footage, this tutorial will help you to get there because other important steps need to be followed beforehand. We’ll be using DaVinci Resolve for the tutorial, but the process is similar to other video-editing software. Plus, there is a free version of DaVinci Resolve available. Despite lacking some features of the full Studio version of the software (£245), it remains a fantastic option for video editing and colour grading.
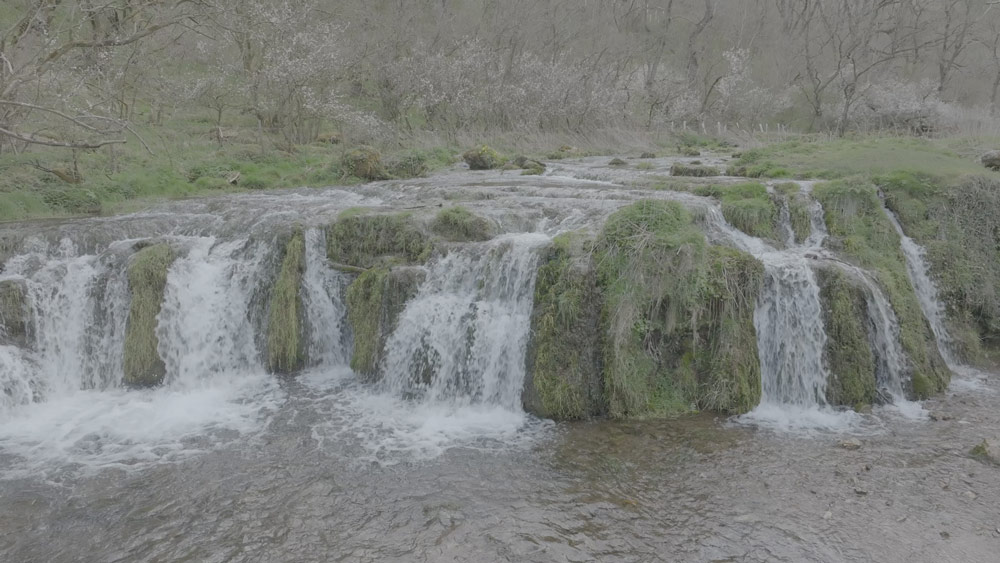
1. Apply the conversion LUT
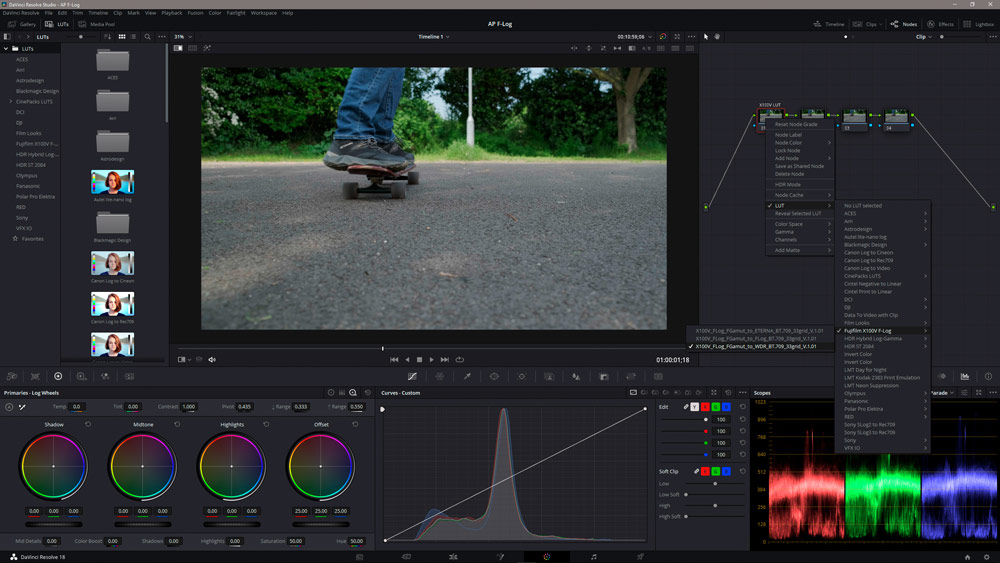
If you have a conversion LUT to convert your Log/Cinelike footage to Rec. 709 from the camera manufacturer’s website you’ll need to install it and then apply it to the footage. Alternatively, set the Input and Output Color Space and Gamma manually. This will immediately improve the look of the footage and make it appear normal, but this is just a starting point for making further colour and tonal adjustments.
2. Colour correct footage
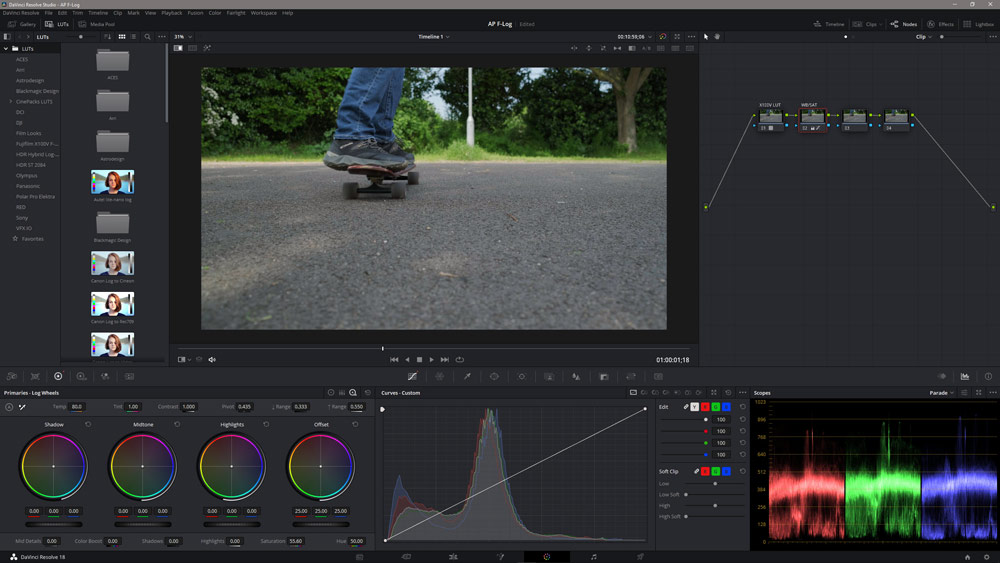
On another Node or Layer, make white balance and colour correction adjustments to neutralise the footage in terms of colour balance. Here, the white balance controls were used alongside a slight boost in saturation. If you’re unable to colour correct the footage with just the white balance controls, you can use the Shadow, Midtones and Highlights colour wheels for precise control of colour balance.
3. Make tonal adjustments
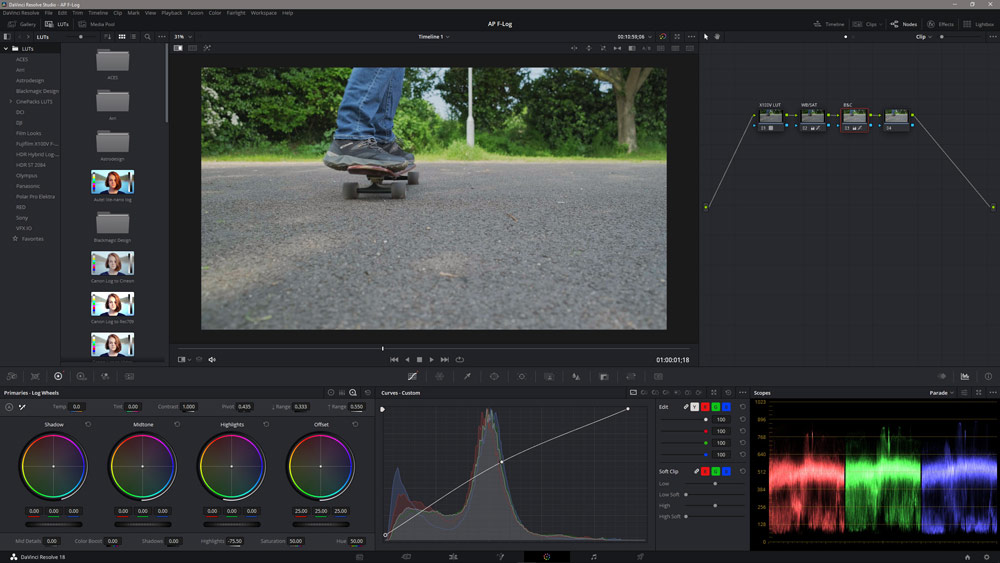
Create a new Node or Layer and make adjustments to brightness, contrast and shadow and highlight recovery if necessary. For this footage, curves were used to increase brightness and to adjust the white and black points to control contrast. At this stage, you may find that you need to go back to the previous Node/Layer to make fine-tuned adjustments to the colour balance. Once happy, create a new Node/Layer for the next step.
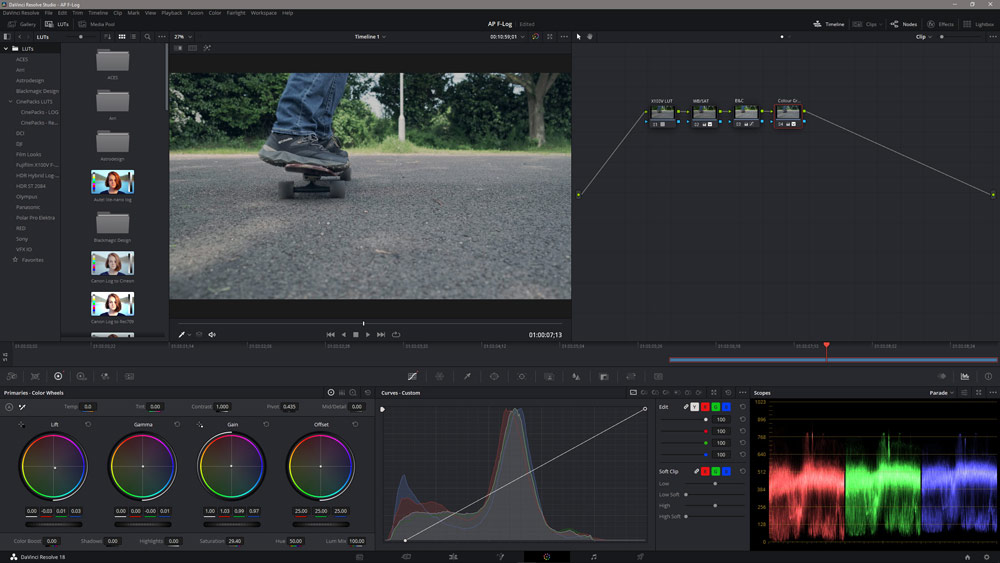
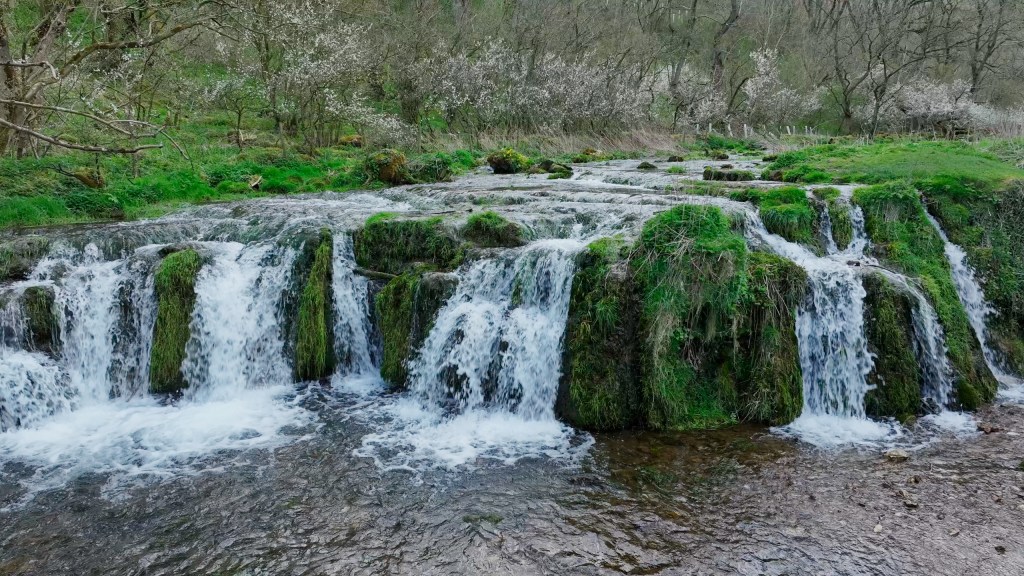
4. Apply stylistic LUT or colour grade
This is the point where you can either apply a stylistic LUT to the new Node/Layer and use Key Output Gain/Opacity to control the strength of the effect. Alternatively, you can apply a manual colour grade. The most basic tools for doing this are the colour wheels and These allow you to target colours to the Shadows, Midtones and Highlights. There’s much more control available, but these will get you started at a beginner level.
How to colour grade Normal/Standard footage in Photoshop

The transition from stills photography to video can be daunting because there are many new skills to learn, and one of the most significant of these is learning how to use video editing software. There is no substitute for using dedicated video editing software, but when you’re getting started Photoshop can be an easy entry point to video editing for some photographers.
The downside is that what you can achieve is limited, and Photoshop can’t handle Log footage – video can only be imported when shot in Standard/Normal profiles. The advantage of using Photoshop, in the early days at least, is that you can work in a familiar software interface while taking advantage of Adjustment Layers to adjust brightness and contrast, apply colour effects and even colour grade your footage.
Colour-grading step by step
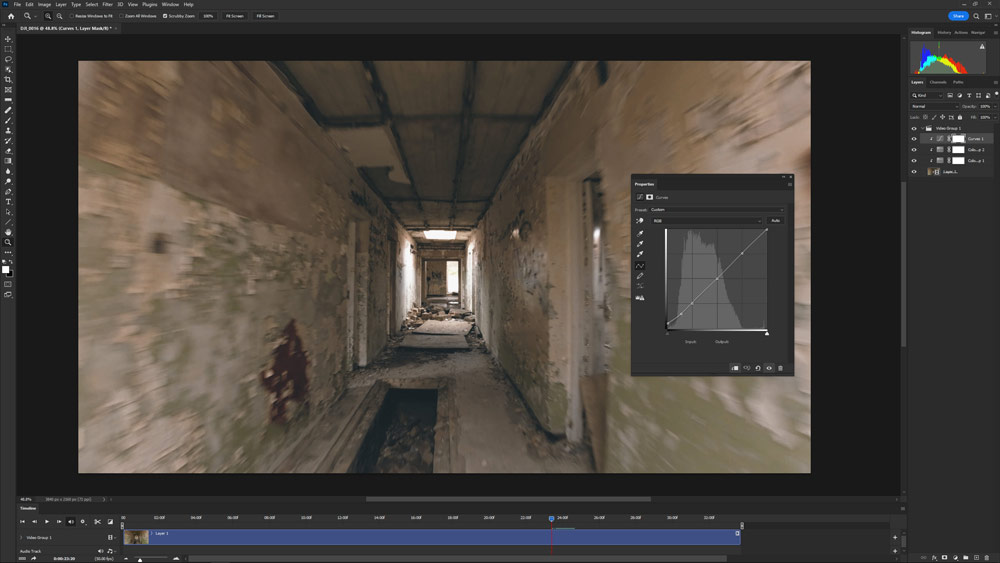
1. Apply Adjustment Layers
Open your video clip in Photoshop and Timeline Tab Group will open automatically if it’s not already visible. Controls are limited, but there’s just enough available to edit basic videos and use Adjustment Layers to apply colour and tone adjustments and effects. In this footage, two Color Lookup Adjustment Layers were used: Sienna Blue at 100% Opacity and Gold-Blue at 50% Opacity alongside a Curves adjustment.
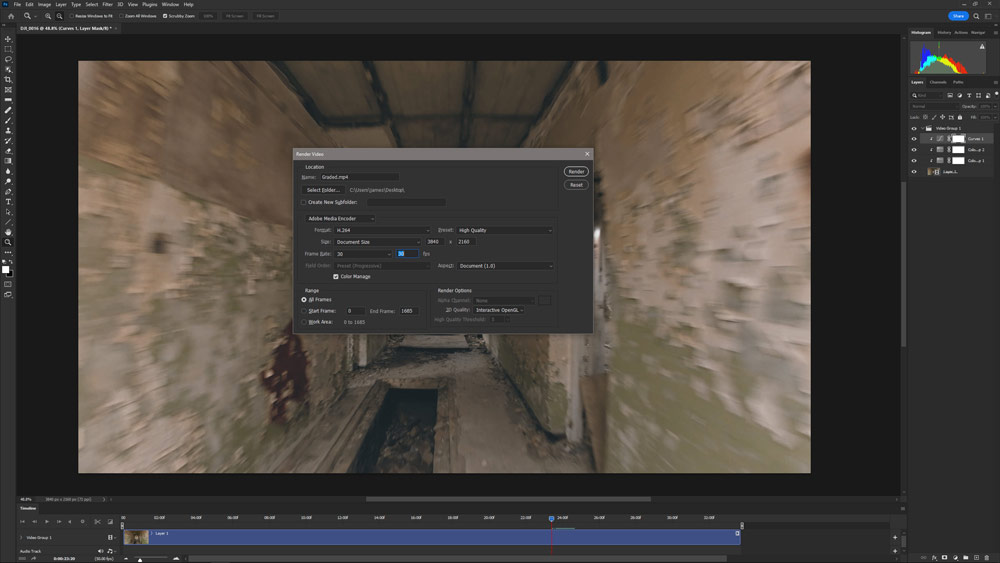
2. Export and Render
Once you’ve applied LUTs or adjustment Layers in Photoshop and edited your footage, you can export the video. To do this go to File>Export>Render Video. The options available are self-explanatory, but you can set the Format which is set to H.264 by default, Size to adjust resolution if required, Frame Rate to maintain or adjust the output frame rate and Preset to take control of quality settings.
Top takeaway tip – reduce the opacity of stylistic LUTs for a better result
When using stylistic LUTs you’ll usually find that their strength is too high, so you’ll need to reduce their opacity to arrive at a more favourable result. Some LUTs may look best at 50%, while others need to be as low as 10%. Personal taste and experimentation will always play a role in how strong an effect needs to be, but with stylistic LUTs, less is often more.
Further reading
Best video-editing software including free tools
Best cameras for video, vlogging and videography
Best lenses for video
Best accessories for video
Best-value audio accessories for video
Follow AP on Facebook, Twitter, Instagram, and YouTube.


