Still-life photography is a great subject for both the experienced and amateur photographer, whether shooting macro, miniature, food or products etc.. Claire Gillo reveals her top tips for perfecting the art of still-life photography.
Simply put, still life is about photographing inanimate subjects, and puts the photographer in control of every aspect of the image, from composition to lighting. It’s all about mastering the art of composition and light to make an ordinary subject appear more interesting.
From a beginner’s perspective, it means you can really take your time with composition and experiment with different lighting techniques. For the more experienced photographer, still life gives the opportunity to push the boundaries of creativity and originality.
Which subjects lend themselves to still-life photography?
A great place to start is with food, because it varies in shape, texture, colour and size. For inspiration, study the classics such as Edward Weston’s pepper and cabbage leaf from the 1920s, or still-life images by Edward Steichen from the same era. Fruit and vegetables shot against a dark backdrop are a great place to begin.
Plants and organic matter such as shells and bones are also incredibly popular with still-life photographers as their shape and form are a subject in their own right. Again, for historical inspiration, Imogen Cunningham’s botanical studies are a good place to begin, as is Edward Weston’s Shell.
Man-made objects such as toys, clothing, and vintage objects like cameras or shoes also make great subjects. In the end, still-life photography can be anything you want it to be – there are no strict rules. For example, some still-life photographers may choose to bring in a hand to the corner of the frame (this works well in food photography) or create a wisp of steam or smoke above a subject.
How do I photograph a still-life photography setup?
The minimum you need to shoot a still-life setup is a camera, lens, tripod, and subject. Although some lenses are better suited to the genre than others – such as a 50mm or 85mm – there aren’t any rules when it comes to lens choice. Your subject and composition will determine the focal length you use.
A tripod is an essential kit for still-life photography as you need to take your time when composing. Also, if shooting with natural light, the chances are you’ll have a slow shutter speed, so a tripod will be necessary for this, too.
When composing your shot, think about where and how your subject sits in the frame and whether you are to introduce other items. In some circumstances, additional props and accessories can enhance a shot: at other times less is more.
In dressing your shots and balancing composition, try to lead the eye through the frame. This can be achieved through the use of negative space – where the space is the emphasis – or objects is up to you and something that can take practice.
Sometimes I place props in the corner of the frame or along an edge to hold the eye in. When it comes to composing still-life scenes the rule of thirds is useful to start with; however, as we all know, rules are made to be broken and sometimes a symmetrical composition can be equally effective. You need to experiment with this and this is why it is useful to have your camera set up on a tripod.
Learn how to set up a still life studio, and how to take product shots for eBay.
What is the best lighting for still-life photography?
Lighting is another consideration when setting up your still-life photoshoot. If you are new to photography, we suggest keeping it simple and using natural light.
A large window and a reflector or tinfoil wrapped around a piece of card (to bounce light back into the shadows) are all you need to create an effective setup. For those who have more experience, you may want to bring in external speedlight/s or studio light/s depending on the effect you seek.
Finally, for your still-life setup, you also need to think about the background. Are you going to shoot your subject in its setting? Or are you going to drop a background in behind/underneath your subject and what will that do for the image? Are you going to shoot indoors or outdoors and what does this add or take away from your shot?
Where and how you place your still-life subject is what makes or breaks the image. For example, a piece of plastic washed up on the beach photographed on the sand might not look as interesting as if you took that same piece of plastic and photographed it against a black background with studio lights. Textured or plain backgrounds of all different colours and appearances can work effectively if used in the right way.
What camera settings do I need for still-life photography?
To take great still-life setups, the most important setting on your camera is the aperture. This controls the depth of field and determines how much of the subject is sharp and how much is soft. It is something that you will need to experiment with, depending on your setup.
Also, keep in mind, the closer you are shooting, the shallower the depth of field. For example, in a landscape setting if your focus point is set at infinity and the aperture is set to f/11, the whole scene is likely to be sharp from front to back (if you have a foreground object this may blur depending on how close to the camera it is, but you get the gist!).
However, with still life, when you shoot close up, even with an aperture set at f/11 it is likely that your subject will have some blur (how much is determined by a number of factors such as how far you are from your subject and your lens choice). If you want the whole of your subject to be sharp, you will need to explore a technique called focus stacking, which is where you shoot your subject at different focal points and then edit the images together.

Top tips for still-life photography
1. Low-key lighting

One technique that lends itself particularly well to still-life is low-key lighting. Low-key lighting often only uses a single light source, and as the name suggests this isn’t a powerful burst of light over your subject, but rather a subtle and soft wash of illumination that falls across it. Natural light or reflected light can work well for low-key lighting. A dark background will also help you create a more atmospheric result.
2. High-key lighting
If you want a light and bright image, try using high-key lighting. You can use natural light or artificial light to achieve this look. The trick with high-key lighting is you want to create minimal shadows and use a large, wide light source. This effect works particularly well when shot from a bird’s-eye view, as in the example here.
3. Backlighting
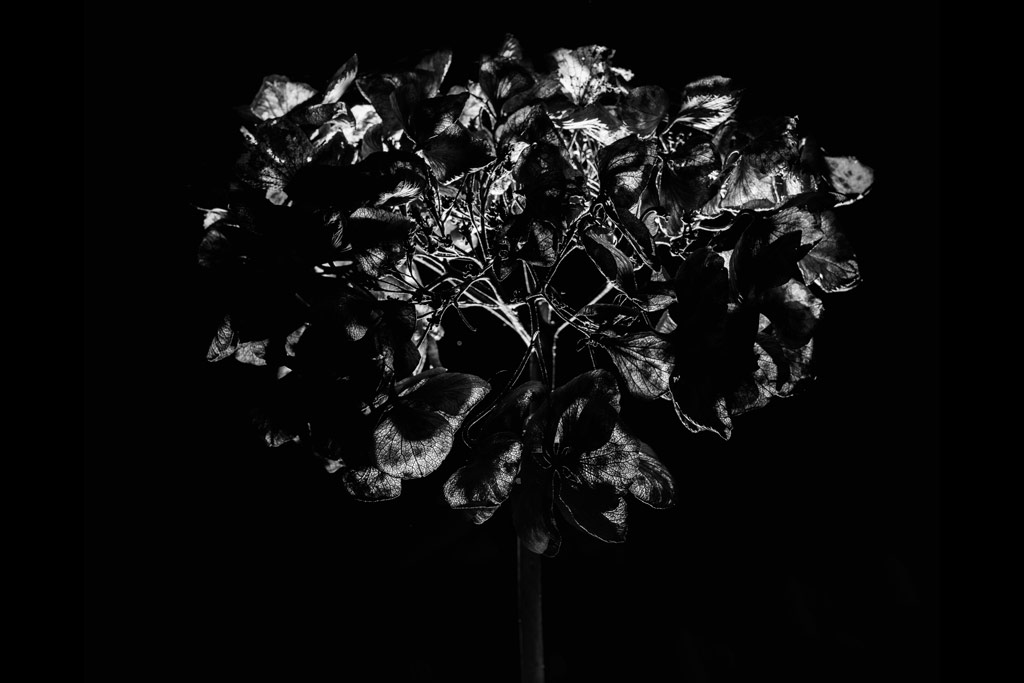
Backlighting is when you light your subject from behind. The idea is to create a fringe or outline around the edge of your subject to highlight its shape and form. In the case here, it’s a dried-out hydrangea. To take this image I used a single flashgun and placed it behind my subject. This creates a silhouette effect. If you want your subject to be lit as well, use another light at the front.
4. Play with the shadows

For intentionally harsh shadows, create a hard lighting effect. Flash is the easiest way to create this effect as you have full control over its intensity and direction. In this example, the light was placed to the side of the skull.
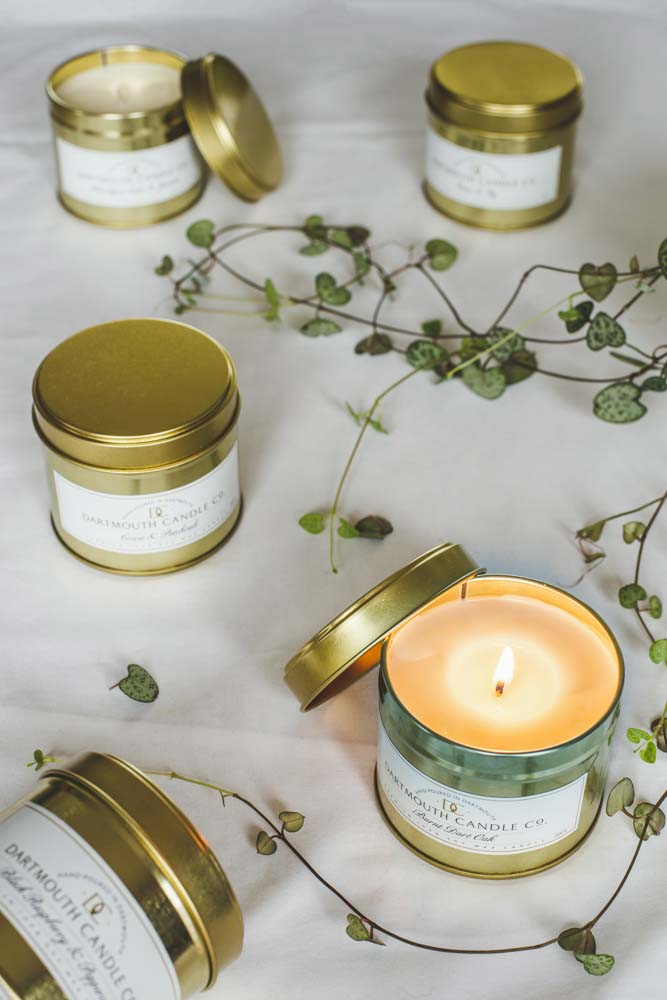
5. Background choice
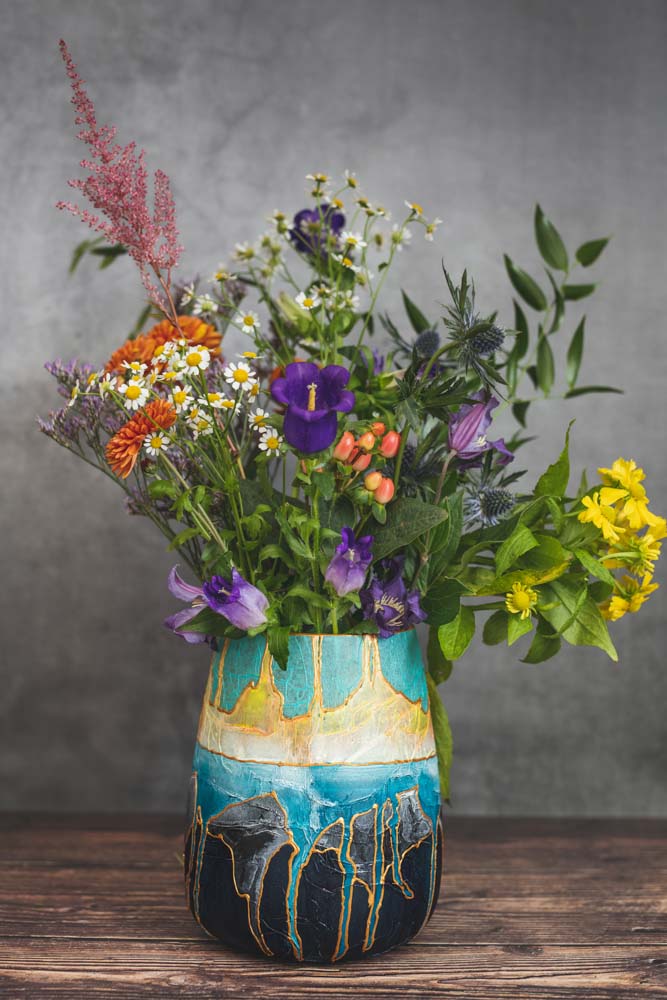
Your still-life’s background drastically alters the overall impact on your image. In this example, a vinyl backdrop creates the perfect setting to show off this vase and flowers. Even the wooden table effect underneath is a vinyl sheet.
6. Bokeh backgrounds
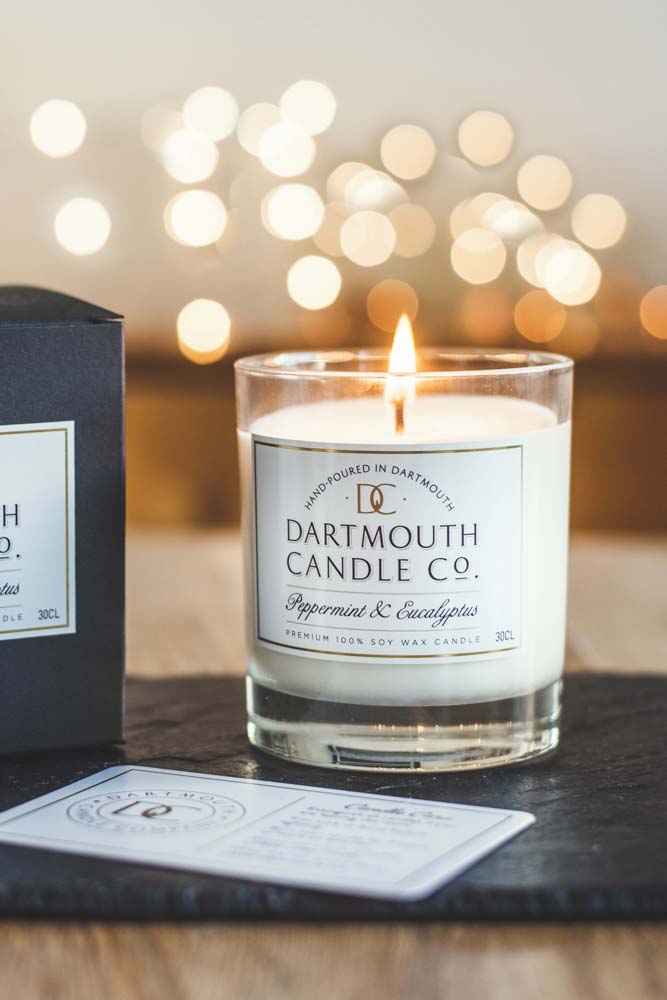
An easy way to create a twinkling and atmospheric background is to use fairy lights. To create this effect, I simply lit the main subject in the foreground using natural light and then bunched some fairy lights in the background around a metre away. By opening up the aperture on my camera, the lights in the background transformed into the perfect twinkling circles.
Still-life photography kit list
1. Lens
For still-life photography, your lens choice will be determined by your subject. One of my favourites in my kit bag is my Sigma 50mm f/1.4 DG HSM Art, which produces excellent results. For most of my still-life images, I work between 50mm and 100mm.
2. Tripod
A tripod is an essential part of my kit for my still-life shoots. Whether I shoot with natural or flash, I always use a tripod. Not only can I keep tweaking the composition of my frame when my camera is on a tripod, I can also adjust the light and camera settings until everything is perfect. In my kit bag I have the Manfrotto 190go! with the XPRO Geared three-way pan/tilt tripod head. The tripod comes with an interchangeable centre column, and the three-way tripod head can be finely adjusted.
3. Lights
In my kit bag, I have three Nissin Di700A flashlights and three PixaPro LUMI 400 II 400Ws Studio Flash lights and accessories. The subject determines what setup I use. For any close-up work, my Nissin Speedlites are more than powerful enough to get great results.
4. Backdrops
From twinkling fairy lights in the background to textured or plain pieces of card, I have a wide selection of backgrounds that I use for my still-life setups. Some of my favourite textured backdrops have been bought from Black Velvet Styling.
Related reading:
- Macro still life photography masterclass
- Still life photography with continuous lighting
- More still life photography tips
- How to shoot floral still lifes
Read more articles by Claire Gillo:
- Best cameras for portraits and portrait photography
- Best full frame mirrorless cameras
- How to make money from photography and sell your photographs
- Fine Art Photography Guide: how to do it
Follow AP on Facebook, Twitter, Instagram, YouTube and TikTok.