
With business booming in maternity and newborn photography, AP shadows top professional photographer Susan Porter-Thomas, to see how LED lighting benefits her work. An increasing number of women all over the world are now embracing their pregnancy curves and celebrating their bumps and bundles of joy publicly with the help of professional family portrait photographers. A lot of the skills required to shoot beautifully posed maternity portraits cross over with boudoir as well as portraiture. Check out our complete guide to boudoir photography here.
With the rise of Instagram and mass photo sharing by celebrities and influencers alike, the popularity of once-niche portrait genres such as maternity and newborn photography is rapidly becoming one of the must-haves for many mothers-to-be. For this guide, we teamed up with leading London-based portrait photographer, Susan Porter-Thomas, who has been shooting family and maternity portraits for some 15 years. Having recently switched from DSLR to mirrorless to reduce the weight and size of her go-to set-up, Susan was intrigued to see what the portable but powerful trio of LED lights Rotolight might have to offer compared to her current lighting kit.

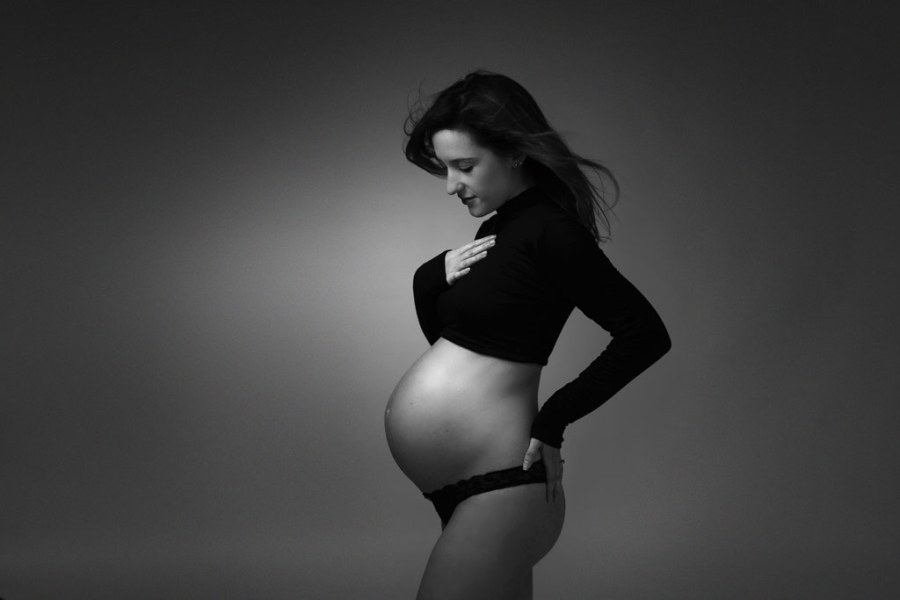
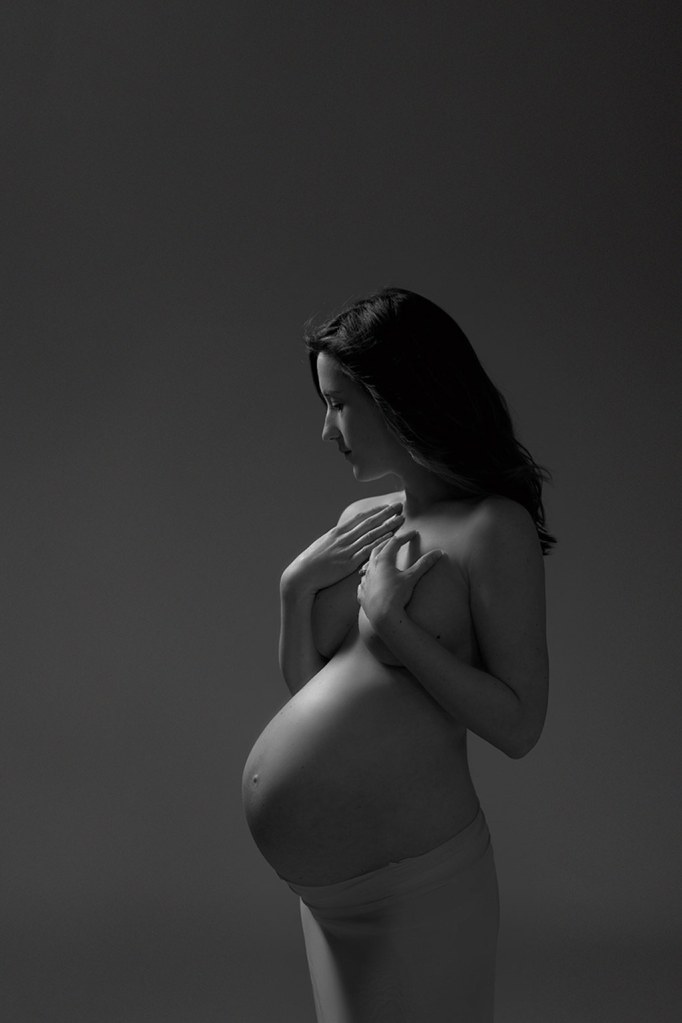
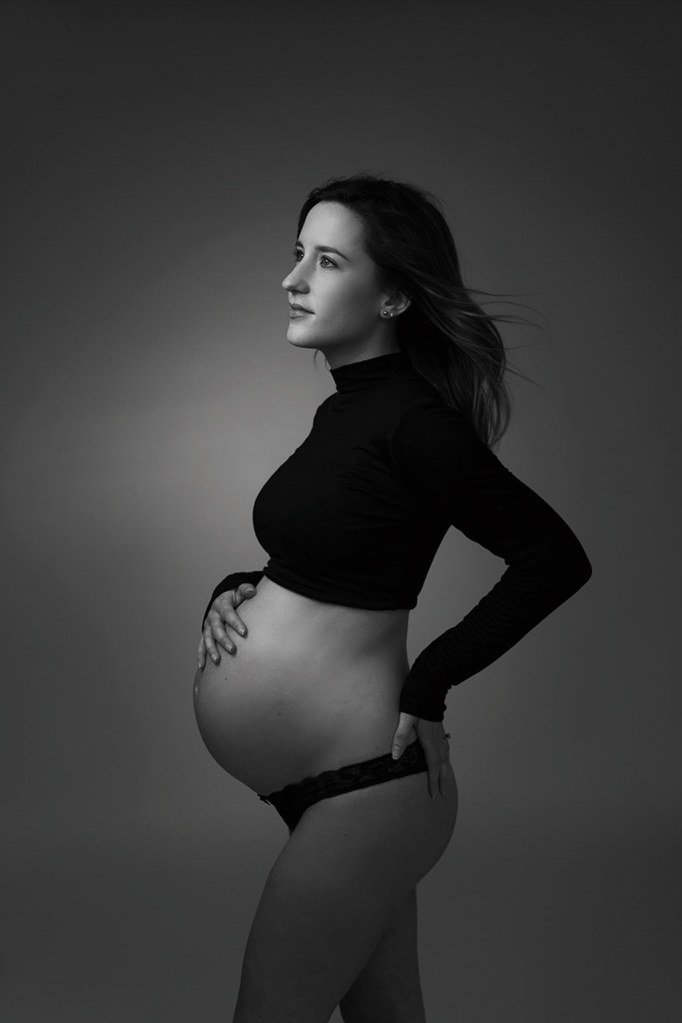
Susan likes to create a soft glow over the body, which was easy to achieve with the Rotolight LEDs
‘My studio set-up is at home in a large open plan kitchen/dining area. I have three background papers set up and ready to use and three Elinchrom strobes. The room is north facing so has plenty of soft light throughout the day, but I like to use strobes for my maternity sessions for greater control. As a result, I was eager to see what difference the Rotolight kit would make to my style of working.’
Controlling and building the light in maternity photography
Unlike flash, the beauty of working with continuous LED lighting is the instant feedback it gives, enabling Susan to work quickly, which is vital when working with potentially anxious and self-conscious mums-to-be in little or no clothing and, of course, unpredictable newborns. ‘It was great to see exactly how the light was going to look in-camera, so I could quickly fine-tune the power and the position and angle of the lights,’ she reveals.
The look Susan likes to create is soft and flattering, while also being moody but subtle. ‘I don’t really like high-key as a general rule; give me low-key every time. My aim for maternity shoots is to create a fine-art look rather than just a straightforward portrait.’
The key to Susan’s lighting technique is diffusing and feathering the light to create a soft glow over the body, which was easy to replicate with the Rotolight LEDs. ‘I like to position my main lights up high as it creates flattering shadows. Any backlighting is just to lift the model out of the background a little and can help to illuminate the materials the model has wrapped around her.’
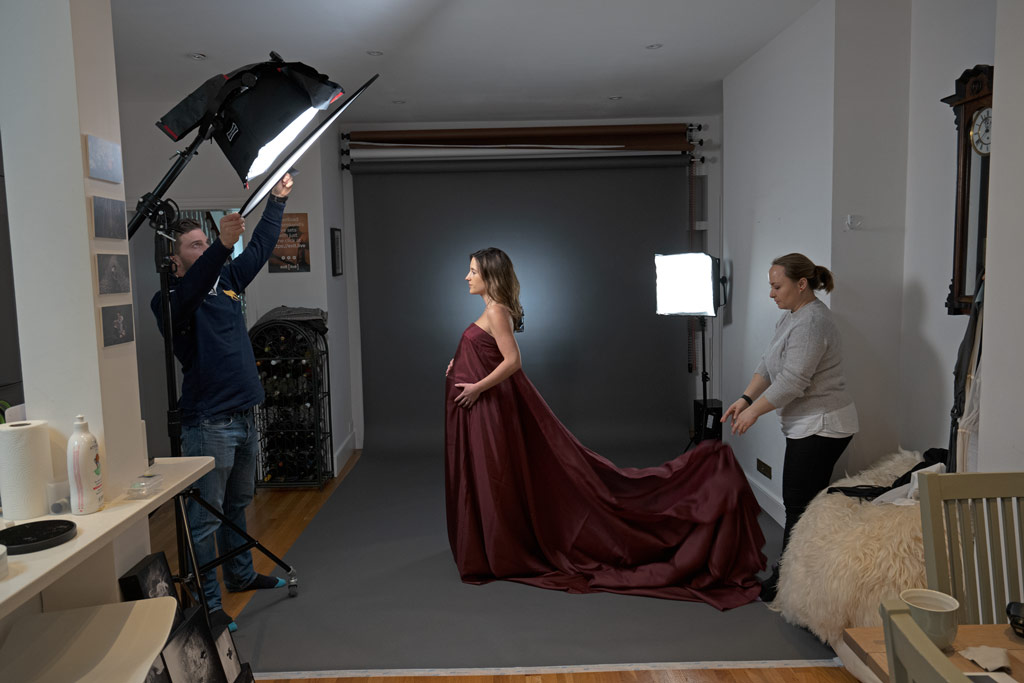
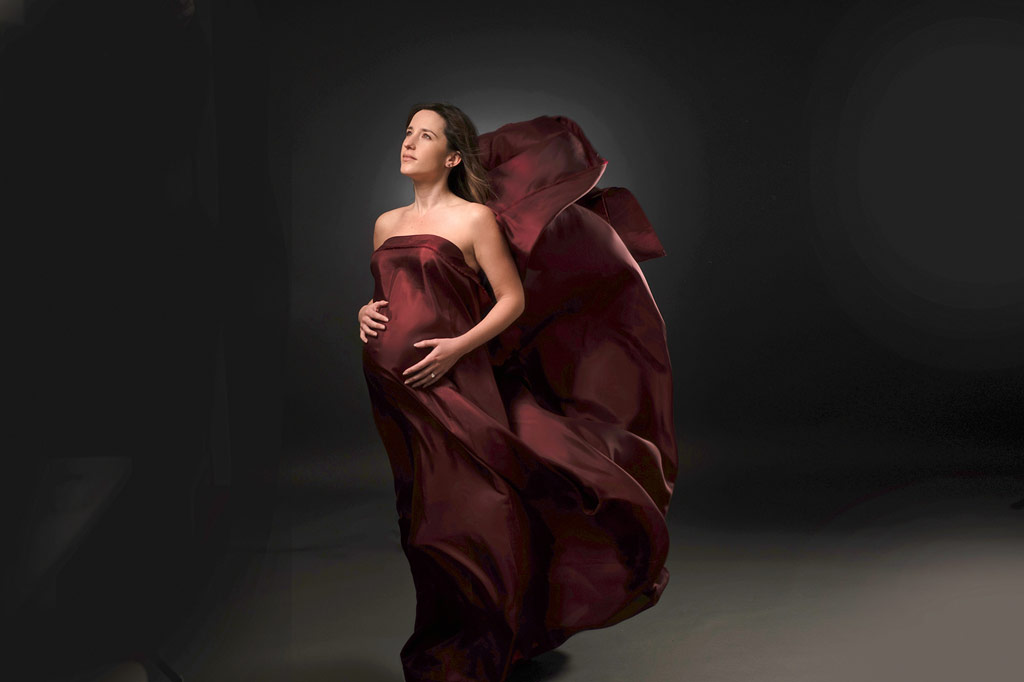
Diffusing the light from the Anova PRO 2 produced a lovely soft effect, while the use of floaty fabrics created movement and shape
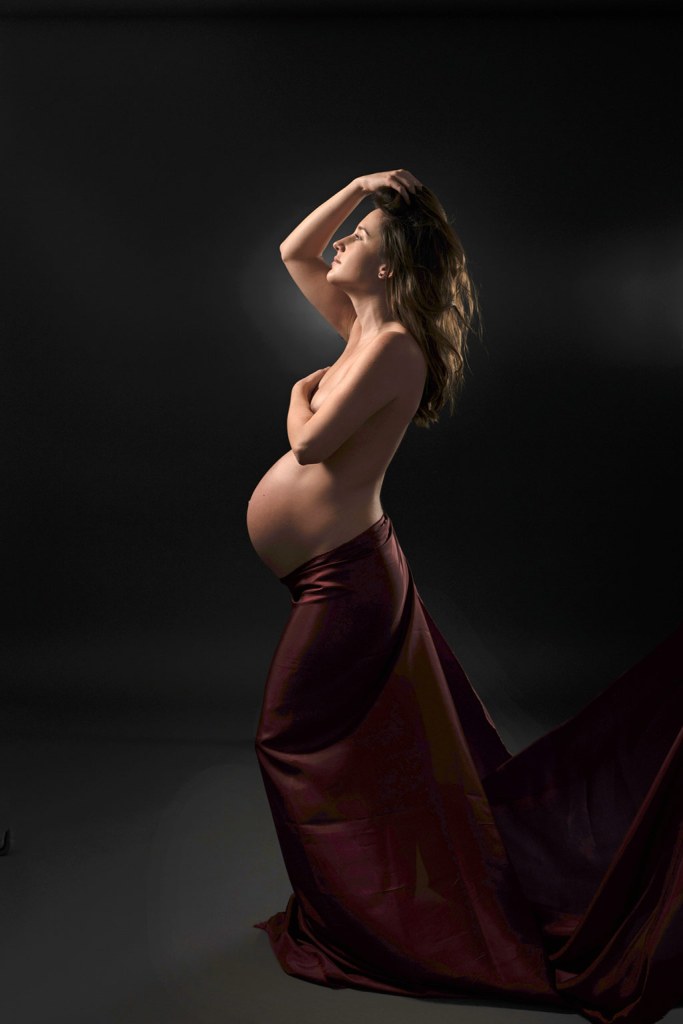
Susan also made use of the colour temperature controls on the lights. ‘Being able to warm up the lighting on the LEDs to give the images a bit of a glow is great. This is a nice touch with semi-nude images, as the warmth can be flattering, as if you’re in the glow of candlelight.’
Along with her main lights, Susan includes a third light in the form of a spot on the backdrop. ‘This adds a glow for a bit of interest and reveals the shape of a pregnant lady, so the compact size of the NEO 2 was ideal for positioning behind the model pointing at the backdrop.’
During a shoot Susan likes to move lights around a client to see what effects she can achieve. ‘A tiny variation in angle and direction can really make a difference. I’m always accidentally discovering a new way of lighting someone. This is why the portability of the Rotolight kit is so beneficial to my style of photography. I also loved the fact that they had battery packs so there were no hazardous cables for me, my assistant or my pregnant models to trip over, making it a much safer environment to work in.’
Posing and creating triangles in maternity photography
Generally, when it comes to posing a pregnant lady, it’s all about the curves and creating triangles, Susan explains. ‘I will always ask my model to place her feet together and then bend the knee that is closest to me – that way the bump is balanced below with the knee.’ It’s also important for the arms to be posed so you can see the outline of the back. ‘If the arms are too close to the body, this widens the subject and isn’t slimming.’ Making sure that the line of the back is visible through a crooked arm, for example, can be far more flattering.
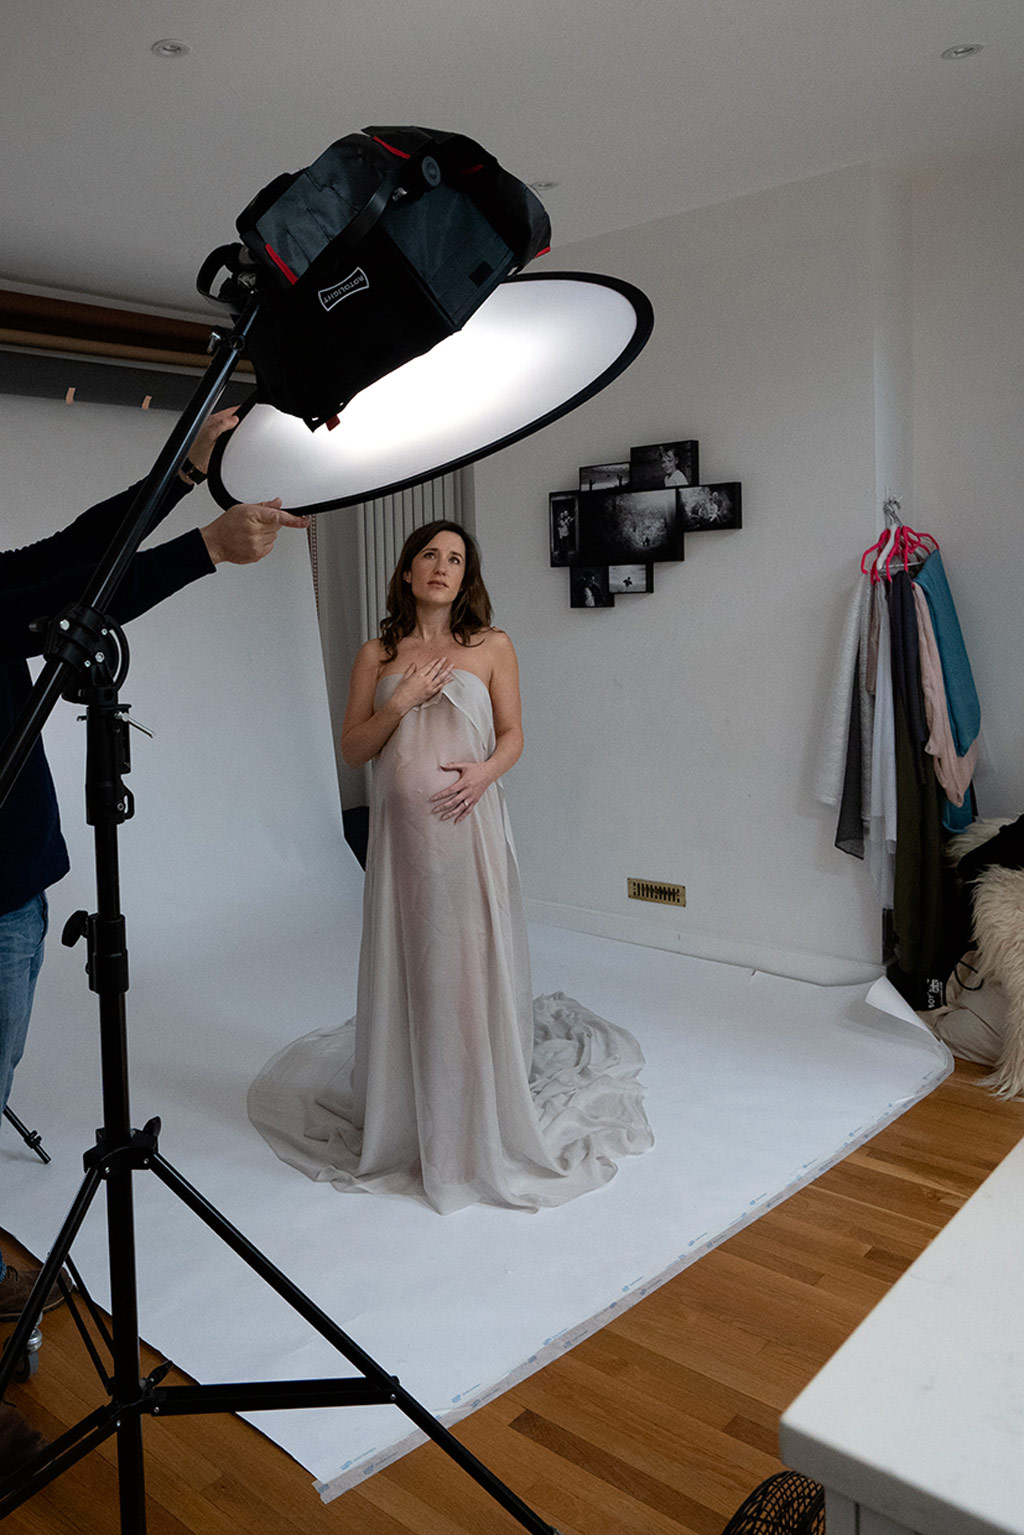
Positioning the light high up, so it falls from top left to bottom right, is especially flattering
To get the best out of her clients Susan, with the help of her assistant, Teddy, is great at putting them at ease. ‘When it comes to this style of photography, there is a fine line between posing and looking natural; it is, after all, an unnatural thing we’re doing by taking studio shots but I want my clients to look as relaxed as possible.’
Making sure shoulders are not tense and high, and fingers are relaxed and slightly bent are some of the details Susan will look out for. Ensure the chin is up too. ‘The best way to deal with double chins is to get the model to turn her head towards the camera before looking down to the bump,’ she explains.
Creative composition for maternity photography
Once the lighting and posing have come together, it’s down to Susan’s creative eye to capture beautiful portraits. ‘I’m always looking to balance the shapes in the images I’m taking, so when you have a big bump out front, it’s nice to have another shape behind the model to balance it, which is why the floaty material shots work so well.’ Susan also makes use of the arms to create leading lines and aid her compositions. ‘By drawing the eye along the elegant lines of the body or creating triangles, one behind and one up top for example, you can produce beautiful flowing lines.
What lighting kit do I need for maternity photography?
Susan used continuous LED lighting for this maternity shoot. Her lighting set-ups included a single light set-up as well as two and three-light set-ups using the Rotolight kit below. Rotolight offer a range of different sized LED lighting products complete with modifiers and accessories for photography and video. Check out our latest hands-on reviews of the Rotolight AEOS 2 PRO and Rotolight NEO 3 PRO.
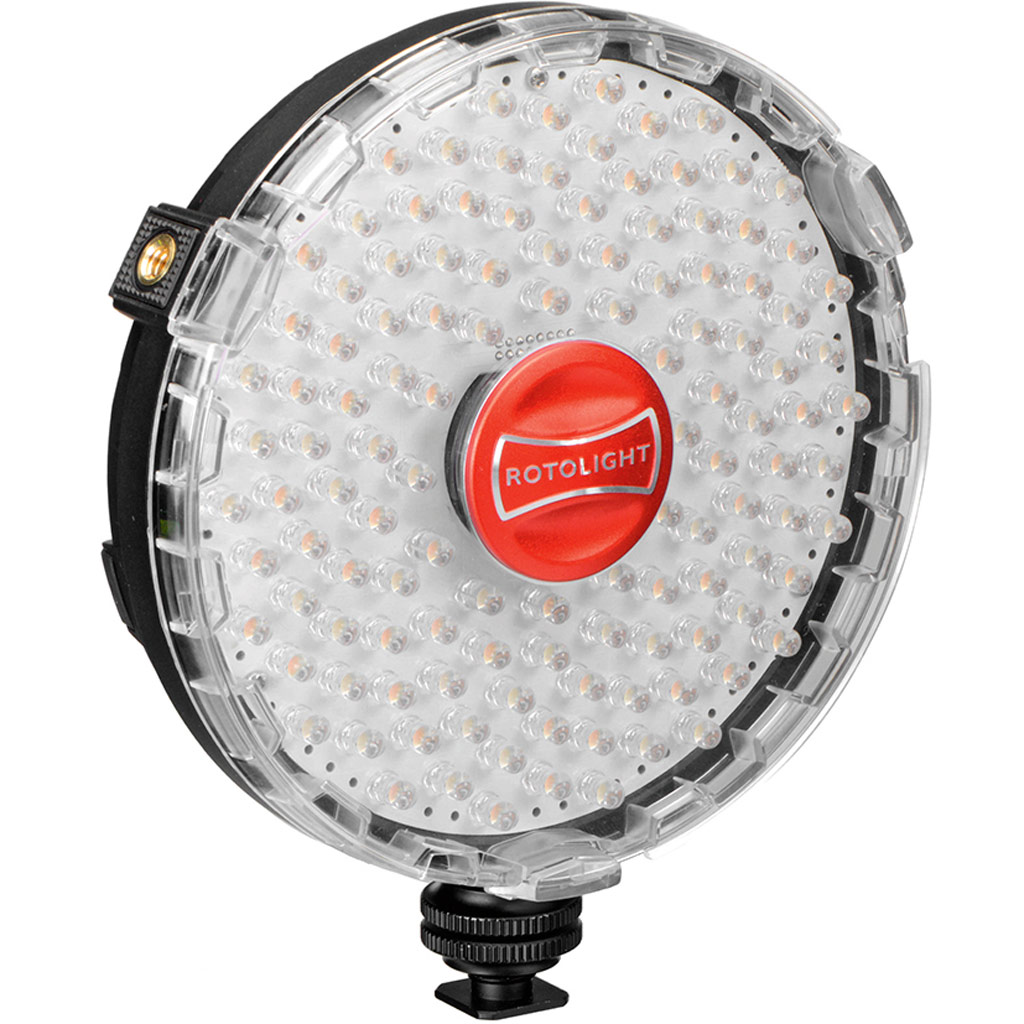
Rotolight AEOS
This disc-like LED can be used in the studio or on location. It offers both powerful constant LED illumination and High Speed Sync (HSS) flash, with a battery pack that lasts for up to three hours’ use. Check out the latest AEOS 2 PRO hands-on review here.
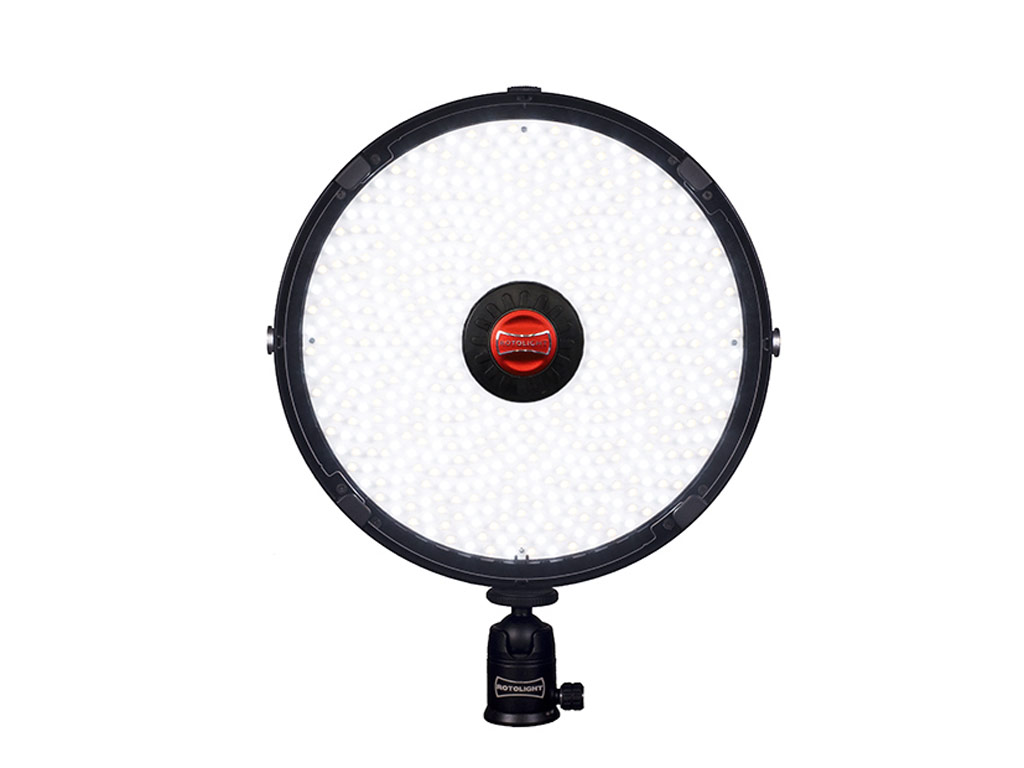
Rotolight NEO 2
The NEO 2 is the most portable light in the Rotolight range (weighing less than 500g). Like the AEOS, it also offers a combination of bright, constant LED illumination and HSS flash. Check out the latest NEO 3 PRO hands-on review here.
Rotolight Anova PRO 2
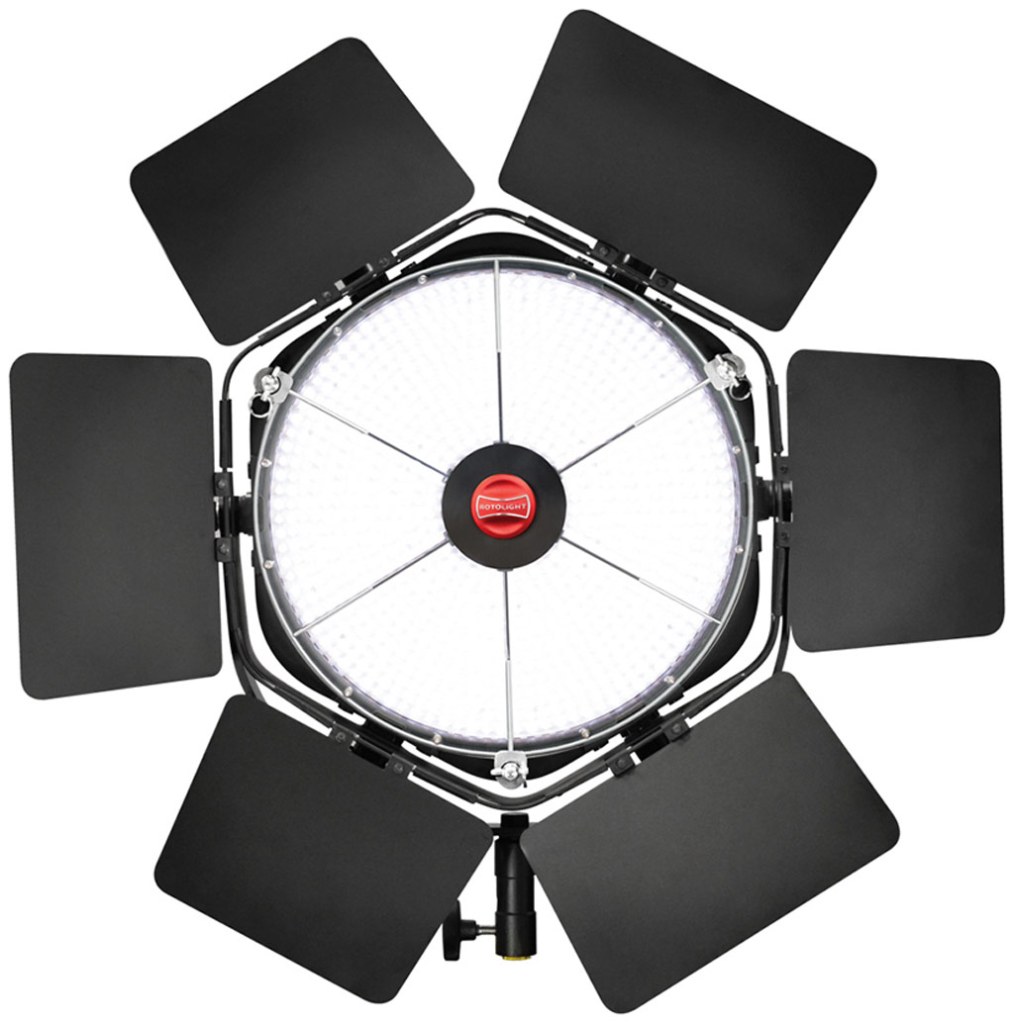
This is the biggest light in the range and is designed for filmmakers and professional photographers. It also offers HSS and weighs close to 4kg, so is better suited to studio work.
Rotolight softboxes
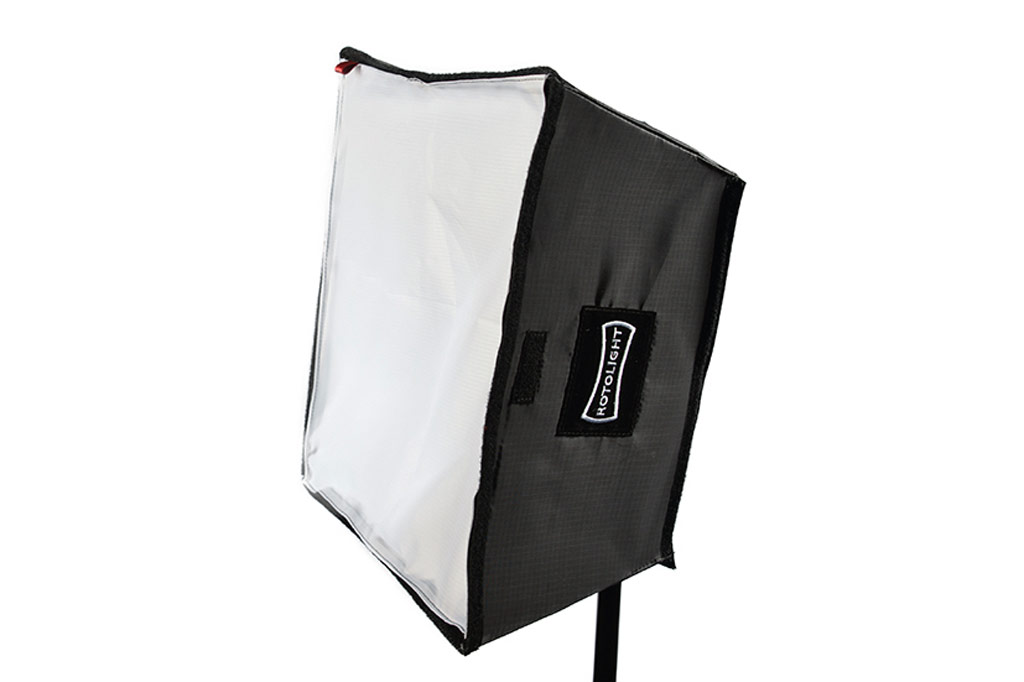
A softbox diffuses and softens light, smoothing out shadows and evening out contrast. It’s the ideal modifier for portraiture. The Rotolight softbox fits over the Anova PRO 2, but we also used the AEOS softbox kit.
Susan’s lighting set-ups for maternity and bump photography
Single light set-up
This is one of my favourite lighting set-ups. It’s simple, elegant and very flattering. I pointed the Anova PRO 2 (fitted with softbox) just past the model to the back of her, rather than directly at her. That way the light is bending around her, which gives a much softer look. When the model is angled at 45° to me, the light from behind her feathers across her body, which is so pretty.
Two-light set-up
The Anova PRO 2 acted as the main light, set to 100% power, which we feathered and diffused with a reflector. The light fell across Hollie’s body ahead of her, to avoid it hitting the backdrop. This is when introducing a second light, which acted as a spot, can look lovely to glow behind the bump. The spot was achieved by using the barn doors on the NEO 2 light at 75% power.
Three-light set-up: backlit
We reduced the ambient light by closing all the blinds. The AEOS and Anova PRO 2 were behind Hollie and off to the side for minimal light. To get enough light in-camera I was shooting at f/2. Hollie was positioned away from the lights; if she were closer the light would fall across her body. The spot was achieved using the NEO 2 directly behind Hollie and pointing at the backdrop.
Three-light set-up: backlit variation
This is a variation on the previous three-light set-up. It directs more light to the front of the model. Here I angled Hollie towards the camera to allow the light to fall top left to bottom right. Positioning the light high up and pointing down gives it a popular Rembrandt style. Again, the light was diffused for a slightly softer look.
Susan’s Top Tips
Props for mums-to-be
Provide a selection of materials – chiffon, silk and netting – to create skirts, dresses, drapes and wraps. Use a wind machine to produce movement and shape the materials and long hair if applicable. All that my clients need to bring with them is black, nude and white underwear. If clients want to bring additional items of clothing or jewellery that’s fine too.
Include partners and children
Have some fun with your maternity shoot – I encourage women to embrace their inner diva and enjoy themselves! If it helps them to relax, they are welcome to involve their partner and children too. I’m very laid back and have a great time with my clients – this enthusiasm seems to rub off on them.
Be confident
Make sure you know your kit (including lights) inside out before you attempt a maternity shoot. Your client might be nervous, so it’s important to put them at ease by showing that you know what you’re doing and that you’re relaxed too.
Susan is an award-winning portrait photographer who specialises in fine-art pregnancy, newborn and location family portraiture. Based in Ealing, London, she has a home studio but also offers location shoots across the city.
Further reading
- Complete guide to maternity photography
- Fine art portrait photography
- Get started with boudoir photography
Follow AP on Facebook, Twitter, Instagram, and YouTube.


