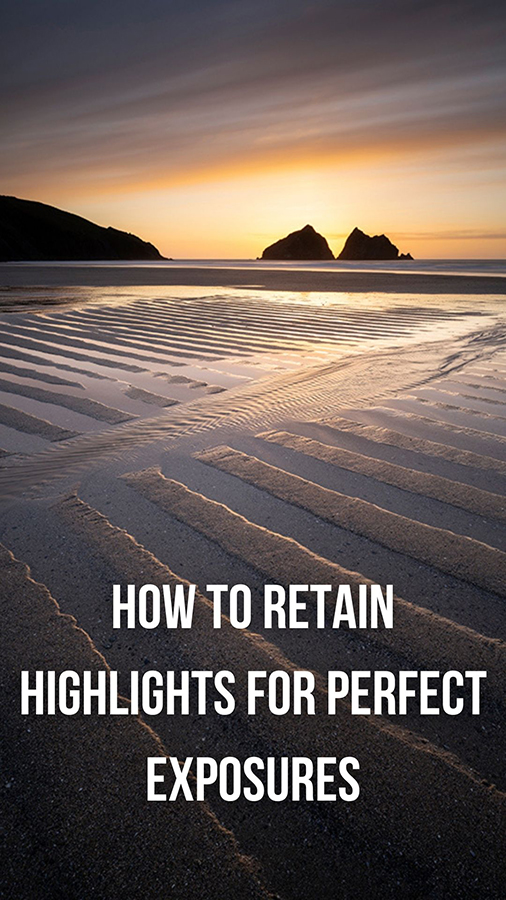
Highlight detail can seem like the holy grail, but as Angela Nicholson and two pro photographers explain, there are plenty of ways to ensure you retain the brightest parts of a scene
We often talk about highlight detail as if recording it is some form of quest that many will undertake and few will achieve, but there are some simple steps that we can take to ensure we get the results that we want, with detail where it needs to be. Let’s start by defining highlight detail. The highlights are the very brightest parts of a scene or an image and the detail is the very subtle variations in tone.
When we look at a cloud in the sky on a sunny day, for example, we can see that it’s white but don’t see it as a uniform mass of white. There are tiny variations with areas of very light grey or pale blue that give it some shape and form. It’s these tonal variations that we want to capture in an image so the clouds don’t look like a solid mass of uniform white.
We want highlights to look white without them being so bright that they burn out. That’s the point at which the brightest greys in a scene are rendered white. The problem with burned-out highlights is that you can’t pull back any tonal variation when you’re editing the image; darkening them just creates areas of uniform grey instead of uniform white.
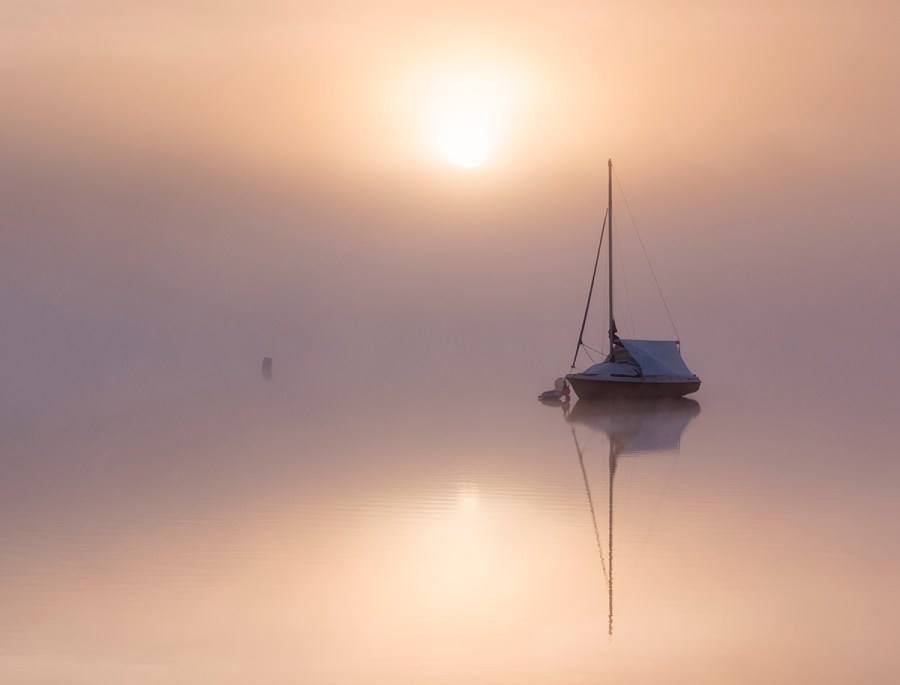
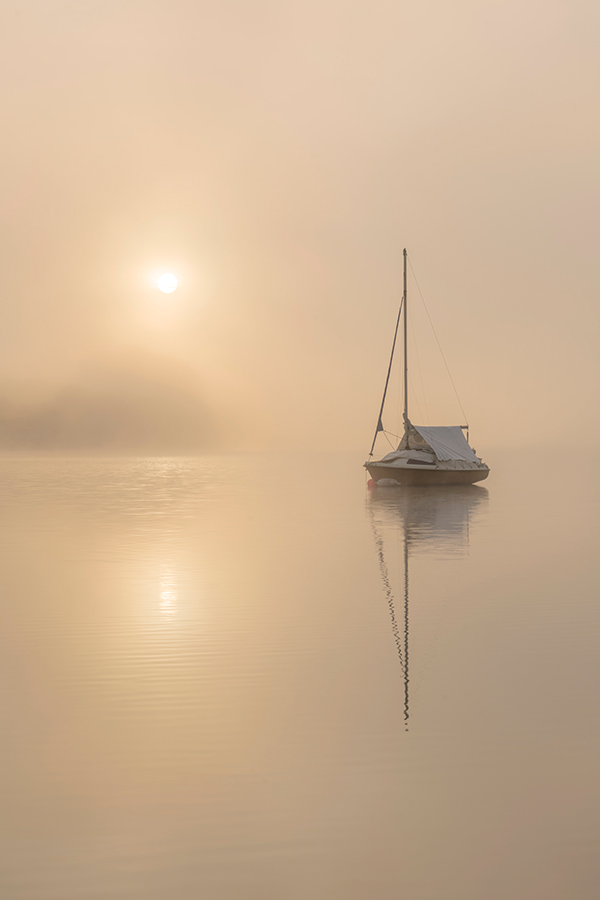
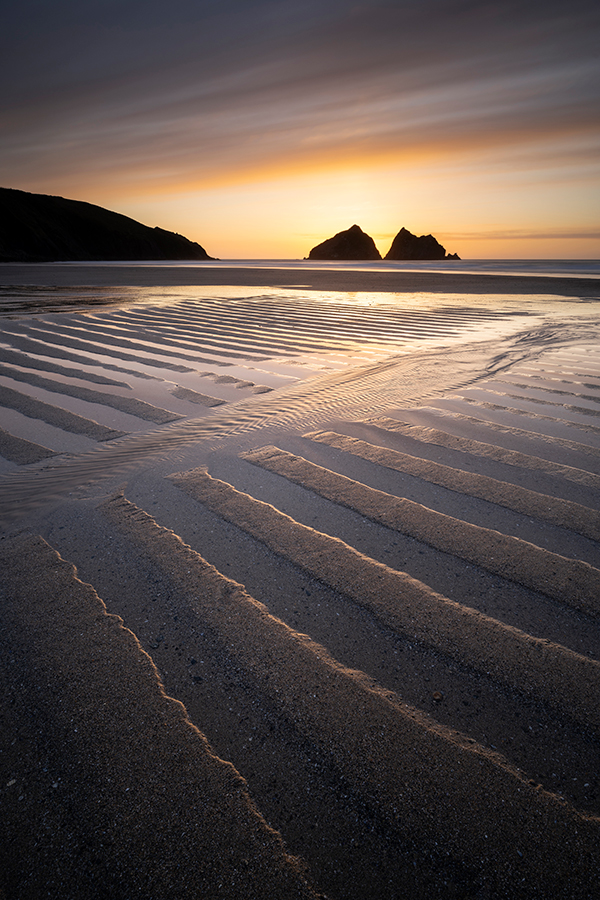
It would be unrealistic to capture the shape of the sun in a scene like this but the subtle tones of the sky and water can be retained with care. Image: Ross Hoddinott
So how do you ensure that you don’t burn out the highlights and you get the detail you want? Read on to find out.
Take a look
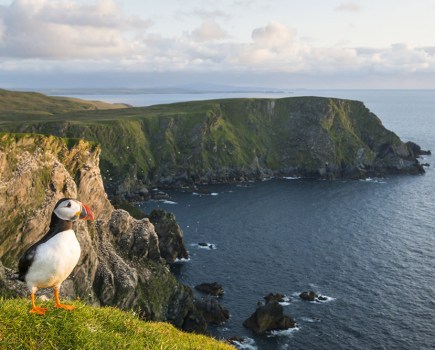
The first step in retaining the highlights in an image is to take a look at the scene and decide where the ‘at risk’ areas are. If you’re photographing a landscape on a heavily overcast day, the chances are that your camera will take it all in its stride because the tonal range of the scene is within its dynamic range, but on a sunny day with pockets of deep shadow and bright white clouds, the clouds are the danger areas. Basically, you need to keep an eye on anything white or reflective like water or metal objects.
If you tend to find it difficult to identify the highlights in a scene, then a strong neutral density filter or (ideally) a variable neutral density filter can help by cutting out all but the brightest light. You just need to hold a variable ND filter to your eye and then increase its density until only the brightest areas of the scene are visible.
Use manual exposure or exposure compensation
The key to retaining the highlights in any image is taking control of the exposure and not leaving everything to the camera. Manual exposure mode gives you the most control, letting you set the aperture to give the depth of field that you want and using the shutter speed control to determine whether any movement is frozen or blurred.
You can also use aperture priority or shutter priority with exposure compensation. Whichever exposure mode you opt for, shoot with a specific sensitivity (ISO) setting rather than using the automatic option so you’re in full control.
Take a look at our Beginners guide to Exposure, Aperture, Shutter, ISO and Metering
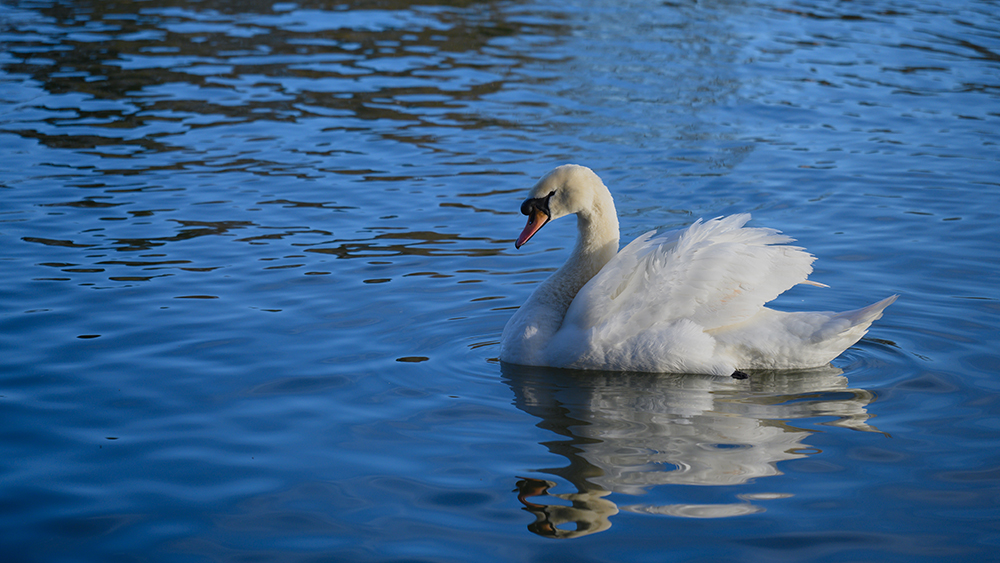
Ensuring the highlights were retained on the swan means that all of detail of its feathers can be pulled out during post-capture processing. Image: Angela Nicholson
Underexpose
If there are highlights in your scene that you want to protect, you need to underexpose the image. This is often referred to as ‘exposing for the highlights’. If you’re shooting in manual exposure mode, it means using settings that the camera’s exposure meter will indicate will result in an underexposed image. If you’re using a semi-automatic exposure mode like aperture or shutter priority, you need to use a negative exposure compensation value.
Some mirrorless cameras have an option that tells the viewfinder to give a ‘natural view’ that mimics that of a DSLR so the exposure settings aren’t taken into account. When you’re trying to assess exposure, however, it’s best to turn this off and use the viewfinder’s default mode so the images you see in it are the same as the captured image.
The temptation can be to reduce the exposure significantly just to be on the safe side, but this is likely to make the shadows very dark and difficult to recover, so it’s important to only reduce the exposure by as much as is necessary.
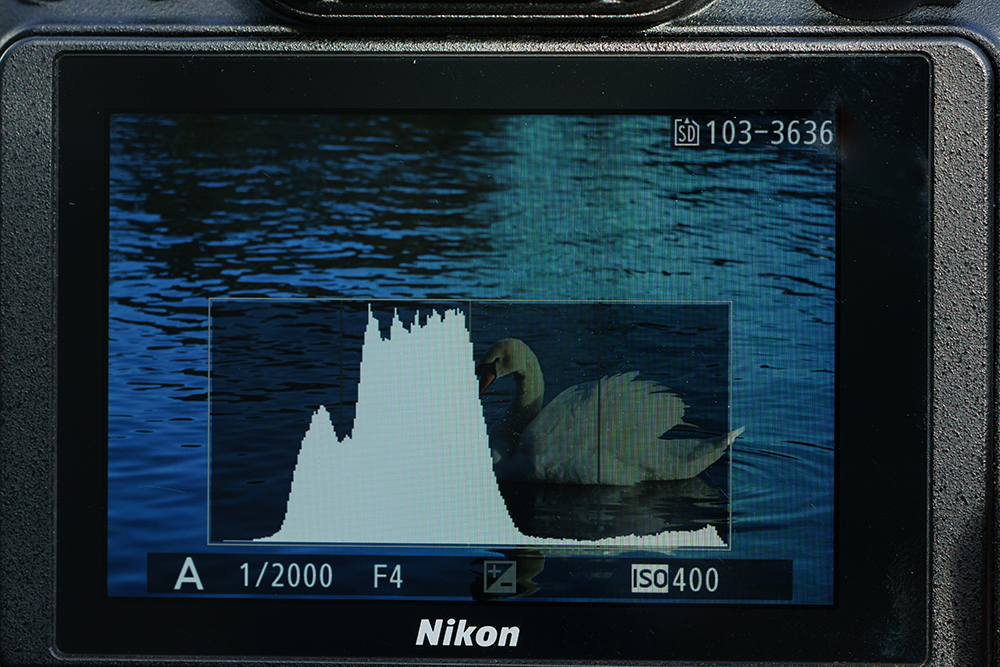
The Live Histogram trace only just reaches the right end of the axis showing that the highlight information in the swan’s feathers have been recorded
Use the histogram
Digital cameras offer a histogram view that’s designed to help with assessing the exposure and selecting the settings. This shows the brightness of the pixels along the horizontal axis with black being at the left end and white at the right. The number of pixels with each brightness value is shown in relative terms on the vertical axis.
Consequently, a large peak at the far right end of the graph means that there are lots of very bright pixels while a peak at the left end means that there are lots of very dark pixels. The distribution of the bars on the histogram changes with the brightness of the subject (and the exposure settings) which means that you may see the graph change if the camera moves or if the sun goes behind a cloud.
However, if you mount the camera on a tripod, and if the lighting stays the same, then you can see the histogram change as you adjust the exposure.
Ideally, with a scene that has some white in it, you want the peaks in the histogram to just reach the right end of the graph. If there’s a large peak, it’s possible that some pixels are burning out, but you can assess this by reducing the exposure until the peak is with the range of the graph and then increasing it slightly so that the peaks just reach the right end point. It’s a technique known as ‘exposing to the right’.
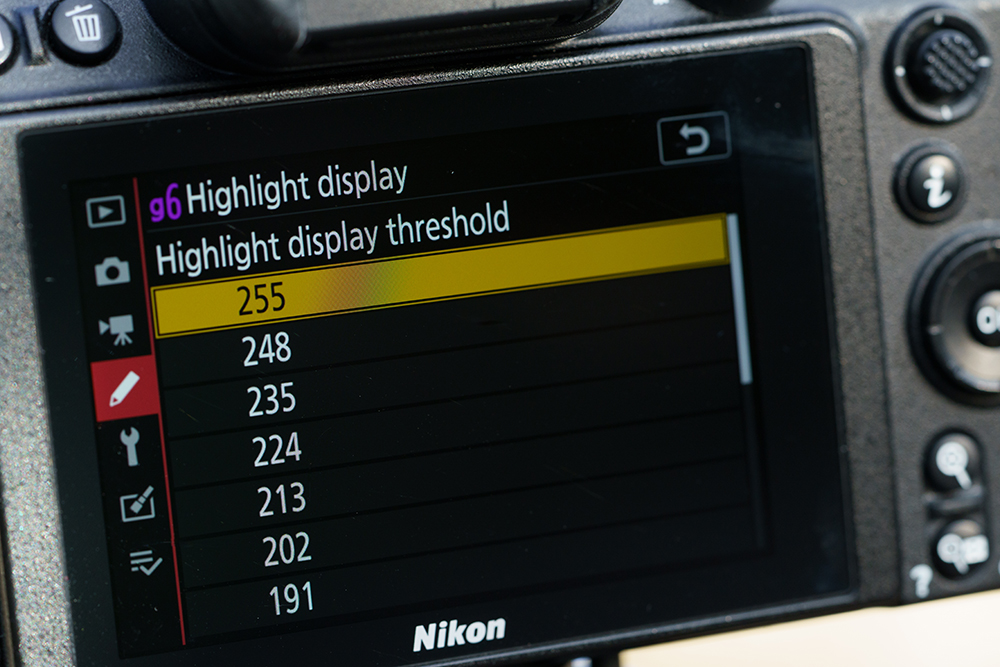
The Highlight display (zebras) in Nikon’s Z-series cameras only works in video mode, but you can switch between stills and video mode to check the highlights – make sure that the exposure settings are the same. Setting the Highlight display threshold to 255 means only the white pixels will be highlighted
Use the highlight warning
Some digital cameras offer a highlight warning which is very useful when you’re trying to retain the highlights. When this is turned on, it will flash to indicate the areas that are going to be lost.
Alternatively, many cameras have a ‘Zebra’ display, which is another type of highlight warning. In some cases, this only works when the camera is in video mode, but it works with stills on some cameras and puts black and white diagonal stripes across the brighter part of the scene.
Whatever they are called, the most sophisticated highlight warning systems allow you to set different levels for the brightness warning. Using a low value lets you know which areas are getting close to burning out, but to save confusion, it’s often easier to set a high value so that only the pure white areas or those very close to burning out are flagged up.
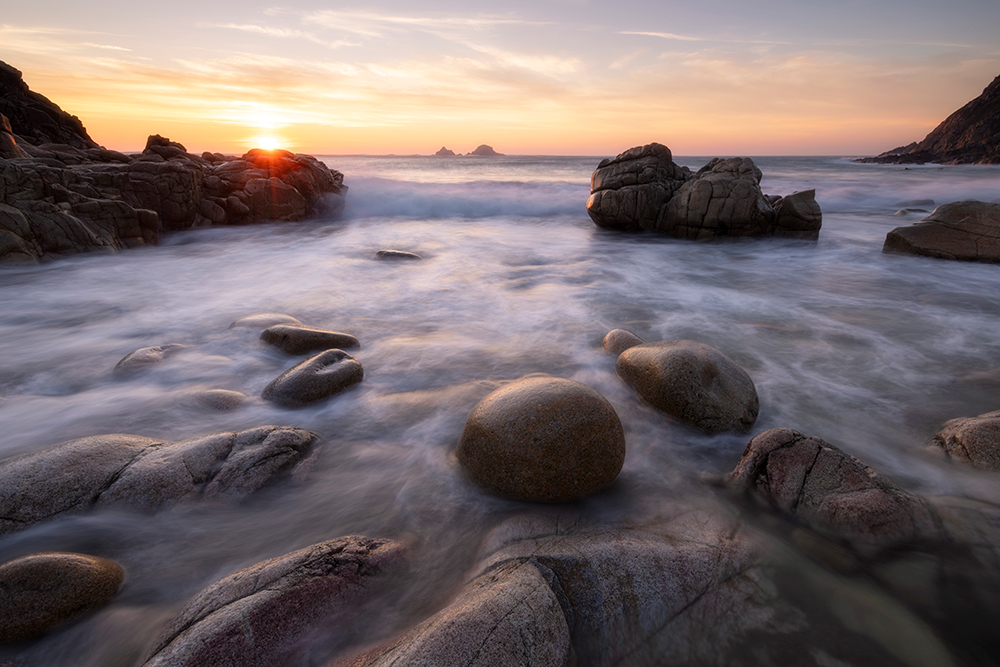
Excellent highlight retention when shooting toward the sun, with good exposure overall. Image: Ross Hoddinott
Shoot raw
Raw files have more data and wider dynamic range than JPEG files. This can be very important when you come to editing your images because there’s often far more detail in the highlights and shadows than there is in a JPEG. Even when you’re shooting raw files, the image that you see on the back of the camera and in the viewfinder of a mirrorless camera is a JPEG.
This image will also show the colour, contrast and sharpening that’s applied with the selected Picture Style, Picture Control or Film Simulation mode, so when highlight detail is critical, it’s a good idea to avoid the most saturated and highest-contrast options. Some cameras offer a ‘flat’ mode or you can create a custom flat mode, but the standard option is often a good choice because it gives a better idea of the final appearance of the image.
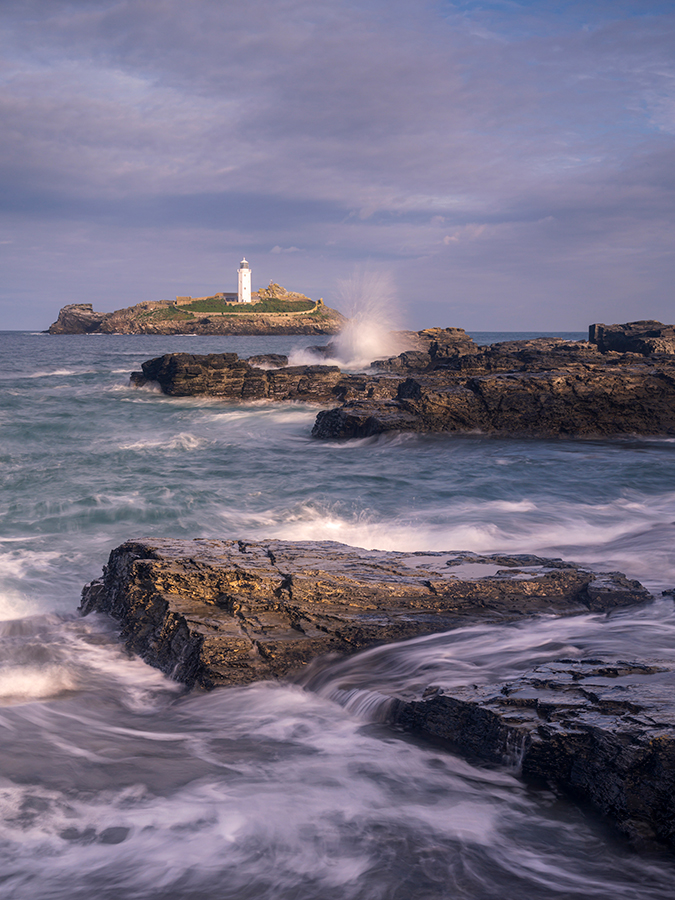
While there were highlight warnings showing on the lighthouse in the distance, reducing the exposure would only make it grey as there’s no visible detail. Image: Ross Hoddinott
Use the right metering mode
Thanks to the accurate preview that’s displayed in the viewfinder of most mirrorless cameras these days, you can usually rely on the default evaluative, matrix or multi-zone metering system. However, some cameras have a highlight metering option that can be useful.
In some cases this works like a form of multi-zone metering that pays particular attention to the highlights, but in others, it’s a spot metering option that’s designed to take exposure readings from the brightest parts of the scene. It won’t render the highlights a mid-tone but it will suggest exposure settings that keep them within the camera’s dynamic range.
Ross Hoddinott, landscape and nature photography
Ross is a professional landscape, wildlife and macro photographer who runs regular workshops and often guides photographers through the process of capturing perfectly exposed images. As he explains, ‘Highlight retention is an issue for high-contrast scenes, which are more common in landscapes than wildlife photography, and with macro photography they are often in the background where they can add a little interest.
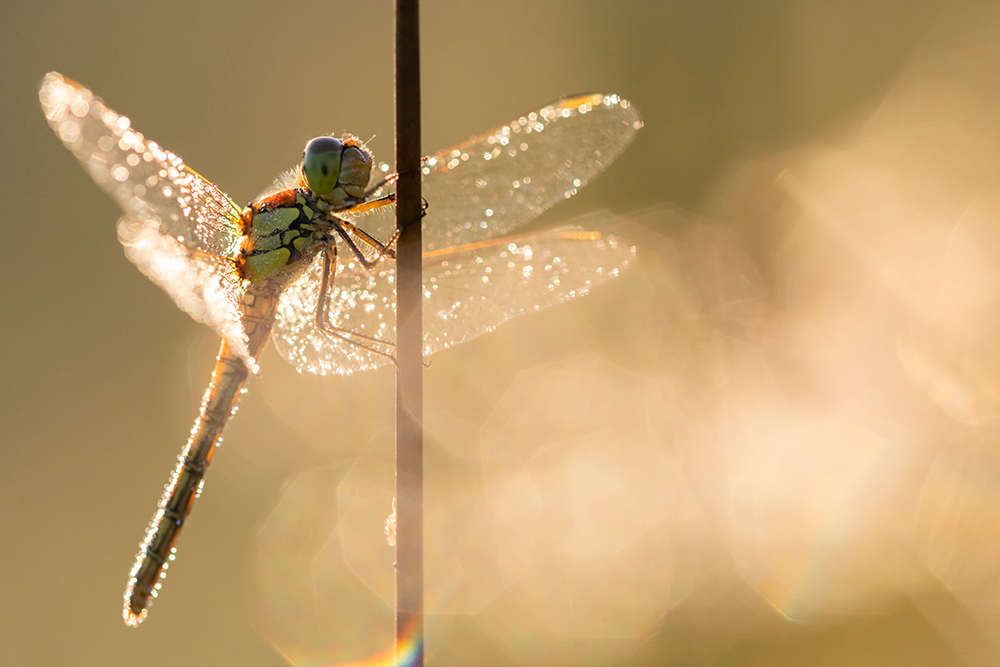
Ross increased the camera’s exposure by 1EV to capture the detail on the body of this common darter while giving the wings a bit of sparkle. Image: Ross Hoddinott
With landscapes there may be some specular highlights, like sparkles on the sea, that you’re prepared to let go. They make the scene look natural and bring it to life. There are also situations where you might have, say, a sunlit lighthouse in the distance, which is pure white and there’s no point trying to underexpose the rest of the scene in order to retain detail which you can’t actually see because it’s too far away.
That’s where you’ve got to be a little bit careful about the highlights warning, because it’s going to flash and highlight those areas, and if you try to underexpose the scene in order to retain them, you’re giving yourself extra work.’

Only the very brightest parts of the specular highlights in this image are pure white. Image: Ross Hoddinott
This understanding of which highlights need to be retained and which can be allowed to be bright white is something that Ross has developed through his years of shooting experience, but he’s still a big fan of using the live histogram on his Nikon Z 7II. He continues, ‘The histogram makes life so easy, but even when you’re looking at it, you still need to evaluate the scene as well.’
ND grads and bracketing for retaining highlights
While some photographers favour bracketing their exposures and then blending images together to get detail throughout the brightness range, Ross generally prefers using ND grads. He says, ‘There are obviously situations when a filter may not be practical, perhaps it’s a mountainous scene or there’s something like a lighthouse that breaks across the horizon, in which case I would bracket and blend, but in many situations, graduated neutral density filters are great for holding highlight detail in the sky.
A neutral density grad can help to retain the highlight detail in the sky of a scene like this. Image: Ross Hoddinott
They mean you can get a good exposure for the highlights without underexposing the foreground shadow detail.’ Again, Ross emphasises the need to evaluate the scene saying, ‘With waves or moving water that are a key part of the image and not just specular highlights, I always make sure I’ve got information there in-camera because then I can decide how I’m going to process it later.
In many cases they are also brighter than the sky so there’s no point in using an ND grad on the sky because you need to get the exposure right for the waves. Waves that have blown out and lack any detail or texture just look odd.’
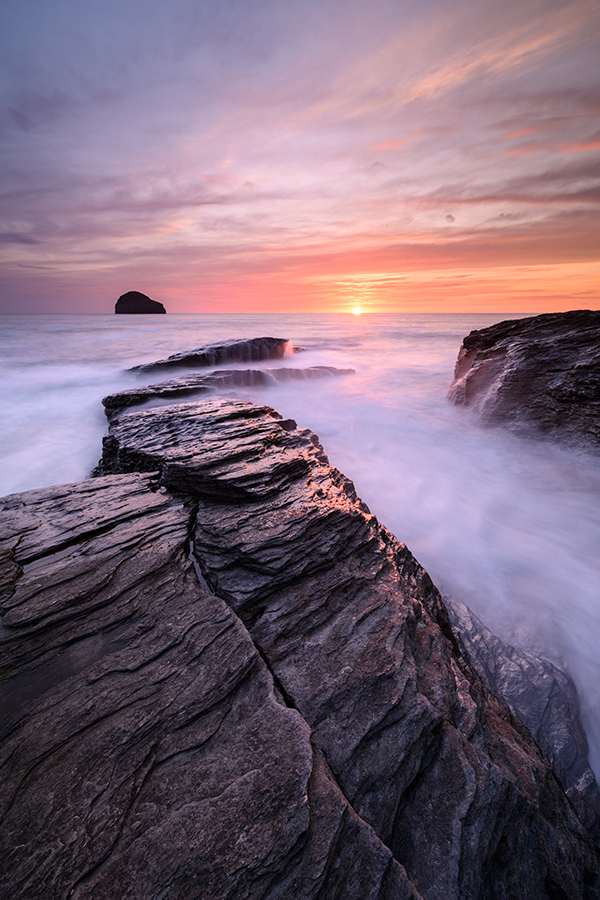
The tones and detail in the water here are vital to the success of this image. Image: Ross Hoddinott
Getting the final result
If you underexpose an image to retain highlight detail, you need to brighten the shadows and mid-tones post-capture to get the result you want. It’s at this stage that you may see the impact of your sensitivity (ISO) selection because brightening the shadows can result in greater visibility of noise and these results are generally better with low-ISO images.
With this in mind, Ross generally shoots at ISO 64 and has his camera on a tripod, but if he wants to shoot a few hand-held images he will happily go up to ISO 1000.
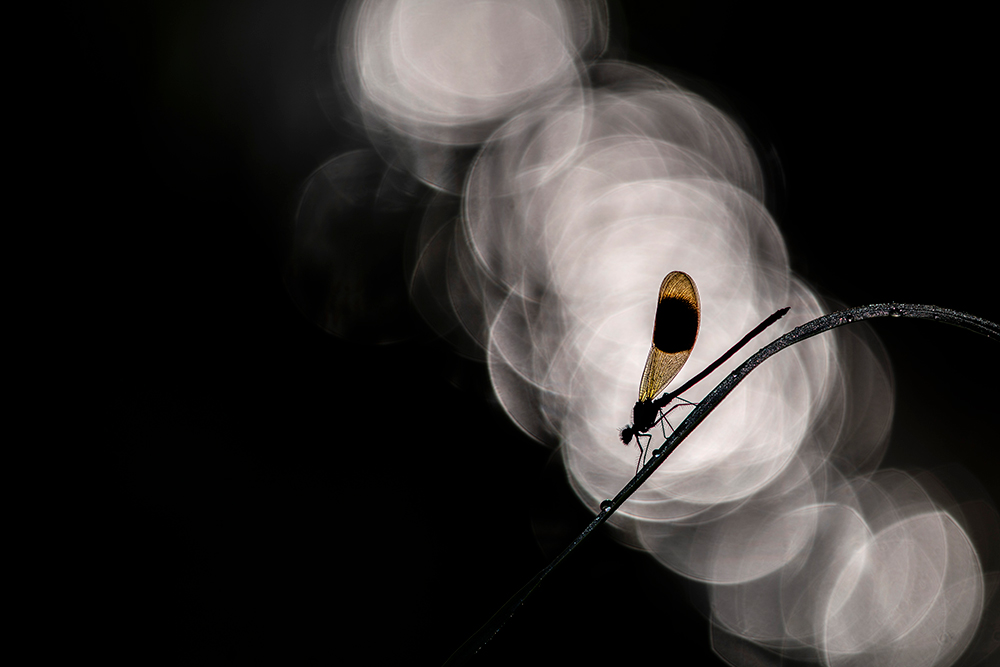
Exposing for the highlights here makes the subject a silhouette and brings out the detail of the demoiselle’s wings. Image: Ross Hoddinott
However, for macro work he says, ‘I’m often shooting at up to ISO 3200 because I’m in low light and having to make sure my shutter speed is fast enough to freeze any wind movement, which means pushing the ISO up. Usually with macro photography, I aim to get the image exposure looking as I want it in-camera, but with landscapes I may need to create the exposure that gives me the best file to then process later.
I am very wary of underexposing the subject with a high ISO setting because that’s when you see the noise in the shadows. Thankfully, you don’t often get the same contrast issues with the kind of macro photography I like to shoot and if there are bright highlights it’s often because I’m going to silhouette my subject anyway.’
Ian Pack, portrait and product photography
Ian Pack is AP’s lighting contributor and a professional portrait and product photographer who routinely uses flash for his work. His top tip when looking to avoid burning out highlights when using flash is to use as big a light source as possible – and diffuse it heavily.
Although you can use flash to fill in the shadows and help balance the exposure across the frame, Ian notes, ‘A lot of photographers talk about overpowering the sun with flash, but you can’t really do that, it’s better to diffuse it. I always say, diffuse rather than light if you can.

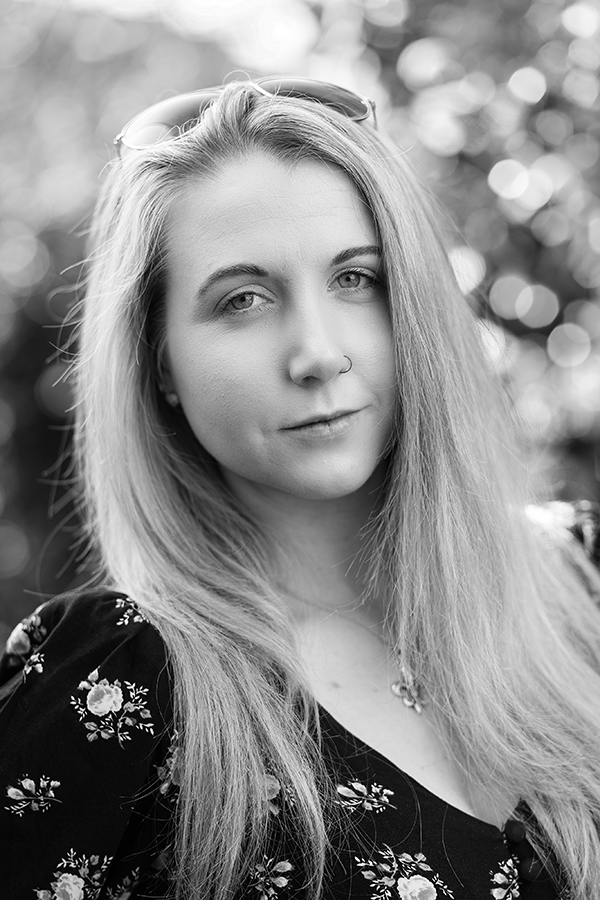
Placing a diffuser or scrim between the sun and model softens the light. Image: Ian Pack
Helpfully, clouds are a natural diffuser. In fact, when I used to shoot weddings, I used to love if the weather was overcast because I had a nice big diffuse light source and I was in control of the exposure. A burst of flash will lift the shadows and add catchlights to the eyes to really bring portraits to life.’
Top shade can help if you’re shooting outside on a bright sunny day, but this isn’t completely without problems as you need to think about the colour of the reflected light. Shooting under a tree surrounded by grass can result in a green cast. You can neutralise it with flash, but another location may work better and cause fewer problems. Alternatively, a pop-up diffuser and a spare pair of arms or a stand to hold it can help.
Using sunlight through a window creates a hair light with a large white flash umbrella lighting the client’s face. Image: Ian Pack
If you’re shooting indoors you may be able to take complete control over the exposure, but sunlight pouring through windows can be an issue. If it’s in the background, you may wish to burn it out for creative reasons, but if it’s falling on your subject, Ian recommends diffusing it. As he explains, pro photographers often use a scrim, which is basically a diffuser that you put between your light source, in this case the window, and your subject.
With a diffuser in place the sun still acts as a back or accent light and detail is retained in the hair. Image: Ian Pack
It doesn’t need to be fancy though, you can use a white bedsheet or even a shower curtain, but take care with plastic materials as they often have an impact on the colour of the light reaching your subject.

Direct undiffused sun from a cloudless sky will burn out highlights. Image: Ian Pack
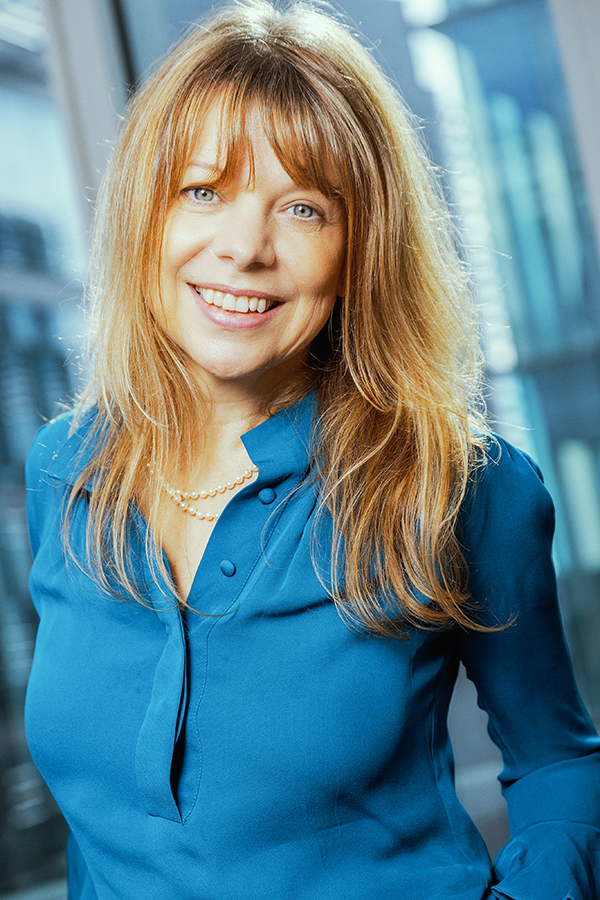
‘Last week I had to photograph the CEO of a company and there was light streaming through her office window. Since my time with her was very limited, I wasn’t able to set up a diffuser in the window, instead, I turned her back to it so it acted as a hair light, let it burn out and used a burst of flash on her face. Sometimes you have no choice and you have to be pragmatic with what you can do in order to get the best result in the time and conditions.’

An undiffused Speedlite produces a small hard hotspot in a light modifier, creating a hot spot and potential for burnt-out highlights.
Shiny skin can be another problem with portraits, says Ian, but make-up powder, kitchen paper towels or tissues can come to the rescue. ‘Just ask the model to touch-up or blot the problem areas to take the sheen down,’ he advises.
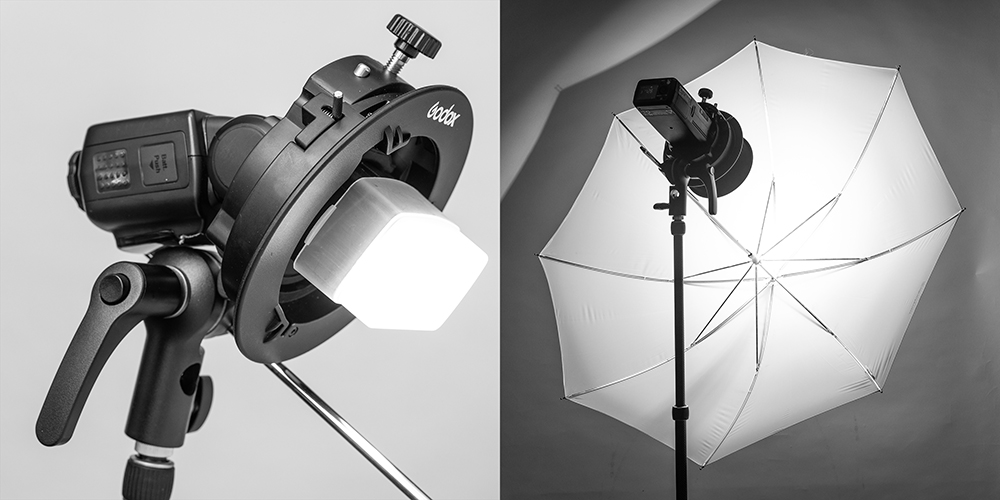
Adding a diffuser to a Speedlite spreads the light inside the light modifier, creating a larger light source – thereby reducing the chance of burnt-out highlights lacking detail
Further reading:
How to achieve optimum exposure in your photos
How to use filters for better landscapes
Pin this article on Pinterest!
Follow AP on Facebook, Twitter, Instagram, and YouTube.