Advertising feature
There is a wide range of photo-editing software to choose from, but Zoner Photo Studio X is one of the most complete image-editing suites on the market. It’s armed with raw support, powerful retouching tools, layers and video editing. Will Cheung is your guide
Zoner Photo Studio X (ZPS X for brevity) is a Windows only application available for $5.99 (about £4.70) a month or $59 annually, so it works out significantly less expensive than the Adobe Photography Plan, for example. You can download a free trial here.
Subscribe and all updates are free so you’ll always have access to new features and compatibility with the latest cameras, and other benefits include 20GB of Zoner cloud storage, access to ZPS X from anywhere, free presets and a Zonerama Premium account which includes unlimited space for 4K videos.
ZPS X is a program based on five modules, taking you through from Manager where you organise your photos, through two stages of processing and editing, onto printing and, unusually for software designed primarily for stills, video editing. It is a complete imaging solution, in other words.
As you can see in the above image, ZPS X also has a Batch filter (Ctrl+Q) available in the Manager, for applying edits to a number of files, and in Editor, for single images. A wide range of filters can be added and combined in the Batch Filter for a speedy workflow.
Working efficiently with raw files in Zoner Photo Studio X: step by step
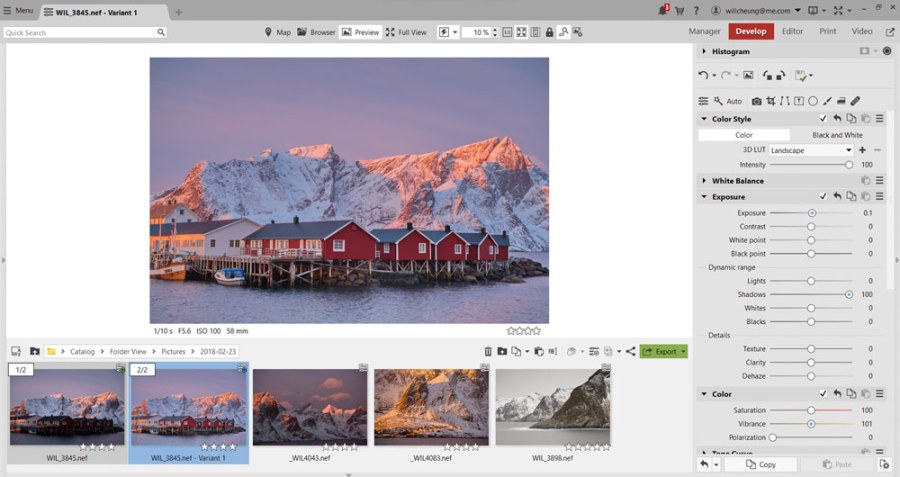
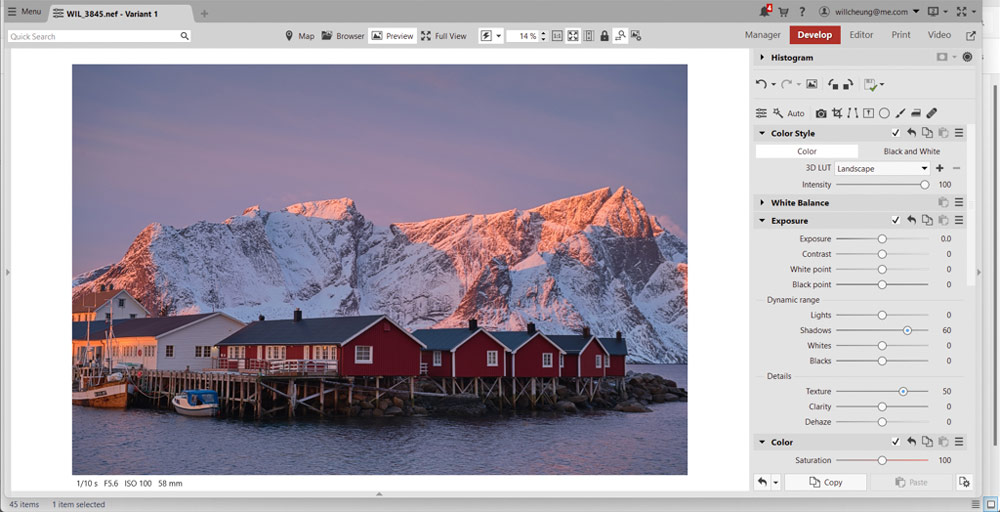
In this tutorial will be on working on raw files in the Develop module. ZPS X is regularly updated (each spring and autumn) to keep up to date with the latest camera formats. At this stage, you get all the essential adjustment options you’re expect from a leading raw processor including a histogram, exposure, white-balance, colour and noise reduction.
There is plenty of opportunity for creativity too with tools including vignetting, grain and split-toning. Editing is non-destructive so there’s no problem revisiting edits. The layout of the editing groups can be reordered so that the tools you use most can be prioritised and the option of making virtual copies means you can explore all the options you wish without touching the original file.

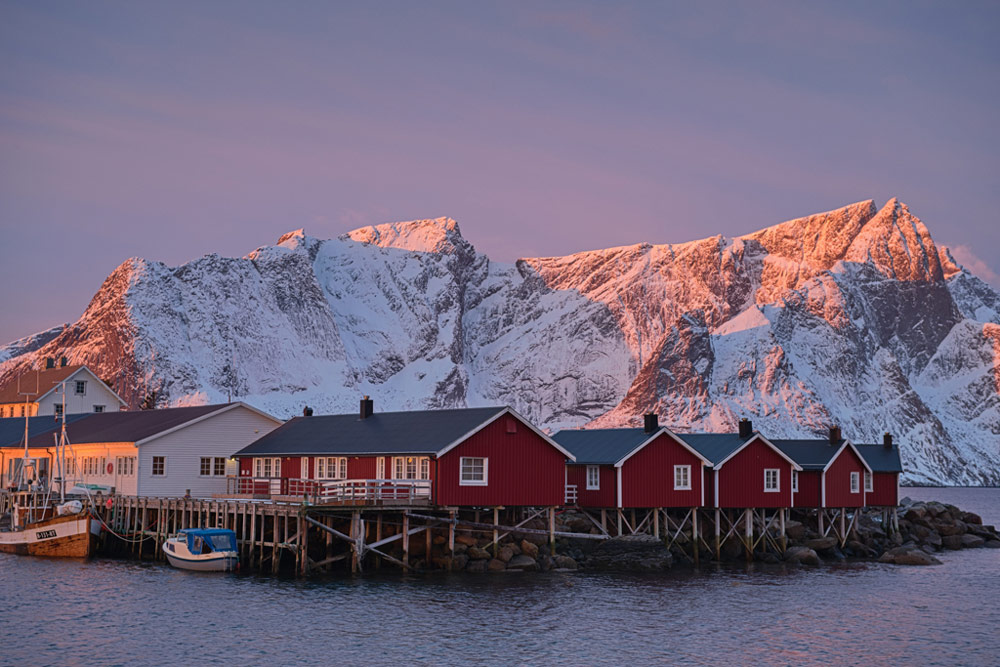
In the Exposure tab under Dynamic range is Shadows. I usually go the maximum strength of a slider and then track back to a level I am happy with. You can see that 100 is a tad too much but 60 looked good to me.
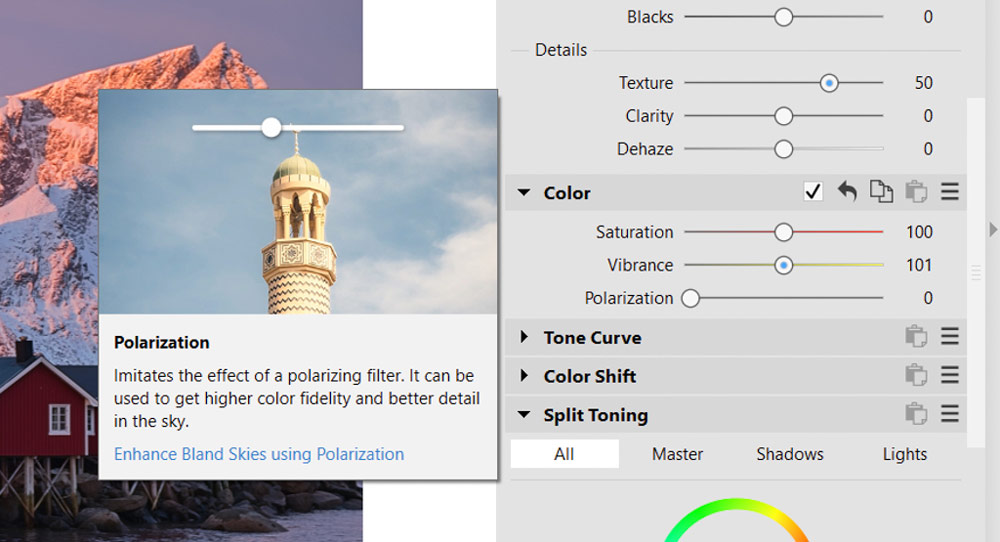
I also experimented with the Details panel. I’m used to adding some Clarity to images to add a little bite to the midtones and here a level of 30 intensified the shadows but in this instance Texture at a level of 50 without any clarity was preferred. It crispened the image without enriching the image.
More advanced Zoner Photo Studio X editing tips
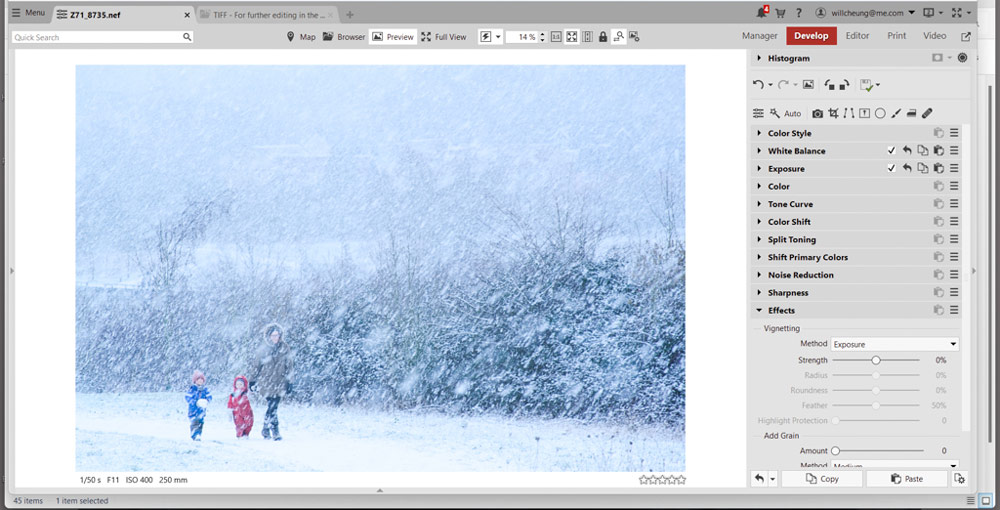
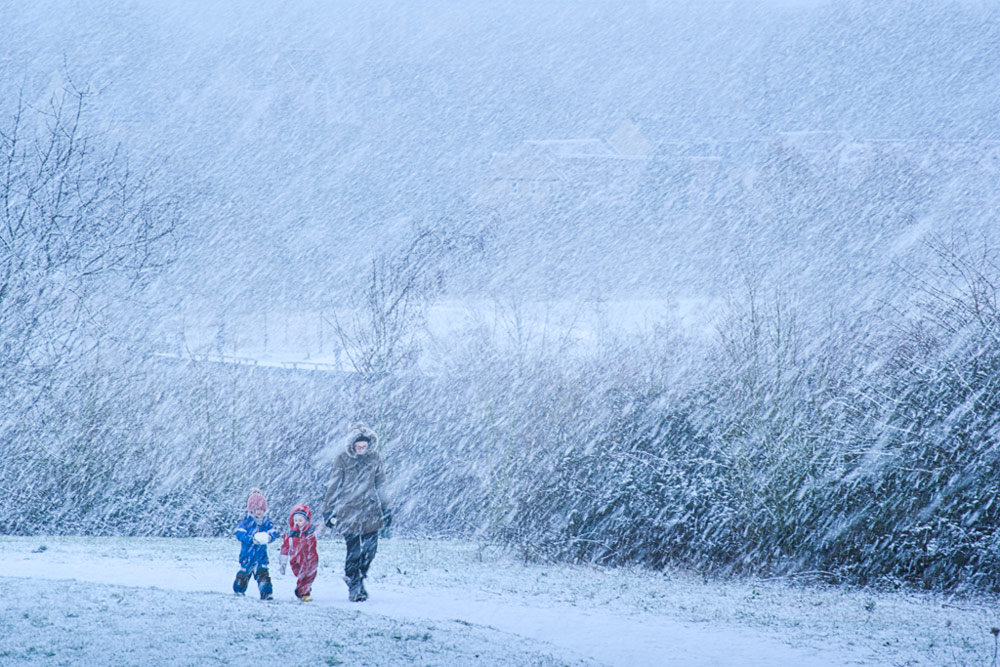
For my second ZPS X editing project, I used a picture I’d taken in a blizzard near Cambridge. In such conditions it pays to keep things simple so I just took out a Nikon Z7 with a 70-300mm zoom that I could shelter under my jacket when I wasn’t shooting.

I’d set a small lens aperture to enable a slow enough shutter speed to get some blur in the snow. Of course, in a strong wind and with the 70-300mm lens handheld at 240mm, there was a big risk of camera shake regardless of what image stabiliser is available, but I was happy with the impressionistic feel of the scene so ultimate sharpness was not a concern. The exposure was 1/30sec at f/16 and ISO 400.
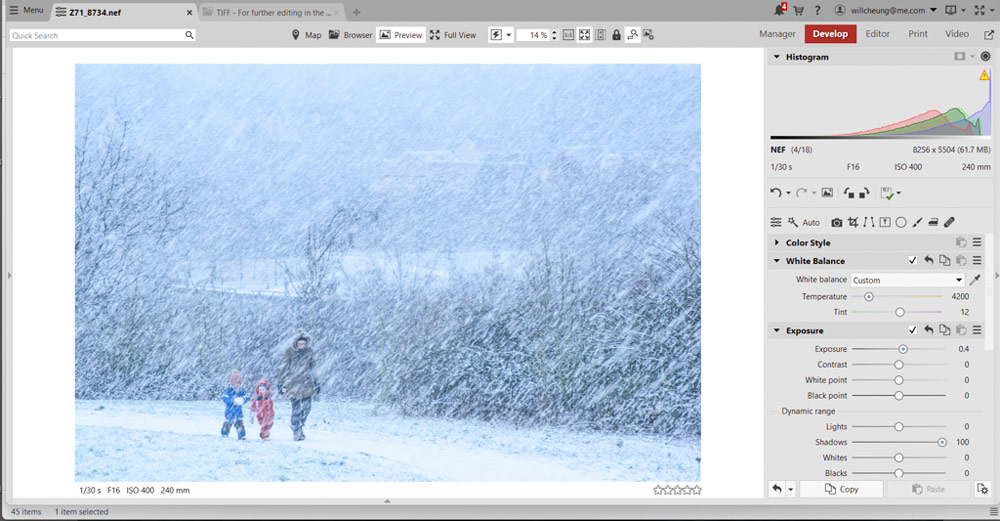
The camera’s Auto White Balance gave a commendably neutral image but I thought adding a touch of blueness would embellish the scene’s chilly appeal. In the ZPS X White Balance menu, I clicked on the Temperature slider. Of course, it is a matter of taste but I stopped at 4200.
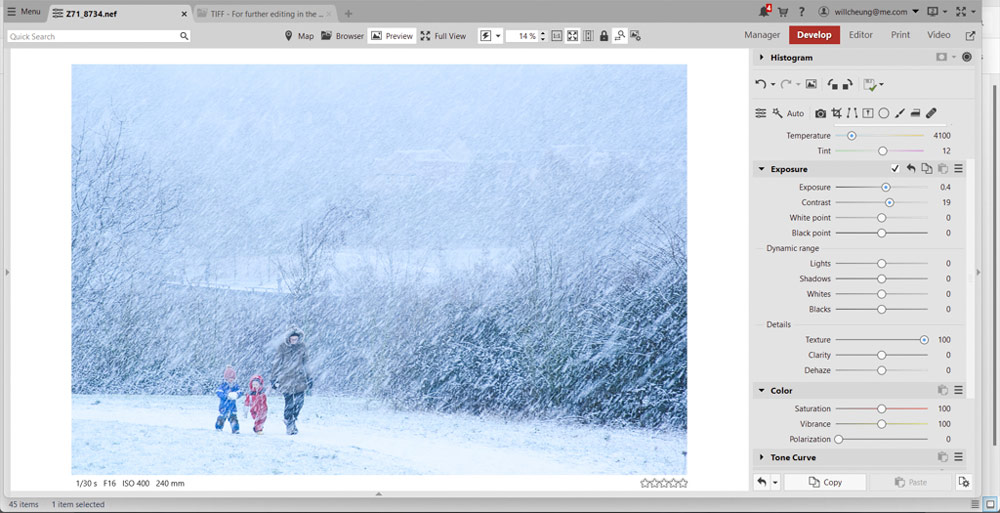
Next it was to the Exposure menu. I tweaked Exposure, Contrast and White point to get a nice look. With the snow, the shot was soft which is a natural effect but I preferred a more defined look to the blurry snow so used the Texture slider, again starting at 100 which was too much – so I settled for 62.
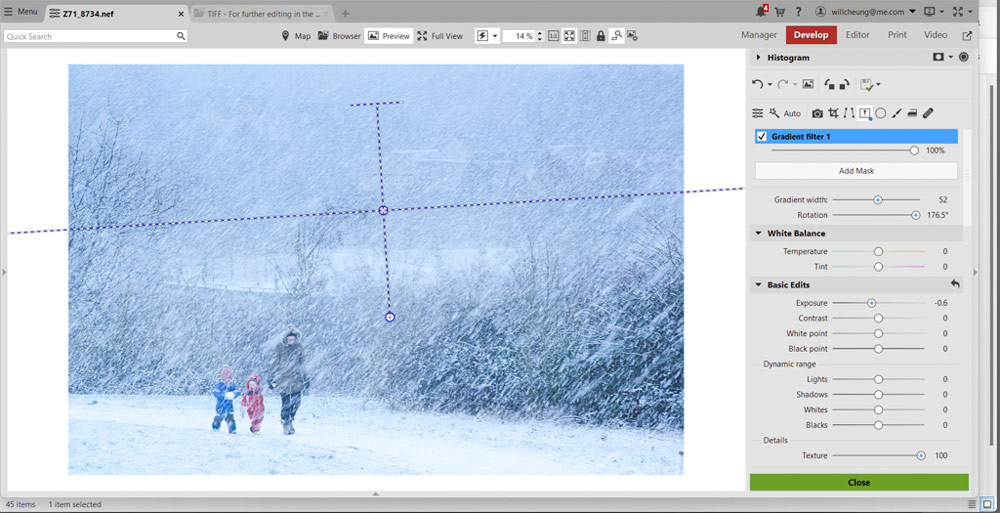
The blizzard had a significant impact on visibility which meant the background looked suitably hazy and indistinct, but it also meant the snow didn’t stand out strongly enough. ZPS S has a Gradient filter which I thought could play a big part in this image.
I started by adding a Gradient filter to the top half of the image. I started by experimenting with the width because I wanted to restrict the filter’s impact and settled on 52. The exposure I set to -0.6 to darken the filtered area down and I pushed up the Texture slider to the maximum of 100 to really make a feature of the snow.
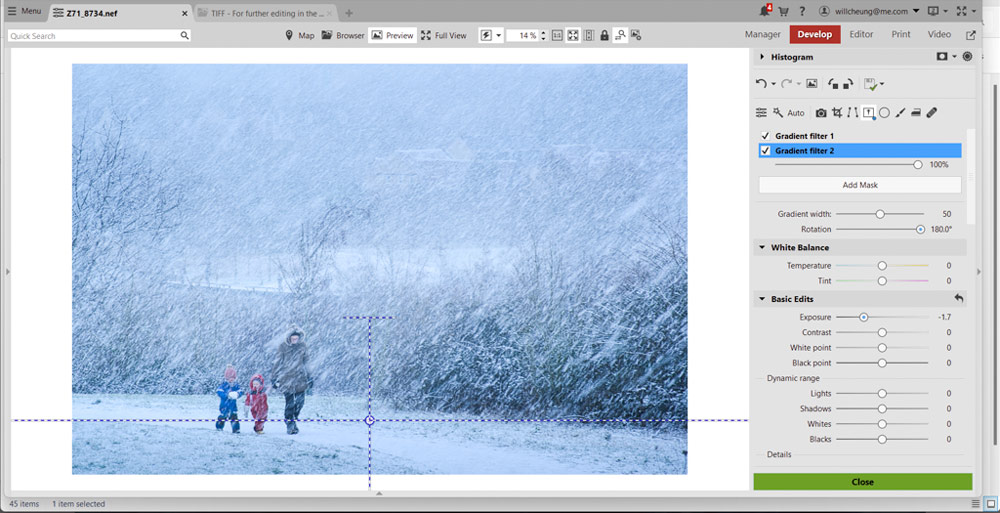
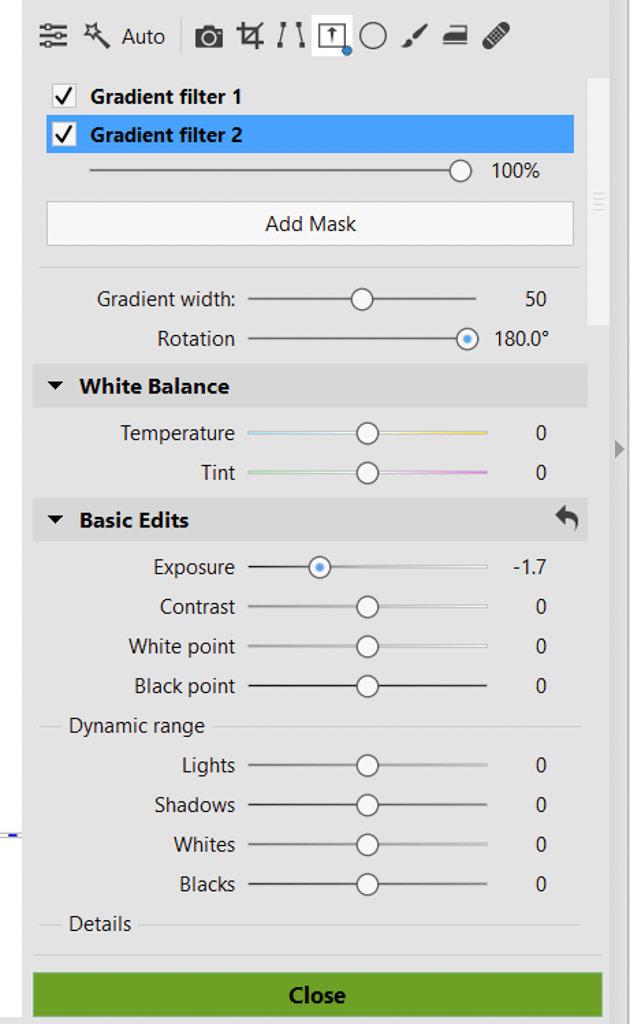
I was happy with how the image looked so far and all that was left was a slightly stronger base for the image to sit on, so I added a second Gradient filter across the bottom of the frame. The grad had to be much thinner to limit the range of its effect and this was set to 50 and after a little experimentation, I set the exposure at -1.7.
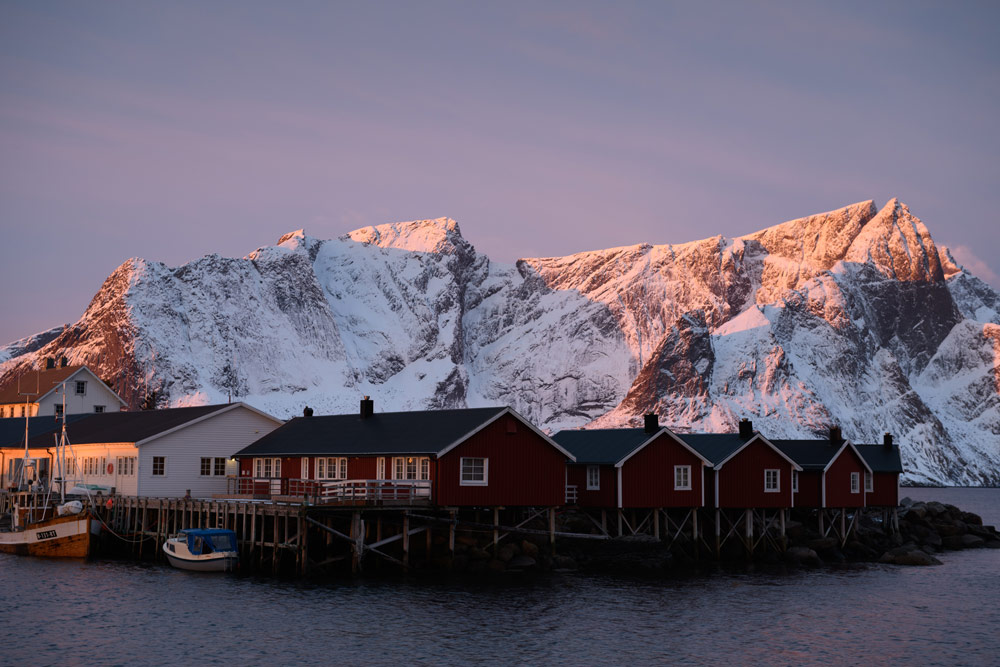
Below is the final image. The processing parameters can be copied (Ctrl+C) and pasted (Ctrl+V) onto other images so I copied my tweaks to the two other shots in the burst. The first shot was the best, in my opinion.
Check out the free trial of Zoner Photo Studio X here.
Further reading
Getting more from the Zoner Photo Studio X software