Makers spend millions making smartphone photography foolproof, but sometimes it’s good to bypass the JPEG processing, AI and other clever tech – and simply shoot raw.
There’s nothing wrong with all the auto-fix everything and computational photography/AI features now built into many Android phones, but as with conventional cameras, it’s useful to know how to shoot raw on your phone. Why? Well, you can end up with better-looking images, for a start.
When you shoot raw on your phone, minimal processing is applied, enabling you to fine-tune the image as you want, and it makes even more sense now larger, more-sophisticated sensors are appearing in phones.
As we’ll reveal, raw phone shooting is not hard, especially if you use an device. It’s not going to break your phone, and you can always go back to JPEG shooting, so give it a go!*
*Just one word of warning – raw images are usually larger than compressed JPEGs, so bear this in mind if your phone or cloud account is running low on storage space.
Shooting raw on Android phones
Below I explain how shooting raw is very easy with Android phones – so you should never feel left out if you don’t own an iPhone!

Shooting raw is easier than you would think
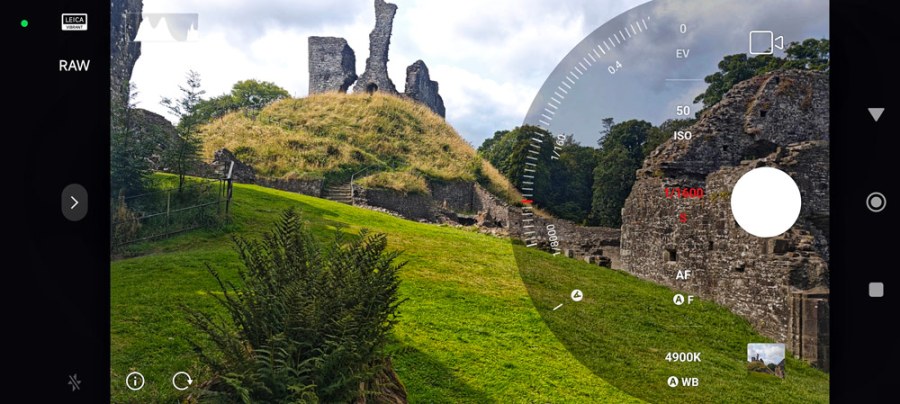
Shooting raw on my current Android phone, the Xiaomi 14, is actually very easy – indeed, ‘Pro’ is the first option you see on the camera app interface and just about every editing app or program can open the raw DNG files it generates.
A live histogram makes it simple to adjust exposure settings and Focus Peaking is also available should you want to focus manually – say when trying your hand at macro, for example.
As with many Android handsets designed with social-media posting in mind, the JPEGs can sometimes look oversaturated and overprocessed, but I don’t have this problem with raw (though there is the option to use the Leica Vibrant filter for images with more ‘kick’).
UltraRaw is also available, which supports 14-bit raw format, and there may be similar options on your smartphone.

Whose exposure is it anyway?
While shooting raw might be slower than just firing off a JPEG, sometimes it’s often good to take a more considered approach to your smartphone shooting.
With a live histogram reading, you can instantly see how adjusting exposure can be used for different creative effects when shooting raw – something that you might not think about when taking a JPEG because the phone processing is doing the work.
With the Xiaomi, I find that slightly underexposing brighter scenes often yields good results when editing or adding app effects, and this can be quicker to achieve when shooting raw via the histogram.

More natural-looking images
We mentioned earlier that shooting raw may seem a more laborious process because you’ll nearly always need to edit the raw images, but there is a counter-argument – with some phones, the heavily processed JPEGs can end up looking rather lurid and unnatural, particularly when it comes to skin tones.
Makers are under pressure to make JPEGs look ‘oven ready’ for social media, so you can’t blame them for this – the smartphone market is insanely competitive.
So, you might end up having to edit the JPEGs anyway. When shooting raw, I find colours and skin tones look more natural/neutral. Moreover, the ‘light touch’ in-camera processing of DNG files can sometimes minimise noise, or make it easier to reduce at the editing stage.
Editing flexibility
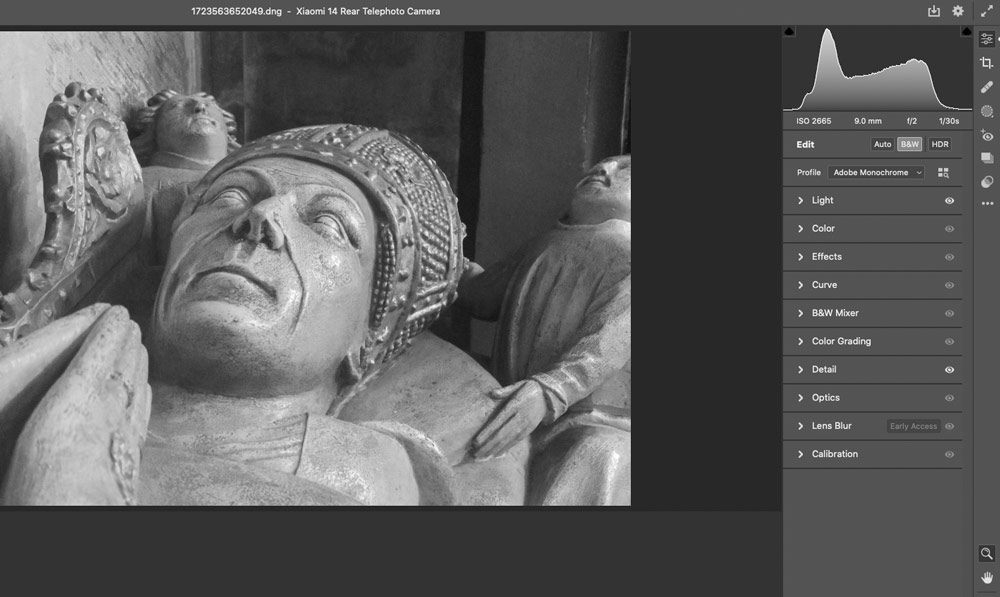
As with shooting raw on a camera, you get to tweak the raw file to your own tastes, recovering shadow or highlight detail as needed. Most of the time, optical distortions are corrected automatically in the raw files, too.
As raw files from my phone are saved as DNGs it’s easy to process them in Photoshop, Lightroom, or my editing apps of choice, namely Snapseed and VSCO – the latter is particularly good for adding classy film simulations and surprisingly convincing infrared effects, but it’s not free.
We hope you’ve enjoyed this guide to raw shooting on phones and do share your best images with us – email [email protected]