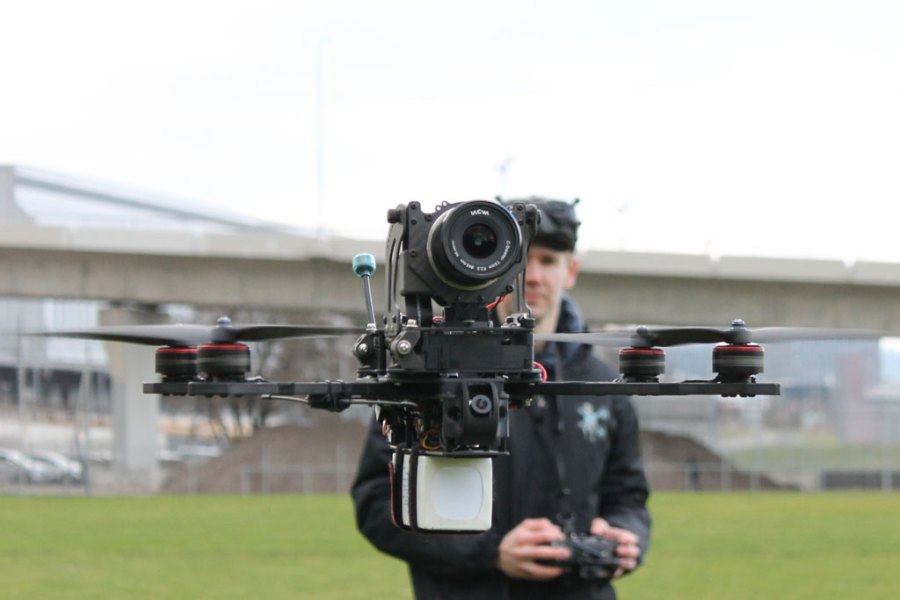
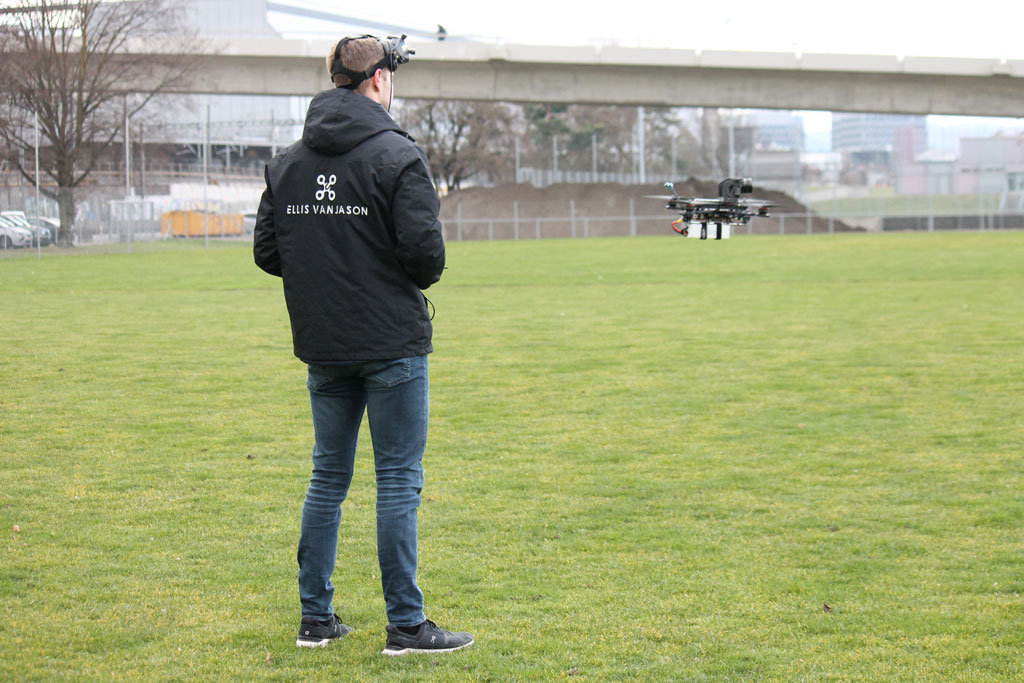
With a modified, drone mounted Blackmagic Pocket Cinema Camera 6K Pro, filmmaker and drone enthusiast Ellis Van Jason creates incredible first-person view (FPV) natural world drone videos. He reveals his top tips for editing engaging video.
Learn new video editing skills
Despite editing my footage in DaVinci Resolve for a while, I still feel like a beginner, watching tutorials before I start a new editing project. As I want to produce a different video than I did previously, I set myself the task of learning something new that I can use in my latest project.
Getting started in video editing
My basic edit starts by looking through all of my footage and grouping my shots together. For example, if I have FPV camera movements that are very similar, I group them as I can cut those clips together. When editing an FPV video, there needs to be a natural flow. You want to avoid going from a clip panning left to a clip that suddenly pans to the right – it won’t flow.
Selecting the right music for your video
Looking for music can be time consuming. The music has to be timeless – I want to be able to go back and watch the video in a few years and not notice that the music dates it. So for that reason, you won’t find me using dubstep or some other popular genre just because it is popular now.
Finishing up your edit
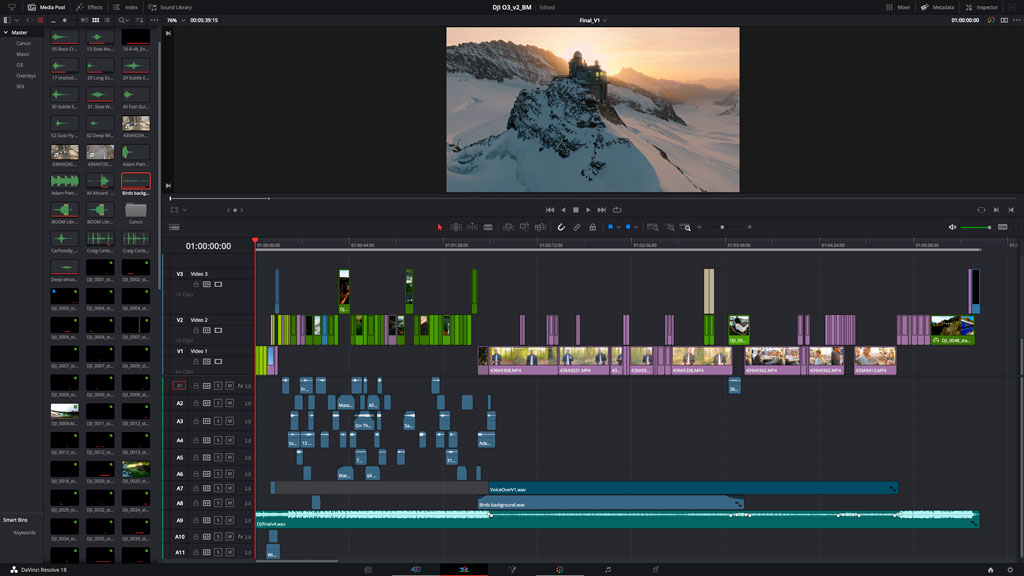
At this point, the editing gets messy. I push these different block sequences around to the best parts of the video and key points in the music. The whole video becomes a puzzle, but I strive to keep momentum building throughout.
For some points, I may have 40 shots for one sequence, but I can only use three. So, I work upward on the timeline, positioning multiple clips at the same point, on different tracks. I then watch the video repeatedly, turning different tracks and clips on and off to see which combinations work best.
I have to think about what will hold people’s attention. As many of my nature shots are around one minute long, I have to break those down into many smaller parts. I then spread the best of those one-minute clips over the entire video.
Once I have everything in place, I start the colour correction.
Color grading
I love colour grading. For me, it is taking something that looks flat and almost ugly. And then, through the grade, you can give your footage a personal character, mood, or feeling. You can change so much with the colour grade.
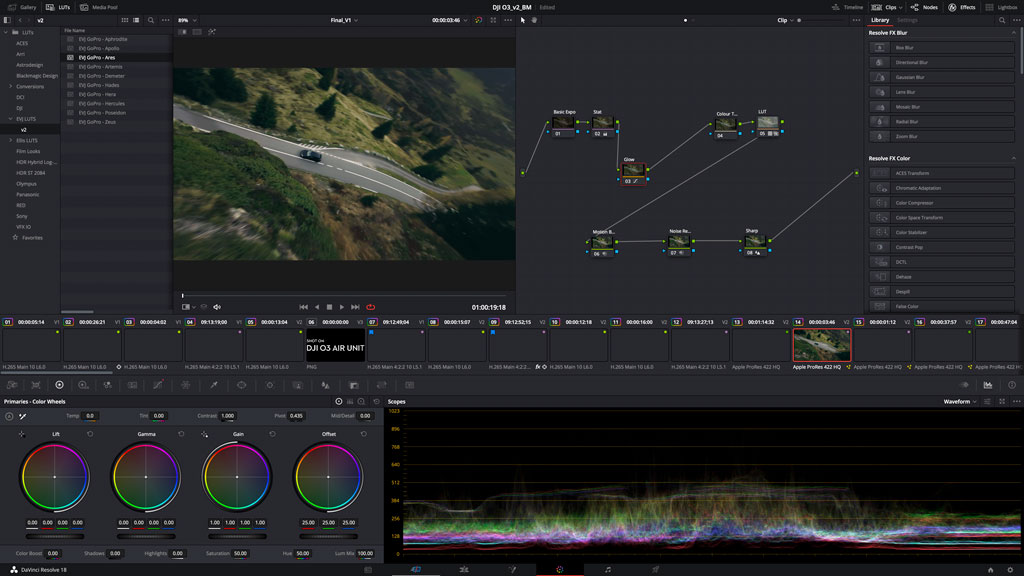
Regarding colour, it is a pity that we all still output videos with rec709 colour space when we have screens capable of displaying much more. I want to future-proof my work, so I let DaVinci Resolve manage the colour, and edit using the entire possible colour space. It gives me the best possible option to go back to a project in the future and export it again in a different space, for example, in HDR.
Sound design
Sound effects are an often overlooked part of creating a video. They are like housekeeping – the more time you spend doing them, the better the video gets.
Again, I can do all my sound design in DaVinci Resolve using the Fairlight audio module. There is so much I can do in the software, including using some third-party plug-ins that help me get the effects I need without interfering with the music soundtrack. As a rule of thumb, your sound effects shouldn’t jump about, so picking the right sound and putting it in the right place at the right volume is vital.
The best advice I can offer when editing the sound effects is to turn off the main music soundtrack and edit and design the effects to the video itself. It helps you get a feel for what should go where and if any audio clips don’t work.
To see more of Ellis’ videos, visit his YouTube channel.
Related content:
- Best video editing software, including free tools
- Best cameras for video, vlogging, and videography in 2023
- Best Drones with Cameras in 2023
- How to add motion and energy to your video footage
Follow AP on Facebook, Twitter, Instagram, and YouTube.