
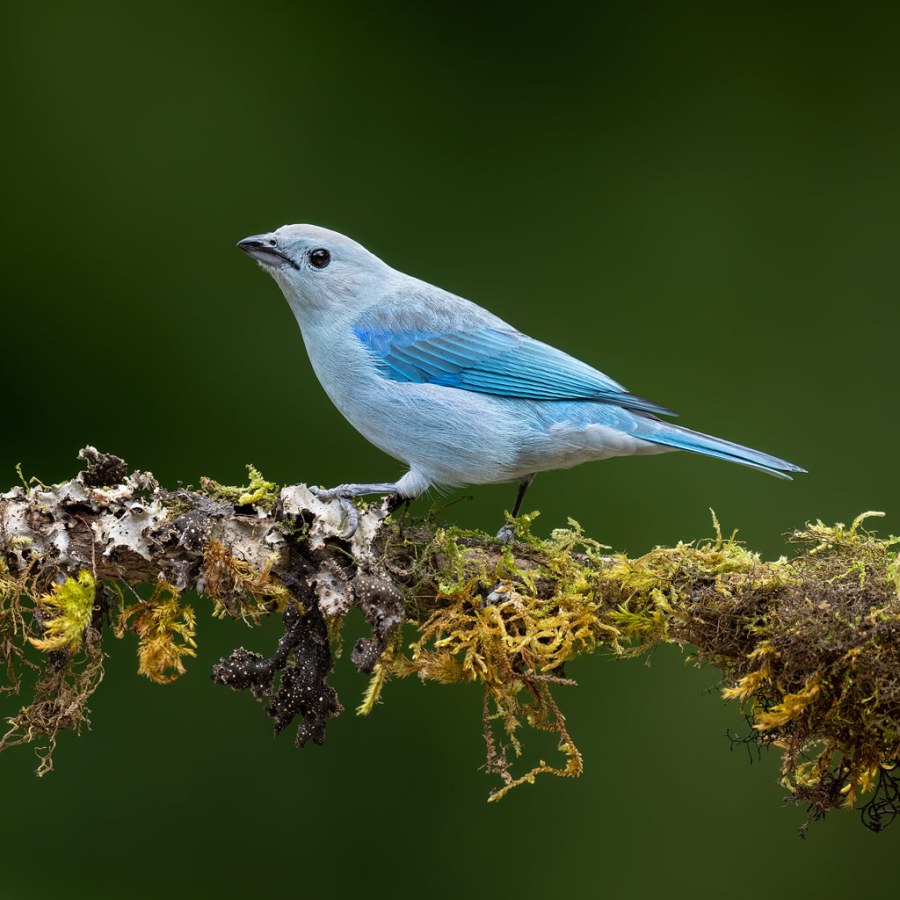
We speak to three award-winning bird photographers to find out what it takes to capture unique and inspiring portraits of beautiful birds from around the world. Like photographing wildlife generally, bird photography requires a lot of patience, practice and a camera for bird photography, but what else do you need to create awe-inspiring images? Read on for expert tips by Rachel Bigsby, Jake Levin and Jack Zhi.
Bird Photography Tips from Rachel Bigsby
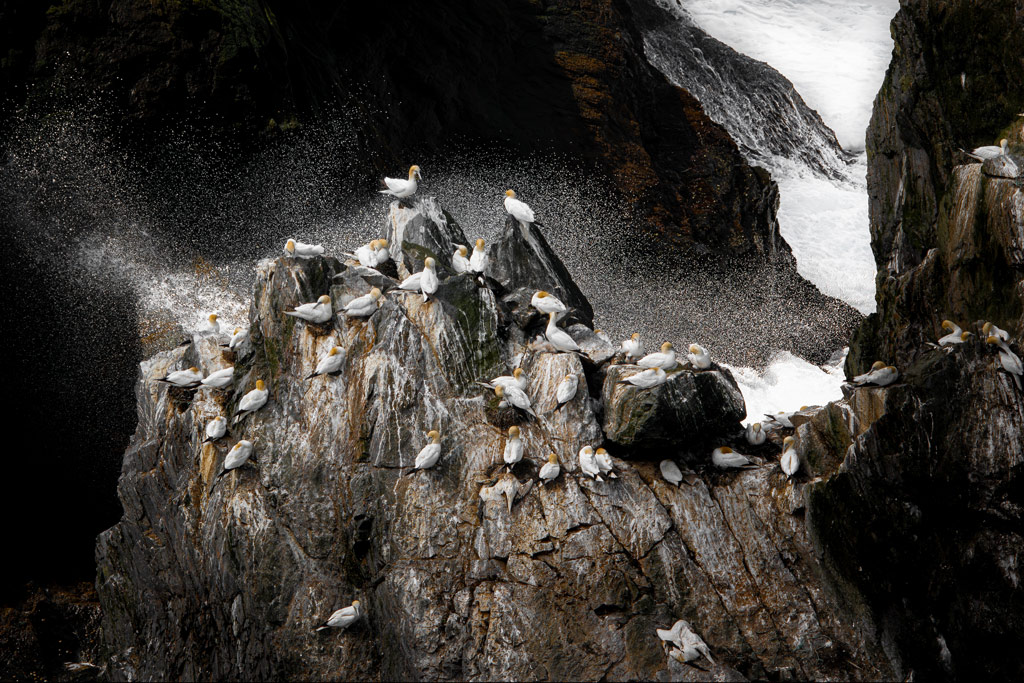
Seabirds provide me with a portal into another world. I am mesmerised by their epic voyages, resilience, characterful behaviours, unique beauty and by the staggering fact that they are the only animal capable of surviving on the water, under the water, in the air and on land. They are the true masters of living life to the fullest, and perhaps my fascination is fuelled by a longing to be a part of their world. Photography allows me to connect to these species that I hold so dear to my heart while connecting a global audience to their story through the natural artistry of our seabirds and their homes.
Understand the behaviour
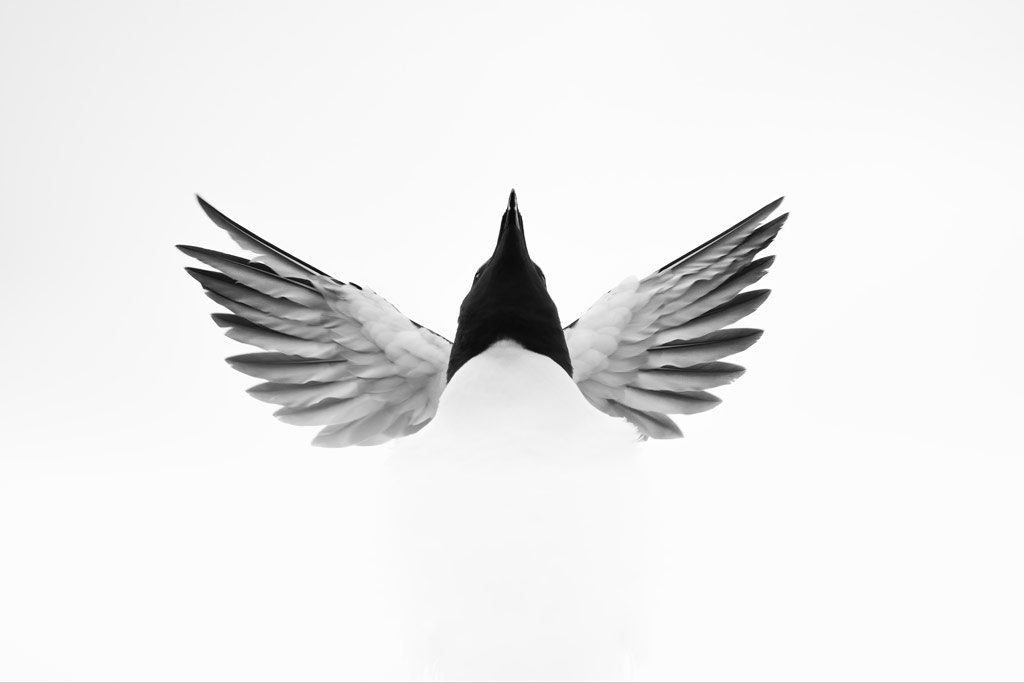
It’s no secret that our great seabird cities can be incredibly overwhelming and as a result, it’s easy to leave without feeling fulfilled with your photographs. So, upon arriving at a seabird colony, take a good moment to stand back, observe and identify the behaviour(s) you wish to photograph – for example, a bird stretching out its wings. Keep focused on that bird and look at what they do in the moments before exhibiting that behaviour. Being able to recognise those simple signs will help you better predict when to hit your shutter and capture your desired shot.
When hitting that shutter, make sure your camera is ready to go. I recommend a minimum shutter speed of 1/2500sec and an f-stop above your widest and select the continuous focus mode.
Commit your composition
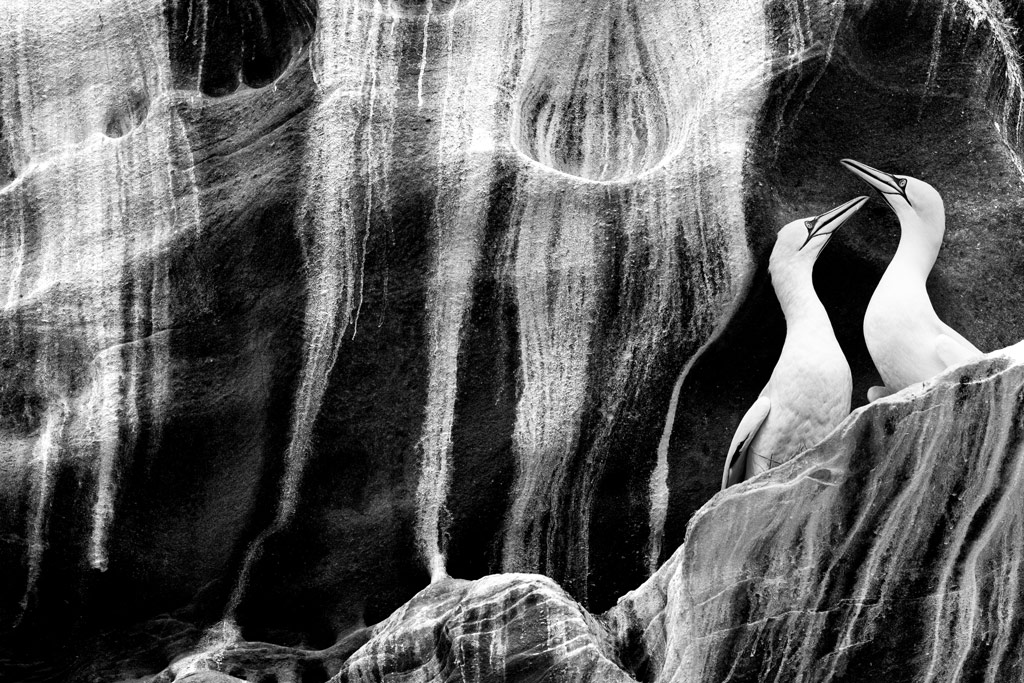
It’s easy to get carried away chasing a seabird with your lens, but a more considered approach will lead to a much more satisfying result. I like to discover my composition first then patiently wait for the seabird to enter my frame. By doing this, I can capture images with my desired elements like bokeh, backlighting or a white background that also include my chosen subject. If I were to track the bird aimlessly, it is unlikely that I would achieve everything that I wanted in one shot. This method can be a little risky, but I personally think that it leads to quality over quantity.
Follow the ‘check, clean, close’ rule
Predators like rats and stoats can wreak havoc among seabird eggs and chicks if they arrive in a colony. So, it’s vital that if you visit a seabird colony, you prioritise biosecurity (the practice of protecting places from the threats posed by introducing new diseases or types of plants/animals that do not naturally occur there). All seabird colonies have emergency response plans, but the best way to keep precious chicks and eggs safe is to stop predators reaching them. So, if you’re planning a trip to an island, be sure to check your bag for stowaways, clean your boots or shoes with disinfectant and tightly close any food containers (since they can attract unwanted attention).
Focus with your eyes first
Smaller seabirds, such as auks, have rapid wingbeats. In fact, a puffin beats its wings 400 times per minute. This means that their flight pattern is erratic and incredibly fast, making tracking and focusing (particularly with longer lenses) feel like an impossible task. But there are two solutions.
Firstly, observe the bird. Most seabirds will wheel around their nest/ledge before landing to avoid any lurking predators and this behaviour will give you multiple chances to follow them or to identify where they might land and remain focused on that spot.
Secondly, it can be useful to focus on the bird from a distance and keep them in your frame as they fly closer towards you. This can be an easier technique than expecting your lens to lock onto focus on a close-up, fast-moving subject.
To photograph a bird in flight, it is best to make sure your camera is in a continuous focusing mode such as AF-C or continuous servo. It is also very important to choose the correct focusing area such as Dynamic, 3D, Group or Zone.
Work with the weather
Conditions at a seabird colony are unpredictable and of course, out of your control. Whether you’re shooting on a remote island or a mainland cliff, you need to be technically prepared for what the weather throws at you and know how to adapt with your camera settings to the conditions you have. This means that you can begin to work with the weather and use it to your creative advantage. On a rainy day, you could slow your shutter down to incorporate the rain drops and add some mood to your image. On a sunny day, try positioning the light behind your subject for a backlit effect.
It’s easy to resent bad weather but arriving prepared with a backup plan as well as practising with your settings means that you can maximise your chances of success, whatever the weather. It’s important to remember that dark and dull weather will drive your ISO higher. Ideally, you should be keeping your ISO as low as possible but as high as needed to get your desired exposure with the shutter speed and aperture you require.
Rachel’s Kit List
Nikon Z 9
As Nikon’s flagship mirrorless camera, the Z 9 is unstoppable and never misses a shot. With 45.7MP, 120fps, pre-release image capture, deep learning AI and an AF system that redefines tenacity, the Z 9 has no misses, no limits, and no boundaries!
Nikon M7 + binoculars
A good pair of binoculars will help you to identify your subject from a distance or to focus in on a behaviour that looks interesting.
Seabird Identification Guide
Just under eight million seabirds from 25 species breed in Britain and Ireland, so it’s important to know how to identify them, where to find them and when to see them.
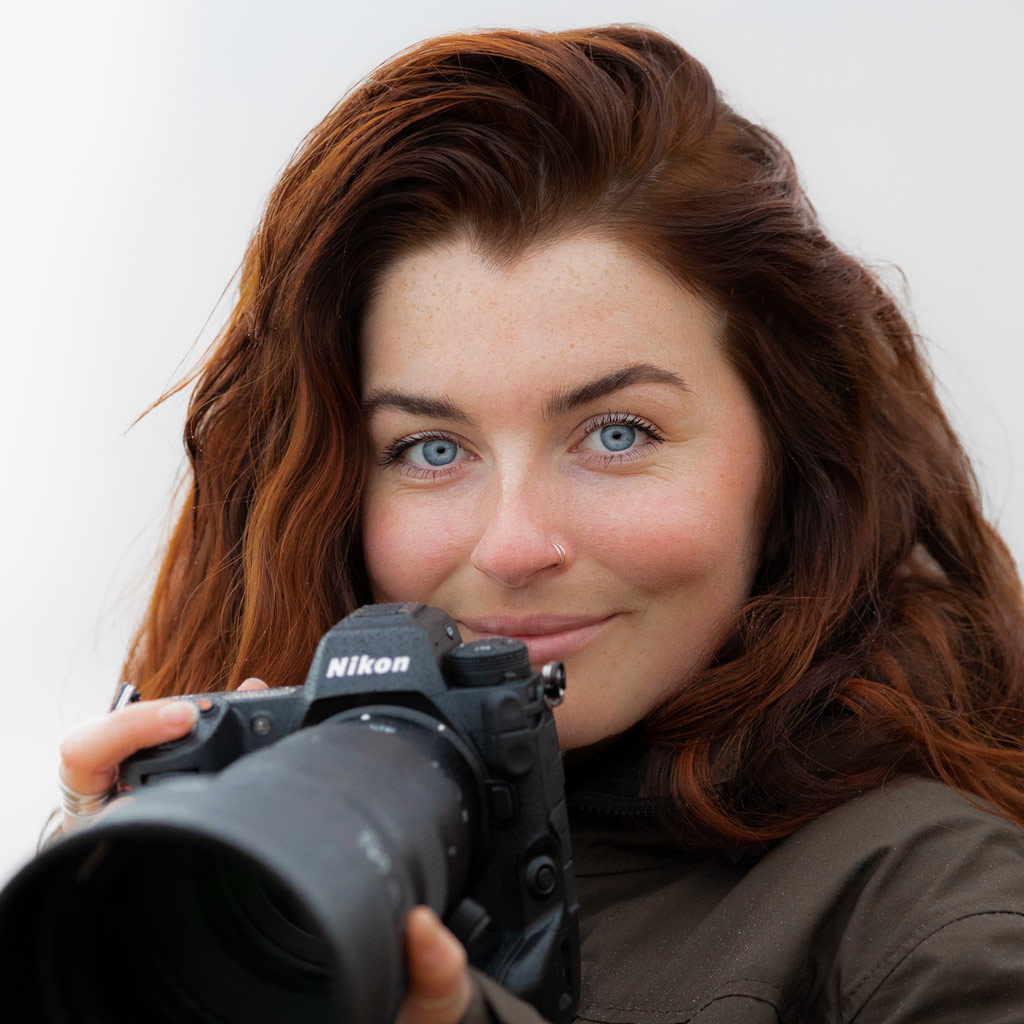
Rachel Bigsby
Considered to be a leading wildlife photographer amongst her contemporaries, Rachel Bigsby has achieved a wealth of accolades as a finalist in five of the world’s leading wildlife photography competitions at the age of just 26, with her passion for photographing seabirds and natural artistry. See more of her work at www.rachelbigsby.com or on Instagram @rachelbigsby
Bird Photography Tips from Jake Levin
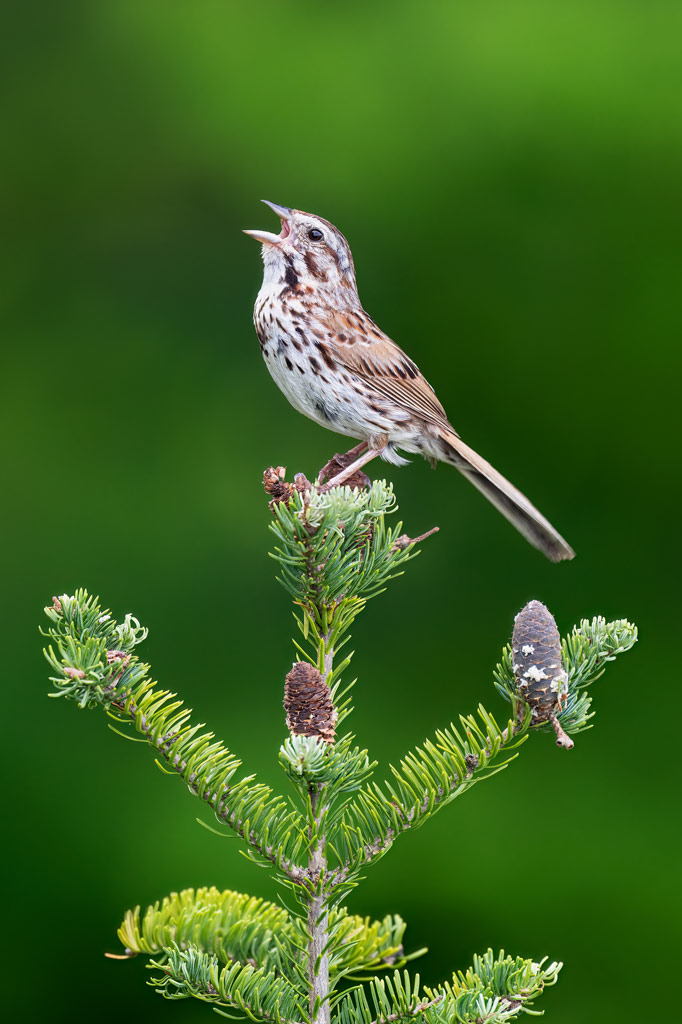
The best thing about photographing in the woods is the variety of birds that you can take advantage of throughout the year. In Canada, we have four distinct seasons, and each one brings different opportunities for photography. You get warblers coming through one month, wetland birds another month, and winter owls in another, all at the same exact location. Furthermore, the fall foliage season and winter snow both allow for some beautiful backgrounds, ranging from a kaleidoscope of colours to simple, minimal white. There are as many creative possibilities in the forest as you can come up with.

Keep the background soft, distant, and simple
You don’t ever want the viewer to be distracted by what’s behind your subject, so make sure it doesn’t compete for attention. My ideal background is a simple wash of colour, with little to no detail at all. I want whoever is looking at the photograph to see the bird first, and then allow the eye to explore the rest of the composition. The further behind the subject you can place the background, the more it will blur itself out and serve as a pleasing complement to whatever is in front of it.
Don’t worry if every single bit of the bird isn’t razor-sharp
If you have the eyes and head, that’s what counts. I often shoot in overcast conditions, whether in the woods at home or in the Costa Rican jungle, so I’m using large apertures all the way up to f/4 in order to have enough shutter speed (since even with a mirrorless camera, there is a limit to how slow you can go and still keep things sharp). It’s not unusual for depth of field to be measured in millimetres when you’re using long lenses, and even though stopping down won’t increase your depth of field by much, it will create a lot of unwanted detail in the background, where you don’t want it at all.
Match the light to the subject and its surroundings
If you’re shooting shorebirds in a river or at the beach, you want gorgeous, golden sunlight. Overcast will turn your water an unimpressive grey and dull down the already subtle colours of species like sandpipers and plovers. On the other hand, overcast works quite well for woodland birds, and strong evening light can be tough to manage when you’re surrounded by trees throwing off long shadows. Birds aren’t models, and there’s no union to call, so it pays to watch the forecast and make note of when the most favourable conditions are expected for the type of shooting you want to do.
Make sure the subject isn’t looking away
Many photographers use a general rule stating that the bird’s head should be turned no further away than parallel to the back of the camera. In an even better scenario, he will have turned his head toward you just a little bit for a more engaging pose. It is worth noting, however, that the rest of the bird’s body doesn’t have to follow this rule. In fact, one of my favourite poses is the ‘lookback’ or ‘over-the-shoulder’, where the bird is facing away from me, but has his head turned back around to look over his shoulder at the camera.
Manual mode is your friend
Even with all the advances in autofocus that have appeared over the past few years, you still have to expose the image properly. Working in manual mode gives you the maximum amount of control over the ISO, shutter speed, and aperture, all of which can come into play when you’re faced with a challenging subject. Unfortunately, as far as camera tech has progressed, the in-camera meter’s best guess at the correct exposure often requires adjusting, and with automatic mode, you’re beholden to whatever exposure the camera thinks it needs. However, in manual mode, you’ll find that you can shoot a far greater range of subjects with a much higher level of control.
Jake’s Kit List
Long, fast lens
The longest focal length lens with the largest aperture that is reasonable for you to acquire. Several good-quality zoom lenses are now available that can work well if you’re just starting out.
A good, sturdy tripod and a gimbal head
Having a steady platform to shoot from is invaluable. Benro and Really Right Stuff both make excellent tripods. Gimbal heads like the Wimberley give you maximum control over your camera and lens while it’s mounted on the tripod.
Colour calibrator
This will allow you to consistently reproduce colour on your monitor in post-processing. Without calibrating your screen, you’re just guessing that the colour you see is correct. Calibration takes that variable out of the equation, and as an added plus, the calibrator handles almost everything automatically, no IT experience needed.

Jake Levin
Born in Washington, DC, Jake Levin is a Spanish professor and researcher in Montreal, Canada. His work can be seen at birdsbyjake.com and on Instagram: @birdsbyjake
Bird Photography Tips from Jack Zhi
I have been photographing birds for six years. I live in Irvine, California. When I first moved here from the Midwest, my son and I went on our bikes to discover the area. He found a place called San Joaquin Wildlife Sanctuary. We loved it. Pretty soon this place became my own sanctuary. I found myself taking a walk there all the time. I saw so many beautiful birds and it didn’t take long before I picked up a camera and started to photograph these amazing creatures.
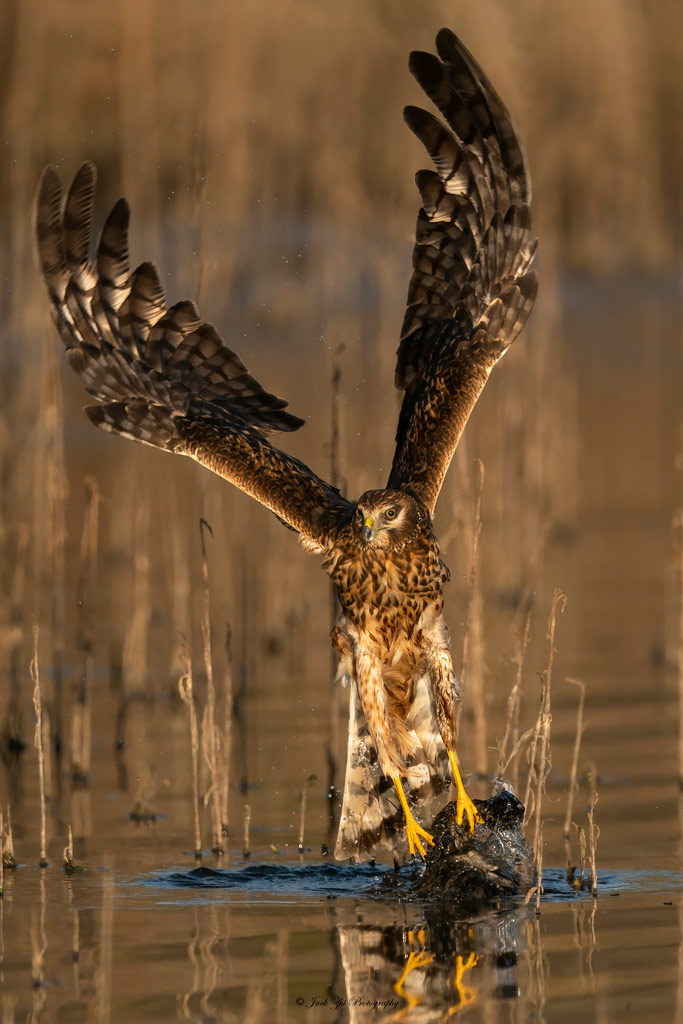
Capture the story and the emotions
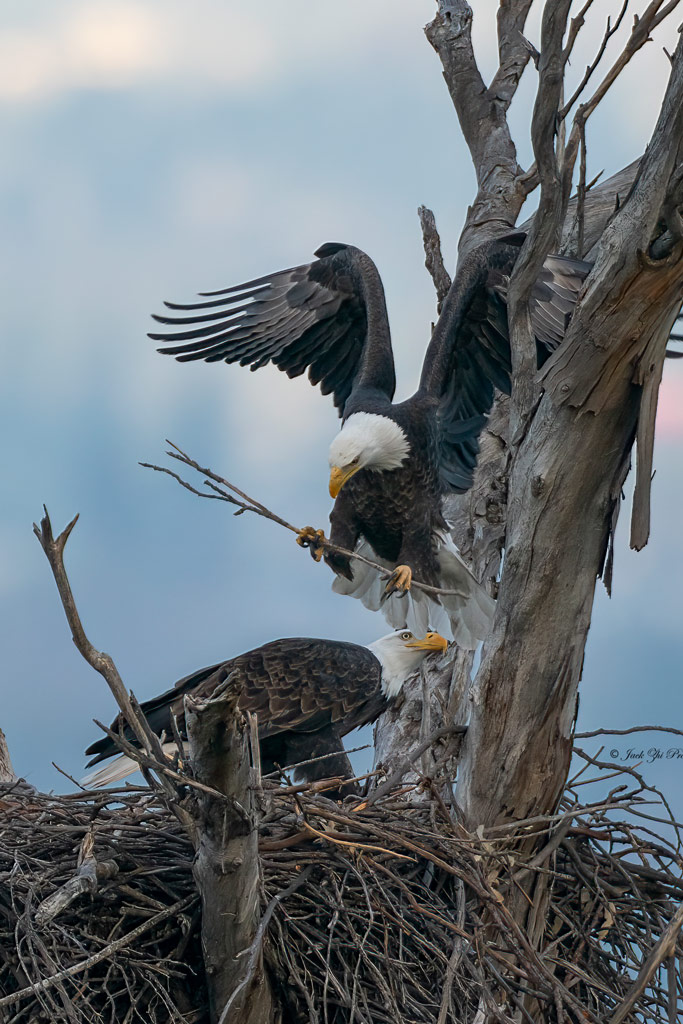
Birds are beautiful. It’s okay to capture a fly-by bird or a perched bird when they aren’t doing anything, but it’s much better if you can capture something that tells a story with emotions involved too. This was a shot of two bald eagles working on their nest. You can see the interaction and the eye contact between them. Two birds are usually better than one in this case. I went to this location many times and waited for something like this to happen. So yes, a side note is to be patient.
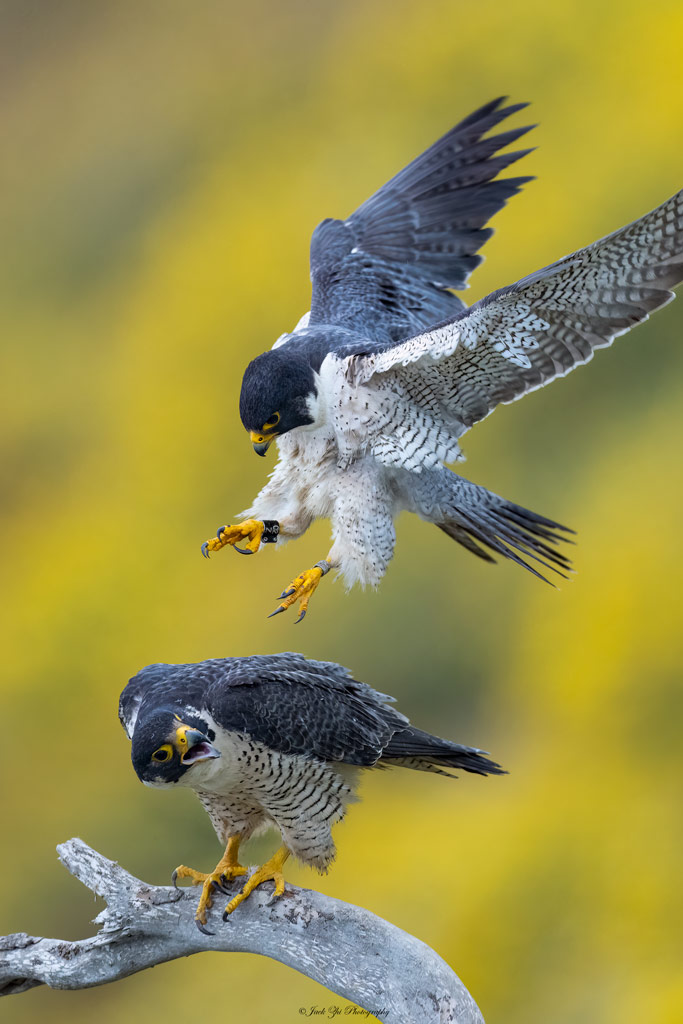
Look out for unique moments
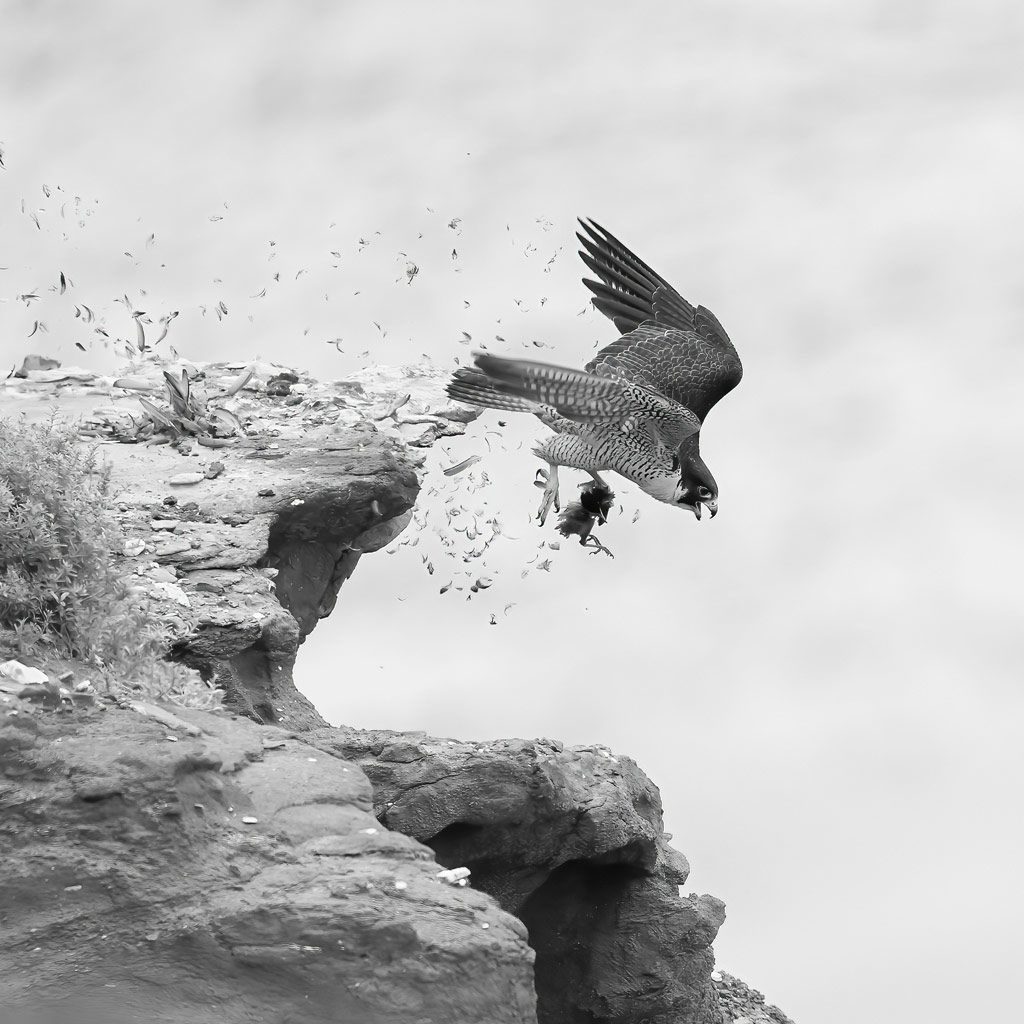
You’ve probably seen enough take-off shots, birds are simply beautiful when they take off. But keep in mind you want something different, something above and beyond a usual take-off, for example, a bird taking off with a prey in the talons. But even that is not all that unique nowadays. So, in this shot I captured the feather flying. The key is anticipation. Don’t tell yourself you’ve already got too many of these take-off shots and then miss a precious opportunity like this.
Think about the background
With a spectacular background, even a simple perched bird can make a beautiful shot. With a terrible background, however, even the most exciting action may not look good at all. That’s the importance of thinking about your background as well as your subject. Always position yourself to get the best possible backdrop. For this shot, I went to this location 30 times and I stayed in the same spot where the background worked for me. I couldn’t control the birds, but I knew I could try my luck. Yes, if I chased the birds, I could have gotten lucky, but I stayed patiently in my spot every visit I made and eventually I got my lucky break!
Putting it all together
An award-winning photo must stand out in multiple areas – storytelling, uniqueness, spectacular lighting, gorgeous background, top of the world image quality, perfect focus, etc. So, as you go out and have fun shooting, practise each of these tips and try to nail as many in your shots as you can.
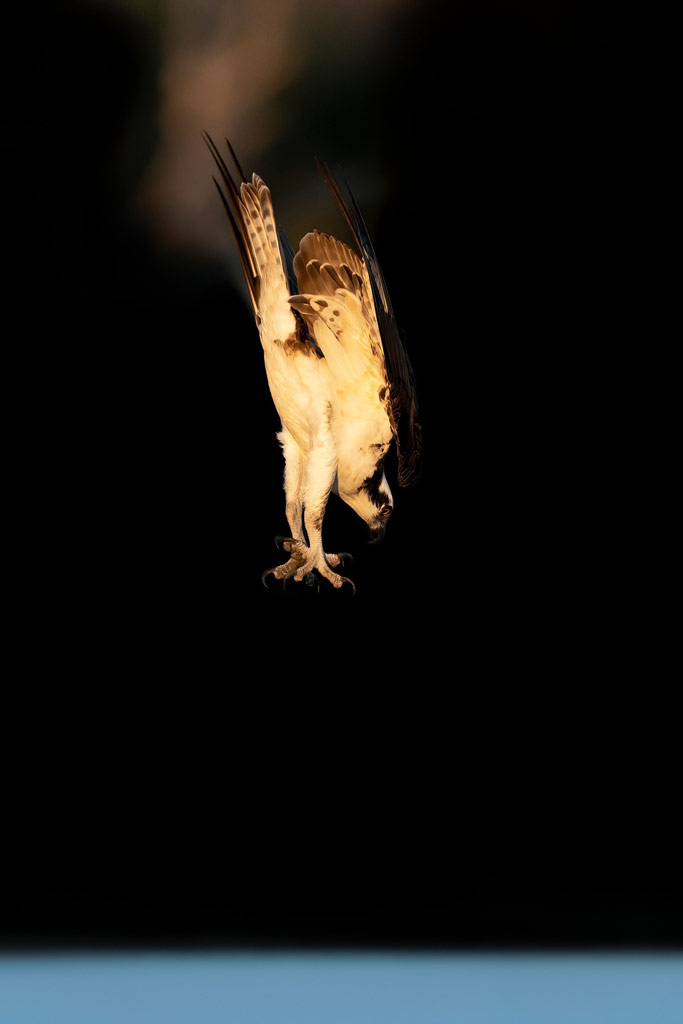
Look for light
Shooting in the wild is completely different from shooting in studios. You don’t get to control the lights; all you can do is to take what nature gives you. But believe me, Mother Nature is fair, and it is fantastic. So, pay attention to the light conditions you’re in and always try to take advantage of it. Quite often a few steps one way or another can present you with a change in light. So keep exploring. In this scene I was able to line up my shot with an area in dark shadow to bring out the diving osprey. With some luck, there was a bush in the background reflecting the sun, making it look like smoke coming out of the osprey as he dove into the water.
Jack’s Kit List
Sony A1
I use a Sony A1 with the Sony 600mm f/4 lens and I also have the Sony 1.4x and 2x Teleconverters for when I need that extra reach. If you don’t want to break the bank the Sony A9 II or a Sony A7R V with the Sony 200-600mm lens is a good combo.
Sony Imaging Edge Mobile app
If you’re a Sony user, the Sony Imaging app is a helpful tool to have. It allows you to transfer images or video to a smartphone or tablet, perform remote shooting, and add location information to images.
Additional but important accessories
To carry my kit, I use a waist bag for easy access. I also carry spare batteries, a remote control and extra memory cards. A good lens blower ball is a must – don’t go cheap on this because you’ll need it for a lifetime

Jack Zhi
Jack is a full-time computer engineer from the USA, and wildlife photography is his passion. He spends his weekends looking for birds and other wildlife in his area and it’s important to him to capture the beauty of nature as it happens. Jack was recently named this year’s overall winner of Bird Photographer of the Year. See more of his work on Instagram @jack.zhi.photo
Related reading:
- How to capture birds in flight and fast-moving animals
- Winging It: Photograph garden birds on a budget
Follow AP on Facebook, Twitter, Instagram, YouTube and TikTok.


