
Adobe’s AI photo editing tools are powerful but can also be bewildering. Martin Evening shows why they are particularly handy for turning your black and white photos into colour photos, using Neural Filters.
The art of hand-colouring photographs dates back to the early days of black & white printing, and was particularly popular during the mid to late Victorian periods. Yet, hand colouring black & white photographs has remained in fashion right up to the current day, especially among digital artists restoring old photographs.
Back in the 1980s, I worked as full-time assistant to the photographer James Wedge. His studio included a retouching desk where he retouched and hand coloured his black & white prints (see the book Painted Ladies by James Wedge). I remember how long it would take to retouch each photograph. Plus, it was not uncommon for a small mistake to ruin a photo and James would have to start from scratch with a new print.
Today’s retouch artists can work entirely on a computer, allowing easy correction of mistakes, and the gradual build up of the colouring effect, with confidence. We have all probably seen good examples of digital hand colouring work and admired the skill applied to make the colouring – in particular skin tone – look realistic.
Adobe AI Neural Filter – Big time-saver
As retouching jobs go, restoring an old black & white photograph and hand colouring the final image can still be a tricky, complex task. Fortunately, Adobe has recently added a colourising feature to the Neural Filters in Adobe Photoshop. This makes use of machine learning to automatically analyse and then colourise a photograph.
The early iterations of this filter were impressive for their instant results from a single click of a button. Compare this with attempts to apply a basic level of hand colouring to an image, whether by traditional methods or digital. Each time you choose to colourise a photograph in Photoshop, a preview of the image is uploaded to the Adobe server. From user responses to the results, the machine learning appears to have improved.
The results obtained with the latest iteration of this filter are now noticeably better in quality. Not only that, but this particular filter now comes with extra controls that allow you to manually edit the different colour zones and add different kinds of vintage colouring effects; either separately or combined.
To get started, go to the Filter menu and choose Neural Filters. Next, go to the Color grouping and click on Colorize. If it is the first time you are using this filter, then you will need to click on the cloud icon next to it to download and add to the other Photoshop Neural filters.
Adobe AI Neural Filter – Colouring black & white photos
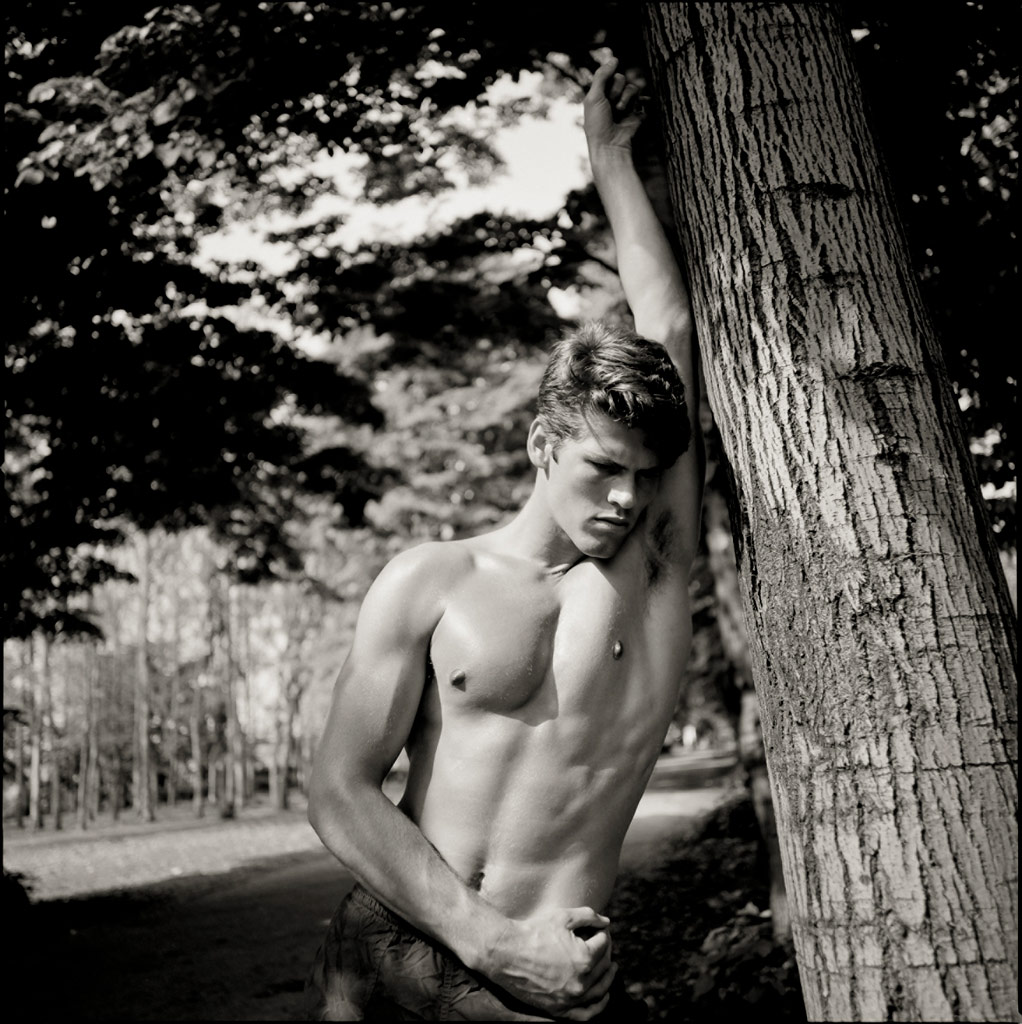
When you enable the Colorize filter the Auto Color Image option is switched on by default. This will upload a preview to the Adobe servers and, based on the AI analysis of the image content, automatically colourise the image. As one-click filters go, this initial interpretation was pretty good and worked well with the subject matter.
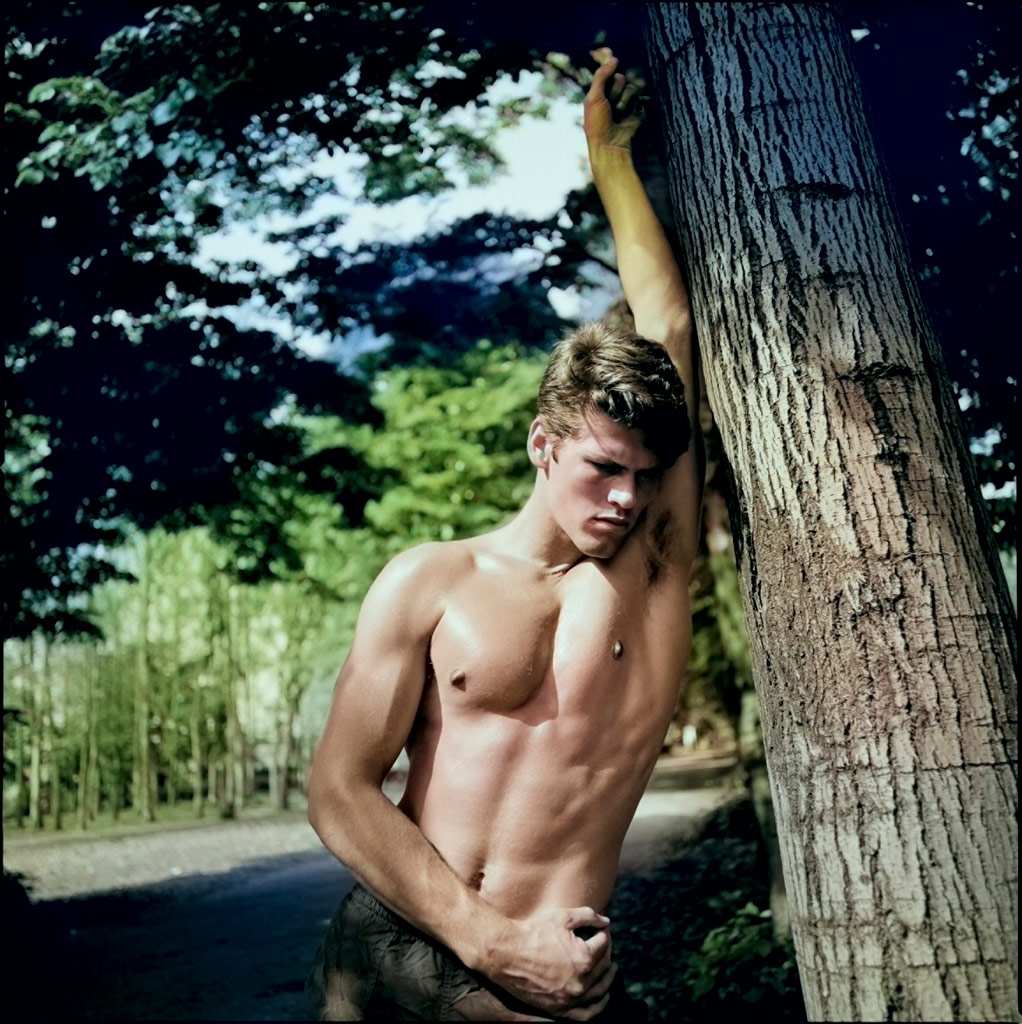
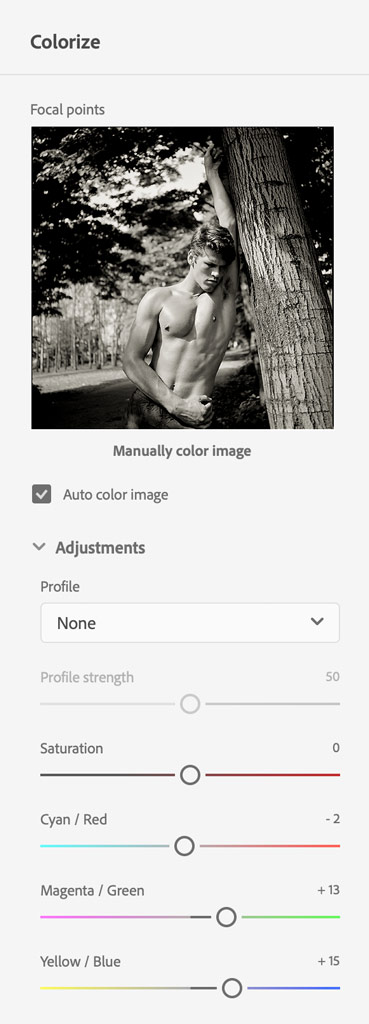
In this instance, I experimented with the Adjustments sliders to shift the overall colour balance, and emphasise cyan, green and blue. This refinement helped overcome the standard Colorize Neural filter look and applied more natural-looking colours. After refining the settings, click OK.
Adobe AI Neural Filter – Adding custom colouring zones
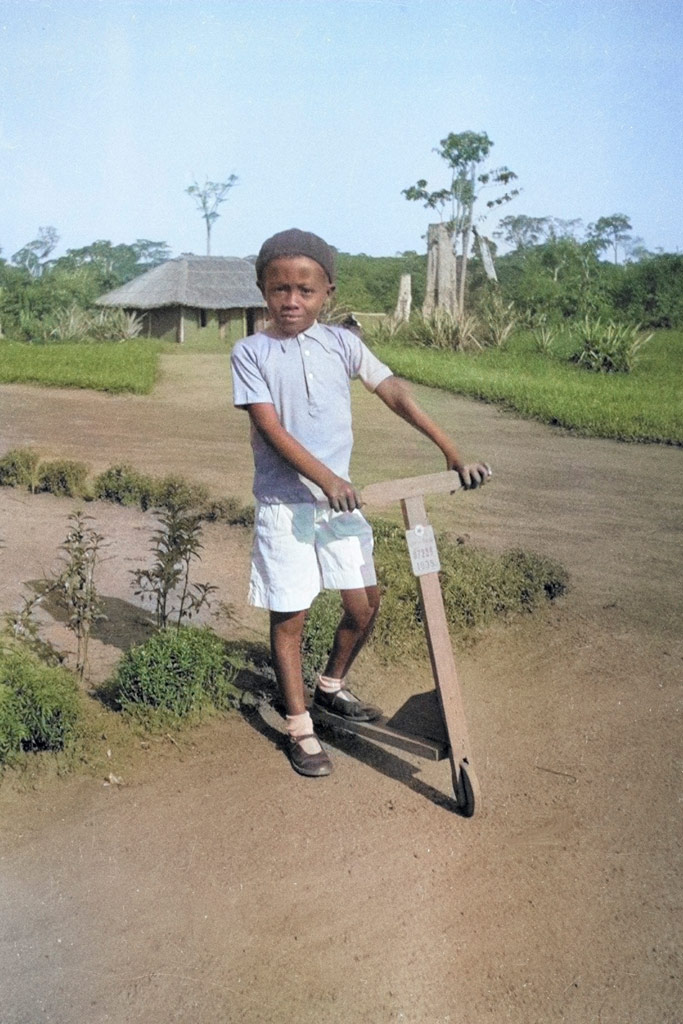
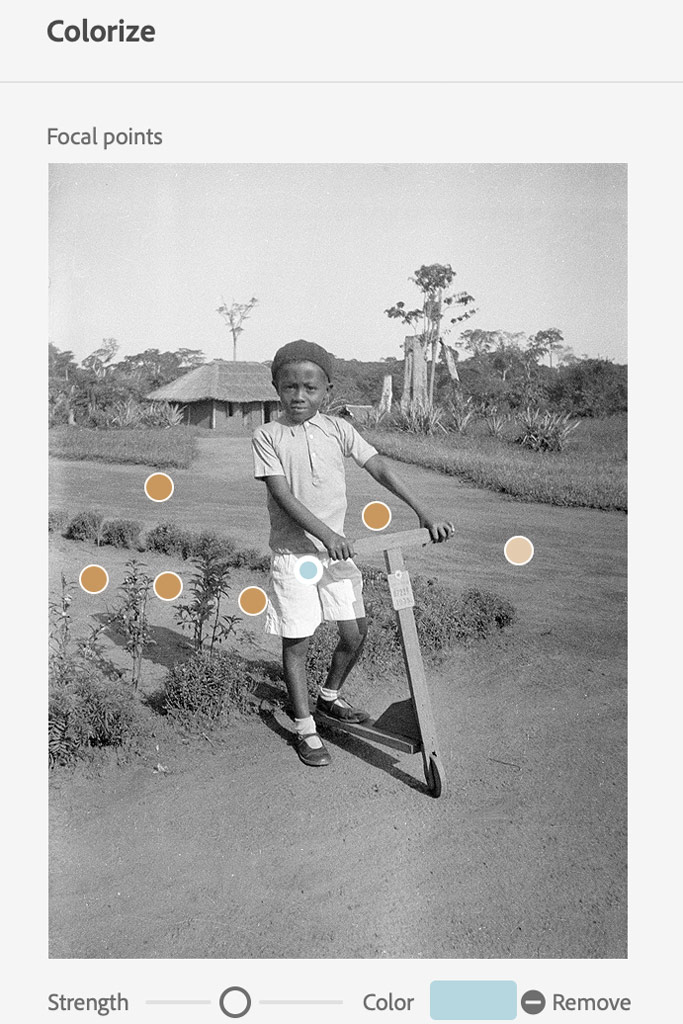
If basic slider refinements are not enough, you can manually edit the colouring zones. Clicking on the filter preview will add a new colour region. Then click on the colour controls to select a target colour to colourise that section of the image. What I do know of the photo below is that it was taken by my father some 90 years ago using a 120 roll film camera. The initial Colorize filter effect worked well enough, but failed to colour all the areas correctly. To improve the look of the image I clicked on the filter preview to add new colouring zones and manually edited the colours of the driveway as well as the colour of the shadow on the boy’s shorts. Overall, this image took less than five minutes to edit.

1. This is a portrait of one of several children my father took into foster care while living and working in what was then known as the Belgian Congo. I scanned the black & white negative, opened it in Photoshop and chose Filter>Neural Filters.
2. In the Neural Filters dialog I selected the Colorize option. This auto-coloured the black & white original image, but not completely. To improve the look of the image I clicked on the filter preview to add extra colouring zones.
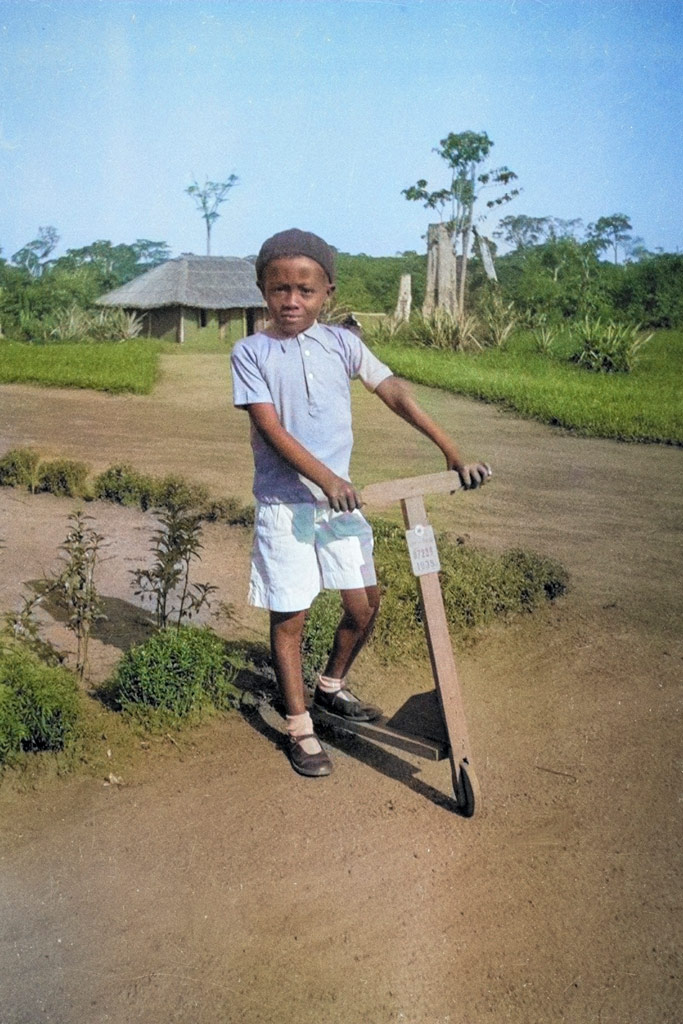
3. Next, I added a little extra tone editing using Lightroom to add more depth to the shadows and boost the colour saturation. The finished result looked as if it could have been shot quite recently using colour film.
Adobe AI Neural Filter – Applying vintage colouring effects
The Colorize filter can also be used to apply vintage-style colouring effects. These can be applied to either black & white or colour originals. The colouring effect looks can all be accessed via the Profile menu. On their own these apply effects that are similar to a Color Lookup adjustment in Photoshop, or a Curves preset adjustment. What I find more interesting here is to combine a profile adjustment with the auto colouring option.
Original Colour Image – Bell Lane field, Northchurch
In this example I combined a Neural Filter Colorize auto colouring combined with a Retro Bright profile to achieve an interesting false colour result. – Bell Lane field, Northchurch
More vintage colouring:
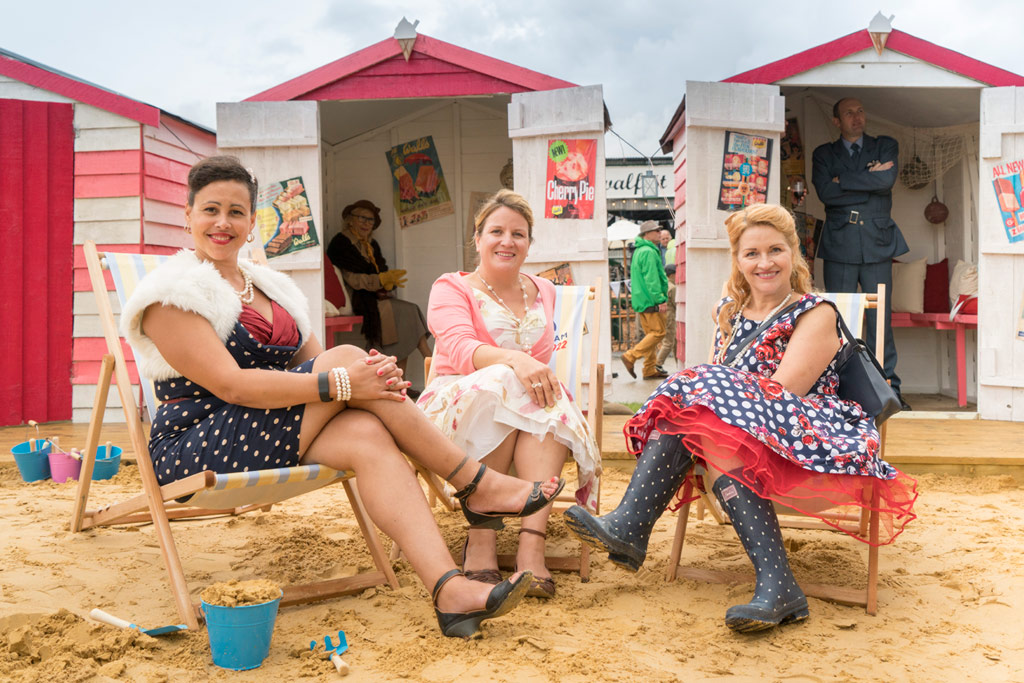
1. The original photograph was shot as a raw file and initially processed in colour to optimise for the colour and tone contrast.
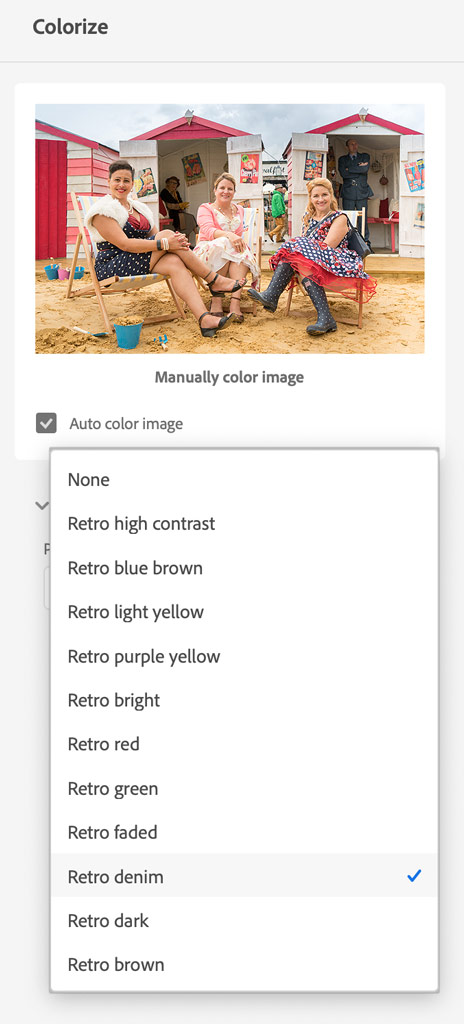
2. In this step, I kept the original image in colour, selected Filter>Neural Filters and selected the Colorize option. I kept the Auto Color Image option checked and from the Profile menu I then chose to apply the Retro Denim profile.
After:
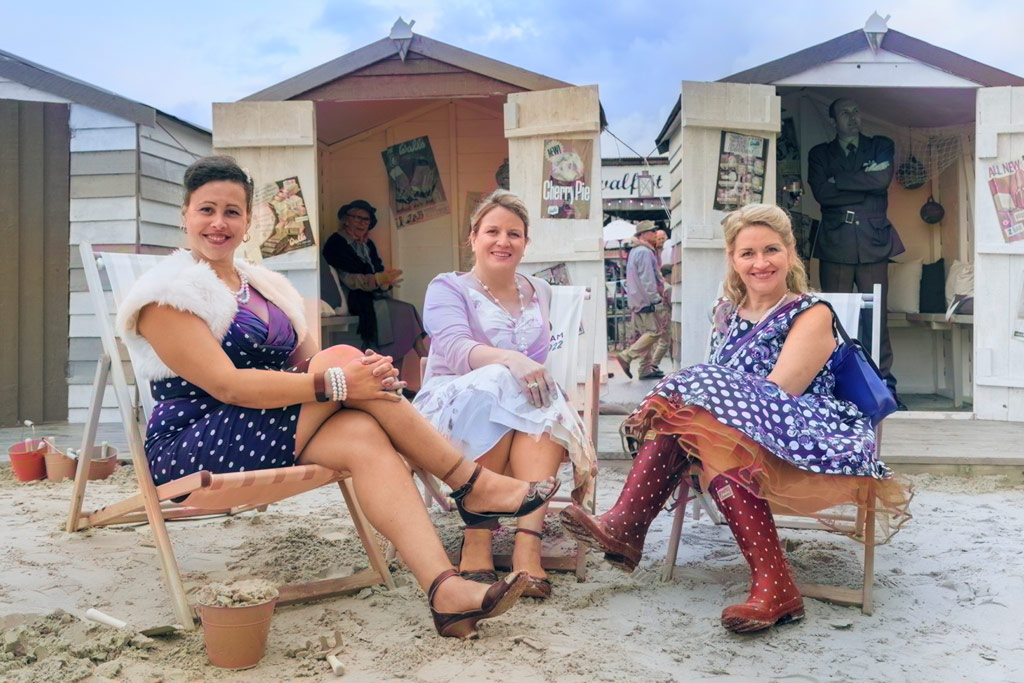
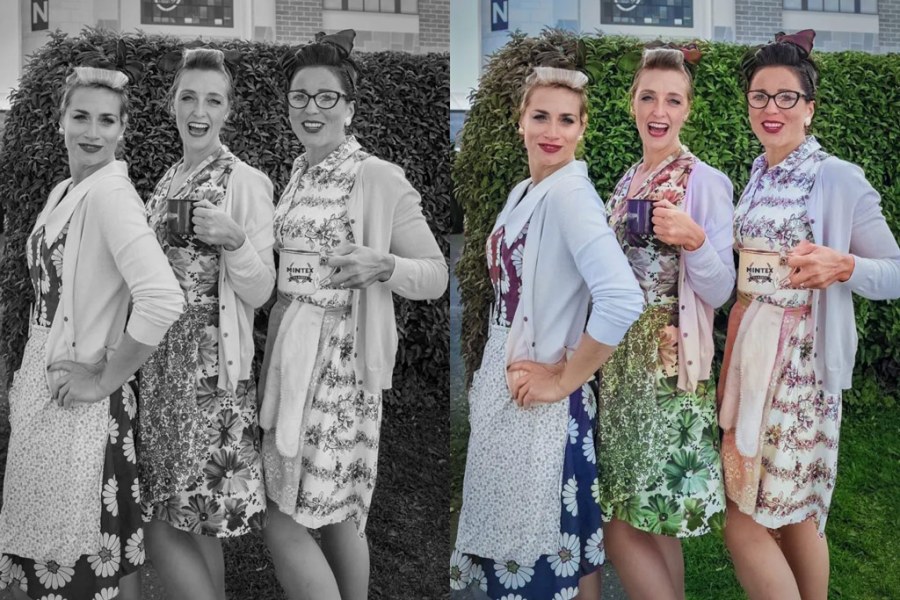
Three ladies dressed in retro sitting in front of beach cabins. Photoshop AI colouring example
Further reading:
- With Generative Fill, Adobe Photoshop takes AI to a whole new level
- AI-powered tools for Photoshop and Lightroom
- Best cameras for black and white photography
- Martin Evening: Remembering a fine author and AP contributor
Follow AP on Facebook, Twitter, Instagram, YouTube and TikTok.


