

Adobe has released a Photoshop update that includes a new improved Sky Replacement feature. This first appeared in Photoshop last year, but the results were a bit hit and miss and not always entirely convincing. Widely published Photoshop and Lightroom expert, Martin Evening, shows how the new additions work rather better
I found the previous sky-replacement feature only worked well if the sky in the image was clearly defined. This new version does a much better job of replacing the sky in almost any photo.
It achieves this through better blending between the subject and sky image. The only limitation is to make sure you have a good sense for which skies will work best with your subject image. There are 25 skies to choose from, although more can be downloaded and added for free via the Creative Cloud app. Plus, you have the option to import your own sky images.
Based on my own photographic experience it has been useful at times to replace skies when working on commercial shoots. For these situations, the feature fits the bill perfectly. Likewise, for anyone working on creative composite projects, such as creating of fantasy images.
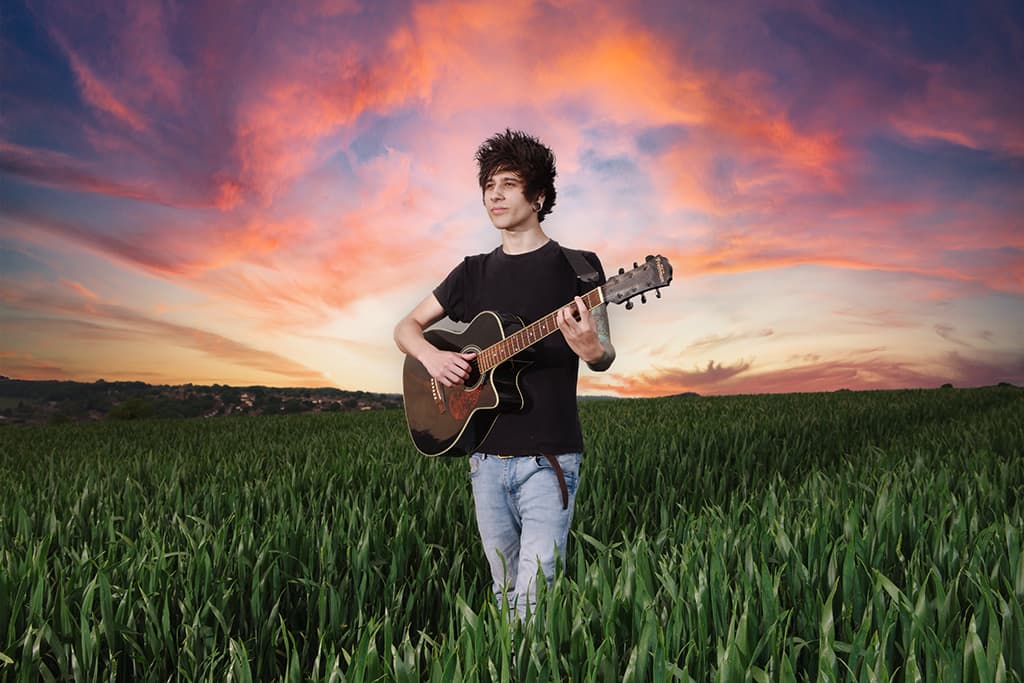
For other types of work, like factual reporting, or landscape photography there is a problem here. The main photo shows how the feature can work well. But in practice, where else could this image be legitimately used? You can forget about entering Sky Replacement photographs into competitions. All the major awards, as well as camera clubs are likely to bar such photos. That is, unless you can find a special Sky Replacement Photographer of the Year category!
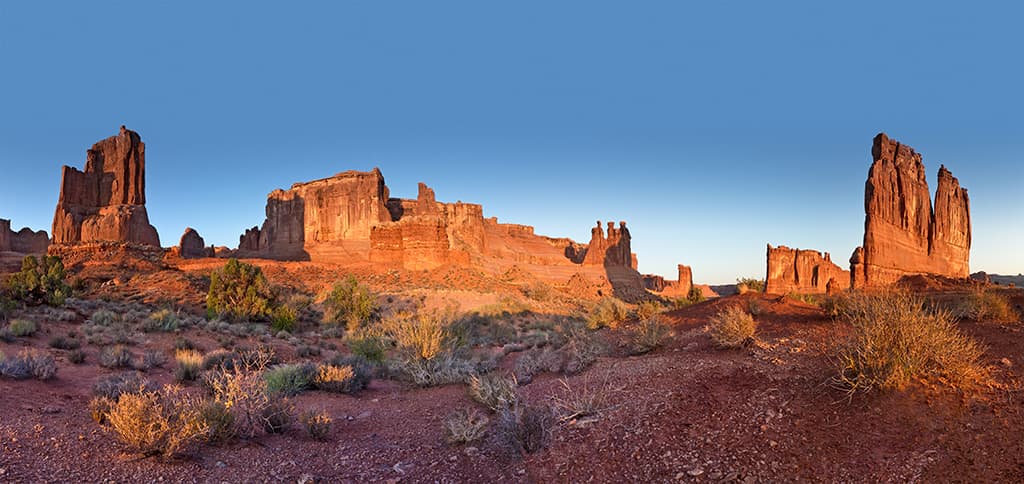
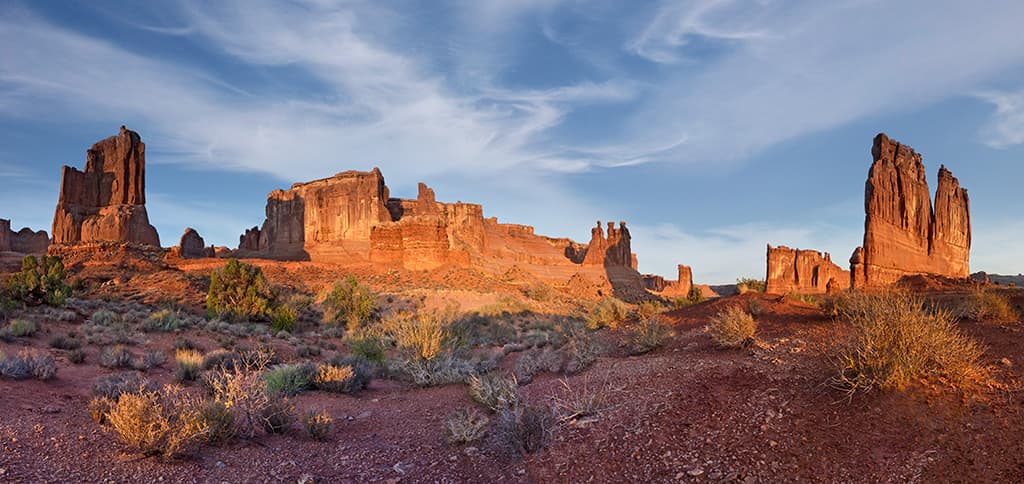
Before and after, with the Sky Replacement tools
Replacing skies step-by-step
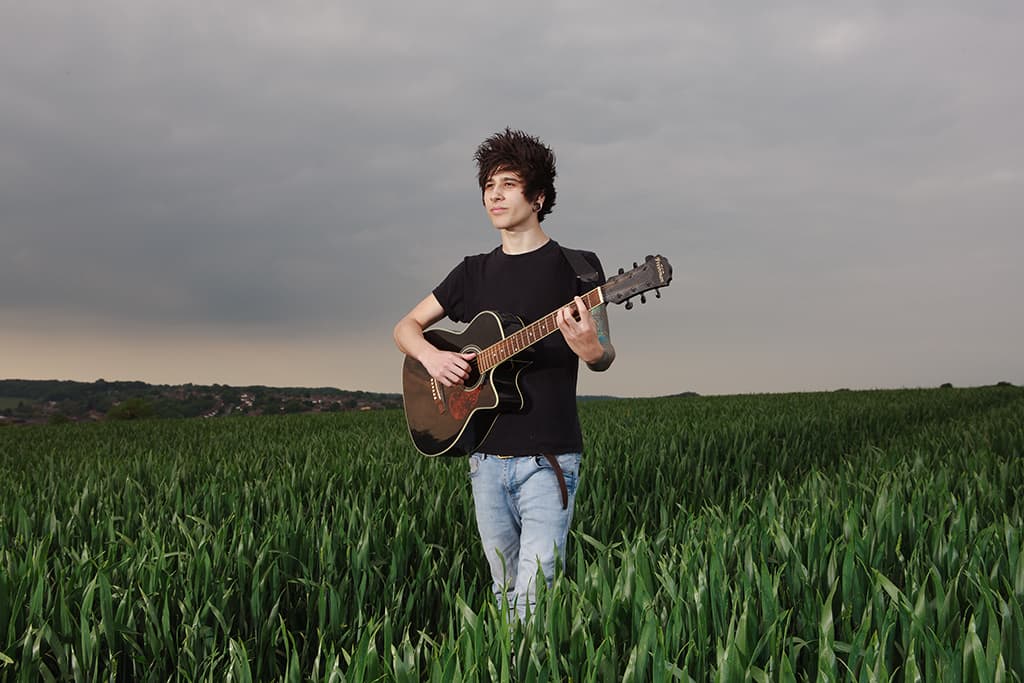
1 This shows the before version of the photo I was about to edit. I shot this on location in the late evening using portable flash heads. To start the sky replacement process, I went to the Edit menu and chose Sky Replacement.
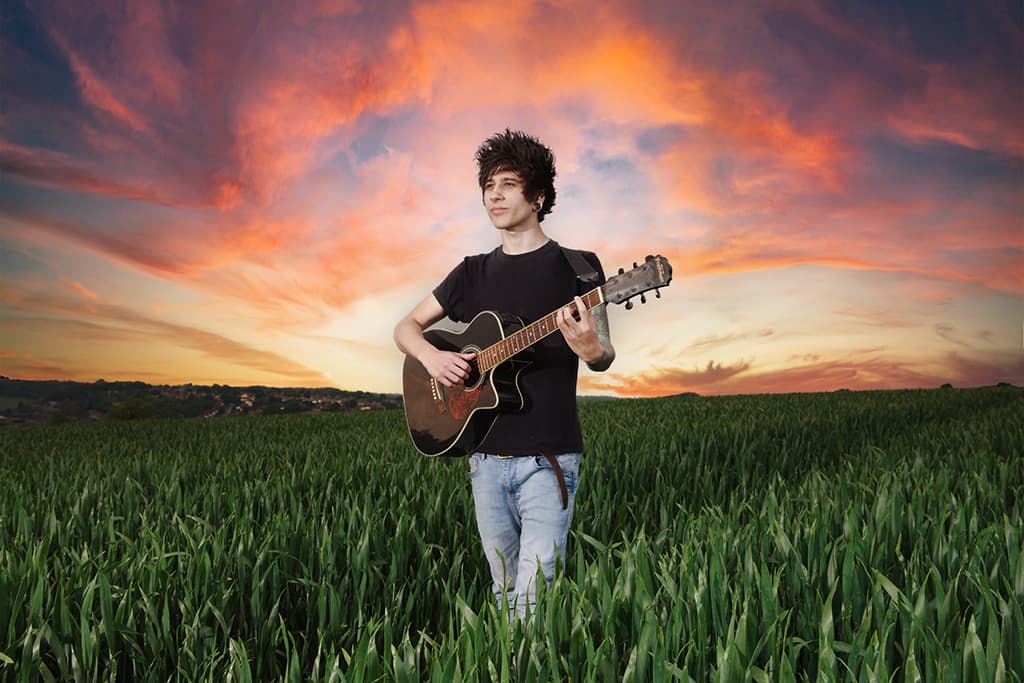
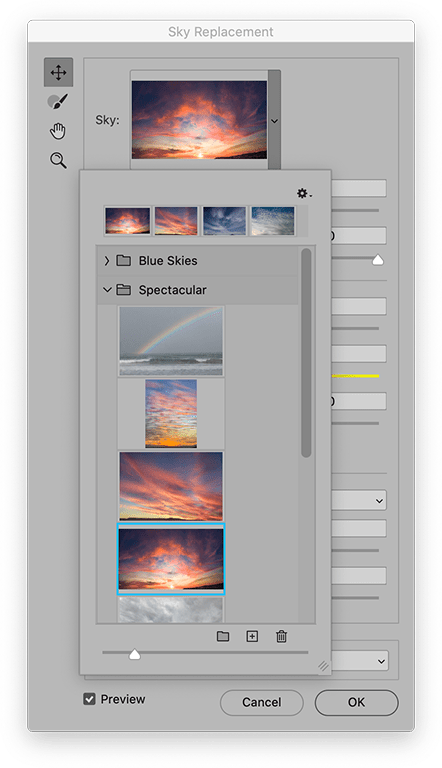
2 This opened the Sky Replacement dialogue shown here. I clicked on the Sky image preview at the top, expanded the ‘Spectacular’ folder group and selected the desired sky image to add to the original image.
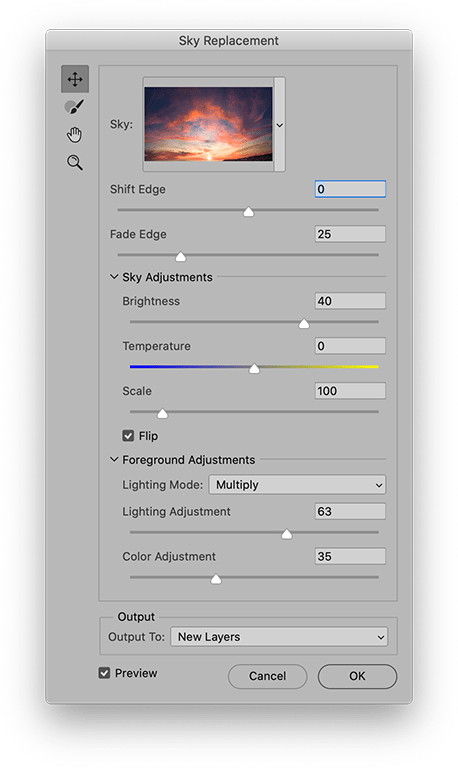
3 In this step I flipped the sky image and dragged the Fade Edge slider to the left to reduce the fading between the foreground and the sky boundary. I also adjusted the Sky Brightness to lighten the sky more.

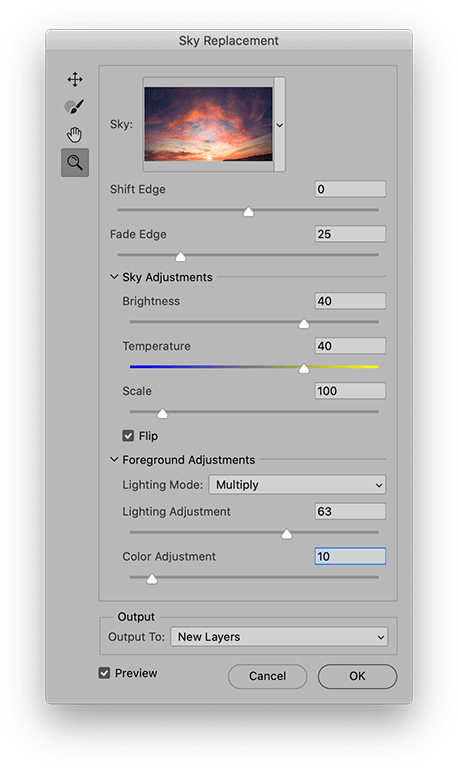
4 Lastly, I dragged the Temperature slider to the right to make the sky warmer in colour. A high Color Adjustment setting will harmonise the colours in the original photo with the sky colours. Instead here, I lowered the amount to preserve more of the original colour in the foreground.
How the sky replacement feature works
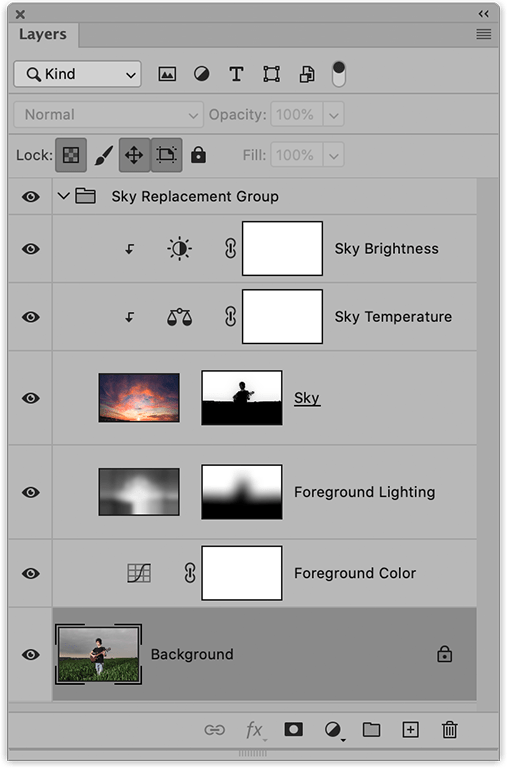
The Sky Replacement feature essentially combines the power of the Select and Mask with scripted actions to create smooth, blended transitions between the subject photo and the selected sky image. When you output the Sky Replacement result as ‘New Layers’, you will see a new nested group of layers added above the original image layer. There will be the masked Sky image layer.
Below this, a ‘Multiply’ blended layer that applies a smooth blending between the original and sky images. Some of the layer settings will depend on the adjustments you make in the Sky Replacement dialogue window. For example, the Sky Brightness and Sky Temperature adjustment layers seen here will only be added if you deviate from the default slider settings.
About Martin Evening
Martin has a background in advertising and landscape photography. He is also well known for his knowledge of Photoshop and Lightroom, plus books on digital imaging. He also runs the Evening Class feature in AP, where he has lots of great suggestions for improving the editing of your images. Submit any images for consideration to [email protected] with the subject line as ‘Evening Class.’ For more on Martin see www.martinevening.com
Further reading
Latest Photoshop updates for desktop and iPad


