Your guide: Tesni Ward
Tesni is an award-winning professional wildlife photographer based near Sheffield. She also shoots projects worldwide to promote conservation and education through her images. www.tesniward.co.uk Instagram @tesniward @badger_diaries.
For many years, Adobe programs were the go-to for post processing, and whilst several new options have come along in the past few years, it’s still a key player in the market and preferred by many. With the Creative Cloud photography plan, photographers have access to both Lightroom and Photoshop, but for the new user, they can be overwhelming and confusing given the wide range of tools at your disposal.
What is Mezzotint? Or Posterize? The truth is there’s a lot of ‘fluff’ on these programs: tools you’ll never need to use or even know what they do. It’s best to focus your attention on the ones you’ll use frequently which will have a noticeable impact on your images and workflow.
Before you even get to post processing, I strongly recommend you shoot in the raw format. JPEG files are convenient as they can be viewed and/or posted anywhere, plus they won’t take up too much space on your memory card, computer or hard drive, but a JPEG is a compressed file format meaning, as a general rule, you lose a lot of data – and this data is important when it comes to processing.
Even if you’re just starting out and aren’t yet comfortable processing your images, shooting JPEG+RAW will future-proof you so that when you’re more confident with your processing workflow, you can revisit them and, all being well, improve them further.
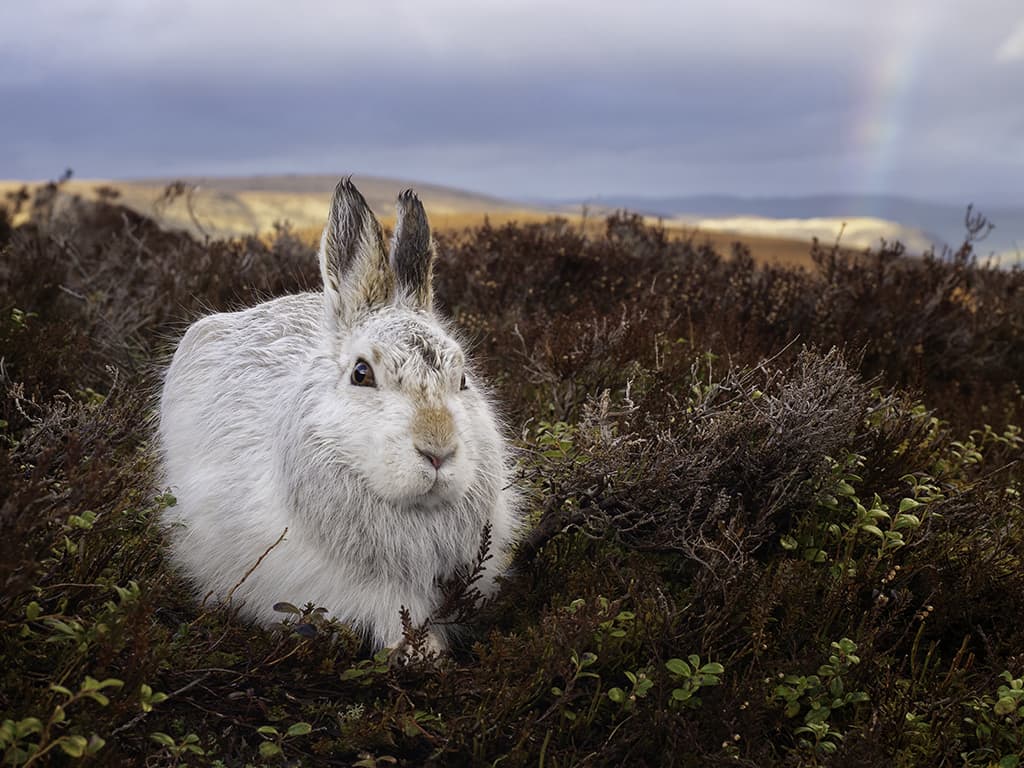
Over time you’ll develop your own unique approach to processing your images but it’s important to invest some time early on to understand which tools are relevant to you and how they can affect your images. Some photographers will use just one program but personally I have a combined approach with Lightroom and Photoshop as they both have their own unique applications, some more user-friendly than others. For the purpose of this tutorial we will focus on Lightroom.
Lightroom processing step by step
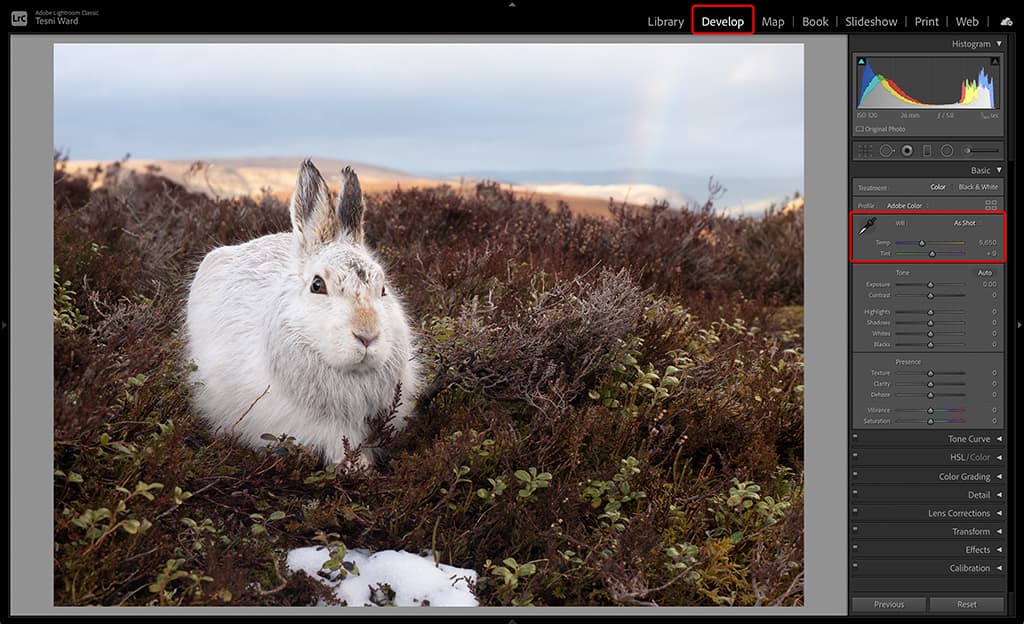
1 Basic Tab – White Balance
If you were slightly off with your white balance when shooting it’s easily fixed here. Use a neutral part of your image like a rock as your reference and move the ‘Temp’ slider so that it looks natural (a rock shouldn’t look orange or blue unless in specific light conditions). Be very subtle if moving the ‘Tint’ slider (+/- 10 at the most).
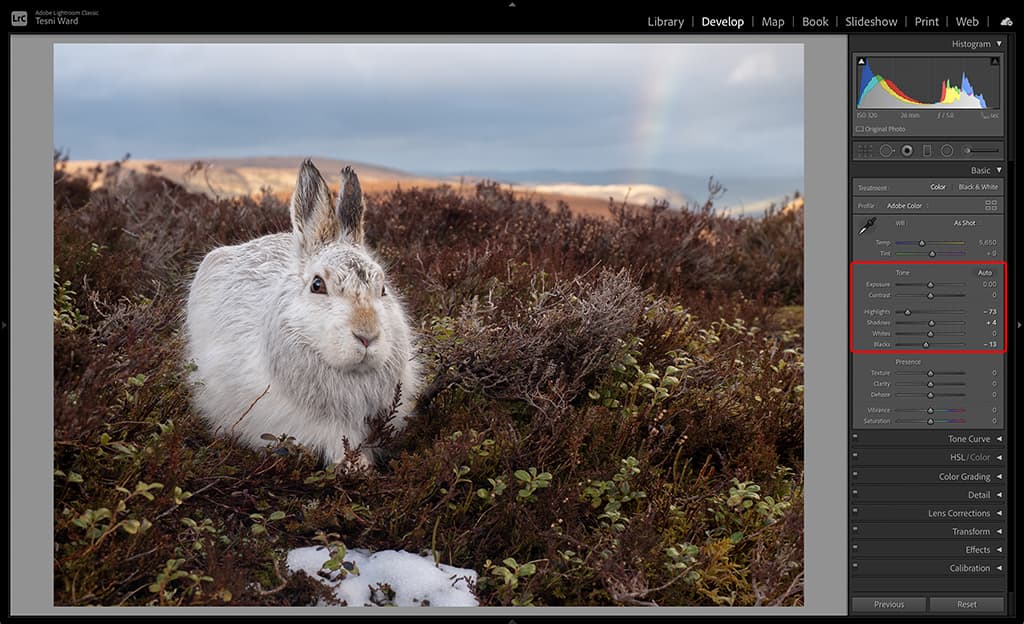
2 Basic Tab – Exposure
If you need to adjust the overall exposure of your image or focus on highlights and shadows, it’s best applied here. Be aware that if you try to brighten the shadows/blacks too much, you will introduce grain and noise, so be subtle where possible. You can also reduce the blacks to add contrast (-15 at the most).
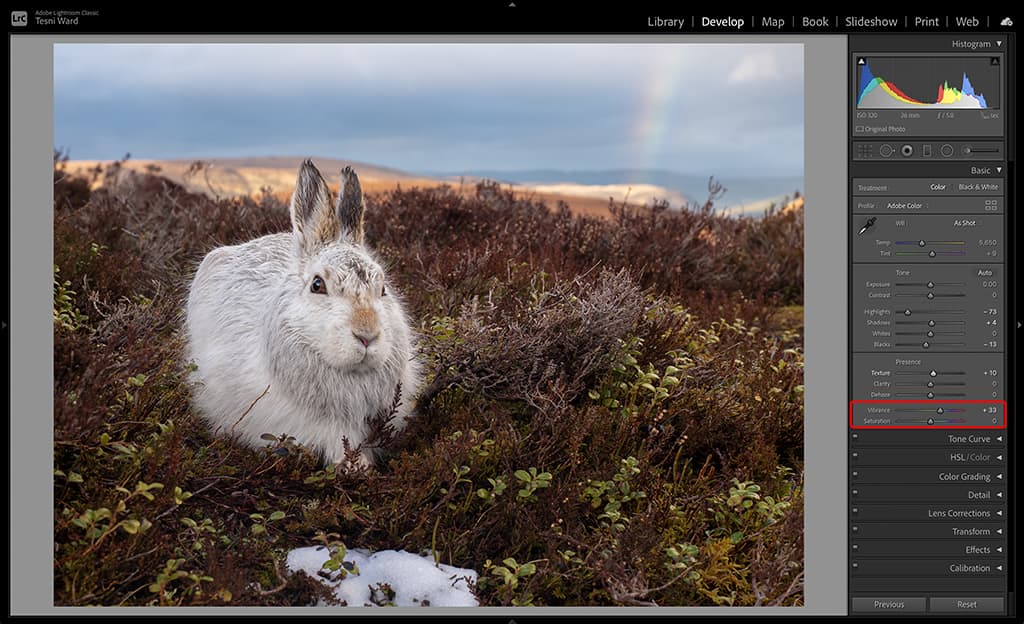
3 Basic Tab – Vibrance & Saturation
One of the challenges with raw is the file can look flat when initially opened, so the original colour will need to be brought back. Vibrance will increase the saturation of colours in the dull areas only; Saturation will increase it over the entire image. Vibrance is my preference but every image is different so do experiment.
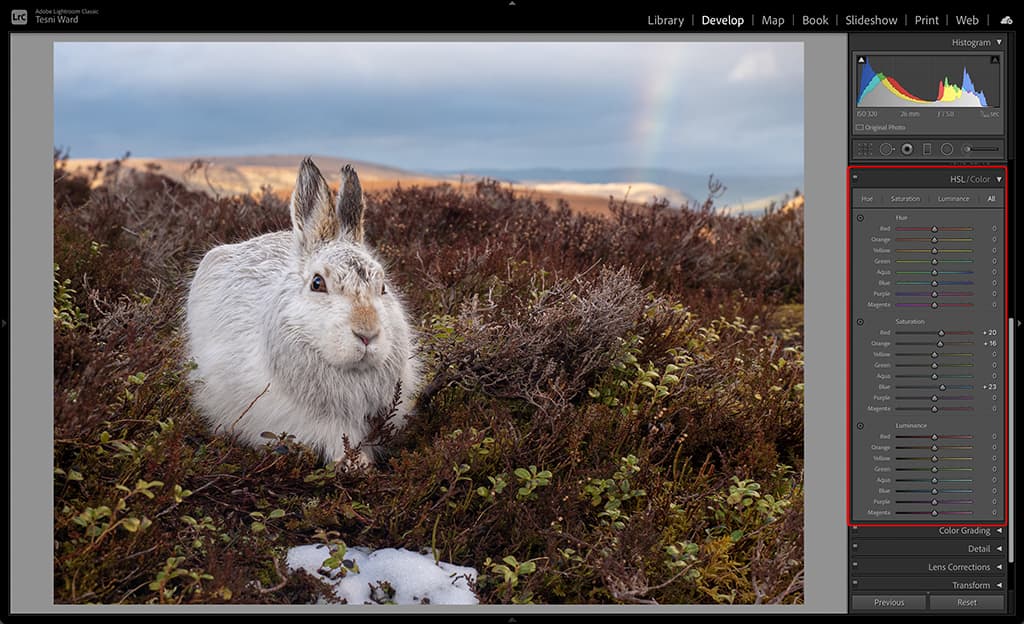
4 HSL/Colour
Sometimes specific colours will look unnatural or overly saturated in an image (e.g. polarising filters can turn foliage neon green in certain conditions) or perhaps we want a certain colour to pop more than others. This is done in the HSL/Colour tab: adjust the Hue and Saturation of your desired colour and don’t worry about luminance!
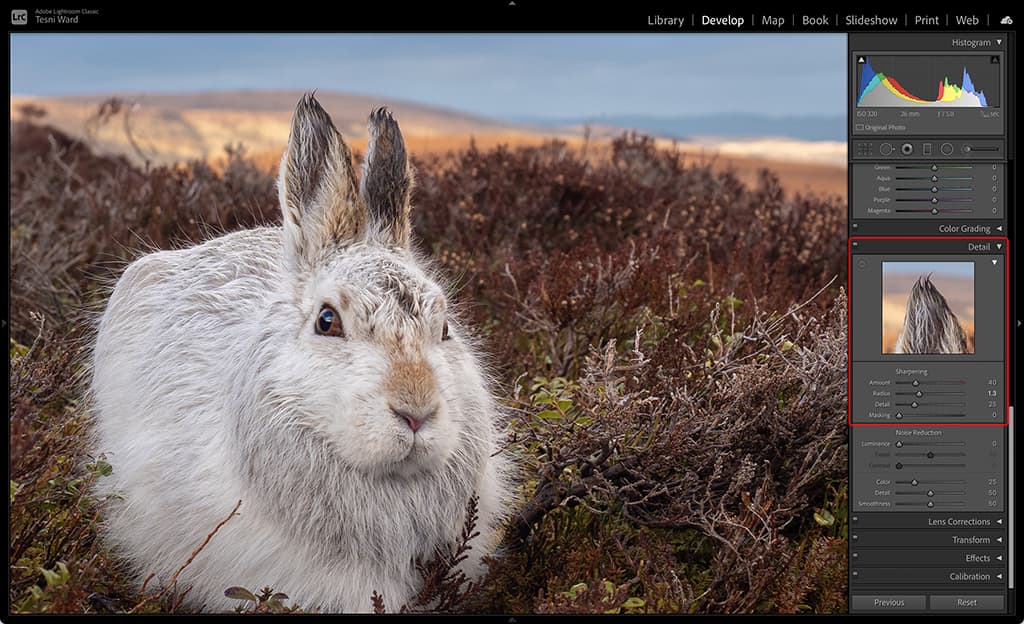
5 Detail Tab
If you need to apply any sharpening to your image it’s done here. ‘Amount’ will add grain to the image so don’t overdo it, whereas ‘Radius’ will focus more on the edge thickness, so don’t push it too far with finer details like fur. Texture in the Basic tab can also apply a very aesthetically pleasing sharpening to your image.
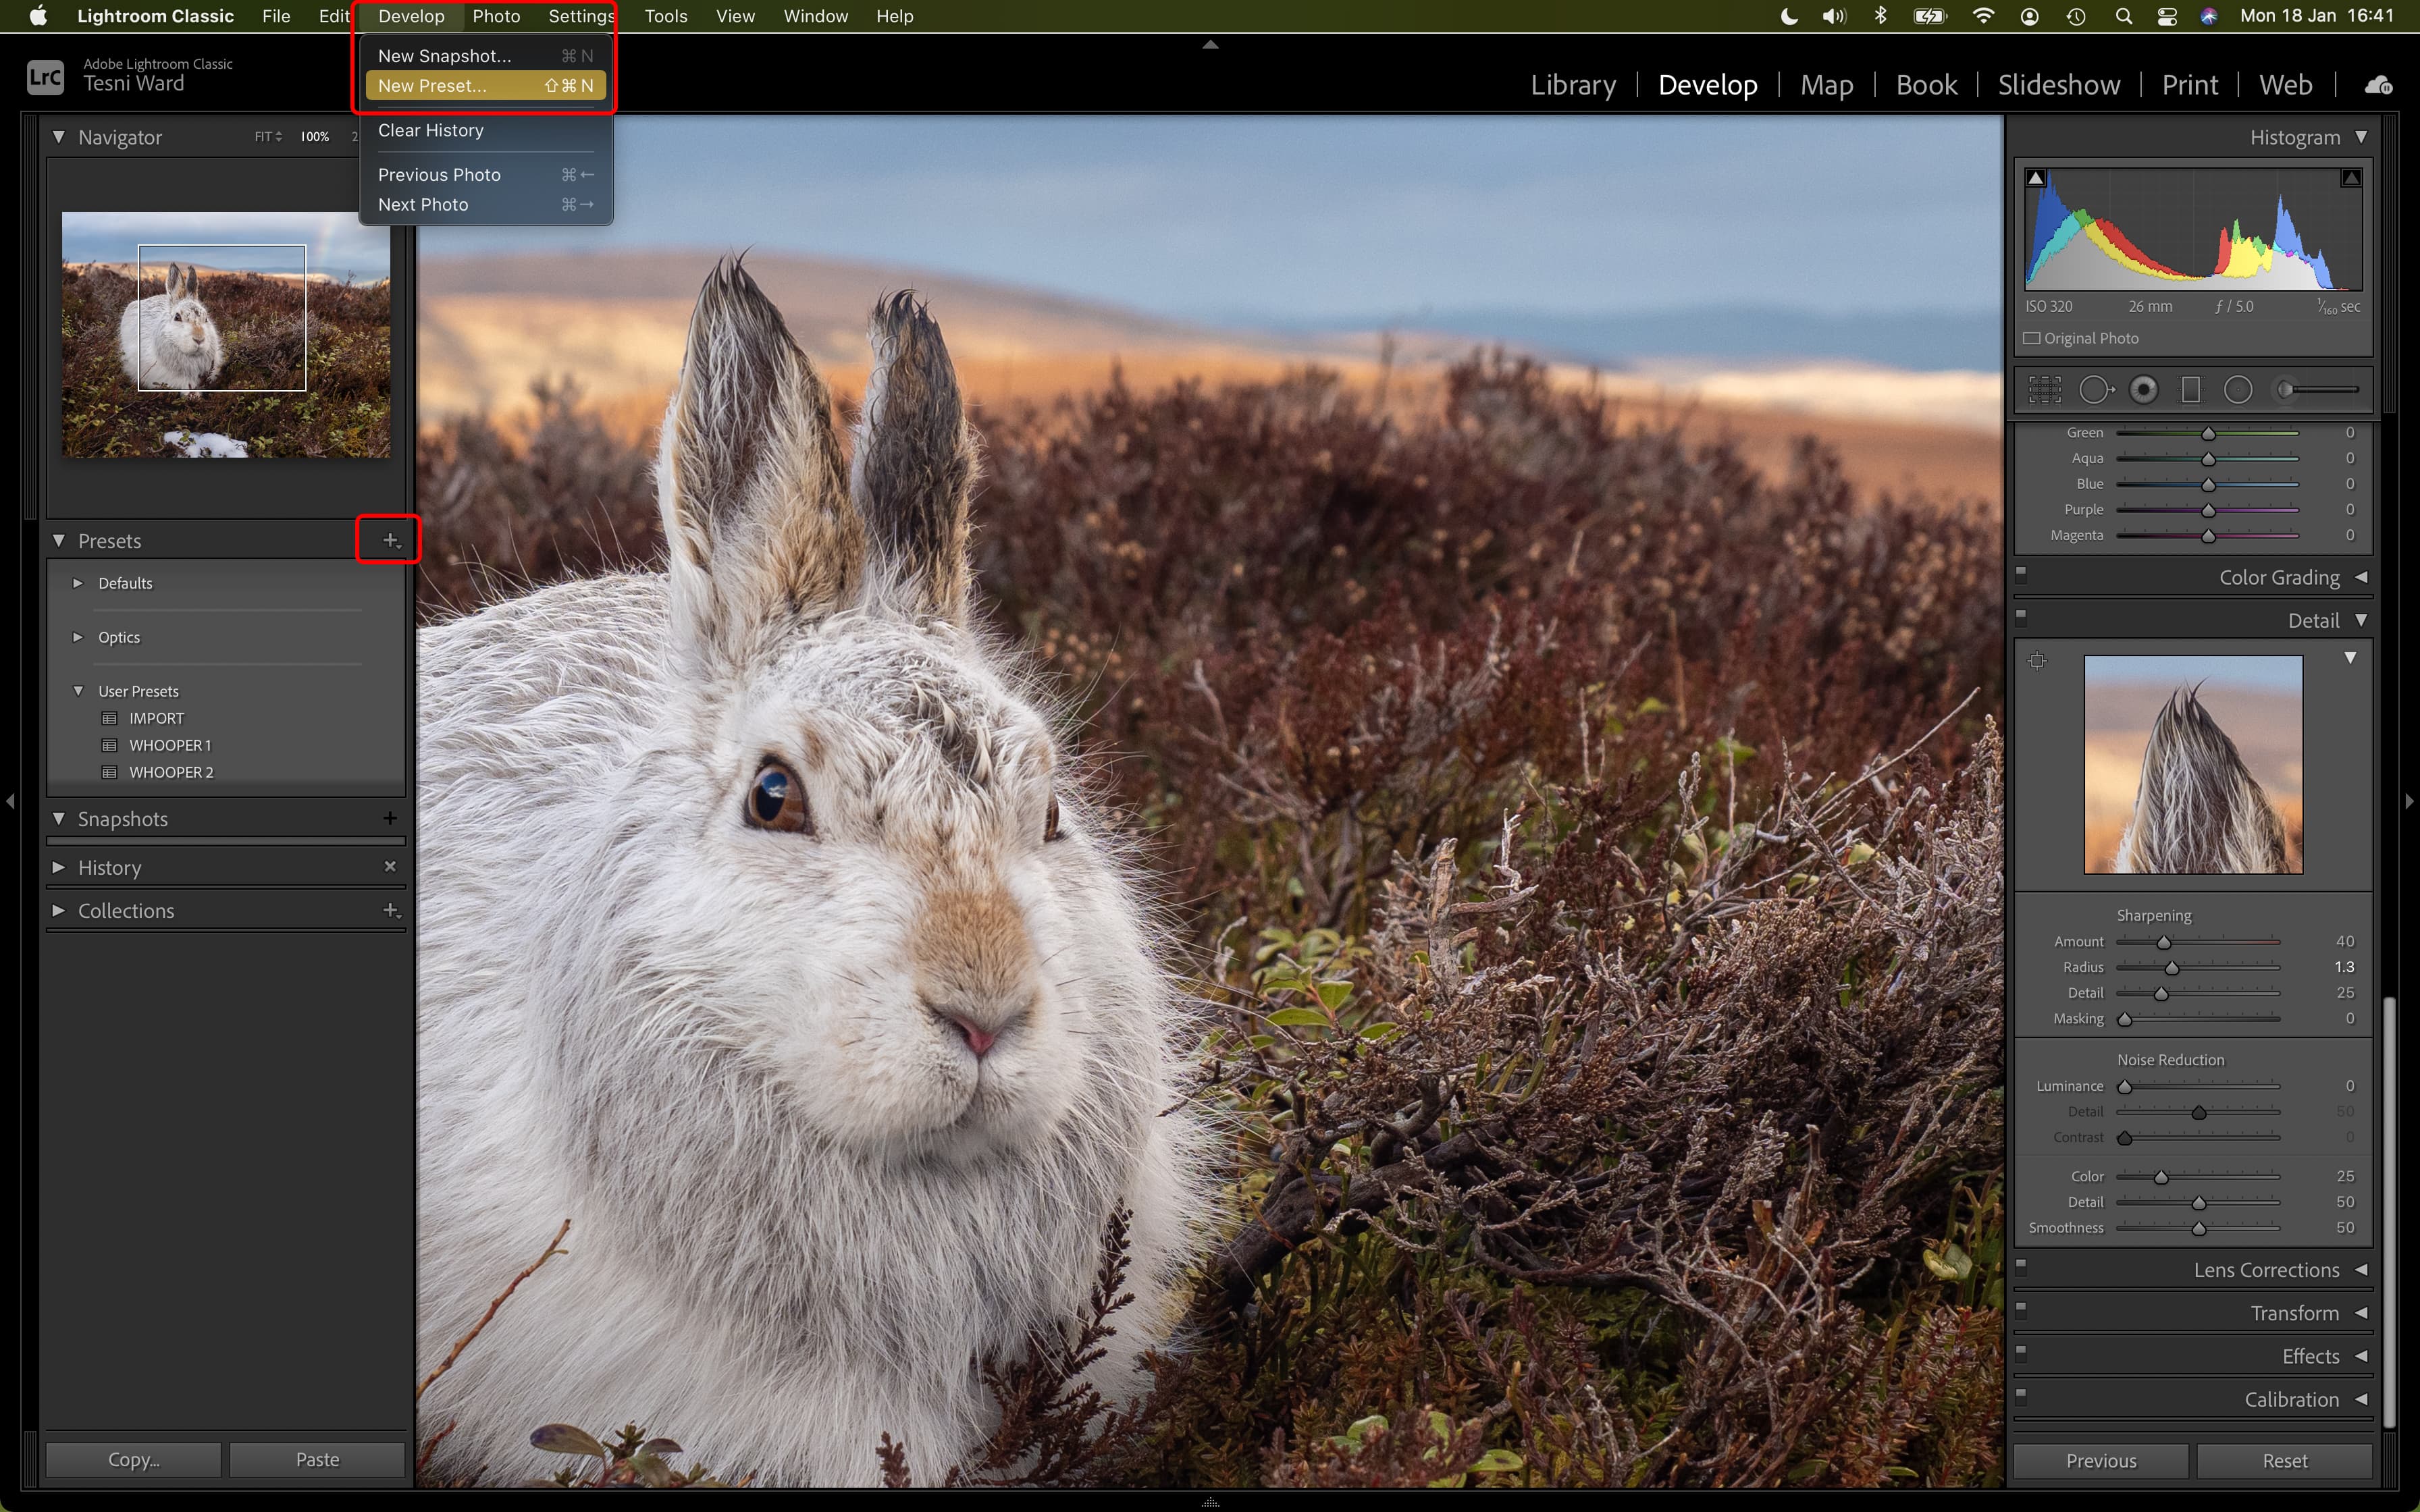
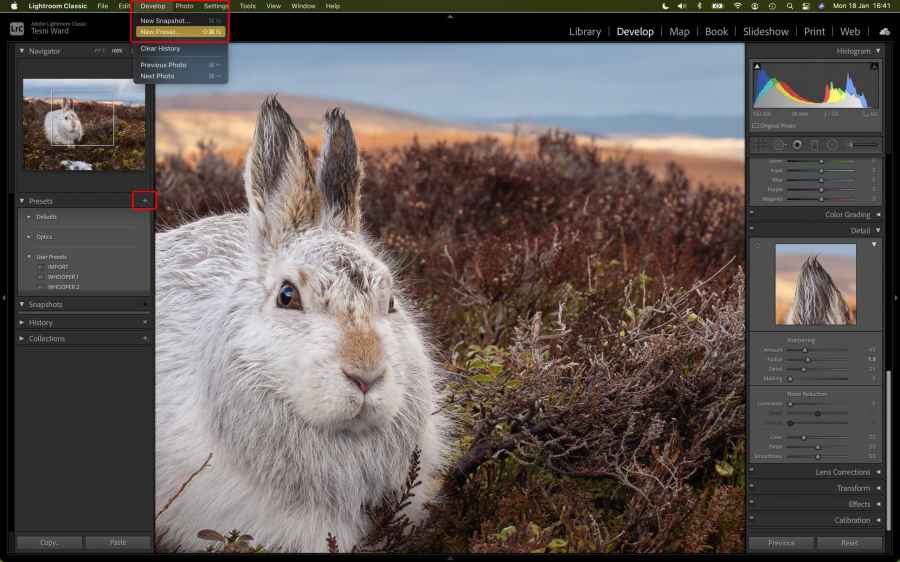
6 Presets
If you have a selection of images shot under the same conditions and you’ve found the optimum settings through stages 1-5, save this as a preset so you can apply it to the other images, which will significantly speed up your workflow. Do this in Develop>New Preset or click the + next to Presets in the left menu.
Further reading
Top tips for sharper wildlife photos