
Unless you’re using a tripod and shooting long exposures in low light, you have to push up your camera’s sensitivity (ISO) setting to get sharp images. Consequently, noise will be a feature of your shots, but you can reduce its visibility either in-camera or using image-editing software post capture. In-camera noise reduction can be effective for JPEGs and can be applied at different levels, but it doesn’t take account of the content of the image. Large even-toned areas, for example, can often benefit from a stronger treatment while areas with lots of detail usually require a more cautious approach.
As a result, it’s usually best to apply a bespoke level of noise reduction, ideally to raw files. This means that you can tailor the type and degree of noise reduction that’s applied to individual images. And in some cases, you can even vary the amount of noise reduction that’s applied to different sections of the image. Let’s take a look at the noise-reduction controls offered by some of the most popular image-editing software and see how they compare.
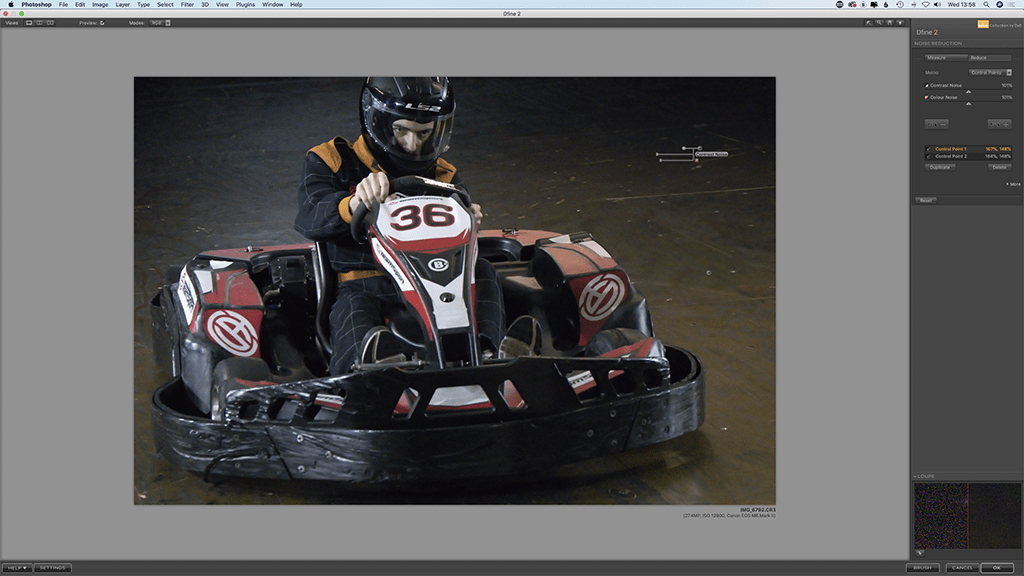
Nik Collection 3 by DxO
£125
Nik Collection 3 by DxO is a set of eight plug-in software packages for Adobe Photoshop, Lightroom, and DxO PhotoLab. Amongst the more well-known plug-ins such as Silver Efex Pro and Analog Efex Pro is Dfine 2, which is specifically designed for noise reduction. Although it was developed by DxO, Dfine doesn’t use DeepPRIME but it’s still very powerful. After opening an image in Photoshop and activating the plug-in, Dfine automatically adds a couple of measurement squares to the preview. You can move these sample points and add others if you wish.
Dfine then analyses the sections and applies some noise reduction which you can save as a reusable Profile that’s specific to the camera and sensitivity (ISO) setting. Clicking on the Reduce button allows you to tweak the denoising using the Contrast Noise and Colour Noise sliders. The noise reduction can also be targeted to specific areas by adding Control Points or by selecting specific colour ranges.
Once you’re happy with the result you can either click on ‘OK’ to apply the denoising as you see it in the preview or you can click on ‘Brush’ to switch to back to Photoshop, automatically creating a mask in the process. Then you can paint in the noise reduction where you want it, even adjusting the opacity in areas where you want a more subtle treatment.
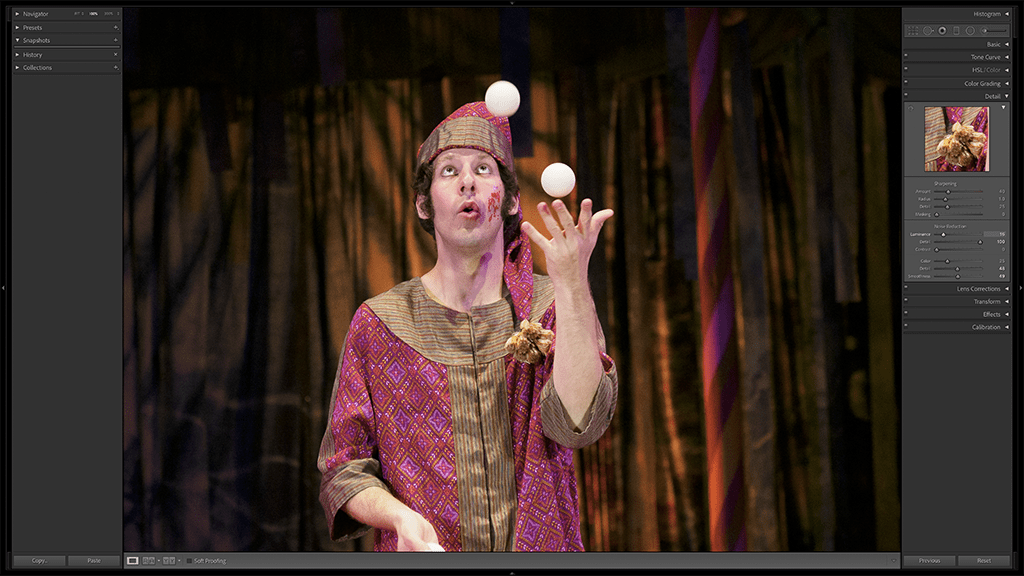
Adobe Lightroom Classic
£9.98/month as part of the Adobe Photography Plan
The six sliding controls that make up Lightroom Classic’s noise-reduction tools are located along with the Sharpening controls in the Detail section of the Develop control panel. These are the same tools as are in Adobe Camera Raw, the raw-processing companion to Photoshop. It’s best to use the Color control first to remove the chroma noise. By default, this is set to 25 and if you drag it left to 0, you’ll see more noise appear.
Then, gradually move the Color control to the right to conceal the noise but keep an eye on the detail level and don’t overdo it. The main image preview shows the impact of these settings, but there’s also a small preview window just above the controls that shows a section of the image at 100%. You can also use the Detail and Smoothness controls to refine the colour noise reduction.
Next, use the Luminance slider taking care not to push it too far to the right as detail is lost. You may be able to bring back a little detail using the Detail slider and restore lost contrast with Contrast control. Finding the right settings is a bit of a juggling act but aim to set the Color noise reduction to a point just after the coloured speckling disappears and be even more conservative with the Luminance control because generally, a little texture is more acceptable than a smooth image.
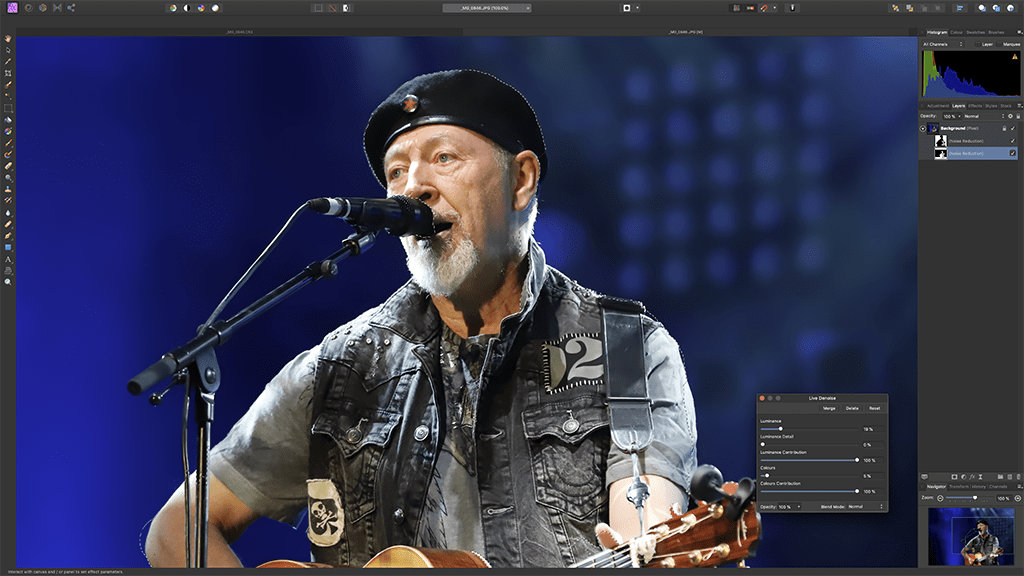
Affinity Photo
£48.99
Affinity Photo is a great-value Photoshop alternative, and it has a similar structure and control arrangement to Photoshop; however, Affinity Photo opens raw files within the core package rather than in separate software like the Photoshop and Camera Raw partnership.
When you open a raw file in Affinity Photo, the noise-reduction controls are found in the Details section of the control panel on the right of the screen. There are controls to reduce both the luminance and the chroma (colour) noise. Although the Colours control is lower in the panel than the Luminance slider, it’s usually best to adjust the colour noise reduction first, moving it to the right to increase the reduction that’s applied until the coloured speckling disappears.
After that, the Luminance slider lets you make the granular texture less visible while the Luminance Details slider helps you pull back a bit of the detail that’s lost. It’s just a question of finding the right balance between these two controls.
The same controls are available in the Denoise Filter for treating JPEG images and can be applied selectively using Affinity Photo’s selection tools and then creating a Denoise Live Filter Layer. You can also make multiple selections to create several layers to apply different noise-reduction treatments. Double-clicking on the mask thumbnail that’s in the panel on the right reopens the Denoise controls if you need to make further adjustments.
Topaz Labs DeNoise AI
$79.99
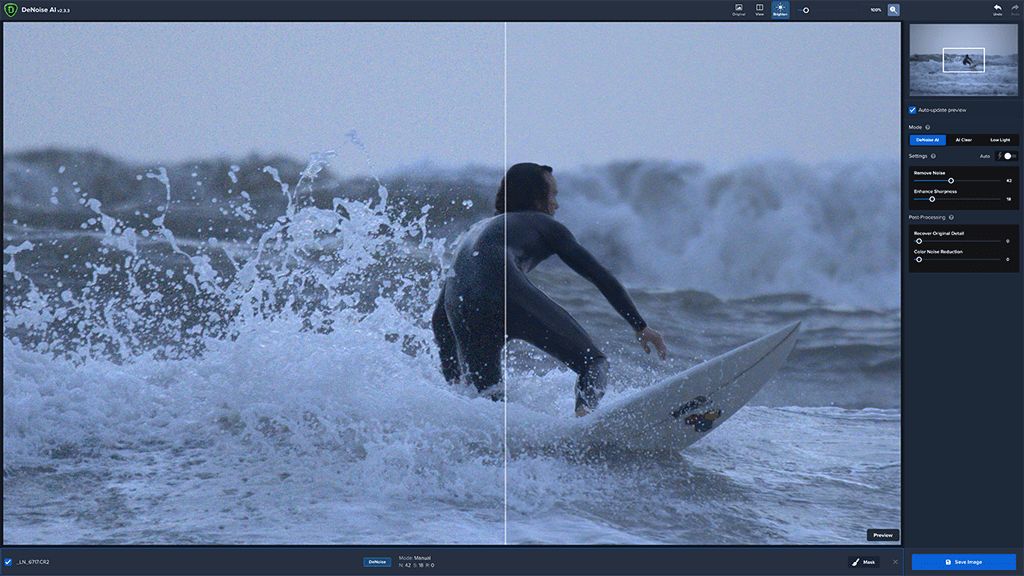
Topaz Labs fed millions of noisy and clean images into its DeNoise AI algorithm to enable it to learn what noise is and what a clean image should look like so that the software can clean up noisy images. There are three modes of noise-reduction available in DeNoise AI: DeNoise AI, AI Clear and Low Light. DeNoise AI is the most advanced.
After importing an image, the software takes a couple of seconds to render the preview and each time you shift the magnified preview, this rendering has to happen again, which gets a bit annoying. Although the default noise-reduction and sharpening settings change from image to image, the Remove Noise and Enhance Sharpness sliders still require some adjustment to conceal more of the chroma noise. DeNoise AI works well and unlike DxO PhotoLab 4 DeepPRIME, it can work with JPEG images as well as raw files, but raw files still produce much better results.
There’s also a masking option that lets you paint in where you want the noise reduction to be applied. In addition, denoised images can be saved as DNG raw files so you can continue editing them in your favourite raw file editor. However, this makes it apparent how convenient it is to be able to reduce noise from within an editing package because you are able to assess the results in combination with exposure, contrast and colour adjustments.
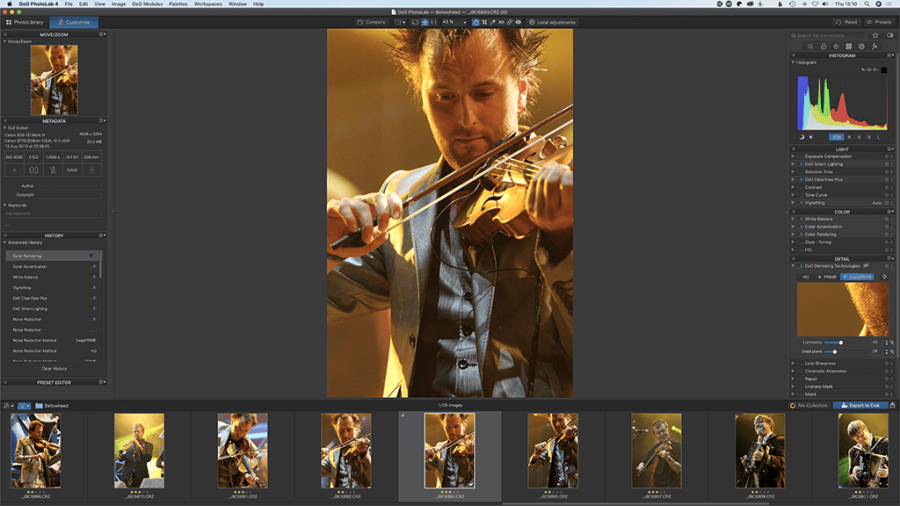
DxO PhotoLab 4 Elite Edition
£169
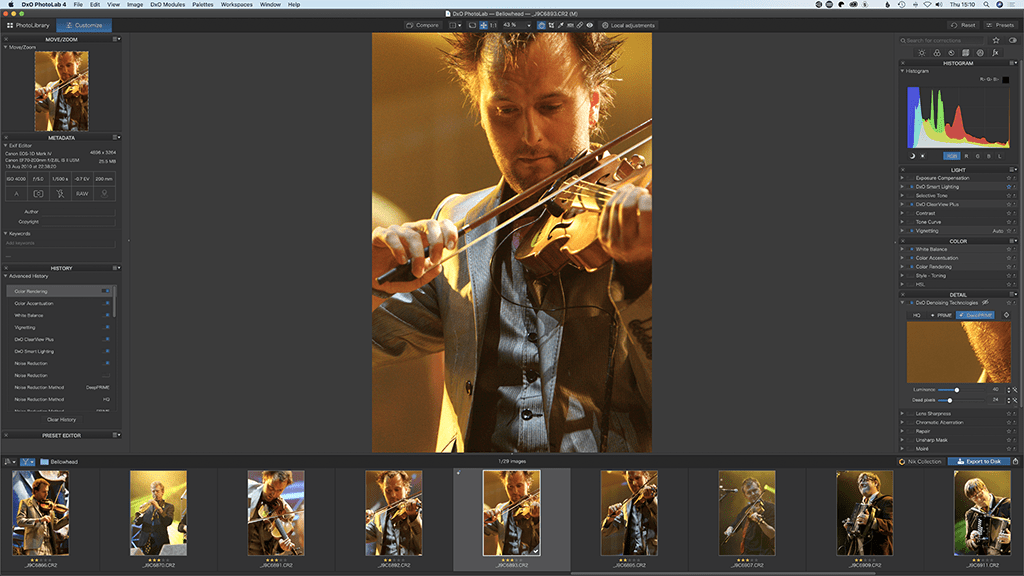
DxO has a background in analysing lenses and cameras to enable it to correct their flaws. This information feeds into DxO PhotoLab 4’s correction modules and PhotoLab 4 is compatible with raw files from more than 400 digital cameras with modules for over 60,000 camera and lens combinations – but check yours are listed before purchasing.
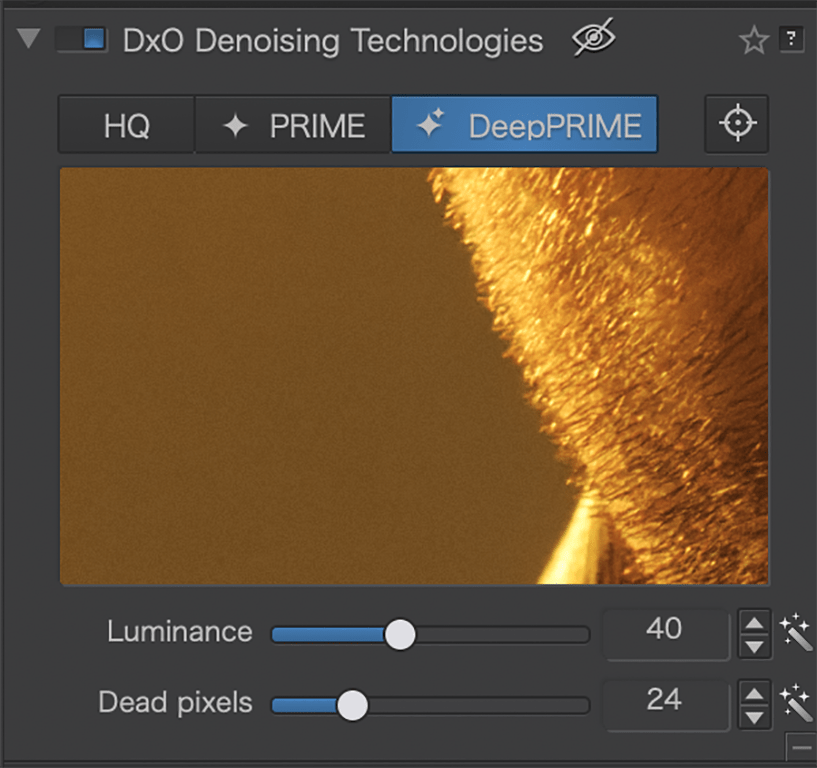
DeepPRIME is the latest version of DxO’s noise-reduction technology and it’s powered by artificial intelligence and ‘deep learning’. It’s located in the Detail section of DxO’s PhotoLab 4 and it’s not activated by default, but all you have to do is click on the DeepPRIME button and the noise reduction is fired-up. The default settings for Luminance noise reduction and Dead pixels work well.
Click on the DeepPRIME button to enable you to select an area in the main image to preview
DxO applies the noise reduction at the export stage and you cannot preview its impact in the main image preview at the centre of the screen, but there’s a small preview window in the DxO Denoising Technologies panel. There’s a crosshair type icon just to the right of the DeepPRIME button.
If you tap on this to turn it blue, you can then click on the main image to select the area to preview. Although it’s incredibly easy to use and it doesn’t seem worth touching the two adjustment sliders, DeepPRIME knocks spots off the other noise-reduction systems in this round-up. Just like Affinity Photo, Lightroom and Nik Collection, PhotoLab 4 has the advantage of allowing other adjustments to be made in the same package. In the case of the PhotoLab software, some of these adjustments can be made automatically.
Further reading
Best software for reducing noise


