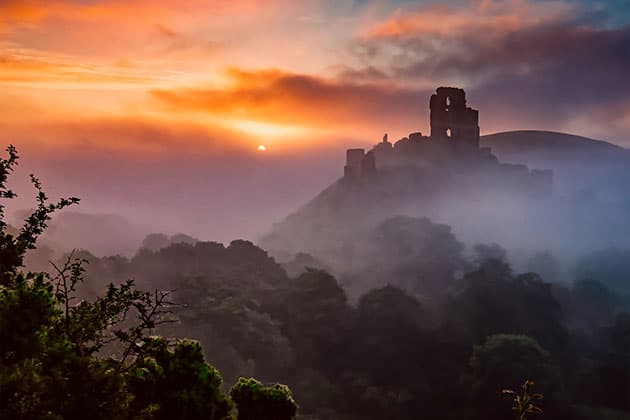
Sharpening an image is an important part of any post-production workflow. Credit: James Paterson
Sharpening is a crucial part of the image-editing process. Not only does it allow you to crisp up details and enhance the important areas of an image, it also lets you optimise the image for specific types of output, such as a particular print size or for viewing on screen. Likewise, noise reduction is another important step for images captured with a high ISO. With the right noise-reduction techniques, you needn’t worry about pushing your camera’s ISO to its upper reaches.
When it comes to choosing your sharpening and noise-reduction tools there are plenty of options out there, from the powerful Detail Panel in Lightroom (and identical panel in Photoshop’s Camera Raw) to the advanced noise-crunching algorithms in DxO PhotoLab or the excellent sharpening controls in Affinity Photo. There’s also the intriguing new ‘Enhance Details’ command in Lightroom and Photoshop. Here, we’ll explore some of the best tools and techniques that these apps have to offer.
Output sharpening in Lightroom
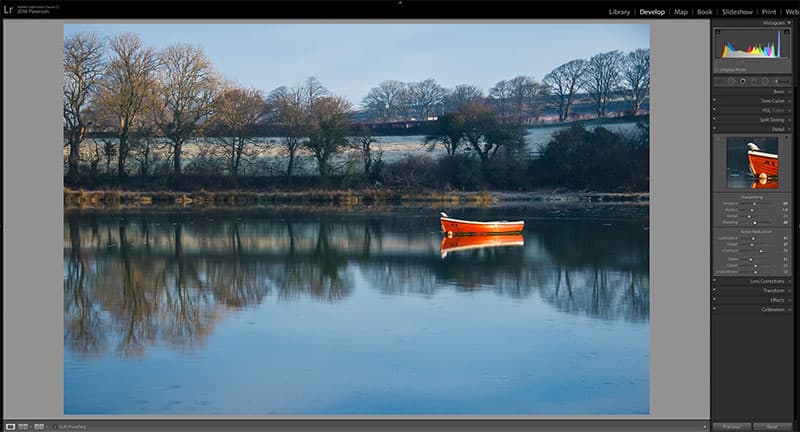
Lightroom’s Export Dialog (as well as the similar options in Camera Raw’s Save dialog) offers a set of simple Output Sharpening controls that, while seemingly basic, can be very powerful. The level of sharpening applied will vary depending on the resolution of the image. So if, for example, you’ve chosen to export a 12x8in print at 300dpi, then the Output Sharpening controls will be tailored towards that specific size. You can choose from three strength settings, and set whether the image is intended to be presented on-screen or as a matt/glossy print. Of course, if you want finer control over your output sharpening then you can open the image into Photoshop instead for further edits.
Credit: James Paterson
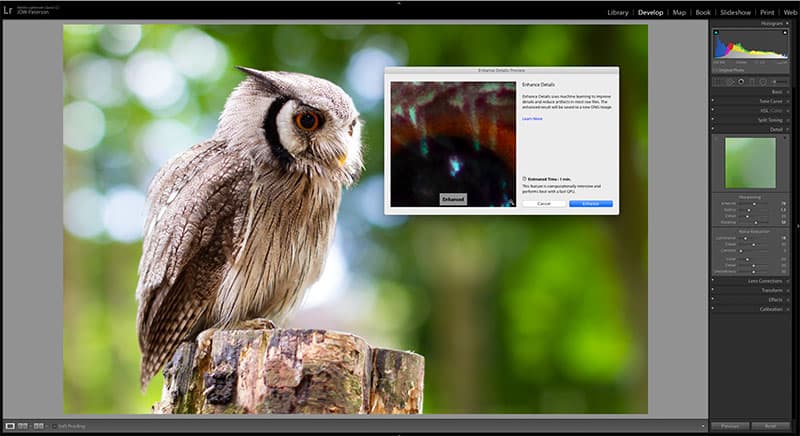
The new Enhance Details feature
Recently announced as an update to Lightroom and Camera Raw, the ‘Enhance Details’ command employs Adobe’s machine-learning tool (named Adobe Sensei) to intelligently analyse image content. In doing so it addresses a range of common problems that occur during the demosaicing process that all raw images go through. One of the biggest issues with demosaicing occurs when small details are close to the resolution limit of the sensor, resulting either in a jumble of colours or moiré patterning. As a result of using Enhance Details, you’ll see more accurate rendering of edges and fine details with fewer artefacts and less moire.
In practice, the Enhance Details feature won’t magically make soft images sharp or result in perfectly detailed photographs – in fact, for many images the change is barely noticeable. But it can lead to greater fine detail, so it’s useful if you need to make large prints or you need to crop the image. To use the feature, go to the top-left menu in Camera Raw. If in Lightroom, either go to Photo>Enhance Details or right-click the image to access the command.
Credit: James Paterson
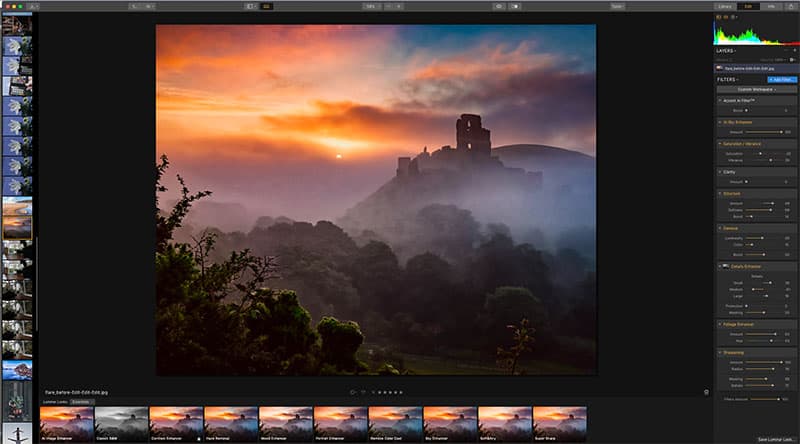
Sharpening in Luminar 3
Luminar 3 offers an exceptional package of sharpening and noise-reduction tools, coupled with detail-enhancing features that work especially well for landscapes. Like all Luminar edits, Sharpening is applied as an editable filter. The Sharpening Amount and Radius sliders work in a similar way to those in Lightroom: Amount controls the strength of the change in edge contrast, while Radius determines the distance from the edge in which the contrast change occurs. Similarly, the Denoise filter tackles Luminance and colour noise.
One of the best features in Luminar 3 is the option to apply all filters – including sharpening and noise reduction – locally, so you can selectively enhance parts of the image while leaving other areas untouched. Like most photo editors, the selective tools include a brush, linear gradient and radial filter.
Credit: James Paterson
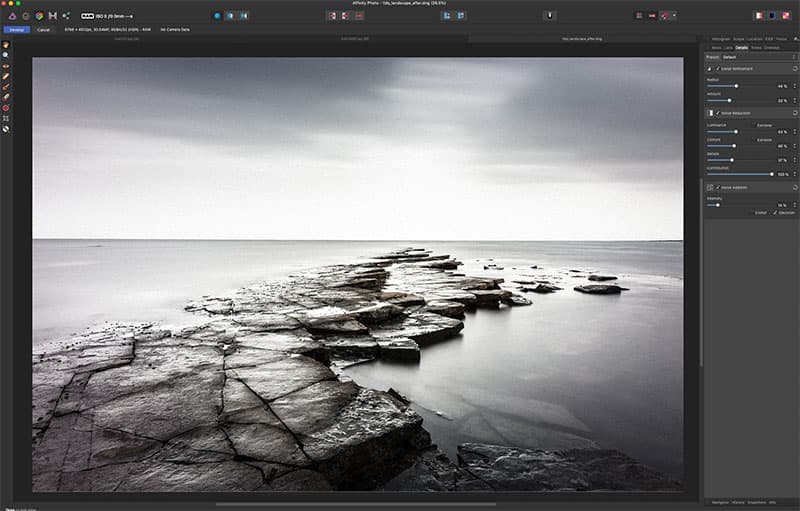
Noise reduction and addition in Affinity
The noise-reduction controls in Affinity Photo will be broadly similar to those found in Lightroom and Camera Raw. There’s a Luminance slider for tackling grainy noise and a Color slider for chroma noise (by default, this is set to 40). Alongside these is a useful Noise Addition command that adds in uniform gaussian noise. Sometimes this can give the image a more refined feel, especially after applying heavy noise reduction; it’s useful if you want to achieve a filmic look. There are also two intriguing ‘Extreme’ checkboxes that allow you to push the noise reduction beyond 100% all the way to 500%. This could be useful for extremely high-ISO photos above 6400.
Credit: James Paterson
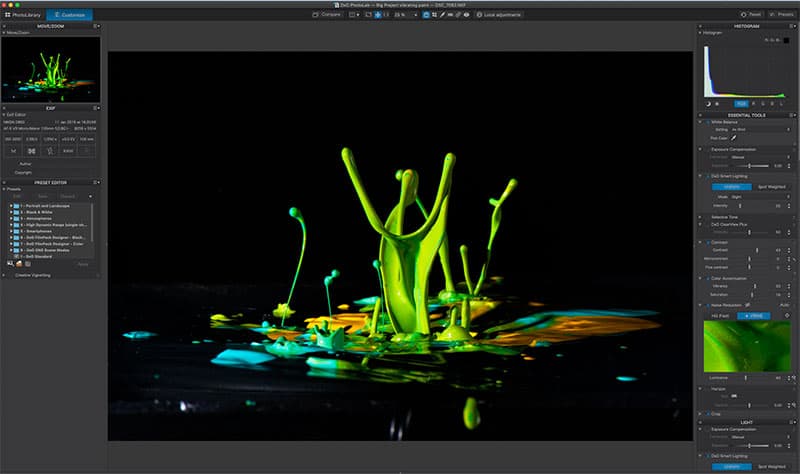
DxO PhotoLab 2’s amazing noise-reduction tool
Long renowned for its noise-reducing technology and extensive lens database, DxO offers a range of powerful raw-editing tools in the latest version of PhotoLab (previously known as Optics Pro). The jewel in the crown here is PRIME Noise Reduction (available in the PhotoLab 2 Elite edition). It’s arguably the best noise-reduction tool you can get in any software currently. If you regularly shoot at high ISOs or at night, the results of using the PRIME noise tool – which intelligently distinguishes between noise and fine details – can be astonishingly good. The only downside is that it takes slightly longer – up to several minutes – to process the image upon exporting it, but that’s a small price to pay for noise reduction this refined.
PhotoLab 2 has another ace up its sleeve when it comes to image sharpness. The editor can call upon DxO’s extensive database of lens/camera combinations and their associated pitfalls. As such, every image is automatically optimised to correct for lens softness, so you might find that the image looks sharper before you even begin making edits.
Credit: James Paterson
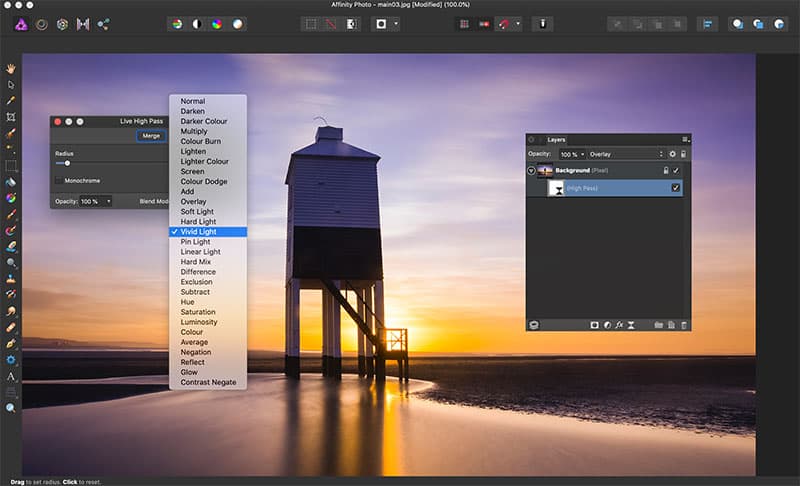
Refined High Pass sharpening
One of the most popular techniques for sharpening details involves using the High Pass filter. It’s especially effective when an image has out-of- focus areas, as it lets us sharpen up the important details but leaves the low-frequency soft areas untouched. By using Live Filters in Affinity Photo, High Pass sharpening can be applied with ease. We simply use Layer>New Live Filter Layer to add the effect, choose a radius setting to control the intensity of the sharpening effect, then set the Live Filter Blend Mode to – in order of intensity – either Soft Light, Overlay or Linear Light.
Stacking photos in Affinity
Photo Sometimes shooting a set of photos and stacking them afterwards can lead to beautifully noise-free photos. This technique is particularly effective for extremely high-ISO shooting scenarios such as astrophotography. After shooting several frames, you can use Affinity Photo’s Stacking command ( File>New Stack) to automatically align and blend the set (Photoshop has a similar feature, too). Each image is compared and any irregularities – including image noise – are excluded from the blend. The resulting combined images will display greatly reduced image noise, often going beyond what could be achieved with a camera’s base ISO.
Lightroom’s Detail Panel explained
The go-to sharpening and noise-reduction command for many photographers, here are the key features explained
There are several sliders for controlling Sharpening and Noise Reduction in Lightroom. Credit: James Paterson
1. Sharpening Amount
This controls the overall strength of the sharpening effect. In essence it’s a contrast slider for edges. An edge is anywhere in the image where light pixels meet dark pixels. This control makes the light side of the edge brighter and the dark side of the edge darker.
2. Radius
This controls the distance from edges in which the sharpening occurs. The higher the radius, the further the sharpening is pushed out from edges. In general, a higher radius is suitable for images with lots of smooth areas such as portraits, while a low radius suits detailed scenes such as landscapes.
3. Detail and Masking
Detail dictates how the high-frequency details are affected. Low detail is best for noisy images as it’ll help prevent amplifying the noise. Masking lets you remove the sharpening from detail-less areas. Alt-drag the slider for a view that shows excluded areas in black.
4. Luminance
This powerful slider helps to clear grainy image noise so it’s useful for improving high-ISO images or underexposed photos that have been lightened. However, be careful not to push it too far as it’ll result in smudgy details. Try to strike a balance between the sharpness and noise reduction.
5. Luminance Detail
This control sets a threshold for noise reduction, so a high Detail setting will preserve the fine details and textures in the image but may leave you with slightly noisier results. The Contrast slider helps to pull back a little contrast, especially when a low Detail value is set.
6. Color Noise controls
Color is set to 25 by default for raw files, which is usually enough. But if you see chroma noise (small magenta and green blotchy patches) then increase the slider. Like the Detail and Contrast sliders above, Detail and Smoothness here let you fine-tune the fix.