

Every season brings with it a long list of opportunities, and none is arguably as potentially transformative as winter. Long gone are the rich, warm tones of autumn, and with the verdant foliage of spring a distant forecast, winter can sometimes feel like a lifeless and dark time of year. But it’s not all bad for photography; there are many advantages for landscape and outdoor photographers, not least beautiful frosty mornings, the potential for snow that magically transforms scenes and, of course, the fact that golden hour occurs at more civilised times of the day than in summer, for instance.
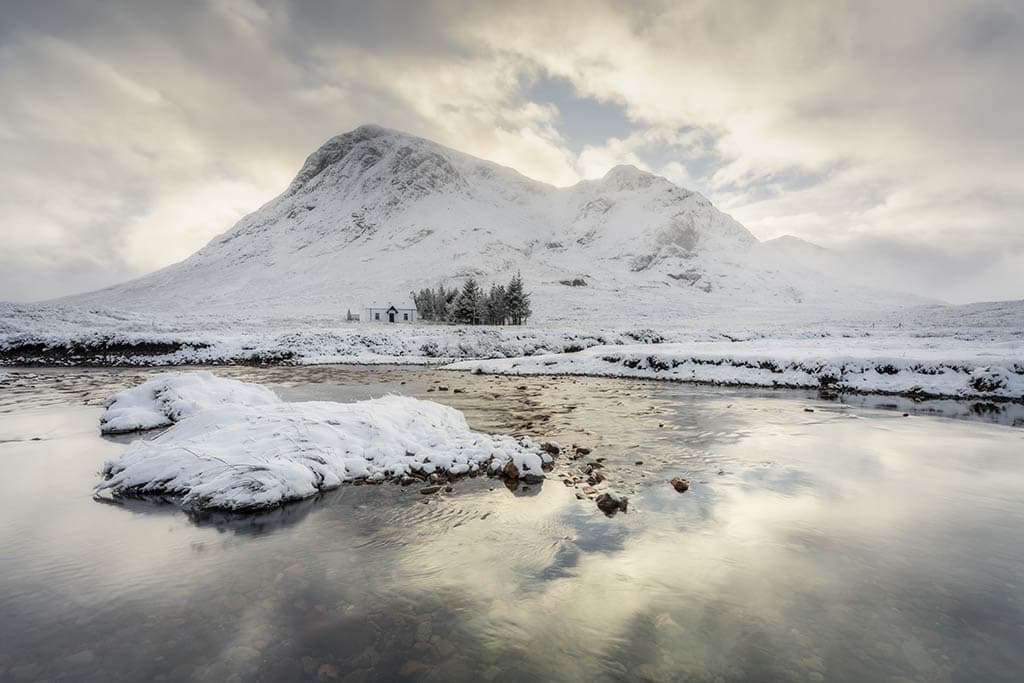
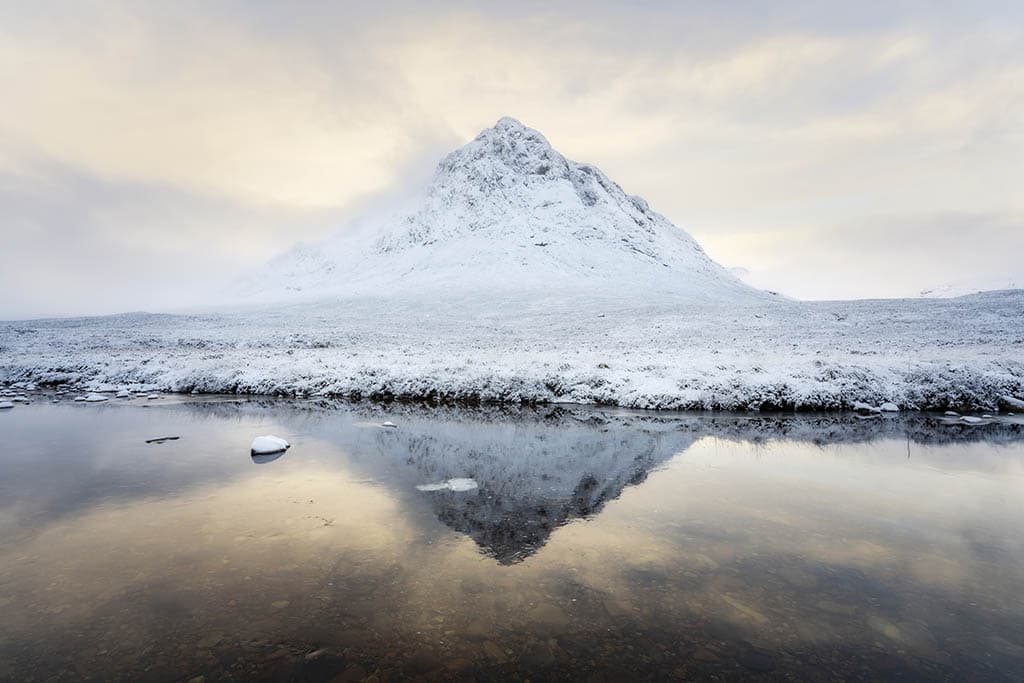
Lagangarbh Hut in Glencoe with Buachaille Etive Mor in the background in winter under snow Sony A7R III, 16-35mm, 0.3sec at f/14, ISO 50
As we write, there are still stringent restrictions in place across the UK regarding where you can travel to, so you need to exercise caution and common sense until the lockdown eases. In England, for example, you can leave your home to exercise, and to the best of our knowledge, this can include walking in a local scenic spot while also taking photographs. “This [exercise] should be limited to once per day, and you should not travel outside your local area,” says the official guidance. So if you drive 100 miles to the Lake District or the Highlands just to take photos you are breaking the law and potentially putting others at risk. Please ensure you follow social distancing rules too.
Civilised golden hour
One of the best aspects of deepest winter, especially if you shoot landscapes year-round, is that sunrise is around 8am and sunset is around 4pm, which means you don’t have to get up or return home in the middle of the night; if shooting close to where you live or where you’re staying, you can get more rest before or after a shoot, and even if you have to drive a couple of hours to shoot the sunrise, this may only mean a 5am alarm.
On the flip side, days are much shorter, so if out shooting for a whole day, you need to plan locations, driving time and the time it takes to walk to locations to make sure you can fit everything in. With these shorter days, you may only be able to fit in a sunrise location, one middle of the day location and one sunset location, so use location guidebooks and/or research the locations online so you have all the information about them you need. Ideally, shoot at locations you’ve visited before, because trying to find a location for the first time in the dark, particularly if shooting a winter sunrise where it will be fairly dark up until the sun reaches the horizon, can be difficult and could result in missing the best light if you get lost on the way.
Enjoy moody and overcast days
Another advantage of winter is that while we do, of course, experience some beautiful sunny days, there are more moody overcast days than at other times of the year, which can mean that you can shoot all day long. One of the problems with bright sunny days at any time of the year is that the light is simply too harsh to shoot landscapes, but overcast days are a completely different story as long as there’s cloud definition in the sky rather than a featureless sheet of grey.

Cwm Idwal waterfall, in Snowdonia North Wales, at sunset in winter. Sony A7R III, 16-35mm, 20sec at f/16, ISO 50
What makes moody winter days particularly special is when you get a break in the cloud that lets warm light pour on to parts of the landscape. This can bring otherwise drab landscapes bursting to life, and while one method of capturing a break of light like this is to wait patiently on location with the camera set up ready to shoot, you may also simply witness a break in the cloud and have to quickly set up your camera to get the shot.
The image of the reflection on Loch Cluanie (below) was spotted while driving through the Scottish Highlands and required getting safely down to the edge of the loch and setting up the camera. The light broke after setting up, proving that luck is always an important ingredient in landscape photography.
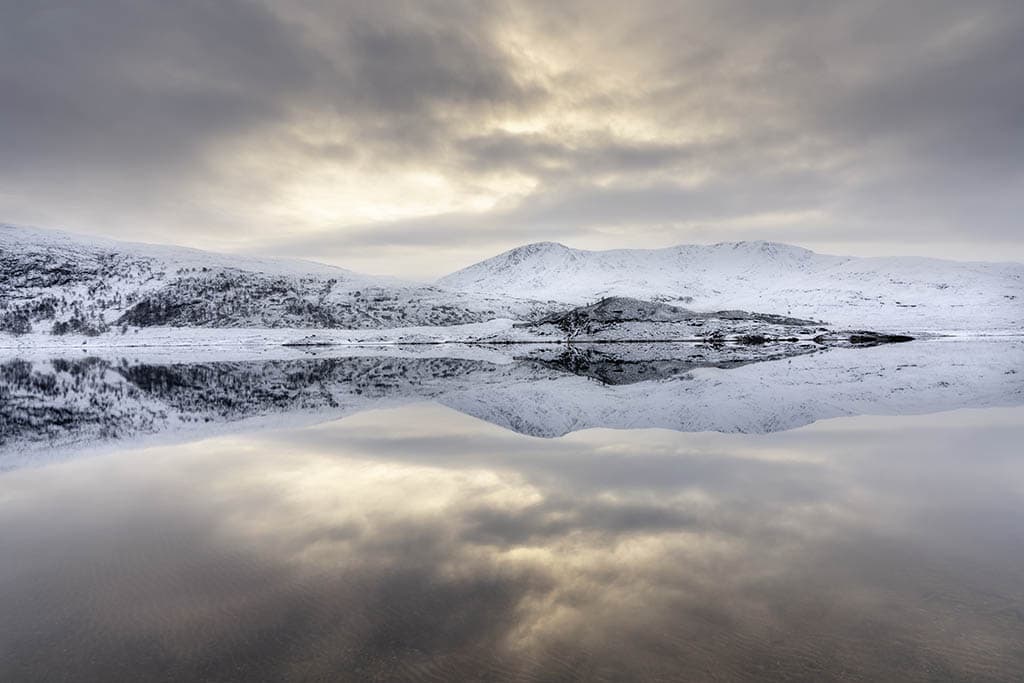
Perfect winter reflection at Loch Cluanie in the Scottish Highlands. Sony A7R III, 16-35mm, 1/40sec at f/13, ISO 100
Shoot reflections
Reflections can be shot at any time of year – as long as there’s little wind you’ll find them on any still body of water. But what’s particularly special about winter is that as well as perfect stillness and reflections, you can also experience mist and/or ice on the water early in the morning. Ice can provide unique foreground interest that obviously won’t be around forever and will never be the same twice, so incorporating it into your winter shots can be a great way to make your images one of a kind.
Shooting reflections is just like any other landscape, so a low ISO setting of 100 and an aperture such as f/11 will provide the best image quality and sufficient depth of field to ensure the entire scene is in focus. Focusing itself is also the same – focus one third of the distance into the scene beyond the foreground that you would like to be sharp, but in many instances autofocusing on the opposite edge of the water where the reflection meets the ground will also render everything in focus.
Capture perfect snow
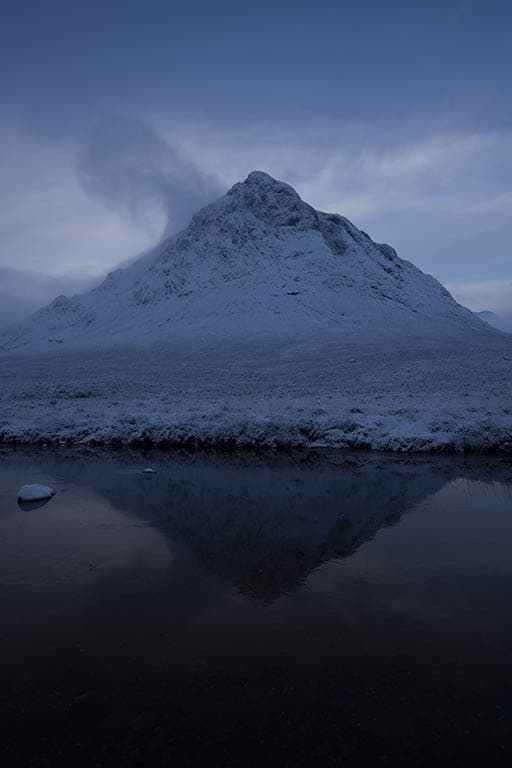
When shooting snowy scenes, you’ll need to pay attention to exposure because the camera’s lightmeter, whichever setting is used, assumes that all tones it reads are 50% grey, which means there’s a tendency to underexpose snow, making it grey rather than white. The simple way of avoiding this is to use exposure compensation, either applied manually if shooting in manual or using exposure compensation if shooting in aperture priority.
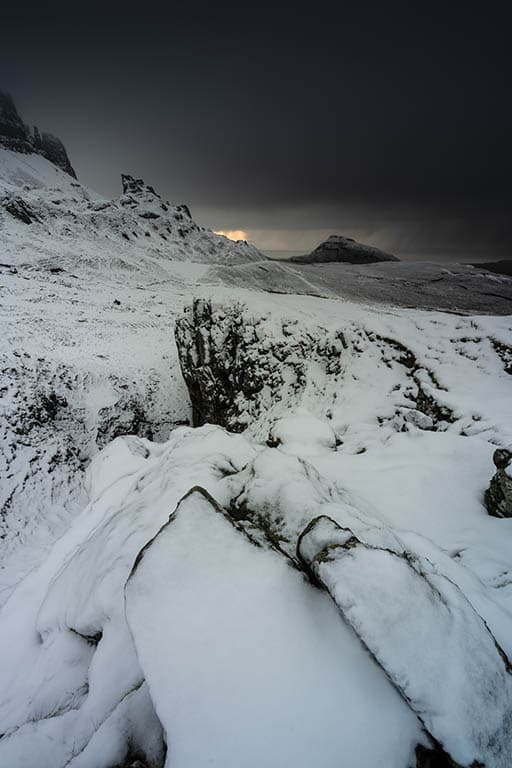
This scene is underexposed….
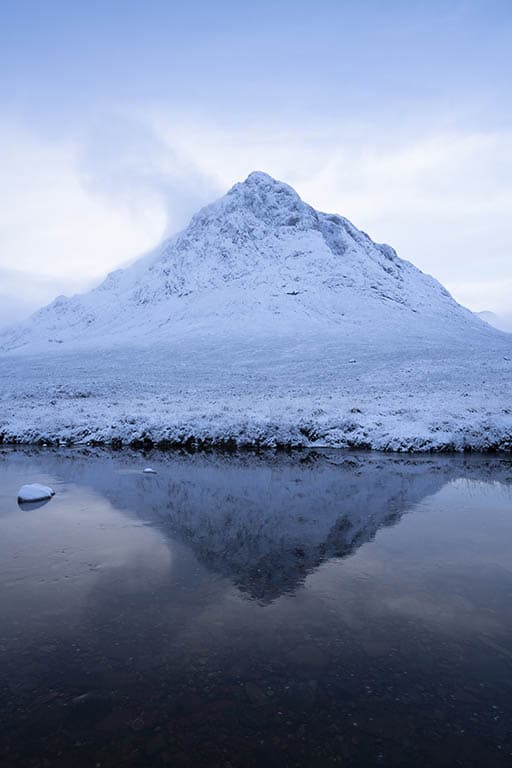
Depending on light conditions, you typically need between one and two stops of positive exposure compensation to correctly expose snow. Also, use the histogram to make sure you don’t blow the highlights. With the camera white balance set to Daylight, snow will often give shots a bluish tint. So, if you typically shoot JPEG, you would be better off setting white balance to Auto; but if you shoot in raw leave it set to Daylight and adjust it in post-processing.
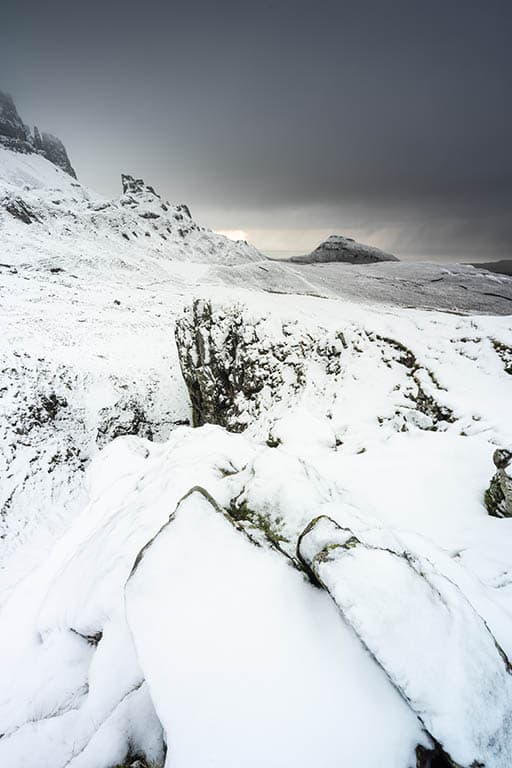
While this has one stop of positive exposure compensation applied
Shoot seasonless seascapes
If wintry conditions favourable to photography, such as frost or snow, aren’t forecast and the landscape is looking drab, you may be lucky enough to live near to the coast. Many coastal locations look the same year-round, they just need good light to look their best, and the more civilised golden hour times mean you can comfortably drive to the coast for sunrise or sunset. The image below was shot in January, but the warm and colourful sky belies the actual temperature and gives it a warm summery look and feel.
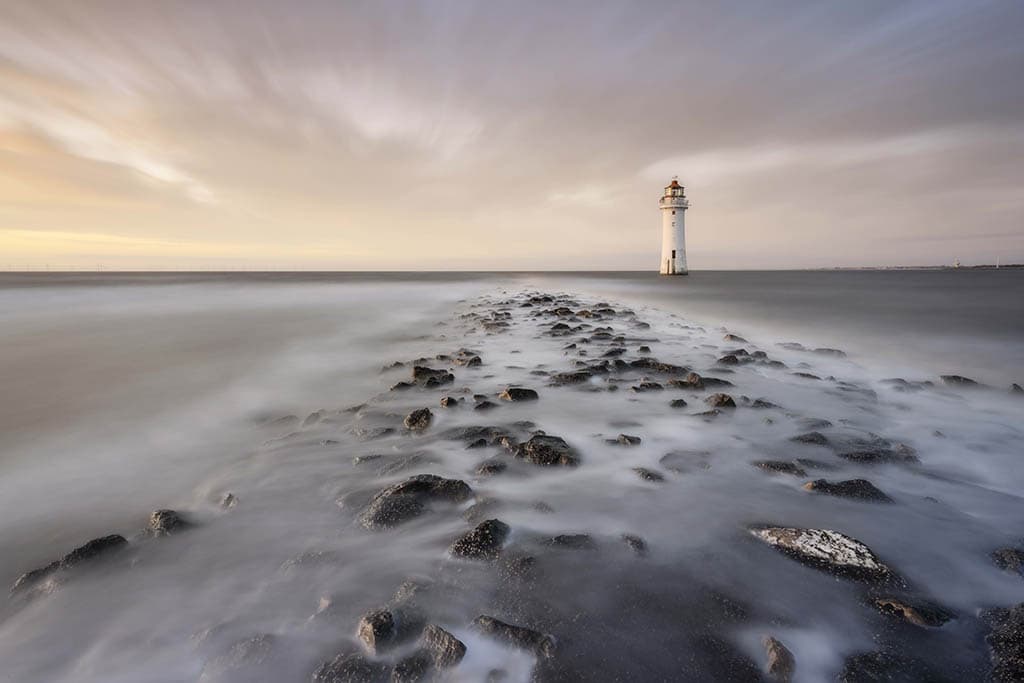
New Brighton Lighthouse at New Brighton Beach, Wallasey on the Wirral at sunset
Shoot in any weather
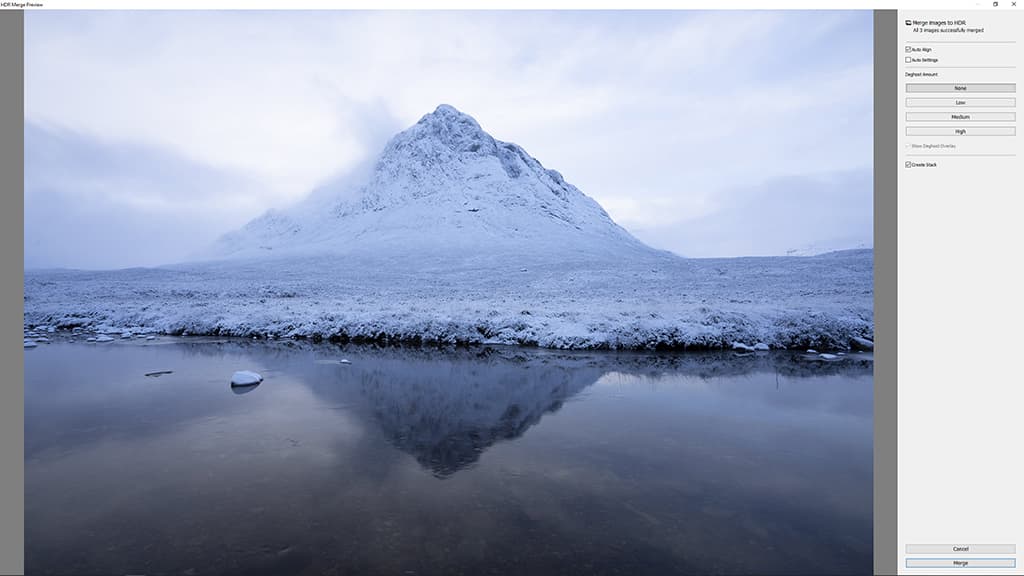
Filters are like magnets for snow and rain, but using a lens hood and shooting HDR is a guaranteed way of maintaining detail while keeping your lens clear. HDR, or high-dynamic-range photography, is a shooting and editing technique that can be used to capture detail throughout high-contrast scenes that are outside of the camera’s ability to record in a single image. By taking three or five bracketed exposures, two stops apart, to capture detail from the deepest shadows to the brightest highlights, you can maintain detail throughout the scene without the need for ND grad filters, which are extremely problematic in snow and rain.
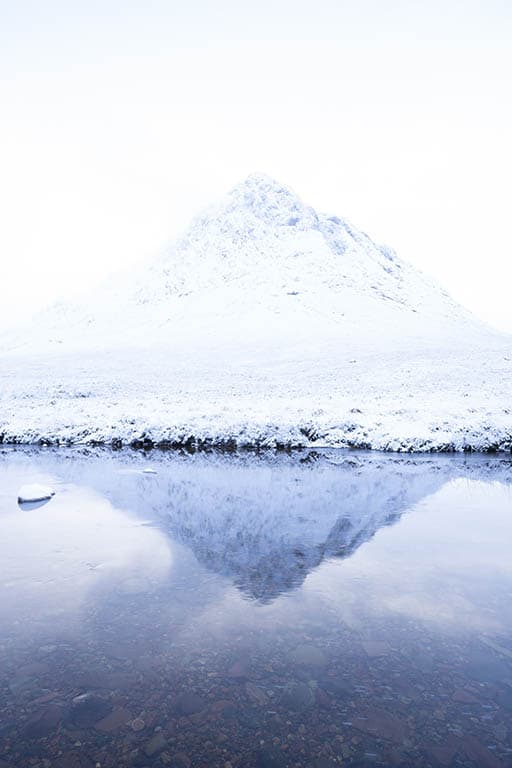
Buachaille Etive Mor and its reflection after sunrise on a winter morning in snow. Sony A7R III, 16-35mm, 1/50sec at f/13, ISO 100
Make sure the camera is mounted on a tripod, because the exposures to capture shadow detail are often too slow to handhold the camera, plus you want no movement of the camera between shots. You must also make sure that focus, aperture and ISO remain fixed for each of the bracketed exposures, and that only shutter speed changes to avoid problems when the exposures are merged in Lightroom or other software.
Shoot bracketed exposures
Shooting HDR is incredibly easy, and with modern cameras all offering Auto Exposure Bracketing, all you need to do is set the camera to aperture-priority mode with AEB turned on and set to shoot three or five bracketed exposures, two stops apart. The middle exposure should always be set to capture detail in the mid-tones. Another way of shooting bracketed exposures is to shoot in manual mode and change the shutter speed accordingly for each exposure.
Exposure bracketing
Let’s go into a bit more detail. Exposure bracketing is a technique that comes from the days of film, where photographers would take several different exposures of the same subject/scene – one at the metered exposure, one around a stop underexposed and another around a stop overexposed.
The idea was that in doing this you would guarantee that one of the three or more shots was correctly exposed, so when you made prints you could select the best negative to print from.
With digital photography, this technique remains relevant for this exact purpose, despite the existence of a histogram and LCD screen to assess exposure. But with digital photography, exposure bracketing is more commonly used to capture the three or more exposures required for HDR photography to ensure detail is captured from the shadows to the highlights, and these are then merged in software to create images with a huge dynamic range.
Step by step
Merge to HDR
Locate your bracketed exposures in Lightroom, left mouse click on the first, hold down Shift and left mouse click on the third or fifth exposure so that all are selected. Next, right mouse click on the selected images and go to Photo Merge>HDR when the menu appears. Make sure Auto Align, Show Deghost Overlay and Create Stack are checked before trying different Deghost Amounts starting with High and working down as low as you can go using the red overlay as a guide.
Apply adjustments
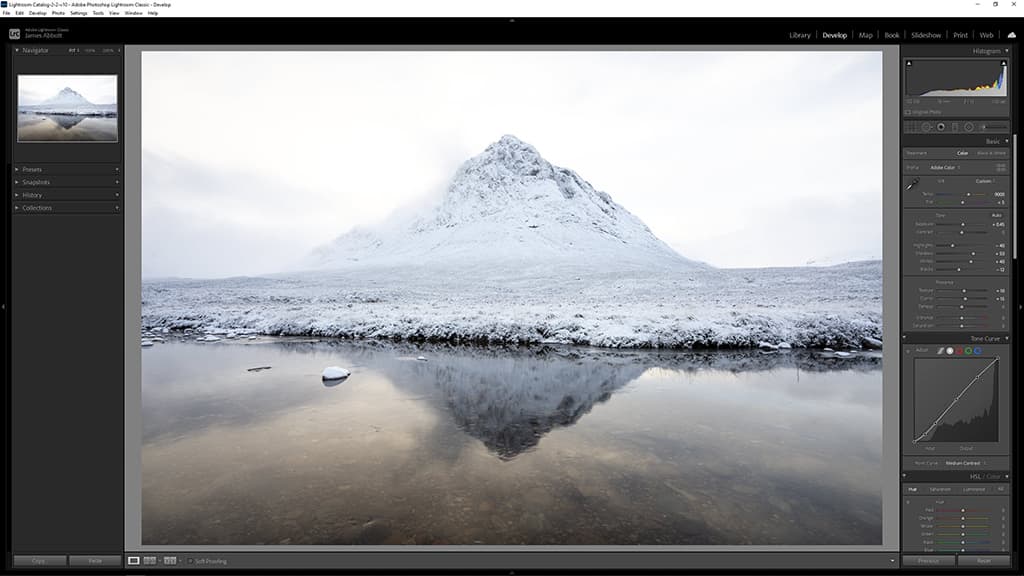
Apply all the adjustments you normally would, such as White Balance, Exposure, Contrast and Lens Corrections etc. Once you’re happy with the basic look of the image, use the Shadows and Highlights sliders to recover detail in the respective tonal areas. Holding down the Alt key while using the sliders will show detail being recovered. Once finished, drag the Whites slider to the right and the Blacks to the left to reduce any muddiness in the image (the Alt key can also be used here).
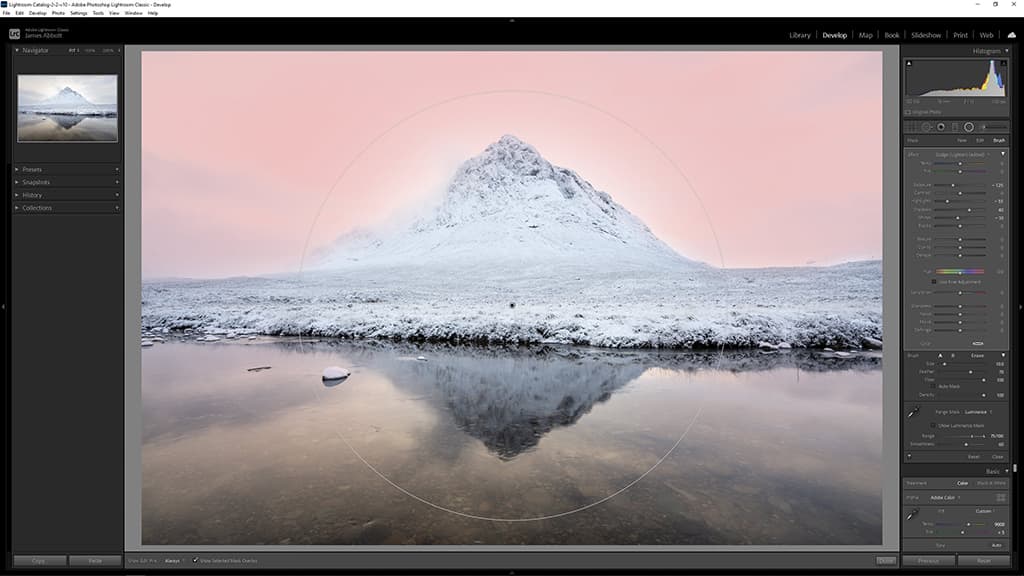
Use localised adjustments
Step two may not recover all shadow and highlight detail, so we can use the localised adjustment tools to deliver targeted adjustments to problem areas – in the case of this image, it’s the
sky. Here, the Radial Filter was extended over the mountain so that the outer area of the guide would be affected by reducing exposure to -1.25, Highlights to -55, setting shadows to 40 before finally reducing Whites to -10. This will apply the adjustments to unwanted areas, but we’ll refine this.
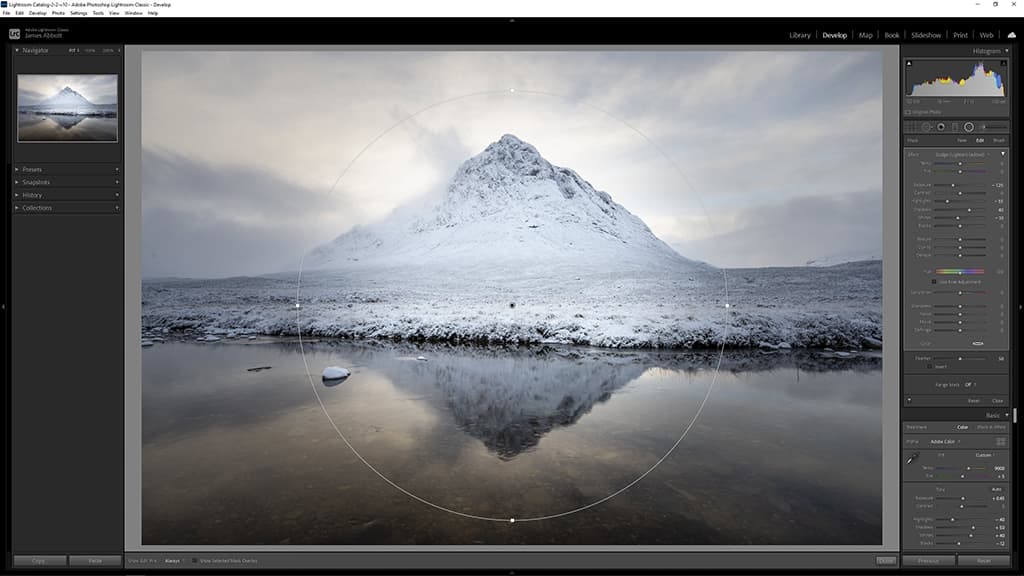
Refine the mask
Press O on the keyboard to show the red mask, and then go to the Range Mask dropdown menu and select Luminance. Target the mask to brighter parts of the image by dragging the left slider
to the right, or to darker tones by dragging the right slider to the left. Smoothness is used to soften or harden the transition of the mask, a bit like feathering. You can now click on the Brush option at the top right to brush the mask in or by holding down the Alt key to brush it away.
Kit list
Camera cover
A camera rain cover is essential for winter shooting because it will keep your camera dry in snow and rain. Even if your camera is weatherproof, using a cover means you won’t have to dry your camera every time you put it back in your kit bag.
Microfibre cloth
In inclement weather a large microfibre cloth is perfect for covering the camera if you don’t have a rain cover, for cleaning lenses and drying a damp camera before putting it away. If using one for wiping lenses and filters, make sure it’s designed for doing so.
Spare batteries
You should always carry spare batteries anyway, but in winter, cold batteries can lose current, which makes them appear to be empty even when they’re not. A spare battery kept warm in an inside jacket pocket will help to keep your camera powered.
Rear-entry backpack
Rear-entry backpacks are great for winter because you can access their contents without putting the bag on wet and dirty ground, which will, in turn, make your back wet and dirty.
The MindShift Backlight can even be accessed without putting it down.
Photography gloves
There’s nothing worse than cold fingers when shooting landscapes, so a pair of gloves designed for photography, such as Vallerret gloves, not only keep your hands warm, they also provide peel-back fingertips, so you can easily change settings and add and remove filters.
Further reading
Our best-ever landscape photography tips
Top tips for better winter landscapes


