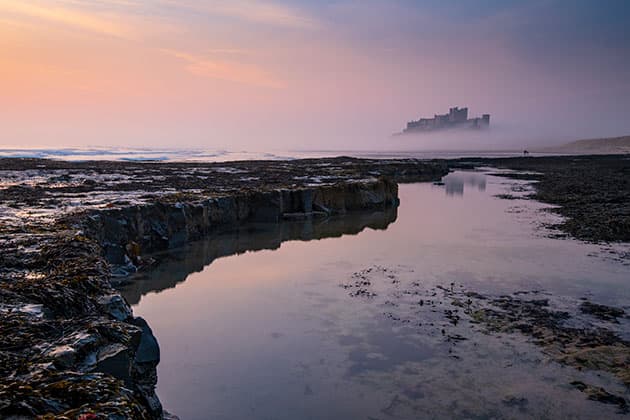
It’s no coincidence that the best landscape photographs are often the most hard-won. It’s tough work getting out and about at ungodly hours for sunrise and sunset; then there’s the carting of heavy gear up and down hills, the patience needed to wait for the best light, and the endless creative challenge of crafting that perfect shot. Yet the work doesn’t stop once the shutter button is pressed. We’ll explore some of the best options and techniques for processing your landscape images to perfection. We’ll begin by looking at Adobe raw-processing software, then we’ll explore other excellent options like Luminar 3 and DXO PhotoLab 2. After all, if you’ve gone through all that effort to get the shot, then it’s only right that your landscapes receive the finish they deserve.
Credit: James Paterson
Where to begin
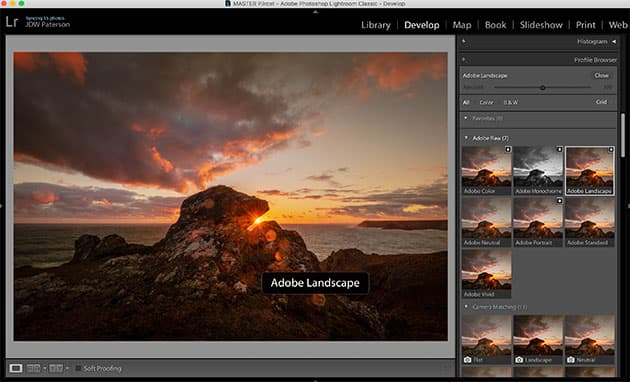
One of the best places to begin editing your landscapes is in Lightroom’s Develop Module (or Photoshop’s near-identical Adobe Camera Raw plugin). After importing the image into Lightroom, the first port of call will often be the Profile Browser within the Basic Panel. Profiles are starting points for different photos. We can choose the Adobe Landscape Profile here (as long as our image is raw) which enhances the blues in skies and reveals detail in textured surfaces. As such, it offers an immediate yet subtle boost. From here, you can go on to apply further, more tailored edits.
Credit: James Paterson
Maximise tonal range
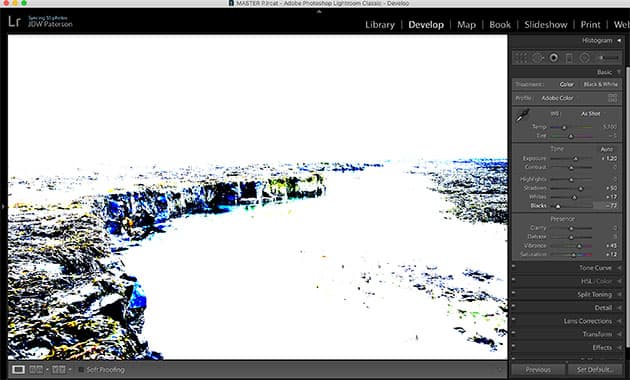
All raw editors enable you to set a white and black point. This is a vital step as first it lets you check for clipped pixels. Areas that are overexposed to pure white or pure black look out of place. If you see clipped pixels try to recover them (not always possible). We also want to boost contrast and make maximum use of the tonal range from pure black to pure white. By setting the black and the white points we can ensure we have this. In Lightroom, hold Alt and drag the Whites and Blacks sliders for a greyscale view to check for clipping. You want to push the sliders to a point just before clipping occurs.
Six essential raw landscape edits in Lightroom
Credit: James Paterson
Enhancing tones
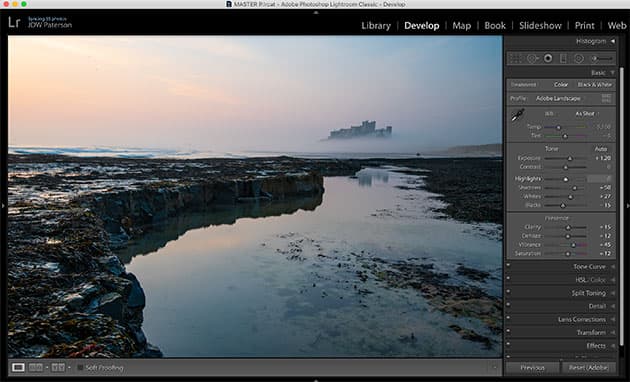
Raw files can often initially look at, but that’s because you’re expected to make your own enhancements. So to begin, try increasing contrast, tweak shadows and highlights, boost saturation and experiment with Clarity and Dehaze. Here opening up the shadows reveals greater detail in the rocks.
Credit: James Paterson
Crop and level
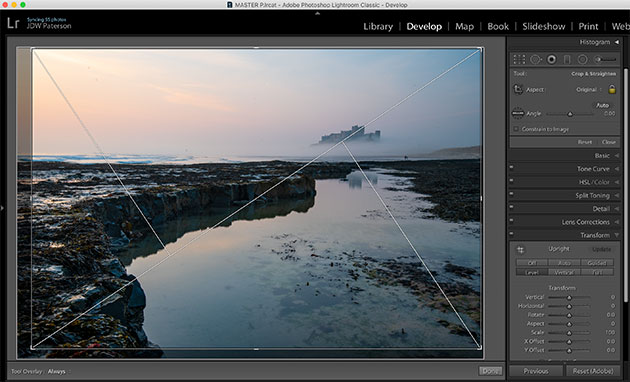
If, like the image here, the horizon is slightly wonky then Lightroom can automatically fix it with the Level button within the Transform Panel. You might also want to crop the image slightly. Lightroom offers various helpful crop overlays that adhere to different compositional rules. Hit O to cycle between them.
Credit: James Paterson
White balance
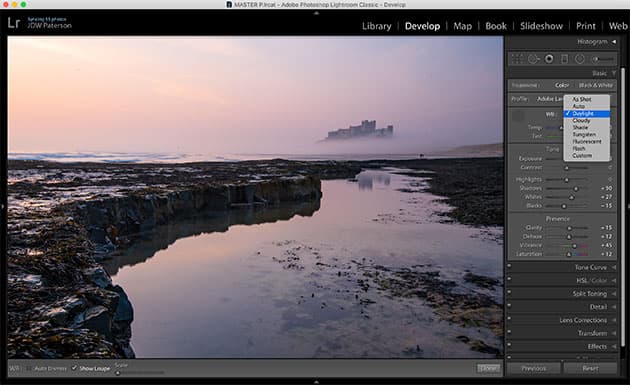
With raws, you can set the white balance either by choosing a preset, like sunny, cloudy or tungsten, from the preset dropdown here, or grab the white balance eyedropper tool from the toolbar. With this, you can click on a neutral point in the image, like a grey rock or white wall, to remove any colour casts.
Credit: James Paterson
Graduated Filter
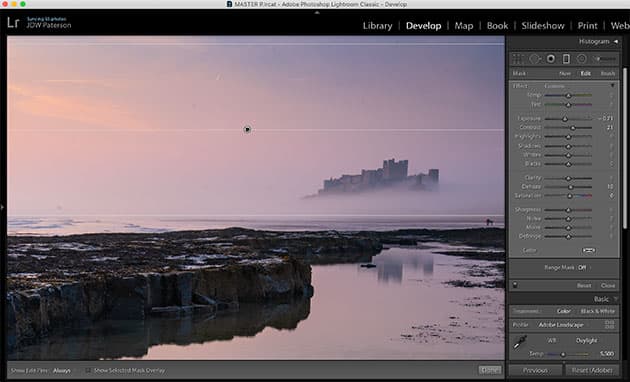
The Graduated Filter works wonders over skies by allowing you to darken the tones, enhance contrast and boost colour. Simply grab the tool from the toolbar, drag down from sky to land (hold Shift while dragging for a horizontal line), then adjust the tonal sliders to the right to alter the area covered by the grad.
Remove distractions
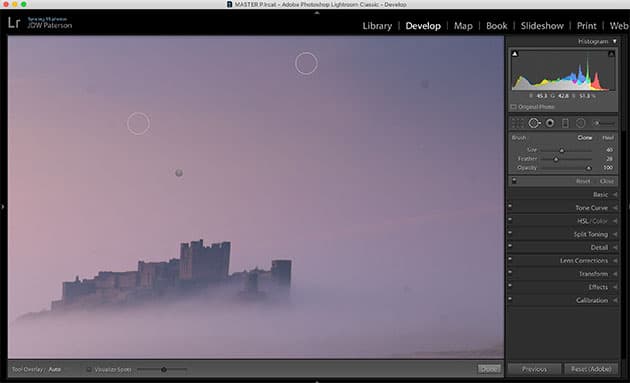
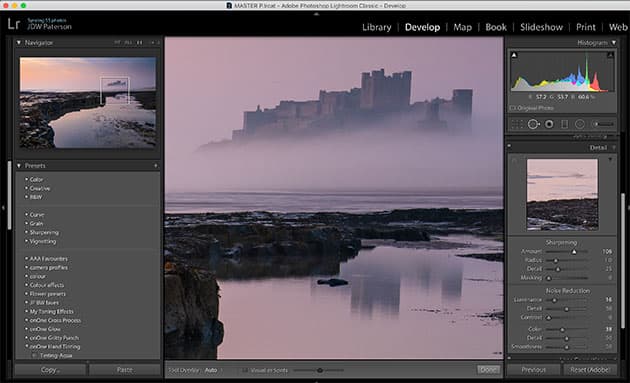
The narrow apertures we generally use for landscapes and the large expanses of sky included in the frame both mean that we’re more likely to spot annoying sensor marks in the image. If so, you can use Lightroom’s Spot Removal tool to get rid of them, and any other small distractions around the frame.
Credit: James Paterson
Sharpening
The Detail Panel in Lightroom is a powerful tool for sharpening your landscapes, which is a crucial step if you want crisp details. The Amount and Radius sliders are the two key settings. With landscapes we typically want a fairly high Amount – around 100-150 – and a low Radius – around 0.8-1.2.
DxO PhotoLab 2
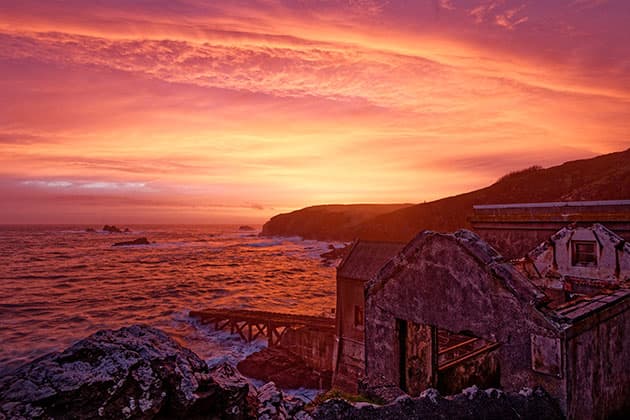
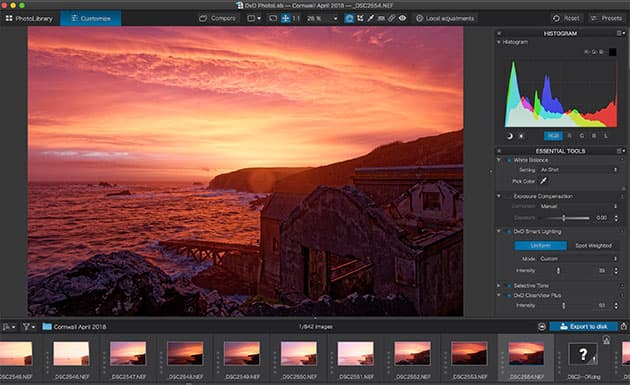
DxO PhotoLab is popular with many photographers thanks to the way it handles raw files. Credit: James Paterson
There’s a reason why lots of landscape photographers love DxO software: it’s because of the way it handles raw files. The latest software from DxO, called PhotoLab 2, performs several enhancements automatically before you even begin editing. DxO uses its extensive database of lens corrections and camera sensors to apply automatic fixes for common problems like chromatic aberration, distortion and vignetting, as well as reducing noise and image softness. You notice this immediately upon opening the raw file, as the program will often ask you to download specific lens and camera modules related to the image being opened. The result is a raw file optimised for further editing and enhancements, which you can go on to make with PhotoLab’s powerful array of tools.
Top PhotoLab 2 features
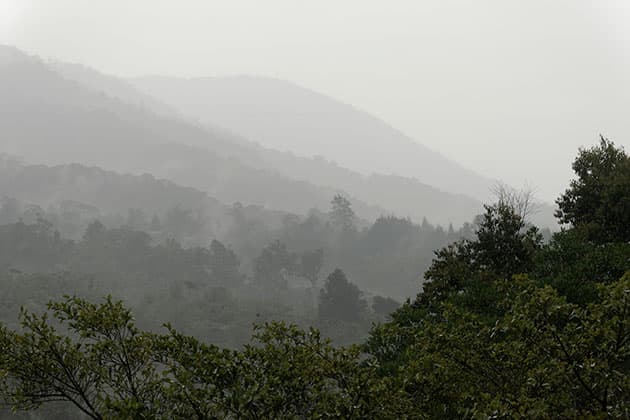
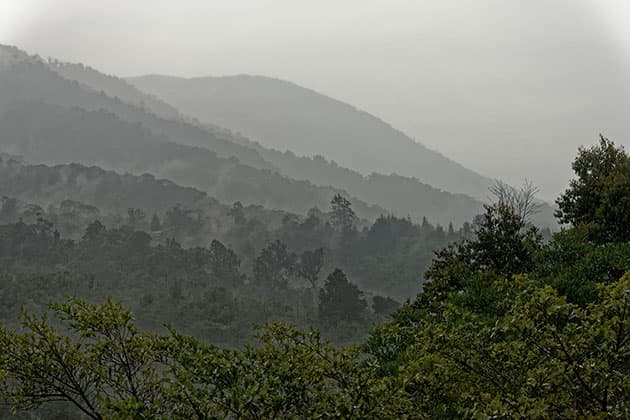
BEFORE (above) and AFTER (below) Reveal hazy detail in the scene using DxO PhotoLab 2. Credit: James Paterson
One of the most impressive features in DxO PhotoLab 2 is ClearView Plus. This helpfully analyses the image for haziness and reduces it, resulting in sharper details and greater contrast over parts of an image affected by atmospheric haze or mist. Lots of raw editors have a dehaze feature, but this is definitely one of the best. Another top feature in PhotoLab 2 that will be appreciated by landscape photographers is the Prime Noise Reduction command. This applies an extra level of noise reduction on exporting the photo. It typically takes a few minutes to complete, but it’s worth it for the fine degree of noise reduction you’ll see in your photos. DxO says that in terms of ISO and noise, it will typically give you the equivalent of an extra stop of light, meaning for example, you can shoot at ISO 400 and get the same results as you’d expect at ISO 200.
Luminar 3 Landscape Looks
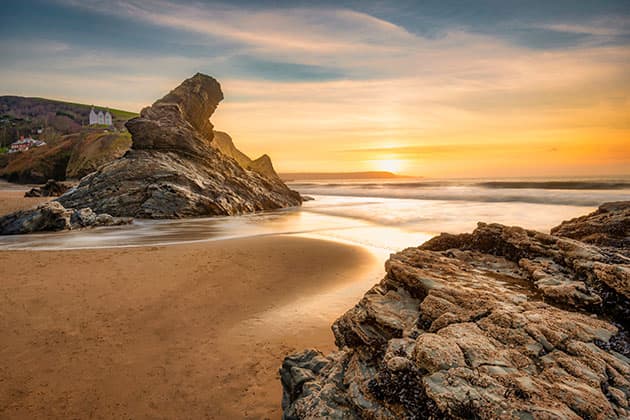
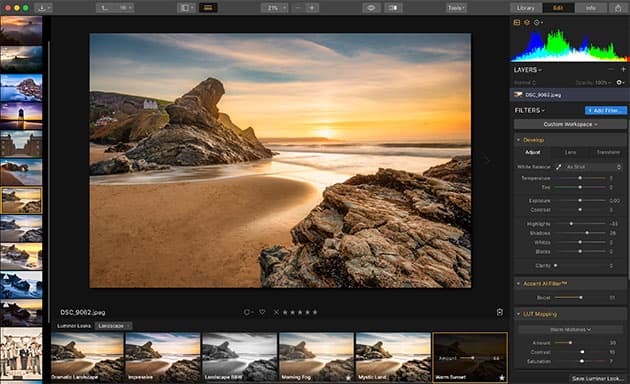
One-click effects in Luminar 3 gives you quick results. Credit: James Paterson
Luminar 3 is a feature-rich editor with several excellent tools geared specifically towards landscape photographers. After opening a raw file in the editor, we can choose from a range of different preset ‘Luminar Looks’. These are one-click effects for boosting an image, and they include a dedicated landscape set with options like ‘Dramatic Landscape’, ‘Morning Fog’ and ‘Warm Sunset’ (used here). Once you settle upon a preset, you can control its overall effect on the image with a simple slider. For more control, you can delve into the panels on the right to fine-tune all of the different settings that go into making the preset, or start afresh. Here you’ll find lots of typical raw controls like Colour Temperature, Exposure and Dehaze, as well as more unique tools like a Foliage Enhancer, Polarizing Filter and Microstructure effect. It’s worth pointing out too that these effects – and any other combination of filters – can be applied to separate layers, which makes it possible to use them selectively over different areas of your photo.
AI Landscape Enhancer
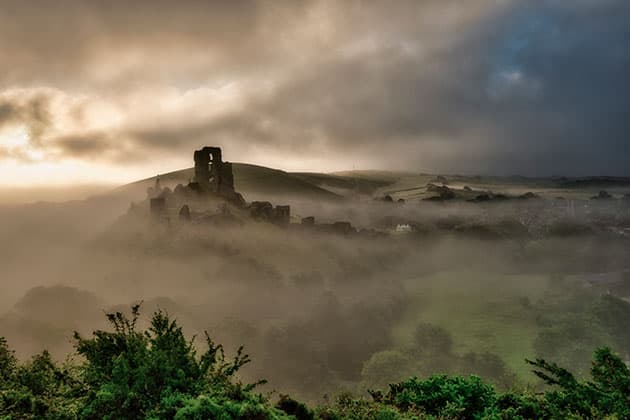
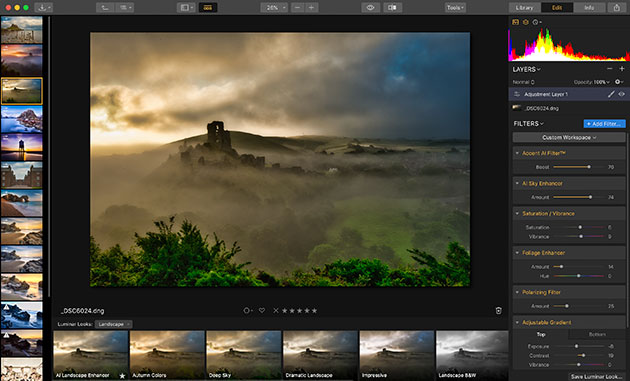
Corfe Castle, Dorset, in mist, edited using AI Landscape Enhancer. Credit: James Paterson
Within the range of Luminar Looks is an intriguing option called the AI Landscape Enhancer. This employs a combination of two forms of artificial intelligence (AI). First, the ‘Accent AI Filter’ analyses your image, detecting the content and boosting detail where appropriate. Second, the ‘AI Sky Enhancer’ automatically detects and enhances the sky. Both these effects have sliders that can be fine-tuned to control their overall strength (and both can be applied individually within the filter menu if you prefer to combine them with other effects). These landscape- specific features are among some of the best in Luminar 3, and they’re especially appealing if you prefer not to spend too much time editing your photos.
The benefits of raw
All the editing software we’ve looked at here is designed to be used with raw files. You can use JPEGs if you like, but with raw the benefits are greater. First and foremost, raws have a wider dynamic range than JPEGs, which means they hold more detail in the highlights and shadows. For landscapes, this extra detail can make all the difference. We can pull detail out of blown-out skies and recover lost detail in deep shadows. What’s more, raws are 12-bit or 14-bit as opposed to JPEGs, which are 8-bit. This translates to an awful lot more colour information, which means that not only are we able to change the colour space of the image, but we can also alter the white balance after the shot has been taken, with exactly the same results as if we’d done so beforehand.

