How to photograph water & landscapes
Guy Edwardes knows a thing or two when it comes to capturing images of landscapes and water
Credit: Guy Edwardes
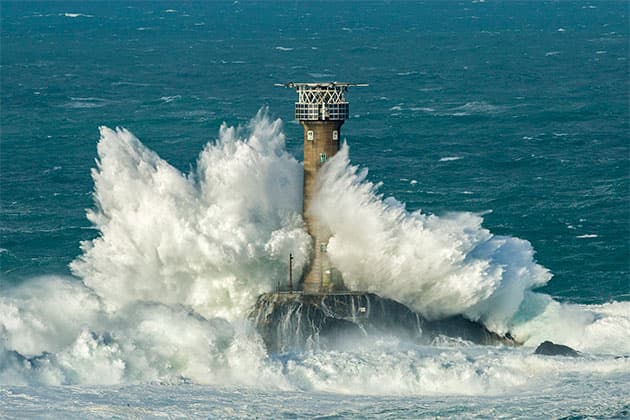
Freeze wave action
In stormy conditions it is often preferable to use a fast shutter speed to freeze the movement of waves as they explode on the shoreline. It’s likely to be windy, so use a tripod if possible and image stabilisation if you have it. A shutter speed of 1/500sec is normally enough to freeze a wave, although slightly slower speeds can also be very effective.
Credit: Guy Edwardes
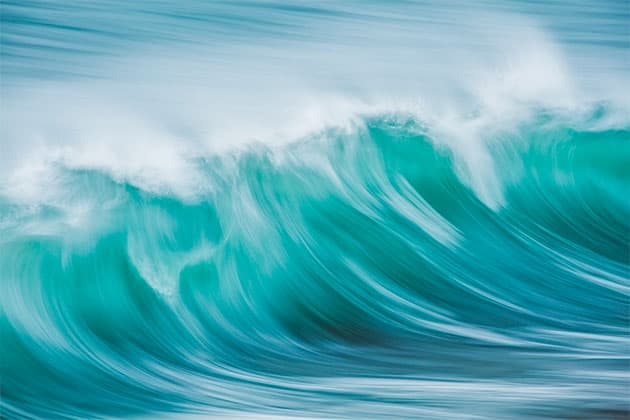
Shoot abstract water images
In windy conditions with large waves (but not too much white foam) try panning the waves as they approach the shore. Support your camera on a tripod or use image stabilisation (mode 2 for Canon or ‘Active’ for Nikon) as a shutter speed of between 1/15sec and 1sec tends to work best. Pan smoothly and you’ll be able to achieve some interesting effects.
Credit: Guy Edwardes
Get in the water
Some of the most dramatic river and waterfall images are taken from the middle of the river – you’re almost certain to achieve a more unique composition! You’ll get closer to interesting foreground elements and with the water rushing towards you any leading lines will be more effective. Consider wearing waders, but don’t put yourself in danger.
Credit: Guy Edwardes
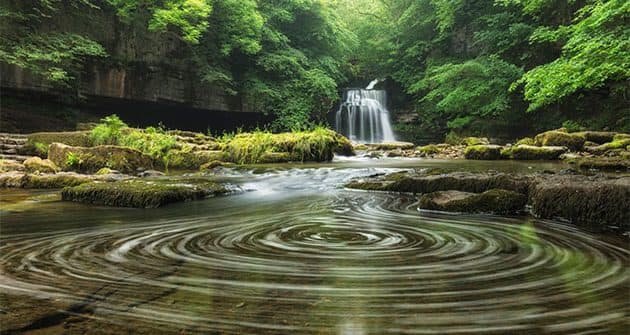
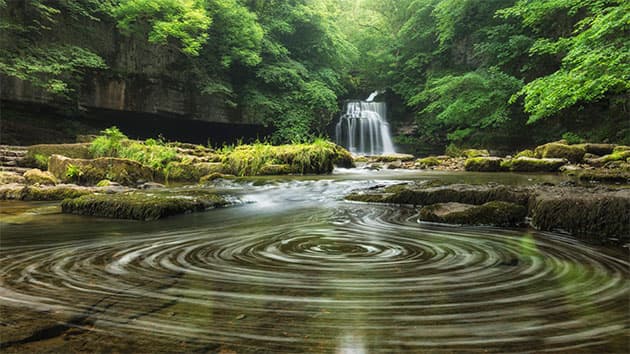
Search for spinning foam along rivers
Beneath waterfalls and along fast-flowing rivers it is often possible to find foam or fallen leaves that have become trapped in a small pool or bay. The water movement often causes them to spin slowly. Use an ND filter to increase your exposure time to between 8 and 30 seconds to use this circular motion to add interest to the foreground of your river images.
Credit: Guy Edwardes
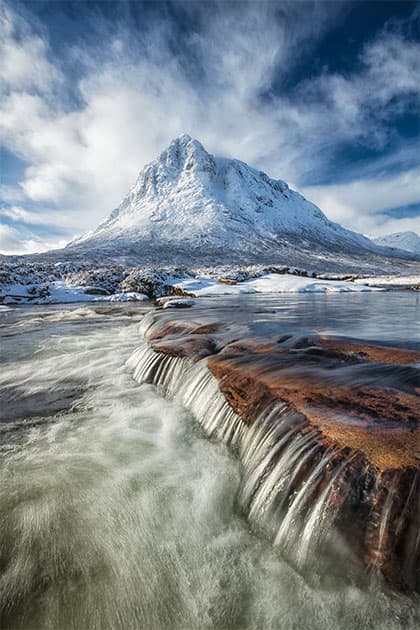
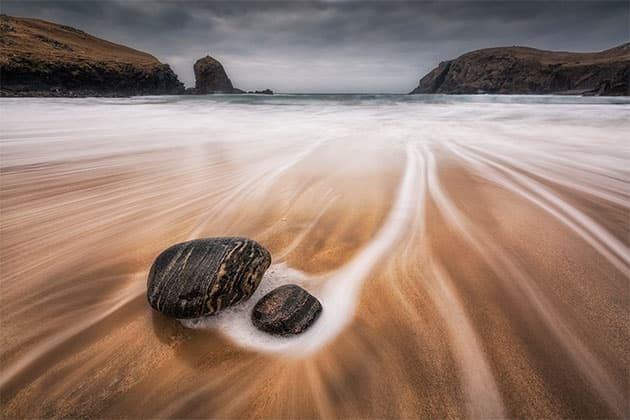
Use water movement to create leading lines
A long exposure can be used to create leading lines in fast-flowing rivers and as the water draws back down a sandy beach. Shutter speeds of between 1/8sec and 4sec tend to work best, depending upon the speed of the moving water. When working on a beach make your exposure as a wave begins to recede down the beach for the best effect.
Credit: Guy Edwardes
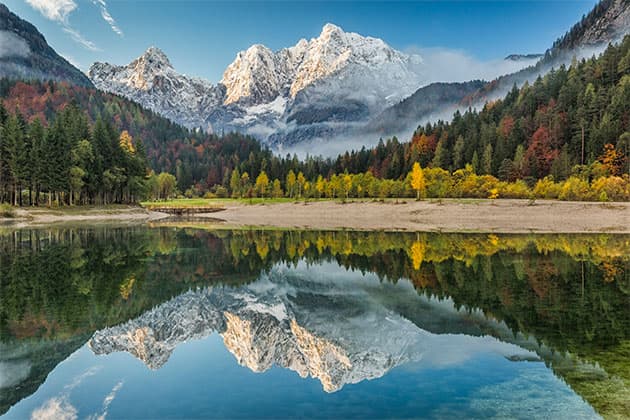
Shoot reflections
Calm, high-pressure weather conditions can result in beautiful reflections on lakes and slow-moving rivers. This occurs most often around dawn and dusk. Look for symmetry in your composition and don’t be afraid to place the horizon in the centre of it. Take care if using a polarising filter as it can reduce the impact of the reflection.
Use ND filters to control exposure time
Neutral density filters are an essential accessory when photographing moving water. They can be used to control the amount of light entering the camera to allow you to use the exact exposure time you need for the desired water effect. A useful selection would be 3-stop, 6-stop and 10-stop. They can be stacked to allow you to achieve a very long exposure time in the middle of the day.
Select the right exposure time
When shooting moving water it’s important to set the correct exposure time for the speed of the water. This is best achieved using ND filters, rather than increasing your ISO or compromising your aperture setting. There are no rules – experiment to see which exposure time provides the best results. It’s worth taking multiple shots, as each one will show a different pattern of water movement.
Guy’s top kit
- Visible Dust Magic Cloth By far the best lens cleaning cloth I’ve used. It even gets salt spray off your lens to leave it sparkling clean.
- Wellingtons or waders A decent set of sturdy wellingtons is a must if you want to get into some of the best positions along rivers and streams.
- Cable or remote release Essential for allowing you to release the shutter at just the right moment to catch a particular water effect without shaking the camera.
Guy Edwardes has been a professional landscape, nature and wildlife photographer for 25 years and has a wealth of knowledge in many fields. Guy also runs photography workshops both in the UK and abroad. To find out more go to guyedwardes.com.
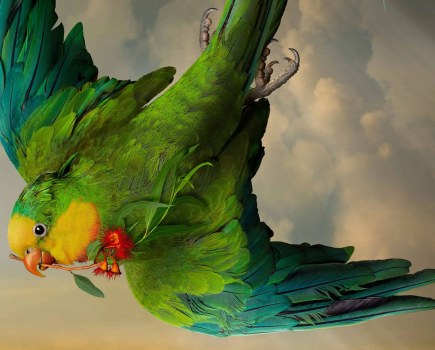
How to photograph wildlife & nature in water
Ross Hoddinott shares his top secrets for capturing magical water wildlife and nature images
Credit: Ross Hoddinott
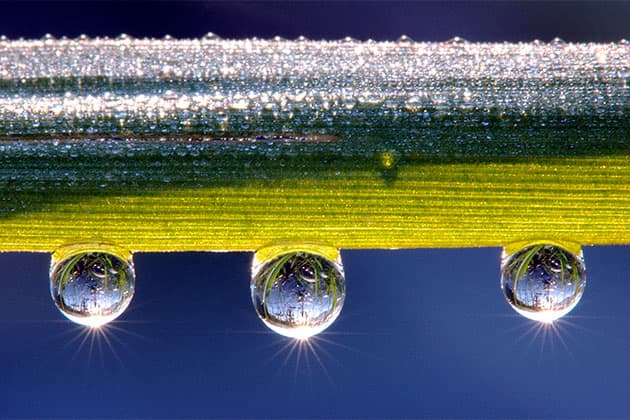
Water abstracts
Water alone can be your subject. Colourful reflections, water droplets, or frame-filling shots of water motion can look eye-catching and abstract in close-up. Water droplets can act like tiny lenses, magnifying or refracting objects positioned behind them, so look closely and select your shooting angle with care. Visit weirs and waterfalls and use a telephoto lens to isolate cascading water. It’s also a good idea to experiment with shutter length. Attach an ND filter to generate an artificially long exposure of a second or two, which will creatively blur the water’s motion.
Credit: Ross Hoddinott
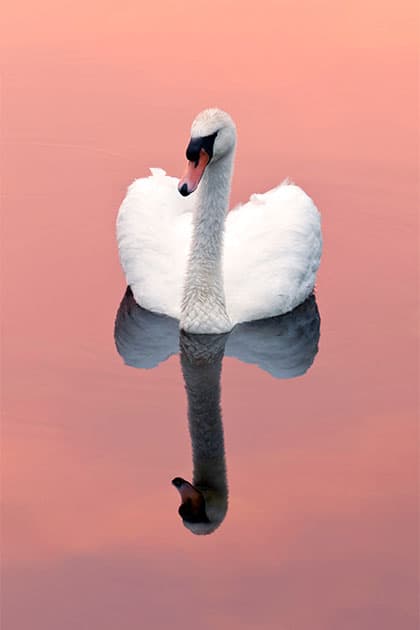
Reflected symmetry
Mirror-like reflections will add symmetry, interest and even a sense of tranquillity to your nature shots. All you need is perfectly calm water and a willing subject! Consider your angle carefully, as it is often best to be close to the water’s edge, while shooting from a low perspective. Although photographers are frequently told to avoid placing subjects centrally, doing so can prove very effective when shooting a reflected subject. By keeping the space above and below your subject equidistant, you will capture images boasting eye-catching symmetry.
Credit: Ross Hoddinott
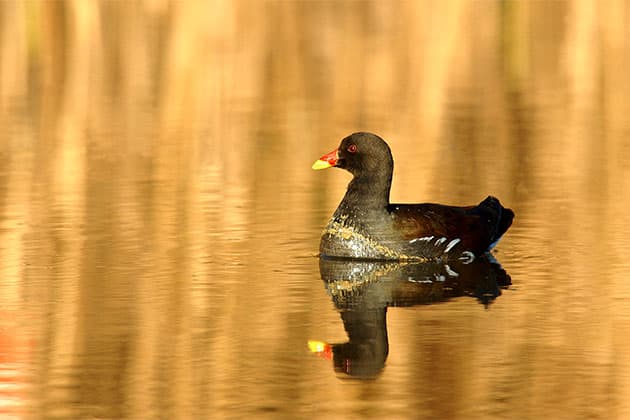
Colourful reflections
Colourful reflections typically create the most striking backdrop. Sunny days with clear blue skies will produce vivid reflections, while warm early morning or late evening light will render water golden and glowing. Urban waterways, like canals, are often sheltered and will reflect the shape and colour of nearby buildings and boats. This can produce very colourful and abstract-looking reflections. If you identify an area of reflective water that is particularly photogenic, sit and wait by the water’s edge – camera at the ready – for a swan, heron or duck to swim into just the right position.
Credit: Ross Hoddinott
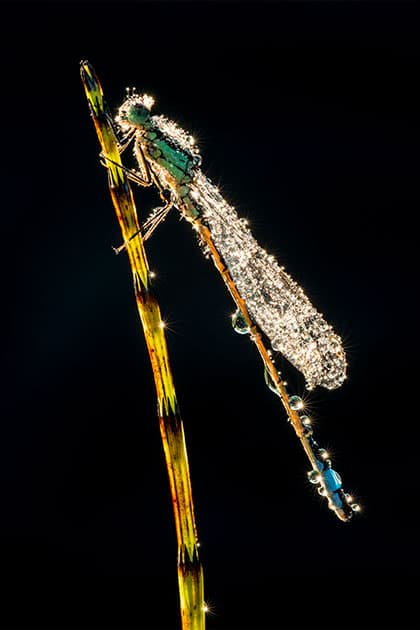
Morning dew
Water droplets will add sparkle, scale and interest to photographs of wild owers, spiders’ webs and insects. After clear, cool nights, dew will form and adorn roosting insects, like dragonflies and damselflies. Set your alarm early and arrive at suitable habitats for daybreak. Use a macro lens, or close-up attachment to achieve frame-filling shots. For added drama, consider backlighting your subject. By doing so, you may also capture tiny starbursts in individual water droplets.
Credit: Ross Hoddinott
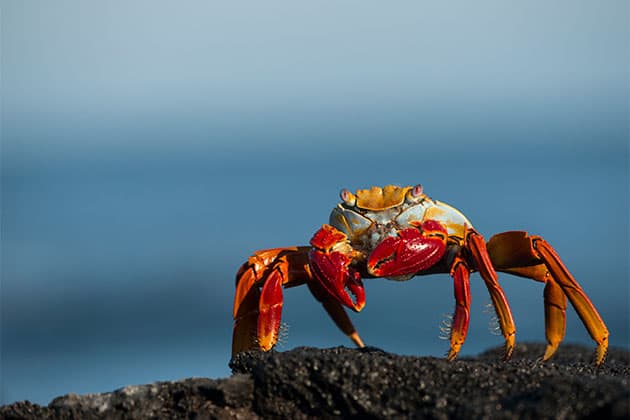
Background impact
Water doesn’t necessarily need to be obvious to enhance your photos! Instead it can provide a vivid background colour or create atmospheric bokeh. For example, when photographing close-ups of birds, mammals or even insects located adjacent to water, include it as a vivid, contrasting backdrop. Use a telephoto lens and large aperture to render vibrant reflections as a diffused wash of colour. Also look for sunlight catching water droplets clinging to foliage, or on the water’s surface, as these sparkles can create beautiful doughnut-shaped bokeh.
Credit: Ross Hoddinott
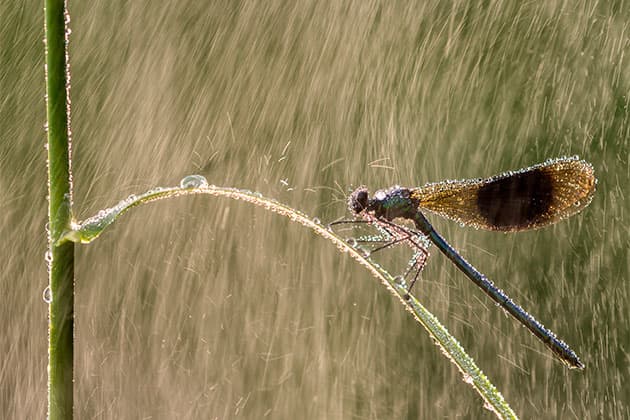
Shoot in wet weather
Bad weather can create great photo opportunities for nature photographers. Rain and drizzle will add interest and texture to fur and feathers, while raindrops clinging to plumage or dripping from beaks, antlers or bodies will really add atmosphere and a sense of environment to shots. Slower shutter speeds will render rain as long streaks, while faster speeds will suspend droplets mid-air. Rain will stand out more against a dark background, so pay attention to your surroundings and adjust your shooting position if necessary. When shooting in wet weather, work from a hide or protect your kit using a protective rain sleeve or cover.
Underwater world
Thanks to sports cameras, such as GoPro, and polycarbonate housings, it is now possible for anyone to capture stunning images of our extraordinary underwater wildlife. You don’t need to be an expert diver – you can simply take images while snorkelling, or even in rock pools. Water absorbs more light the deeper you go, so you will need a strobe (flash) if you intend diving far. Always try to minimise the amount of water between you and your subject, as the closer you get, the better the colour, contrast and sharpness will be.
Create a water feature
All animals rely on water. Wetland habitats are typically teeming with wildlife, while the coast is another hotspot. However, you don’t need to travel further than your own backyard to capitalise on nature’s reliance on water. Use water to lure subjects closer to your camera – just as you might wild bird seed, nuts and bait. Build a small pond or reflection pool in your garden, or buy a bird bath, and wait for songbirds to visit. Disguise your whereabouts by working from a portable hide or shoot from a window in your house or nearby shed.
Ross’s top kit
- Rain cover A protective rain sleeve or waterproof cover will help keep kit dry when it is raining or when there is spray or moisture in the air. A lens hood is useful for keeping the front of the lens free of moisture.
- Waterproof trousers Waterproof over-trousers are a must-have item when you are likely to be kneeling or lying down close to the water’s edge, or on wet sand.
- Wellington boots Wellies may not be as comfortable as walking boots, but they allow you to wade deeper or stand in water for prolonged periods and remain dry. Neoprene wellies, made by brands like Bogs and Muck Boots, are particularly warm and comfortable.
Ross Hoddinott is an award-winning photographer who regularly writes for a number of photography publications. Find out more about Ross, his portfolio and workshops at rosshoddinott.co.uk.
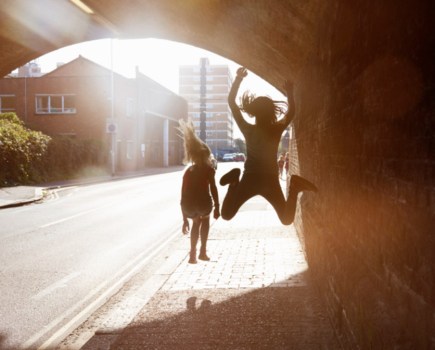
How to photograph portraits & water
Claire Gillo shares her best tips for photographing people and water together in the same frame
Credit: Claire Gillo
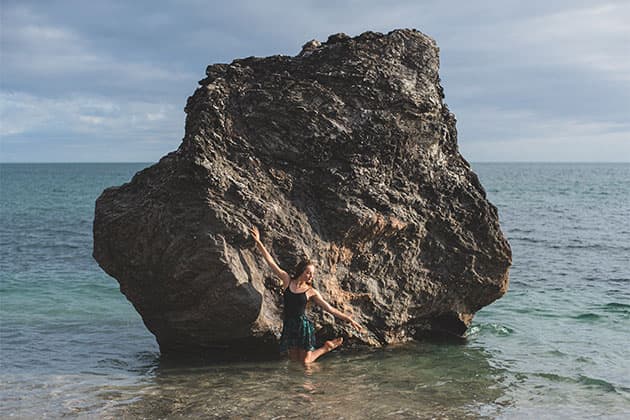
In the water
This image, above, has been taken from a series shot with ballerina Lydia Brayshaw aimed to blend the dancer’s movements with the beauty of the beach setting. Here Lydia holds a strong posture being aided by the rock. Despite it being a calm day you can see the sea’s power by the fact she appears so small. From a technical side, keep in mind the sea can easily overexpose in the midday sun so shoot later in the day when the light is softer to avoid unwanted glare. Also knock your exposure down on the scale to make sure the highlights aren’t overexposed.
Credit: Claire Gillo
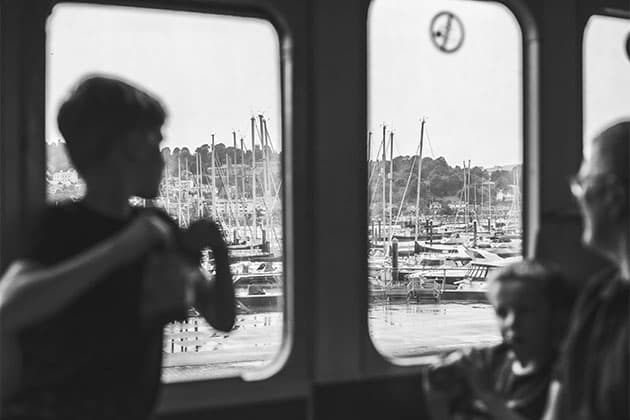
Document by the sea
This image, above, was taken on a family day out on a steam train that runs alongside the River Dart. I made the creative decision to keep the boats and water in focus whilst blurring the people – turning them almost into silhouettes. By bringing two settings (indoors and outdoors) together you can create interesting juxtapositions that relate to each other but are also separate. The conversion to black & white makes this image more about shape and texture rather than getting distracted by colour. Again, in bright conditions it’s easy to overexpose the water in a shot like this so expose for the water in the background rather than the people in the foreground.
Credit: Claire Gillo
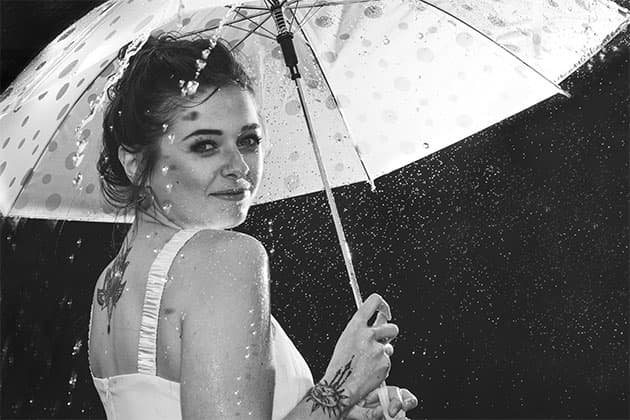
Get creative
You don’t need rain to get out the umbrella for your portraits. Fake it like I did using a hosepipe, a dark background and two flashguns in the garden. Keep your flashguns protected by placing clear plastic bags over the top, and light your subject from behind as well as in front to make the water drops ‘ping’ from the scene!
Credit: Claire Gillo
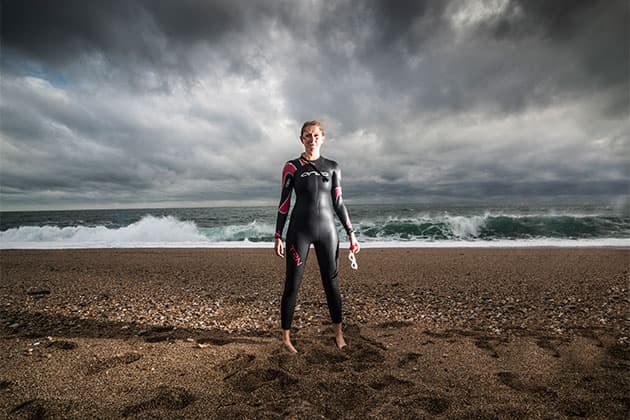
Dramatic water
A portrait framed against a dramatic seascape will work really well if you take the right approach. When shooting location portraiture there are many things to think about so plan well to get the best possible result. To get this image I used one single flashgun set to the side of the model, which I then had to remove in Photoshop at the editing stage. Underexpose the background by a stop to bring out the textures in the clouds and sea. Time your shot so the waves look arched and formed – it’s amazing how a rough sea can look flat when you get your images up on the screen.
Claire’s top kit
- Plastic bags Clear resealable plastic bags are versatile and can be used as a cheap alternative rain cover for your kit.
- Towel It may seem obvious to bring a towel for your model, however it can often get overlooked when thinking about what else you need to pack. You may also need one for yourself if you dip your toes in too deep!
- Hot chocolate If you’re on location and your model gets cold from the water, a nice mug of hot chocolate from the Thermos will go down well.
Claire Gillo is a photographer and writer based in the south west of the UK and writes for many different photography publications. Claire can be found at clairegillo.com or follow her on Instagram @clairegillophotography.