Your guide: John Wade
John Wade Regular AP contributor John first tried infrared photography 40 years ago with film cameras, gave up because he couldn’t make it work and has just rediscovered it, thanks to the magic of digital photography.
Put simply, what we call white light is made up from the colours of the visible spectrum: red, orange, yellow, green, blue, indigo, violet. For the technically minded, that represents wavelengths from around 380 to 750 nanometres. Outside this range there are wavelengths the human eye can’t see: ultraviolet below 380 nanometres and infrared above 750 nanometres. Since the green foliage of plants and trees reflects more infrared light than other surrounding objects, what’s needed is a way to make the camera ignore the visible spectrum and record only infrared. As a result, green foliage glows pure white, blue skies turn jet black, white clouds stand out in dramatic contrast, buildings and other stonework remain unchanged but take on a vivid clarity.
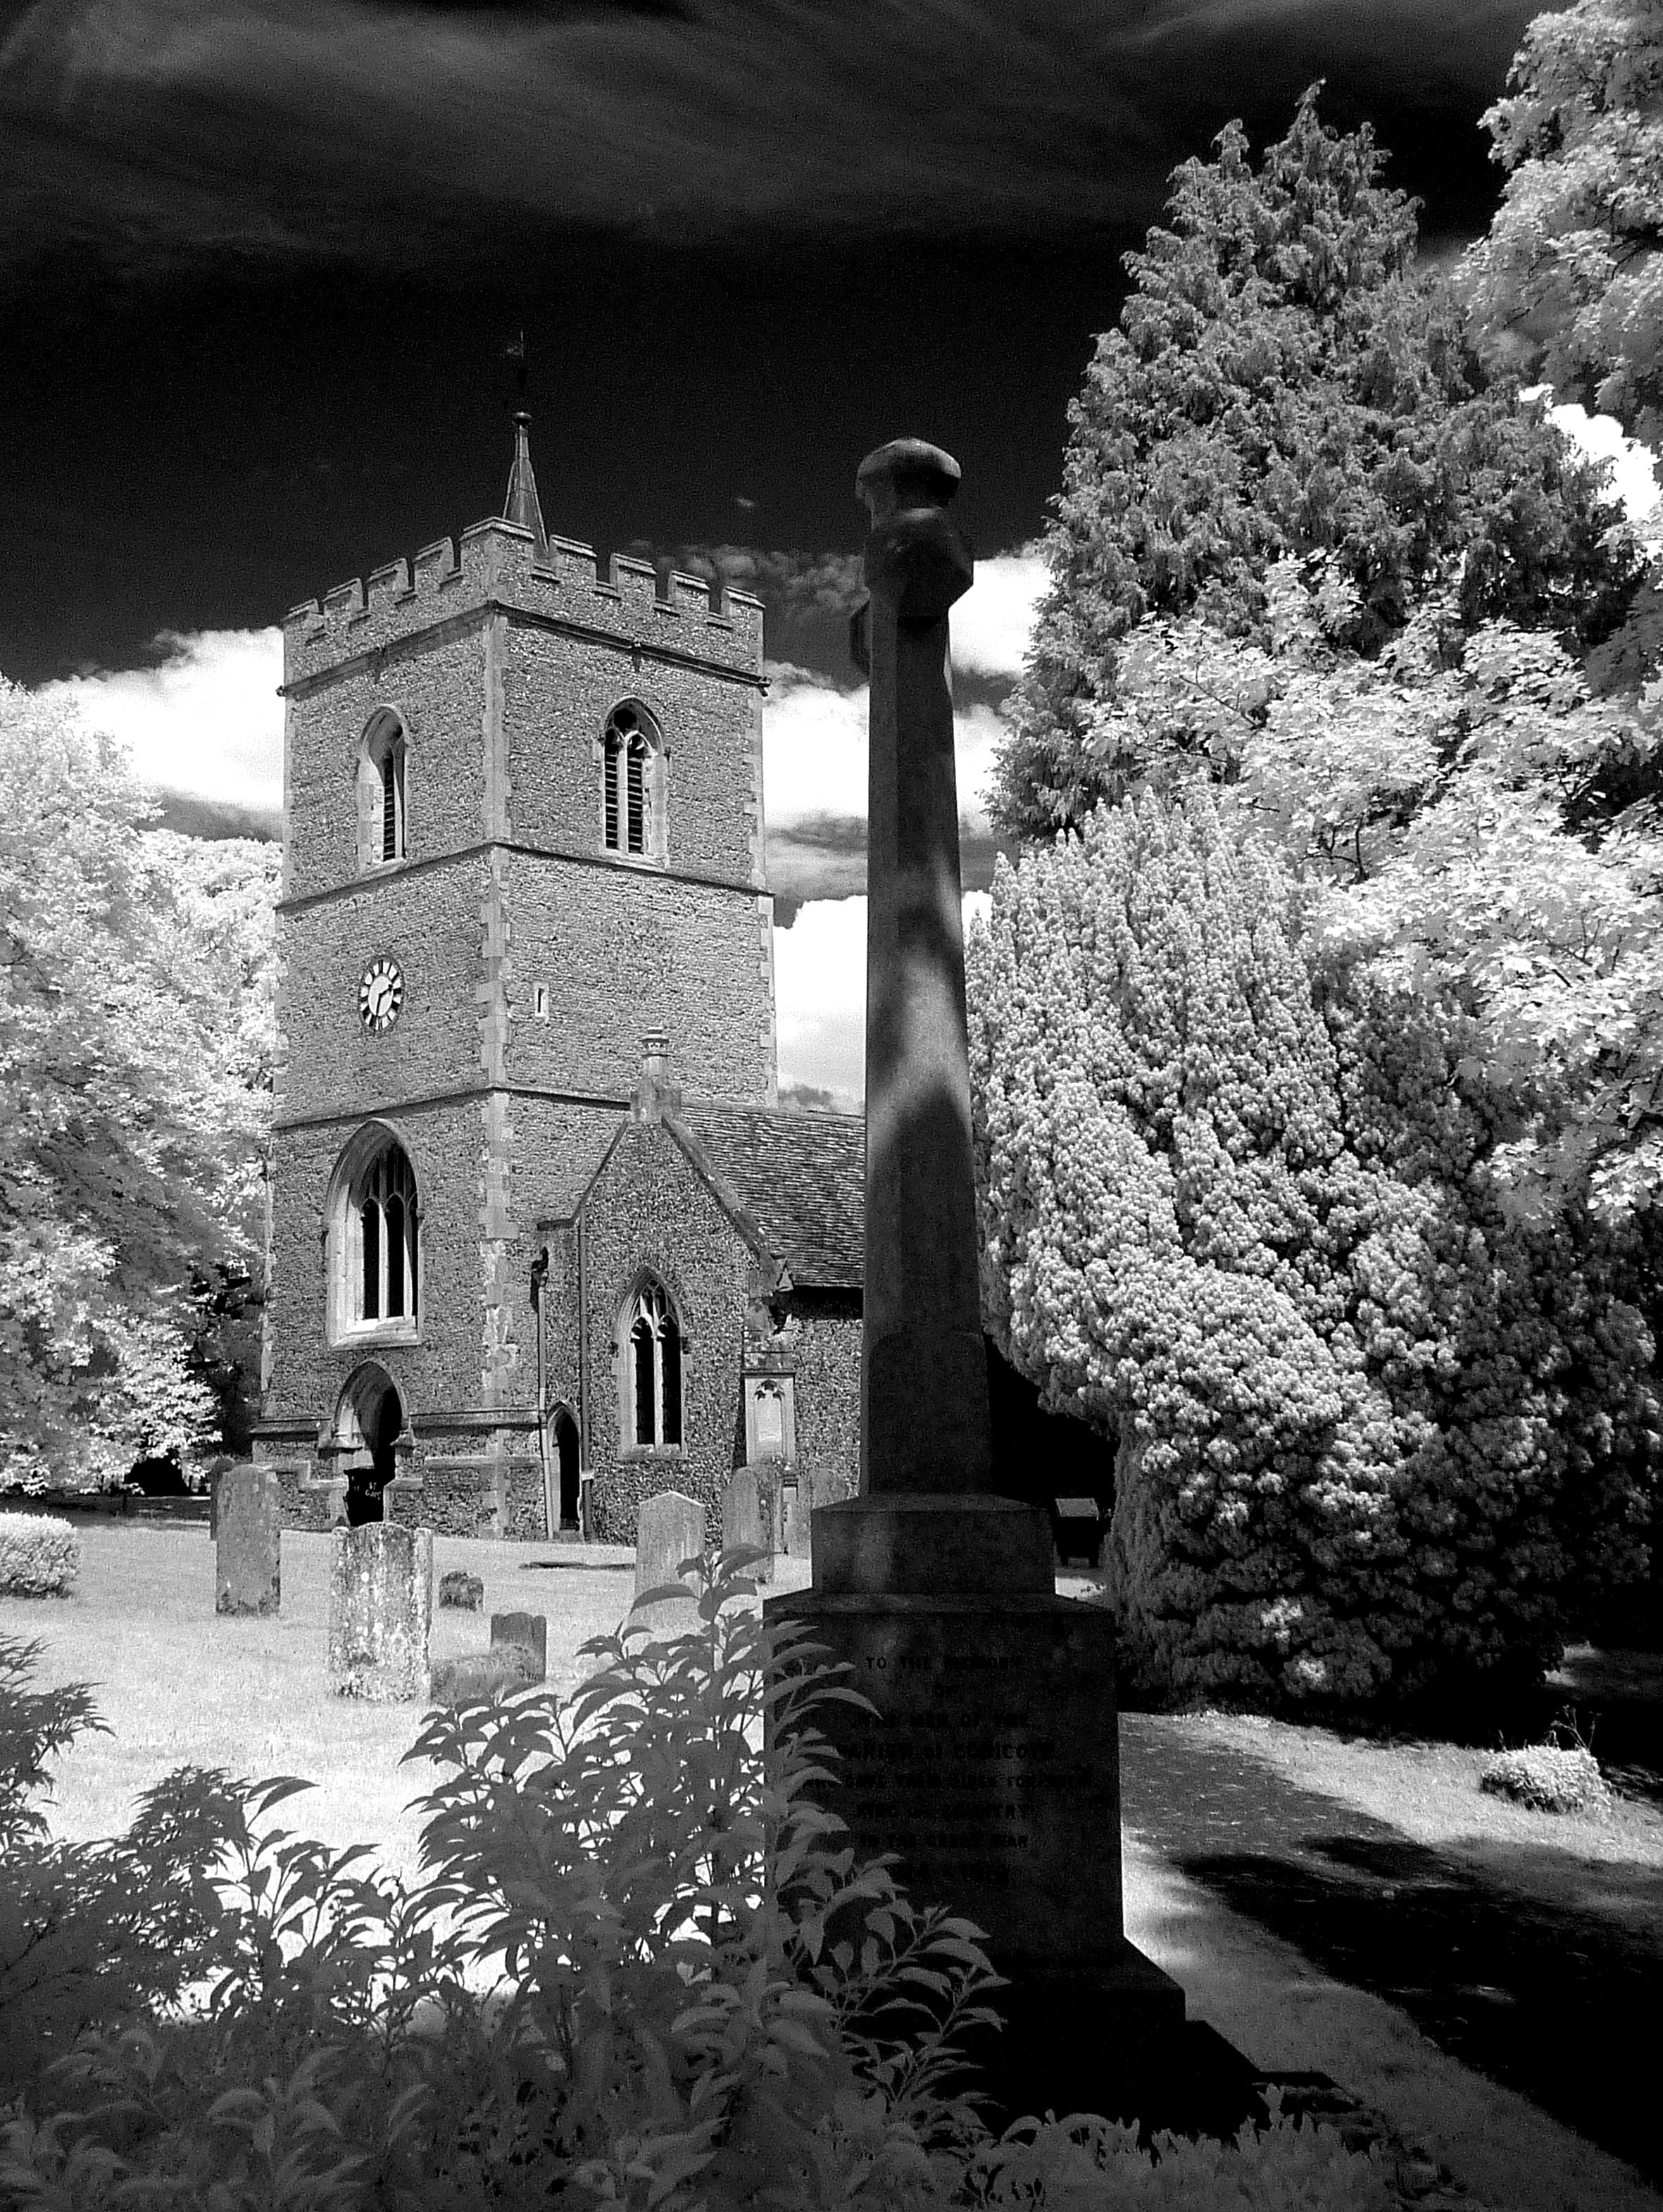
White trees, black skies and well-defined stonework are all characteristics of monochrome infrared photography
Infrared film
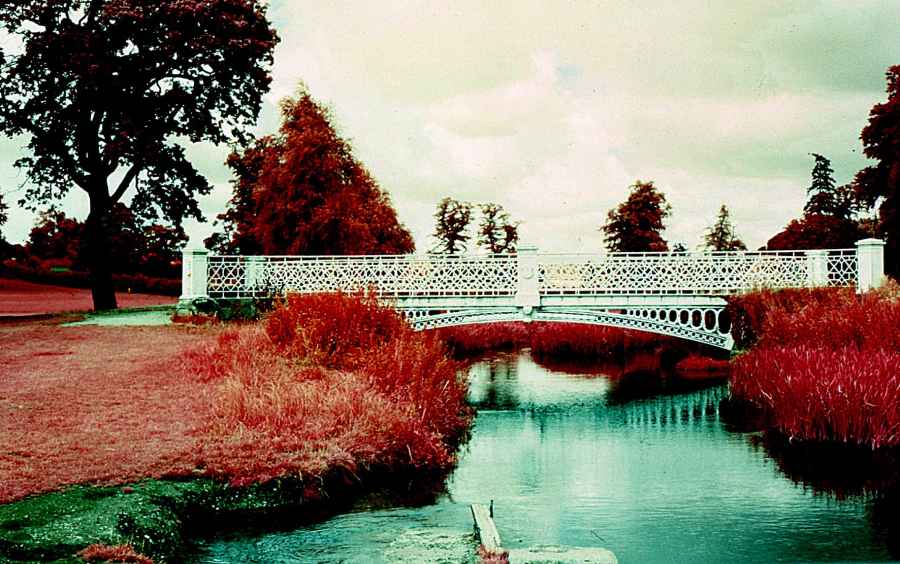
Long ago, Kodak produced an infrared version of Ektachrome. Shot without filtration, foliage recorded magenta and skies turned green. It required the now obsolete E4 process. Today, Lomochrome Purple colour negative film is still available, uses the C-41 process and gives similar results. Older, now obsolete films past their ‘expose by’ dates can also be found on the internet.
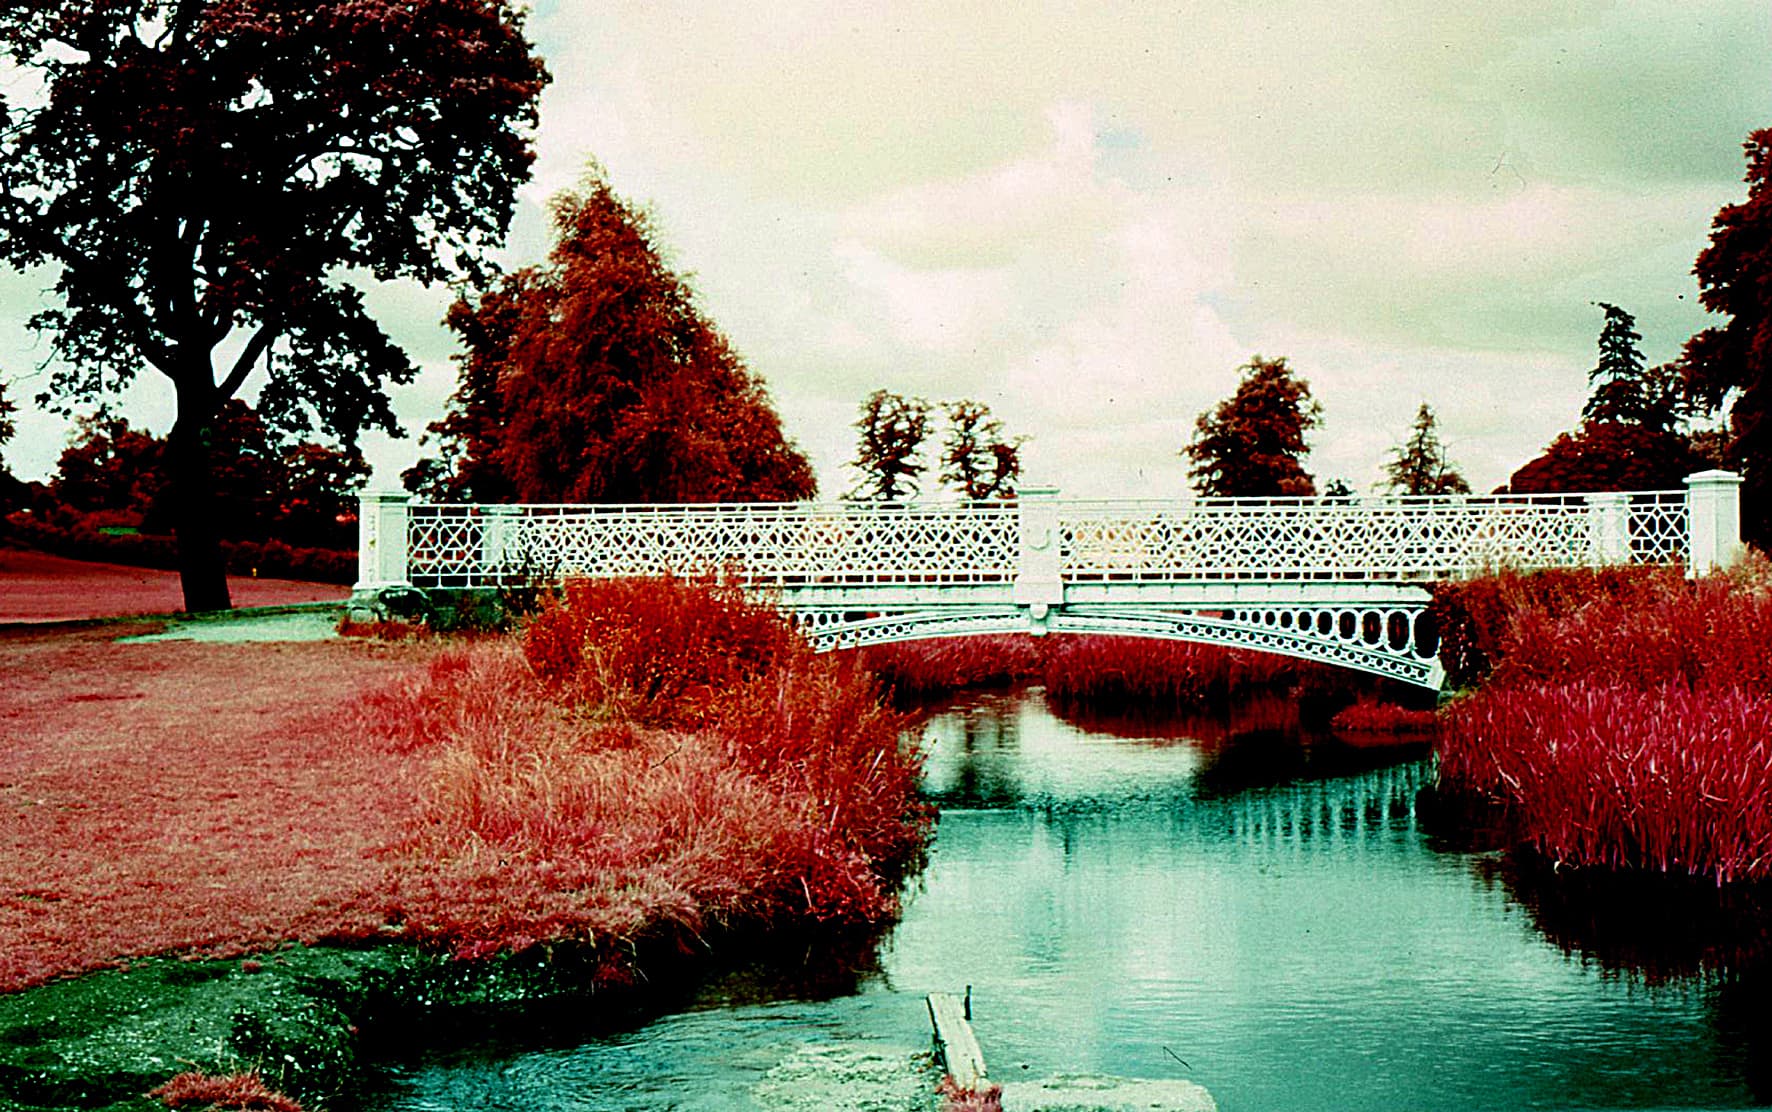
A 40-year-old 35mm transparency taken on the now obsolete Ektachrome Infrared film. Similar results can be attained today using Lomochrome Purple film
Using these films with coloured filters.produces a variety of unusual images. Modern black & white infrared film is more accessible. Shot straight it gives a fairly normal monochrome image, but because it can record infrared as well as the visible spectrum, the images exhibit a slight ghosting. Shoot it with a deep red filter and it will record more infrared than visible light and you’ll get the traditional white trees/black sky look. Infrared films are extremely light-sensitive. They should be loaded in the dark and used in older cameras that do not incorporate internal LEDs as part of their auto functions.
Infrared filters
Although the human eye can’t see infrared, digital sensors can. That said, modern sensors are less susceptible to infrared than was once the case. So, with the use of filters, you’ll get the best results from older digital cameras. These pictures were shot with a 15-year-old Nikon D70, using a Cokin Infrared 720 filter. To look at, this filter appears opaque. In reality, it is a very deep red and blocks visible light up to 720 nanometres. With the camera tripod-mounted an initial picture was shot in program mode. At ISO 200 the exposure was 1/250sec at f/8. The filter was held in front of the lens, exposure switched to manual and, with the aperture kept at f/8, a range of shutter speeds was tried. The best result came at 1 second, giving a low-contrast image with a strong red cast ready for tweaking in Photoshop.

Left to right: original subject; with infrared filter; after Photoshop manipulation
Converted cameras
This is a subject that was dealt with in depth by Geoff Harris in a recent article. It’s a job for experts, involving the removal of the manufacturer’s infrared blocking filter and replacing it with a visible spectrum blocker. The usual result is a low-contrast image that’s more pink/purple than the red that comes from filter use, and one which again needs some Photoshop manipulation. Here’s a useful tip, however: if you use a camera that allows white balance to be set manually, the colour cast will be significantly reduced, providing an easier starting point for Photoshop tweaking. Set the white balance using a grey rather than a pure white surface. Most of the pictures on these pages were taken with a converted Panasonic DMC-TZ6. A converted camera can be used handheld with normal exposures.
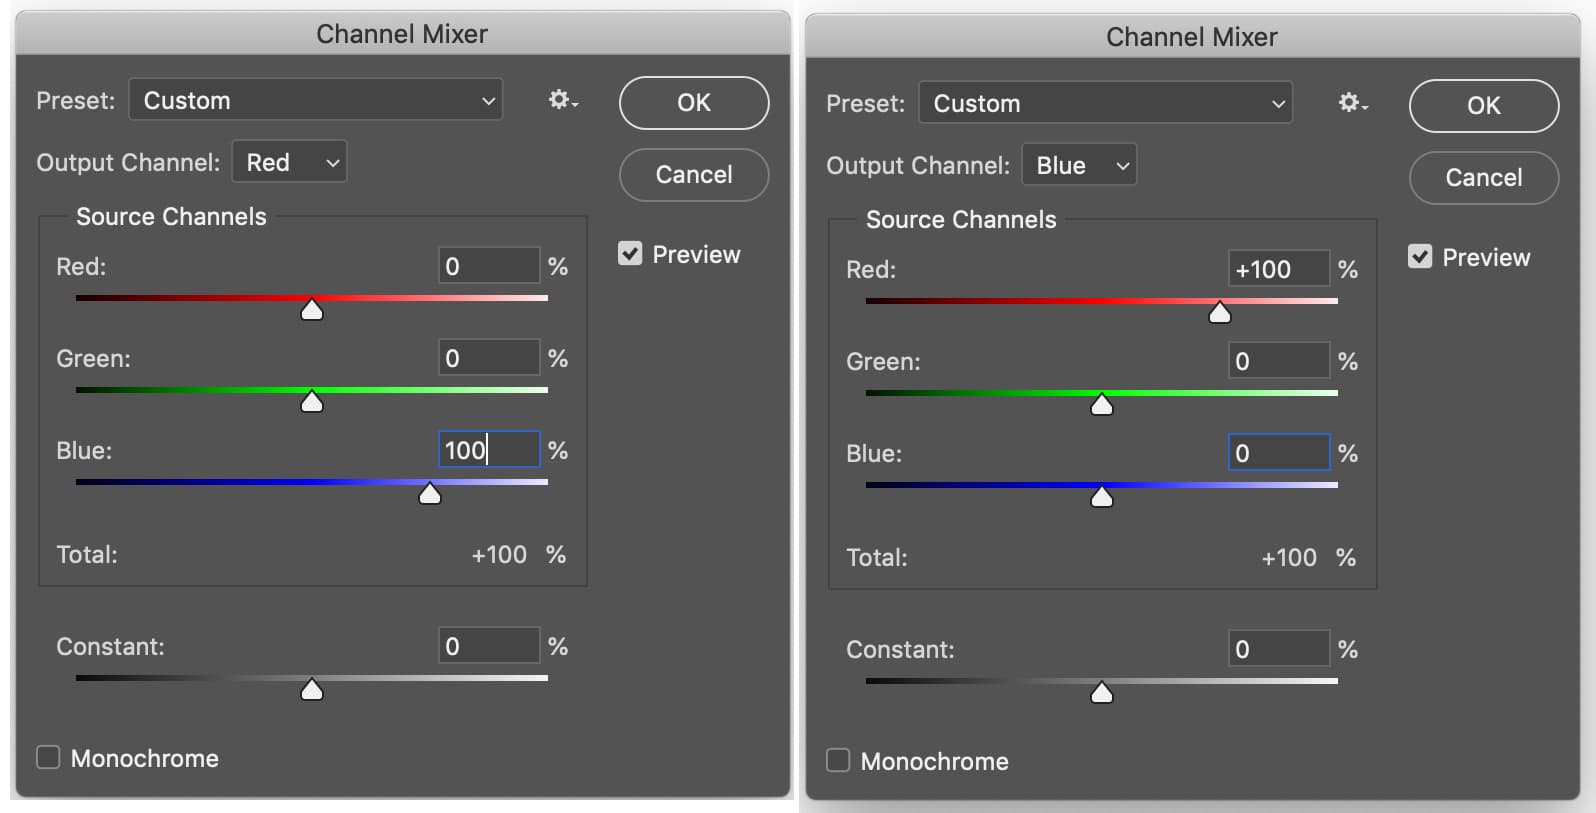
Left and right: Photoshop’s Channel Mixer with adjustments made in the red and blue output channels
Photoshop processing
Photoshop’s Channel Mixer is your best friend for manipulating infrared images. It allows you to control, change or even swap individual colours within an image. Go to Image>Adjustments>Channel Mixer. To convert a strong red image from camera to the stark monochromatic effect of infrared photography, go to the Channel Mixer and check the monochrome box in the bottom left corner. Even though this changes the overall image to black & white, you still have control over what were the original colours of the image. Dial down the red channel to -20 and dial up the blue channel to +150. These are approximate settings which can be juggled until the best effect is achieved. Finish by converting to grayscale then fine-
tuning the brightness and contrast. Another method is to convert the infrared image to grayscale and play with the lighten and darken controls in Levels. It’s easier but it doesn’t give you as much control as using the Channel Mixer.
Adding false colours
This technique works best with an image produced using manually adjusted white balance in a converted camera. Do not change the image to grayscale. Retain it as RGB even though it is largely monochromatic. Open the channel mixer and, with the output channel set as red, change the red source channel to 0 and the blue source channel to +100. Then change the output channel to blue, and set the blue source channel to 0 and the red source channel to +100. Adjust the hue and saturation sliders until you get an effect that pleases you.

Left to right: straight from camera; after adjustment in the red and blue output channels; after further adjustment of the hue and saturation
Fake it in Photoshop
The internet is full of information on how to fake an infrared image. Many of the workings are long, complicated and confusing. Here’s a way to make it work in three simple steps. Start with an image that contains plenty of green foliage and an interesting sky. Open the Channel Mixer and click the monochrome box in the bottom left corner. Adjust the green source channel to +180 and adjust the blue source channel to -130. Use these settings as a starting point and juggle them to fine-tune the effect.
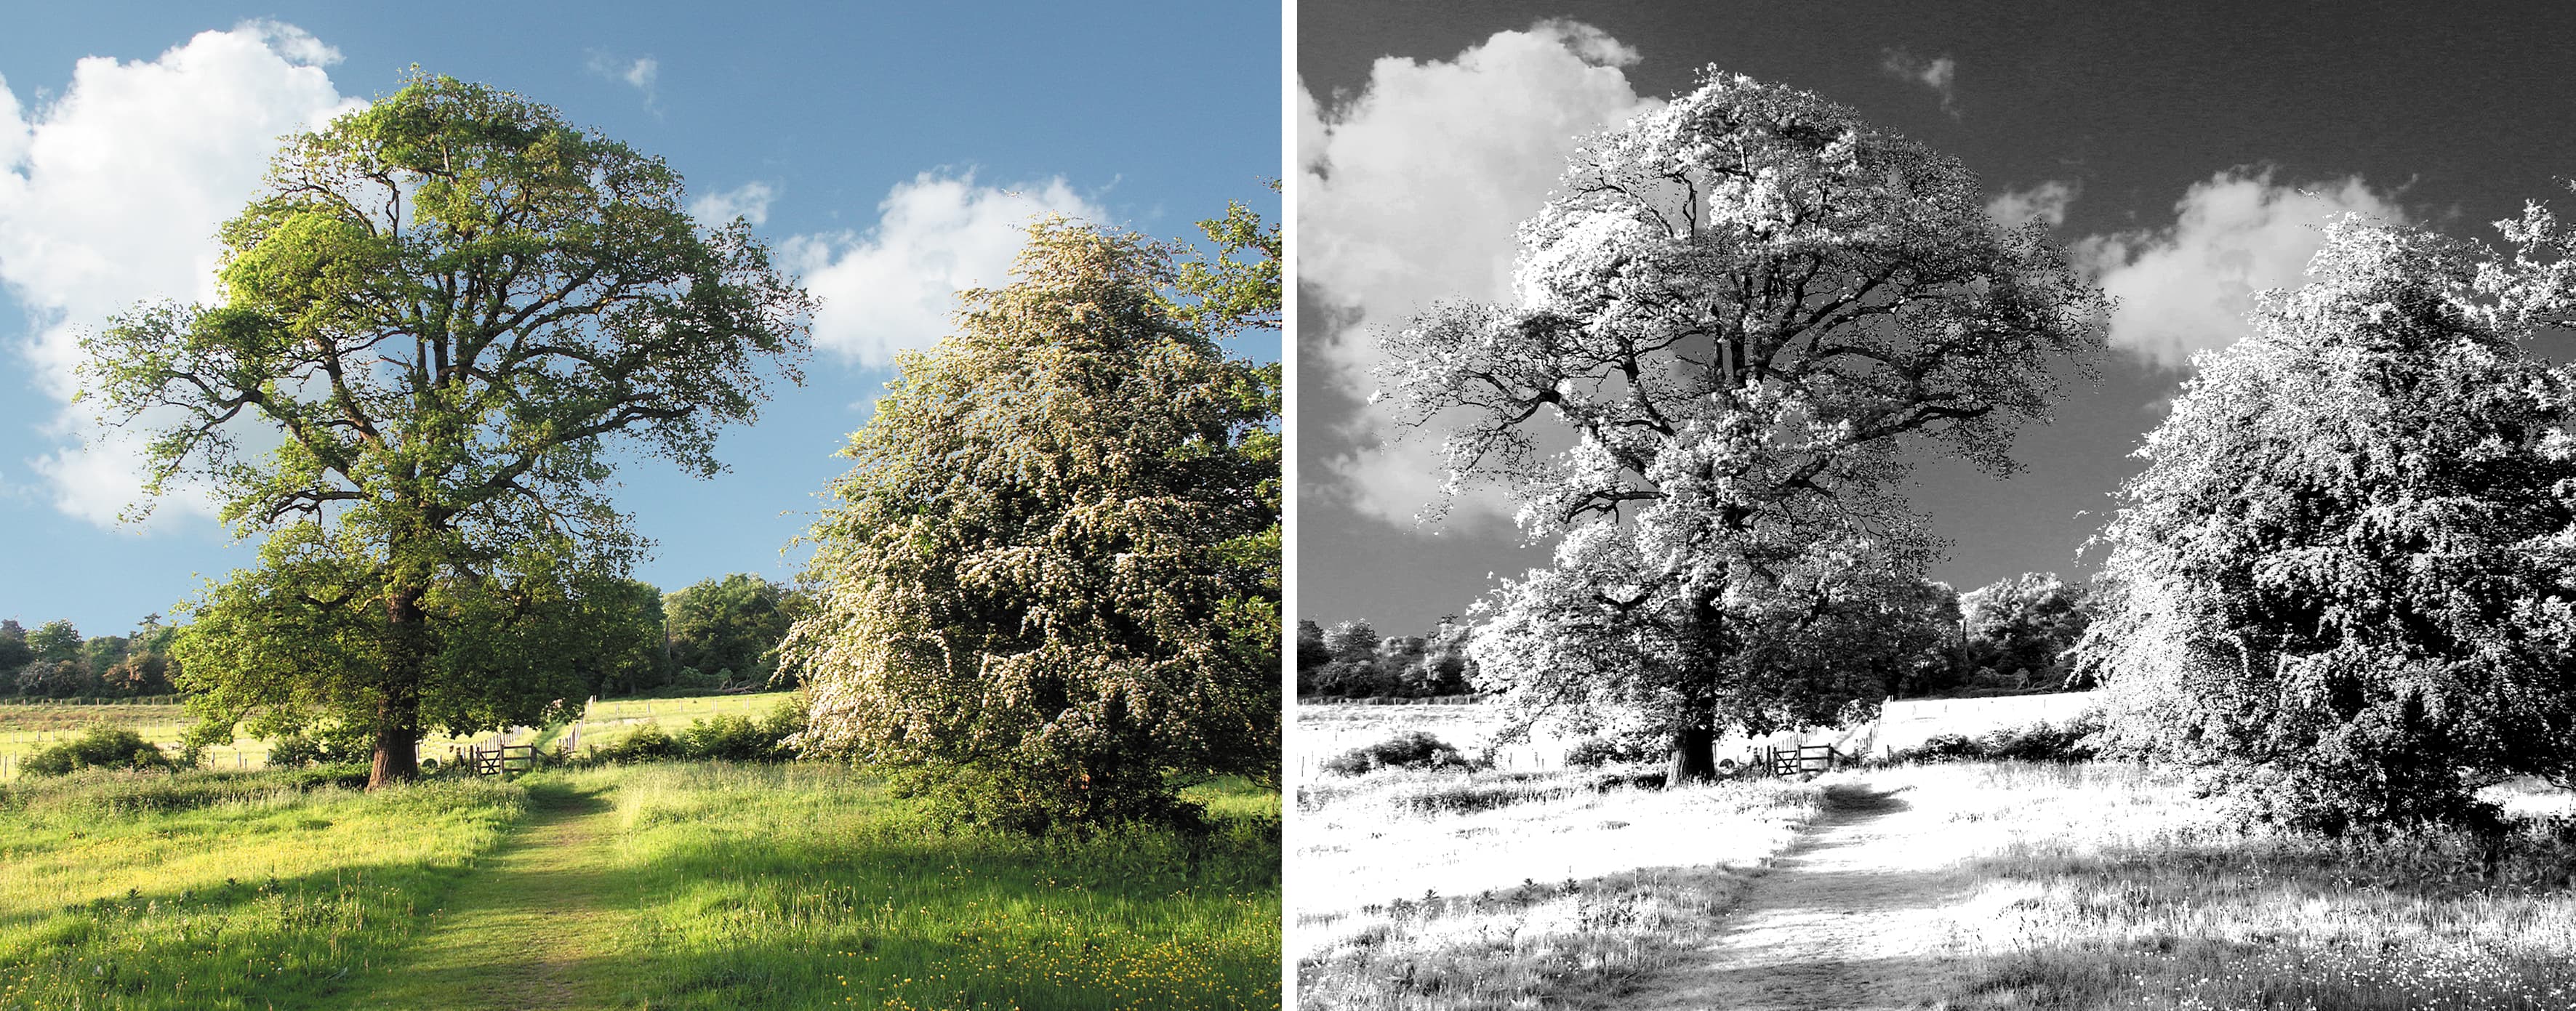
Left and right: original picture and conversion in the Channel Mixer
John’s top tips for better infrared pictures
* The best results come from shooting around midday when the sun is at its harshest, ideally in bright, sunny conditions.
* When using an infrared filter on a DSLR, you won’t be able to see an image in the viewfinder, so compose and focus the shot before adding the filter. * Don’t shoot foreground green trees against more greenery in the background, otherwise all the whites will melt into one confusing mass. * Concentrate on shooting trees or other foliage isolated against the sky. A combination of sunshine and cloud is ideal.
* The focus point with infrared is slightly different from visible light, so an image might appear out of focus. Older manual lenses have a tiny mark close to the usual focus index mark to show where to set the lens’s focus for infrared.
* With autofocus lenses, use small apertures to compensate for inaccuracies in focusing. If the image looks slightly blurred, use Photoshop’s unsharp mask tool.
* These are examples of infrared filters on sale today: Cokin 720, Hoya R72, B+W 830, Lee 695, Kenko R72, Kood R720. Prices range from £20-100. * Infrared film for both colour and black & white can be found here: www.wexphotovideo.com, analoguewonderland.co.uk, www.bristolcameras.co.uk.
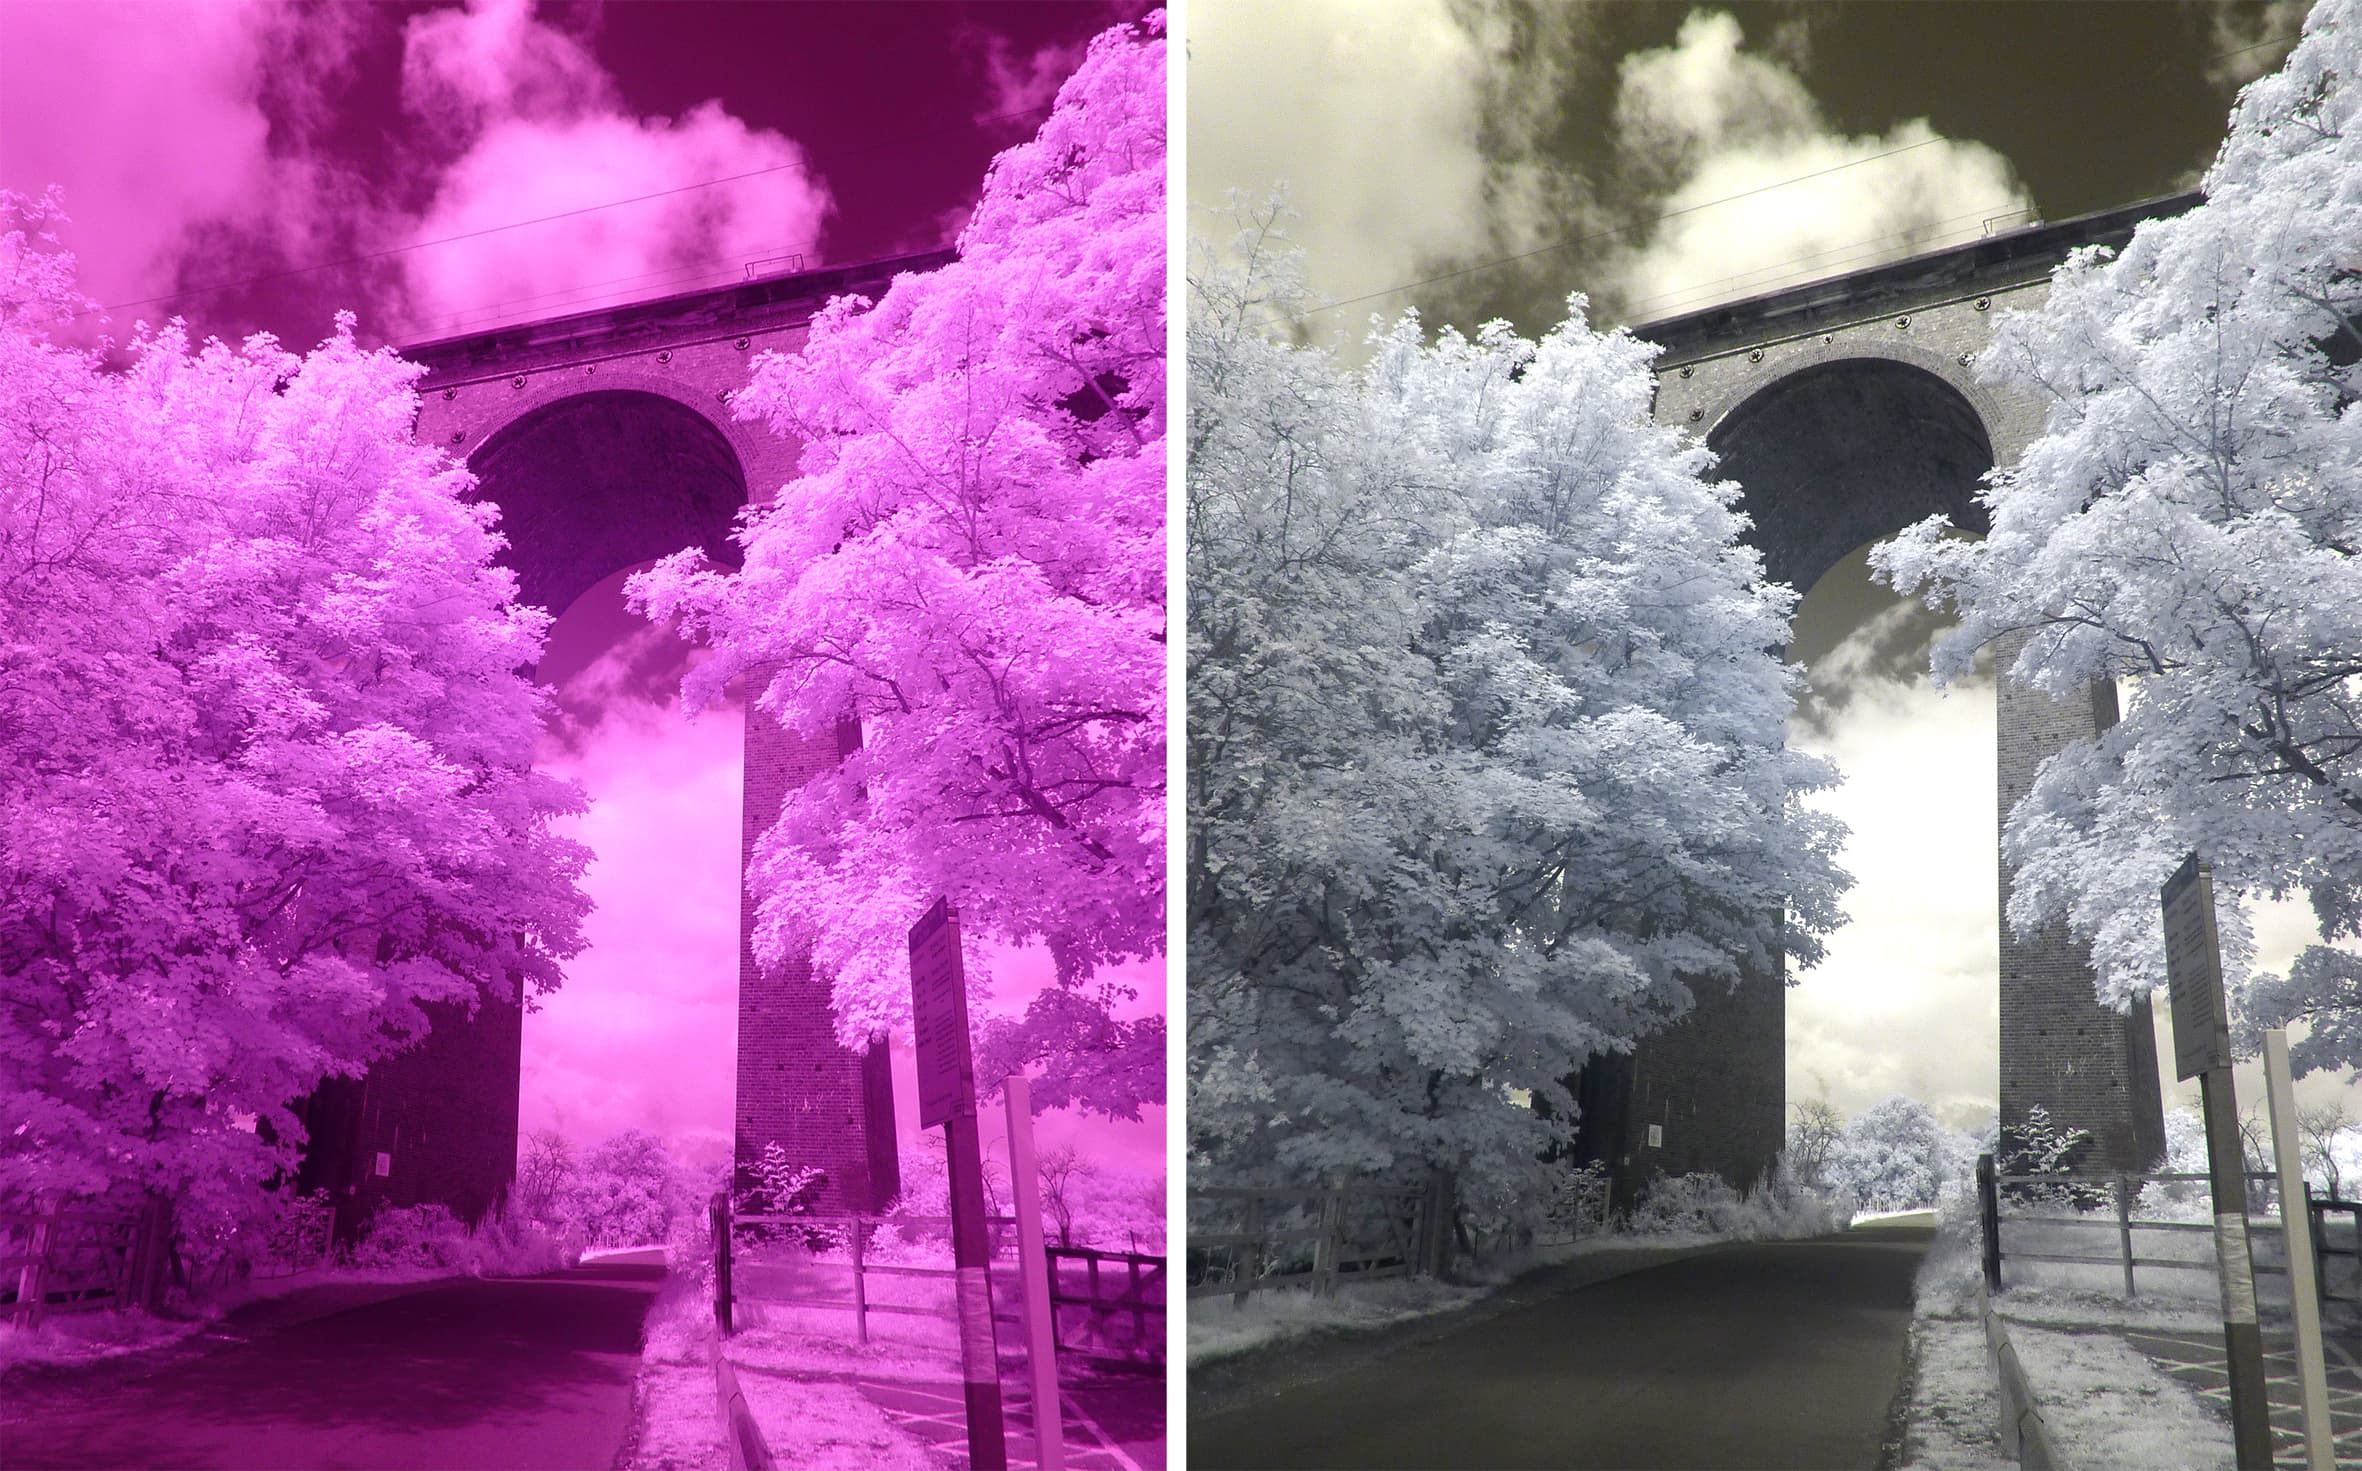
Using a converted camera, showing the difference between shooting with auto white balance (far left) and manually adjusted white balance (left)
Further reading
Get great results by converting an old infrared camera
Get great black and white infrared images

