While the colours, scale and details of magnificent view often inspire us to capture an image, the sky can really make or break the shot. The monotonous grey of an overcast sky or the uniform blue of a clear sky fail to convey the splendour of the scene or the emotion you felt at the time. However, help is at hand in the form of Luminar 4’s incredible AI Sky Replacement tool. Pro photographer Stewart Carroll explains why and how he uses it to create head-turning images.
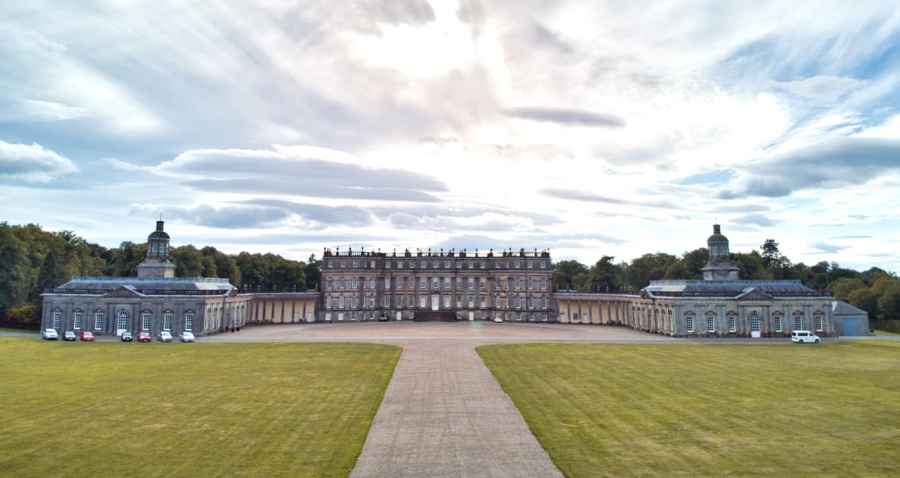
Why would you want to replace the sky in a photo? First and foremost, it’s great fun to have this power at your fingertips! As a drone photographer who typically fly cameras with small sensors, I’ve been able to recover “broken” images by tastefully replacing the sky. This example shows what I mean. In the first RAW shot from a DJI Mavic Air, I couldn’t recover enough detail in the highlights. With a quick sky replacement, we got a much better result that was true to the original.
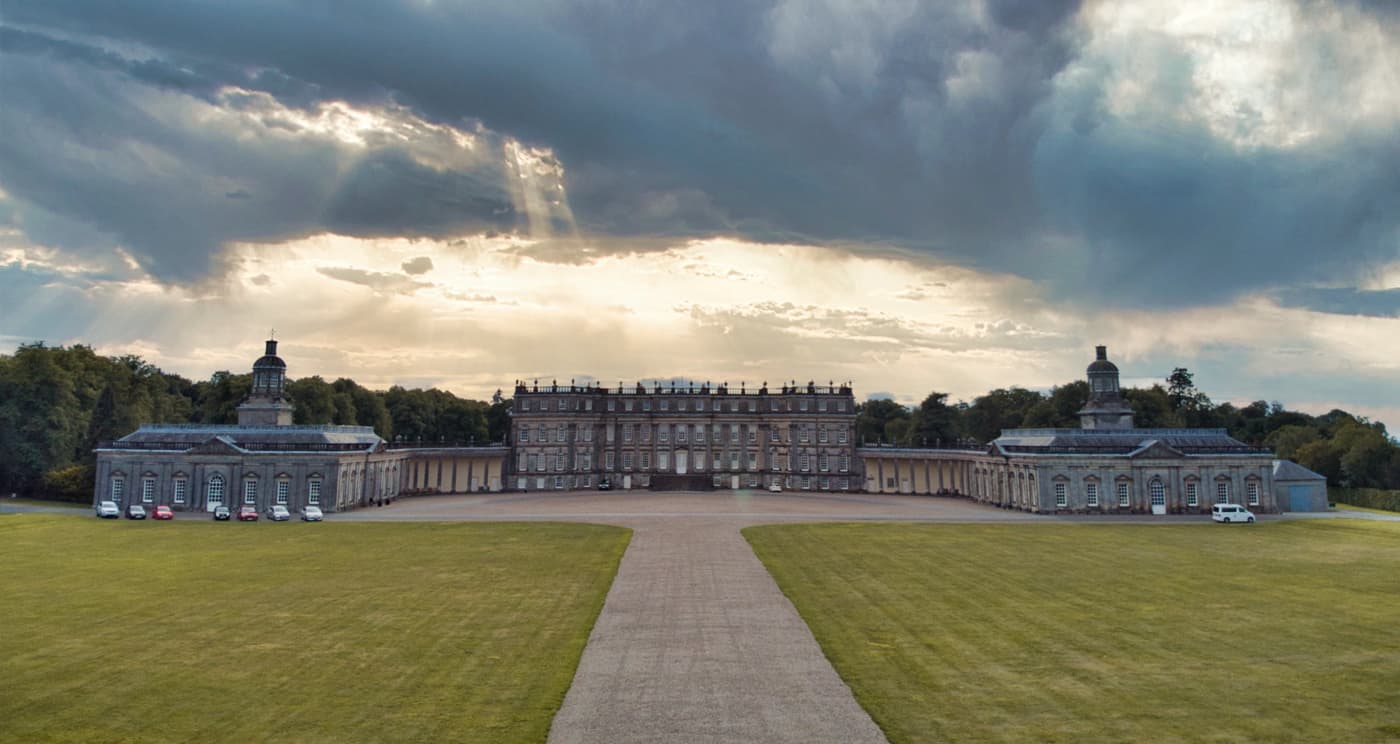
Hopetoun House edited in Luminar 4
You can also see how I subtly improved the sky in this GoPro photo (and removed unwanted objects and added a striking color grade).


Shot of a Lamborghini before and after editing in Luminar 4
I would summarize my post-production skills in Adobe Lightroom as pretty good and my Adobe Photoshop skills as not so great.
I recently worked our way through a lengthy YouTube Photoshop tutorial on adding motion blur to a static car. One hour in and I gave up — I just wasn’t getting the result I was looking for. Photoshop is incredible software, but it can be a grind and has a steep learning curve. Were I to try a complex sky replacement on one of our aerial panoramas, I’m sure I would have had the same outcome!

Mavic Air RAW photo of Hopetoun House before and after editing in Luminar 4
I am what I would call an opportunistic aerial photographer. If I’m up north filming for a client, I’ll capture some raw photos or panoramas on my DJI Mavic 2 Pro drone. Rarely can I wait hours for the perfect conditions.

Mavic 2 Pro panorama of Glencoe, Scottish Highlands edited in Luminar 4
With this in mind, after hearing about Luminar 4’s one-click AI Sky Replacement, I knew I had to try it. The idea of replacing an uninspiring sky in moments was pretty appealing — even if it did sound too good to be true.
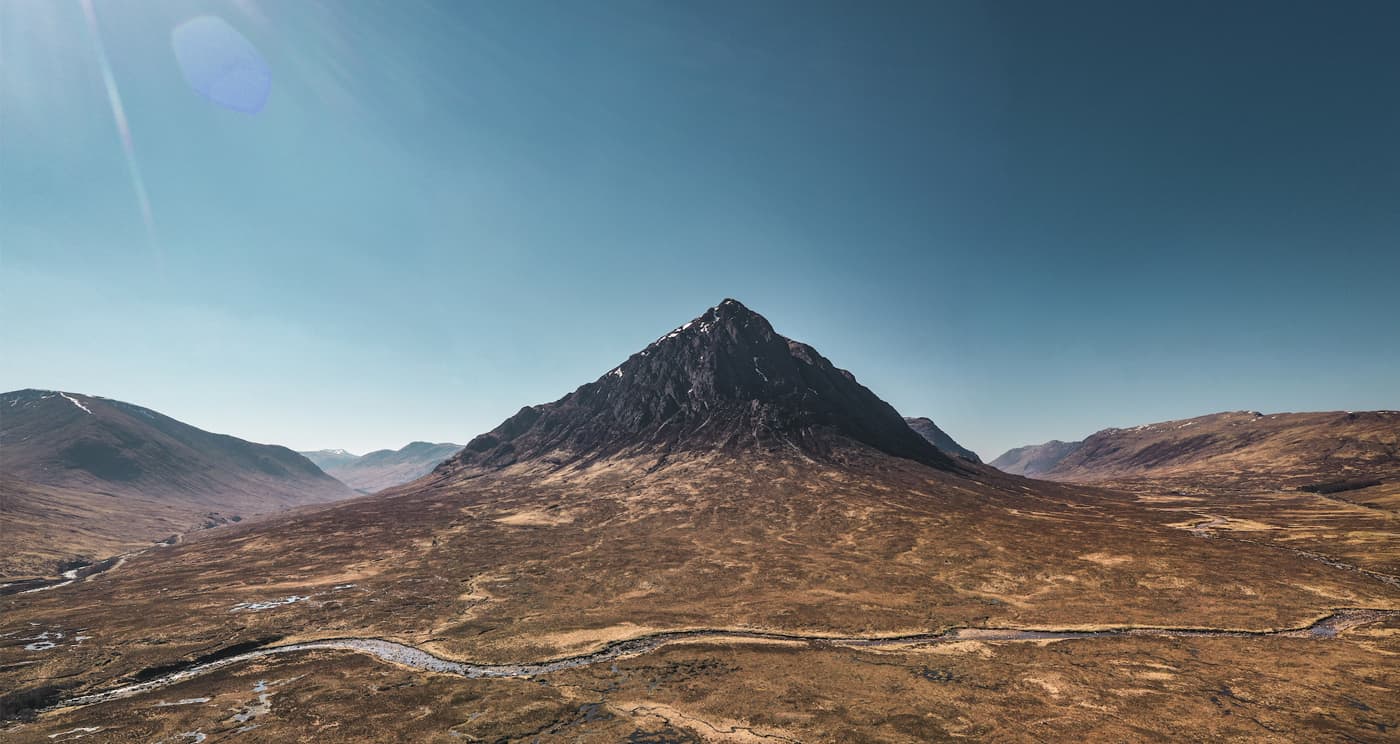
Glencoe, Scottish Highlands [unedited]
1. Open the image in Luminar
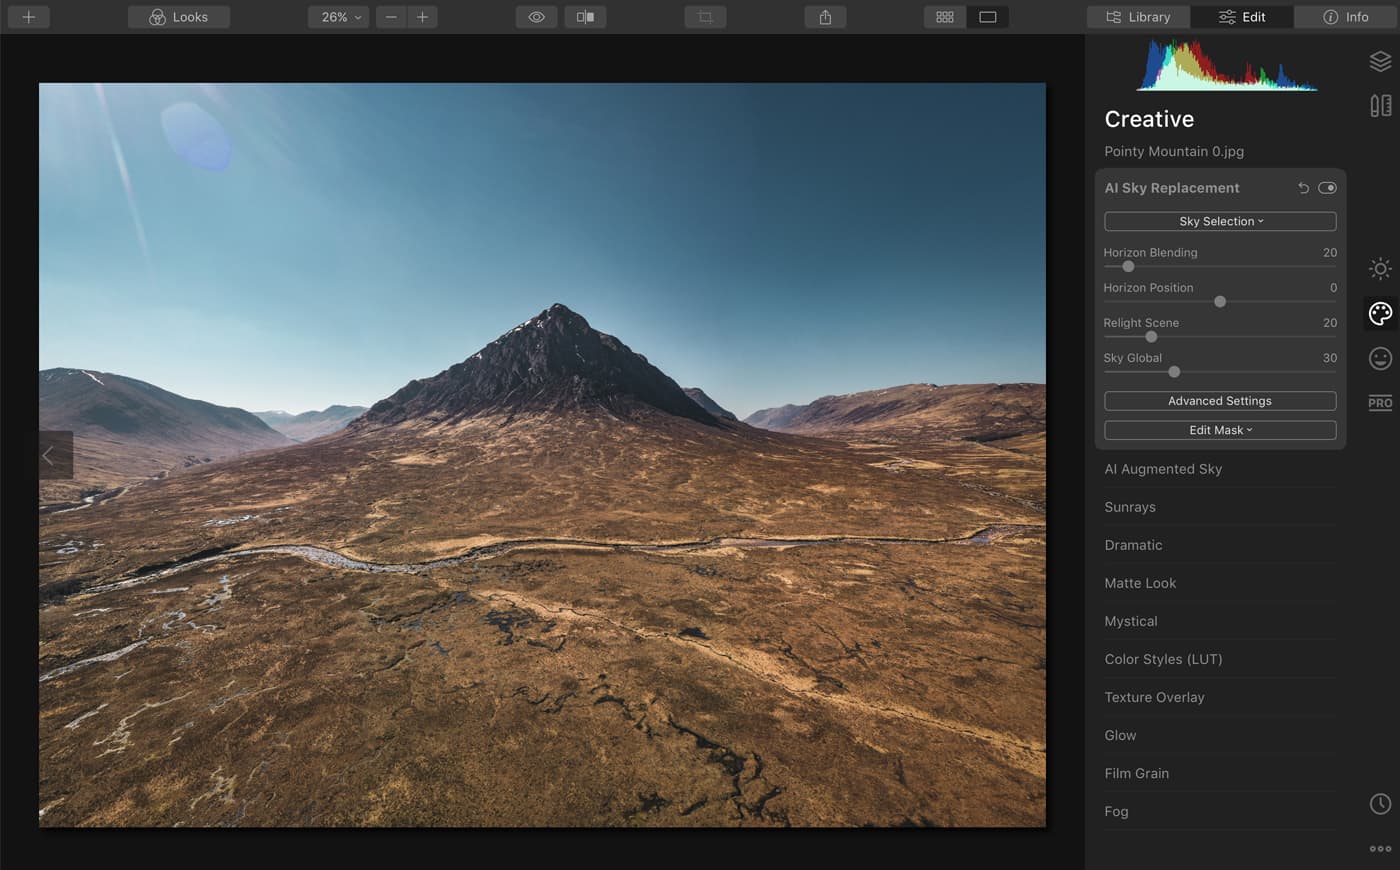
2. Locate the AI Sky Replacement
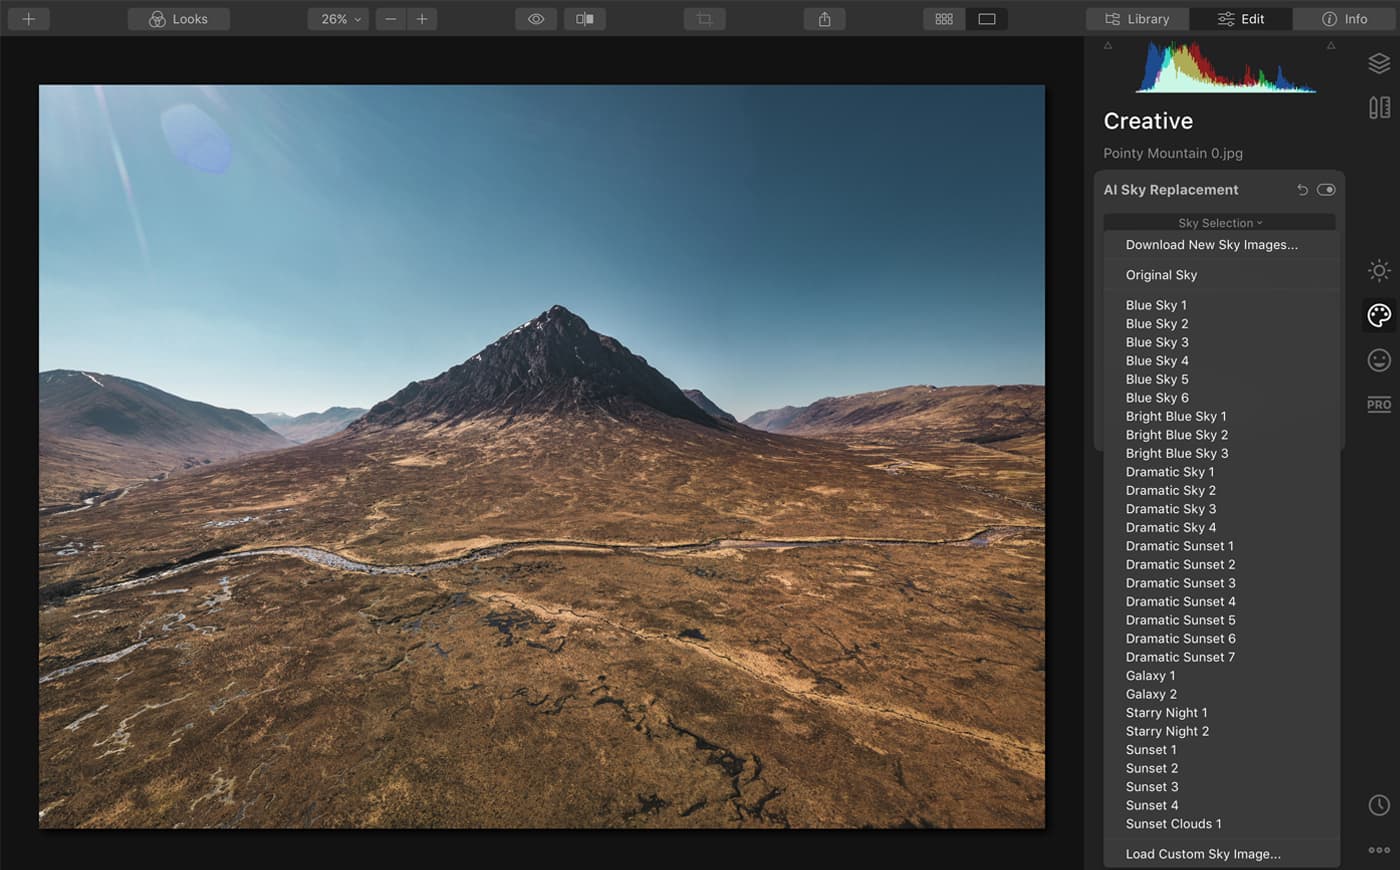
3. Find the Sky Selection dropdown menu with replacement skies.
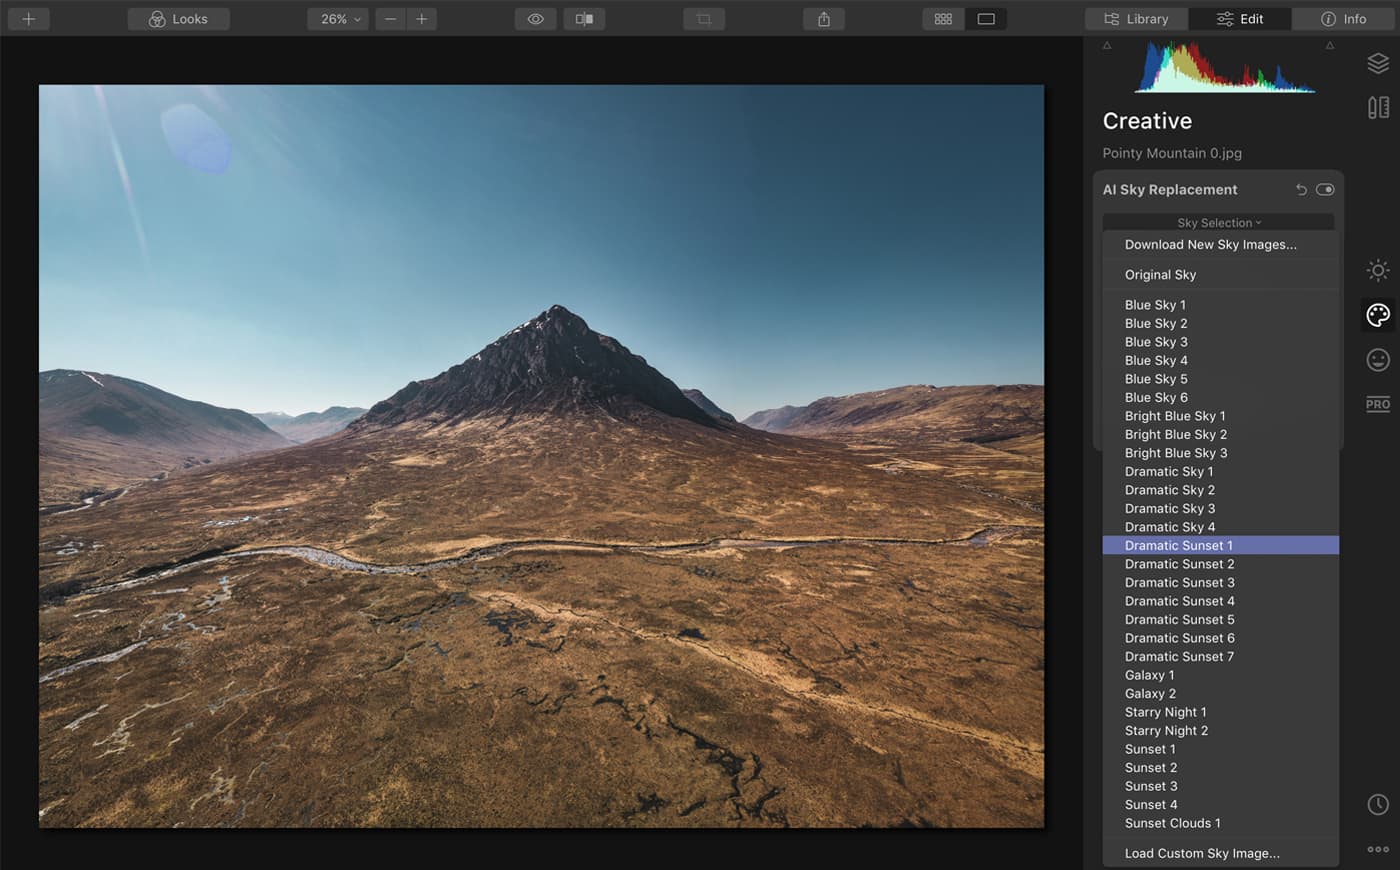
4. Select Dramatic Sunset 1.
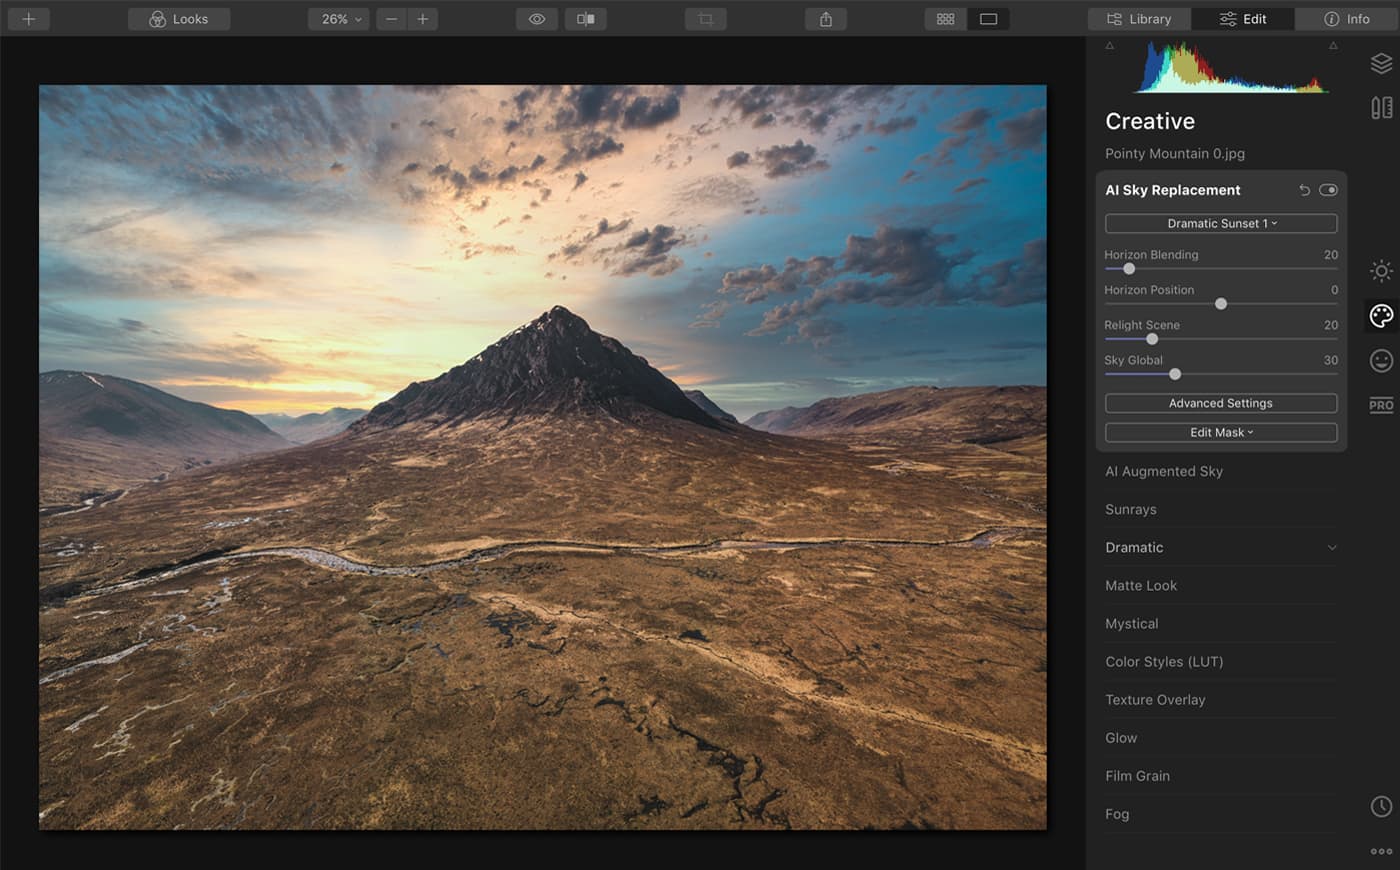
Boom! Just like that, the sky is replaced. Seriously, it’s that easy!
Personally, I love this vivid replacement sky. But let’s try something more discrete — Dramatic Sunset 5
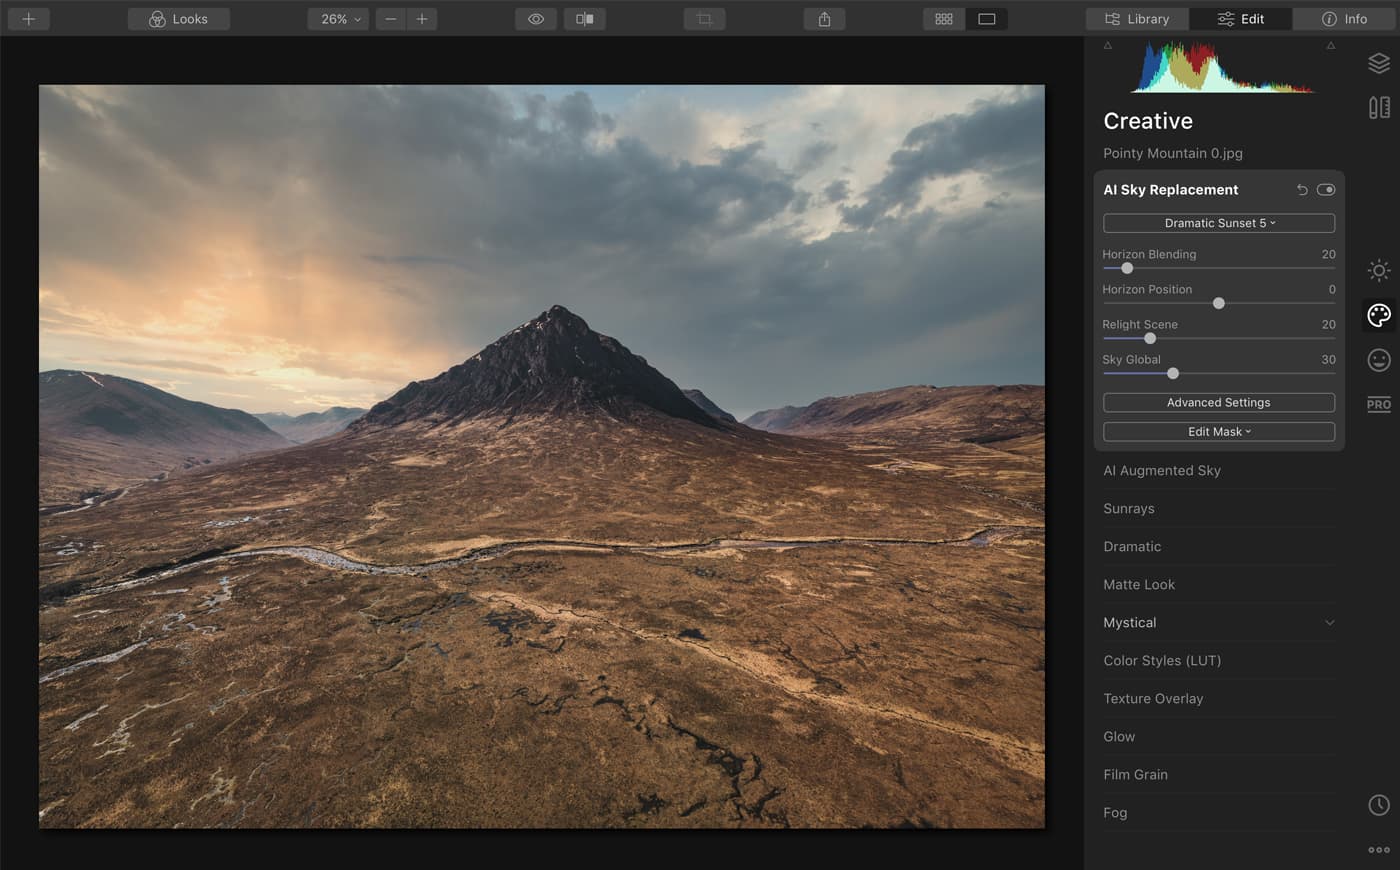
Beautiful! If you zoom in, you can see the pixel-perfect accuracy of Luminar 4:
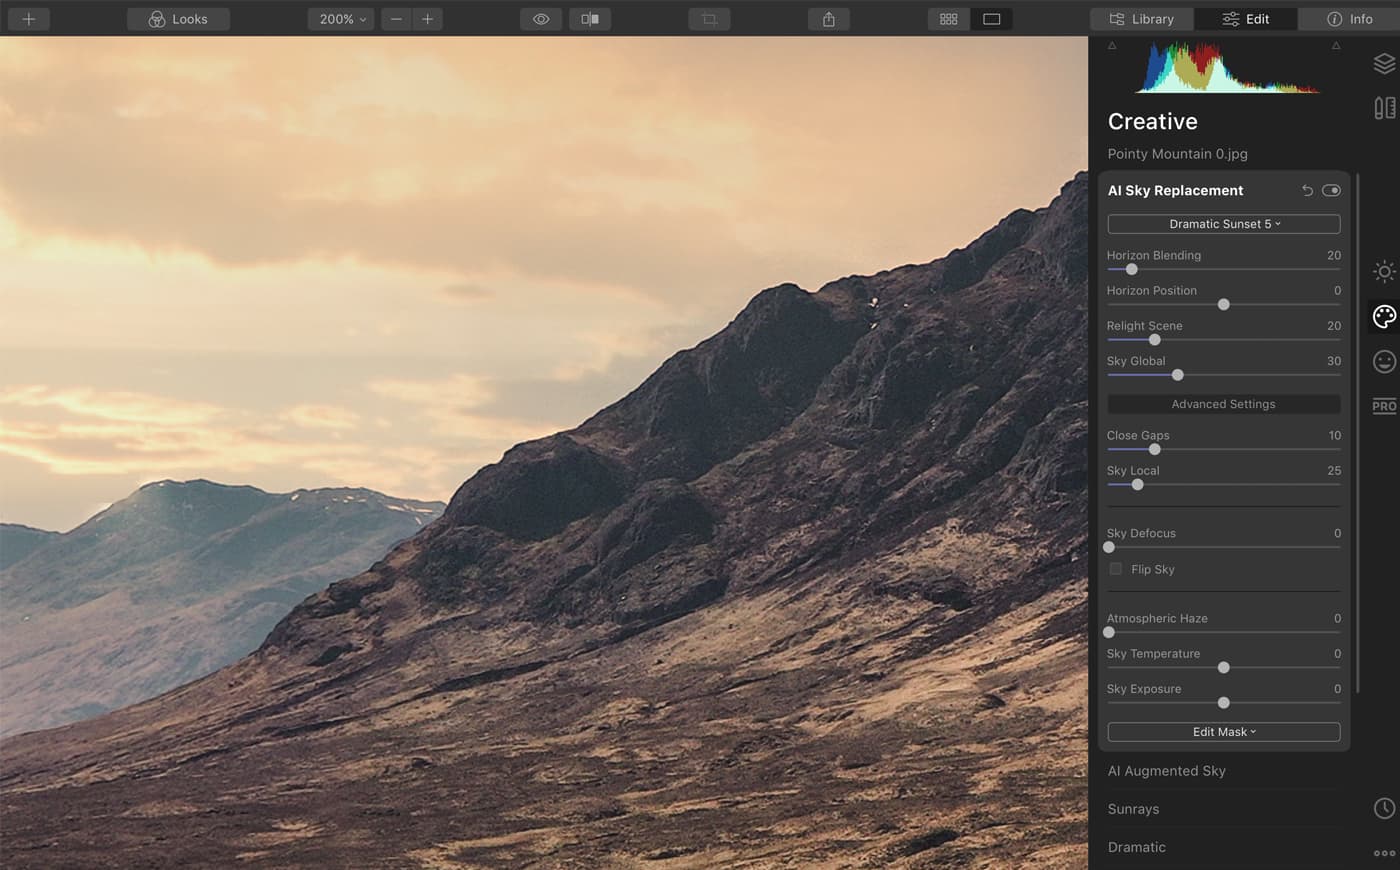
If you want to fine-tune your sky replacement, you can adjust the horizon, change the temperature and exposure, add atmospheric haze, and defocus the sky.
One of the adjustments I find most valuable is Relight Scene. Your replacement sky won’t always be a perfect match for the original, so Luminar 4 adjusts the color and exposure for you. The strength of this is controlled by Relight Scene.
Check out this example:
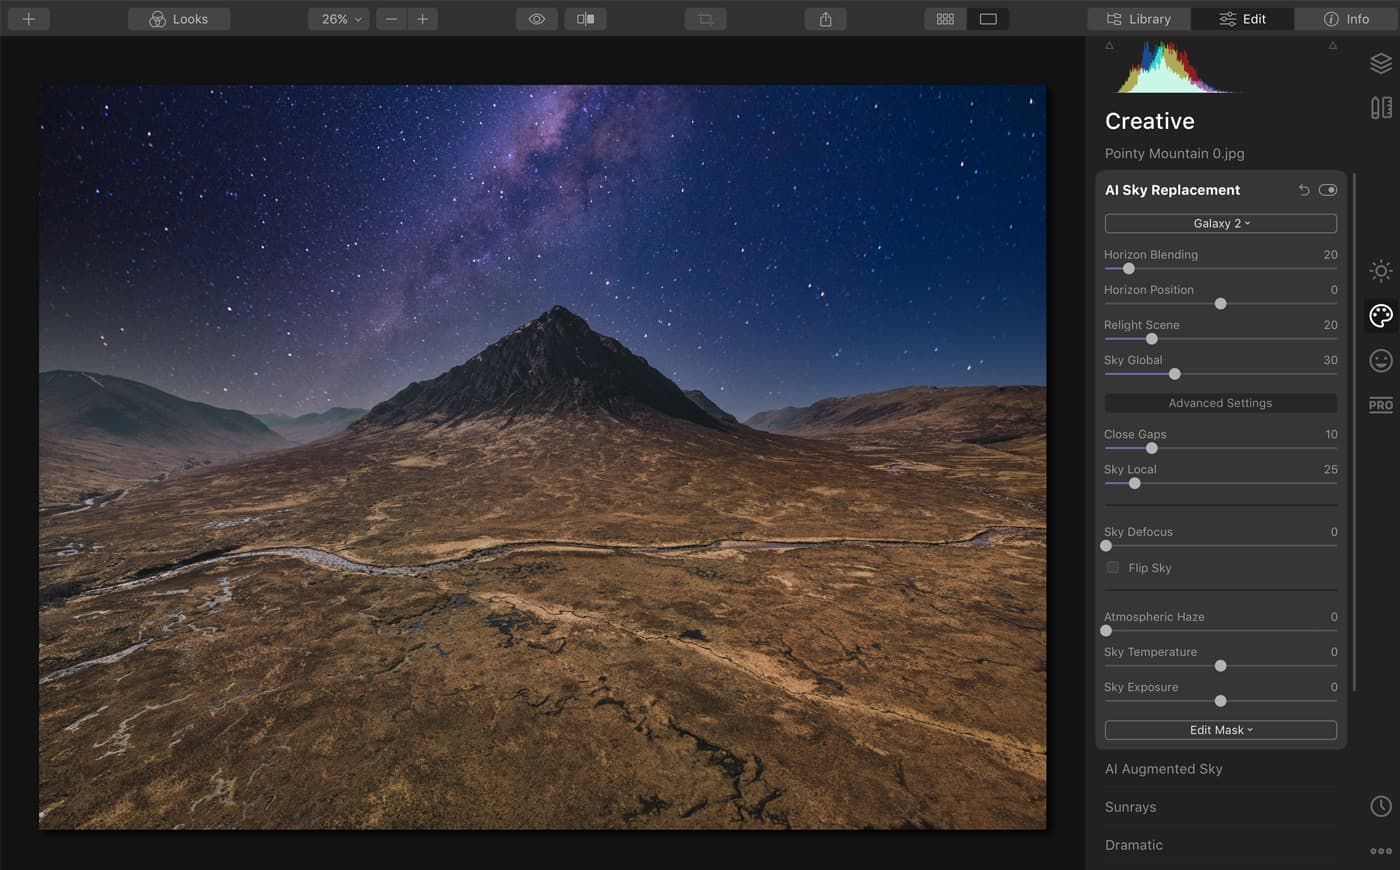
A pretty epic night sky replacement! However, the original portion of the image is a touch bright. No problem. Let’s move the Relight Scene slider from 20 to 60.
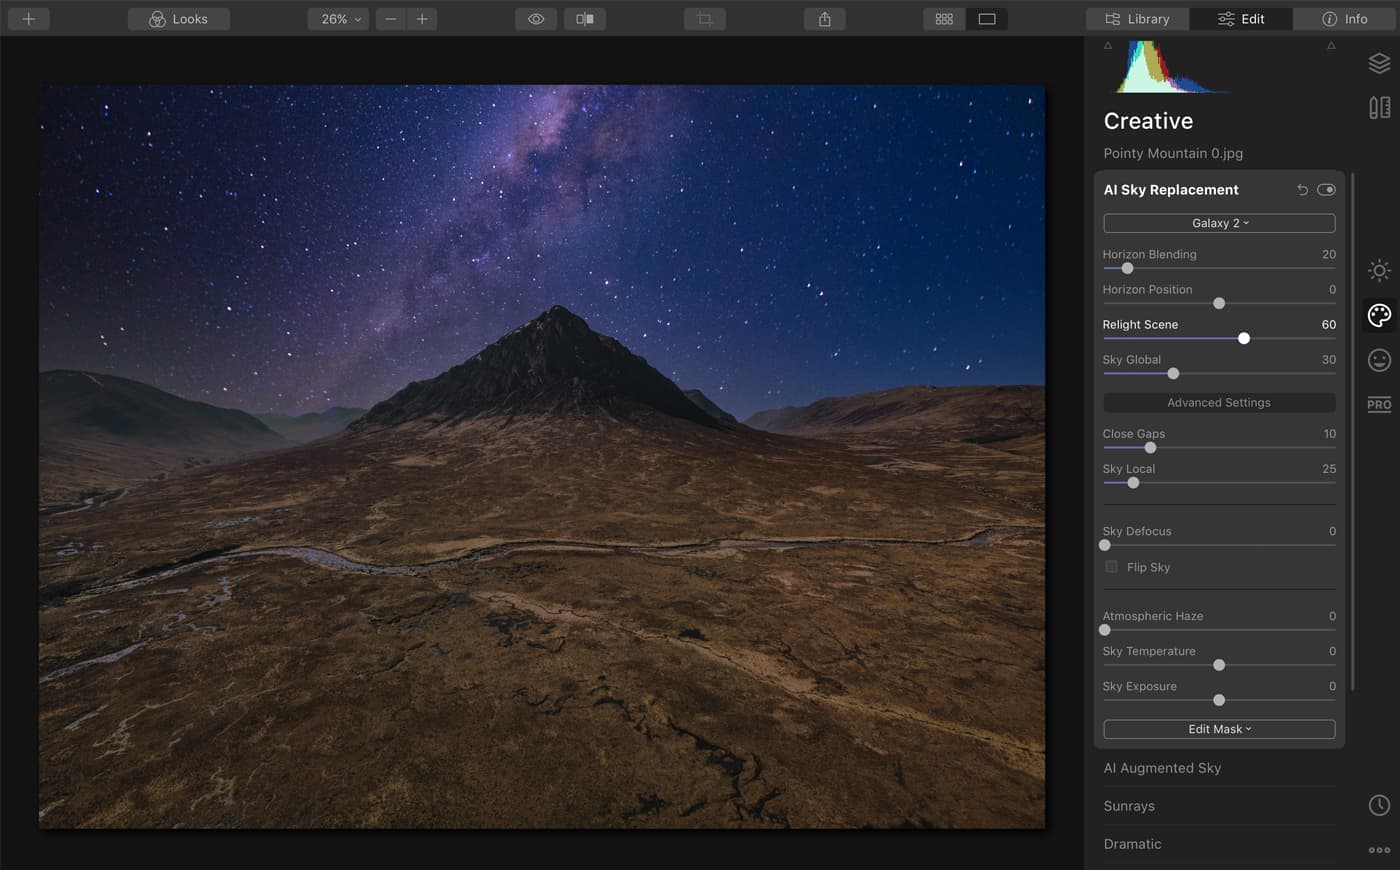
Now we have a better exposure and color match!
The photo below is a classic example of us missing stunning evening light by mere minutes. But look at those trees: I don’t fancy masking round that in Photoshop.
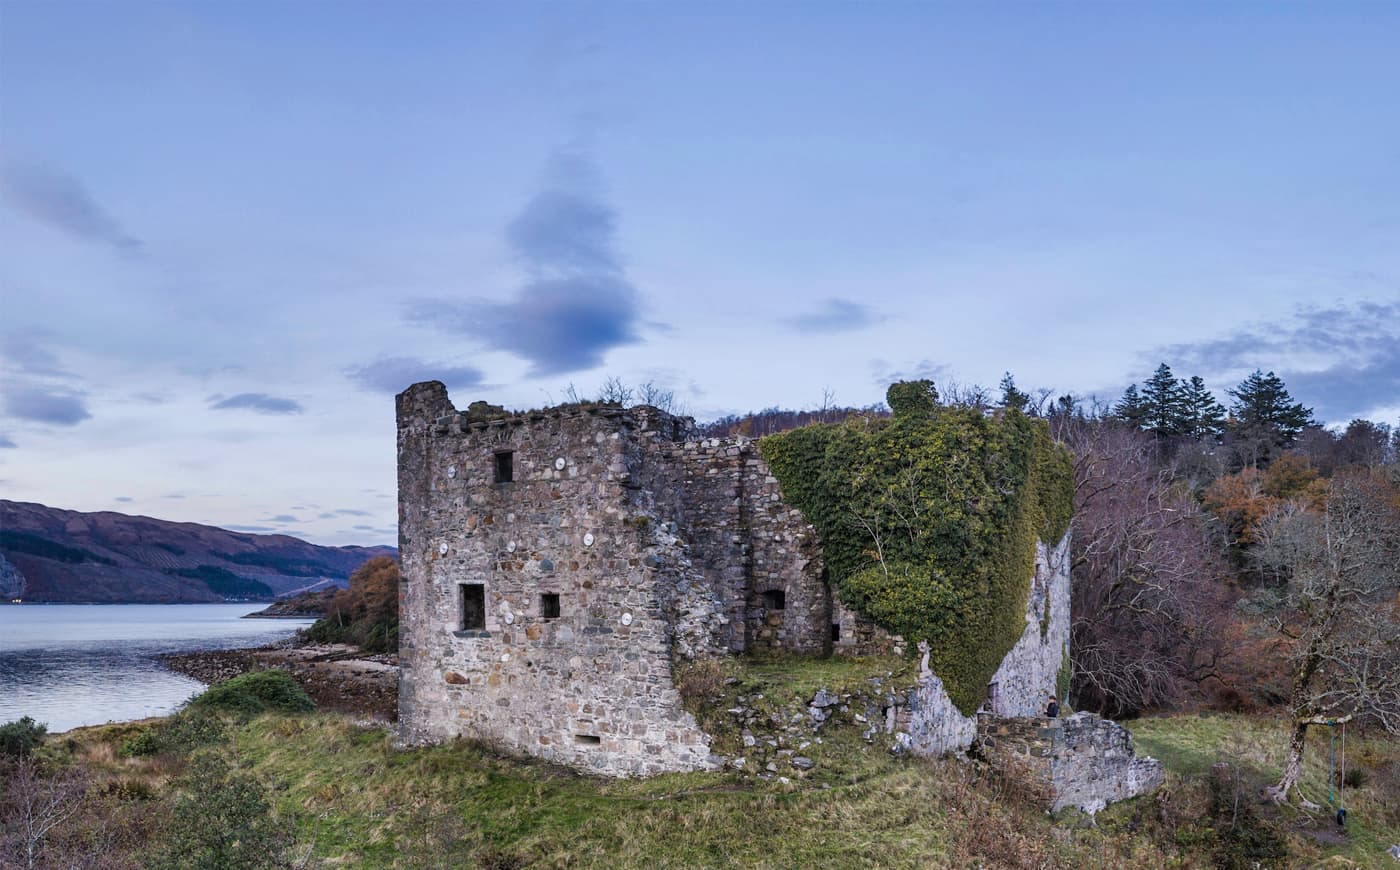
Old Castle Lachlan, Scotland [unedited]
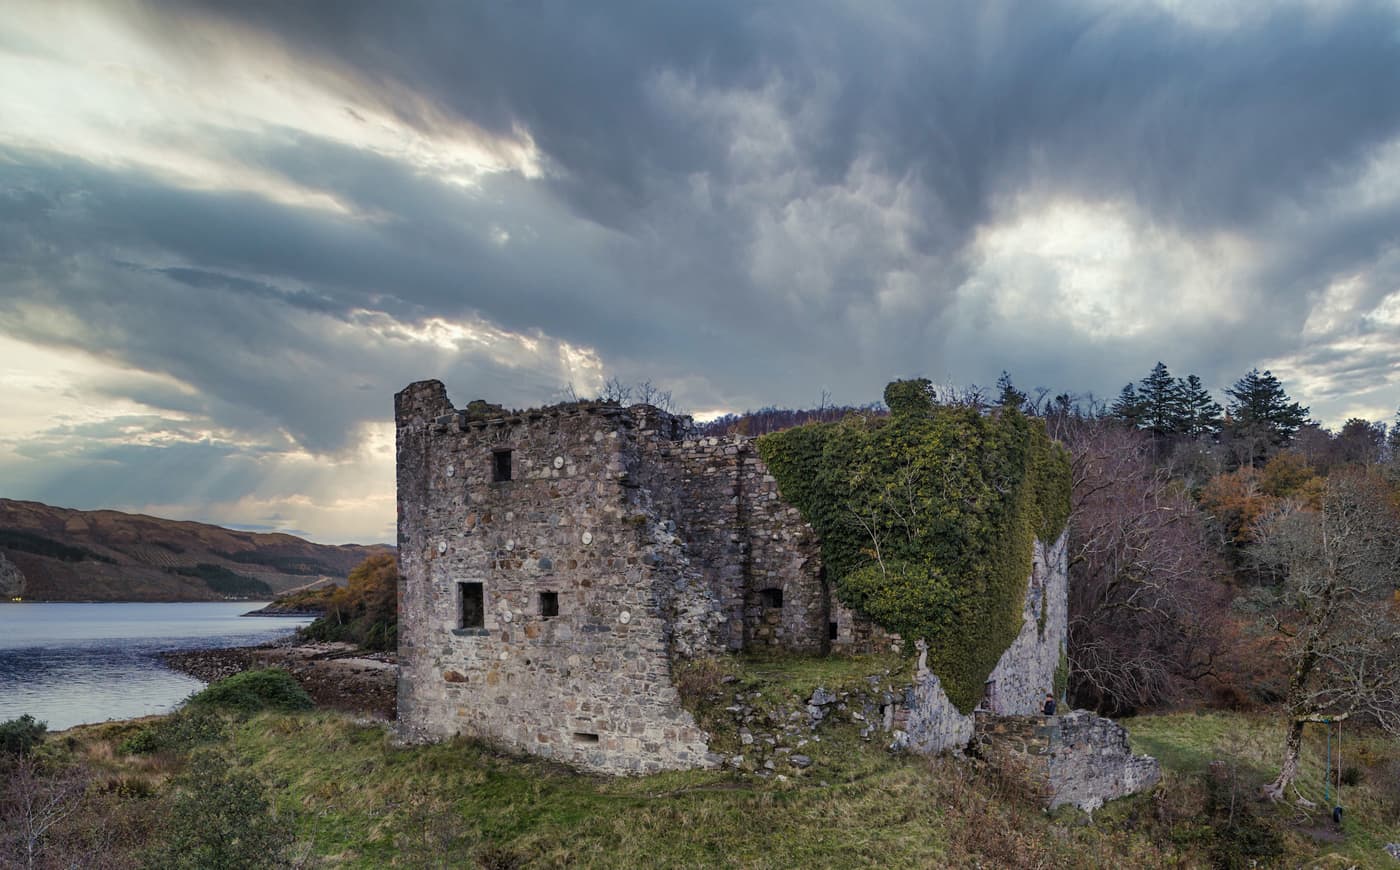
Old Castle Lachlan, Scotland – Edited
Luminar 4 functions as both standalone software and a plugin for the likes of Lightroom, and I use it in both ways.
In the photo below, I experimented with a dramatic change and imported my own sky. I adjusted the Sky Global and Sky Local sliders to improve the sky replacement. I also added a little Atmospheric Haze for a better match with the landscape.
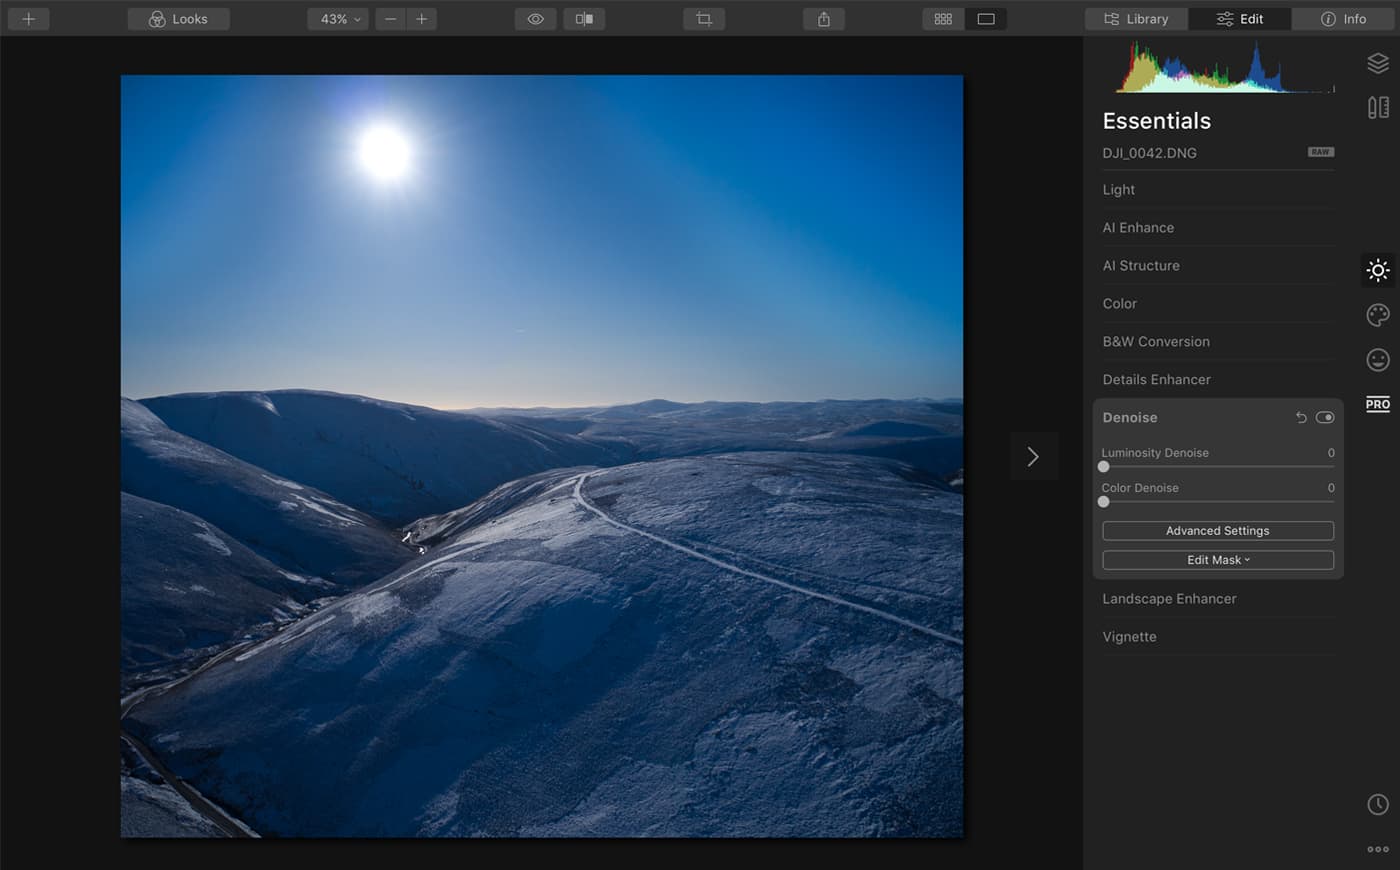
Lowther Hills, Scotland [unedited]
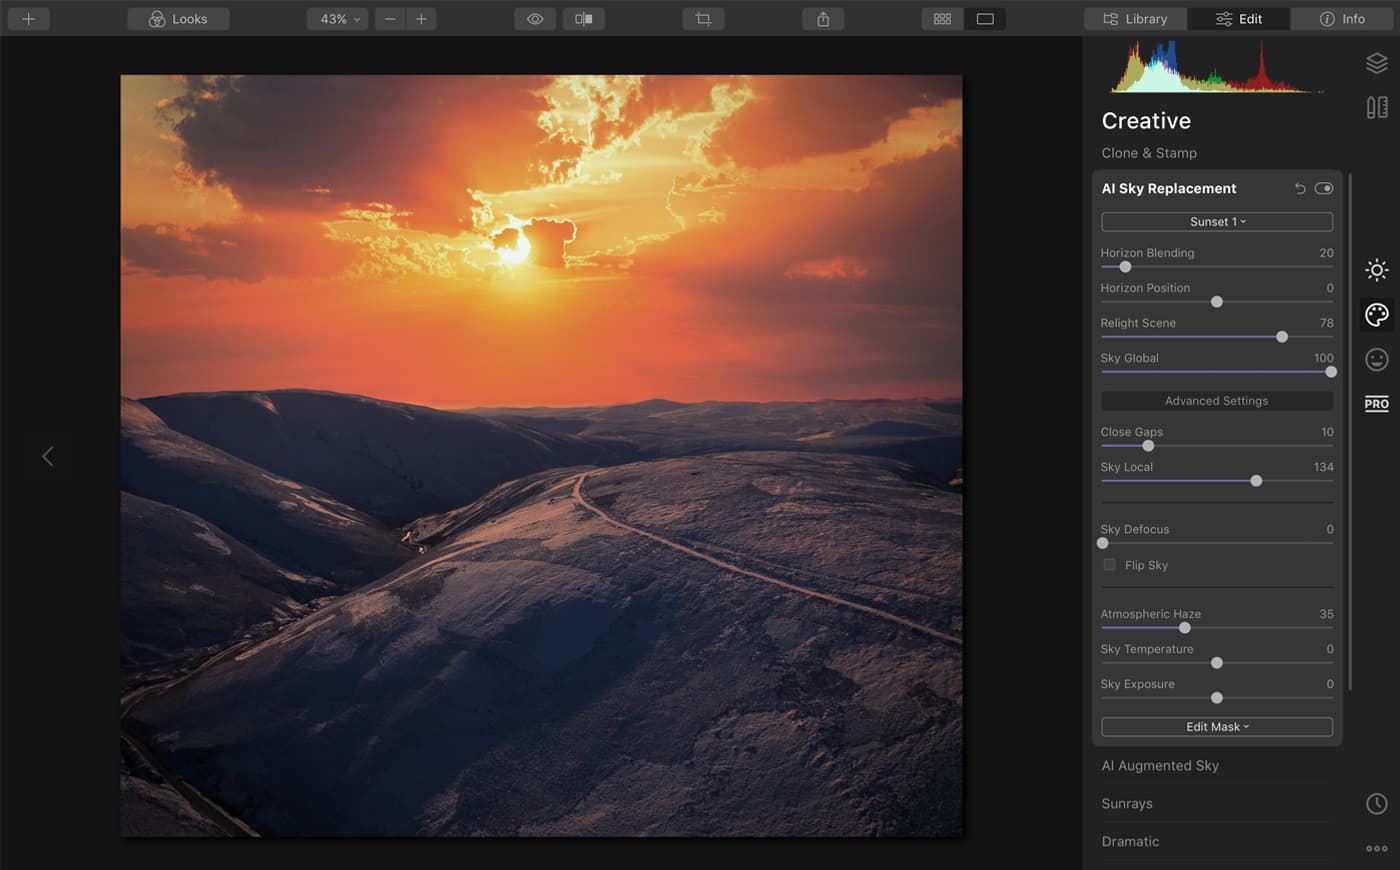
Lowther Hills, Scotland [edited in Luminar 4]
With an image manipulation tool as powerful yet easy to use as Luminar 4’s AI Sky Replacement, there’s always a risk of overdoing things. There’s a certain irony whereby the easier a tool is to use, the more experience is required to ensure a tasteful and discrete result. If in doubt, step away from the computer for an hour and come back with fresh eyes. Above all, have fun!
Click the link below to watch how Stewart replaces a sky in Luminar 4. Buy it now and save £10 ($10) on the full retail price with exclusive discount code AP.
 Author Bio
Ten years ago, Stewart Carroll embraced his passion for photography and filmmaking and, together with his now-wife Alina, formed two boutique digital content production companies. Early adopters of drone technology, they accumulated an enormous library of aerial footage before finally launching the Drone Film Guide YouTube channel.
How to Try Luminar 4’s AI Sky Replacement for Yourself
As Stewart has explained, Luminar 4’s AI Sky Replacement tool takes just a few seconds to transform a lacklustre image into one that you want to print and hang on your wall or share on social media. It has a large collection of interesting skies to choose from (plus you can add your own) and in many cases the software delivers the perfect result with just one click. However, there are also easy-to-use tools available to let you customise the result until you create exactly what you want, with a sky that matches the land and delivers the impact you wished for when you took the shot.
To find out more about Luminar 4’s AI Sky Replacement tool, visit Skylum .
Now is the perfect time to buy Luminar 4 because Skylum has announced that during April, $5 from any purchase made on skylum will be donated to the World Health Organization COVID-19 Response Fund, the Coronavirus Relief Fund by GlobalGiving, Heart to Heart International, and local charities around the world to help fight COVID-19 and assist victims of the coronavirus pandemic.

