Angela Nicholson shows how to use different focusing modes in challenging situations, plus photographers across genres share their guide to get sharp images
With a few creative exceptions, one of the fundamental ‘rules’ of photography is that the subject should be sharp. Thankfully, most modern cameras can ensure that’s the case automatically, but there are times when you need to take control to ensure you get the result you want.
For example, if you’re photographing a moving subject, it’s best to switch from single autofocus mode to continuous autofocus (C-AF) mode as this tells the camera to continue to focus for as long as the shutter release is half-pressed.
Alternatively, single AF (S-AF) mode is the best choice if the subject isn’t moving as the focus is less likely to ‘fidget’ or hunt, but if you’re undecided, most cameras also offer an auto AF mode that switches between S-AF and C-AF automatically if it detects subject movement.
Focus-area modes
As modern cameras often have many focus points there are also modes to help with their selection. Using a single small AF point enables you to target the subject very precisely, and it’s especially useful if you’re trying to photograph through other objects – for example, wildlife through foliage or with a motionless subject.
However, it’s also usually possible to use a larger focus point, or a group of focus points. As well as taking less time to select because there are fewer, larger points across the frame, there’s more chance that you’ll be able to hold the larger point over the subject. It’s also more likely that a large point will cover a detail or some contrast that the camera can focus on.
As a rule, larger focus areas are a better choice with moving subjects. Most cameras also offer an auto-area mode in which the camera has free rein to select any of the focus points to use. This can be helpful if you have no idea where the subject will appear in the frame, but it also hands over a lot of control to the camera. That said, some cameras, especially Sony’s, have an uncanny knack of being able to spot the subject when it’s moving.
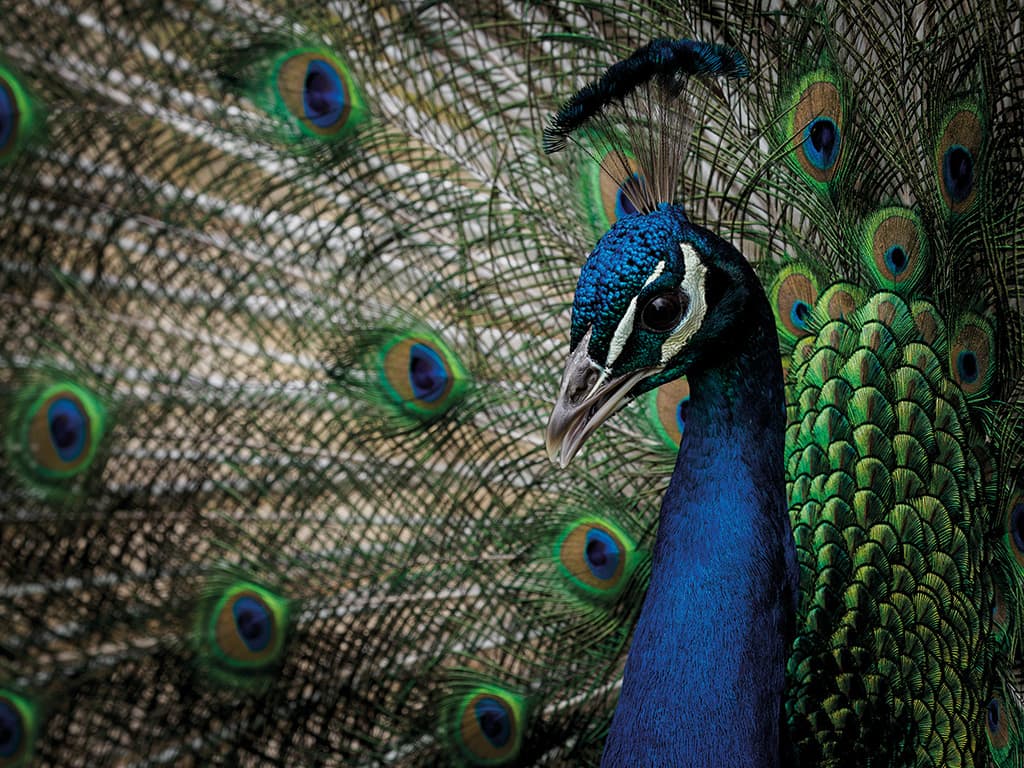
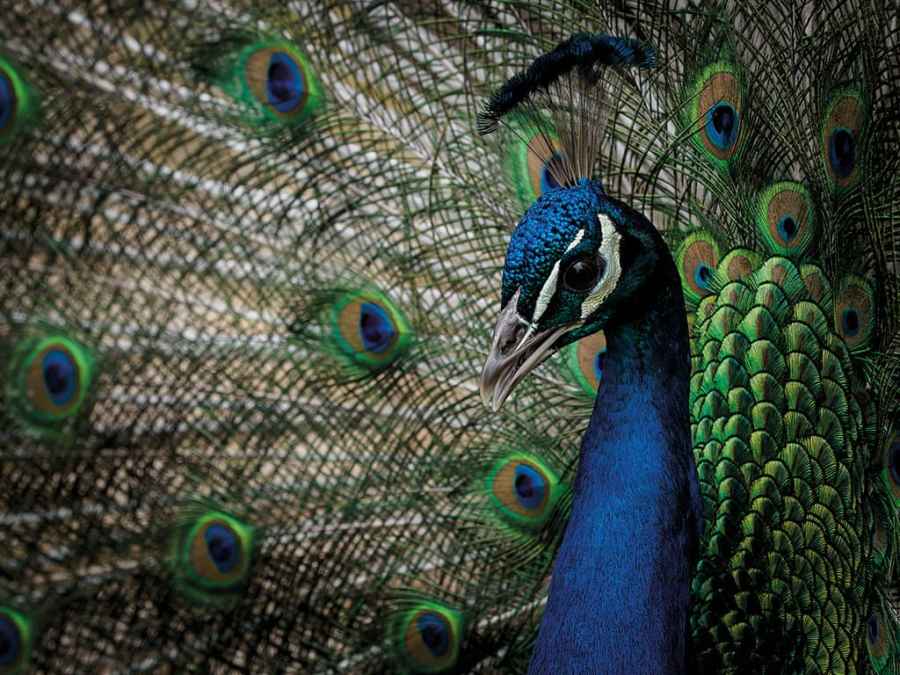
Using a single AF point enabled the eye of the peacock to be selected for focusing. Olympus OM-D E-M1X, 40-150mm f/2.8, 1/320sec at f/5, ISO 400
Subject detection
Subject detection, and specifically eye detection, is arguably the most significant development that has been made in focusing technology in the past decade or so. When it’s activated, the camera looks automatically for the subject and focuses on it so you don’t need to worry about keeping the AF point over it.
It’s especially useful with moving subjects because it leaves you free to concentrate on the composition and exposure while the camera ensures that the subject is sharp.
The most common form of subject detection is human eye-detection, and it’s incredibly useful for portrait, wedding and social photography, but it can also be great for sport photography too. It’s often a feature that needs to be activated via the menu and you can normally specify whether you want to focus on the left eye or the right eye.
We’re now seeing an increasing number of cameras that can also be set to detect animals’ eyes, which is great for pet and wildlife photography. The Olympus OM-D E-M1X can even be set to detect birds, or subjects connected with trains, aeroplanes and motorsports.
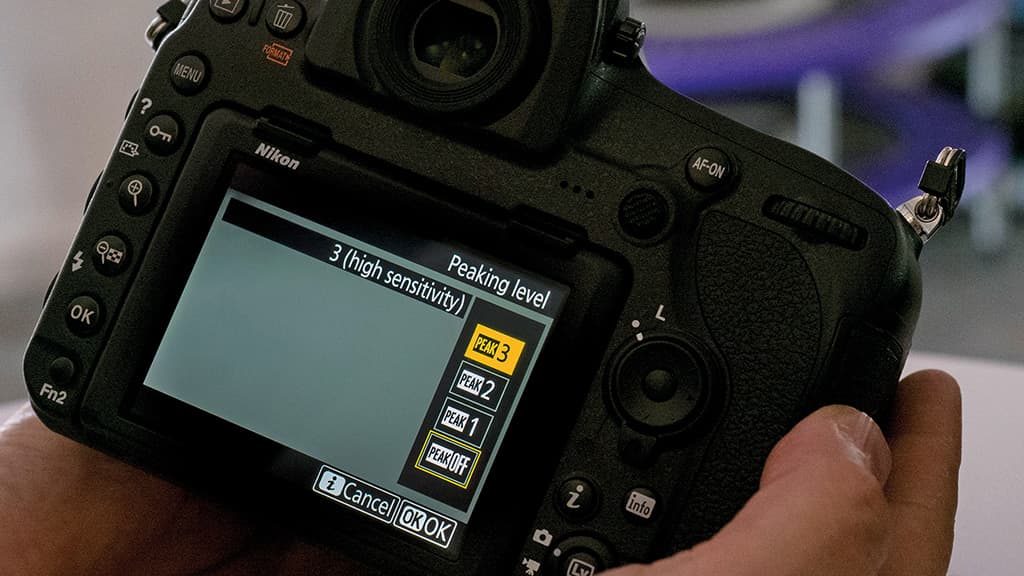
The focus peaking level determines the sharpness level range that will be highlighted
Manual focus
Although modern autofocus systems are generally very good, occasionally it’s easier, faster or more convenient to focus manually. And while you can still just look through the viewfinder and turn the focus ring until the subject looks sharp, most modern cameras offer a magnified view that makes it much easier to assess sharpness.
If you’re using a DSLR, you need to switch to live view mode and compose the image on the screen on the back of the camera before you can magnify the view. In some cases, when the camera is set to manual focus mode it will enlarge the area under the AF point as soon as the focus ring is rotated, but you may need to go to the menu to activate that option, or even press a button to enlarge the image manually.
Mirrorless cameras also have this magnification function and because they operate in live view mode permanently, you can see the enlarged image in the viewfinder as well as on the screen. Lenses used to always have a focus distance scale, but that’s less common these days.
However, many cameras have a distance scale view that pops up in the viewfinder or on the screen whenever you attempt to focus manually. With ‘focus-by-wire’ lenses, this is very useful for making sure that you’re adjusting the focus in the right direction.
It can also be helpful for setting the focus distance while you await the subject’s arrival, but it’s best to use a moderate or small aperture so that you have enough depth of field to get an acceptably sharp result. Most cameras also have something called focus peaking.
This live view feature highlights the areas of highest contrast, which are usually the points of sharpest focus, and it’s well worth activating it via the menu if you’re focusing manually. Ideally, set the focus peaking colour to one that contrasts well with your subject – it can usually be set to white, red or yellow.
To discover some of the best ways to focus across a variety of genres and using different camera brands, AP spoke to six photographers who revealed their favourite focusing modes and methods.
Sports
Adrian Dennis, AFP
Canon
Adrian Dennis has been a photographer for Agence France-Presse (AFP) since 2000 with an emphasis on shooting sports. He previously worked for The Independent newspaper group and is a two-time winner of Sports Photographer of the Year, as voted for by The Sports Journalists’ Association. You can follow Adrian Dennis on Twitter at @photogator96 and check out more of his work at www.adriandennis.com.
I generally try to use the same mode across all my cameras. Being ‘old-school’ I generally don’t tinker that much with the AF settings – that way I know when I pick up my camera in the heat of the moment what it’s capable of and how the AF is going to react. I use it on Case 1 – a versatile multi-purpose setting – most of the time, coupled with the Expand AF area. For shooting at Wimbledon, I actually changed my AF setting to Case 2, which is better for tracking the players as they move across the court.
I use the Multi-function (M-Fn) button near the shutter button to scroll through my preferred focus points. With my eye to the viewfinder, one press with my thumb and then index finger on the function button allows me to scroll through the different AF methods. If something is tricky to focus on, I may quickly select the one-point spot focus or now I’m starting to use the face-tracking setting in Zone AF, where the camera will detect and focus on a face in that section of the viewfinder.
I like to work with my autofocus operating off the AE Lock button on the back of the camera. It becomes second nature as to when to press it in with my thumb while hitting the shutter button or when to ‘dab’ it if the subject is moving around in the frame.
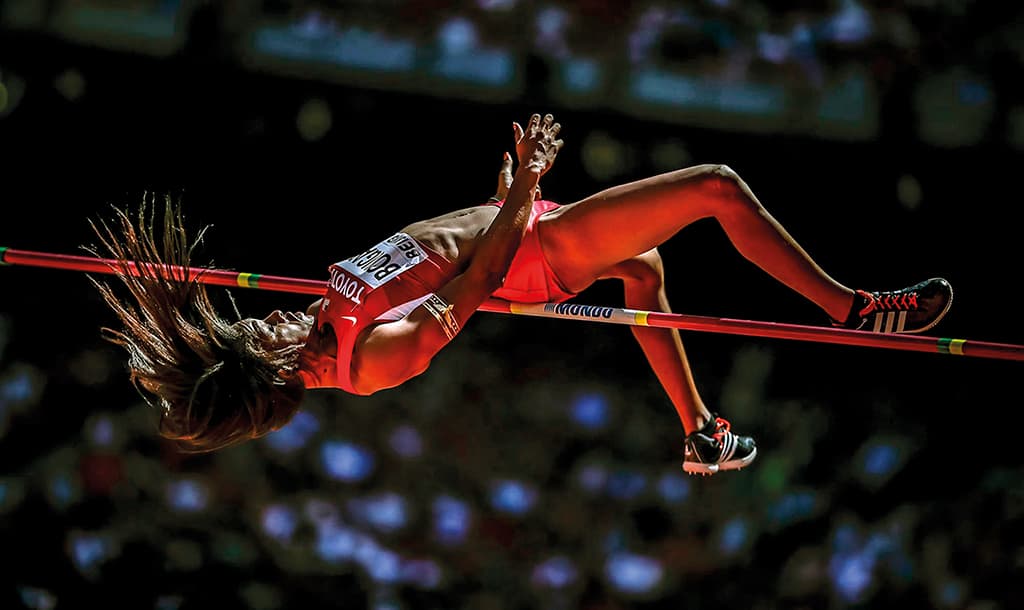
USA’s Erica Bougard competes in the high jump in the women’s heptathlon at the 2015 IAAF World Championships in Beijing. Canon EOS-1D X, EF 200mm f/2L IS USM, 1/3200sec at f/2, ISO 100. Shot with Expanded AF
When AF first became a thing, it played havoc with your composition. Back in the day, when there wasn’t the choice of moving the AF points around, there was a whole ‘generation’ of sports pictures where the subject was always in the centre of the frame. These days it’s much easier to have something nice and sharp on the edge of the frame so you can employ the good old ‘rule of thirds’ in your masterpiece.
I find that the long telephoto lenses work best for focusing. The lenses are amazing how they track with the subject, but it’s also down to there being fewer things to ‘distract’ the lens in the frame.
The ideal picture is shot on a bright day where there’s plenty of contrast between the foreground and the background and the subject matter is big in the frame. For example, a football player running toward you filling the frame, shot wide open on f/2.8 or f/4 with a nice, mottled background – the lenses keep up and every frame is sharp.
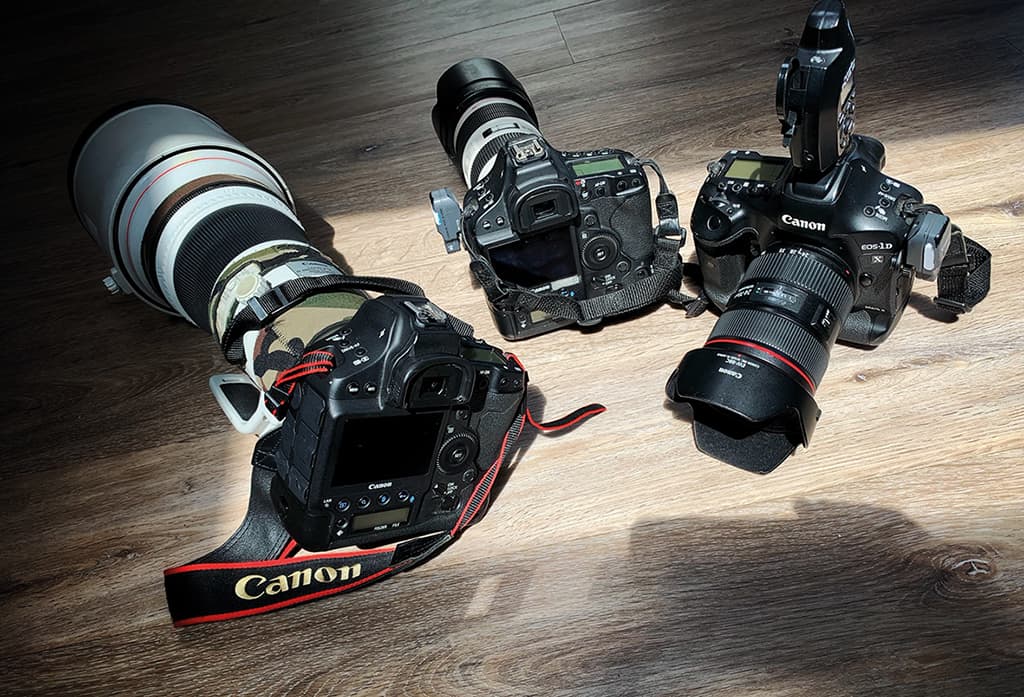
Adrian Dennis’s typical Canon kit for shooting sports
My typical kit on a Saturday afternoon is three Canon EOS-1D X cameras: a Mark III with a 400mm f/2.8 and two Mark II bodies – one with a 24-70mm f/2.8 sitting on the floor with a remote control and one with a 70-200mm f/2.8 for goalmouth action, plus Pocket Wizard remotes… hence why a lot of photographers suffer with bad backs!
Case 1 – versatile multi-purpose setting
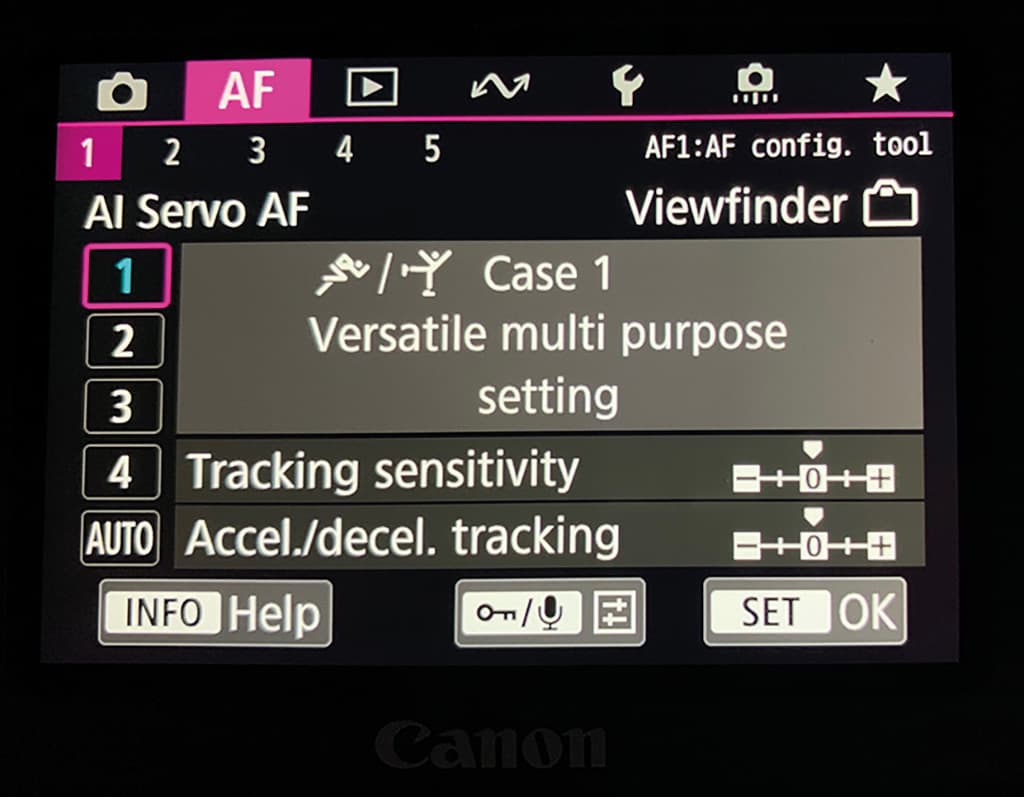
Canon’s Case 1 setting is a standard setting that’s suited to moving subjects, particularly sportspeople. It offers adjustable levels of tracking sensitivity and Accel./decel. tracking. Adrian reveals, ‘My preferred setting is the Expanded AF area, which I then move around my viewfinder using the toggle on the back of the camera. Depending how I’ve composed my photo, I’ll move the AF cursor around the frame without really thinking about it!’
Low Light
Björn Kupper
Fujifilm
Björn Kupper is a German photographer who has been based in Greece since 2009. After attempting a career in music, he gained a master’s degree in Cultural Anthropology and chose to express his artistic desires through photography. He mainly shoots the seemingly artless, ordinary aspects of everyday life. Follow Björn Kupper on Instagram at @bjoern_kupper and check out more of his work at www.bjoernkupper.com.
I mostly use the Single AF mode with the smallest available centre focus point. Although Continuous AF mode is very helpful in many scenarios, I prefer to have more control over the situation. With Single AF I have the possibility to quickly re-compose a frame, which requires some practice, but gives me great compositional freedom. It also lets me use the pre-focusing technique, which fits my style of shooting. I can carefully compose a frame and wait for the scene to happen. Of course, this needs some experience and empathy in terms of how a situation will develop.
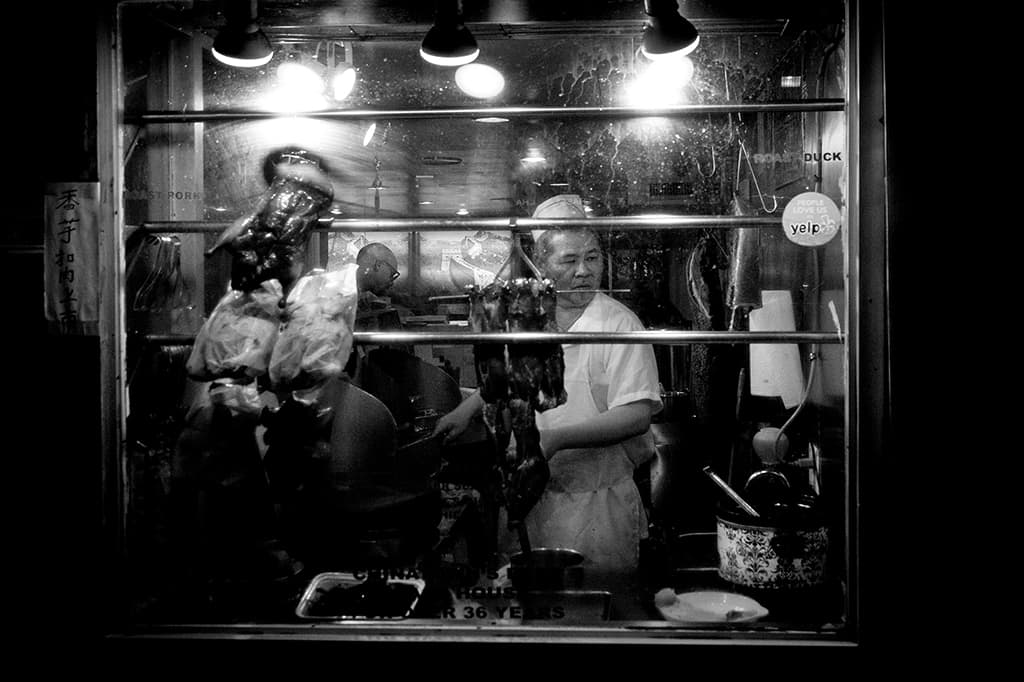
‘Roast Duck’, Chinatown, New York City, USA. This was pre-focused on the white kitchen roll behind the cook. Fujifilm X-Pro2, XF 10-24mm F4 R OIS, 1/1000sec at f/4, ISO 6400
When shooting during the night or in difficult lighting situations, I often use MF mode to gain full control of the whole process. You’re always running the risk of obtaining an out-of-focus result, but I feel more comfortable with MF in such situations. In AF-S mode I just use the smallest available centre focus point.
I seldom use AF-C mode and I don’t customise these presets at all. The various AF-C presets of the Fujifilm cameras are very versatile and do an excellent job, so I’ve never felt the need to set up a custom AF-C setting. With the exception of some extreme situations, my favoured method of focusing is AF-S.
I don’t assign any focusing modes to any buttons. I always focus by half-pressing the shutter release button as I am a fanatical ‘old school, single AF-mode, centre focus point shooter’. Thus there is no need for back button focusing as I very seldom use the zone focusing or tracking mode – the AF-L button is still assigned as per the factory setting. I always tend to set up my camera in a way that gives me as much control and freedom as possible.
In several photographic genres, such as street photography, where composition is usually the most crucial factor to make a photo unique, I will, whenever possible, choose pre-focusing in order to keep my mind only on catching the decisive moment. Hence, in terms of focusing, the AF-S mode is the mode for me. It’s a focusing mode every photographer should practise using in order to expand their artistic freedom.
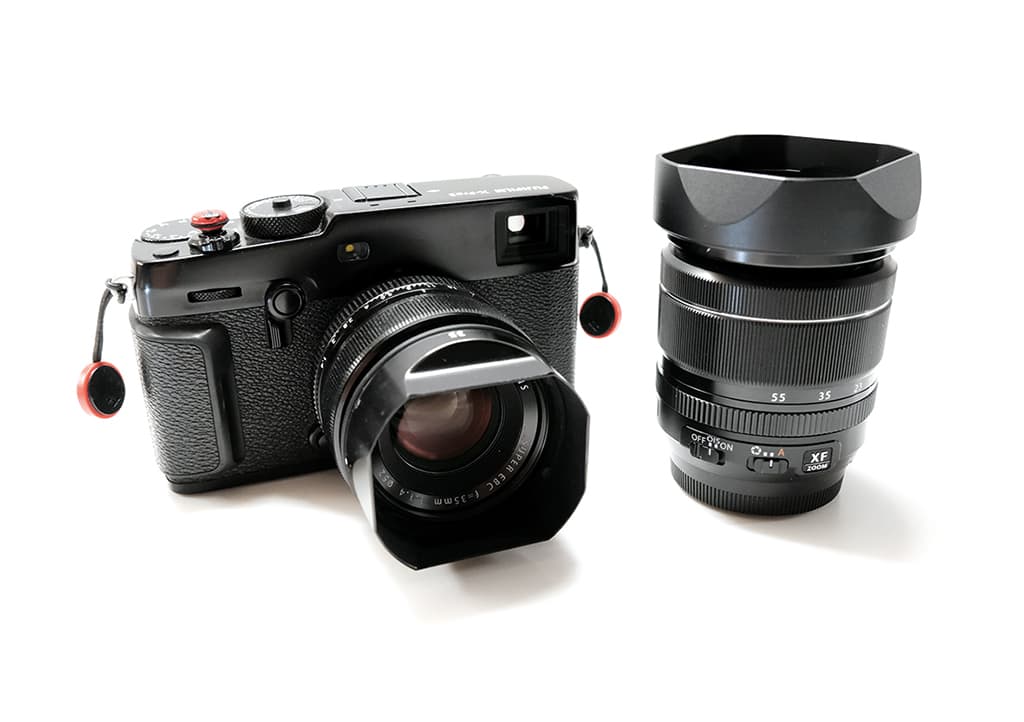
Björn Kupper’s kit for shooting in low light includes the Fujifilm X-Pro3, the XF 35mm F1.4 R and the XF 18-55mm F2.8-4 R LM OIS
I’ve gathered lots of equipment over the years. What I carry with me depends on where I am and what I am shooting. Usually, I try to stick with prime lenses and might bring a little zoom lens in the backpack just in case. Sometimes I carry two cameras, equipped with prime lenses covering two different focal lengths, say 16mm and 50mm. Very rarely I’ll carry a tripod as I hate these things for slowing me down – the high ISO and dynamic range capabilities on my Fujifilm cameras are brilliant anyway.
Single Point (AF-S) mode
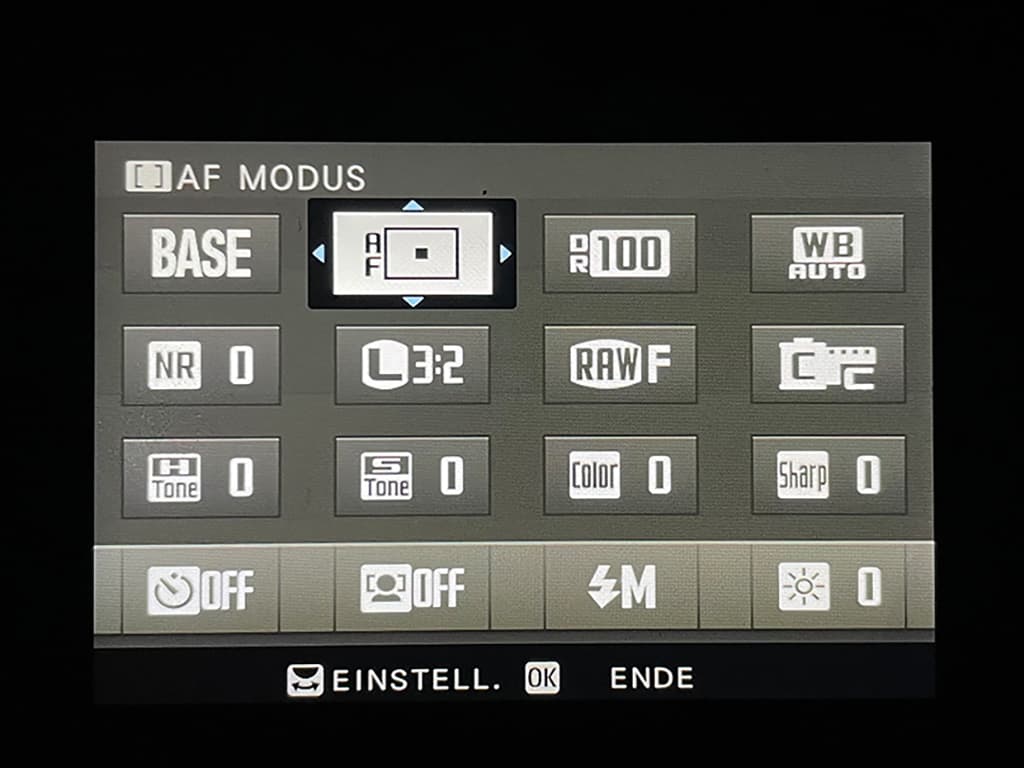
Fujifilm’s Single Point Mode restricts AF to just one point, which can be very useful when a photographer wants to focus at a specific place in a scene. When combined with shallow depth of field this allows photographers to be really specific about which aspects of a scene are sharp and what is intentionally blurred.
You can move the active AF point by moving the focus lever or by pressing your camera’s AF button and using the four-way select buttons. You can also use the rear control dial to change the size of the active single AF point – smaller is more selective, whereas larger is easier to use.
Macro
Lydie Bréda
Nikon
Lydie Bréda is a macro, nature and landscape photographer who hails from France. Her passion for nature developed when photographing insects and flowers in her parents’ garden in Gironde in 2012. She is self-taught and has been a finalist in the Close-Up Photographer of the Year awards. You can follow Lydie Breda on Instagram at @lydiephotosnature and view more of her work at www.lydiebreda.wixsite.com/photos.
For macro photography I mainly use the manual focus mode and I don’t feel the need to customise my focusing set-up. I focus manually by turning the ring on my lens until my subject is in focus.
I also use a little trick where I move my lens forward or backward rather than always turning the ring. I find it less tiring. I do, however, use the AF-C mode for insects as they can move – for example, for shooting jumping spiders. I often shoot static or almost static subjects behind the vegetation in the foreground, so it is best to focus manually.
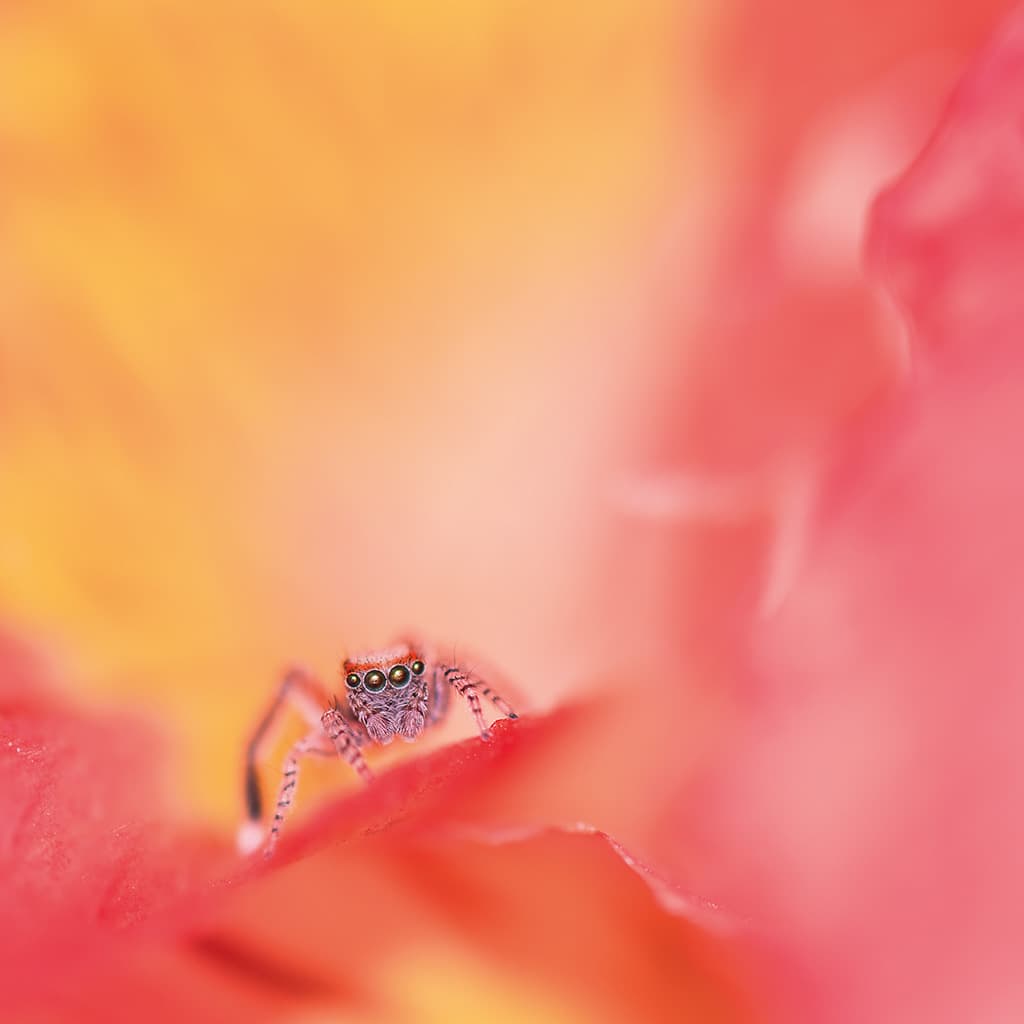
A jumping spider on a flower. Nikon D7100, 85mm f/3.5 Micro, 1/125sec at f/4.8, ISO 100
With my mirrorless camera, I have a lot of AF points so I can focus anywhere I want easily. The smaller the subject, the harder it is to focus, and it’s even worse if it moves! For jumping spiders, I have a lot of failed images because the eyes have to be in focus. It’s hard to concentrate on the focus, composition and release the shutter without moving and all before the subject moves.
When the subject is static, if there is no wind, it’s much easier. That said, it sometimes takes me a while to find my subject in the viewfinder, especially if I’m far away and there’s a lot of vegetation between my camera and the subject – it’s a real game of hide and seek!
To focus successfully, it’s necessary to position oneself well and to be fully stabilised to avoid camera shake. Sometimes I take a breath and hold it for the time of the shutter release. Depending on the subject, if it is moving or not, if the environment is clear or busy, I focus in AF-C mode because it is more comfortable to let the camera do the work. If it is slipping out of focus and doesn’t manage to do it, then I’ll switch to manual mode to be sure I have the focus in the right place.
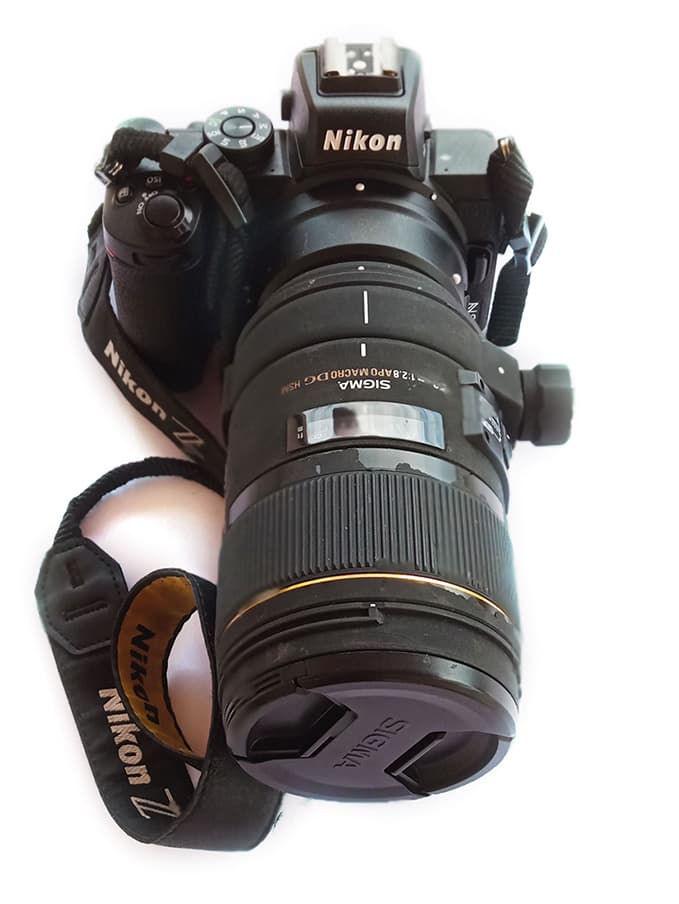
Lydie Bréda’s main camera is a Nikon Z 50, which she usually teams with a Sigma 150mm macro telephoto lens or a Nikon 85mm prime for AF shooting
I often use the Sigma 150mm f/2.8 macro lens – it’s very good but I can’t focus other than manually. It’s a real plus to be able to use autofocus if the situation allows it. I also have the Nikon 85mm f/3.5, which allows me to use autofocus and I use it to photograph jumping spiders, which works very well.
I go out with very little equipment. Usually, it’s my Nikon Z 50 with my Sigma 150mm. There’s also an accessory I couldn’t do without – an angle-finder. In macro photography the positions I take are far from comfortable and the angle viewfinder helps a lot! I also carry a pair of scissors and a torch. Sometimes I carry a white umbrella to shade my subject if I go out to shoot in the middle of the day.
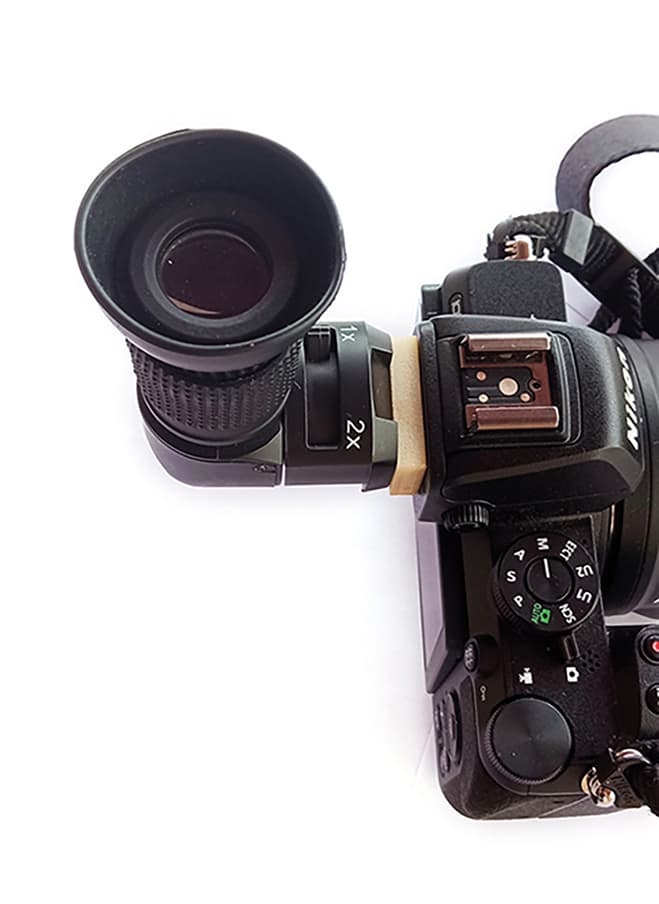
Lydie Bréda uses an angle finder to help her to compose and shoot from tricky positions
Continuous AF mode
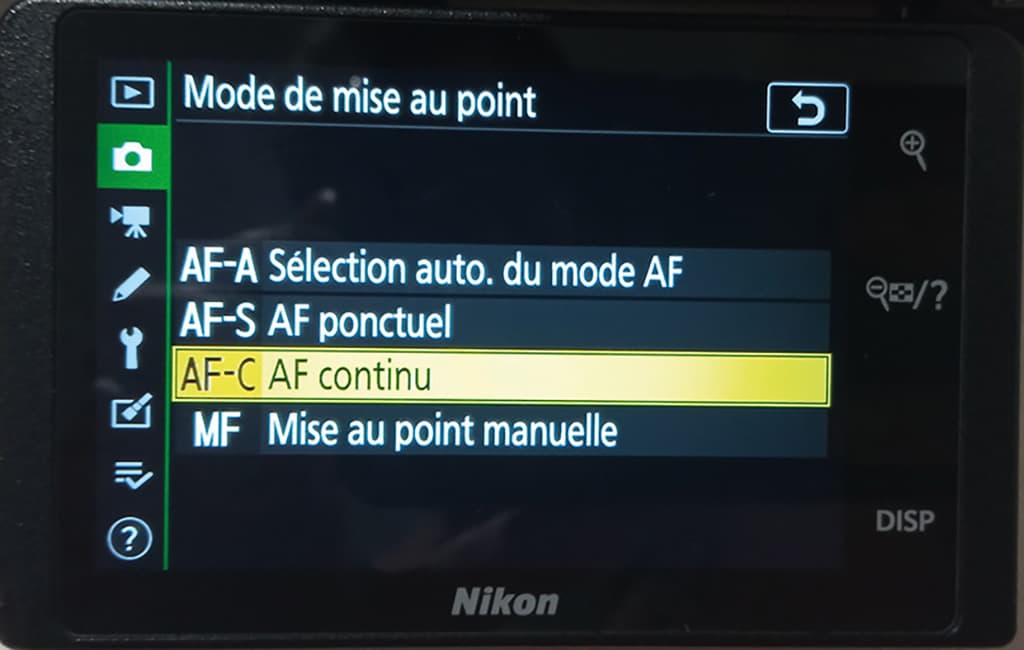
Nikon’s AF-C Mode (aka Continuous Servo) allows the photographer to keep focusing on track by continuously focusing on the subject whilst the camera’s shutter button is half-depressed. In AF-C mode if the main subject moves towards or away from the camera, predictive focus tracking is automatically triggered. This calculates the most likely position of the subject (based on its speed and direction of travel) at the moment of capture and adjusts focus accordingly.
Landscape
Tom Ormerod
Olympus
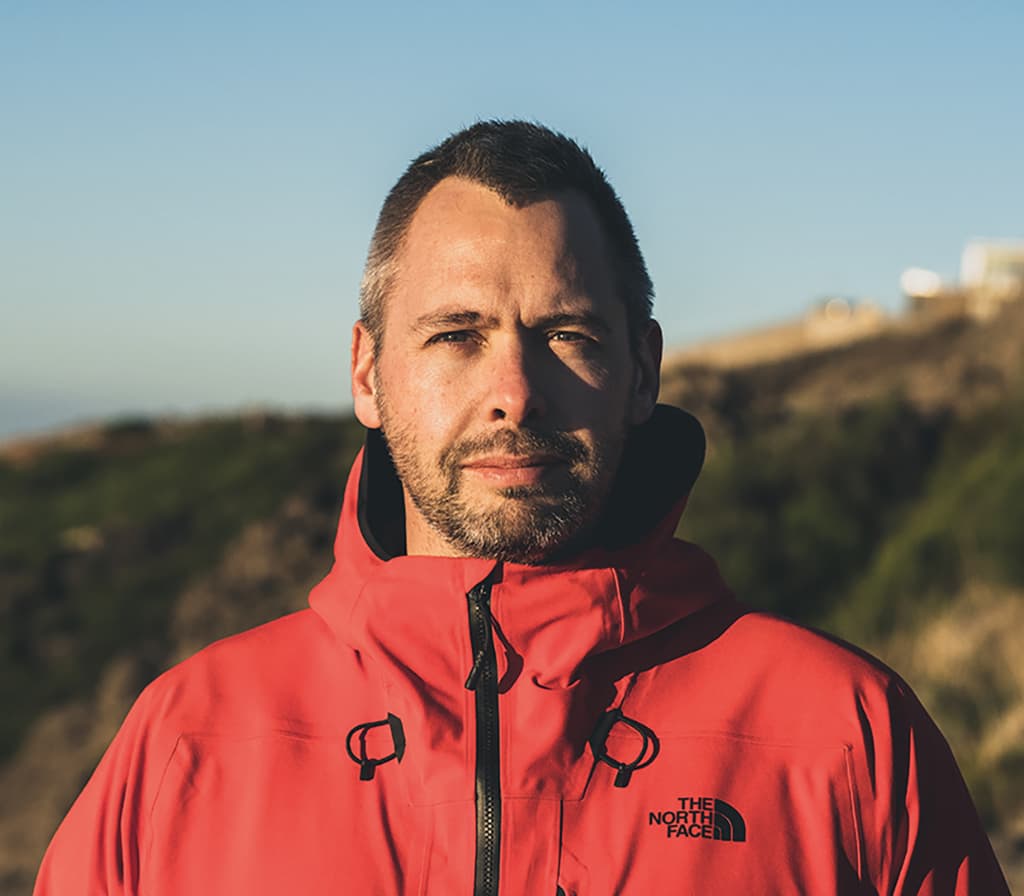
Tom Ormerod is a landscape, seascape, astro and drone photographer. Based in Dorset, England, he is part of the Olympus ambassador programme as a Mentor, yet also works as an IT consultant in the education sector. He is best known for seascapes and astrophotography shot with the OM-D system. You can follow Tom Ormerod on Instagram @tomormerod and check out more of his work at
www.tomormerod.com.
I rely on three main types of focus – Selective Single Point Autofocus, manual focus and Starry Sky Autofocus, which is currently an Olympus OM-D E-M1 Mark III exclusive for astrophotography. I’ve tried various customising tweaks over the years, but the default settings are pretty good. I always make sure any face priority settings are disabled.
I generally use Single Point Autofocus, but in a variety of different ways. I really enjoy shooting down very low, so using the viewfinder isn’t an option. In this situation I often use touchscreen shooting. A single tap on the area you want the autofocus to hit activates the AF and takes the exposure in one simple motion. However, in other situations, I usually use single point back-button focusing.

Durdle Door limestone arch, shot using Starry Sky AF mode. Olympus OM-D E-M1 Mark III, 17mm f/1.2, 10min at f/1.2, ISO 3200
The main thing I rely on is single point focusing, so I use the d-pad or joystick to adjust the focus point to the particular area I want to focus on. I use focus bracketing from time to time, particularly when I am zoomed in on a subject, but I need the scene to have good depth of field – the camera takes multiple shots adjusting the focus point and then these can be stacked in post-processing.
Olympus cameras can produce a stacked JPEG in-camera, which is amazing when you are on the move as it allows you to transfer the JPEG to your phone and share it straightaway using the Olympus OI Share App.
I use back-button focusing all the time and have the AEL/AFL button set up to do a single point AF. This separates the focusing action from the actual exposure, thus enabling you to pre-autofocus on the area you want and then take the shot. This is really useful with things like waves crashing over rocks as the wave could adjust your focus at the wrong moment.
Astrophotography and focusing on the stars can be challenging. However, the Starry Sky AF function on the OM-D E-M1 Mark III is fantastic and removes one of the biggest barriers to people getting into landscape astro shooting like the Milky Way. It removes the need for photographers to learn how to focus manually on the stars, which can be really tricky in complete darkness.
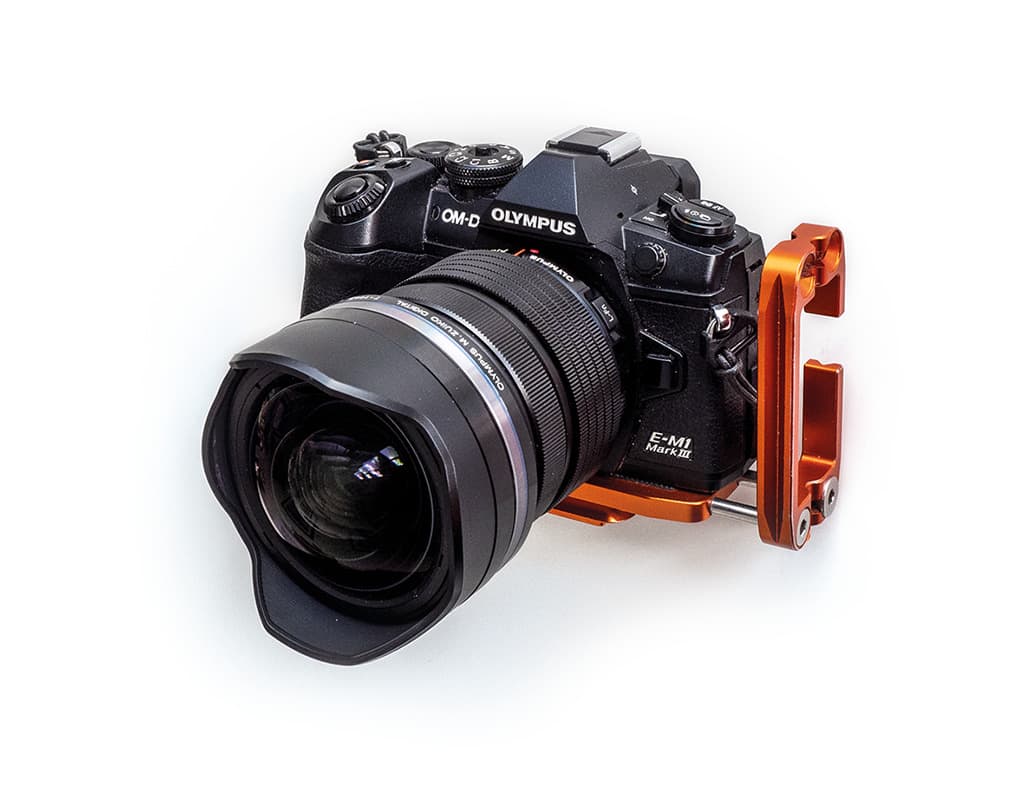
Tom Ormerod’s Olympus OM-D E-M1 Mark III camera
The Olympus M.Zuiko Pro lenses are fantastic; not only are they lightning-fast at autofocus but they also have the amazing manual focus clutch system that makes switching between manual and AF so quick and easy. In my current kitbag is an Olympus OM-D E-M1 Mark II and Mark III, an assortment of lenses, teleconverters and filters, plus a 3 Legged Thing Albert Tripod & Ellie L-Bracket, Peak Design Straps, a DJI Mini 2 drone and an Atlas Athlete backpack.
Selective Single Point AF (S-AF)
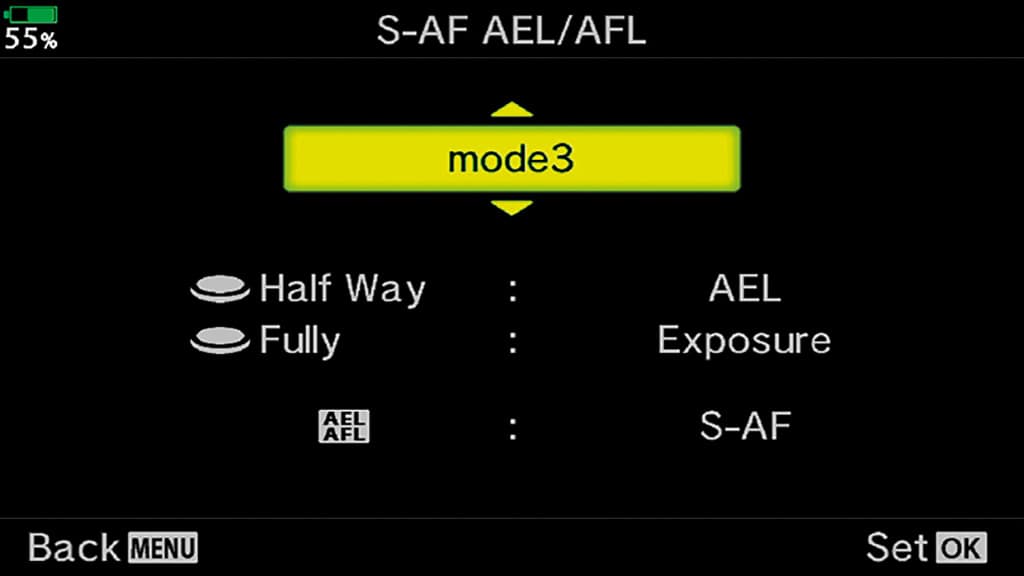
Within the AF/MF menus of his Olympus cameras, Tom often assigns the S-AF function to the AEL/AFL button for back-button focusing. This allows him to separate focusing from the exposure settings – this lets him pre-autofocus on the area he wants, so he can then take the image at the exact moment he wants. It’s best deployed for still subjects or those with limited movement.
Starry Sky AF
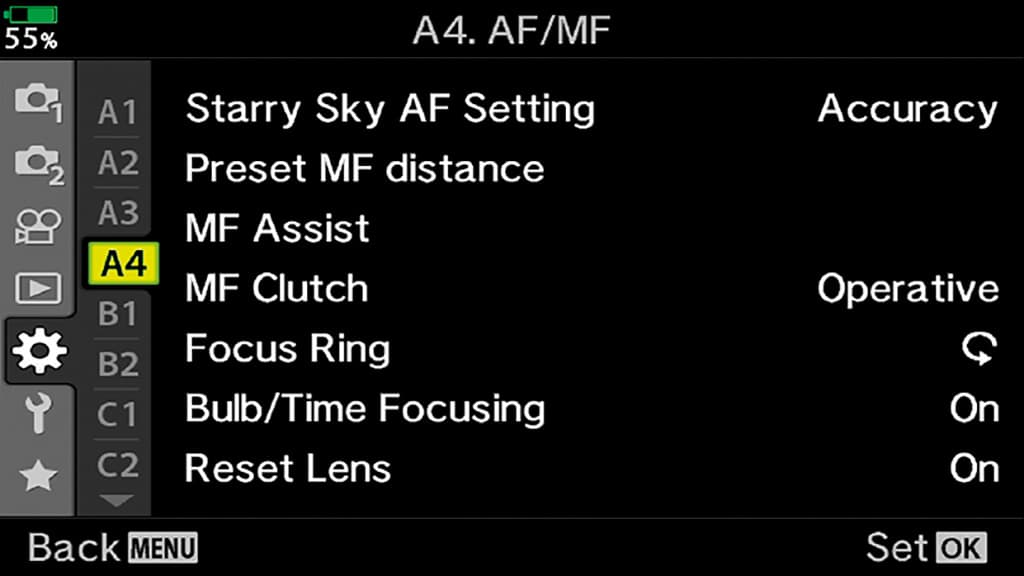
The Starry Sky AF mode on the Olympus OM-D E-M1 Mark III is an autofocus mode that allows the camera to focus automatically on the stars in the night sky. It does this by scanning the composition and looking for the smallest points of light in a night scene. Then it moves the lens elements back and forth to acquire focus with the help of a dedicated algorithm. It offers two options – Accuracy or Speed – and is operated via a half-depression of the shutter button or via back-button focus.
Portraits
Jacob James
Panasonic
Jacob James is a UK-based, internationally published travel and documentary photographer. His images have appeared in many exhibitions and books, and he is currently a Panasonic LUMIX Ambassador. He is an active photography educator and speaker who regularly runs photo workshops around the world. You can follow him on Instagram @jacobjamesphoto and see more of his work at jacobjamesphotography.co.uk.
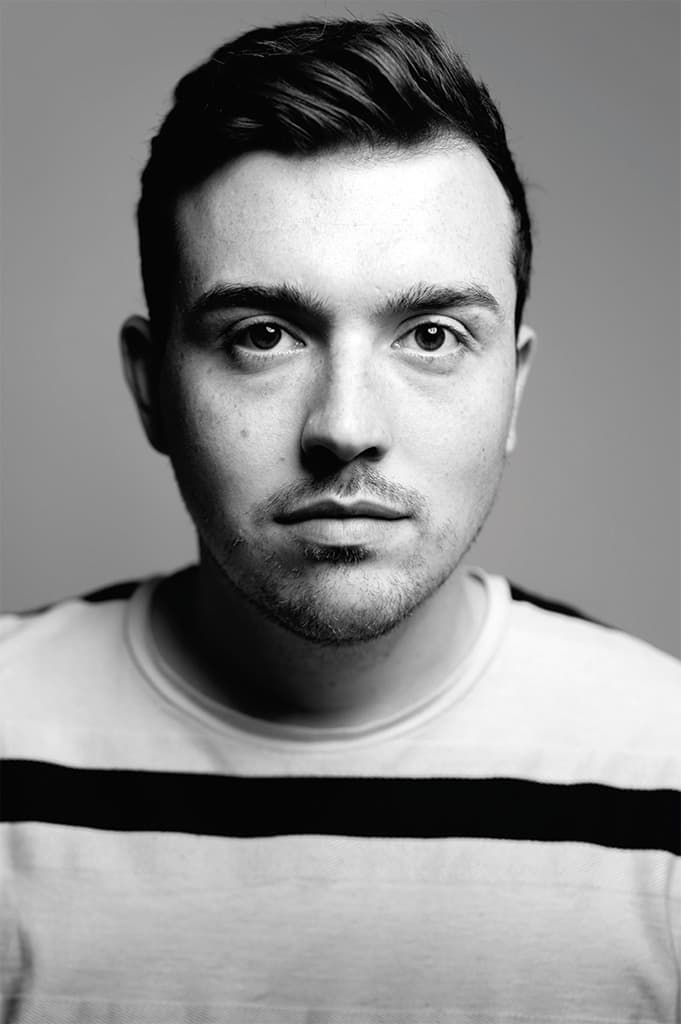
For portrait photography I always used to use the single point focus mode in AF-C to ensure the eye was always sharp. Now I find myself using Eye Detection focus a lot more. Eye Detection uses the AI algorithms inside the camera to track the eye of the subject and ensure the focus point is exactly on the eye. This is essential for portraits, where having the eye in focus is the difference between a great shot and the recycling bin.
In the past AI- guided AF wasn’t reliable, but with the advancement of mirrorless technology, the smart AF modes are more accurate than I can be when doing it manually with a single point. On Panasonic cameras I turn on touch-pad AF, which allows me to use the touchscreen to move the focus point even when my eye is to the EVF.
I find this much quicker and more intuitive than using the joystick. In Panasonic cameras there are options for Exact, which positions the focus point to match where your finger is on the screen, and Offset, which moves it around as you drag your finger.

Monk in monastery, Maramures, Romania. Panasonic Lumix GX8, 15mm f/1.7, 1/50sec at f/1.7, ISO 1600. Shot with Eye Detection AF
For portraits the advancement of Eye Detection AF is a huge improvement, especially when working with narrow depth-of-field and prime lenses. It allows you to ensure the eye is in focus at all times without having to move the composition or the focus point. This allows you to focus on the image and not worry about getting the eye in focus… less time on the technical and more time creating great images.
Ensuring the eye is pin-sharp when shooting at shallow depth of field is the biggest challenge for portraits. If it’s not sharp, it becomes very obvious to the viewer of the image. Shooting wide open with primes leaves you sometimes with only a matter of centimetres for depth-of-field, and so focusing on the eyebrow or eye socket can mean the retina is not in focus.
If the subject moves even 1-2cm forward or backward it can be critical to keep the focus point shifting. There’s no right or wrong way to focus, it’s about discovering the way to use the camera in a way that is most intuitive to you. The best images come when the camera is no longer a distraction.
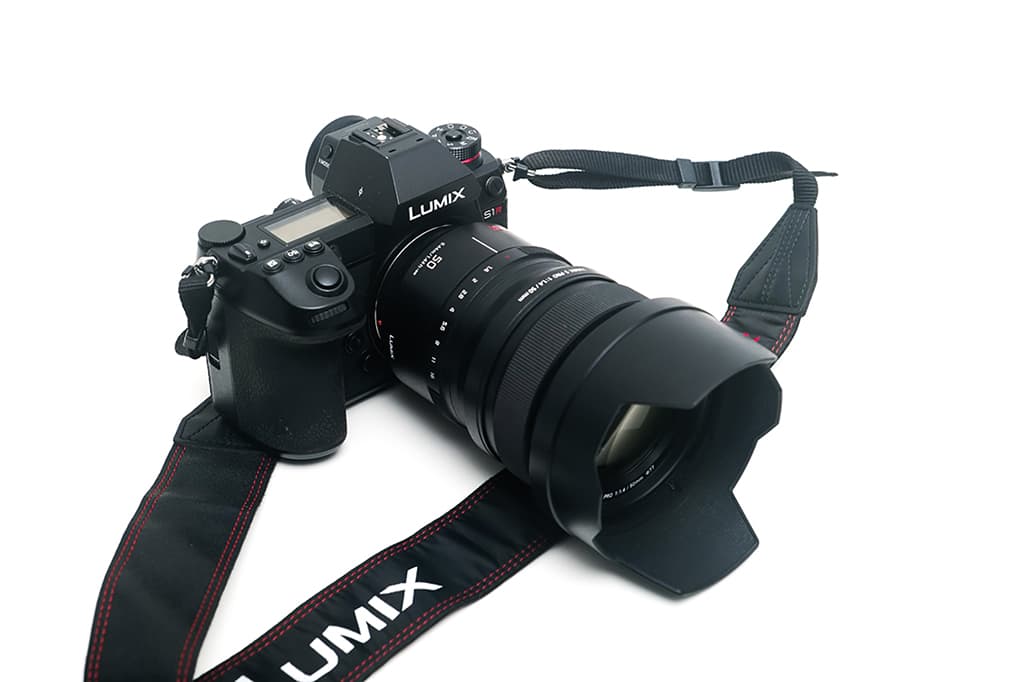
Jacob James’s Panasonic Lumix S1R with a 50mm f/1.4 lens
Prime lenses traditionally tend to focus much faster, and it holds true in my experience for most lenses, due to the wider apertures. Although modern zoom lenses like the Panasonic 12-35mm f/2.8 are very close if not better than their comparative prime lenses.
My usual kitbag is the Lumix GX8, or G9, with the Leica 15mm f/1.7, 25mm f/1.4 and 42.5mm f/1.2. Occasionally I also carry the 35-100mm f/2.8 for long lens landscapes. I prefer to shoot natural light, rarely carry a flash and use minimal gear… it’s better to spend more time forming a relationship with the subject.
Eye Detection AF
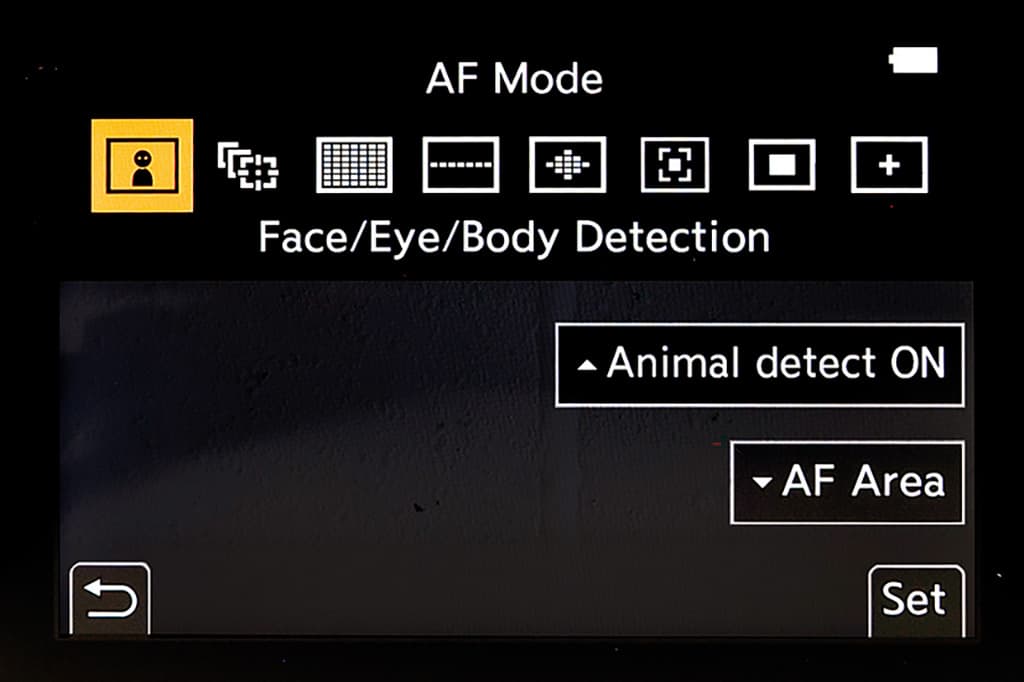
Panasonic’s Eye Detection (aka Face/Eye/Body Detection) AF mode is found amongst the AF point selection modes in Lumix mirrorless cameras such as the G9 and S1R, which Jacob has in his kitbag. The setting ensures the camera automatically focuses on your subject’s face or eye. It’s useful for shooting portraits and weddings as deploying it means photographers can shoot at wider apertures as they don’t need the security blanket of extra depth of field as you pretty much know the eyes will be sharp.
Wildlife
Will Burrard-Lucas
Sony
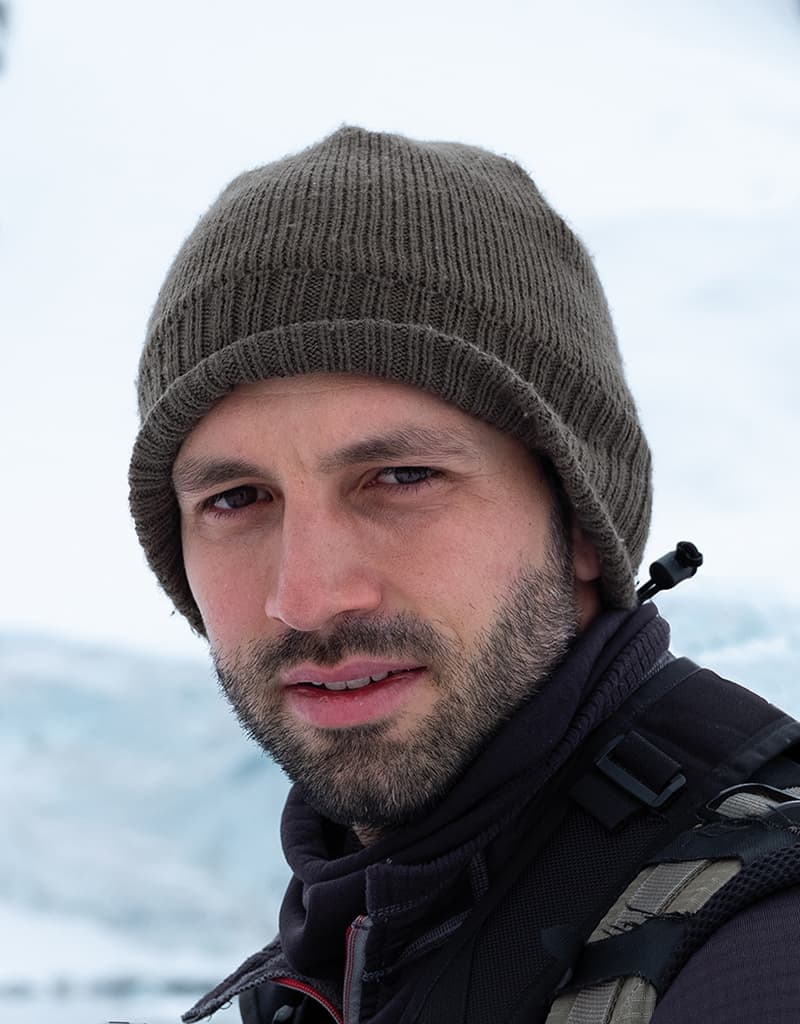
Will Burrard-Lucas is a UK-based wildlife photographer who usually works in Africa. He is currently a Sony Ambassador and, aside from his pictorial work, he is known for inventing camera traps and devices to help get photographers closer to wildlife. His latest book, The Black Leopard, was published in 2021. You can follow Will Burrard-Lucas on Instagram at @willbl and check out more of his work at www.willbl.com.
To photograph wildlife I’m mostly using a long lens on the Sony A7R IV or Sony A1 with one of the tracking continuous autofocus modes. Mirrorless cameras have changed the way I use autofocus because their subject recognition and tracking abilities are so revolutionary. I will now use a single focus point and place it over my subject, usually over its eye, and then press the shutter button half-down to start tracking.
The camera locks on to the spot I defined and if the subject moves, or if I recompose, the camera will tenaciously remain focused on the same spot. It will regain the focus point even if the subject leaves the frame briefly, which is very handy when photographing erratically moving subjects. This method has completely replaced the old back-button technique I used to use on my DSLR.
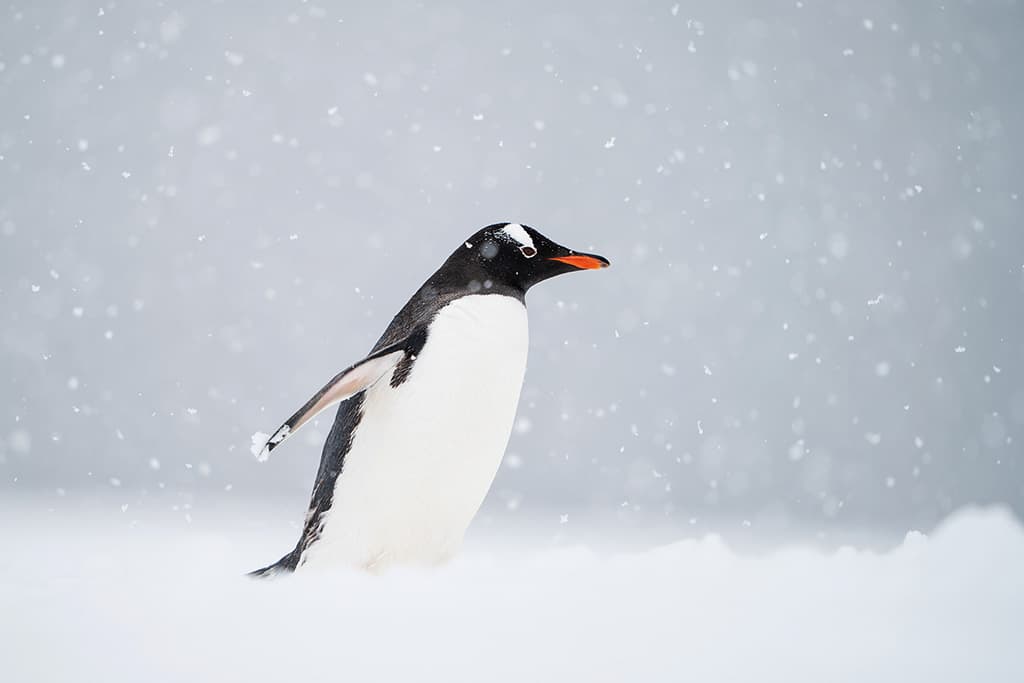
Penguin in Antarctica. Sony A7R III, FE 400mm F2.8 GM OSS, 1/800sec at f/2.8, ISO 100
Eye autofocus is now at the point where it is working reliably with animals, so I’m also starting to use that rather than manually selecting the eye to track. I limit the available focus modes that I can select so that I can quickly cycle between the modes I use the most. Specifically, I limit the camera to tracking modes with various different focus areas to select from.
I change the AEL button to initiate eye autofocus and use the AF-ON button to hold the focus. I often set the buttons on the lens to activate my ‘fast action’ mode. This recalls a custom shooting mode which ups the frame rate, ups the shutter speed, expands the focus area to the entire centre zone and sets the autofocus to continuous tracking.
This means I can be photographing a stationary subject like a bird on a twig but the moment it takes off I can simply hold a button down to recall multiple different settings, which will give me a good chance of getting a sharp in-flight shot.
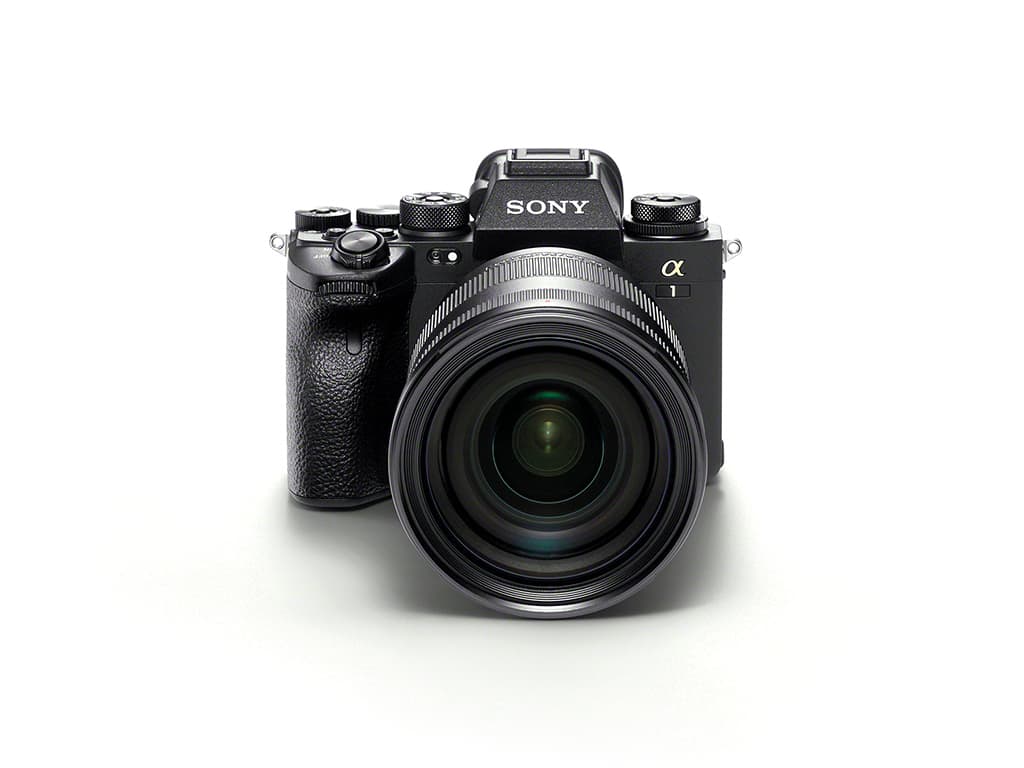
Will Burrard-Lucas’s kitbag includes the Sony Alpha 1 camera and a 24-70mm f/2.8 zoom
The biggest challenges when focusing for wildlife shots are keeping the eye sharp, particularly when shooting with a fast prime like the 400mm f/2.8, which has a very shallow depth of field. I usually have two camera bodies. One is specifically set up using the focus settings I’ve described and used exclusively with long lenses or shallow depth-of-field prime lenses like the 135mm f/1.8. My second body has no autofocus customisations and is the camera I use with a wide angle, like the 24-70mm.
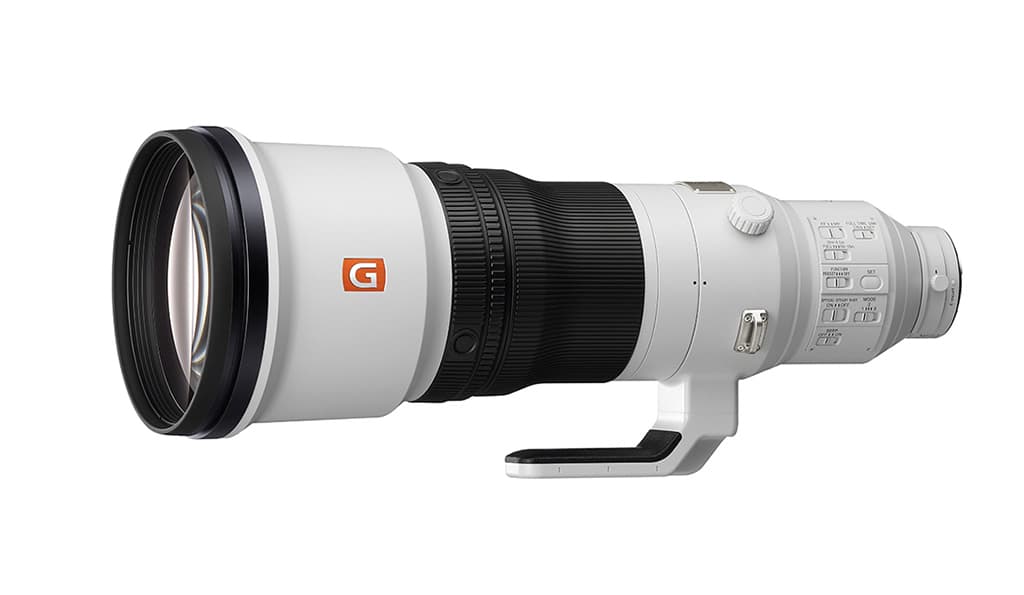
The Sony 600mm f/4 G Master lens
The G Master primes are all great. I think the focus performance of the 400mm f/2.8 and 600mm f/4 is fantastic. My usual kitbag is a Sony A7 IV, A1 and A9, which is used in a Beetlecam with a 16-35mm f/4 lens. My lenses include a 24-70mm f/2.8, 70-200mm f/2.8, 400mm f/2.8, 100-400mm and a 600mm f/4. I also have several Camtraptions camera traps with me.
Animal Detection AF mode
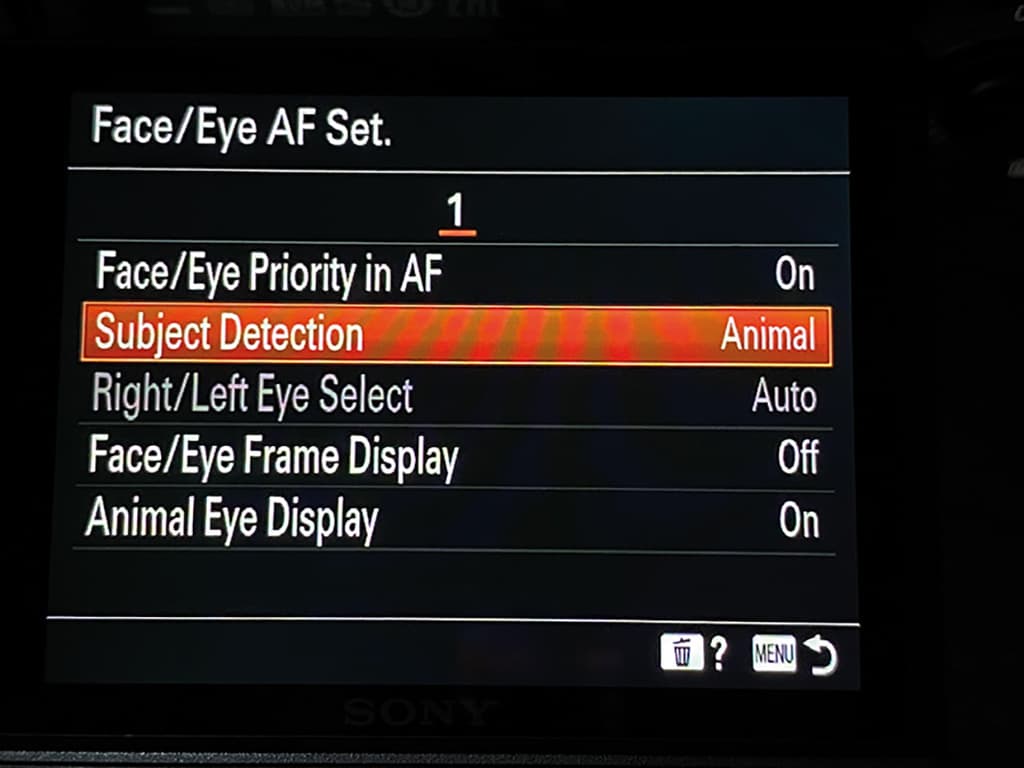
Within Sony’s Face/Eye AF menu setting, Will deploys the Subject Detection: Animal sub-setting with Animal Eye Display set to On and Right/Left Eye Select on Auto. Once selected from the menu you can then activate animal eye recognition by pressing the shutter button halfway or by pressing a custom-assigned key on your camera. It uses Sony’s advanced AI-based subject-recognition technology with a new algorithm for animals to help fast, precise, auto detection and tracking of the eyes of animals.
Further reading

