
If you’ve ever wondered how to really master close-up macro photography, then focus stacking is the answer, as it allows us to expand the area in focus, giving impressively sharp and detailed images. Three expert photographers explain how to do it…
Geraint Radford explains Focus Stacking
Geraint is an Olympus ambassador with a love for macro photography. He hopes that his images may inspire others to care for insects. He regularly posts videos and tips on Instagram. Find him at @geraintradfordmacro
Macro photography lets us explore the magical world of tiny beasts, flora and fauna. I love to photograph live wild insects, yet discourage the use of any practices that could harm these tiny important beings.
When working close to our subjects, the depth of field reduces considerably. The smaller apertures needed to achieve extra depth of field can impact picture quality through diffraction and reduce the faster shutter speeds we need to maintain image sharpness.
What is focus stacking?
Focus stacking is a great solution to this problem. The technique entails shooting a sequence of images at different focusing distances, and using software to blend the sharp areas together into a single file with greater depth of field and better image quality.
By focus stacking, we can use wider apertures with lower ISO numbers to maintain a decent shutter speed. Sounds ideal, but there are a few caveats. For a successful stack, exposure must be consistent and neither we nor the subject can move. Photographing living beings means we won’t have the opportunity to shoot hundreds of frames. The keep rate can be low, but thankfully there are some things we can do to increase our chances of success.
Dawn and dusk are ideal shooting times as the cooler temperatures make creatures easier to approach and less likely to move. Stability is key to successful stacking. My camera has seven stops of in-camera stability, enabling me to shoot handheld. A ground-level tripod may be useful, while a centre column that tilts horizontally will stop the tripod legs from getting in your way.
Diffused flash will give us complete control of our lighting and help reduce camera shake, especially when shooting handheld. My flash and 30cm diffuser is mounted directly above my lens pointing downwards to achieve soft lighting and nice shadows. This also avoids the light shining directly into the eyes of my subjects.
Geraint’s focus stacking kit list
Macro lens
Macro lenses are my favourite invention! Being designed especially for close-up work, they will achieve 1:1 magnification. The longer the focal length, the further from our subject we can be and still achieve maximum magnification. I would recommend at least 90mm for insect photography.
Extension tubes
These work by increasing the distance between the lens and the camera sensor, so we can focus much closer. The downside is that working distance is reduced, and this in turn reduces the depth of field. Ambient light is also lessened, so a combination of artificial light and focus stacking will give great results.
Flash and diffuser
When shooting macro images handheld, a great flashgun with a speedy recycling time will be your best friend. Good diffusion will help with controlling the highlights created by the shiny exoskeletons of our bug buddies.
How to use focus stacking
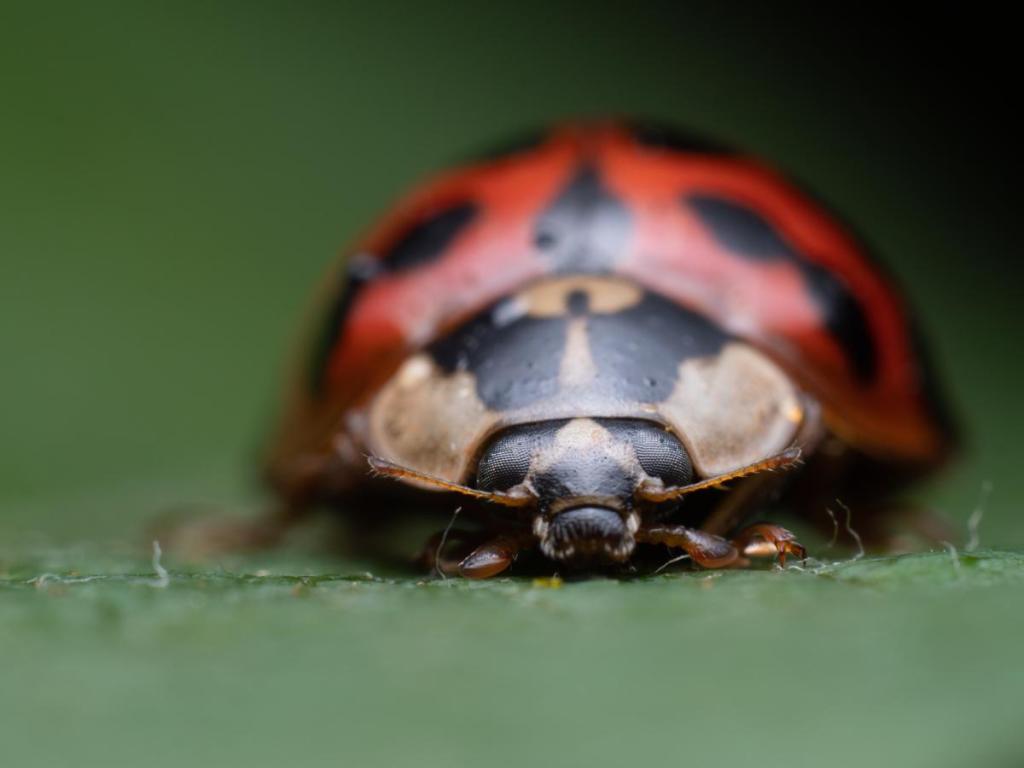
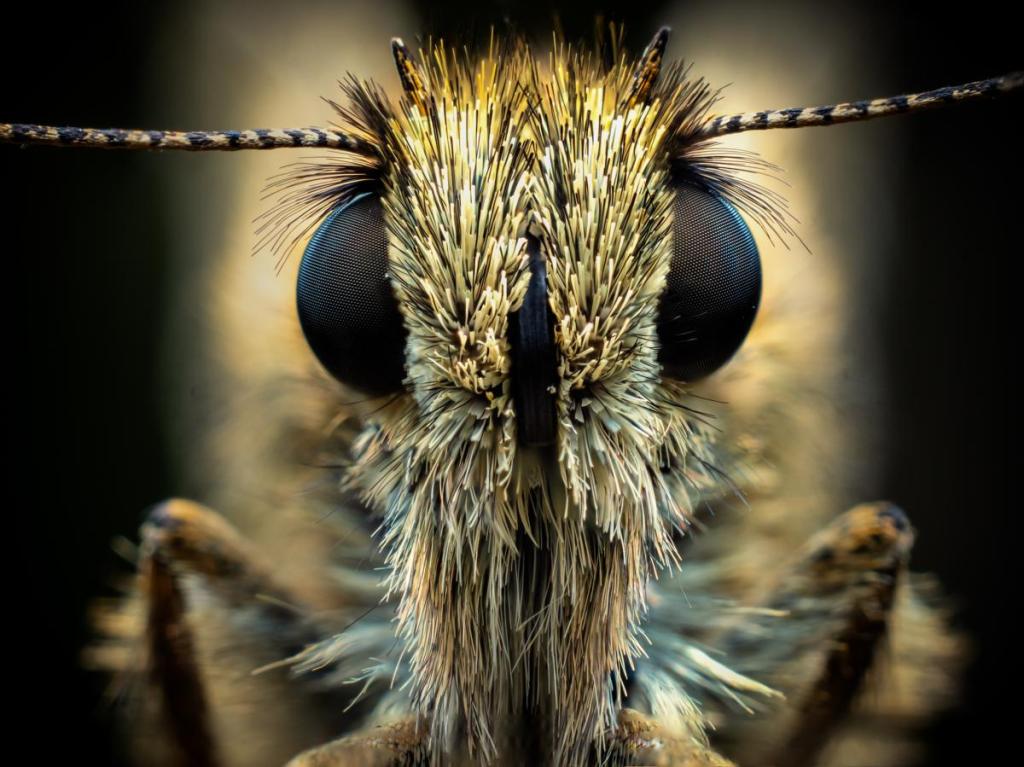
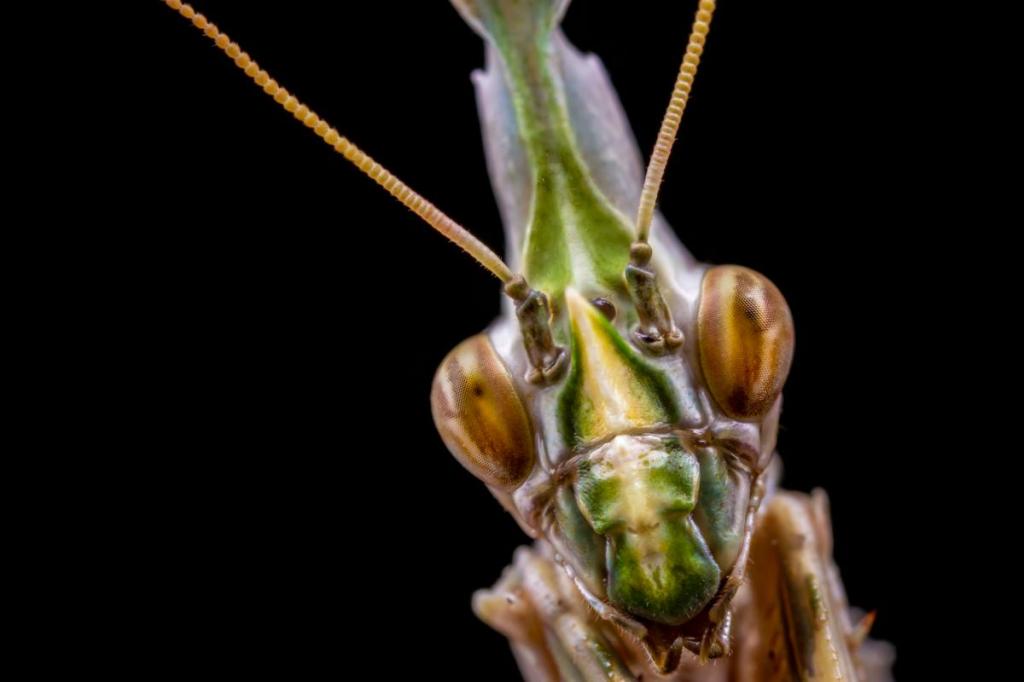
The depth of field is very shallow in this image and we need more to show this beautiful creature in all its glory. With two sets of extension tubes attached to my 60mm (120mm equivalent) macro lens, an aperture of f/5.6 is the limit before diffraction sets in.
Focusing is achieved manually by composing the shot and then moving the camera towards the subject. Make small adjustments to ensure each image overlaps properly. Using the rule of thirds grid in our viewfinder helps visual alignment. Use them as crosshairs to make sure the focal point remains the same in each picture.
Essential software
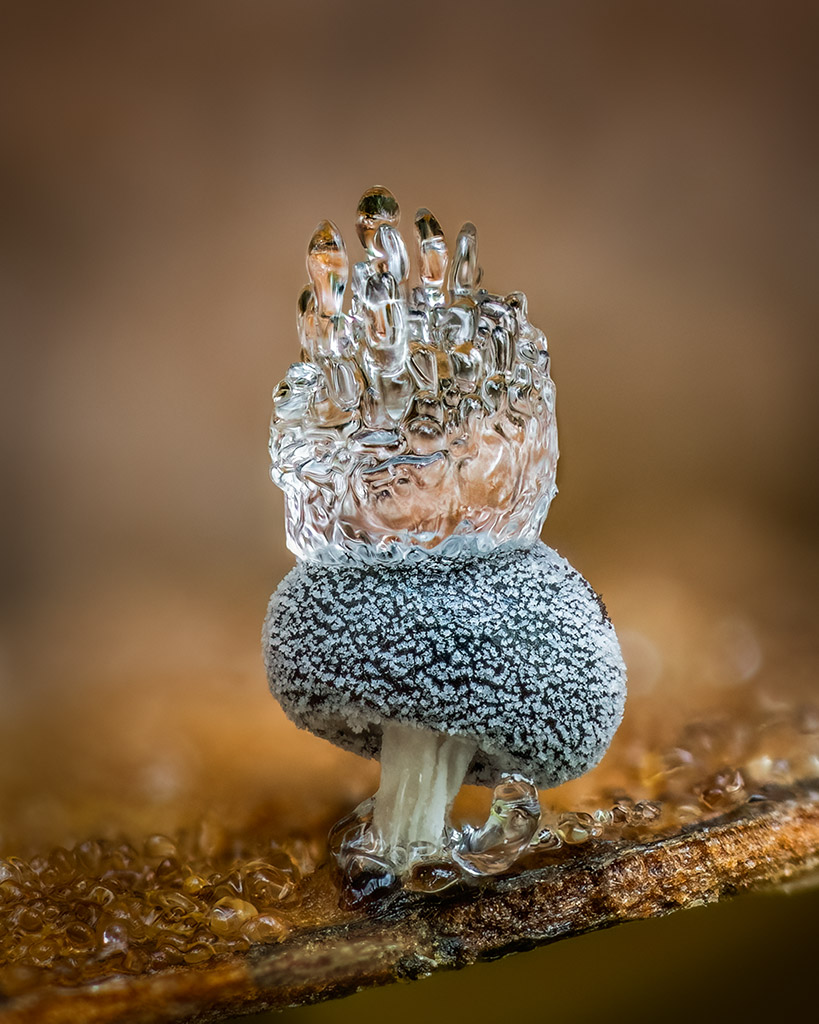
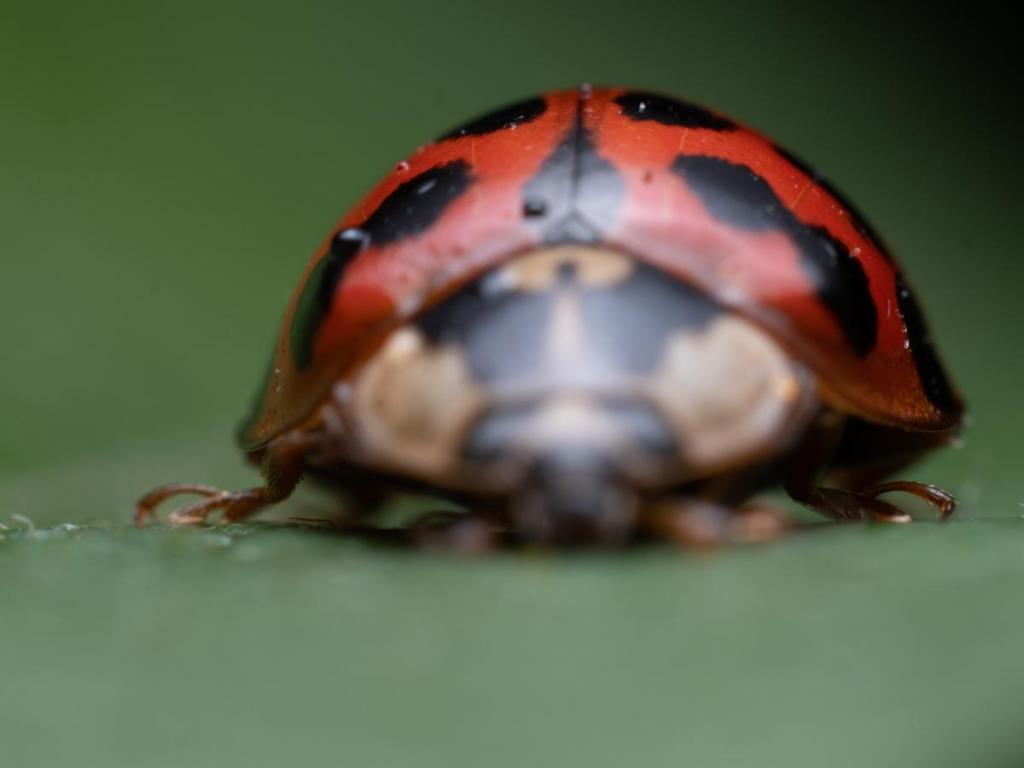
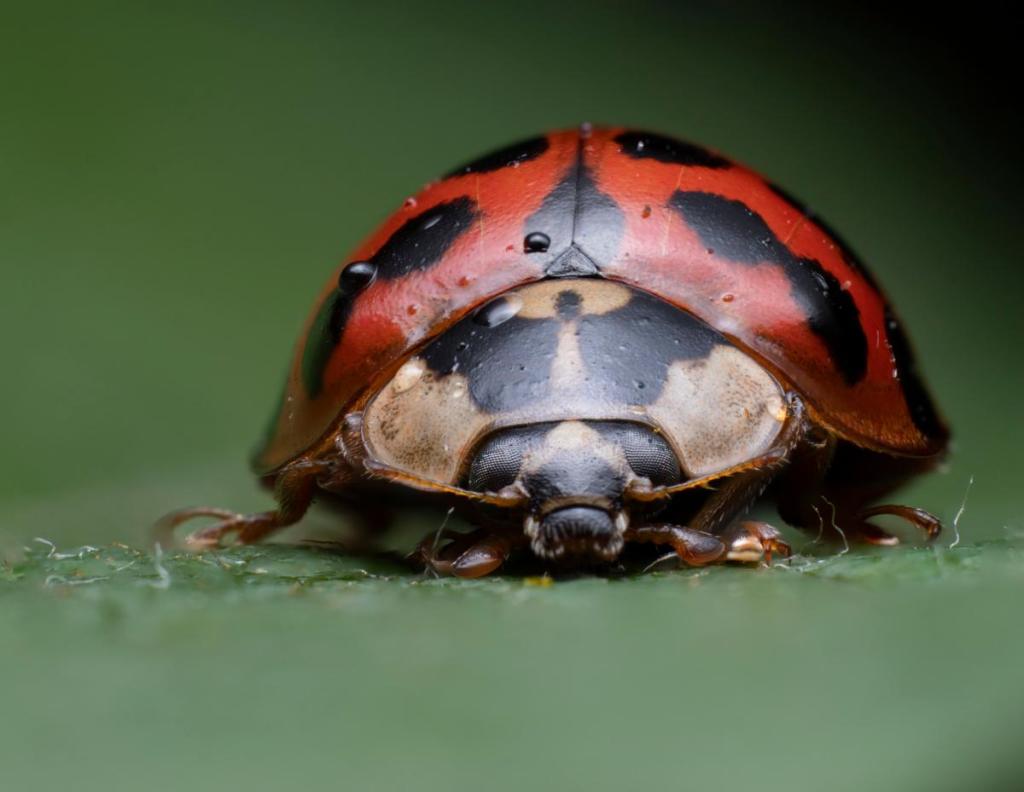
There is a good choice of dedicated focus-stacking software available, but Zerene Stacker and Helicon Focus are very popular. Adobe Photoshop does a good job for small image stacks and it’s a great starting point. For the image above, I blended eight images in Photoshop. The fine details and raindrops, which were obscured by the shallow of depth of field, are now magically revealed. On a side note, I was absolutely drenched getting this shot.
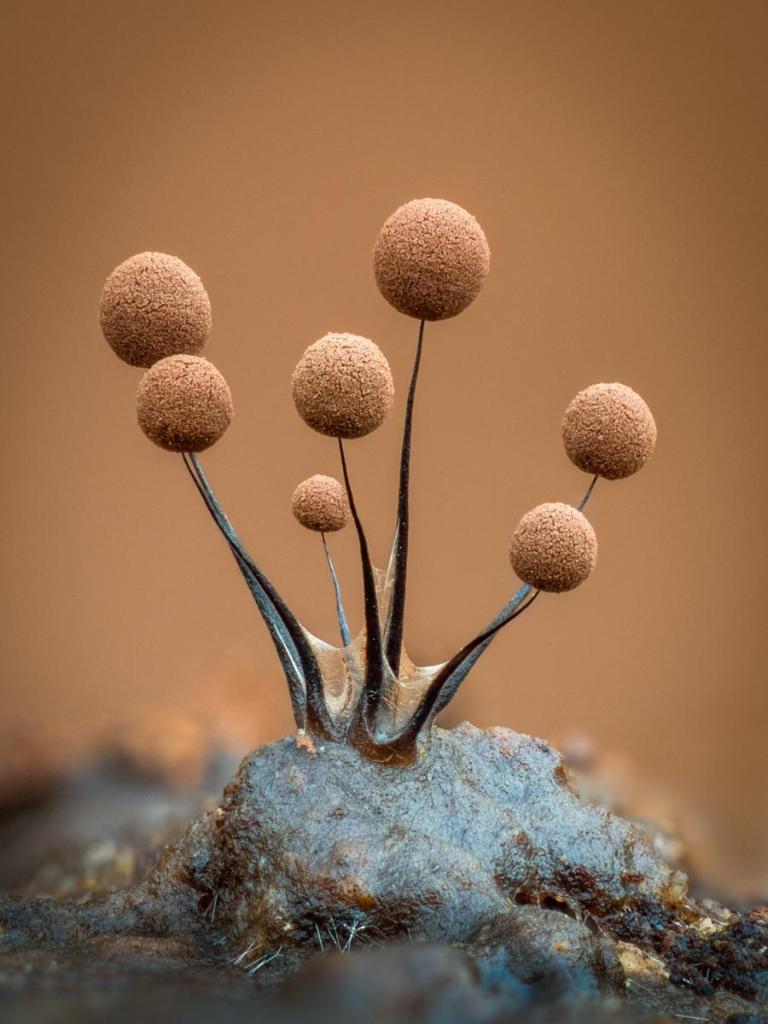
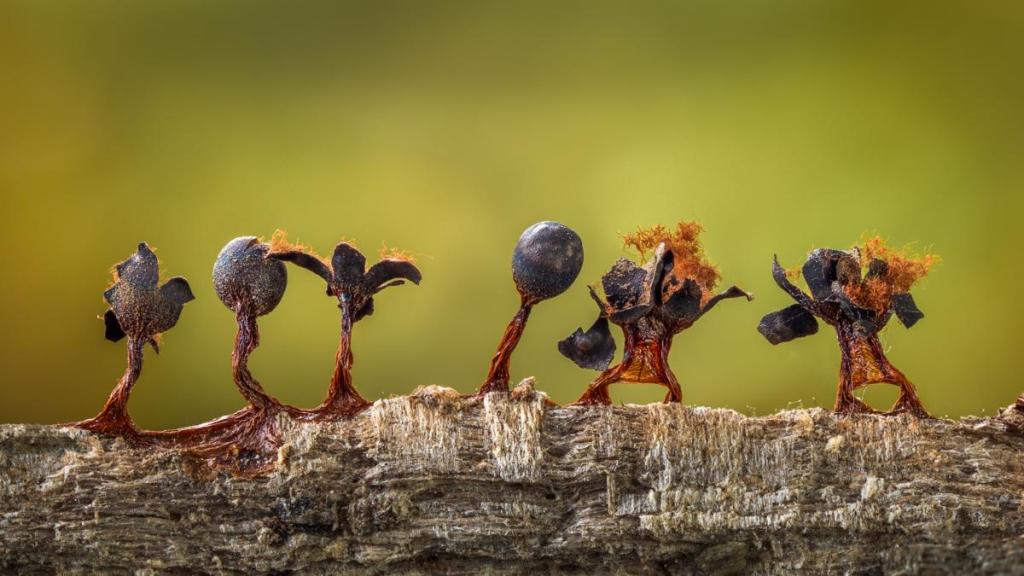
Barry Webb on using Focus stacking in slime mould macro photography
Barry Webb specialises in macro photography and is a regular contributor to Chalfonts and Gerrards Cross Camera Club. He gives presentations and leads practical workshops. Visit www.barrywebbimages.co.uk, @barrywebbimages.
Macro photography and, particularly, focus stacking enable you to see intricate details of tiny subjects. I have been taking macro images of insects, plants and fungi for many years, using a full-frame camera with a 90mm macro lens. I started focus stacking five years ago, using a manual-focus rail to allow fine incremental adjustments between shots.
Practically, the addition of a focus rail made my equipment heavier and more cumbersome. Focusing with a focus rail was time-consuming and made it difficult to manoeuvre into restricted positions.
After much deliberation, I decided to try using a Micro Four Thirds system with a 60mm macro lens. I was amazed at the difference it made. The compact and lightweight setup was a pleasure to use. Additionally, the increased magnification of the Micro Four Thirds sensor and fast, accurate, in-camera focus bracketing meant that I no longer needed to use a focus rail.
I now use this system exclusively for focus stacking. I also often use between one and three extension tubes and, on occasions, a Raynox close-up lens. This has allowed me to explore, and become fascinated by, the tiny, beautiful and most unlikely of subjects – slime moulds.
Barry’s focus stacking kit
Lens and extension tubes
The Olympus M.Zuiko Digital ED 60mm f/2.8 Macro lens is very small and light yet extremely sharp. It has a useful focus selector that enables you to select true 1:1 with the flick of a switch. I also use the Kenko Auto Extension Tube Set DG for Micro Four Thirds lenses (10mm and 16mm). These tubes maintain TTL exposure with the 60mm Macro lens and they allow the lens to focus closer and provide more magnification.
Tripod
Focus-stacked images require a stable and manoeuvrable tripod that can get right down to ground level. I use the Gitzo Explorer GT 2531. The separate leg locking levers mean that each leg can be positioned independently, at any angle.
LED Hand lens
I use a Triplet Loupe Hand Lens 10x21mm that has built-in LEDs in a ring around the lens. It allows you to observe fine details in low-light conditions: vital for good composition.

Barry’s top tips for capturing slime moulds
Composition
Once I have found my subject, I use a 10x loupe to help me work out the best composition. The camera is manually focused and the lens is set to 1:1 as a starting point. The tripod legs are adjusted to the optimum position and the tripod then physically moved until the point of nearest focus is located.
The number of shots and the size of the differential between shots will vary according to the depth of the subject and the number of extension tubes being used. Generally, for slime moulds, I take between 30 and 150 shots. An ISO of 100 or 200 is ideal, as is a relatively wide aperture, at the macro lens’s sweet spot.
Light
I prefer to work in natural light whenever possible. Soft light, cloudy conditions or hazy sunlight all give good results, while changing light causes problems during a focus bracket. In bright sunlight, it is usually necessary to shade the subject as direct sunlight causes specular highlights, particularly on wet or reflective surfaces. A small LED light with a diffuser can be useful as fill lighting when shooting subjects on the underside of logs or in areas of deep shade.
Movement
A reliable tripod and a shutter release are both essential for shooting multi-bracketed shots. The slightest movement at high magnification will ruin a stack. Wind is a real problem. Even someone walking nearby can cause ground movement. Small creatures such as springtails can pass through your frame unnoticed, which can complicate post processing.
Processing
I download the bracketed series to Lightroom, select them all and make basic adjustments to the exposure and white balance. The images are then exported to Zerene Stacker for stacking and retouching. The saved output image is then synchronised back into Lightroom, where I make any final adjustments. Occasionally, I import the image into Photoshop to repair any areas that could not be retouched successfully in Zerene Stacker.
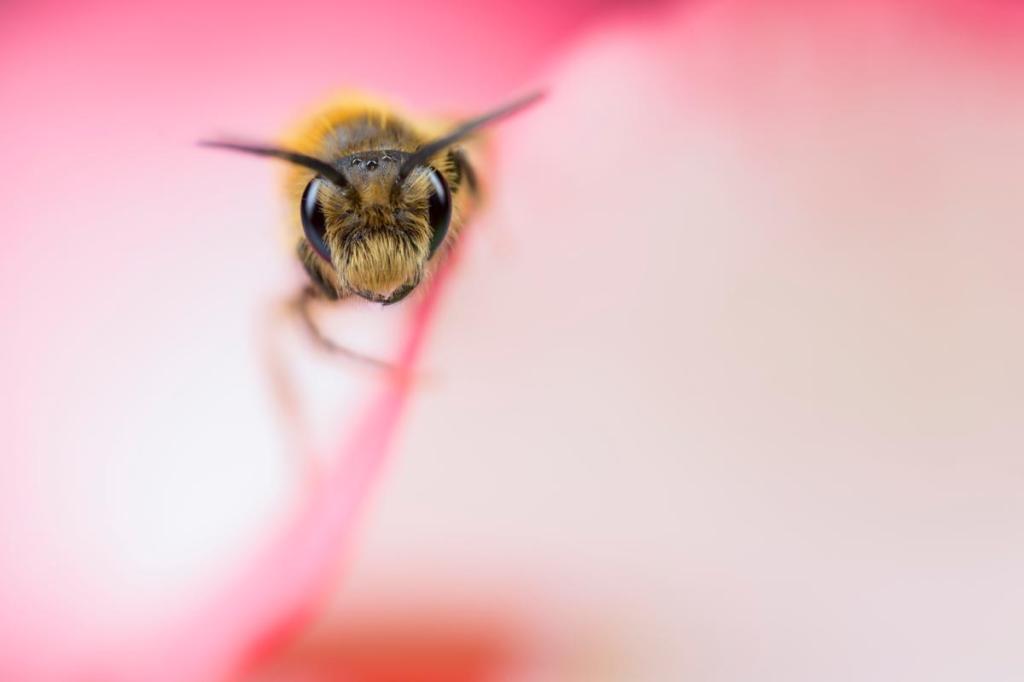
Matt Doogue on close-up insect photography

Award-winning photographer Matt Doogue is a passionate conservationist, tour leader, public speaker, outreach teacher and mental health ambassador. Matt’s work has been published in most of the UK’s leading photographic titles, and has appeared on TV shows such as BBC’s Springwatch alongside Chris Packham. In his spare time, he regularly visits schools to educate children on the importance of our natural world. Visit www.mattsmacro.co.uk
Macro photography is a popular genre among photographers, and is one of the most rewarding. Subjects can be found anywhere from inside our own homes, gardens and of course, the great outdoors. Using a macro lens allows you access to a hidden world the human eye never sees, a world full of detail, colour and design. I have been a macro photographer for several years now and I’m still learning.
When photographing at high magnification with a macro lens, depth of field becomes very narrow, leaving much of the subject out of focus. We can increase our depth of field but this limits our light, so naturally we increase ISO but that just adds unnecessary noise. At high magnification, the increase of these two factors can actually leave your image looking less sharp due to the softening effects of diffraction. However, focus stacking resolves this. While it’s one of the more challenging techniques of macro photography to master, it can yield great results if done correctly.

Matt’s focus stacking kit list
Lens choice
My go-to lens is the Canon MPE 65mm, this allows me to achieve up to 5x magnification. I also use the Canon 100mm f/2.8 Macro or the Sigma 180mm f/2.8 Macro. I use these when shooting larger subjects such as butterflies, dragonflies or even reptiles.
Flash system
I use the Canon MT24 EX dual flash coupled with the MPE 65mm. When shooting at high magnification, the flash really helps. It’s the perfect combination of kit for this type of shooting.
Matt’s top tips for handheld focus stacking
- Focus stacking is simply the process of moving the point of focus over your subject in very small increments and taking a photo at each of those points. I set the desired magnification on my lens and turn off autofocus.
- It’s essential you don’t change this while attempting a ‘stack’ and make sure you have consistent exposure settings that are correct for the scene. I shoot with everything in manual: aperture, shutter speed, ISO and flash power.
- The sharpest point of most lenses, known as the sweet spot, is around f/8 to f/9, however when it comes to focus stacking, we can drop that to anywhere between f/2.8-f/5.6. This will give us a sharper final stacked image.
- Setting a wider aperture will also allow more light into the lens, which enables us to lower the flash power for faster flash recycle times. This is crucial in order to maintain a quick firing rate.
- The flash also increases valuable light levels within the scene and can help freeze any subject movement in the frame. You can stick to natural light, of course, but at high magnifications you will end up pushing the ISO so much that it adds unnecessary noise to your image.
- Start at the front of your subject and work towards the back. Move forward very slightly to adjust the depth of field and as you watch the point of focus move over your subject, take a shot at each stage. The tiniest of movements is sufficient for this.
- I shoot the majority of my ‘stacks’ handheld. The key is to stay as still as possible, which is easier said than done! If the subject moves or you move from side to side, stop and start a new stack.
- While getting to grips with this technique, stick to small stacks. Start off with 2-5 images. Then, once you have mastered this you can go for bigger stacks.
- Don’t be tempted to fire off a burst of shots. While you may get one or two more stacks, you will most likely end up taking shots at the same point of focus and this will leave your image diffracted once you stack those multiple frames together in software.
- I prefer to use Photoshop, but you can use dedicated software such as Helicon Focus and Zerene Stacker. Loading your files into the selected software of choice will now create a stacked composite of your images. There are plenty of YouTube tutorials to guide you through this process.
Related reading:
- Top Macro Photography Tips
- Best photo editing software
- Top tips for insect photography
- More techniques for pin-sharp close-up / macro photographs
Follow AP on Facebook, Twitter, Instagram, YouTube and TikTok.


