Digitising film with your DSLR or mirrorless camera. You don’t need a dedicated scanner to digitise film because a mirrorless or DSLR camera will do the job, and more, when done right. Tim Coleman walks us through best practices to photograph film using your DSLR or mirrorless camera.
Back up and peace of mind. A new lease of life with editing, online sharing and digital printing. Yes, digitising film is a crucial practice today for analogue shooters. Sadly, as digital is the mainstay of photography in 2022, tools for analogue photographers to archive film have diminished.
Nikon has ceased producing its excellent dedicated film scanners, alternatives from the likes of Plustek don’t come cheap either, while those that do like the nifty Kodak Mini Digital Film and Slide Scanners can lack the resolution for high quality scans.
Have no fear. With the right setup and techniques, a mirrorless or DSLR camera can do the job of a high-quality scanner and ensure you get the best digital versions of your film stock. In fact, even a smartphone can do the trick. In this article we’ll walk you through how to get your film ‘scans’ done with a camera.
What you need to photograph film
Lights, masks, camera and lens are your essential considerations for photographing film.
Light source
You’ll need to place a clear and bright light source – ideally daylight-balanced – behind the film to obtain the best quality picture of it using a camera. Hands down the cheapest and easiest option is a light box. Companies like Kaiser Fototechnik specialise in light boxes with a diverse range for all sizes and budgets. For this purpose, one of its smallest and cheapest light boxes is sufficient. Lomography goes one better by offering a purpose-built film mask with a built-in light box bed.
If you don’t own a light box but happen to have a portable studio light with continuous output – even many studio flashes do – then that’ll work instead. In fact, flash works as well as continuous light does for this chosen task. You’ll need to go about suspending a firm and flat diffused surface between light and camera on which to place the film. Consider a white perspex sheet, it will avoid unwanted hotspots and reflections. This setup may be more faff than it’s worth, but if you like a DIY challenge then this option could be for you!
Masks
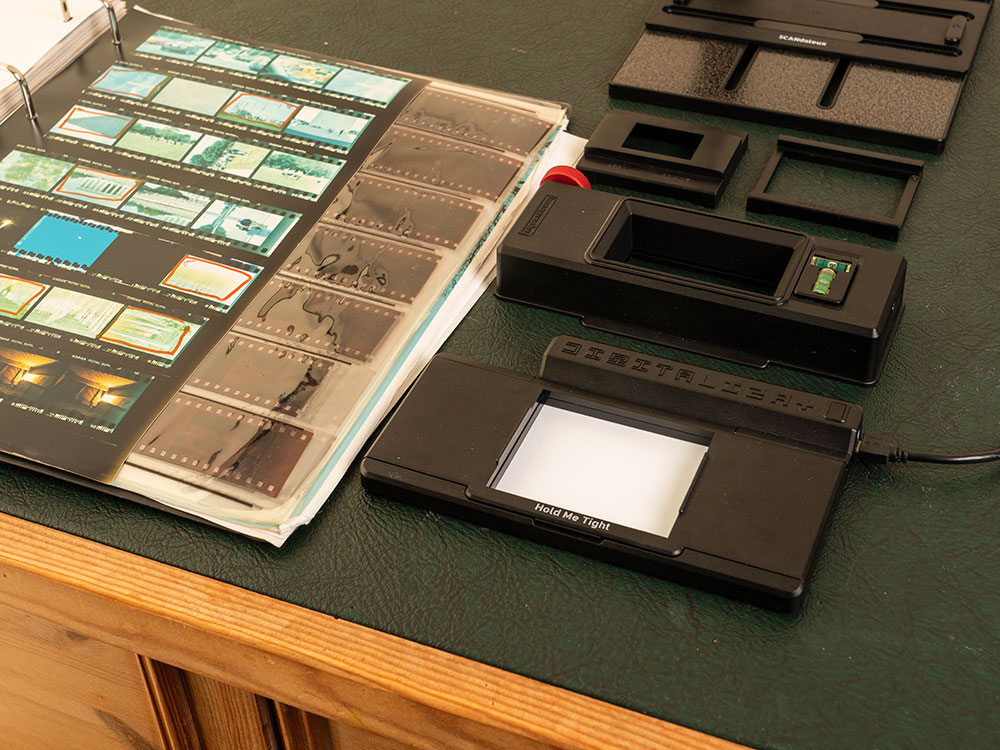
With light source and surface in place, you need a secure aperture within which to place the film completely flat, and to mask it to avoid light spill that can cause flare. The aforementioned Lomography’s DigitaLIZA kit is a simple solution for 35mm and 120 film.
If you’re on a real shoestring, why not make your own mask? Mount board is a secure material to cut out a mask for any film size; 35mm, 120 and 5×4 large format. It’s more fiddly than a purpose-built mask to secure the film (we’ll get onto that), but again a good option for DIY enthusiasts and all film-size masks can be cut within the same large format aperture!
There are alternative purpose-made options like the Nikon PB-6 bellows to insert film rolls, plus a slide copier like the Nikon ES-2 or from SRB Photographic that attach directly onto our camera lens to photograph slides. Slide copier and bellow options still require clear sight of a strong light source.
Camera and lens choice
The main consideration for both camera and lens is resolution. The more pixels, the larger the ‘scan’ and enlargement prospects you have. A full-frame mirrorless or DSLR camera is likely to have more pixels to play with than crop sensor formats like APS-C and Micro Four Thirds, but in other regards sensor size is irrelevant because the film should be illuminated by a strong light which will eliminate the adverse impact of noise in your pictures.

To make the most of your camera and its resolution, you’ll want a lens that can focus close enough in order to fill the entire frame with the film. For full frame you’ll likely need a macro lens, while a standard lens might well focus close enough with a crop sensor camera like Micro Four Thirds. A prime lens with standard focal length between 50mm and 105mm will maximise sharpness and minimise distortion, and keep the working distance and setup manageable. A smartphone can do the trick too, though the primary camera angle of view is wide may introduce barrel distortion.
How to photograph and digitize film
Setting up your camera and work station, plus preparing the film itself.
Camera and work station set up
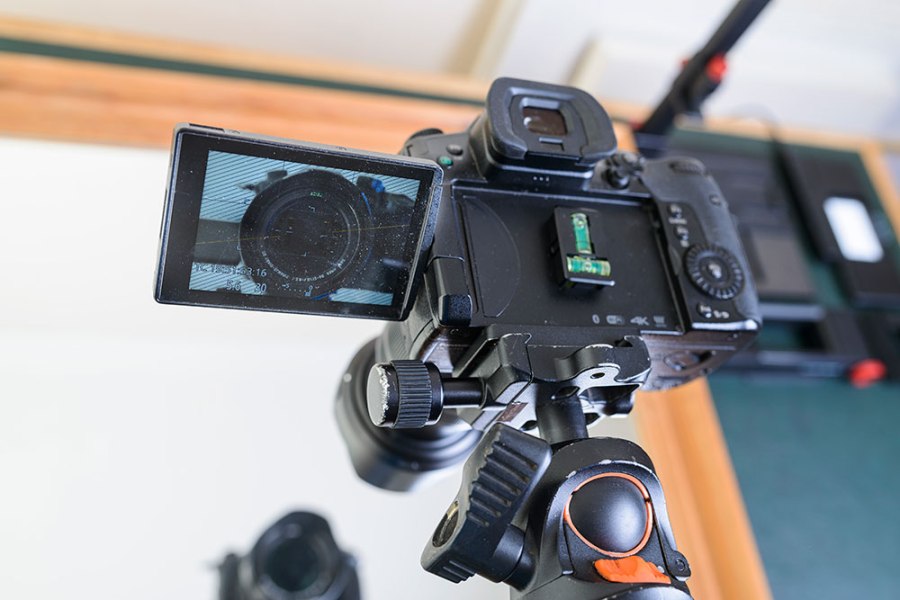
Although many modern cameras feature image stabilisation, you should mount the camera to a support for photographing film, such as a tripod, in order to lock it in place for working quickly and accurately through what is potentially many film rolls.
It is essential to position the camera square-on to the film to avoid any distortion that results from shooting at an angle. A bubble-level will do, though a neat trick is to use a mirror on the same surface as the film and ensure the lens is centre-frame in your shot – this accounts for the level of both surface and camera simultaneously. If a tripod is your support choice, it needs a centre column that extends horizontally away from the legs so that you can angle the camera straight down and square on, without the legs getting in the way.
What camera settings do I need to photograph film?
We’ll keep camera settings to the basics; use the highest possible picture quality and raw format in case exposure is off in any way. Exposure is a little tricky because you want the base of the film to appear white, which can mean over-exposing slightly. To maximise editing flexibility, it’s wise to shoot a flat colour profile and restrain sharpness in-camera.
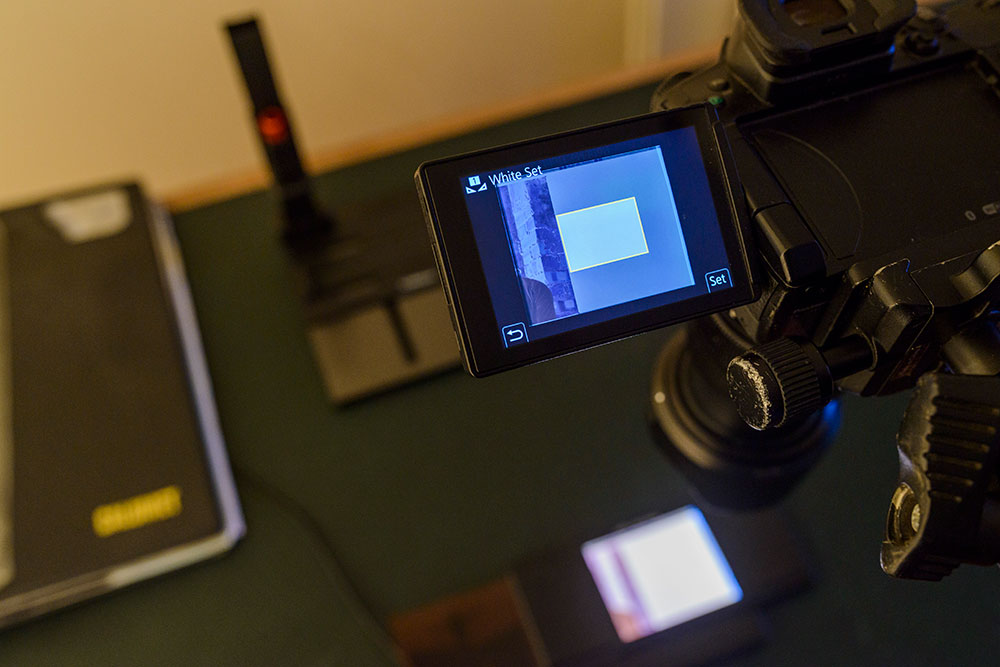
Most fiddly is white balance, because the temperature is affected by both your light source and the colour cast of the film base. Auto white balance will likely prove unreliable in such a scenario. To kill those two birds with one stone – create and save a manual white balance reading of a blank exposure of the chosen film against the light source. If you’ve shot in raw, further white balance adjustments are much easier in your chosen editing software where you can use the white balance picker tool from any blank area of the film to set white balance instead.
Securing the film
We have mentioned creating a mask in order to secure the film and eliminate light spill. For sure, a ready-made film holder is the quickest option and should come cheap. Alternatively, cut out a 5x4in aperture in black mount board (for large format), then within that cut-out a 6x7cm aperture (for medium format), then again a 36x24mm aperture for full-frame. That way you have all the major film sizes covered.
Securing a ridge on the underside of the mount board for each cut-out makes it easier to slide between frames within the film roll, and use masking tape to fix it down. Alternatively, and especially if film roll is curved, you can non-destructively flatten it in place with magnetic or pressure plates.
Preparing film
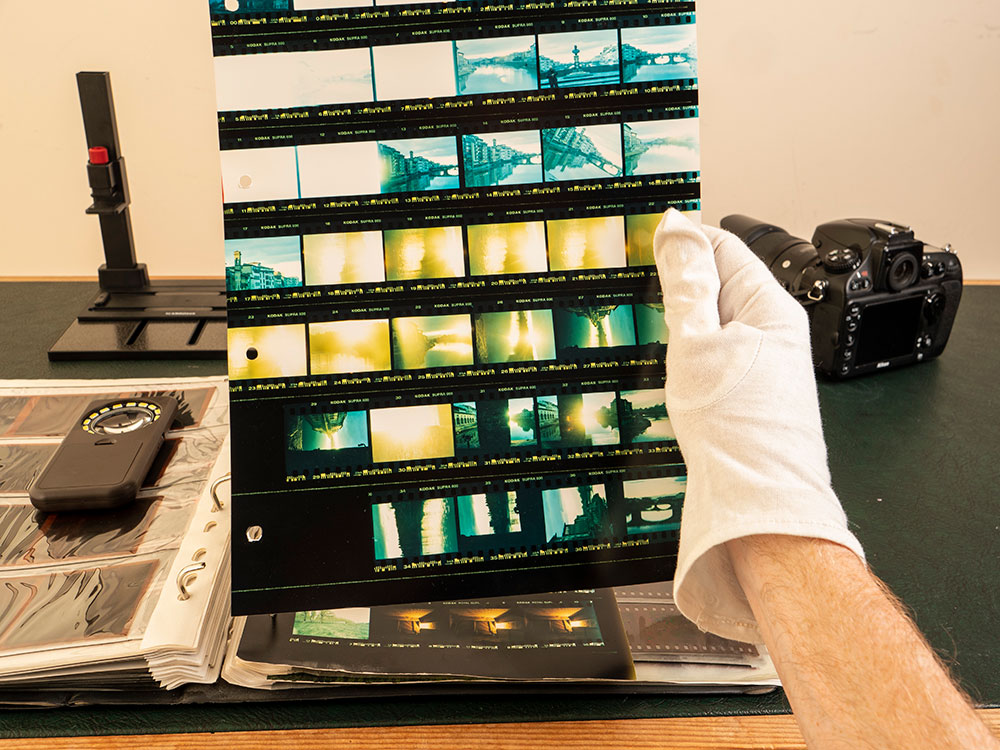
Dust, fingerprint marks and smudges are the nemesis of good film scanning, especially when you consider that any blemishes are magnified with any enlargement. So, before you press the camera shutter, make sure your working environment is as clean and dust free as possible and that you avoid handling film with bare hands – look for lint-free cotton gloves.
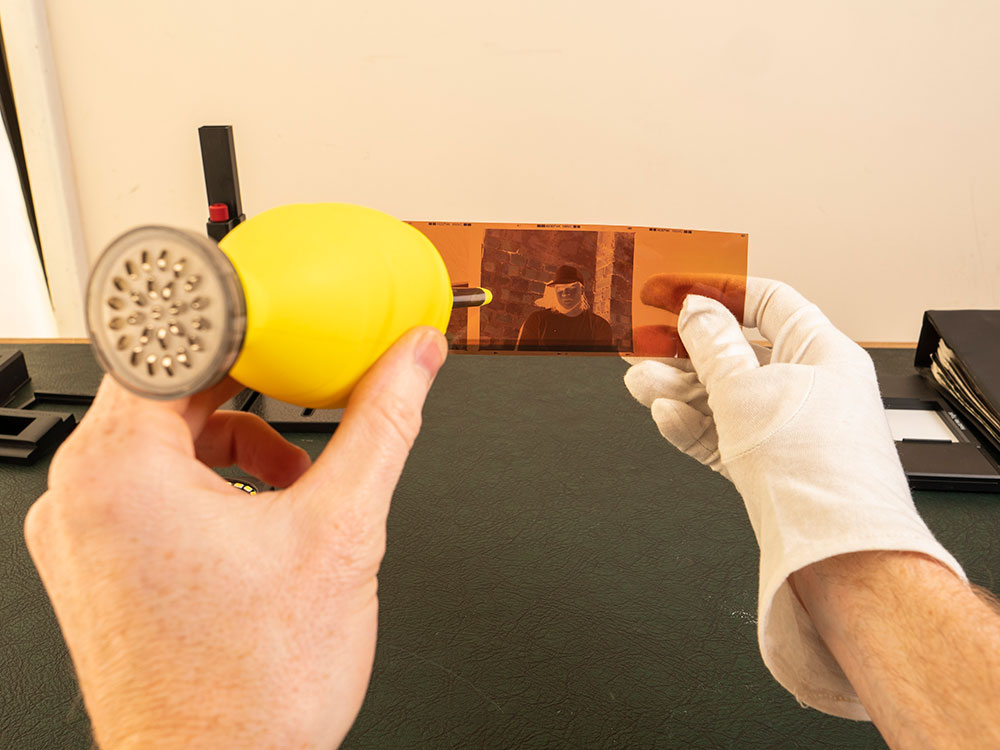
Next get a close look of the film using a loupe or magnifying glass because blemishes can be hard to spot with the naked eye. Remove any dust by using a blower. Follow all these essential preparation steps for any film scanning, and your time editing will be joyfully taken with your artistic choices rather than painstaking cloning and healing.
File management
You could well be photographing hundreds if not thousands of frames, and so before you get cracking consider the following:
Be selective
As you work your way through each roll of film, be selective about which frames you will photograph. If you are unlikely to edit, print or share a frame, why bother digitising it? Consider this moment a pre-edit; a library management and picture rating process like in Adobe Camera Raw.
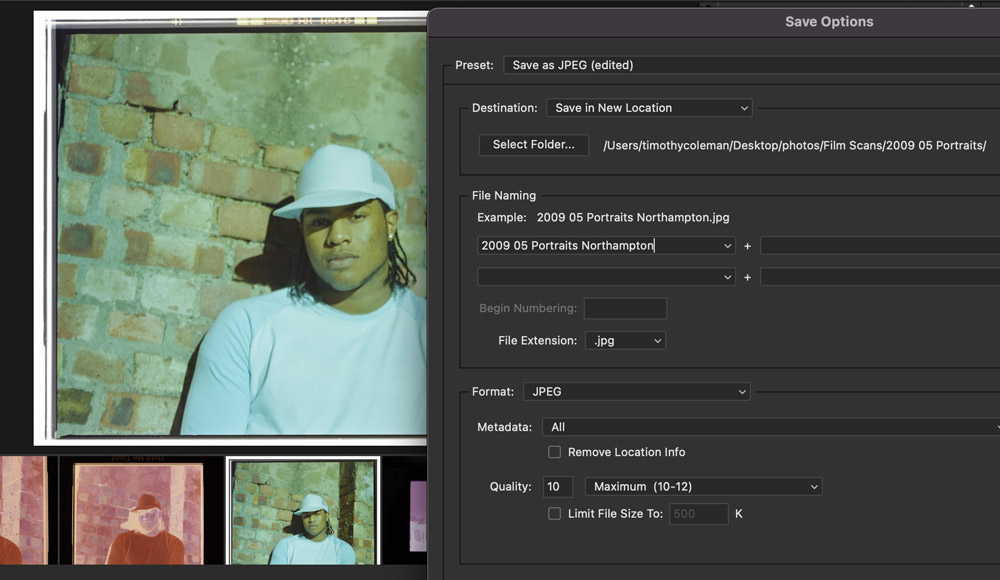
Naming files
Like any set of digital images, consider how you will name the digital photographs of your film so that they can be found easily further down the line. Date or subject are the most obvious choices, though you may also wish to keyword the files, too, including info such as the camera used.
Remember, the metadata that comes with your digitised film files; date, location, camera, lens and exposure settings, will all relate to the moment you took a photo of the film, not of the original picture itself. Remembering when film pictures were from takes serious brain power!
Your file naming choices at the very beginning of this archiving journey will concrete how your library fills out. Ask yourself, could you navigate those photos once your library contains hundreds of folders?
Editing
Film negatives remain a negative when photographed and need to be inverted using editing software. CMD+I / CTRL+I is the shortcut in Adobe Camera Raw / Photoshop, while any software with tone curves can complete this task by reversing the Point curve. Slides are already positive and therefore do not need the same treatment.
Try as you may, the reality is that it’s infuriatingly hard to remove all blemishes from film (and you aren’t enjoying the Digital ICE feature in dedicated scanners that does this job for you). As you process those archived files, the healing or clone tool will become your best friend. Healing tool is perhaps best dealing with blemishes where there is not too much detail going on in the photo, while the clone tool can handle the recovery of intricate detail better. All other edits are down to artistic preferences. Happy ‘scanning’!
7 Top tips for digitising film with your camera
- A light box with a film mask is your most cost effective option for digitising film with your DSLR or mirrorless camera
- Position the camera square-on with a close focusing lens to minimise distortion and maximise resolution
- Create and save an in-camera custom white balance reading taken from the light source and film base
- Wear gloves when handling film and use a blower to keep film as clean and dust free as possible!
- Don’t photograph every frame – consider the photographing film process as a pre-edit
- Give thought and discipline to file naming and keywording especially when managing large quantities of film
- Film negatives need to be inverted, and the shortcut in Adobe software remains Cmd+I, or instead in Curves reverse the ‘Point Curve’
Related reading:
Film photography and scanning tips