Leading film photographer Dan Rubin shares his insights into getting the best results, particularly if you are scanning negatives, with Geoff Harris
Dan Rubin is a well-known name in the film photography community; as well as being an accomplished film photographer and teacher who works with Ilford, Leica and other big names, he’s well established as a top digital creative who was there right at the beginning with Instagram (he currently has nearly 700,000 followers).
AP first met this affable and eloquent Anglo-American photographer on a film photo walk he organised with Ilford at The Photography Show, so we’re keen to share his practical and inspiring tips for film photographers – particularly in the sphere of scanning.

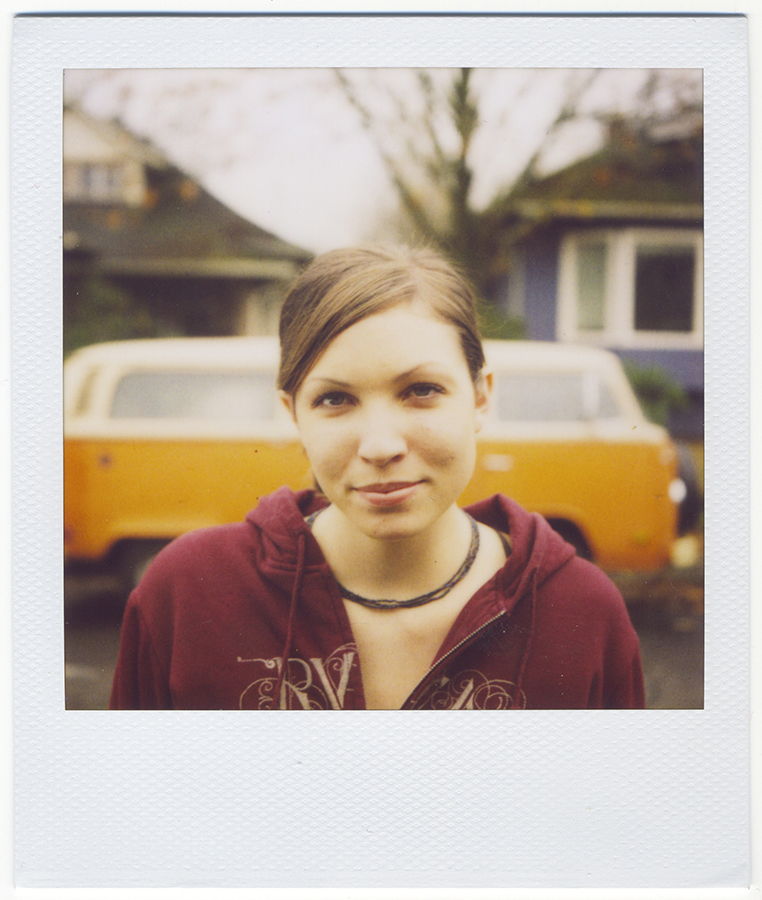
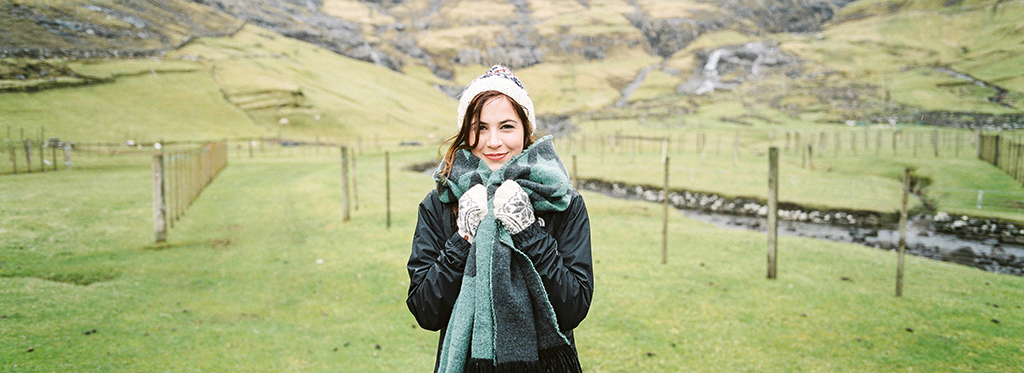
Esther, Valencia, 2017. Film: Ilford HP5+ (pushed 1-stop, metered at 400 ISO) Camera: Mamiya 645 Pro
Development and scanning: Carmencita. Image taken by: Dan Rubin
Design driven
‘It was my design career that led me into film photography and photography generally, but not in the usual way,’ Dan explains. ‘I’d never used a camera as a creative tool when I was younger, and I was more of a painter and designer. Near the end of 2008, a designer friend picked up a classic Polaroid SX-70, in beautiful brown and chrome.
He wrote a blog about it after Polaroid had ceased manufacturing and it really intrigued me… I fell in love with the design of the camera, so I decided to get hold of one and start shooting some film while I could still get it, just to tell my grandkids I’d had a go!’
When Dan saw the images he fell in love with them. ‘Edwin Land, who designed the SX-70, intended it to make photography easy for anyone and that’s how it worked for me. It changed my life.’ At this stage in his career, Dan was working in a very digital world, doing a lot of design work for the screen.

Shinagawa Station, Tokyo, 2016. Film: Ilford HP5+ Camera: Leica M6 Development and scanning: Bayeux. Image taken by: Dan Rubin
‘Along with many of my peers, I had a digital point-and-shoot camera but didn’t really know how to use it. Film was fascinating because many of us remembered it from our childhood; digital cameras were cool but for those of us who weren’t photographers, analogue was cool too.’ His first 35mm film camera was a Canon FTb, and he also upgraded to a digital Canon EOS 400D SLR.
‘The design part of my brain was trying to reverse-engineer why the Polaroid had captivated me so I carried on shooting film alongside the digital Canon. I liked the 400D, but I didn’t love the results in the same way as the results from the Polaroid and the FTb. I ended up shooting film more and more alongside digital where appropriate, and this had continued to this day.’
By 2015, Dan was shooting film and digital 50/50 for a wide range of commercial photography projects, and had upgraded to the Canon EOS 5D series. He realised, however, that he was using digital cameras as a ‘crutch,’ rather than because he really needed them. ‘I realised I should be shooting film much more, but didn’t have confidence.
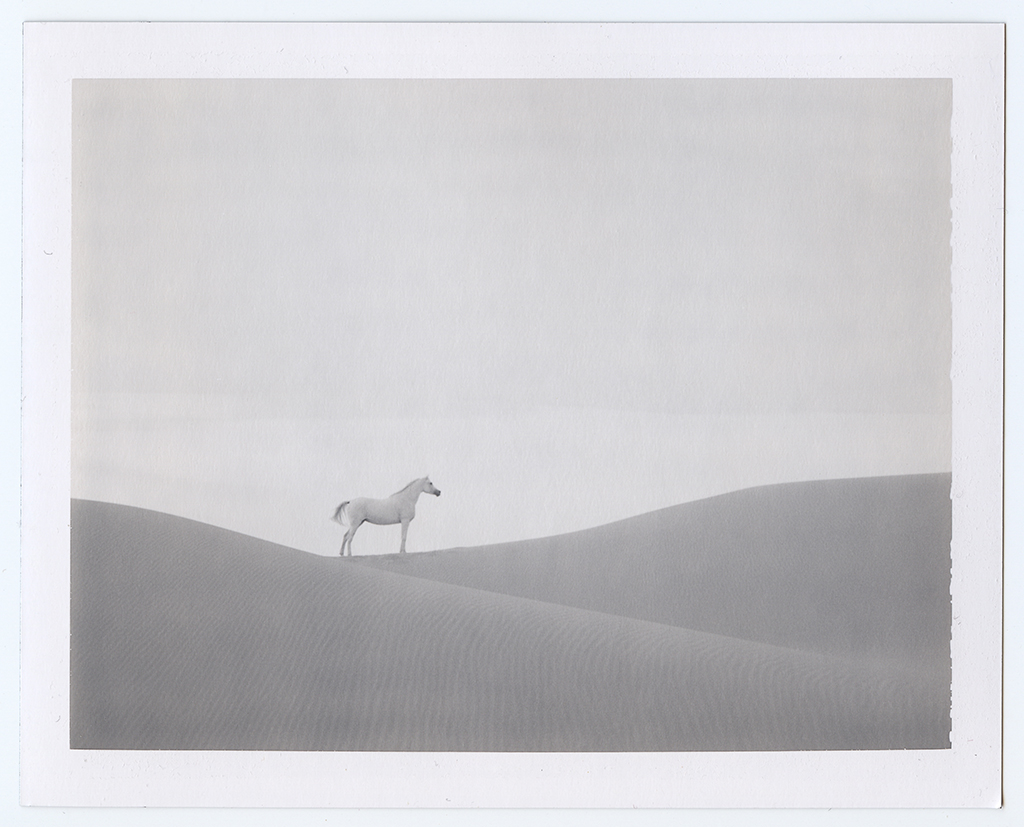
Qatar Desert, 2015. Film: Polaroid 667 (expired) Camera: Polaroid 195. Image taken by: Dan Rubin
I let other (digital) photographers influence my decision. But I was mainly delivering film photos to clients and was mainly taking the digital gear along for safety. When I realised this, I forced myself to switch fully to film, unless it was the wrong choice for the subject and commission. When shooting in a dark interior, for example, I need the better high ISO performance that you’ll get with a top digital camera.’
We wondered what, specifically, attracted Dan to film? ‘I think it was the tone and texture of film, but as I was living in a world of immediate results via digital in my job as a designer and creative director, I learned to appreciate the sense of anticipation you get with film. Even with the Polaroid, it would be four or five minutes before the image appeared. It was the antithesis of everything else I was doing and it got me away from a screen.’
The results Dan got with film also felt more ‘finished.’ As he explains, ‘I tried to find ways of editing my digital images so they had the tonal range and unique colour palette of film, but it was quite hard back in the days before film presets. My film images just felt more complete. With my raw digital shots, it felt there was still a lot more work to do… although you do need to edit “flat scans” of negatives (see later) I still find this quicker than editing digital raw files.’

Fort Lauderdale, 2009. Film: Polaroid 600 (with a 2-stop ND pack filter) Camera: Polaroid SX-70. Image taken by: Dan Rubin
Lessons learned
What does Dan think are the biggest challenges for film beginners? ‘People are often afraid to “waste” film, which I guess is understandable as film has got more expensive recently. The roll can sit in the camera for ages, which prevents them from learning anything. I encourage film newcomers to make it their goal to just finish the roll.
When it comes to shooting film, there are some key considerations to get your head around. With digital you are often slightly underexposing in order to protect the highlights; with film you often want to overexpose slightly to get a thicker negative, with a rich range of detail tone and contrast. I found this mental adjustment hard at first, especially when using film and digital cameras together. Your brain has to look at the same light and think about it in two different ways.’
Roslyn, Portland, 2008. Film: Polaroid 600 (with a 2-stop ND pack filter). Camera: Polaroid SX-70. Image taken by: Dan Rubin
A mindful process
Dan also believes that with film, you are making a lot of your creative decisions ahead of time. ‘That is one of the things I like about analogue, and it has simplified my workflow. I create a mood board for the shoot, pick my film stock for the particular look, my film cameras and lenses (35mm or medium format), etc… I make all these decisions before I even shoot, so I can focus on the actual shooting – it can be the opposite with digital as you are doing so much editing afterwards.’
For Dan, film photography is particularly well suited to his travel photography work. ‘It slows me down and makes me more mindful – I am not thinking about what I am shooting while I am shooting, or even afterwards. ‘If I was shooting digitally, I will want to look at the images immediately after I have taken them, or edit them in my accommodation that evening. That is not the way I want to work on location; I want to be out talking to people or having new experiences in a particular place.’
Scan-do attitude
While these are important considerations, Dan reckons the biggest mistake people make with film photography, whether they be beginners or ‘born again,’ is not working more closely with film development labs – particularly when ordering digital scans of negatives. ‘Understanding the scanning process in terms of resolution and setting your preferences can really help,’ he explains.
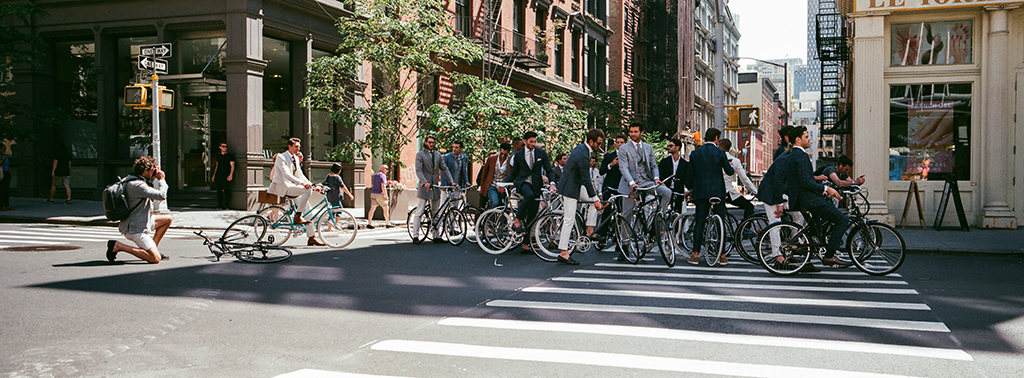
New York City, 2016. Film: Fujifilm C200 Camera: Hasselblad XPan Development and scan: Carmencita. Image taken by: Dan Rubin
‘Don’t just rely on the lab’s default scanning procedure – you need to talk with them to discuss how to get the best results, and most will be happy to have this conversation.’
One immediate practical tip is to stick to high-resolution scans, even though this can be more expensive. ‘I was comparing lower-res 8-12MP scans with images from my high-resolution Sony Alpha camera, and of course they weren’t as detailed. I was also letting the lab decide everything in terms of contrast and white balance on the scans.
You need to think of scanning more in terms of professional workflow, asking the labs “I like this very much but not this, why are the results different?” Having these conversations filled the gaps in my knowledge.’ As Dan goes on to explain, if you only ever use your lab’s default scanning settings – whether automatic from the scanner or decided by the operator – you run the risk of never understanding what is possible with the negative, both with black & white and colour.
‘You can’t blame the labs for having a “default” way of scanning film as it’s the most efficient way of working. But that doesn’t mean you can’t ask them to do things differently for you.’
Lizzie, Faroe Islands, 2016. Film: Fujifilm Pro 400H Camera: Hasselblad XPan Development and scan: Canadian Film Lab. Image taken by: Dan Rubin
Dan suggests focusing on two main areas with scans. ‘First is white balance; with higher-end scanners the white balance is changed by changing the light shining through the negative – it’s an adjustment that makes a big difference. So rather than going with the lab default, you can ask them to white balance the skin tones, for warmer or cooler effects across the roll etc. You can change this order to order, or film stock to film stock.’
The flat scan society
The next thing is to ask for ‘flat’ scans. ‘This refers to the histogram,’ Dan explains. ‘If you look at a histogram, it goes from shadows on the left to highlights on the right. When you rely on the scanning default it will usually apply some kind of contrast curve to the data in the negative to make it contrasty. This is okay but typically what will happen is that some data will get lost, usually shadow detail but also midtones and highlight – the curve changes what the information looks like.
‘With a flat negative you get a linear scan, so there is no S curve. The flat scan you get back will lack contrast but this is okay – it’s almost the equivalent of seeing a digital raw file. What it shows you is how much detail is actually there in the negative. Then you apply a tonal curve as required. You can use a reference image across a roll, so your edits to contrast, white balance etc are applied consistently. Film is pretty consistent and yes, while you are having to do more work to the scanned image, with raw files there tend to be more variables.’
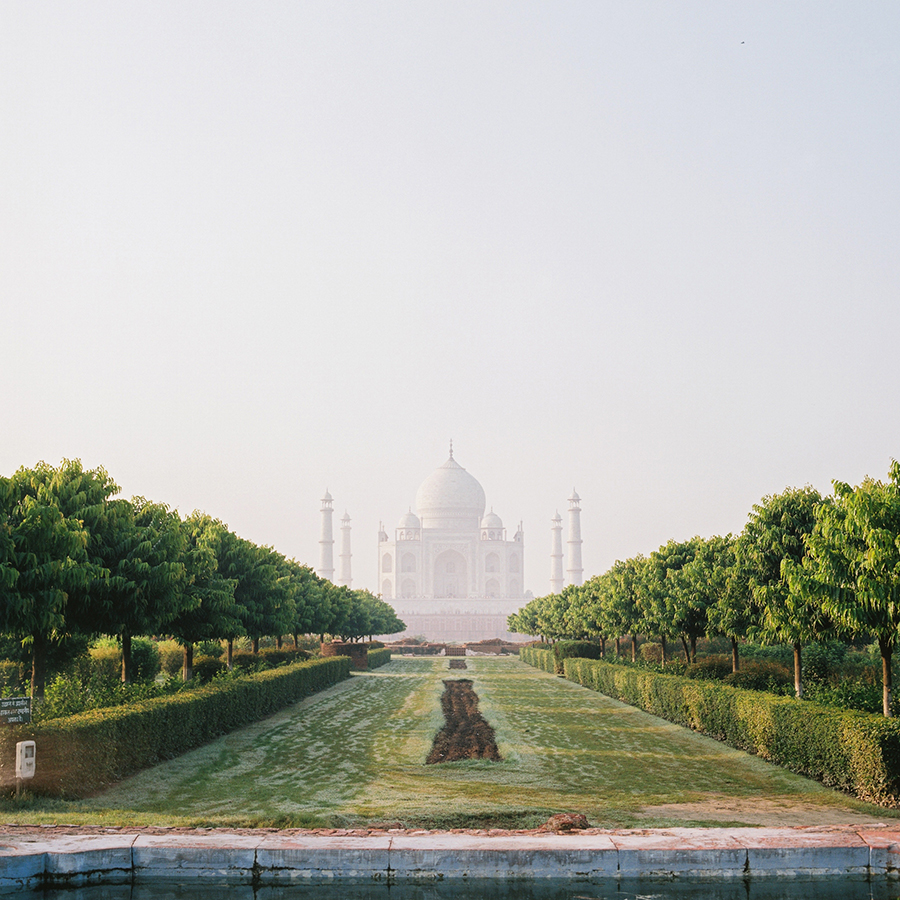
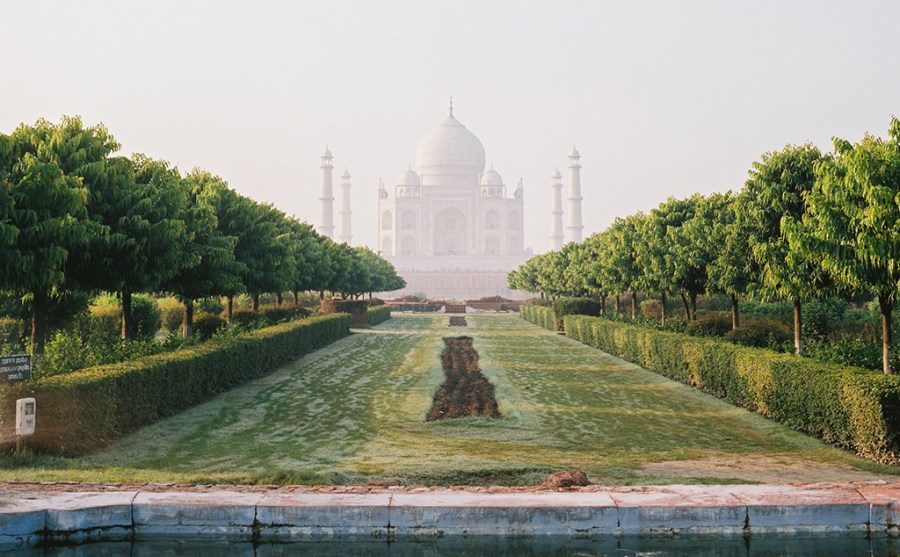
Taj Mahal, Agra, India, 2013. Film: Kodak Portra 400 Camera: Hasselblad 500C/M Development and scan: Bayeux. Image taken by: Dan Rubin
Dan points out that scans from a high-resolution (and expensive) drum scanner also tend to be flat: ‘You get a raw representation of the data in the negative and you make specific edits to get it print-worthy, which is what we are doing here. Asking my labs to do flat scans has totally changed my relationship to film.
Once you have a set of edits you’d like to be applied consistently to your images, depending on subject matter and other considerations, you can ask them to make a scanning profile based on these edits – generally they say yes.’ When it comes to editing flat scans, Dan is a Lightroom Classic fan.
‘It is super-fast for film scans. Lightroom can render the JPEGs very quickly and it enables me to build my own presets, which is very handy with flat scans (see Adobe’s video guide at bit.ly/adobeLRpresets). I edit a reference image and then copy the edits across the developed roll.
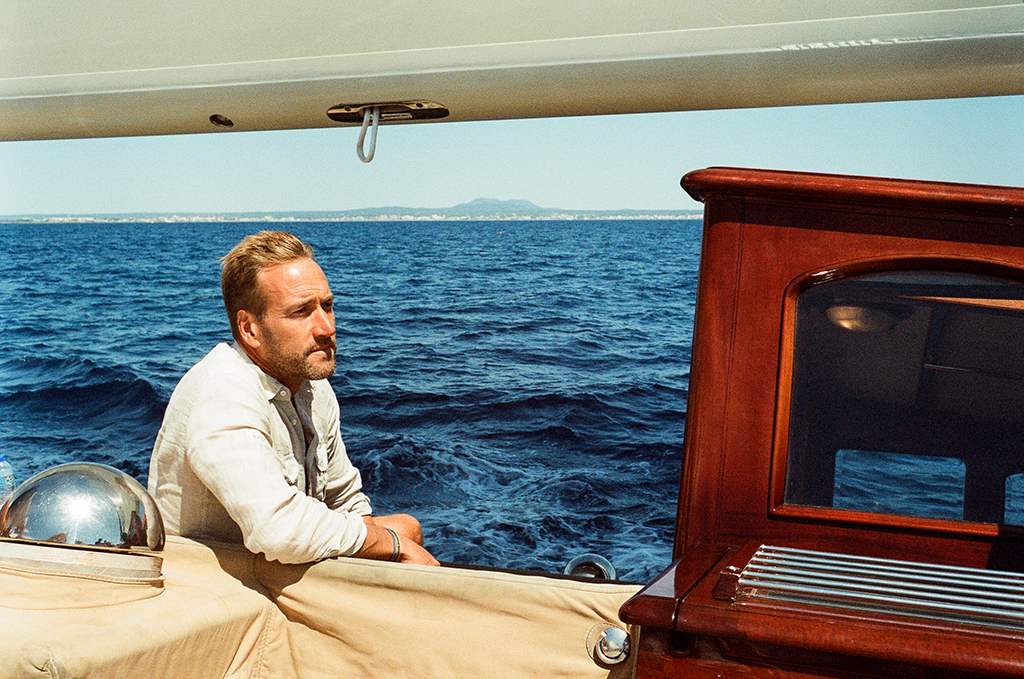
Ben Fogle, Bay of Palma, Majorca, 2018. Film: Kodak Portra 800 (pushed 1-stop, metered at 640 ISO) Camera: Leica M6 Development and scan: Bayeux. Image taken by: Dan Rubin
I know Photoshop inside out, as I have been using it since version 2, but it’s slow – you end up saving out pretty large PSDs. Lightroom is non-destructive, and all the edits sit on top of the image – you then export a version that incorporates the changes. With Lightroom I can also sync my film catalogue so I can access it on my iPad or iPhone as well as my laptop.’
DIY development and scanning
Does Dan ever cut out the middleman and do his own film development and, indeed, negative scanning? ‘If you had asked me pre-lockdown, I would have said I don’t have the time or energy or skill. But while some people learned how to bake sourdough during the lockdowns or learned a language, I decided to dive into film developing, both for black & white and colour.
‘As for scanning, I don’t want to do flatbed scanning but I am very much into digital camera scanning. I got a set-up kit from Negative Supply and my Sony A7R II, which I don’t use much for photography nowadays, is perfect for digitising negatives. But now I am able to do more travel commissions and have less time, I still use labs for my commercial work– it’s like having a team of pros working with you.
I have built a relationship with my labs and they are experts, part of my team. For a lot of my personal work, however, I do home development and like to experiment with push processing – I pretty much always push Ilford HP5 black & white film at least one stop. Also, film prices have increased, so developing at home is a way of making film photography cheaper once you have invested in the darkroom kit.’
Dan’s favourite film cameras
I have a lot of cameras, and acquire way more than I need – it’s worse for me as I am also a product designer, so I am fascinated by a camera’s form factor and design. But my favourites are as follows:
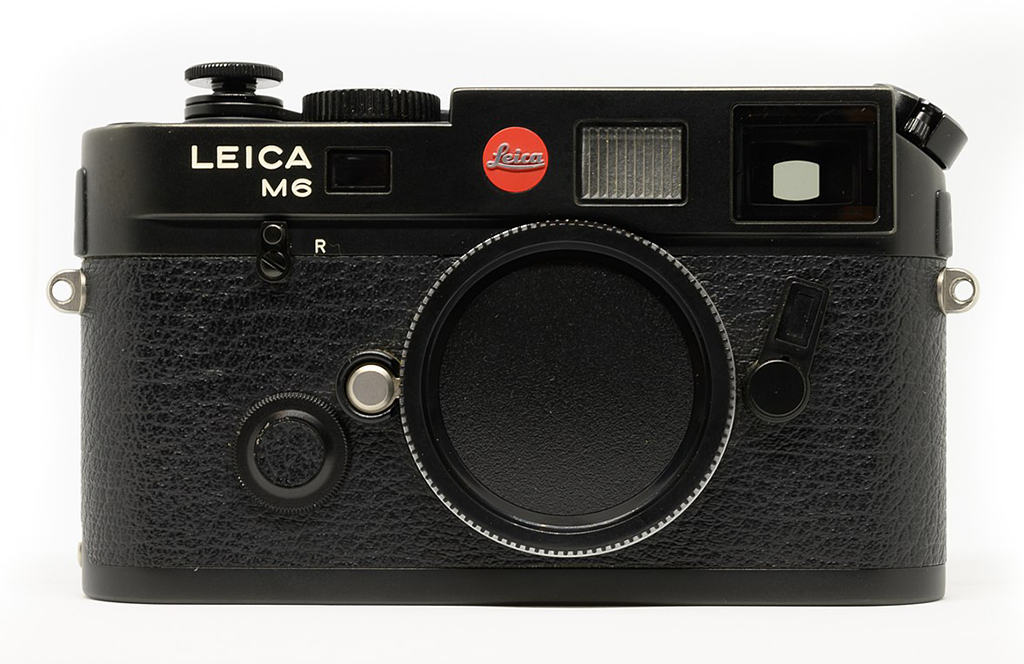
Leica M6 with 35mm f/2 lens
This is a brilliant 35mm rangefinder, which has taken a lot of abuse. It’s a classic for a good reason.
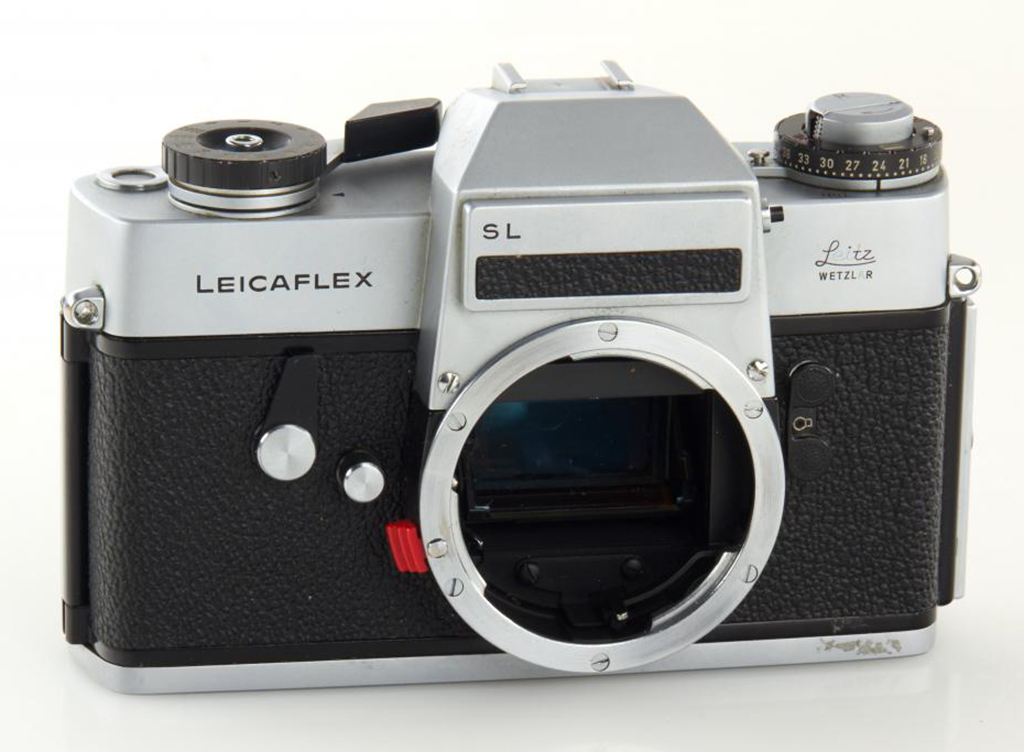
Leicaflex SL
This is my favourite 35mm SLR. A lot of people don’t know about this range, which was superseded by the Leica R series. The lenses are great, particularly the 50mm f/2 Summicron, and although they are a bit bigger than M-series glass, they render in the same way – for a lot less money.
You don’t need to use a Leica, however. You can get very reliable Canon and Nikon AF film SLRs from the 1990s with quality lenses at a very reasonable price. I also love the Pentax ES II. It’s a brilliant little M42-mount camera that nails the exposure every time.
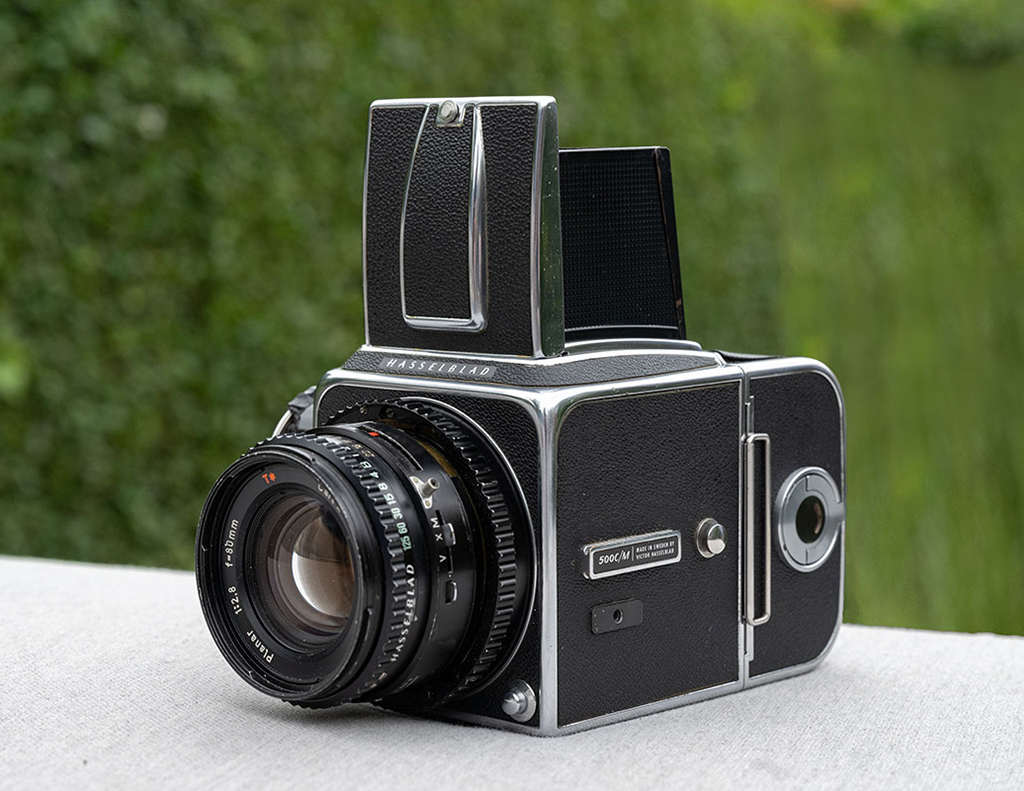
Hasselblad 500C/M
I will use also use medium format cameras when appropriate – I prefer the higher resolution, lower grain, and the heightened shallow-depth-of-field effects, depending on the camera. As well as the Hasselblad, I enjoy using the Pentax 6×7 and 645N, which I will mix and match.
Watch our video: How to use a Hasselblad 500C/M
Recommended labs to try
Dan favours the following film-development labs
Bayeux
This is one of the most experienced pro labs in London, with a great team which seems to have been there forever!
Bayuex
Kirklees Photographic
A newer lab, but it does amazing work. Costs are competitive as it is outside London so I send them a lot of personal work. They only do high-res scanning (ideal, for the reasons outlined in the main feature), and offer useful specific upgrades like 16-bit b&w scanning. This is another good way to work, as you get so much more tonal information.
Outside of the UK I also recommend:
Carmencita in Spain
Thackers in the US
A new outfit in my home town of Fort Lauderdale, Florida. It’s run by a keen young team.
Dan Rubin
Born in Miami but now living in London, Dan Rubin is a pro film and digital photographer, and creative director. Dan created and hosted the Apple Event series Meet The iPhone Photographer, and co-founded The Photographic Journal. See danrubin.is and @danrubin on Instagram.
Related Articles:
How to maintain your film camera
Leica R7: a great Leica for less
How to get great shots on a cheap Holga film camera
An introduction to medium format film photography